Right and left refer to the position that the user adopts when sitting on the
saddle to do the exercises.
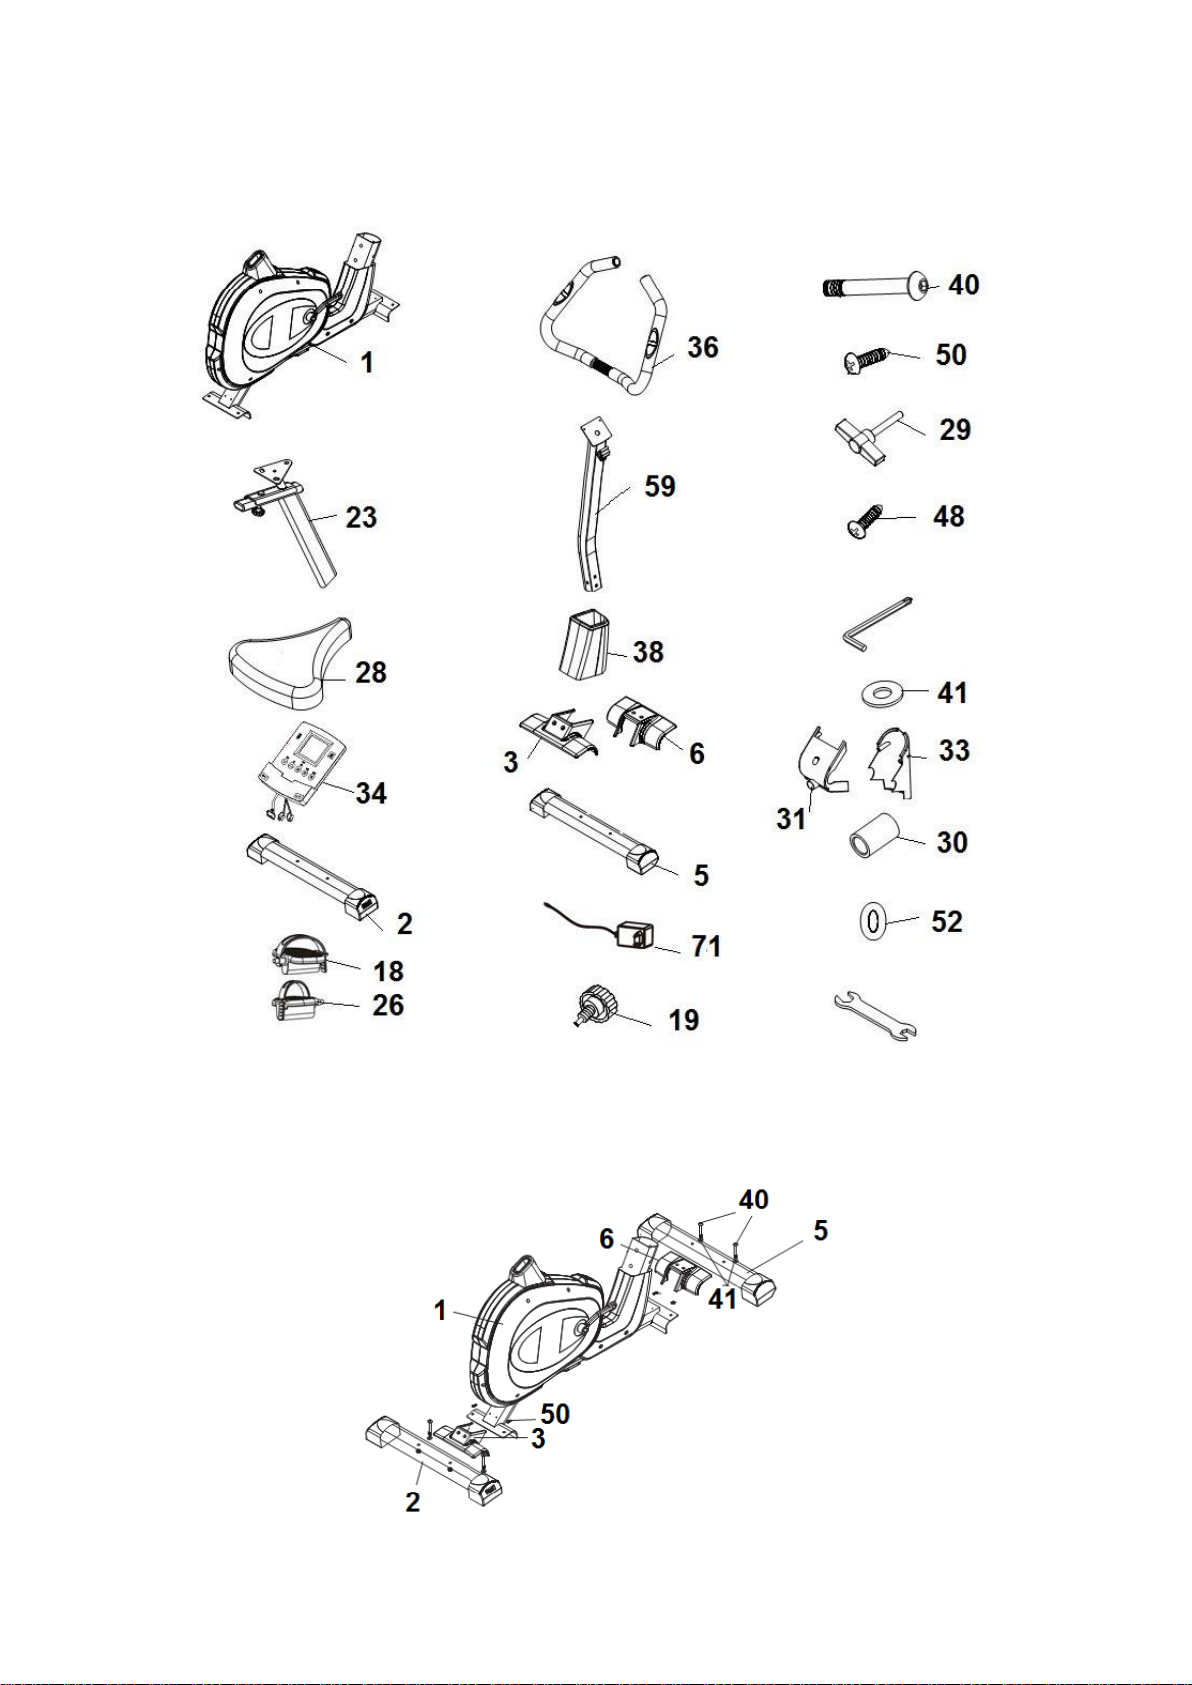
The right-hand pedal, marked with the letter (R), screws onto the right-hand
crank, also marked with an (R), in a clockwise direction. Tighten
securely,Fig.3. The left-hand pedal, marked with the letter (L), screws onto the
left-hand crank, also marked with an (L), in an anti-clockwise direction.
Tighten securely Fig.3.
4. INSTRUCTIONS FOR FITTING THE SADDLE.-
Next, take the horizontal tube for the saddle (23) and attach the saddle (28) to
it, Fig.4, tighten the nuts (46).
VERTICAL ADJUSTMENT.
In order to raise or lower the saddle post (23), first loosen off the control knob
(19) on the saddle post a little by turning it in an anticlockwise direction, pull
the control knob back and without releasing it, move the saddle post up or
down, Fig.4. When it is at the right height release the knob and it will lock into
a hole on the saddle post. Tighten it up by turning the control knob (19) in a
clockwise direction.
HORIZONTAL ADJUSTMENT.
To adjust the saddle’s horizontal position, loosen the control knob (24) on the
saddle’s horizontal bar and move the saddle, along with the bar, into the
desired position, then tighten the control knob securely, Fig.4.
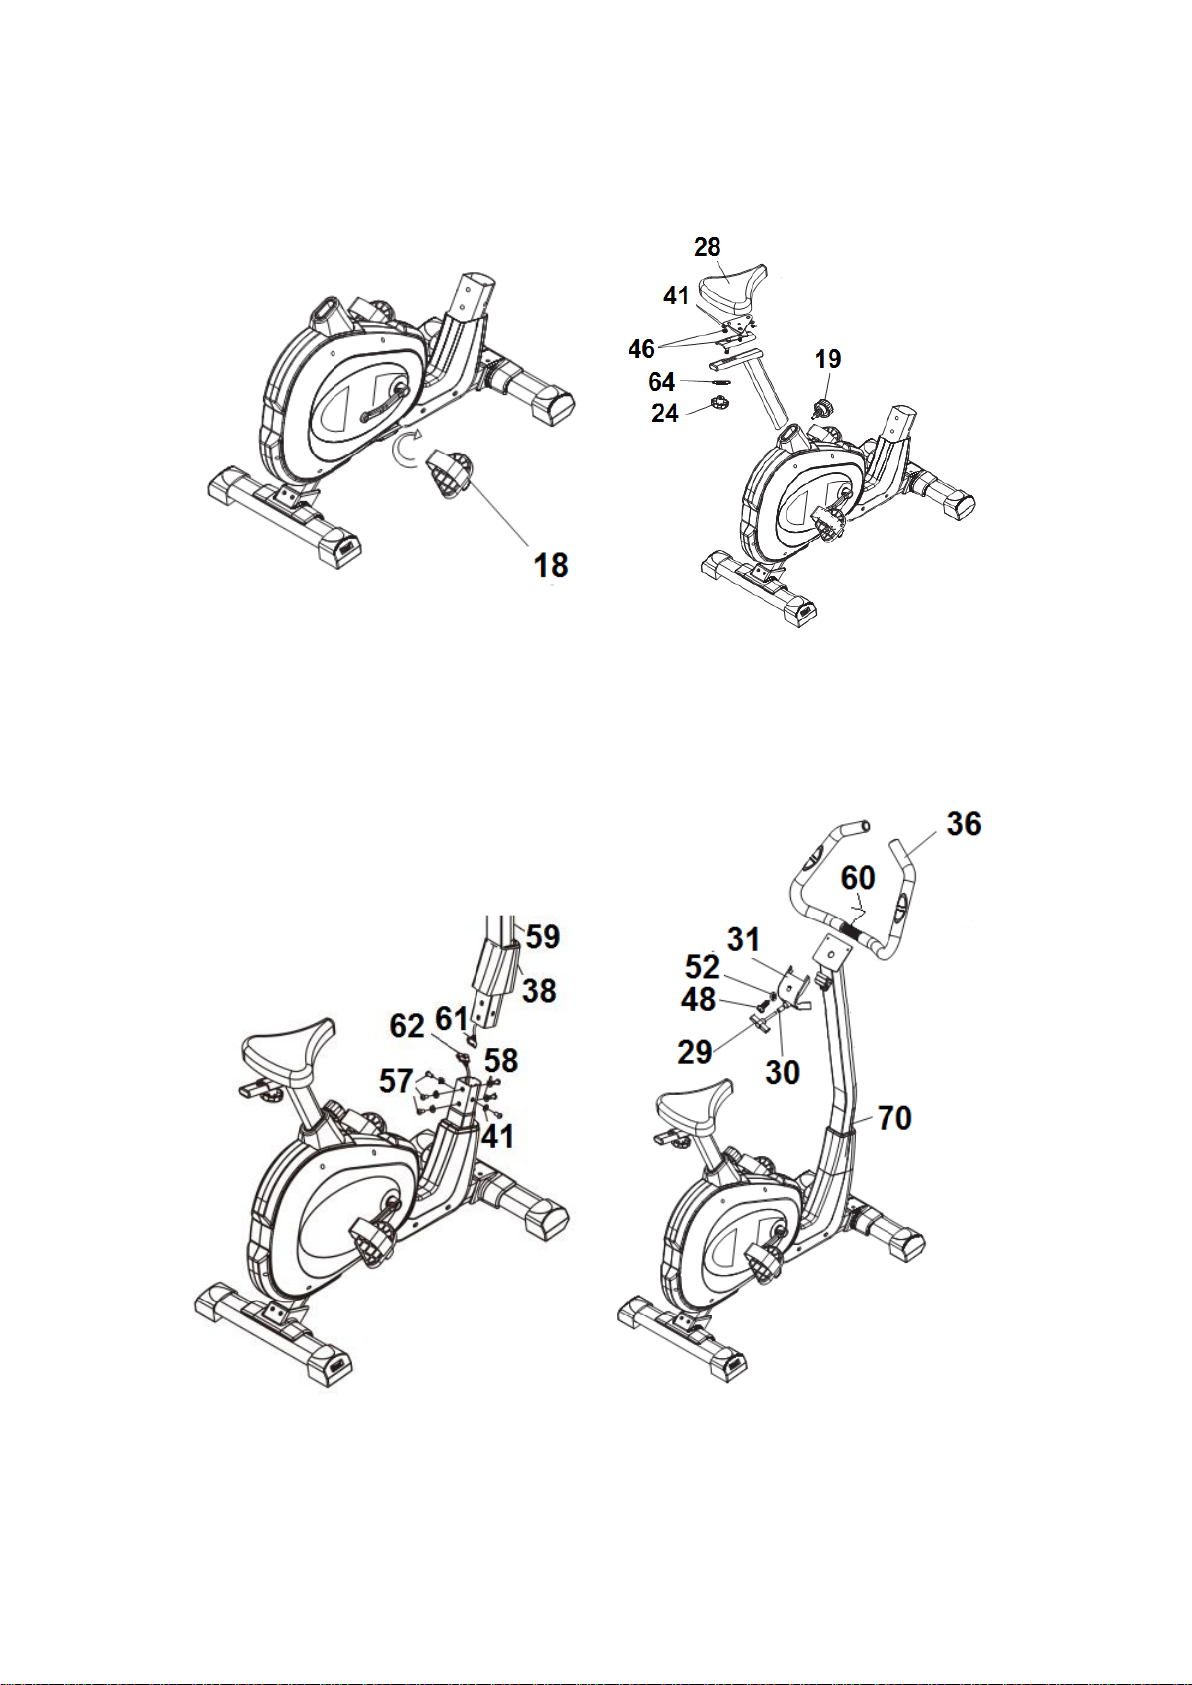
5. FITTING THE BOTTOM POST COVER.-
Take the main post (59) and insert the bottom post cover (38) in the direction of the
arrow, Fig.5.
6. FITTING THE MAIN POST.-
Take the screws (57) out of the main body (1), bring the main post (59) up to
the boss on the main body, and connect terminals (61-62). Put bolts (57),
along with their washers (41) (58) back in, Fig.5, making sure that the
handlebar is straight and then tighten securely.
Loosen the handlebar bracket, line the handlebar (36) up with the main post
(59), Fig.6.
Pass the hand-grip cables (60) through the slot on the post, and pull them out
through the top. Insert the handlebar (36) in the bracket of the main mast (59).


 Service manual")