BH F8 TFT G6428NTFT User manual

1
0190473
UNIDAD ELECTRÓNICA
ELECTRONIC MONITOR
UNITÉ ÉLECTRONIQUE
ELEKTRONIKEINHEIT
IMPIANTO ELETTRONICO
ELEKTRONISCHER MONITOR

2
Fig.1 Fig.2
Fig.3
Fig.4

3
Fig.5
Fig.6
Fig.7

4
Fig.8
Fig.9
Fig.10

5
Español
ELEMENTOS DEL MONITOR.-
A: Este electrónico (Monitor) dispone
de 1 display TFT táctil.
B: Pulsadores o teclas de acceso
rápido a inclinación (2- 4- 6- 8- 10- 12-
15).
C: Este electrónico (Monitor) dispone
de 7 pulsadores o teclas: PROGRAM;
MODE; INCLINACIÓN (↨); START/
STOP; VELOCIDAD Km/h (↨).
D: Puerto USB
E: Alojamiento de llave de seguridad.
F: Pulsadores o teclas de acceso
rápido a la velocidad (2- 4- 6- 8- 10-
14- 16 Km/h).
g: Llave de seguridad.
H: Tecla ECO
PUESTA EN MARCHA.-
Conecte la unidad a un enchufe
provisto de terminal TIERRA ponga el
interruptor (L) en posición (1). Fig.1.
La llave de seguridad (g) deberá estar
colocada en su alojamiento (E) Fig.2.
En caso contrario la máquina no se
pondrá en marcha y mostrará un
mensaje de advertencia.
La máquina se encenderá en la
pantalla principal. Fig. 4.
CAMBIO DE IDIOMA.-
En la pantalla principal pulse
OPTIONS tocando directamente la
pantalla y luego seleccione la opción
de LANGUAGE, Fig.5. Seleccione el
idioma deseado. Para volver a la
pantalla principal pulse el icono
HOME situado en la esquina superior
izquierda, Fig.5.

6
CAMBIO DE KILÓMETROS A
MILLAS.-
En la pantalla principal pulse
OPTIONS tocando directamente la
pantalla y luego seleccione la opción
de UNITS, Fig.5. Seleccione la unidad
métrica deseada. Para volver a la
pantalla principal pulse el icono
HOME situado en la esquina superior
izquierda, Fig.5.
AJUSTE DE LUMINOSIDAD
DE PANTALLA.-
En la pantalla principal pulse
OPTIONS tocando directamente la
pantalla y luego seleccione la opción
de SCREEN, Fig.5. Ajuste la
luminosidad tocando directamente la
barra en la pantalla. Para volver a la
pantalla principal pulse el icono de
casita situado en la esquina superior
izquierda, Fig.5.
AJUSTE DE VOLUMEN.-
Pulse el icono del círculo situado
en la parte derecha de la pantalla para
ajustar el volumen.
INSTRUCCIONES DE
FUNCIONAMIENTO.-
Este monitor dispone de los siguientes
programas: 1 programa MANUAL; 36
programas en PROGRAMAS
PREDEFINIDOS; 1 programa de
USUARIO; 1 programa de MODO
NAVEGACION y 1 programa de
CONTROL DE FRECUENCIA
CARDIACA.
Pulse la tecla START/STOP o el
QUICK START directamente en la
pantalla y la máquina se pondrá en
funcionamiento transcurridos 3
segundos, indicados en forma
descendente en el display central de
acuerdo con los valores que haya
introducido.
Usted puede variar en cualquier
momento del programa, la velocidad,
pulsando las teclas SPEED (↨) entre
los valores de 1.0–20 Km/h
(G6424TFT 1.0-18 km/h, G6427TFT-
G6520TFT 1.0-22 km/h) y la
inclinación, pulsando las teclas
INCLINE (↨) del monitor.
Pulsando la tecla START/STOP o
quitando la LLAVE DE SEGURIDAD
la máquina se parará y mostrará un
resumen de su ejercicio. Fig.6
Nota: No se puede realizar más de un
ejercicio simultáneamente. Si un
ejercicio está activo, las teclas QUICK
START y EXERCISE mostrarán la
gráfica del ejercicio en curso. Para
realizar otro ejercicio pulse STOP,
luego RESUME y seleccione el
ejercicio nuevo.
FUNCION MANUAL.-
Estando en la pantalla principal, Fig.4
pulse EXERCISE para entrar en la
pantalla de selección de programa,
Fig.7. Para seleccionar el programa
manual pulse MANUAL. Pulse el
icono situado en la esquina inferior
derecha para iniciar el ejercicio.
Este programa es un perfil constante
que el usuario puede modificar.
El usuario puede variar en cualquier
momento, la velocidad, pulsando las
teclas SPEED (↨) y la inclinación,
pulsando las teclas INCLINE (↨) del
monitor.
Nota: El objetivo marcado será el

7
último que se ha fijado.
Programación de tiempo.-
Tras seleccionar el programa
MANUAL puede programar el tiempo
de su ejercicio (5-99 Minutos) tocando
la barra en la pantalla
Seleccione el tiempo y pulse el icono
para comenzar el ejercicio. El
tiempo irá disminuyendo hasta
alcanzar el valor “cero“.
Programación de la distancia.-
Si tras seleccionar la función
MANUAL pulsa el icono > podrá
programar la distancia (5- 99 Km)
tocando la barra en la pantalla.
Seleccione la distancia y pulse el
icono para comenzar el ejercicio.
La distancia ira disminuyendo hasta
alcanzar el valor «cero».
Programación de las calorías.-
Si tras seleccionar la función
MANUAL pulsa el icono > dos veces
podrá programar las calorías (50 - 990
Cal.) tocando la barra en la pantalla.
Seleccione las calorías y pulse el
icono para comenzar el ejercicio.
Las calorías disminuirán hasta
alcanzar el valor “cero“.
FUNCIÓN PROGRAMAS.-
Estando en la pantalla principal, Fig.4
pulse EXERCISE para entrar en la
pantalla de selección de programa,
Fig.7. Para seleccionar el programa
predefinido pulse PROFILES. Pulse
los iconos > < para seleccionar el
gráfico de programa (1-36) que desee
para hacer su ejercicio y pulse el
icono para programar el tiempo
del ejercicio. Pulse el icono para
comenzar el ejercicio.
Una vez comenzado el ejercicio usted
puede variar la velocidad, pulsando
las teclas SPEED (↨) y la inclinación,
pulsando las teclas INCLINE (↨) del
monitor.
Gráficos de programas del P1 al P36.
Ver páginas finales.-
FUNCIÓN ECO.-
Pulse este botón en modo programas
o modo manual para entrar en modo
económico. La máquina cambiará la
inclinación y la configuración para
disminuir el consumo eléctrico y en la
ventana de tiempo se alternará el
tiempo con la palabra ECO. Pulse de
nuevo el botón ECO para salir de esta
función.
PROGRAMA DE USUARIO.-
Estando en la pantalla principal, Fig.4
pulse EXERCISE para entrar en la
pantalla de selección de programa,
Fig.7. Para seleccionar el programa
de usuario pulse USER.
Seleccione el nivel deseado de
velocidad e inclinación para cada
escala de las 10 tocando directamente
la pantalla. Pulse el icono para
programar el tiempo del ejercicio.
Pulse el icono para comenzar el
ejercicio.
PROGRAMAS DEL CONTROL
DEL RITMO CARDIACO.-
Estando en la pantalla principal, Fig.4
pulse EXERCISE para entrar en la
pantalla de selección de programa,
Fig.7. Para seleccionar el programa
del control del ritmo cardiaco pulse

8
HRC. Seleccione la edad tocando
directamente la barra en la pantalla,
después seleccione la opción
deseada (90%, 80%, 65%) o tocando
el nivel en la barra de pulso y pulse
NEXT para programar el tiempo del
ejercicio.
Pulse el icono para comenzar el
ejercicio.
Las opciones (90%, 80%, 65%)
indican el porcentaje respecto al pulso
cardiaco máximo (220-edad). La
velocidad se ajustará
automáticamente de acuerdo al valor
de pulso seleccionado. Si el valor de
pulso está por debajo del valor
objetivo, la velocidad aumentará.
Si el valor de pulso está por encima
del valor objetivo la velocidad
disminuirá.
Es obligatorio utilizar la medición del
ritmo cardiaco, usando para ello los
sensores manuales (hand-grip) o la
banda de pulso telemétrico de pecho.
El máximo número de pulsaciones
que una persona nunca debe
sobrepasar se le denomina ritmo
máximo y éste disminuye con la edad.
Una sencilla fórmula para calcular es
restar a 210 la edad en años. El
ejercicio, para que sea correcto, debe
mantenerse entre el 65% y el 85 %
del ritmo cardíaco máximo y se
recomienda no sobrepasar el 85%.
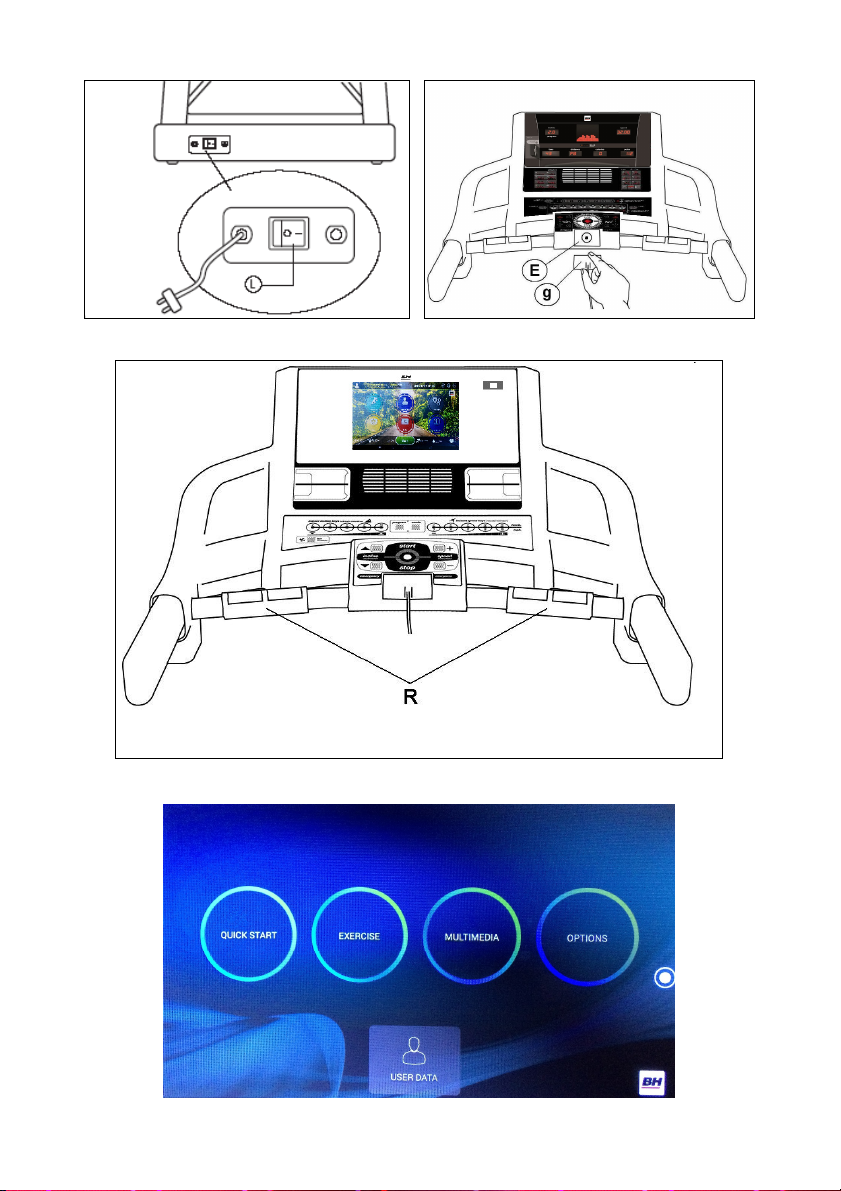
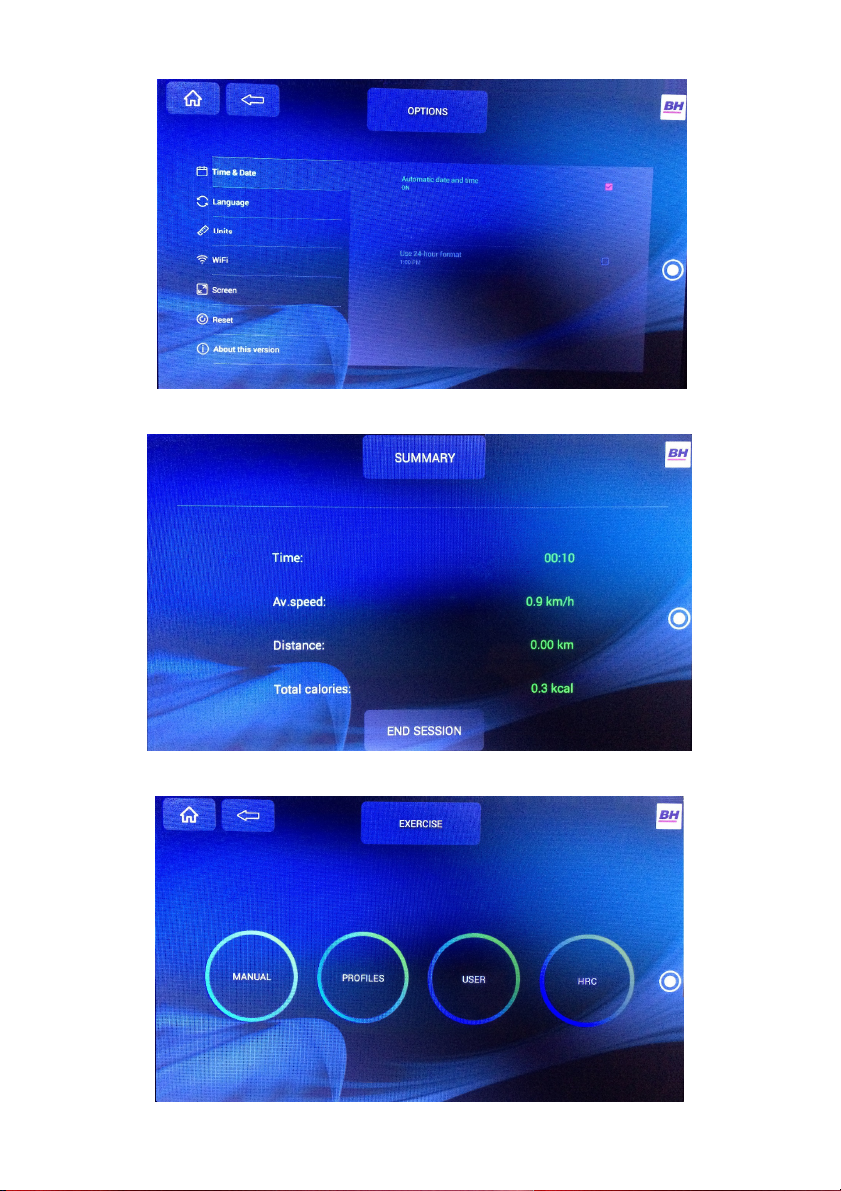
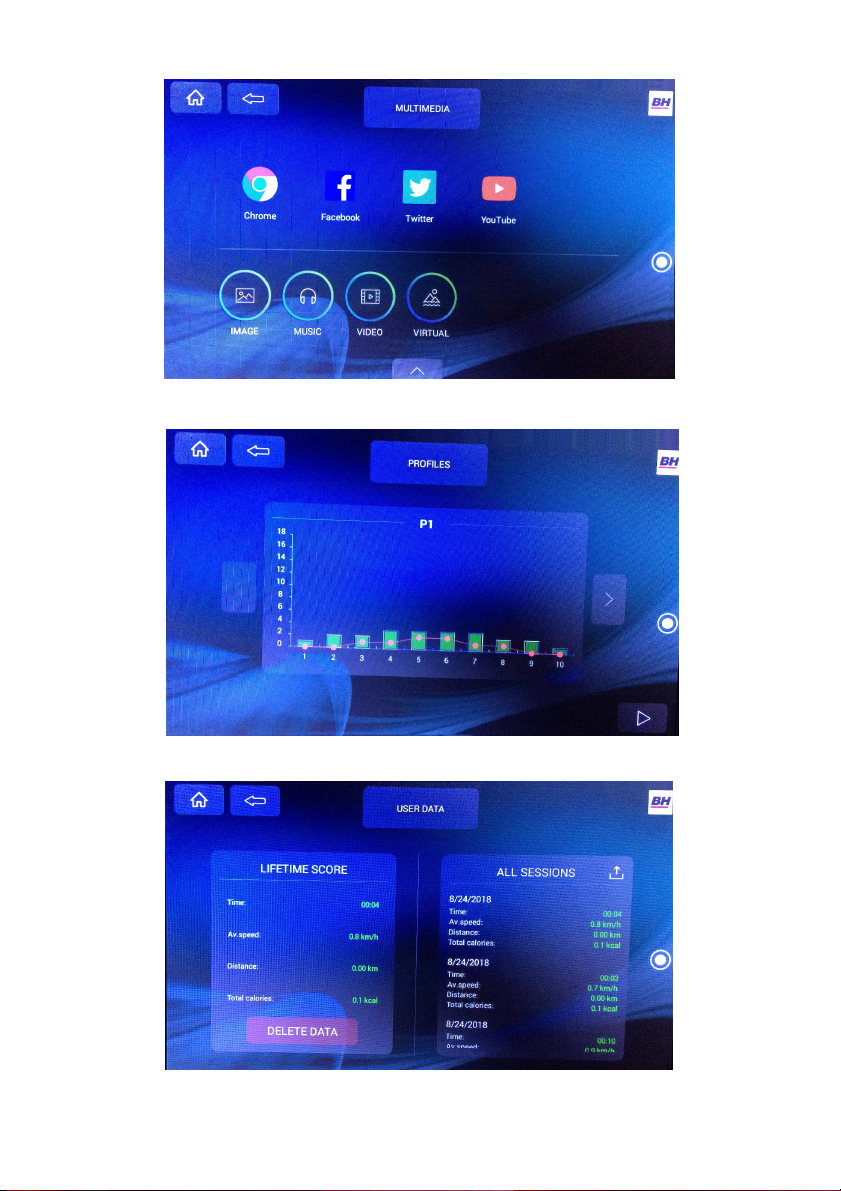
MULTIMEDIA.-
En el menú principal (Fig.4) pulse
MULTIMEDIA para acceder a las
aplicaciones multimedia. Fig. 8.
Inserte un dispositivo USB con
archivos de música para
reproducirlos.
Para navegar por internet debe
conectarse primero a una conexión
WIFI. Para eso pulse OPTIONS en la
pantalla principal (Fig. 4) y luego
seleccione la opción de WIFI, Fig.5.
Para acceder a MULTIMEDIA durante
su sesión de ejercicio pulse el icono
del círculo situado en la parte
derecha de la pantalla y luego pulse el
icono de MEDIA. Para volver a la
pantalla del ejercicio pulse el icono del
círculo , luego pulse el icono
HOME y después QUICK START o
EXERCISE.
Si durante el ejercicio necesita
acceder al menú OPTIONS puede
hacerlo pulsando el icono del círculo
, luego HOME, luego OPTIONS.
MODO VIRTUAL.-
Este programa reproduce un video de
forma continua durante el
entrenamiento.
Para seleccionar este programa entre
en MULTIMEDIA y elija el programa
VIRTUAL. Fig. 8.
Escoja el video que será reproducido
durante el ejercicio. Pulse start para
comenzar.
USER DATA.-
Pulse sobre el icono situaldo en la
parte inferior del menú principal, Fig.
4, para acceder al registro de sus
ejercicios, Fig 10. Estos registros
pueden ser eliminados mediante el
botón DELETE DATA.

9
ACTUALIZAR LAS
APLICACIONES ANDROID
PREINSTALADAS
Nota: Las aplicaciones pueden no
estar actualizadas debido a los
cambios de versión. Se recomienda
actualizar a la última versión para un
correcto funcionamiento.
Para actualizar automáticamente las
aplicaciones de tu dispositivo siga los
siguientes pasos:
1. Abra la aplicación.
2. Introduzca una cuenta de
correo de Google existente o abra
una nueva.
3. Seleccione update.
4. Espere hasta que se termine
de actualizar.
5. Reinicie la máquina.
Nota: Si una cuenta del dispositivo
tiene un error de inicio de sesión, es
posible que las aplicaciones no se
actualicen automáticamente. Inténtelo
de nuevo y espere antes de reiniciar.
PARADA DE EMERGENCIA.-
Para dar máxima seguridad al
usuario, esta unidad dispone de una
llave de seguridad (g) y de un botón
de START/STOP. La llave de
seguridad (g) deberá estar colocada
en su alojamiento (E), ver Fig.2.
En caso contrario, la máquina no se
pondrá en marcha.
Cuando haga uso de la máquina, fije
la llave de seguridad a la ropa
mediante el clip. Con un tirón, la llave
de seguridad saldrá de su alojamiento
y la máquina se parará de forma
instantánea. Para ponerla de nuevo
en marcha, vuelva a colocar la llave
en su alojamiento.
Quite la llave de seguridad (g) si esta
no va a ser usada y guárdela fuera del
alcance de los niños. Pulsando el
botón rojo de START/STOP la unidad
se parará inmediatamente.
Para ponerla de nuevo en marcha
pulsar el botón START/STOP.
INCLINACIÓN.-
La inclinación es una función
independiente a todas las funciones.
Cada vez que ponga el interruptor
general (L) en la posición I, como se
indica en la puesta en marcha, Fig.1.
en el display de inclinación aparecerá
el valor de inclinación que usted ha
dejado.
Si la inclinación no está a cero cuando
comienza el ejercicio con la tecla
START/STOP, ésta irá a cero
mientras la máquina se pone en
funcionamiento.
Pulsando los botones INCLINE (+) o
INCLINE (-), usted podrá ajustar la
inclinación de su unidad desde el nivel
0 hasta el nivel 15 según la inclinación
a la que desee hacer el ejercicio.
Importante. No cambie la inclinación
de su cinta de correr poniendo objetos
debajo de la banda.
IMPORTANTE: LA INCLINACIÓN
DEBE ESTAR EN SU NIVEL MAS
BAJO ANTES DE PONER LA
MÁQUINA DE ANDAR EN SU
POSICIÓN DE PLEGADO.
INSTRUCCIONES - USO DEL
HAND-GRIP MEDICION DE
PULSO.-
PULSO Hand-grip.
El pulso de este modelo se mide
colocando ambas manos en los
sensores (R), que están puestos en el
manillar como se indica en la Fig.3.

10
La medida de pulso aparece después
de unos segundos.
Si no tiene colocadas ambas manos
correctamente, el pulso no funciona.
PULSO TELEMÉTRICO.
El monitor está equipado para recibir
las señales del sistema telemétrico de
captación de pulso.
El sistema se compone de un receptor
(D) y de un transmisor (banda de
pecho no incluida).
Este sistema de pulso telemétrico
prevalece sobre el sistema de pulso
de Hand-Grip cuando se estan
usando conjuntamente.
Ver libro de instrucciones de pulso
telemétrico.
IMPORTANTE. Este no es un aparato
médico y por tanto la información del
ritmo cardiaco es orientativa.
Para cualquier consulta, no dude en
ponerse en contacto con el
(S.A.T).Servicio de Asistencia
Técnica, llamando al teléfono de
atención al cliente (ver página final del
presente manual).
BH SE RESERVA EL DERECHO A
MODIFICAR LAS ESPECIFICACIO-
NES DE SUS PRODUCTOS SIN
PREVIO AVISO.

11
LOCALIZACIÓN DE FALLOS O AVERIAS
SÍNTOMAS COMPROBACIONES SOLUCIONES
1. No se enciende el
monitor.
1) Asegúrese de que la máqunia
está enchufada a la red, el
interruptor general en posición 1
y la llave de seguridad puesta.
1) Enchufe el cable a la red.
Coloque el interruptor en
posición 1 y ponga la llave
de seguridad.
2. Se enciende el
monitor y no
funciona el motor.
2) Comprobar que el limitador de
corriente esté hacia dentro. 2) Desconectar la máquina y
pulsar el limitador de
corriente. Lubricar la banda.
3. Tirones al andar
encima de la banda. 3.a) Comprobar lubricación banda
3.b) Comprobar tensión banda
deslizamiento
3.c) Comprobar tensión correa de
transmisión
3.a) Lubricar la banda de
deslizamiento .
3.b) Tensar la banda de
deslizamiento.
3.c) Tensar la correa de
transmisión.
4. La máqunia se
para (salta el
limitador de
corriente).
4) Comprobar lubricación banda 4) Pulsar el limitador de
corriente con el interruptor
en 0 y lubricar la banda de
deslizamiento.
5. La barandilla da
calambres en las
manos.
5) Comprobar que el enchufe
donde está conectada tiene
toma tierra
5) Enchufar la máquina en
enchufe con toma de tierra.
6. La banda se
descentra.
6.a) Comprobar nivelación del
suelo.
6.b) Comprobar la cojera de la
máquina.
ERRORES DE LA MÁQUINA
Pantalla de
monitor E1 Posible mensaje de
fallo. Conecte el cable correctamente entre el
controlador superior y el controlador inferior
Pantalla de
monitor E2 Apagado Funcionamiento con voltaje correcto; conecte
de nuevo el cable del motor.
Pantalla de
monitor E3 Sin señal del sensor de
velocidad Sustituya la luz del sensor del controlador
inferior o el sensor de velocidad.
Pantalla de
monitor E5 Posible sobrecarga del
motor Lubrique la cinta.
Pantalla de
monitor E7 Llave de seguridad Coloque la llave de seguridad en su
alojamiento.
Para cualquier consulta, no dude en ponerse en contacto con el (S.A.T).Servicio
de Asistencia Técnica, llamando al teléfono de atención al cliente (ver página
final del presente manual).

12
English
ELEMENTS OF THE MONITOR.-
A: The electronic monitor has 1 TFT
display including touchscreen.
B: Incline function quick access keys
or buttons (2- 4- 6- 8- 10- 12- 15).
C: The electronic monitor has 7 push
buttons or keys; PROGRAM; MODE;
INCLINE(↨); START/STOP; SPEED
Km/h (↨).
D: USB port.
E: Slot for safety key.
F: Speed function quick access keys or
buttons (2- 4- 6- 8- 10- 14- 16Km/h).
g: Safety key.
H: ECO key
START/STOPING.-
Plug the unit into a wall socket with an
EARTH terminal and set switch (L) to
position (1), Fig.1.
The safety key (g) must be inserted
into its spot (E) Fig.2, otherwise the
machine will not operate and will show
and error message.
The machine will turn on on the main
screen. Fig. 4.
CHANGING LANGUAGE.-
On the main screen click on
OPTIONS, then select the option
LANGUAGE, Fig. 5. Choose the
language that you wish. For return to
main screen click on the icon HOME
in the upper left corner, Fig.5.
CHANGING FROM
KILOMETRES TO MILES.-
On the main screen click on
OPTIONS, then select the option
UNITS, Fig. 5.
Choose the unit that you wish. For

13
return to main screen click on the icon
HOME in the upper left corner, Fig.5.
SCREEN BRIGHTNESS
ADJUSTMENT.-
On the main screen click on
OPTIONS, then select the option
SCREEN, Fig. 5. Adjust the brightness
by touching directly the bar on the
screen. For return to main screen click
on the icon HOME in the upper left
corner, Fig.5.
VOLUME ADJUSTMENT.-
Click on the icon located on
the right side of the screen to
adjust the volume.
OPERATING INSTRUCTIONS.-
This monitor has the following
programs: 1 MANUAL program; 36
PRESET PROGRAMS; 1 USER
program; 1 NAVIGATION MODE
program and 1 HEART RATE
CONTROL program.
Pressing the START/STOP key or
QUICKSTART on the screen will light
the MANUAL and the machine will start
within 3 seconds, shown by a
countdown on the TIME display, at a
speed of 1.0km/h.
You can change the speed settings
between 1.0–20 km/h (G6424TFT 1.0-
18 km/h, G6427TFT-G6520TFT 1.0-
22 km/h) at any time during the
exercise by pressing the SPEED (↨)
keys, and the inclination settings by
pressing the INCLINE (↨) keys.
The machine will stop if you press the
START/STOP key or if you remove the
SAFETY KEY and will display a
summary of your exercise. Fig.6
Note: You can not perform more than
one exercise simultaneously. If an
exercise is active, the QUICK START
and EXERCISE keys will display the
values of the current exercise. To
perform another exercise press STOP,
then RESUME and then select the
new exercise.
MANUAL MODE
Click on EXERCISE on the main
screen (Fig.4) and you will enter the
program selection screen (Fig.7).
Click on MANUAL to select manual
program.
Click on the icon in the lower right
corner to start the exercise.
This program maintains a flat profile that
the user can modify during the exercise.
User can vary at any time of the
program, the speed, by pressing the
SPEED (↨) keys and the incline, by
pressing the INCLINE (↨) keys of the
monitor.
Note: The marked target will be the
last one that has been set.
Programming a time limit.-
After selecting manual mode you can
program a time limit for the exercise
(between 5-99 minutes) by touching
directly the bar on the screen.
Select the time and click on the icon
to begin the exercise. The time
will begin to count down until it
reaches zero.
Programming a distance limit.-
If, after selecting manual mode, you
click on the icon > you can program a
distance for your exercise (between
5–99 km) by touching directly the bar

14
on the screen.
Select the distance and click on the
icon to begin the exercise.
The distance will begin to count down
until it reaches zero.
Programming a calorie limit.-
If, after selecting manual mode, you
click on the icon > twice you can
program the calories for the exercise
(between 50-990 Cal.) by touching
directly the bar on the screen.
Select the calories and click on the
icon to begin the exercise.
The calories will begin to count down
until they reach zero.
PROGRAM FUNCTION.-
Click on EXERCISE on the main
screen (Fig.4) and you will enter the
program selection screen (Fig.7).
Click on PROFILES to select a pre-set
program.
Click on the icons > < to select the
program graph (1-36) that you wish to
use (Fig.9) and then click on the icon
to program a time limit. Click on
the icon to begin the exercise.
User can vary at any time of the
program, the speed, by pressing the
SPEED (↨) keys and the incline, by
pressing the INCLINE (↨) keys of the
monitor.
Program graphics for P1 to P36.
See end pages.-
ECO FUNCTION.-
Press this button when in manual or
program mode to enter into economic
mode. The machine will change the
incline and configuration to reduce
power consumption and the time
window will alternate time with the
word ECO.
Press the ECO button again to exit
this function.
USER PROGRAM.-
Click on EXERCISE on the main
screen (Fig.4) and you will enter the
program selection screen (Fig.7). Click
on USER to select this program.
Select the desired level for each stage
by touching the screen. Click on the
icon to program a time limit. Click
on the icon to begin the exercise.
HEART RATE CONTROL
PROGRAMS.-
Click on EXERCISE on the main
screen (Fig.4) and you will enter the
program selection screen (Fig.7).
Click on HRC to select one of the
heart rate control programs.
Select the age by touching the bar on
the screen, then select one of the
options (Target, 90%, 80% 65%) and
click on NEXT to program a time limit.
Click on the icon to begin the
exercise.
The options (90%, 80%, 65%) represent
the percentage with respect to
maximum heart rate (220-age). The
exertion level will adjust automatically in
accordance with the selected heart rate
value.
If the pulse rate is below the target value
then the speed setting will increase.

15
If the pulse rate is above the target
value the speed setting will reduce.
It is mandatory to use the heart rate
measurement, using manual sensors
(hand-grip) or the telemetric pulse
chest belt.
The maximum number of pulsations
that a person should never exceed is
called the maximum rate and this
decreases with age. A simple formula
to calculate is to subtract 210 from
age in years. Exercise, to be correct,
should be maintained between 65%
and 85% of the maximum heart rate
and it is recommended not to exceed
85%.
MULTIMEDIA.-
In the main menu (Fig.4) click on
MULTIMEDIA to access multimedia
applications. Fig. 8.
Insert a USB device with music files to
play them.
To surf the internet you must first
connect to a WIFI connection. On the
main screen click on OPTIONS, then
select the option WIFI, Fig. 5.
To access Multimedia during the
exercise click on the icon on the
right side of the display and then click
on MEDIA. To return to the exercise
screen click on the icon then
click on the icon HOME and then click
on QUICK START or EXERCISE.
If you wish to access the menu
Options during the exercise just click
on the icon , then HOME and
then OPTIONS.
VIRTUAL MODE.-
This program plays a video
continuously during training.
To select this program, enter
MULTIMEDIA and select the
VIRTUAL program. Fig. 8.
Choose the video that will be played
during the exercise. Press start to
begin.
USER DATA.-
Click on the icon located at the bottom
of the main menu, Fig. 4, to access
the record of your exercises, Fig 10.
These records can be deleted using
the DELETE DATA button.
UPDATE PREINSTALLED
ANDROID APPS
Note: Applications may not be up to
date due to version changes. We
recommend updating to the latest
version for proper operation.
To automatically update apps on your
Android device:
1. Open the Google Play Store
app.
2. Enter an existing Google mail
account or open a new one.
3. Tap Update.
4. Waiting for finishing the
update.
5. Reboot the treadmill.
Note: If an account on your device
has a sign-in error, apps may not
update automatically. Please try again
and wait more before reboot.
EMERGENCY STOP.-
For the user’s maximum safety, this unit
is equipped with a safety key (g) and a
STOP button. The safety key (g) must
be slotted into its housing (E), Fig.2,
otherwise the machine will not start.
When you are using the machine

16
always clip the cord on the safety key
to your clothing. Tugging on the cord
will pull the safety key out of its slot
and the machine will stop immediately.
To restart the machine simply put the
key back into the key slot.
Remove the safety key (g) whenever
the machine is not being used and
keep it out of children’s reach.
Pressing the red button marked STOP
will also stop the unit immediately.
To restart it, press the button marked
START/STOP again.
ELEVATION.-
The inclination function operates
independently of all other functions.
Each time that you set switch (L) to
position I, as described in the Starting
section, Fig.1. the inclination level that
was last used will be displayed.
If inclination is not at zero when the
START/STOP key is used to begin
exercising, the machine will zero itself
while it is starting.
You can adjust the elevation level by
pressing the INCLINE(+) or INCLINE(-
) keys to specify a value of 0 to 15,
depending on how you would like to
do the exercise.
Important: Do not change the
inclination level of your treadmill by
propping it up on objects.
IMPORTANT: THE INCLINATION
LEVEL MUST BE AT ITS LOWEST
SETTING BEFORE ATTEMPTING
TO PUT THE TREADMILL INTO THE
FOLDED POSITION.
PULSE MEASUREMENT
INSTRUCTIONS – USE.-
PULSE Hand-grip.
On this model the pulse rate is
measured by placing both hands on
the sensors (R), located on the
handlebar, as shown in Fig 3.
After a few seconds a heart rate
reading will be displayed.
If both hands are not placed correctly
then the pulse function will not work.
TELEMETRIC PULSE RATE.
The monitor is equipped to receive
signals from a telemetric pulse
measurement system.
The system comprises of a receiver
(D) and a transmitter (chest band not
included).
This telemetric pulse rate system
takes precedence over the Hand-
grip pulse rate system when both
are used together.
(See telemetric pulse rate instruction
book).
IMPORTANT: This is not a medical
appliance and therefore the heart rate
shown is merely for guideline purposes.
Do not hesitate to get touch with the
Technical Assistance Service if you
have any queries by phoning customer
services (see last page in manual).
BH RESERVES THE RIGHT TO
MODIFY THE SPECIFICATIONS OF
ITS PRODUCTS WITHOUT PRIOR
NOTICE.

17
FAULT FINDING CHART
PROBLEM CHECKS SOLUTIONS
1.The monitor does not
switch on.
1) Make sure that the
machine is plugged in, the
ON/OFF switch in position 1
and that the safety key is
inserted.
1) Plug the machine into the
mains supply. Set the switch to
position 1 and insert the safety
key.
2.The monitor switches
on but the motor fails
to start.
2) Check that the current
limiter is pressed in.
2) Switch the machine off and
press the circuit breaker in.
Lubricate the treadmill band.
3.Walking motion is
jerky on the
treadmill.
3.a) Check that the belt is
lubricated.
3.b) Check the tension on the
sliding belt.
3.c) Check the tension on the
drive belt.
3.a) Lubricate the sliding belt.
3.b) Adjust the belt tension.
3.c) Adjust the drive belt tension.
4.The machine stops
(the breaker trips). 4) Check that the band is
lubricated. 4) Reset the overload button with
the On /Off switch at „0“ and
lubricate the treadmill band.
5.Electrical shocks
through the handrail.
5) Check that the machine is
plugged into an earthed
mains socket.
5) Plug the machine into an
earthed mains socket.
6.The treadmill belt
skews off centre.
6.a) Check that the machine
is level on the floor.
6.b) Check that the machine
does not wobble.
ERROR CODES
Monitor screen display
E1 Possible message fault. Connect the wire well between top
controller and bottom controller
Monitor screen display
E2 Burst clash. Operating with correct voltage; Connect the
motor wire again.
Monitor screen display
E3 No speed sensor signal Replace the sensor light on the bottom
controller or speed sensor.
Monitor screen display
E5 Possible motor overload. Lubricate the belt.
Monitor screen display
E7 Safety key. Insert the safety key.

18
Français
MONITEUR.-
A: Ce moniteur est doté d'un écran TFT
tactile.
B: Boutons ou touches d’accès rapide
à l’inclinaison (2- 4- 6- 8- 10- 12- 15).
C: Ce moniteur dispose de 7 boutons ou
touches: PROGRAM; MODE, INCLINE
(↨); START/STOP; VITESSE Km/h (↨).
D: connecteur USB
E: Fente de la clé de sécurité.
F: Boutons ou touches d’accès rapide
à la vitesse (2- 4- 6- 8- 10- 14-
16Km/h).
g: Clé de sécurité.
H: Bouton ECO
MISE EN MARCHE.-
Connectez le moniteur à une prise
munie d’une mise à la TERRE. Placez
l’interrupteur (L) sur la position (1).
Fig.1.
La clé de sécurité (g) doit être introduite
dans sa fente (E) Fig.2, faute de quoi, la
machine ne se mettra pas en marche et
affichera un mesage d’avertissement.
La machine s’allumera sur l’écran
principal Fig.4.
CHANGEMENT DE LANGUE.-
Sur l’écran principal appuyez sur
OPTIONS en pressant directement
l’écran puis sélectionnez l’option
LANGUAGE, Fig.5. Choisissez la
langue désirée. Pour revenir au menu
principal, appuyez sur l’icone HOME
situé dans le coin supérieur gauche,
Fig.5.

19
CHANGEMENT KILOMETRES
A MILES.-
A partir de l’écran principal appuyez
sur OPTIONS en appuyant
directement sur l’écran puis
sélectionnez l’option UNITS, Fig.5.
Choisissez l’unité métrique souhaitée.
Pour revenir à l’écran principal appuyz
sur l’icone HOME situé dans le coin
supérieur gauche Fig.5.
REGLAGE LUMINOSITE ECRAN.-
A partir de l’écran principal appuyez
sur OPTIONS en appuyant
directement sur l’écran, puis
choisissez l’option SCREEN, Fig.5.
Réglez la luminosité en touchant
directement la barre de l’écran. Pour
revenir à l’écran principal, appuyez sur
l’icone “Petite case” situé dans le coin
supérieur gauche Fig.5.
REGLAGE DU VOLUME.-
Pour règler le volume alors vous
pouvez le faire en appuyant sur
l’icone situé dans la partie droite
de l’écran.
FONCTIONNEMENT.-
Ce moniteur dispose des programmes
suivants: 1 programme MANUEL; 36
PROGRAMMES PRÉDÉFINIS; 1
programme d’USAGER; 1 programme
en MODE NAVIGATION et 1
programme de CONTRÔLE DE LA
FRÈQUENCE CARDIAQUE.
Appuyez sur la touche START/STOP
ou le QUICKSTART directement sur
l'écran et la machine se mettra en
marche dans les 3 secondes,
indiquant de manière décroissante au
display central selon les valeurs que
vous avez introduites.
À tout moment du programme, vous
pouvez modifier la vitesse en appuyant
sur les touches SPEED (↨) entre 1.0-
20 km/h (G6424TFT 1.0-18 km/h,
G6427TFT-G6520TFT 1.0-22 km/h) et
l’inclinaison en appuyant les touches
INCLINE (↨) du moniteur.
En appuyant sur la touche
START/STOP ou en retirant la CLÉ
DE SÉCURITÉ, la machine s’arrête et
le moniteur affichera un résumé de la
séance d’exercice. Fig. 6
Remarque: On ne peut réaliser plus
d’un exercice simultanément. Si un
exercice est actif, les touches QUICK
START et EXERCISE montreront le
graphisme de l’exercice en cours.
Pour réaliser un autre exercice
appuyez sur STOP, puis RESUME et
choisissez le nouvel exercice.
MODE MANUEL.
Une fois sur l’écran principal, FIG 4,
appuyez sur EXERCICE pour acceder
à l’écran de sélection de programmes,
Fig.7. Pour sélectionner le programme
manuel, appuyez sur MANUAL.
Appuyez sur l’icone situé dans le
coin inférieur droit pour démarrer
l’exercice.
Ce programme maintient un profil
constant plat que l’usager peut
modifier durant la séance d’exercice.
L'utilisateur peut varier à tout moment
du programme, la vitesse, en
appuyant sur les touches SPEED (↨)
et l'inclinaison, en appuyant sur les
touches INCLINE (↨) du moniteur.
REMARQUE: L’objectif marqué est le
dernier que vous aurez fixé.

20
Programmation de la durée.-
Après avoir sélectionner le
programme MANUAL, vous pouvez
programmer la durée de l’exercice (5-
99 Minutes) en appuyant sur la barre
de l’écran.
Choisissez la durée et appuyez sur
l’icone pour débuter votre
exercice. La durée diminuera jusqu’à
atteindre la valeur “Zero”.
Programmation de la distance.-
Après avoir sélectionner la fonction
MANUEL, appuyez sur l’icone > et
vous pourrez programmer la distance
(5- 99 Km) en appuyant sur la barre
de l’écran .
Choisissez la distance et appuyez sur
l’icone pour démarrer l’exercice.
La distance ira en diminuant jusqu’à
atteindre la valeur «Zero».
Programmation des calories.-
Après avoir sélectionner la fonction
MANUAL, appuyez sur l’icone > deux
fois et vous pourrez programmer les
calories (50 - 990 Cal.) en appuyant
sur la barre de l’écran.Choisissez les
calories et appuyez sur l’cone
pour débuter l’exercice. Les calories
diminueront jusqu’à atteindre la valeur
“Zero“.
FONCTION PROGRAMMES.-
Une fois sur l’écran principal, Fig.4,
appuyez sur EXERCISE pour entrer
sur l’écran de sélection de
programmes, Fig.7. Pour sélectionner
le pogramme pré-défini, appuyez sur
PROFILES. Appuyez sur les icones >
< pour sélectionner le profil du
programme (1-36) que vous souhaitez
pour votre exercice (Fig.9) et appuyez
sur l’icone pour programmer la
durée de l’exercice.
Appuyez sur l’icone pour
démarrer l’exercice.
L'utilisateur peut varier à tout moment
du programme, la vitesse, en
appuyant sur les touches SPEED (↨)
et l'inclinaison, en appuyant sur les
touches INCLINE (↨) du moniteur.
Graphiques des programmes du P1
au P36.
Voir les dernières pages.-
Appuyez sur la touche START pour
commencer.
FONCTION ECO.-
Appuyez sur ce bouton en mode
manuel ou programmes pour passer
en mode économique. La machine
modifiera l'inclinaison et la
configuration afin de réduire la
consommation électrique et la fenêtre
affichant le temps se montrera en
alternance avec le mot ECO.
Appuyez sur la touche ECO pour
quitter cette fonction.
PROGRAMMES
UTILISATEUR.-
Une fois sur l’écran principal, Fig.4,
appuyez sur EXERCISE pour accèder
à l’écran de sélection de programmes,
Fig.7. Pour sélectionner le programme
utilisateur, appuyez sur USER.
Choisissez le niveau souhaité pour
chacun des 16 existants en appuyant
directement sur l’écran.
Appuyez sur l’icone afin de
programmer la durée de l’exercice.
Appuyez sur l’icone pour
démarrer l’exercice.
Table of contents
Languages:
Other BH Monitor manuals