
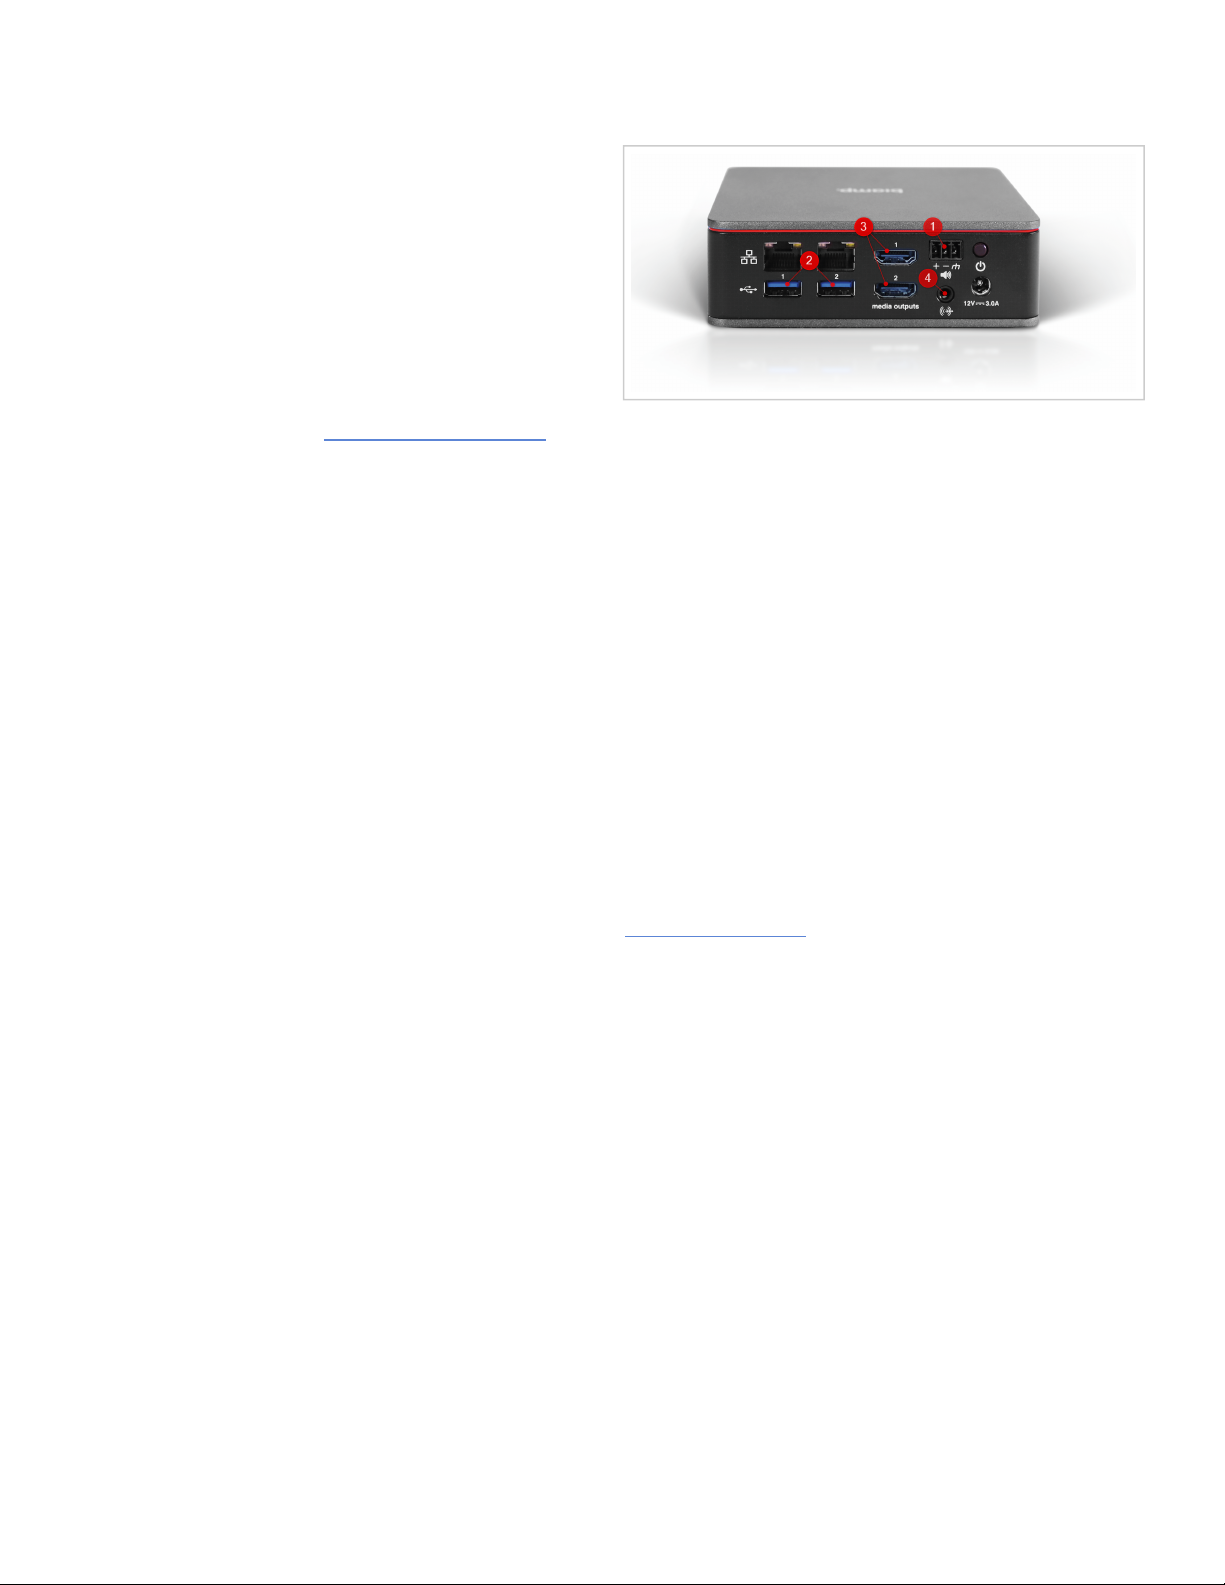
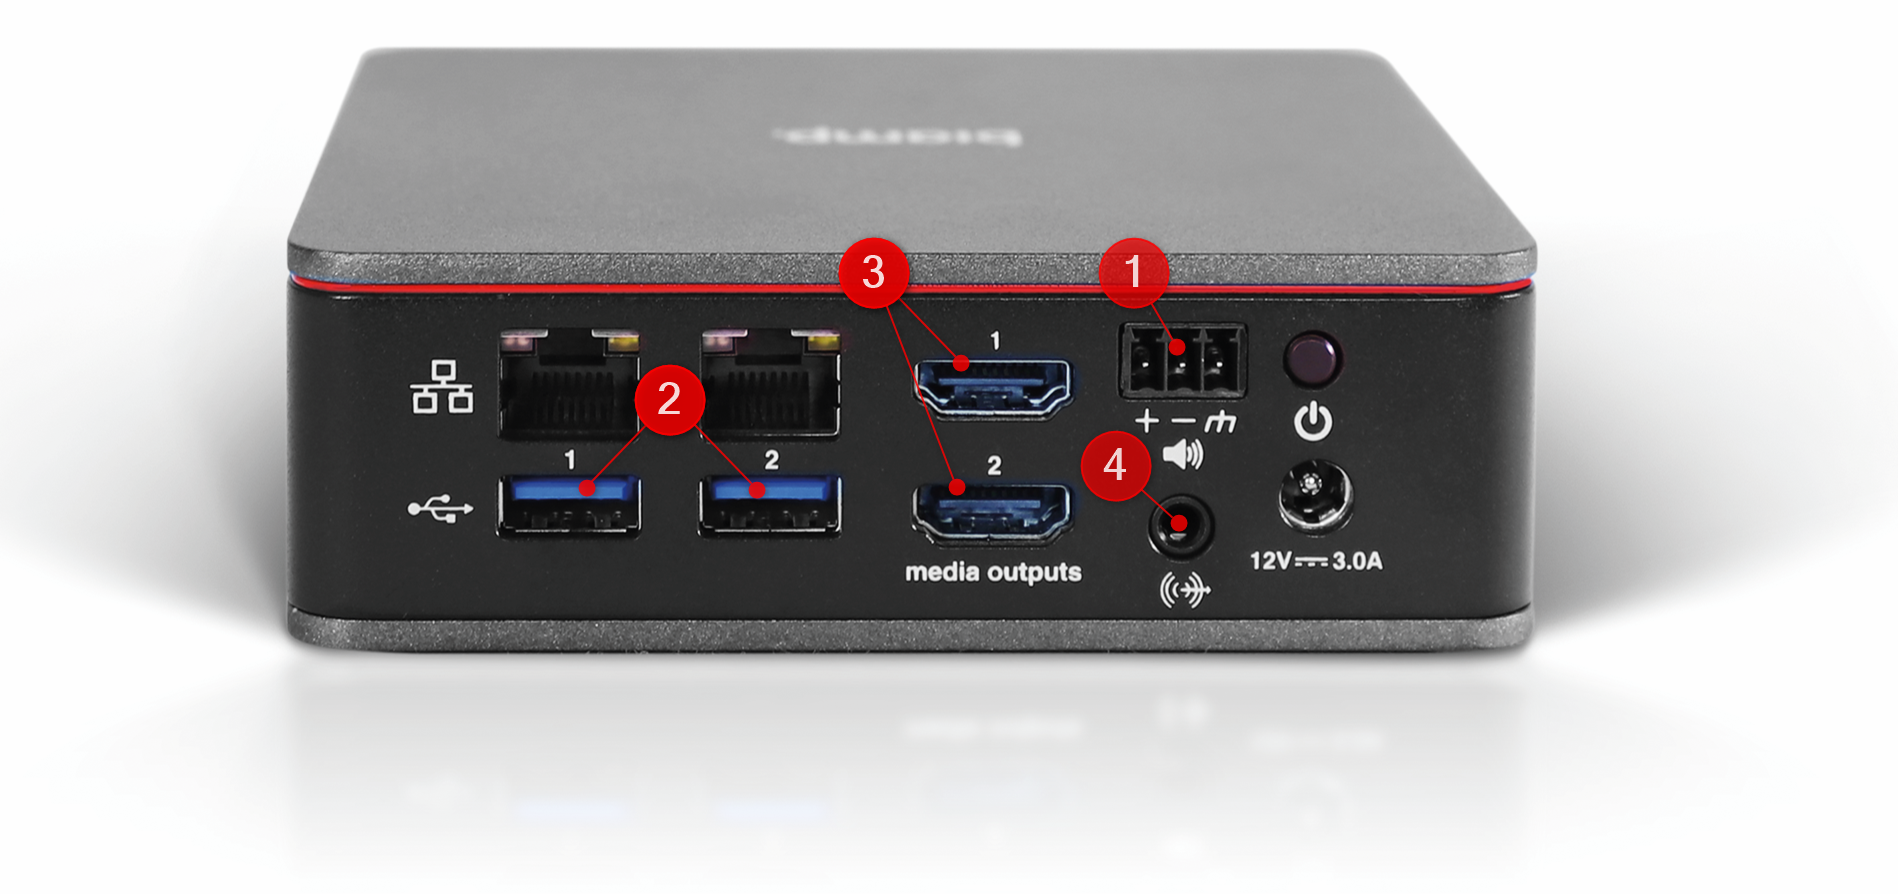
(4) Unbalanced audio output
A 3.5mm Minijack connector offers an auxiliary output to most consumer-grade audio equipment, by using a Minijack
auxiliary cable or a Minijack to RCA adapter cable. This output also allows to connect headphones directly to the ATOM,
which can be helpful during system tuning and troubleshooting.
Audio setup
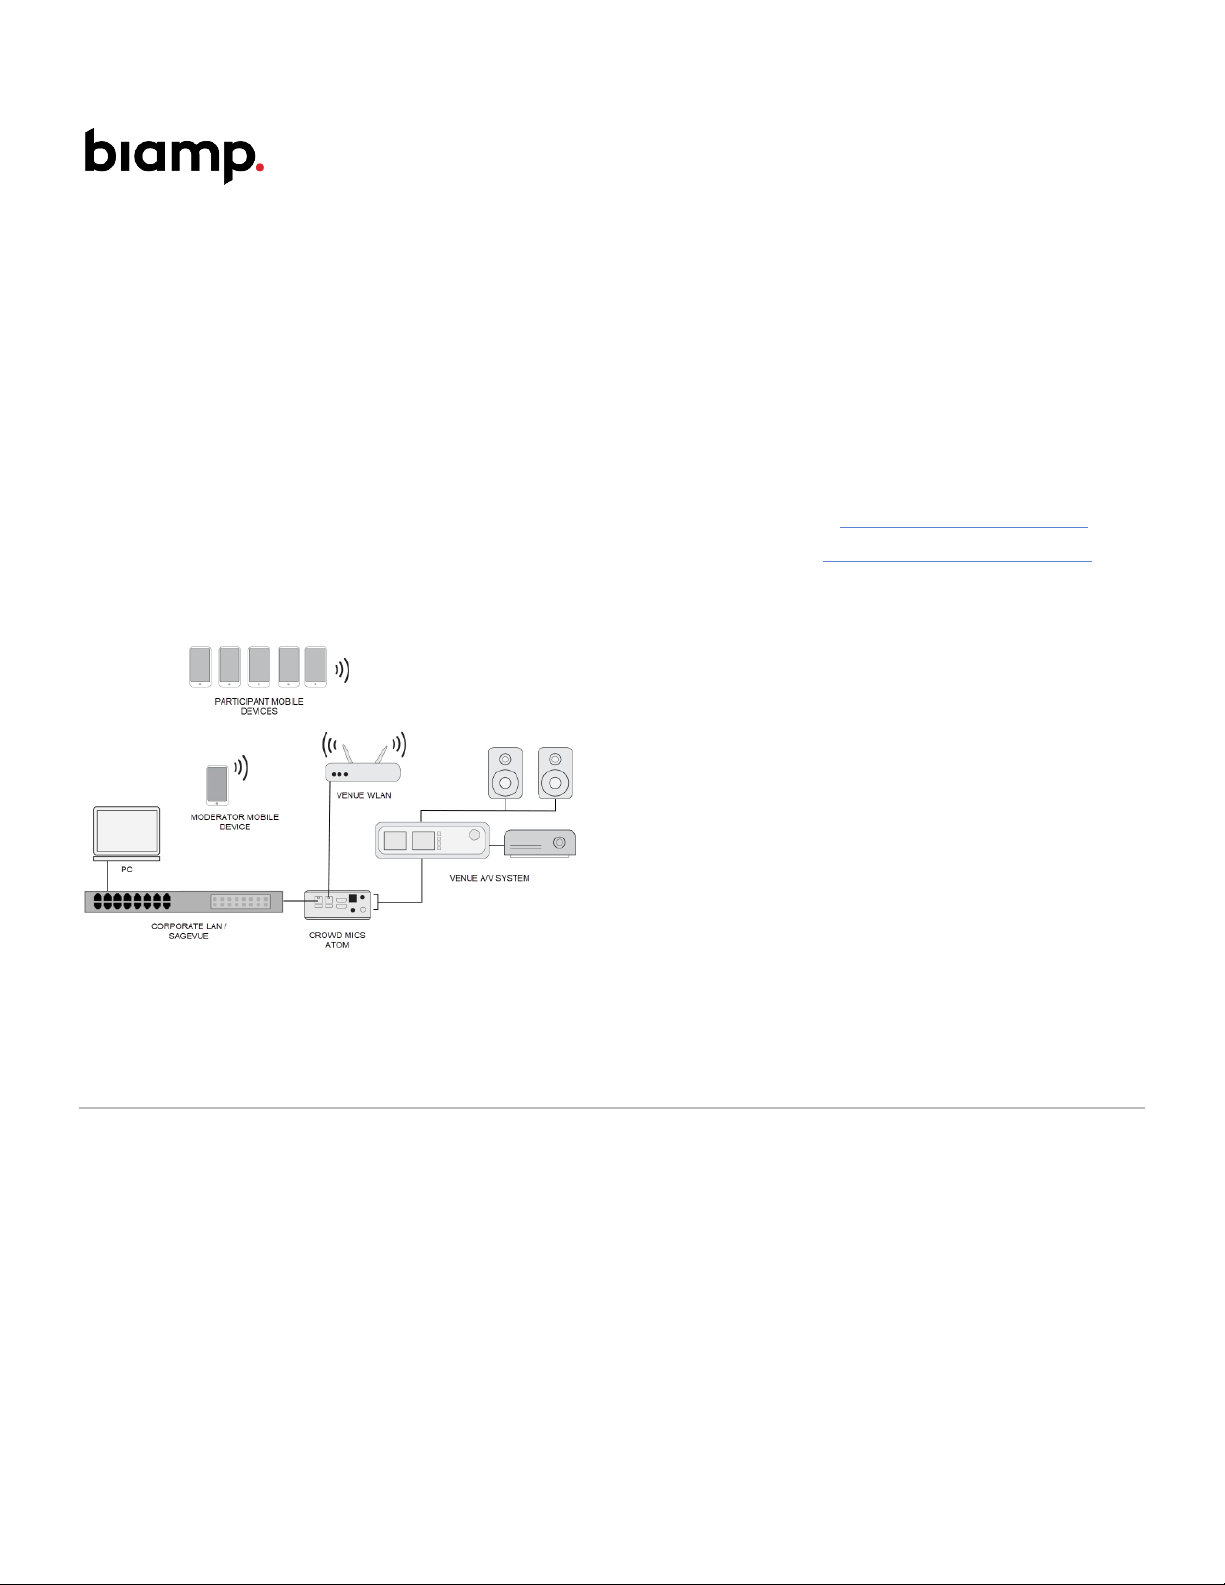
The following section will provide tips and instructions on setting up the audio signal path from Crowd Mics into a
venue's PA system. General advice for a successful audio setup:
• Ensure there is enough time to prepare and test the audio system during the event setup. Working with consumer-
grade endpoint devices can lead to different results, even when operated at the same site, with the same
configuration. The variety of smartphones available on the market, may result in unpredictable audio levels - some
talkers might be perceived louder, while others could require additional gain in order to reach sufficient operating
levels.
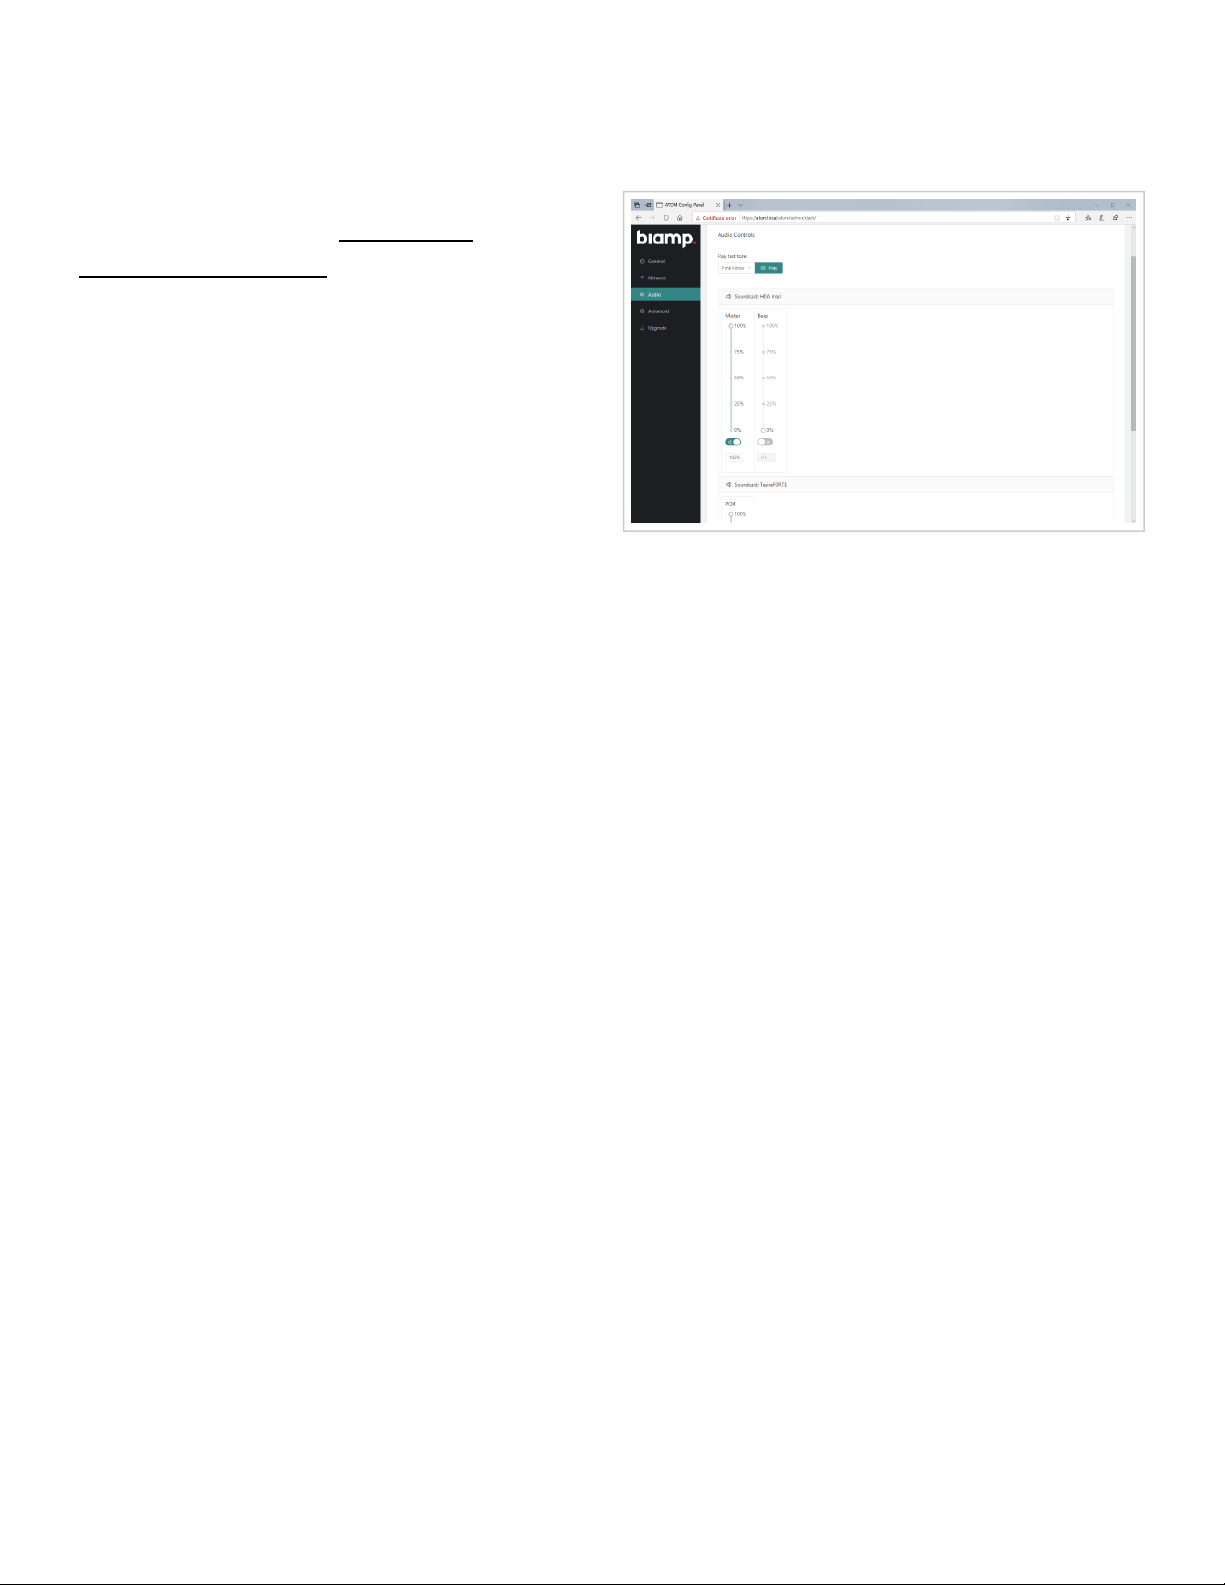
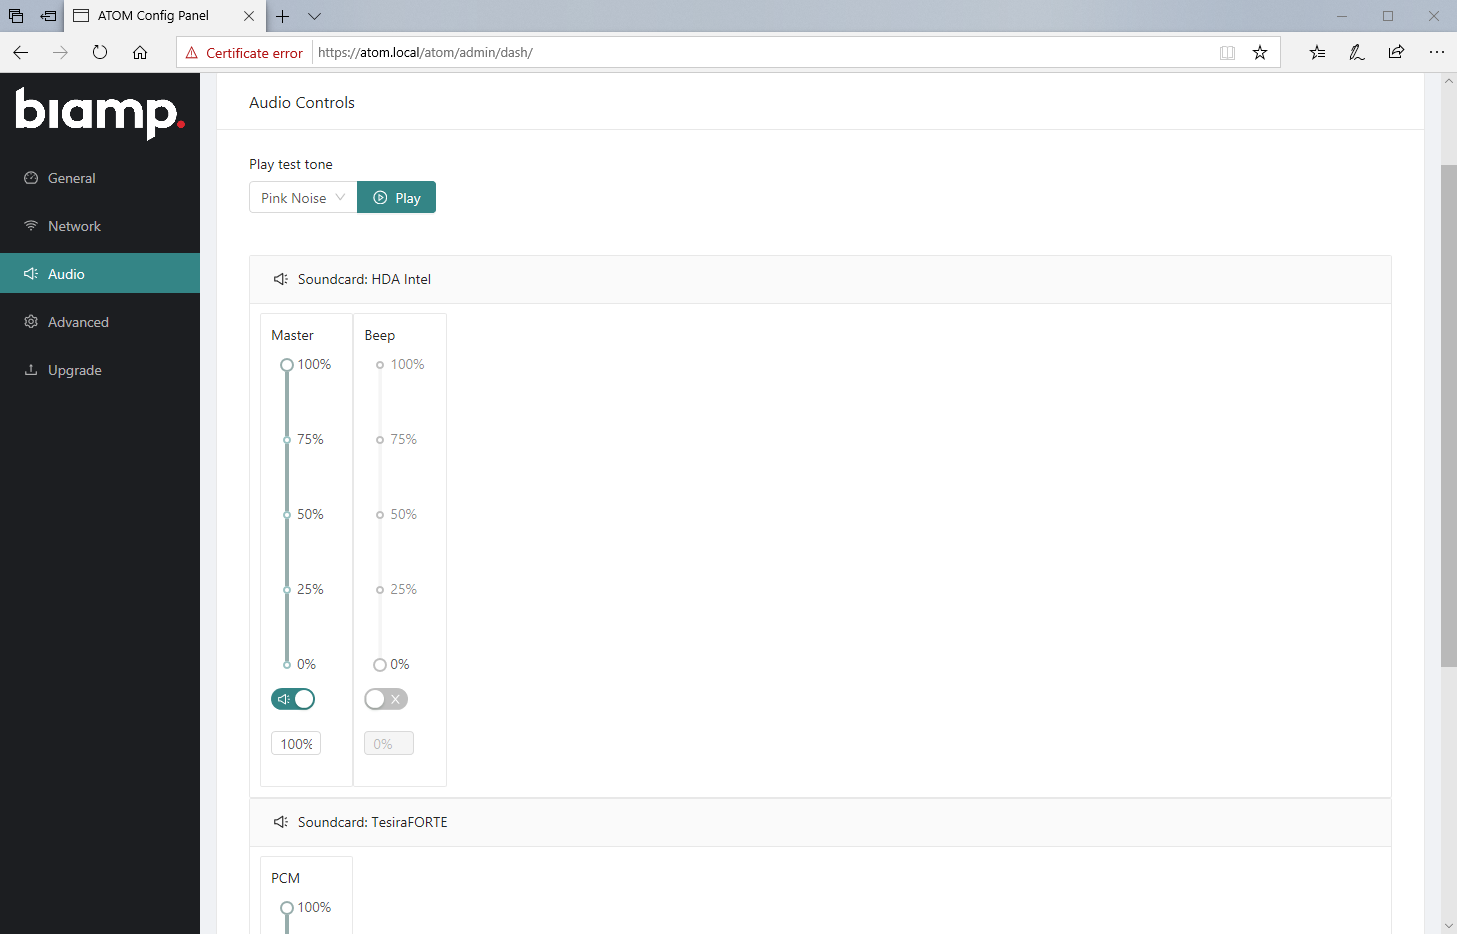
• In order to provide a reference audio output level, the ATOM can play back different test signals, such as sine wave
and different noise signals, via the Audio Controls configuration page.
Important note:The sine wave test signal is a 440Hz tone at full scale. On a Tesira USB input, an input RMS level
of 23dBu is expected at 100% volume setting. The pink noise test signal ranges about +10dBu.
• Large venues with an extended distance to the stage, often use delay speakers to equally cover the entire area
front-to-back. Additional delay applied by the DSP to the overhead speakers or sidefills, allows their sound to blend
into the FOH speakers. While this is a desired effect for a presenter (sound source) located at the front, it can be
counter-productive, if the talker is located in the audience. If the audio system allows, bypass any additional
speaker delays for only the Crowd Mics audio feed and observe if this setting does increase intelligibility for
audience questions.
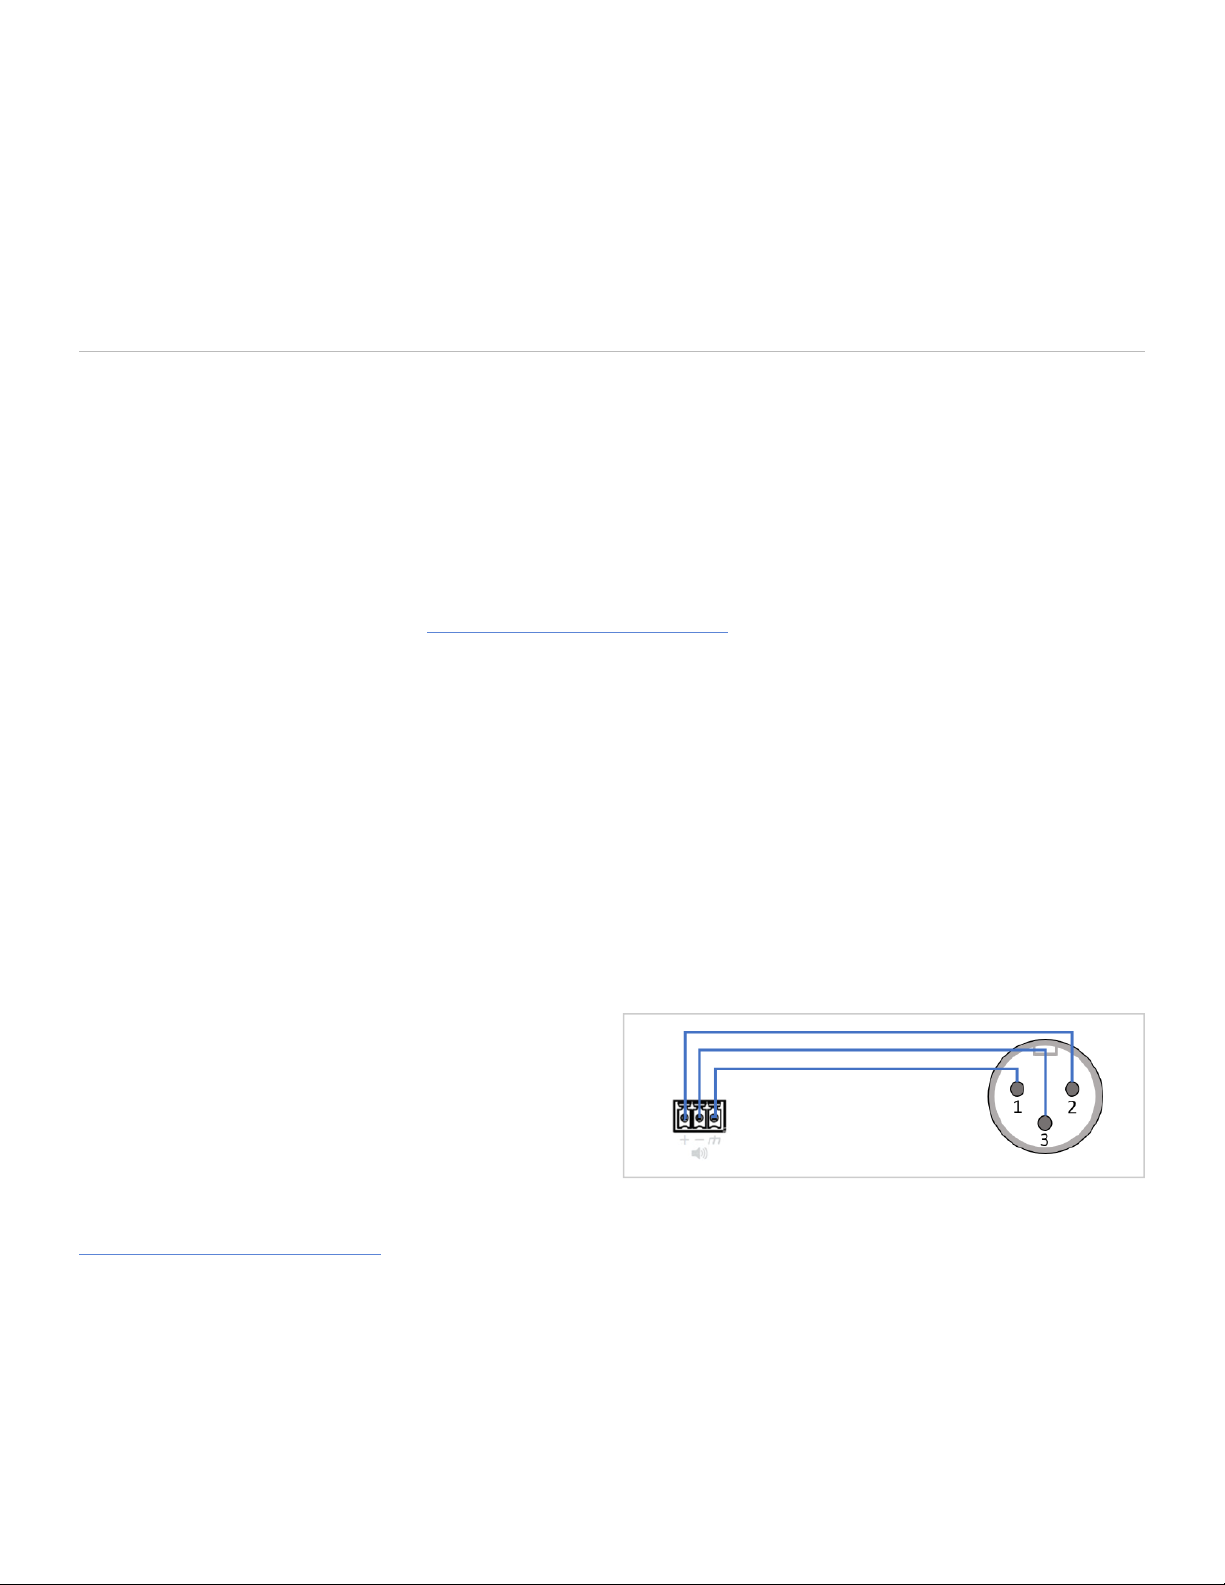
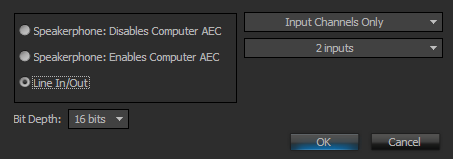
Interfacing Crowd Mics with a mixing console
Audio connection: The ATOM device offers an installer-
friendly 2.5mm Euroblock connector as a balanced line
audio output. Make sure to prepare a Euroblock-to-XLR
male adapter in advance. Use a free microphone input
channel of the audio mixer and make sure phantom power
is disabled.
Gain structure: Start with 0dB Gain at the mixer's preamplifier and use the test signal available through the ATOM
Audio Controls configuration page. Under "Play test tone" by choosing the sine wave signal, the ATOM will play back a
440Hz tone at +12dBu on the balanced output. This is a full scale signal, so there shouldn't be expected any signal
louder than this. If the peak level of the microphone input is +24dB, it is advisable to add +12dB of gain at the preamp.
Now the test signal reaches a level of +24dB and matches the dynamic range of the mixing console.
Filters: Enable a High-Pass filter at 80Hz, 24dB/Oct, LR. Even though smartphone microphones typically don't
Copyright 2013-2020 Biamp Systems http://support.biamp.com/ 3


