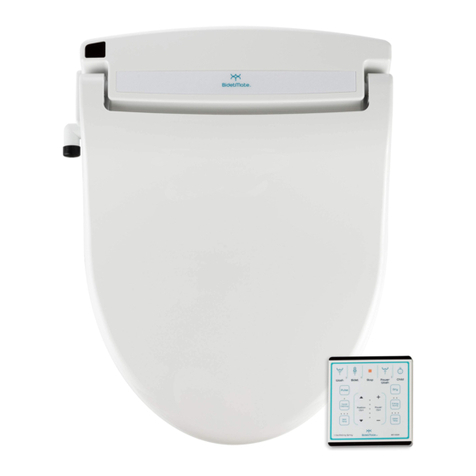
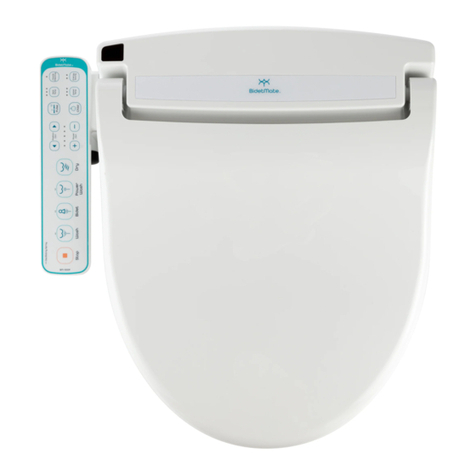
BidetMate BM-2000P User manual

User’s Guide
BM-2000P 120V
60Hz
This user’s guide contains the product warranty certificate.
Be sure to read this user’s guide carefully before use.

Table of Contents
1 Safety Instructions
2 Parts & Configuration
3 Designation of Components
4 Installation
4 Trial Operation
5 Disassembly
6 How to Use the Product
7 User Settings
8 Maintenance & Cleaning
9 Repair & Specifications
10 Features
11 Warranty

Safety Instructions
1Important Safetyguards
When using electrical products, especially when
children are present, basic safety precautions
should always be followed, including the
following:
Read All Instructions
Before Using
• In the case 120V 60Hz: Power supply must be a
15 AMP GFCI outlet.
• The electrical cord must be at least 4ft. long
• The electrical cord must be connected to a
GFCI outlet.
• The GFCI outlet should be 1ft. above the floor.
• Install only in well-ventilated areas to avoid
excess humidity.
• Do not install in narrow toilet stalls or in shower
stalls.
• Install only where direct contact with water is
minimized.
• Do not install near any heat source.
• Avoid using extension cords if possible. Consult
with a certified electrician where extension
cords are necessary.
Danger!
Reduce the risk of electrocution:
• Do not use while bathing.
• Do not place or store product where it can fall
or be pulled into a tub or sink.
• Do not place in or drop into water or other
liquid.
• Do not reach for a product that has fallen into
water. Unplug immediately.
Warning!
To reduce the risk of burns,
electrocution, fire or injury to
persons:
• Close supervision is necessary when this
product is used by, on, or near children or
handicapped individuals.
• Use this product only for its intended use as
described in this manual. Do not use
attachments not recommended by the
manufacturer.
• Never operate this product if it has a damaged
cord or plug, if it is not working properly, has
been dropped or damaged, or dipped into
water. Return the product to a service center for
examination and repair.
• Keep the cord away from heated surfaces.
• Never use while sleeping or drowsy.
• Never drop or insert any object into any
opening or hose.
• Do not use outdoors or operate where aerosol
(spray) products are being used or where
oxygen is being administered.
• Connect this product to a properly grounded
outlet only. See grounding instructions.
• Unplug this product before filling. Fill reservoir
with water. Do not overfill.
Grounding Instructions
Danger- Improper use of the
grounding plug can result in a risk
of electric shock.
This product should be grounded. In the event of
an electrical short circuit, grounding reduces the
risk of electric shock by providing an escape wire
for the electric current. This product is equipped
with a cord having a grounding wire with a
grounding plug. The plug must be plugged into
an outlet that is properly installed and grounded.
If repair or replacement of the cord or plug is
necessary, do not connect the grounding wire to
either flat blade terminal. The wire with insulation
having an outer surface that is green with or
without yellow stripes is the grounding wire.
Check with a qualified electrician or serviceman if
the grounding instructions are not completely
understood, or if in doubt as to whether the
product is properly grounded.
For a grounded, cord connected product rated 15
A or less and intended for use on a nominal 120V
supply circuit. This product is for use on a nominal
120 V circuit, and has a grounding plug that looks
like the plug illustrated in sketch A in Figure 1
temporary adapter, which looks like the adapter
illustrated in sketches B and C, may be used to
connect this plug to a 2-pole receptacle as shown
in sketch B if a properly grounded outlet is not
available.
The temporary adapter should be used only until a
properly grounded outlet (sketch A) can be
installed by a qualified electrician.
The green colored rigid ear, lug, and the like
extending from the adapter must be connected to
a permanent ground such as a properly grounded
outlet box cover. Whenever the adapter is used, it
must be held in place by the screw.

Parts & Configuration
2Main Body Product Characteristics
Power Plug
Dryer
Release Button
Seat Cover
Seat Sensor
Wash & Power Wash
Bidet Nozzle
Heated Seat
Operation Panel
1. Continuous Warm
Water Supply
Enjoy continuous warm water
throughout the wash cycle.
3. Bubble Wash
Aerated water wash adds
cleaning comfort.
4. Massage
Nozzle moves back and forth
for massage effect.
5. Pulse
Pulsating wash repeatedly
cycles from weak to strong.
6. Deodorization
Function
Semi-fundamental deodorizing
filter provides odor-free
experience during use.
5. Energy Saving
Function
Bidet is able to track use and
adjust energy output to
increase energy savings.
6. Child Settings
Specialized nozzle position and
water pressure for children.
2. Power Wash
Soft but powerful water wash
for added cleansing benefit.
BM-2000P-E
BM-2000P-R

HI/LO
Adjusting water
pressure /dry level.
(5 Levels.)
Designation of Components
3
Catch Plate Deodorizing
Cartridge
Water Feed
Hose (For Bidet)
T-Valve
Operation Panel
Accessories
FR/BK
Controls the nozzle
location as desired.
Dry
Run the dry
function.
(3 minutes)
Massage
To run the Massage (oscillating) during
Wash/Bidet/Power Wash. Nozzle moves
forward and backward repeatedly. Press it
again to stop the function.
Child
Child safety mode. Nozzle
moves forward and water
pressure is weak.
Water Temp
To control water
temperature.
(off/low/mid/high)
Seat Temp
To control seat temperature.
(off/low/mid/high)
Energy Saving
1: Automatic Mode.
2: Learning Energy Saving.
3: Cancel the Energy
saving function.
Pulse
To run the Pulse function during
Wash/Bidet/Power Wash.
Power Wash
Run the Power
Wash function.
(2 minutes)
Wash
Run the wash
function.
(2 minutes)
Stop
Stop all functions.
Bidet
Run the bidet
function.
(2 minutes)
Top Mount
Metal Bolt
Bracket
Holder
Top Mount
Rubber Nut

Installation
Trial Operation
41. Remove the seat from
existing toilet body.
Release the nuts, and then remove
the seat and cover from it. Keep the
removed seat, cover and nuts in a
proper place in case you need to use
them again.
2. Close the water feed
valve by turning it
clockwise, and then
drain the toilet water
tank out.
3. Remove the water feed
pipe and then install
T-valve.
8. Insert the deodorizing
cartridge into the bidet
body
4. Connect the toilet-use
hose.
Install T-valve
Toilet-use hose
Water supply hose
It is OK to use
Teflon tape or
similar thread
sealing compounds
for a better seal.
6. Push the main body
toward the Catch Plate
completely.
7.Connect the bidet-use
hose to the bidet body.
1. Open the water feed
valve by turning it
counter-clockwise.
2. Be sure of no leakage
around the hose
connection.
3. Be sure that the nozzle
comes and retracts when
powered on.
Don’t plug the power cord with wet
hands. Risk of electric shock.
4. When the unit is powered
on, water tank will be filled
immediately. Check if water
comes out from drain hole
for 1~2 sec.
Push it back until you hear a click.
When the product is not installed
well, the seat may come apart.
T-valve
Bidet Water
Supply hose
Top mount metal bolt
Bracket Holder
Catch Plate
Top Mount Rubber Nut
Align
5. Fix the bracket onto the
toilet first.
Adjust the seat and the front part of
toilet back and forth so that they
correspond before fastening the nuts.

Disassembly
51. Remove the power plug
from the outlet.
6. Connect the water feed
pipe that was removed
when the bidet was
installed.
7. Open the water feed
valve by turning it
counter-clockwise.
Be sure of no leakage
around the water feed
connection.
8. Attach to the toilet the
seat and cover that were
removed when the bidet
was installed.
2. Close the water feed
valve by turning it
clockwise.
Completely drain out the toilet water
tank, release the nuts at bidet body of
the bidet hose, and then remove them
from the main body.
2. Press the release button
on the side of bidet.
Completely drain the water from the
water tank. After draining the water
thoroughly, pull the main body forward,
and then remove it from the toilet.
5. Remove bidet hose,
toilet-use hose & T-valve.
4. Unscrew the metal
bolts, and remove the
toilet brackets. Once
removed, pull out the
rubber nuts.
Top mount metal bolt
Bracket Holder
Catch Plate
Top Mount Rubber Nut

2. Press Wash, Bidet, Power
Wash Buttons.
Selected function can be used as
desired. After Wash, Bidet and Power
Wash, dryer works automatically. For
sitz bath, press Wash again. Sitz bath
works for 5 minutes at set temperature.
3. Press the Dry Button
Hot air indicator light will turn on. Dryer
works for 3 minutes. Dryer temperature
is adjustable by pressing “HI” and “LO”
buttons. It is recommended to wipe off
the water on your bottom before
operating the dry function for improving
the dry effect.
1. Sit on the Toilet Seat
Be sure to sit on the user sensor of seat.
If the sensor is not occupied, functions
will not work. Deodorizing function
starts automatically.
6. Pulse Wash
When pressing Pulse button during
the operation of Wash, Bidet, and
Power Wash, water pressure will
repeat High/Low levels for smooth
pulsating wash.
11. Deodorizing Function
When sitting on the seat, the
deodorizing function starts automatical-
ly. Deodorizing function can be
controlled by the following methods.
• While holding the Stop button, when
pressing the hot water button once,
deodorizing fan will rotate at slow
speed during and after the usage of
bidet.
• While holding the Stop button, when
pressing the hot water button twice,
deodorizing fan will rotate at slow
speed during the usage of bidet, and at
high speed when leaving the seat.
• While holding the Stop button, when
pressing the hot water button 3 times,
deodorizing fan will rotate at high
speed during and after the usage of
bidet.
After the usage of bidet, the
deodorizing function will operate for 1
minute.
12. Nozzle Cleaning
While not sitting on the seat, and
pressing the Wash button 3 times, the
nozzle will move forward at its
maximum distance so that the user can
clean it easily (it will return after 2
minutes). When pressing the Stop
button, the nozzle will return and
operate a self-cleaning operation.
13. Night Light
Blue LED light provides enough
brightness to see the toilet without
turning on the bathroom light. Night
light can be turned on/off by pressing
“HI” button for three seconds, while the
bidet is not occupied.
7. Water Pressure Control
Pressing HI/LO button enables the
control of water pressure. When any
foreign material blocks the water filter,
it may cause low water pressure. Check
to ensure stable use.
8. Nozzle Position Control
Nozzle position can be controlled by
pressing FR/BK.
WARNING!
Consult your doctor before using Power
Wash function in situations of anal
disease/surgery.
User Instructions
Instructions and caution statements for
cleaning, user maintenance, operations
recommended by the manufacturer, such
as lubrication or nonlubrication, and a
warning to the user that any other
servicing should be performed by an
authorized service representative or that
the product has no user serviceable
parts. The manual or other literature
packaged with the product shall also
indicate the product is for household
use.
Specific instructions for the proper
method of cord storage, total product
storage, and the like when the product is
not in use; and for cord care while in
use, such as for hand supported
products, untwisting, and the like.
9. Child Function
For child use, press the Child button
first (Child light will turn on), nozzle
position water pressure and seat
temperature will be adjusted. Nozzle
moves forward more than adult wash.
Water pressure is weaker than adult
wash. Seat temperature drops down to
93° F from set level.
10. Energy Saving Function
Automatic Energy Saving function
• When pressing the button once, it
enters into automatic energy saving
mode. (Yellow LED turns on)
• When seat is not occupied, the seat
will be heated at minimum heating
temperature.
• When sitting on the seat to use, it
turns to the pre-designated
temperature; when leaving the seat, it
returns to the automatic energy saving
mode.
Learning Energy Saving Function
• When pressing the button twice, it
enters into the learning energy saving
mode. (Green LED turns on)
• Learning energy saving enables
MICOM to detect the time framed used
by users and keeps the memory for the
next 5 days. It releases the energy
saving function 15 minutes in advance
at each time frame and keeps the
pre-designed temperature for an hour.
• After an hour, the unit enters the
energy saving mode.
When pressing the button 3 times, the
energy saving mode will be released.
*This product adopts the instant water
heating method, and does not consume
the electricity to operate the water
heater while not used.
How to Use the Product
6
User Sensor
4. Press the Stop Button
Any operation will stop. Press Stop
for 3 sec. to turn off unit.
5. Massage Wash
When pressing the Massage button,
nozzle will move back and forth and
wash a wider range. When pressing
the Child button during the operation
of Massage, the amount of movement
can be adjusted within 5 levels.

Seat sensor ‘off’ status Seat sensor ‘on’ status Regardless of on/off
No. Function Seat Status Switch Operation Description Initial Status
1 Automatic Massage
Preset/Release Press Massage button for 3 sec. or
longer while in standby status (Same
in case of releasing)
When pressing Wash, Bidet, Power
Wash button, Massage will operate
automatically even if not pressing the
Massage button
CANCEL
User Settings
7
2 Automatic Pulse
Preset/Release Press Pulse button for 3 sec. or
longer while in standby status (Same
in case of releasing)
When pressing Wash, Bidet, Power
Wash button, Pulse will operate
automatically even if not pressing the
Pulse button.
CANCEL
5 Selecting the speed
of deodorizing fan While pressing the Stop button,
press the Water Temp button Press the Water Temp button to select
the desired speed CANCEL
11 Night light setting Press the “HI” button for longer
than three seconds To on/off the night light Night light is
turned on
6 Saving the washing
water pressure/
nozzle position
Pressing the Wash button for 3 sec.
during the operation of Wash Saving the present operating
condition. Even if other user uses the
different pressure and position, when
user gets out of the seat, it will
automatically return to preset level
Water pressure 3
steps Nozzle 3
steps
7 Saving the bidet
water pressure and
nozzle position
Pressing Bidet button for 3 sec.
during the operation of Bidet Saving the present operating
condition. Even if other user uses the
different pressure and position, when
user gets out of the seat, it will
automatically return to preset level
Water pressure 3
steps Nozzle 3
steps
8 Saving the Power
Wash water
pressure and nozzle
position
Pressing Power Wash button for 3
sec. during the operation of Power
Wash
Saving the present operating
condition. Even if other user uses the
different pressure and position, when
user gets out of the seat, it will
automatically return to preset level
Water pressure 3
steps Nozzle 3
steps
9 Turning off Press Stop button for 3 sec. Press 1 of Stop, Wash Bidet and Power
Wash to turn on the unit
10 Initialization Press Stop button for 5 sec. Initializing all the function to the initial
status
4 Selecting the
operating time of
Wash, (Bidet, Power
Wash) and Dry
Press ‘Backward’ and ‘Low’ buttons
for longer than 3 sec. Preset mode:
Selecting the desired time by the
buttons of Hi/Lo, Forward/Back-
ward.
• Using HI/LO button, select the
desired washing time
5M 3M 2M 1M 30S
CANCEL
3 Operating Signal
Cancel Press Massage for 3 sec. Use when turning off the operating
signal Operating signal is
turned on
• Using FR/BK button, select the
desired drying time
5M 4M 3M 2M 1M

Cleaning of Water Pipe Filter Cleaning of Nozzle Cleaning of Bidet Body
1. Exterior surface of bidet is made of plastic
material, which may be damaged by scrubber,
chemicals, etc.
2. Wipe the product surface with a soft cloth
dampened with room temperature water and if
needed a pea size amount of soap labeled, "for
use on all surfaces." Then remove all residue of
soap with a clean sponge or soft cloth
dampened with room temperature water. Do
not spray water directly onto the surface
3. Clean the body after removing the power
plug from the outlet. Be sure no water splashes
to the power plug or outlet. Don’t touch the
power outlet with wet hands. Risk of electric
shock.
4. Risk of damage. Be careful to not drop any
chemical detergents or toilet cleaner on the
water supply hose or rest of the product. Do
not to close the cover before the cleaning agent
in the ceramic toilet bowel is completely
washed away otherwise the surface of the
product may be corroded by the evaporation
of the cleaning agent.
5. The deodorizer cartridge can be cleaned
from time to time with a dry, soft brush to
remove any dust build-up on the surface. It
does not need to be replaced.
1. Close the water valve by turning it clockwise.
2. Disconnect the water supply hose. Take the
screen filter out and clean it with a soft brush.
(e.g. toothbrush)
3. After cleaning, place it back. Then connect the
water supply hose.
4. Open the water valve by turning it
counter-clockwise.
Maintenance During Winter
Season
When bidet seat is not used for an extended
period of time, either; Leave unit plugged in and
turned on OR unplugged and drain the unit.
1. Press the Wash button for 3 sec., and then the
nozzle will move forward and stop (for 2 minutes)
2. Clean the nozzle with an unused toothbrush,
etc., and press the Stop button, then it will
return to the original place for self cleaning.
Do Not Throw Away
We are committed to protect the environment.
Please help us by disposing of this product in a
responsible way when it reaches the end of its
service life, to prevent certain substances
contained in electric and electronic products
from harming public health or the environment.
The symbol means that the products may not be
thrown away with other household waste: at the
end of its service life, it may be taken at no
charge to you to the waste collection centers
provided for the purpose by the authorities in
your country. It may be taken to the distributor
from whom you purchase a new product that is
equivalent to or that performs the same
functions as this product. This later option may
not be available in some countries.
1. Remove the power plug from the outlet.
2. Close the water feed valve by turning it
clockwise.
3. Press the release button on the side of main
body.
Draining of Hot Water Tank
Screen Filter
Water Supply Hose
Maintenance & Cleaning
8

Self Diagnosis
Indications
Inlet hot water sensor disconnected or not
inserted
1
2
3
4
No.
LEDs of water temp. Med & Low
blinking simultaneously
Inlet hot water sensor short-circuited and
temperature excessively increased. LEDs of water Med & High level
blinking simultaneously
Outlet hot water sensor disconnected or not
inserted LED hot water temp. Med & Low
blinking separately
Outlet hot water sensor short-circuited and
temperature excessively increased LED hot water temp. Med & High
blinking separately
Please refer to the following table for the exact status when requesting
repair service.
Please refer to the following table for the exact status when requesting
repair service. Item
Wash
Heated
Seat
Dimension
Weight
Net Weight
(Gross Weight)
Dry
Feed
Volume
BM-2000P
Rated Voltage AC 120V, 60Hz
Max. Power Consumption 1270W
Power Cord Length 4ft.
Water Feed Method Directly connected to water pipe
Recommended Water Inlet Pressure 99~106.6 psi
0.16 gal/min
Wash
0.16 gal/min
Bidet
0.13 gal/min
Power Wash
5 Levels
Pressure Control
Room temp.~100°F
Temperature Control
1200 W
Heater Capacity
Temp. Fuse, Thermo Switch
Safety Device
Room temp.~107°F
Temperature Control
55W
Heater Capacity
Temp.Fuse
Safety Device
Room temp. ~122°F
Temperature Control
18.5” x 20.8” x 5.7”
BM-2000P-E
10.6lb (17.3)
BM-2000P-E
10.5lb (17.2)
BM-2000P-R
18.5” x 19.5” x 5.7”
BM-2000P-R
250W
Heater Capacity
Temp Fuse, Bi-metal
Safety Device
Catalytic Deodorization
Deodorization
Repair & Specifications
9
Error/Issue
What to Check
Before Requesting Repair
Self-Diagnosis Table
Specifications
Completely out of operation • Check if the power plug is not connected
• Check for power failure
Water pressure is low • Check if water pipe filter is blocked by foreign material
• Check if the water pressure is set at too low a level
5 Seat sensor disconnected or not inserted LED seat temperature Low blinking
9 Deodorizing motor: Check the cycle of
rotation at low speed Buzzer sounds. Abnormal condition
is differently indicated by symptoms
10 Stoppage of motor due to the over-current
of deodorization motor
11 Heat stops in case of low speed rotation of
drying motor
12 Heater and drying motor simultaneously stop
in case of the over-current of drying motor
6 Seat sensor short-circuited and temperature
excessively increased LED seat temperature High blinking
7 Air pump motor disconnected or not
inserted Wash, Bidet, Power Wash, are out of
operation
8 Air pump motor short-circuited
Water is not warm enough • Check if its temperature is set at ‘Off’ or ‘Low’
Seat is not warm enough • Check if its temperature is set at ‘Off’ or ‘Low’
Water does not spray out • Check if the water supply is suspended
• Check if the water feed valve is locked
• Check if the nozzle is blocked by foreign material
• Check if connection hose is bent

Features
10
Features
BM-2000P
Wash / Dry FeaturesConvenient / Comfortable Features
Comparison Chart Dimensions
Wash
Bidet
Power Wash
Dry
Learning Energy Saving
Massage
Pulse
Instant Heating
Warm Seat
Soft Closing Lid & Seat
Detachable Main Body
Night Light
Child
Automatic Energy
Saving
Deodorization
Bubble Wash
Built in Pump Motor
<BM-2000P-E> <BM-2000P-R> Inch (mm)

1 Year Warranty
11 BidetMate warrants its BM-2000P Series Bidet to
be free from defects in materials and
workmanship during normal use when properly
installed and serviced for a period of 1 year from
the date of purchase. This limited warranty is
extended only to the ORIGINAL PURCHASER of
the smart toilet seat and is not transferable to any
third party. This includes, but is not limited to, any
subsequent purchaser or owner of the smart toilet
seat.
BidetMate’s obligations under this warranty are
limited to repair, replacement, or any other
appropriate adjustment, at BidetMate’s option, of
the smart toilet seat or parts found to be
defective in normal use, provided that such
products are properly installed, used and serviced
in accordance with instructions.
BidetMate reserves the right to make such
inspections as may be necessary in order to
determine the cause of the defect. BidetMate will
not charge for labor or parts in connection with
warranty repairs or replacements. BidetMate is
not responsible for the cost of removal, return
and/or reinstallation of the smart toilet seat.
This warranty does not apply to any of the
following items:
• Damage or loss sustained in a natural calamity
such as fire, earthquake, flood, thunder, electrical
storm, etc.
• Damage or loss resulting from any accident,
unreasonable use, misuse, abuse, negligence, or
improper care, cleaning, or maintenance of the
smart toilet seat.
• Damage or loss resulting from sediments or
foreign matter contained in a water system.
• Damage or loss resulting from improper
installation or from installation of the smart toilet
seat in a harsh and/or hazardous environment, or
improper removal, repair or modification of the
smart toilet seat. This includes locations where
the water pressure is above local codes or
standards.
• Damage or loss resulting from electrical surges
or lightning strikes or other acts which are not the
fault of BidetMate or which the smart toilet seat is
not designed to tolerate.
• Damage or loss resulting from normal and
customary wear and tear, such as gloss reduction,
scratching or fading over time due to use,
cleaning practices, water, or atmospheric
conditions.
In order for this warranty to be valid, proof of
purchase is required. If the product is used
commercially, BidetMate warrants the product to
be free from defects in materials and
workmanship during normal use for 3 Months
from the purchase date of the product. All other
terms of this warranty shall be applicable except
the duration of the warranty.
BidetMate will advise you on how to proceed in
making warranty claims. To begin a warranty
claim, write to BidetMate explaining the defect
and include proof of purchase and your name,
address and telephone number. Email is
19215 SE 34th St., Ste. #106-382 Camas, WA 98607 USA www.BidetMate.com
This manual suits for next models
2
Table of contents
Other BidetMate Toilet manuals
Popular Toilet manuals by other brands
THE BOLD LOOK OF KOHLER
THE BOLD LOOK OF KOHLER K-3517 Installation and care guide

Kohler
Kohler WELLWORTH WATERGUARD K-3520-CE installation instructions
Villeroy & Boch
Villeroy & Boch OP WC installation instructions
TRELINO
TRELINO Origin instruction manual

Toto
Toto CST442 installation manual
CORONA
CORONA Ecoclean Single O26011001 installation instructions
