Biobeat Briyout Instruction manual

Quick User Guide
IMPORTANT Please read this guide before
using the chest-monitor.
The quick user guide provides basic instructions only.
Users must read the full user manual thoroughly
before using the device.
Chest-Monitor
Biobeat Technologies Ltd.
22 Ef'al st, Petach Tikva, Israel, 4951122
PUG-0002-03
For email assistance contact us via
www.briyout.co.il
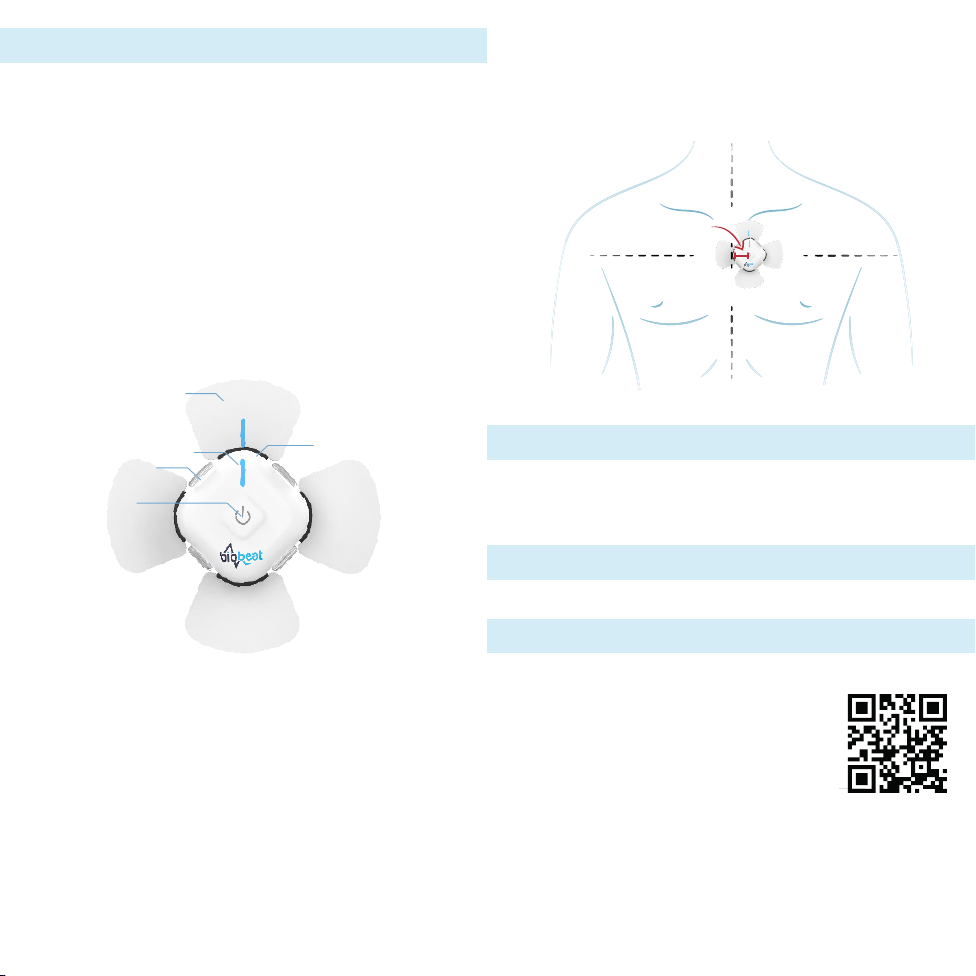
1. Connecting the sensor to the adhesive unit:
1.1. Switch the sensor on: press the power button until a
blue light will turn on.
1.2. Make sure the LEDs on the back of the sensor are
switched on and are ashing continuously.
1.3. Attach the sensor to the adhesive unit's plastic
frame as seen in gure 1. Make sure the vertical line
on the sensor is continuous with the line on the
adhesive unit.
Apply pressure on the four corners of the chest-
monitor until you hear the plastic clasps click and
fasten around the sensor.
2.5. The chest-monitor should be positioned 1 cm left of the
sternum, with the top of the adhesive unit in line with
the sternal notch as shown in gure 2.
2.6. The entire surface of the adhesive unit should be
attached to the skin.
Placing and initializing the chest-monitor
Turning off the chest-monitor
Battery
Connecting to the Hospital at Home mobile app
A battery indicator is displayed in the Biobeat web app.
1. Access the Google Play Store or Apple App Store and
download the Biobeat Hospital at Home
Chest-Monitor App.
2. Make sure your phone’s Bluetooth is
on. Do not pair the device to the phone
using the phone’s Bluetooth menu.
3. Open the app and follow the instructions for pairing the
device to your phone.
4. Make sure your health care provider has set the baseline
for the device on the Biobeat Web Platform.
Press and hold the power button for four seconds.
Upon release, the LED lights on the back of the sensor
will turn off.
Figure 1.
2. Attaching the chest-monitor to the patient's chest:
2.1. Any hair on the chest should be removed before use.
2.2. The chest should be cleaned with an alcohol swab. Wait
until the chest is completely dry.
2.3. Remove the white cover from the back of the adhesive
unit.
2.4. Attach the chest-monitor. The Biobeat logo should be on
the bottom of the sensor, and the vertical line on the top of
the sensor.
Adhesive unit
Plastic frame
Sensor
Continuous line
on adhesive unit
and sensor
Power button
Figure 2.
1 cm left of
the sternum


