Biochef Arizona User manual

USER MANUAL
Arizona
Dehydrator

ENGLISH 3
FRANÇAIS 21
DEUTSCH 41
ESPAÑOL 61
EN
FR
DE
ES
The information in this manual is
intended to help you to get the
best results from your BioChef
Arizona Dehydrator. Please read
and follow these instructions
and safeguards prior to use.
Please keep your manual handy
for future reference, warranty
information and support details

Contents
Safety Precautions 4
How To Set Up Your Dehydrator 5
Cleaning and Maintenance 5
Operation of the Control Panel 6
Dehydrating Food 8
Preparation of Foods 9
Food Storage 12
Reconstitution 12
Drying Times 13
Troubleshooting 18
Warranty 20
.
EN
3

Safety Precautions
! Save these instructions for future reference.
! Examine the carton and the unit for any damage that may have occurred
during shipping. Contact your point of sale to report any damage.
! Close supervision is required if the unit will be used around children.
! Only for use indoors in a clean, dry location, free of ammable objects.
! Do not move the dehydrator while in operation.
! Always place the dehydrator on a level surface and at least 10cm away
from walls or other appliances.
! This unit may scratch household bench surfaces.
! Do not use if the power cord or controls have been damaged in any way.
Contact Vitality 4 Life before attempting to make any repairs.
! Do not use sharp utensils inside the unit.
! Turn o the Dehydrator before plugging or unplugging from an electrical
outlet.
! Leave the Dehydrator unplugged when not in use.
! Allow the dehydrator to cool completely before cleaning.
! Never immerse the dehydrator or power cord in water or any other liquids.
! Never plug the dehydrator into a damaged electrical outlet.
! Do not allow the cord to contact the sharp edge of a counter, table or any
hot surface.
! The use of attachments or accessories not provided with the dehydrator is
not recommended and will void the warranty.
EN
4

How To Set Up Your Dehydrator
1. Make sure the power switch is turned o. Place the dehydrator on a clean,
dry surface away from children and pets.
2. Plug into an undamaged electrical outlet. Warning: Do not use an
extension cord with your dehydrator.
3. To set temperature and time, see Operating Instructions.
4. Before the rst use of your dehydrator, heat the unit at 35°C/95ºF for 45
minutes to remove any moisture.
5. If the unit stops for any reason, turn o, unplug and then repeat Steps 2
and 3. If the unit continues to not operate normally, turn o, unplug and
call Vitality 4 Life.
6. Follow your recipe to prepare the food that you wish to dehydrate.
7. Using oven mitts slide the dehydrator trays out of the unit and load the
product to be dehydrated onto the trays. For best results, do not overlap
the product and be sure to leave space between the items to allow for
maximum air circulation.
8. Using both hands for maximum stability, gently slide the dehydrator trays
back into the unit.
9. Once the door is closed, press the power button and follow the
instructions to set the time and temperature.
10. Moisture may collect on the surface of the food, this can be blotted o
with a paper towel.
Cleaning and Maintenance
• The stainless steel trays are dishwasher safe. The mesh and non stick
sheets are not dishwasher safe. Make sure the trays and drying sheets are
thoroughly dried before inserting them back into the dehydrator.
• To clean the exterior and interior of the main body, use a damp cloth.
EN
5

Operation of the Control Panel
The digital control allows for easy adjustment of the temperature inside
the dehydrator. In addition, the timer function will automatically turn o the
dehydrator when the selected time has elapsed.
The dehydrator should then be unplugged when not in use.
Adjusting Temperature
• Press the POWER button for 3 seconds to turn on the unit.
• Press the TEMP button, the display window will ash, and then press +or
–buttons to select the desired temperature. To change the temperature
rapidly, hold down the +or –buttons. The temperature range for this
dehydrator is 35-70˚C /
95-158ºF.
• At any time you can adjust the temperature by using the TEMP, +and –
buttons. You can stop the dehydrator at any time by pressing the POWER
button.
Power
Temperature
Display
Timer
Increase Decrease
EN
6
Setting Timer
1. Press the TIMER button, the display will ash, and then press the +or –
buttons until the desired time is displayed (30 minutes to 24 hours). To
change the time rapidly, hold down the +or –buttons.
2. The time in the display window will begin to countdown.
3. The dehydrator will automatically shut o after the set time has
expired. If dehydration is completed, remove food from dehydrator. If
additional drying time is needed, follow the preceding steps to continue
dehydrating.
4. At any time, you can adjust the time by using the TIMER, +or –buttons. You
can stop the dehydrator at any time by pressing the POWER button.
EN
7

Dehydrating Food
While most food types can be dehydrated at a temperature of approximately
55°C/131ºF, when dehydrating meats, poultry and sh (making jerky, biltong
etc) the temperature needs to be raised to guard against pathogens such as
Salmonella and E. Coli.
! WARNING It is recommended that meat and poultry is dehydrated at the
70°C/158°F setting on your dehydrator. Fish should be steamed or baked
to at least 93ºC/200ºF until aky before dehydrating at the 70°C/158°F
setting on your dehydrator.
Choosing food to dehydrate
• For best results only use highest quality foods.
• Produce in peak season has more avour and more nutrients.
• Meats, sh and poultry should be lean and fresh.
• Do not use food with bruises and blemishes. Bad produce can spoil the
entire batch.
• Remove as much fat as possible from meats prior to dehydrating. You can
use a paper towel under meat when dehydrating to absorb fat.
EN
8

Tips for pre-treatment of foods
With most types of cooking, preparation is important for the best results.
Foods that are prepared correctly prior to dehydration will taste better and
have a better appearance.
• Cut, shred or dice the food uniformly. Slices should be between 6mm and
20mm thick. Meats should not be thicker than 5mm.
• To avoid browning of fruits soak cut fruit in lemon or pineapple juice for 2-3
minutes, then place in the dehydrator. Alternatively soak in an ascorbic acid
solution (made as per manufacturers instruction) for 2-3 minutes, then place
in the dehydrator.
• Waxy fruits, (such as peaches, grapes, blueberries, etc.) should be dipped
in boiling water to remove the wax. This allows moisture to escape easily
during dehydration.
• Blanching can also be used to pre-treat foods for dehydration.
Preparation of Foods
For best results, select the freshest foods available to dehydrate. Note that
immature fruits and vegetables do not have as much colour and avour
as those that are fully matured. Foods should be dehydrated as soon after
purchase as possible. Foods high in sugar such as apples, pears, peaches and
bananas are prone to darkening due to oxidation of the sugars.
Below are some pre-treatments that will help to reduce this eect:
• Lemon and pineapple juice are natural antioxidants. Place the sliced
produce in fresh lemon or pineapple juice for a few minutes, remove,
drain and place on the dehydrator shelf. For extra avour, try sprinkling on
cinnamon or other spices.
• Ascorbic acid mix (a form of vitamin C) is available at most health
food stores and is can be used in tablet or powder form. Use about
2-3 tablespoons of powder or ground tablets per litre of water; stir to
completely dissolve the powder and place fruit into the solution for 2-3
minutes. Remove, drain and place on the dehydrator shelf.
• Blanching is used primarily to prepare fruits and vegetables for dehydrating
that have skins that will toughen during drying. This process helps lock in
the colour and avour as well as soften the skin of grapes, cherries. prunes
and plums.
EN
9

There are two blanching methods: water and steam:
–water blanching - Fill a large saucepan about half full of water. Bring the
water to a boil and use tongs to place food directly into the water, cover
the saucepan and let it simmer for approximately 3 minutes. Remove,
drain and place on the dehydrator shelf.
–steam blanching – Using a steamer pot such as one used in Chinese
cooking, put 5-8 centimetres of water in a saucepan and bring to a boil.
Place the food into the steamer basket, place over the saucepan and
cover. Steam food for approximately 5 minutes, then remove and place
on the dehydrator shell.
• Nuts and seeds – nuts and seeds contain phytic acid and enzyme
inhibitors. Phytic acid is biologically necessary, as it helps safeguard the nut
or seed until proper growing conditions are present and germination can
occur.
–Prepare your nuts and seeds by soaking them in warm water (ltered
is best) and 1 tablespoon of salt to every 2 cups of raw nuts or seeds.
This will neutralize many of the enzyme inhibitors and increase the
bioavailability of many nutrients, especially B vitamins.
–Within 7-24 hours (depending on the seed or nut), many of the enzyme
inhibitors are broken down.
NOTE: Linseed, Flaxseed and Chia seeds are not suitable for soaking.
Cashews can only be soaked for 3-6 hours as they have already been
heated to rid them of the naturally occuring toxic oil, cardol.
• Grains - for best results with dehydrating grains you will need to sprout
them beforehand, this is especially necessary when making sprouted our.
The sprouting process occurs over a period of 2-3 days, depending on
the humidity of the surrounding air, and will involve soaking, draining and
rinsing your wheat berries in ltered water every 6-8 hours. You will need to
ensure the wheat berries are covered with a mesh or cheesecloth and set
at an angle to allow an even circulation of air for fermentation to take place.
Once the root tips have grown to 1.5cm the seeds can be spread on the
dehydrator trays, using the mesh sheets to prevent them falling through.
After the sprouted grain has been dehydrated, you can use a power blender
to make fresh sprouted our.
EN
10
PLEASE NOTE
There are no exact rules that apply to food dehydration, as results can be
aected by room temperature, relative humidity and moisture levels in
the food that you are drying. To become procient it will be necessary to
experiment with your drying techniques. If you use too much heat, food may
harden on the outside while being moist inside; however, with too little heat
your drying times will be very long. With a little practice you will be creating
tasty, ready to eat snacks in no time.
Dehydrating Tips
• Do not overlap foods. Make sure foods are at when placing on dehydrating
trays. Overlapped foods can greatly increase drying time.
• Make sure foods are completely dry before removing. If you are not sure,
cut a sample down the middle to check for internal dryness.
• Make sure to label containers when you store your dehydrated food.
• Proper storage helps maintain quality food. Package the food when cool.
Foods can be kept longer if stored in a cool, dark and dry place. The ideal
storage temperature is 16°C/61°F or lower.
• Vacuum sealing is a great way to keep dehydrated foods.
• Food will shrink approximately ¼ to ½ their original size and weight during
dehydration. Make sure not to cut pieces of food too small.
EN
11

Food Storage
Dried foods should be allowed to condition before being placed into a
storage container. Generally, let stand for approximately one week in a dry,
well ventilated and protected area. The conditioning time allows for further
drying and removes most of the remaining moisture.
Dried foods can be placed into clean, dry, insect resistant containers,
preferably glass jars. Heavy gauge plastic freezer bags can also be used.
Remember to eliminate as much air as possible before sealing the bag. When
used properly, vacuum sealers provide the ideal storage method. The less air
present, the less potential for the formation of mould.
Reconstitution
Dried foods do not need to be reconstituted for consumption. Many people
prefer to eat them in their dried state. If you want to reconstitute your food,
here are some basic guidelines:
• Soak food in unsalted water for 3-7 minutes and then prepare as usual.
If you are boiling them, use the same water they soaked in to preserve
nutrients. If you plan to soak foods for more than one hour, they should be
placed in the refrigerator to prevent bacterial growth.
• One cup of dried vegetables will reconstitute approximately two cups.
• One cup of dried fruit will reconstitute to about one and a half cups.
• Reconstitution times will vary depending on the thickness of the food and
the water temperature used.
• Warm water will speed up reconstitution but may result in some avour
loss.
EN
12

Drying Times
The following charts are guidelines for the preparation of various fruits,
vegetables and meats. Drying times will vary depending on the room
temperature, relative humidity and moisture levels in the food that you are
drying. If the moisture level is low, the drying time will be on the low end of
the range. However, if the moisture level is high, the drying time will be on the
high end of the range.
Keep in mind that drying times are also aected by the amount of food placed
on the shelves. Overloading the shelves will slow the drying time and may
produce poorer results.
When dehydrating foods, it is important to check on the dryness of the
product. If the product is not thoroughly dried, mould may form during
storage (see Food Storage). To test for dryness, remove a piece of food
from the dehydrator and allow it to cool to room temperature. Bend and tear
the piece to check for internal moisture.
EN
13

Vegetables 50-55°C/122-131°F
TIME (HRS)
FOOD PREPARATION TEST FAST REG
Asparagus Wash and cut into 25mm pieces Crunchy 2 2-3
Beans, green
or waxed
Wash, remove ends and cut into 25mm
pieces or French style
Crunchy 2 6-8
Beetroot Remove 10mm of the top, scrub
thoroughly. Peel if preferred and cut into
5mm slices.
Pliable 2 6-8
Broccoli Wash and trim and cut into 1cm pieces.
Dry the orets whole.
Crunchy 2 7-9
Cabbage Wash and trim, cut into 3mm strips Crunchy 2 5-7
Carrots Wash and trim tops, peel or scrape if
desired. Cut into 3mm thick slices.
Pliable 2 4-7
Corn Cut kernels from cob and spread on the
mesh tray.
Crunchy 2 4-7
Cucumber Wash and trim, cut into 3mm slices Pliable 2 2-6
Eggplant Wash and peel, cut into 6mm slices Pliable 2 2-6
Mushroom Wash and cut into 8mm slices Pliable 2 2-6
Parsnips Scrub and steam blanch (if desired) and
cut into 8mm slices
Pliable /
Tough
24-7
Capsicum Wash and remove seeds and white
section. Cut into 6mm strips or rings
Pliable 2 2-6
Potatoes Use new potatoes, wash and peel if
desired. Steam blanch for 4-6 minutes.
Cut into French style or 6mm thick
circles.
Crunchy /
Pliable
24-9
Summer
Squash
Wash and cut into 6mm slices Pliable 2 7-9
Tomatoes Wash and slice into 6mm circles Pliable 2 7-9
Zucchini Wash and cut into 5mm slices Crunchy 2 4-7
EN
14

Fruits 60-65°C/140-149°F
TIME (HRS)
FOOD PREPARATION TEST FAST REG
Apples Wash, core and peel if desired. Pliable 2 4-10
Apricots Was, halved and remove pit. Slice in half
and dry skin side down
Pliable 2 10-14
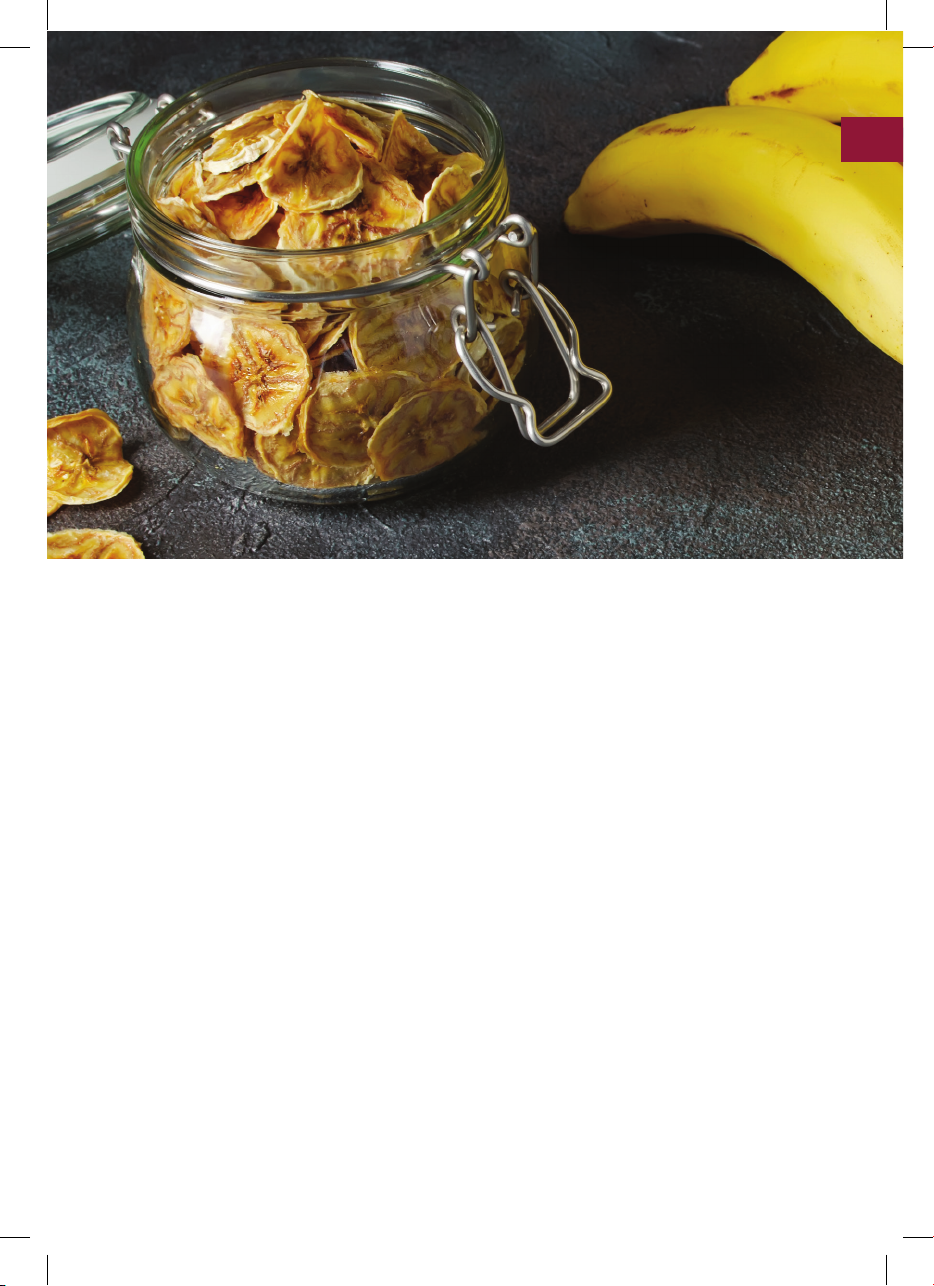
Bananas Peel and slice into 3mm slices Pliable 2 4-7
Figs Wash, cut out blemishes and quarter.
Dry skin side down.
Pliable 2 10-14
Kiwi Fruit Wash and slice into 6mm slices Pliable 2 5-7
Nectarines Wash, halve and remove pit. Slice if
desired and dry skin side down.
Pliable 2 4-12
Peaches Wash, halve and remove pit. Slice if
desired and dry skin side down.
Pliable 2 5-12
Pears Wash, core and peel if desired. Pliable 2 2-5
Pineapple Peel, remove brous parts and remove
core. Cut into 6mm slices or wedges.
Pliable 2 7-12
Rhubarb Wash and cut in 25mm lengths Pliable 2 4-7
Strawberries Wash, cut of tops and slice into 6mm
pieces
Crisp 2 4-10
Watermelon Cut o rind, cut into wedges and
remove seeds. Cut into 10mm pieces.
Pliable
and sticky
25-7
EN
15
Meat & Fish 70°C/158°F
TIME (HRS)
FOOD PREPARATION TEST FAST REG
Jerky Use lean meat and remove as much fat
as possible as fat turns rancid with time.
Cut 6mm thick slices and place on shelves.
Pliable 2 4-6
Nuts & Seeds 45-50°C/113-122°F
TIME (HRS)
FOOD PREPARATION TEST FAST REG
Nuts, Seeds See preparation instructions in this
manual
Dry, not
chewy
2 2-7
Grains 45-55°C/113-131°F
TIME (HRS)
FOOD PREPARATION TEST FAST REG
Grains See preparation instructions in this
manual
Firm
/dry
28-12
View our complete recipe collection online
www.biochef.kitchen/recipes
EN
16

Recipes
View our complete recipe collection online
www.biochef.kitchen/recipes
EN
17

Troubleshooting
Dehydrator
does not turn
on
Make sure the power cord is properly secured into the
power source and that the switch is turned to the ‘ON’
position.
Fan is working
but there is no
heat
Turn the dehydrator o. Call the service centre.
Heater is
working but
the fan is not
working
Turn the dehydrator o. Check to see if there is any
foreign object. If still not working, call the service
centre.
Not
dehydrating
correctly
1. There may be too much food on the tray. Reduce
the food quantity
2. Food is overlapping on the tray. Evenly space food
on the tray
Water drops
on the door
1. There may be too much food on the tray. Reduce
the food quantity.
2. Food contains too much water. Reduce the food
quantity and increase dehydrating time
Over heating
or little
heating
Temperature control system is not working properly.
Turn the machine OFF and contact the service centre.
EN
18

Foods are
not evenly
dehydrated
1. The thickness of the food is not even. Evenly slice
the food.
2. There may be too much food on the tray. Reduce
the food quantity.
Abnormal
sound from
the fan
Screen cover in front of fan is rubbing the fan blade.
Turn o the machine and unplug from power source.
Gently pull screen away from fan blades by using
needle nose pliers.
EN
19

BIOCHEF ARIZONA 8/10 TRAY DEHYDRATOR WARRANTY
WARRANTY PERIOD: 3 YEARS
VITALITY 4 LIFE IS THE GLOBAL DISTRIBUTOR AND WARRANTY PROVIDER OF BIOCHEF. WARRANTY REGISTRATION
AND CLAIMS ARE HANDLED BY YOUR LOCAL VITALITY 4 LIFE SUPPORT CENTRE, DETAILS ON INSIDE BACK COVER.
PLEASE REGISTER YOUR WARRANTY ONLINE AT WARRANTY.VITALITY4LIFE.COM WITHIN 30 DAYS OF PURCHASE.
LODGING A WARRANTY CLAIM
Should you experience any issues with your product, please
follow these steps to lodge a warranty claim:
1. Contact your local Vitality 4 Life Service Centre with the
following details:
– Your warranty details including name, email and phone
number
– Product name and model number
– Product serial number, found on the rating label of the
product
– Explanation of how the damage occurred
– Photos of the damage or issue is highly beneficial to
expediting your claim
2. Vitality 4 Life will assess your claim and respond within
24-48 hours.
3. In the event the product is required to be sent to the
Service Centre, the customer is liable for all packing,
freight and insurance costs for transit of the product to
Vitality 4 Life. Subject to the applicable consumer laws in
your jurisdiction.
4. If the product, or one of its parts, qualifies for replacement
or service within the 30-Day period after date of purchase,
Vitality 4 Life will arrange the shipping at no cost to you.
5. Any product sent to a Vitality 4 Life Service Centre must
include a Return Authorization Form. Failure to include this
form may result in the product being rejected from our
warehouse or a delayed service time.
6. Vitality 4 Life will contact you with a quote prior to
undertaking any service work outside of the warranty
coverage.
7. Typical turn-around times to address warranty claims
can be between 10-14 business days, plus shipping,
depending on location and type of damage or warranty
claim.
TERMS OF PRODUCT WARRANTY COVERAGE
Vitality 4 Life provides the Product Warranty coverage
as further described below and limited to the terms and
conditions hereof:
1. If the Product exhibits a defect while in normal domestic
use, within the warranty period; we will, at our option,
either repair or replace the product or defective part free
of charge. The Product must be delivered by insured mail,
in proper packaging to your Service Centre as indicated
on the back of the manual as a condition to any warranty
service obligation.
2. In the event that the warranty period for a product has
expired, or if a Product does not qualify for warranty
service, repair or replacement, consumers may still buy
replacement parts or have products repaired by one of
Vitality 4 Life’s Service Centres. Please contact Vitality 4
Life for further information.
3. Do not send the product back to the Service Centre
without a Return Authorization Form.
4. In no event shall our liability exceed the retail value of the
product. We make no warranty with respect to parts, from
a source other than Vitality 4 Life.
5. In the event that warranty parts or products are provided,
the customer must cover the related shipping costs to
receive goods.
6. All exchanged or substitute parts and products replaced
under warranty service will become the property of Vitality
4 Life. Repaired or replaced products or parts thereof
will be warranted by Vitality 4 Life for the balance of the
original warranty period.
7. (Australia only) Our goods come with guarantees that
cannot be excluded under the Australian Consumer
Law. You are entitled to a replacement or refund for a
major failure and compensation for any other reasonably
foreseeable loss or damage. You are also entitled to have
the goods repaired or replaced if the goods fail to be of
acceptable quality and the failure does not amount to a
major failure.
WARRANTY DOES NOT COVER
1. Damage, accidental or otherwise, to the Product, not
caused by direct defect in factory workmanship or
materials.
2. Damage due to abuse, mishandling, alteration, misuse,
commercial service, tampering, accident, failure to follow
care, operating and handling provisions indicated in the
instructions.
3. Damage caused by parts or service not authorized or
performed by Vitality 4 Life.
4. ‘Normal’ wear and tear that naturally and inevitably occurs
as a result of normal use or aging.
5. Some states do not allow the exclusion or limitation of
incidental or consequential damages. Therefore, the above
limitations may not apply to you in the case of damage
in shipment. If your product was damaged in shipment:
Immediately report this type of damage to the parcel
carrier and have them file an inspection report to contact
the distributor from whom you purchased the product for
further instructions.
6. You have rights and benefits under the consumer laws
in your jurisdiction. Without detracting from these rights
or benefits, Vitality 4 Life excludes all liability in respect
of this product for any other loss which is not reasonably
foreseeable from a failure of this product, which may
include liability for negligence, loss of expenditure
associated with the product and loss of enjoyment.
EN
20
Table of contents
Languages:
Other Biochef Kitchen Appliance manuals

Biochef
Biochef ARIZONA SOL User manual

Biochef
Biochef Commercial 20 User manual

Biochef
Biochef SAVANA User manual

Biochef
Biochef Kalahari User manual

Biochef
Biochef Savana User manual

Biochef
Biochef Arizona Sol User manual

Biochef
Biochef Premium Commercial User manual

Biochef
Biochef Vacuum Blending Accessory User manual


