Biochef SAVANA User manual
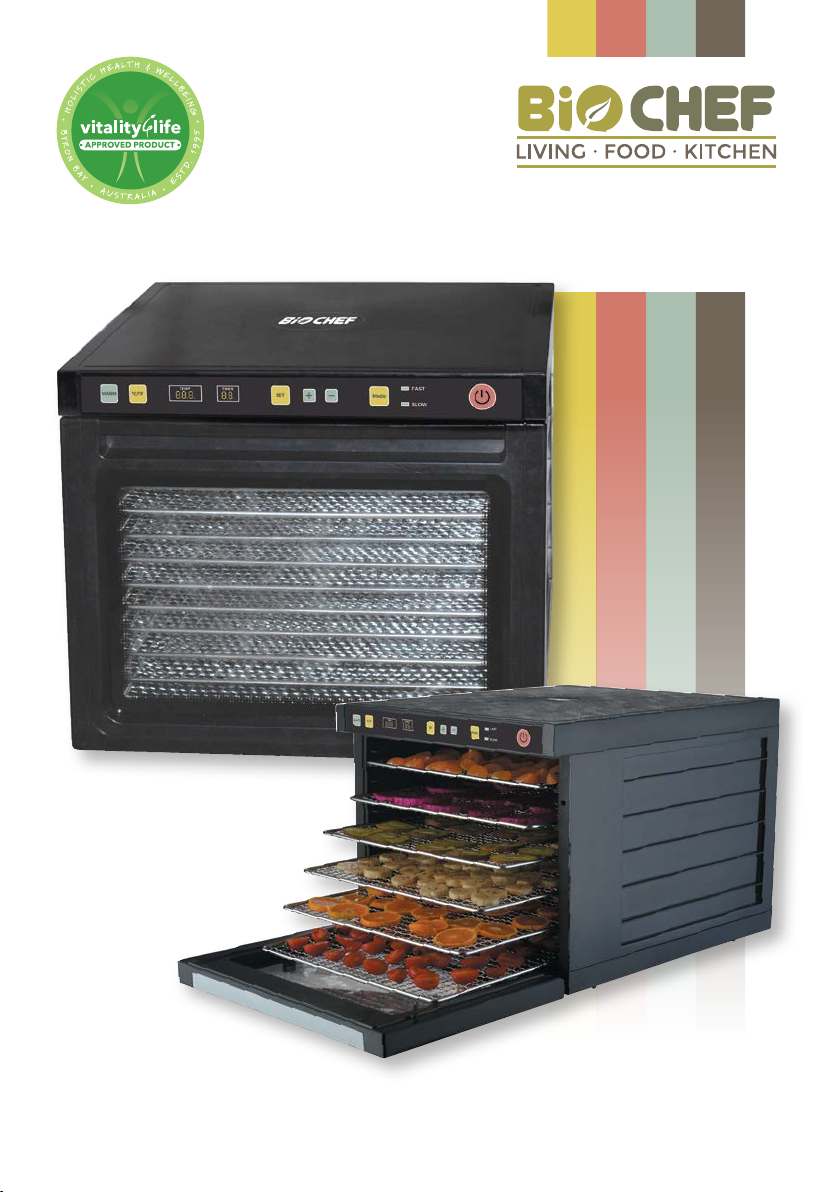
SAVANA
DEHYDRATOR
User Manual and Drying Guide

THE BIOCHEF STORY
Vitality 4 Life was founded over 20+ years ago, based on our belief in the
incredible healing power of living food, living juice, pure water, fresh air and
sunshine.
Vitality 4 Life houses some of the very best healthy home products from
around the world and our selection criteria has always remained the same
over the years; the product must offer the customer superior value and
quality, must deliver genuine health benefits and must be made in a way that
recognises the scarcity of the planet's resources.
BioChef is Vitality 4 Life's very own range of healthy kitchen products,
developed and designed based on these same core values. BioChef is the
entity of what we believe in as a company at Vitality 4 Life, it is who we are.
The BioChef brand is very exciting for Vitality 4 Life, in that after so many years
in the industry, working with our customers and sourcing products, we now
have a product range that we regard as the finest in the world.
• Products that offer superior value in terms of quality and longevity
• Products that genuinely make our customers feel better from the inside, out
• Through long warranties and superior workmanship, minimise our impact
on the planet.
A Healthy Choice
The BioChef range also includes food dehydrators, slow (cold press) juicers and
high performance blenders - products that constitute what we call a "living
food kitchen". These products are primarily designed to make healthy eating
uncomplicated and exciting, just as it should be. BioChef is about sharing the
power of raw foods and living juices with people all across the world.
Become part of the BioChef community today and begin to enjoy the benefits
of a healthier way of life.
LIVING • FOOD • KITCHEN
The information within this manual is intended to help you get the best results from
your BioChef Dehydrator. Please read this booklet carefully and don’t hesitate to contact
Vitality 4 Life if you have any questions.
www.vitality4life.com.au • www.vitality4life.co.uk • www.vitality4life.co.nz

Operation of the Control Panel
Selecting the Drying Mode
1. Press the button to turn
the food dehydrator on and off.
2. Press the MODE button once to
activate the FAST default. Press the MODE button again to activate the
REGULAR default.
3. The WARM mode automatically activates once either FAST or REGULAR drying
mode is complete.
FAST: Using two motors, the default temperature is 70°C/°F and default time is 2
hours.
REGULAR: Using one motor, the default temperature is 50°C/°F and default time is
10 hours.
The Savana Food Dehydrator features dual fan technology with two independent
500 watt fans, two heating coils and two heat sensors, which can operate
independently or simultaneously. This technology offers quiet operation, even
distribution of air and energy-saving results.
Setting the Temperature and Time
You can manually adjust the temperature and time settings of both the FAST and
REGULAR drying modes to suit your needs or follow the recommendations within
the Drying Times further in this instruction manual.
1. Select the temperature degree symbol by pressing the °C/°F button. The default
display is Celsius.
2. To adjust the temperature, press the SET button and use the + and – buttons to
alter this accordingly.
WARM ºC/º
FS
ET
Mode
FAST
REGULAR
TEMP
8.8.8.
TIMER
8.8.
WARM ºC/ºFSET
Mode
FAST
REGULAR
TEMP
8.8.8.
TIMER
8.8.
ON/OFF
SELECT
DRYING
PRESETS
DISPLAYDISPLAYAUTOMATIC DRYING
ADJUST
TIME/TEMP
SELECT DEGREE SYMBOL
INCREASE
DECREASE

3. Press the SET button again to adjust the time and use the + and – buttons to alter
as necessary.
The FAST mode is particularly beneficial for foods with a higher water content
and require a heightened temperature to avoid fermentation. The duration of this
mode can be increased if desired although it may exceed raw food dehydrating
guidelines.
The REGULAR mode allows you the convenience of using half the number of
stainless steel trays, drying space, and electricity to dehydrate your raw food recipes.
When choosing the REGULAR mode, please refer to the recommended Drying
Times.
Automated WARM Drying Mode
The Savana Food Dehydrator is equipped with a Two-Stage Sequential
Temperature-Timer (TST) which is a feature that works in two modes to add
further ease when dehydrating. The Savana TST will operate in either the FAST or
REGULAR drying mode for the chosen settings, then automatically switch to the
WARM drying mode at a low temperature of 35°C, and remain at this temperature
until the unit is turned off.
With this innovative Two-Stage Sequential Temperature-Timer, the advanced
Savana Dehydrator adds even more convenience when preserving the nutrition in
your whole living foods. The unique WARM drying setting accelerates the drying
process by kickstarting dehydration, while also preventing any moisture from
entering the food again after the drying process is complete.
Less time and effort is involved with creating delicious, raw foods and keeping
them at an optimum dehydrated state – even when you are out of the house!
Please Note:
Your food dehydrator will quietly beep when any of the buttons are pressed, when
the door is opened and when the assigned dehydrating time has lapsed.
Opening the door to your food dehydrator will shut off the power to both the
heating coil and the fan. The power will automatically re-start when the door is
securely closed again.

Product Specifications
Model BCSA6
6 Stainless Steel Trays, 2 Mesh Sheets, 2 Non-Stick Sheets
BCSA9
9 Stainless Steel Trays, 3 Mesh Sheets, 3 Non-Stick Sheets
BCSA12
12 Stainless Steel Trays, 4 Mesh Sheets, 4 Non-Stick Sheets
Dimensions L 51cm x W 40cm x H 34.5cm
Tray Dimensions L 39cm x W 34.5cm
Wattage See rating label
Voltage See rating label
Materials Stainless Steel trays, BPA-Free Mesh Sheets and
Non- Stick Sheets
Colour Black
History of Dehydration
Drying is a method of food preservation that works by removing water from the
food, which inhibits the growth of bacteria and has been practiced worldwide since
ancient times. The most astonishing fact about food preservation is that it permeated
every culture at nearly every moment in time. To survive, ancient man had to harness
nature. In frozen climates they froze meat on ice, and in tropical climates they dried
foods in the sun.
Evidence shows that Middle Eastern and Oriental cultures dried foods in the hot sun
as early as 12,000 B.C. The earliest written record we know stated that the Phoenicians
and other fishing people of the Mediterranean used to dry their catches in the open
air. Sun drying tea leaves was very common among the early Chinese and many other
early cultures were also known to have consumed plenty of dried foods.
During the ages of exploration in the 15th and 16th centuries, most sailors on long sea
voyages ate varieties of dried food in order to stay alive. When Columbus discovered
the New World, dehydrated food played an important part in sustaining his crew and
in preventing any outbreak of nutritional diseases like scurvy and beriberi.
Leathery dried meat (or jerky) acted as staples for far roaming “mountain men” who
braved the Sierra Nevada Mountains and the unexplored Pacific Coast of America. By
1795, the French had developed the first dehydrator - a device designed to regulate
the drying conditions and to speed up the drying process.
Dehydrated food became popular during World War I. Due to America sending a
steady stream of supplies to Europe of which dried food made up a good portion.
Interest in drying food dropped off somewhat after the war, though it rekindled
during the Great Depression and World War II. After modern refrigeration and freezing
appliances became popular dehydration again dwindled as people no longer felt the
need to preserve their own food.
Today, because of the uncertainties with which we live, dehydrating is once again
becoming more and more popular as a method of preserving food. Dried food takes
up less space than frozen food, or canned food, no electricity is required to keep the
food, you don’t have to cook or thaw the food and you won’t have any leftovers that
could spoil. Dehydration offers a whole new and wonderful world of variety, healthy
snack options and tasty raw food.

Read ALL of these instructions thoroughly before using your dehydrator
1. Save these instructions for future reference.
2. Examine the carton and the unit for any damage that may have occurred during
shipping. Contact your point of sale to report any damage.
3. Never leave your dehydrator unattended.
4. Close supervision is required if the unit will be used around children.
5. Only for use indoors in a clean, dry location, free of flammable objects.
6. Do not move the dehydrator while in operation.
7. Always place the dehydrator on a level surface and at least 10cm away from walls
or other appliances.
8. This unit may scratch household bench surfaces.
9. Do not use if the power cord or controls have been damaged in any way. Contact
Vitality 4 Life before attempting to make any repairs.
10. Do not use sharp utensils inside the unit.
11. Turn off the Dehydrator before plugging or unplugging from an electrical outlet.
12. Leave the Dehydrator unplugged when not in use.
13. Allow the dehydrator to cool completely before cleaning.
14. Never immerse the dehydrator or power cord in water or any other liquids.
15. Never plug the dehydrator into a damaged electrical outlet.
16. Do not allow the cord to contact the sharp edge of a counter, table or any hot
surface.
17. The use of attachments or accessories not provided with the dehydrator is not
recommended and will void the warranty.
Cleaning and Maintenance
1. The Stainless Steel Trays are dishwasher safe. The BPA-Free Trays are not
dishwasher safe. Make sure the trays and drying sheets are thoroughly dried
before inserting them back into the dehydrator.
2. To clean the exterior and interior of the main body, use a damp cloth.

How to set up your dehydrator
1. Remember to register your warranty with Vitality 4 Life, you can register by either
visiting our website and completing our online form or calling us directly.
2. Make sure the power switch is turned off. Place the dehydrator on a clean, dry
surface away from children and pets.
3. Plug into an undamaged electrical outlet.
Warning: Do not use an extension cord with your dehydrator.
4. To set temperature and time, see Operating Instructions.
5. Heat the unit at 35°C/95ºF for 45 minutes to remove any moisture.
6. If the unit stops for any reason, turn off, unplug and then repeat Steps 3 and 4. If
the unit continues to not operate normally, turn off, unplug and call Vitality 4 Life.
7. Follow your recipe to prepare the food that you wish to dehydrate.
8. Using oven mitts slide the dehydrator trays out of the unit and load the product to
be dehydrated onto the trays.
For best results, do not overlap the product and be sure to leave space between
the items to allow for maximum air circulation.
9. Using both hands for maximum stability, gently slide the dehydrator trays back
into the unit.
10. Once the door is closed, press the START button and follow the instructions to set
the Time and Temperature.
11. Moisture may collect on the surface of the food, this can be blotted off with a
paper towel.
Dehydrating Food
While most food types can be dehydrated at a temperature of approximately 55°C/131ºF,
when dehydrating meats, poultry and fish (making jerky, biltong etc) the temperature
needs to be raised to guard against pathogens such as Salmonella and E. Coli.
WARNING – It is recommended that meat and poultry are dehydrated at a
temperature of at least 68°C/155ºF, or alternatively the meat should be preheated
to 68°C/155ºF to guard against pathogens.
Fish should be steamed or baked to at least 93ºC/200ºF until flaky before dehydrating
at a temperature of least 68ºC/155ºF.
Choosing Food to Dehydrate
• For best results only use highest quality foods.
• Produce in peak season has more flavour and more nutrients.
• Meats, fish and poultry should be lean and fresh.
• Do not use food with bruises and blemishes. Bad produce can spoil the entire batch.
• Remove as much fat as possible from meats prior to dehydrating. You can use a
paper towel under meat when dehydrating to absorb fat.

Tips for Pre-Treatment of Foods
With most types of cooking, preparation is important for the best results. Foods
that are prepared correctly prior to dehydration will taste better and have a better
appearance.
Cut, shred or dice the food uniformly. Slices should be between 6mm and 20mm
thick. Meats should not be thicker than 5mm.
To avoid browning of fruits soak cut fruit in lemon or pineapple juice for 2-3 minutes,
then place in the dehydrator. Alternatively soak in an ascorbic acid solution (made as
per manufacturers instruction) for 2-3 minutes, then place in the dehydrator.
Waxy fruits, (such as peaches, grapes, blueberries, etc.) should be dipped in boiling
water to remove the wax. This allows moisture to escape easily during dehydration.
Blanching can also be used to pre-treat foods for dehydration.
Preparation of Foods
For best results, select the freshest foods available to dehydrate. Note that immature
fruits and vegetables do not have as much colour and flavour as those that are fully
matured. Foods should be dehydrated as soon after purchase as possible. Foods high
in sugar such as apples, pears, peaches and bananas are prone to darkening due to
oxidation of the sugars.
Below are some pre-treatments that will help to reduce this effect:
Lemon and pineapple juice are natural antioxidants. Place the sliced produce in
fresh lemon or pineapple juice for a few minutes, remove, drain and place on the
dehydrator shelf. For extra flavour, try sprinkling on cinnamon or other spices.
Ascorbic acid mix, (a form of vitamin C) is available at most health food stores and is
can be used in tablet or powder form. Use about 2-3 tablespoons of powder or ground
tablets per litre of water; stir to completely dissolve the powder and place fruit into the
solution for 2-3 minutes. Remove, drain and place on the dehydrator shelf.
Blanching is used primarily to prepare fruits and vegetables for dehydrating that
have skins that will toughen during drying. This process helps lock in the colour and
flavour as well as soften the skin of grapes, cherries. prunes and plums. There are two
blanching methods: Water and Steam.
Water Blanching - Fill a large saucepan about half full of water. Bring the water to a
boil and use tongs to place food directly into the water, cover the saucepan and let
it simmer for approximately 3 minutes. Remove, drain and place on the dehydrator
shelf.
Steam Blanching – Using a steamer pot such as one used in Chinese cooking, put
5-8 centimetres of water in a saucepan and bring to a boil. Place the food into the
steamer basket, place over the saucepan and cover. Steam food for approximately 5
minutes, then remove and place on the dehydrator shell.

Nuts and Seeds – Nuts and Seeds contain phytic acid and enzyme inhibitors. Phytic
acid is biologically necessary, as it helps safeguard the nut or seed until proper
growing conditions are present and germination can occur.
Prepare your nuts and seeds by soaking them in warm water (filtered is best) and 1
tablespoon of salt to every 2 cups of raw nuts or seeds. This will neutralize many of
the enzyme inhibitors and increase the bioavailability of many nutrients, especially B
vitamins.
Within 7-24 hours (depending on the seed or nut), many of the enzyme inhibitors are
broken down.
NOTE: Linseed, Flaxseed and Chia seeds are not suitable for soaking. Cashews can
only be soaked for 3-6 hours as they have already been heated to rid them of the
naturally occuring toxic oil, cardol.
Grains (45-55ºC/113-131ºF) – For best results with dehydrating grains you will need to
sprout them beforehand, this is especially necessary when making sprouted flour. The
sprouting process occurs over a period of 2-3 days, depending on the humidity of the
surrounding air, and will involve soaking, draining and rinsing your wheat berries in
filtered water every 6-8 hours. You will need to ensure the wheat berries are covered
with a mesh or cheesecloth and set at an angle to allow an even circulation of air for
fermentation to take place. Once the root tips have grown to 1.5cm the seeds can
be spread on the dehydrator trays, using the mesh sheets to prevent them falling
through. After the sprouted grain has been dehydrated, you can use a power blender
to make fresh sprouted flour.
PLEASE NOTE:There are no exact rules that apply to food dehydration, as results can
be affected by room temperature, relative humidity and moisture levels in the food
that you are drying. To become proficient it will be necessary to experiment with your
drying techniques. If you use too much heat, food may harden on the outside while
being moist inside; however, with too little heat your drying times will be very long.
With a little practice you will be creating tasty, ready to eat snacks in no time.
Dehydrating Tips
• Do not overlap foods. Make sure foods are flat when placing on dehydrating trays.
Overlapped foods can greatly increase drying time.
• Make sure foods are completely dry before removing. If you are not sure, cut a
sample down the middle to check for internal dryness.
• Make sure to label containers when you store your dehydrated food.
• Proper storage helps maintain quality food. Package the food when cool. Foods can
be kept longer if stored in a cool, dark and dry place. The ideal storage temperature
is 16°C/61ºF or lower.
• Vacuum sealing is a great way to keep dehydrated foods.
• Food will shrink approximately ¼ to ½ their original size and weight during
dehydration. Make sure not to cut pieces of food to be dehydrated too small.

Food Storage
Dried foods should be allowed to condition before being placed into a storage
container. Generally, let stand for approximately one week in a dry, well ventilated and
protected area. The conditioning time allows for further drying and removes most of
the remaining moisture.
Dried foods can be placed into clean, dry, insect resistant containers, preferably glass
jars. Heavy gauge plastic freezer bags can also be used. Remember to eliminate as
much air as possible before sealing the bag. When used properly, vacuum sealers
provide the ideal storage method. The less air present, the less potential for the
formation of mould.
Reconstitution
Dried foods do not need to be reconstituted for consumption. Many people prefer
to eat them in their dried state. If you want to reconstitute your food, here are some
basic guidelines:
• Soak food in unsalted water for 3-7 minutes and then prepare as usual. If you are
boiling them, use the same water they soaked in to preserve nutrients. If you plan
to soak foods for more than one hour, they should be placed in the refrigerator to
prevent bacterial growth.
• One cup of dried vegetables will reconstitute approximately two cups.
• One cup of dried fruit will reconstitute to about one and a half cups.
• Reconstitution times will vary depending on the thickness of the food and the water
temperature used.
• Warm water will speed up reconstitution but may result in some flavour loss.
Drying times
The following charts are guidelines for the preparation of various fruits, vegetables
and meats. Drying times will vary depending on the room temperature, relative
humidity and moisture levels in the food that you are drying. If the moisture level is
low, the drying time will be on the low end of the range. However, if the moisture
level is high, the drying time will be on the high end of the range.
Keep in mind that drying times are also affected by the amount of food placed on
the shelves. Overloading the shelves will slow the drying time and may produce
poorer results.
When dehydrating foods, it is important to
check on the dryness of the product. If the
product is not thoroughly dried, mould may
form during storage (see Food Storage). To
test for dryness, remove a piece of food
from the dehydrator and allow it to cool
to room temperature. Bend and tear the
piece to check for internal moisture.

Vegetables 50-55°C/122-131ºF
FOOD PREPARATION TEST TIME (HRS)
FAST
TIME (HRS)
REGULAR
Asparagus Wash and cut into 25mm pieces Crunchy 22-3
Beans,
Green or
waxed
Wash, remove ends and cut into
25mm pieces or French style
Crunchy 26-8
Beetroot Remove 10mm of the top, scrub
thoroughly. Peel if preferred and
cut into 5mm slices.
Pliable 26-8
Broccoli Wash and trim and cut into 1cm
pieces. Dry the florets whole.
Crunchy 27-9
Cabbage Wash and trim, cut into 3mm strips Crunchy 25-7
Carrots Wash and trim tops, peel or scrape
if desired. Cut into 3mm thick
slices.
Pliable 24-7
Corn Cut kernels from cob and spread
on the mesh tray.
Crunchy 24-7
Cucumber Wash and trim, cut into 3mm slices Pliable 22-6
Eggplant Wash and peel, cut into 6mm slices Pliable 22-6
Mushroom Wash and cut into 8mm slices Pliable 22-6
Parsnips Scrub and steam blanch (if
desired) and cut into 8mm slices
Pliable /
Tough
24-7
Capsicum Wash and remove seeds and white
section. Cut into 6mm strips or
rings
Pliable 22-6
Potatoes Use new potatoes, wash and peel
if desired. Steam blanch for 4-6
minutes. Cut into French style or
6mm thick circles.
Crunchy
/ Pliable
24-9
Summer
Squash
Wash and cut into 6mm slices Pliable 27-9
Tomatoes Wash and slice into 6mm circles Pliable 27-9
Zucchini Wash and cut into 5mm slices Crunchy 24-7

Fruits 60-65°C/140-149ºF
FOOD PREPARATION TEST TIME (HRS)
FAST
TIME (HRS)
REGULAR
Apples Wash, core and peel if desired. Pliable 24-10
Apricots Was, halved and remove pit. Slice
in half and dry skin side down
Pliable 210-14
Bananas Peel and slice into 3mm slices Pliable 24-7
Figs Wash, cut out blemishes and quar-
ter. Dry skin side down.
Pliable 210-14
Kiwi Fruit Wash and slice into 6mm slices Pliable 25-7
Nectarines Wash, halve and remove pit. Slice if
desired and dry skin side down.
Pliable 24-12
Peaches Wash, halve and remove pit. Slice if
desired and dry skin side down.
Pliable 25-12
Pears Wash, core and peel if desired. Pliable 22-5
Pineapple Peel, remove fibrous parts and
remove core. Cut into 6mm slices
or wedges.
Pliable 27-12
Rhubarb Wash and cut in 25mm lengths Pliable 24-7
Strawberries Wash, cut of tops and slice into
6mm pieces
Crisp 24-10
Watermelon Cut off rind, cut into wedges and
remove seeds. Cut into 10mm
pieces.
Pliable
and
sticky
25-7

Meat and Fish 62-65°C/143-149ºF
FOOD PREPARATION TEST TIME (HRS)
FAST
TIME (HRS)
REGULAR
Jerky Use lean meat and remove as much
fat as possible as fat turns rancid with
time. Cut 6mm thick slices and place
on shelves.
Pliable 24-6
Nuts and Seeds 45-50°C/113-122ºF
FOOD PREPARATION TEST TIME (HRS)
FAST
TIME (HRS)
REGULAR
Nuts, Seeds Soak overnight as per instructions
above.
Dry, not
chewy
2 2-7
Grains 45-55°C/113-131ºF
FOOD PREPARATION TEST TIME (HRS)
FAST
TIME (HRS)
REGULAR
Grains See preparation instructions above. Firm / Dry 28-12

Troubleshooting
SYMPTOM PROBABLE CAUSE REMEDY
Dehydrator does
not turn on
No screen display
The wall power supply is
not on.
The dehydrator switch is
not on.
Make sure power is in on position.
Press the power on button.
Displays E1 Door not closed
Safety sensor damaged
Check door is closed securely
Check small silver lever on right
hand side of door is contacting
with door.
Displays E2 The temperature
measurement prong is
damaged.
Only fan working. No
heating element.
Turn the dehydrator off. Contact
the service centre for assistance.
Ambient temperature is more
than 35 degrees. Adjust heat to
higher temperature.
Fan is working but
there is no heat
Heater malfunction. Turn the dehydrator off. Call the
service centre.
Heater is working
but the fan is not
working
Check for any foreign
object lodged in the fan.
Turn the dehydrator off. Check to
see if there is any foreign object.
If still not working, call the service
centre.
Not dehydrating
correctly
Too much food on the
tray.
Food is overlapping on the
tray.
Reduce the food quantity
Evenly space food on the tray
Water drops on
the door
Too much food on the tray.
Food contains too much
water.
Reduce the food quantity
Reduce the food quantity and
increase dehydrating time
Over heating or
little heating
Temperature control
system is not working
properly.
Turn the machine OFF and contact
the service centre.
Foods are not
evenly dehydrated
The thickness of the food
is not even.
Too much food on the
tray.
Evenly slice the food.
Reduce the food on the tray.
Abnormal sound
from the fan
Screen cover in front of fan
is rubbing the fan blade.
Turn off the machine and unplug
from power source. Gently pull
screen away from fan blades by
using needle nose pliers.
Register online at warranty.vitality4life.com
Congratulations on purchasing your
BioChef Savana Dehydrator from Vitality 4
Life! This is your warranty card. To activate
your warranty, please register online at
warranty.vitality4life.com
Vitality 4 Life warrant this BioChef Savana
Dehydrator to be free from defects in
materials and workmanship while in
normal domestic use for a period of 3 years
from the original date of purchase.
DO NOT RETURN THE PRODUCT TO THE
STORE
Please follow these instructions to receive
faster service:
1. Note the product model and the serial
number.
2. Contact Vitality 4 Life.
3. If the product, or one of its parts,
qualifies for replacement or service
within the 30 day period after date of
purchase, Vitality 4 Life will arrange the
shipping at no cost to you. Vitality 4 Life
may ship the replacement or contact
you with further information regarding
repair of the product.
4. Typical turnaround times to address
warranty claims can be between 10-14
business days, plus shipping, depending
on location and type of damage or
warranty claim.
TERMS OF PRODUCT WARRANTY
COVERAGE
Vitality 4 Life provides the Product Warranty
coverage as further described below and
limited to the terms and conditions hereof:
1. If the BioChef Savana Dehydrator
exhibits a defect while in normal
domestic use, within the warranty
period; we will, at our option, either
repair or replace the Dehydrator or
defective part free of charge. The
product must be delivered by insured
mail, in proper packaging to your service
centre as indicated on the back of the
manual as a condition to any warranty
service obligation.
2. To activate your warranty, you can
register online within 30 days, or send
all the details by email to
customerservice@vitality4life.com
3. In the event that the warranty period for
a product has expired, or if a Product
does not qualify for warranty service,
repair or replacement, consumers may
still buy replacement parts or have
products repaired by one of Vitality 4
Life’s Service Centres. Please contact
Vitality 4 Life for further information.
4. Do not send the product back to
the service centre without return
authorization form.
5. In no event shall our liability exceed the
retail value of the product. We make no
warranty with respect to parts, from a
source other than Vitality 4 Life.
6. In the event that warranty parts or
products are provided, the customer
must cover the related shipping costs to
receive goods.
7. All exchanged or substitute parts and
products replaced under warranty
service will become the property of
Vitality 4 Life.Repaired or replaced
products or parts thereof will be
warranted by Vitality 4 Life for the
balance of the original warranty period.
Warranty Card

8. (Australia only) Our goods come with
guarantees that cannot be excluded
under the Australian Consumer Law. You
are entitled to a replacement or refund
for a major failure and compensation for
any other reasonably foreseeable loss
or damage. You are also entitled to have
the goods repaired or replaced if
the goods fail to be of acceptable quality
and the failure does not amount to a
major failure.
WARRANTY DOES NOT COVER
1. Damage, accidental or otherwise, to the
Product, not caused by direct defect in
factory workmanship or materials.
2. Damage due to abuse, mishandling,
alteration, misuse, commercial service,
tampering, accident, failure to follow
care, operating and handling provisions
indicated in the instructions.
3. Damage caused by parts or service not
authorized or performed by Vitality 4
Life.
4. ‘Normal’ wear and tear through use
of the auger, drum, drum caps, sieve,
juicing screens or plunger.
5. Some states do not allow the
exclusion or limitation of incidental or
consequential damages. So the above
limitations may not apply to you in
the case of damage in shipment. If
your BioChef Savana Dehydrator was
damaged in shipment: Immediately
report this type of damage to the parcel
carrier and have them file an inspection
report to contact the distributor from
whom you purchased the BioChef
Arizona Dehydrator for further
instructions.
6. You have rights and benefits under
the consumer laws in your jurisdiction.
Without detracting from these rights
or benefits, Vitality 4 Life excludes all
liability in respect of this product for
any other loss which is not reasonably
foreseeable from a failure of this
product, which may include liability
for negligence, loss of expenditure
associated with the product and loss of
enjoyment.
Please follow these instructions when
making a warranty claim:
1. You must inform Vitality 4 Life as soon as
the warranty claim arises and provide a
visual documentation of the fault.
2. Subject to the applicable consumer laws
in your jurisdiction, you must pay for all
packing, freight and insurance costs for
transit of the product to Vitality 4 Life.
IF THE WARRANTY CLAIM IS NOT
ACCEPTED:
a) Vitality 4 Life will inform the customer;
b) If requested to do so by the customer,
Vitality 4 Life will repair the product
provided the customer pays the usual
charges for such repair; and
c) If applicable the customer will be
responsible for all costs associated with
collection of the product from Vitality 4
Life.
In order to get the best use from your
BioChef Savana Dehydrator, read and follow
the instructions in your operating manual.

Find out more at:
vitality4life.com.au/biochef
/mybiochef
biochef.com.au #vitality4life
vitality4life /biochef
@biochef
Vitality 4 Life – Head Office and Showroom
5/10 Brigantine Street,
Byron Bay, NSW 2481, Australia
International Phone: +612-66807444
Toll-Free (within Australia): 1800 802 924
Fax: +612-66807481
Email: [email protected]om
Website: www.vitality4life.com.au
Vitality 4 Life – United Kingdom Office
Unit 7 Vitas Vending Business Centre
Fengate, Peterborough, PE1 5XJ, United Kingdom
International Phone: +44 (0) 844 800 0831
Email: [email protected]o.uk
Website: www.vitality4life.co.uk
Vitality 4 Life - United States
Website: www.vitality4life.com
Vitality 4 Life – France
Email: [email protected]
Website: www.vitality4life.fr
Vitality 4 Life – Deutschland
Email: [email protected]
Website: www.vitality4life.de
Vitality 4 Life – Italiano
Email: [email protected]
Website: www.vitality4life.it
Vitality 4 Life – España
Email: [email protected]
Website: www.vitality4life.es
Vitality 4 Life – Netherlands
Email: [email protected]o.nl
Website: www.vitality4life.co.nl
Table of contents
Other Biochef Kitchen Appliance manuals

Biochef
Biochef Arizona User manual

Biochef
Biochef Commercial 20 User manual

Biochef
Biochef Savana User manual

Biochef
Biochef ARIZONA SOL User manual

Biochef
Biochef Vacuum Blending Accessory User manual

Biochef
Biochef Arizona Sol User manual

Biochef
Biochef Kalahari User manual

Biochef
Biochef Premium Commercial User manual


