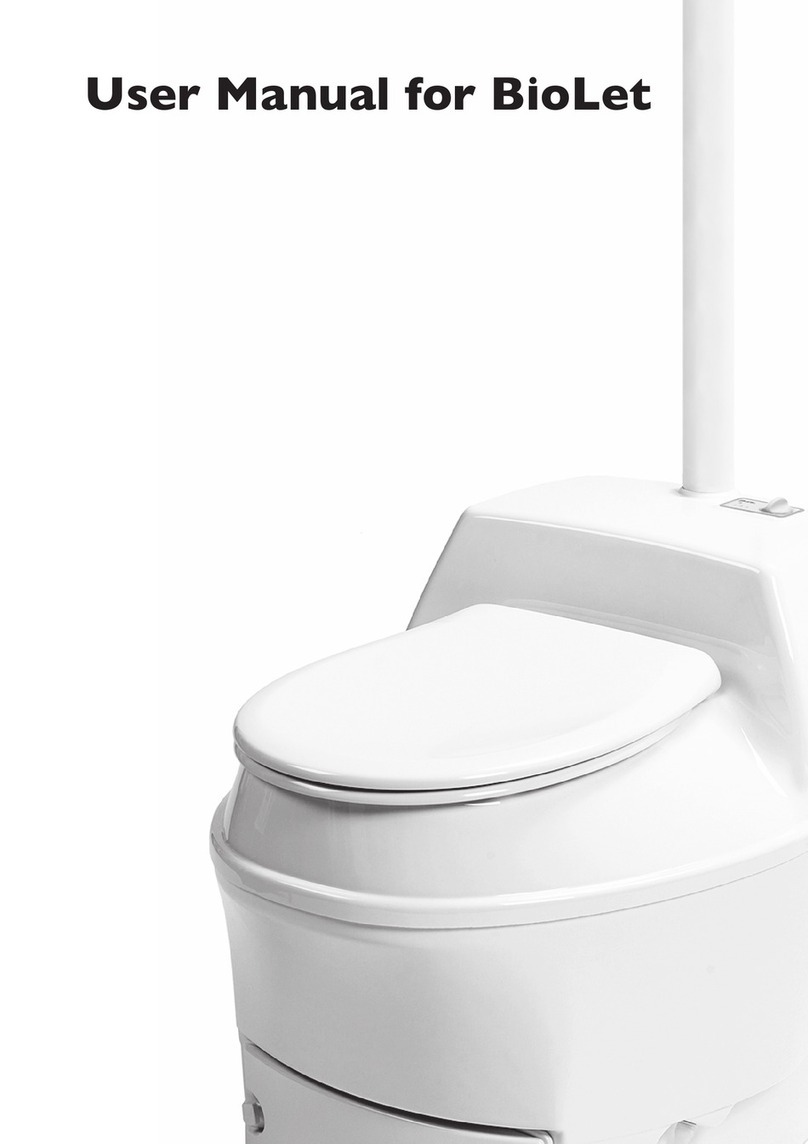
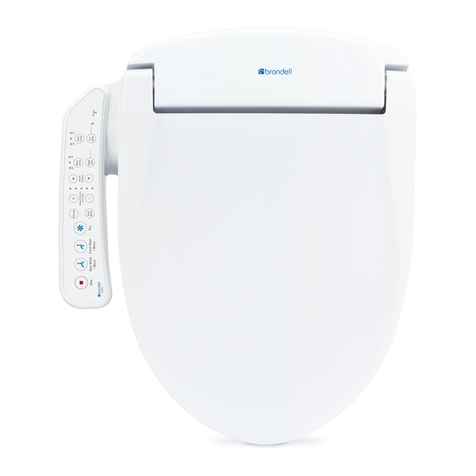
Biolet BTS 33 User manual

Rev. 120815
Owner’s Manual
BTS 33 12V
Waterless Toilet

2
Index
Specifications 3
Capacity 3
Weight Limit 3
Measurements an Weight 3
Intro uction 3
Description 3
Package Contents 3
Toilet Box: 3
Vent Kit: 3
Toilet Components 4
Installation 4
Tools Require 4
Precautions 4
Before installing your BTS 33 4
Starting the toilet 7
Theory of composting toilets 8
Moisture 8
• Maintaining moisture 8
Temperature 8
• Maintaining temperature 8
Aeration 8
• Maintaining aeration 8
Carbon to Nitrogen ratio (C:N) 8
• Maintaining C:N 8
Use an Care 8
Precautions 8
A ing starter mulch 8
• Approve mulches 8
• Homema e mulch 9
Emptying the Compost Bin 9
Shutting own your toilet 9
In case of paper buil up 9
Cleaning 9
Insect control 9
Helpful hints 9
Troubleshooting 10
O ors in bathroom 10
O ors outsi e the structure 10
Excess moisture in the toilet 10
Excess moisture in the bin 10
BTS 33 Warranty Registration 11

3
Specifications
Capacity
• 4 people - full-time use
• 6 people - part-time use
Increase capacity by a ing optional bins. Each bin increases capacity by 2 - 3 people
Weig t Limit
350 lb
Measurements and Weig t
S ipping Installed
Depth 31.5” 26.5”
Wi th 19.25” 15.5”
Height 29” 24.75”
Seat Height 19.25”
Weight 63 lb 25.5 lbs
Introduction
Thank you for your purchase of a BTS 33 Toilet system. With proper installation an maintenance we are certain it will
offer you the convenience an reliability you woul expect from the manufacturer of the best selling composting toilet
in the worl . Please, read t ese instructions carefully, as they will give you vital information about installing an
maintaining your BTS 33.
*** Please remember: State and Local regulations always supersede instructions in t is manual. Always
c eck wit your local ealt aut orities and building inspectors for regulations governing composting toilets
prior to installation of your BTS 33. ***
Description
The BTS 33 is a biological composting toilet that uses the process of aerobic ecomposition to transform human
waste an toilet paper to a hygienically safe pro uct (humus) that may be safely utilize if ispose of in a manner
escribe in this manual or by your local health authorities.
The BTS 33 oes not have a heat source to ai in the evaporation process. Therefore, a rain tube MUST be installe
to evacuate any excess liqui . This liqui shoul be ispose of in a manner escribe in this manual or by your local
health authorities.
Package Contents
Toilet:
1 – BTS 33 Toilet with 12V Fan
1 – 8 gallon bag Starter Mulch
2 – Compost bins
1 – Compost Bin Li
1 – Compost Bin Tray
1 – Fan housing
1 – 1” x 5’ rain hose
1 – Har ware Kit “A”
2 – ¾” #8 – 32 screws
2 – #8 nuts
4 – stainless/rubber bon e washer
4 – 1 ½” #10 machine screws
1 – 1” hose clamp
Vent Kit:
6 – 26 ¼” sections 2” white pipe
2 – 26 ¼” sections 4” black pipe
1 – 2” x 45 egree street elbow
5 – 2” x 2” PVC coupler
1 – 4” x 4” PVC coupler
2 – 26 ¼” sections foam insulation
1 – 2” x 2” shiel e rubber coupler
2 – 2” x 45 egree stan ar elbow
1 – 4” x 2” rubber re ucing coupler
1 – 4” roof flashing

4
Toilet Components
1.
Seat assembly
2.
Top Part
3.
Compost Bin Li
4.
Fan Housing
5.
Compost Bin
6.
Compost Bin Tray
7.
Toilet Base
8.
Drain Nipple
Installation
Tools Required
• 5/16” nut river or socket
• Phillips screw river
• Drill
• 2 1/2” hole saw
• 1 1/4” rill bit/hole saw
• Jig saw, sawzall, or keyhole saw
• Hammer
• Roofing nails
• 100% a hesive silicon caulking ( o not use latex
silicon)
• Plum bob or weighte string
• Pencil
• PVC pipe cleaner an glue.
Precautions
• Always wear goggles an protective clothing while operating han an power tools.
• Observe all precautions an operating instructions provi e by the tool manufacturer.
• Ensure there are no electrical wires, water pipes or gas pipes in the area you are cutting or rilling
Before installing your BTS 33
• Check with your local health authorities an buil ing inspector for regulations governing the installation of your
BTS 33.
• Ensure there is generous air flow into the bathroom. A 1” gap un er the bathroom oor or a vent in the wall will
ensure sufficient airflow to the toilet. Overhea vents an open win ows shoul be use with caution as these
may cause a negative pressure in the room an promote a back raft into the room through the toilet causing the
presence of an unpleasant o or.
• Ensure the temperature in the room where the toilet is to be installe can be maintaine above 64°F uring
perio s while the toilet is being use .
• Ensure the floor un er the toilet is level an insulate or heate .
• Ensure the vent pipe will be able to exten at least 6” above anything within 10’ of it or above the peak of the roof
whenever possible. (See the “Installation” an “Theory of composting toilets; maintaining aeration” sections
below)
• Ensure your installation can be achieve with the a ition of no more than 2 – 45° angles.
• Verify that the total run for the vent pipe is less than 30’ in a straight up installation or 27’ if 2 – 45° angles are
require . Consult with BioLet Toilet Systems technical support if a longer run is require .
****IMPORTANT****
Installation of t e vent pipe is CRITICAL to t e operation of your BTS 33 Toilet System. If you must vary t e
installation from t ese instructions in ANY WAY, please contact tec nical support at 1-800-524-6538 PRIOR to
installation.

5
Straig t run t roug ceiling and roof
1.
Remove top of unit by lifting straight up
2.
Remove bins from insi e of unit
3.
Separate bin by gently pulling up on bin li
han le while hol ing bottom bin firmly.
4.
Insert fan housing in back of unit as shown in
Fig. 1
5.
Use 2 – ¾” #8 – 32 screws an 2 #8 nuts to
secure the fan housing to the base.
6.
Sli e 2” x 2” shiel e rubber coupler over vent
fan housing nipple with screws facing
ownwar . Tighten clamp using 5/16” nut river
or socket until snug. (CAUTION: DO NOT
OVER TIGHTEN)
7.
Insert male en of 2” x 45 egree street elbow
into rubber coupler with the female en facing
upwar . Assembly shoul now look like fig. 2.
8.
Place toilet in esire location an position
9.
Using plumb bob or weighte string mark
position on ceiling irectly above the center of
the vent pipe.
10.
Ensure point marke on ceiling is not irectly
below a ceiling joist, wiring, pipe, or other
obstruction that will prevent the pipe from
running upwar .
11.
Determine how an where you are going to run
the rainage tube using the “Drainage
Recommen ations” section as a gui e.
***IMPORTANT***
Ensure placement of t e drain tube allows for a
constant downward slope to promote proper
flow of t e liquids. Ensure drain tube does not
kink w erever bends are necessary.
12.
Mark position on wall or floor where rain tube
will penetrate.
13.
Ensure position marke is not irectly in line with
joists, stu s, wires, pipes or other obstructions
that will prevent the rain tube from running
through the wall or floor.
Fig 1
Fig 2

6
14.
Drill a 1 1/4” hole in the floor or wall to
accommo ate the rain tube.
15.
Drill a 2 1/2” hole in the ceiling where you ma e
a mark in Step 8.
16.
Drill a 2 1/2” hole in the roof irectly above the
hole in the ceiling.
17.
Glue 1 length of 2” white pipe into the female
en of 2” x 45 egree street elbow attache to
the back of the toilet using PVC glue (ensure
you follow all precautions and directions on
glue and cleaner)
18.
Glue 2” x 2” PVC coupler to other en of 2”
white pipe on back of toilet.
19.
Repeat steps 17 an 18 until white pipe exten s
through the roof an at least 6” above anything
within 10’ of it.
20.
Seal the hole in the roof aroun the pipe using
silicon caulk.
21.
Cut 1 en of foam insulation to angle of roof
22.
Cut total length of insulation so it’s 2” shorter
than the length of white pipe sticking through the
roof
23.
Wrap insulation aroun white pipe above roof so
all but the top 2” of the pipe is covere with
insulation.
24.
Tape all seams in the insulation.
25.
Cut 1 en of 4” black pipe to the angle of the
roof.
26.
Cut total length of 4” black pipe so it is 2” shorter
than the 2” white pipe sticking out of the roof.
27.
Sli e 4” black pipe own over the white pipe an
insulation
28.
Sli e roof flashing over 4” black pipe with ome
si e upwar . (note this will be a tight fit!)
29.
Sli e 2” x 4” rubber coupler over 4” black pipe
an 2” white pipe till 2” white pipe is flush with
top of 2” opening. Tighten 2” an 4” clamps
using 5/16” nut river or socket.
30.
Sli e roof flashing own so it lies evenly on the
roof, slipping its flanges un er the shingles
along the top e ge.
31.
Outline the flashing on the roof.
32.
Raise the flashing an apply silicone sealant
insi e the outline. Sli e the flashing back own,
sli ing the flange un er the shingles along the
top e ge an press it firmly into the sealant.
When the flashing is properly place the top part
of the flashing shoul be un er the shingles an
the lower portion shoul be on top so water
she s easily.
33.
Secure the flashing with corrosion resistant nails
or staples at each corner an along the si es at
4” – 6” intervals.
34.
Expose nails or staples shoul be seale with
silicone sealant.
35.
Install the rainage tube attaching it to the rain
nipple on the back of the toilet using the 1” hose
clamp provi e in Har ware Kit “A” an run it
through the hole you rille in step 13
36.
Attach toilet to floor using 4 #10 1 ½” machine
screws with 4 #10 stainless/rubber bon e
washers RUBBER SIDE DOWN.
37.
Remove compost bin tray from box labele
“Parts Box” an place the bin tray in the bottom
of the unit with the ri ge si e up.
38.
Place 1 compost bin in toilet so epressions on
bottom of bin matches up with the “nipples” on
the bin tray.
39.
Replace top of toilet
*** IMPORTANT ***
W erever t e ventilation pipe passes t roug an
unconditioned area (i.e. attic space) or outside it
needs to be insulated. Use t e remaining
insulation from your vent kit to insulate t e pipe
in t e unconditioned space. Ensure every inc of
pipe is insulated in t is space
A rain cap is not necessary. If one is desired, use
ONLY t e BioLet aut orized wind directional cap
t at can be obtained from BioLet Toilet Systems.
Any ot er cap may inder t e airflow from t e
toilet and cause a reduction in t e performance
of t e unit.

7
T roug t e exterior wall using 45° elbows.
*** IMPORTANT ***
Pipe will need to pass t roug t e wall at a 45 degree angle.
AT NO TIME CAN THE PIPE RUN AT MORE THAN 45 DEGREES OFF VERTICAL!
1.
Remove top of unit by lifting straight up
2.
Remove bins from insi e of unit
3.
Separate bin by gently pulling up on bin li
han le while hol ing bottom bin firmly.
4.
Insert fan housing in back of unit as shown in
Fig. 1
5.
Use 2 – ¾” #8 – 32 screws an 2 #8 nuts to
secure the fan housing to the base.
6.
Sli e 2” x 2” shiel e rubber coupler over vent
fan housing nipple with screws facing
ownwar . Tighten clamp using 5/16” nut river
or socket until snug. (CAUTION: DO NOT
OVER TIGHTEN)
7.
Mark position on wall behin toilet where pipe
will penetrate through interior wall
8.
Ensure position marke is not irectly in line with
stu s, wires, pipes or other obstructions that will
prevent the vent pipe from running through the
wall. Remember the pipe will be running through
the wall at an upwar 45 egree angle. Ensure
there are no obstruction on the outsi e of the
wall where the pipe will exit.
9.
Drill a 2 ½” hole through the wall at an upwar
45 egree angle
10.
Determine how an where you are going to run
the rainage tube using the “Drainage
Recommen ations” section as a gui e.
***IMPORTANT***
Ensure placement of t e drain tube allows for a
constant downward slope to promote proper
flow of t e liquids. Ensure drain tube does not
kink w erever bends are necessary.
11.
Mark position on wall or floor where rain tube
will penetrate.
12.
Ensure position marke is not irectly in line with
joists, stu s, wires, pipes or other obstructions
that will prevent the rain tube from running
through the wall or floor.
13.
Drill a 1 1/4” hole in the floor or wall to
accommo ate the rain tube.
14.
Pass a 2” white pipe through the wall an into
the 2” rubber coupler. Ensure the pipe is fully
insulate in the wall.
15.
Tighten clamp on rubber coupler using 5/16” nut
river or socket until snug.
16.
Cut 2” white pipe exten ing through the wall to
esire length.
17.
Glue 45 egree elbow to en of 2” white pipe
exten ing through wall with open en facing
upwar .
18.
Glue next 2” white pipe into open en of 45
egree elbow.
19.
Follow steps 18 – 39 in instructions on page 6
Starting the toilet
1.
Insert the composting bin insi e the toilet with
the curve en facing forwar .
2.
Open the inclu e 8-gallon bag of starter mulch
an a about 1 quart of water to it. (just enough
to keep the mulch from usting)
3.
Mix the water with the mulch to evenly istribute
it throughout the bag.
4.
A about 2 gallons of starter mulch to the
bottom of the composting bin.
5.
Replace the top on the toilet.
6.
Your BTS 33 is now rea y to use
Drainage recommen ations
The rainage system to be chosen epen s entirely
on the soil con ition, groun water level an local
regulations. Always consult your local health
authorities before installing your rainage system.

8
Theor of composting toilets
There are 4 factors that affect the efficiency of a
composting toilet:
Moisture
In optimum con itions, the composting material has the
consistency of a well-wrung sponge – about 45% to 70%
moisture. When below 45%, there is not sufficient
moisture for the microorganisms to function, an above
70%, saturate con itions begin to evelop, an oxygen
epletion becomes a limiting factor.
Maintaining moisture
Since the BTS 33 oes not have a heater, the
moisture content nee s to be maintaine by
proper ventilation, a ition of proper mulch, an
a goo flow from the rain tube.
Temperature
The typical temperature range for most composting
toilets is 68°F to 112°F. Lower temperatures result in
a mol ering process that takes a significantly longer
perio of time to compost an therefore requires a
much larger composting chamber.
Maintaining temperature
Since the BTS 33 oes not have a heater, the
temperature nee s to be maintaine by
maintaining ambient room temperature an by
the natural heat generate uring the
composting process. Therefore, ambient room
temperature of at least 64°F nee s to be
maintaine uring perio s while the toilet is
being use .
Aeration
The aerobic organisms responsible for the
composting process require free atmospheric or
molecular oxygen to survive. Without oxygen, they
will ie an be replace by anaerobic
microorganisms that will slow the composting
process an generate o ors. For composting toilets
to work most effectively, the materials being
composte shoul be unsaturate with liqui s, an
have a loose texture to allow air to circulate freely
within the pile.
Maintaining aeration
Your BTS 33 inclu es a 12V fan an will assist
in aeration. A itionally, maximum aeration can
be achieve by:
1. Keeping the pro uct insi e the composting
chamber in a loamy consistency.
2. Proper installation of the ventilation pipe. Keep
in min that the a ition of any angles in the
vent pipe will re uce the airflow.
3. Ensure a goo flow of air to the bathroom from
the living area.
4. Make sure there are no other air rawing
appliances; e.g. furnace nearby. They woul
interfere with the air flow.
Carbon to Nitrogen ratio (C:N)
Microorganisms require igestible carbon as an
energy source for growth, an nitrogen an other
nutrients for protein synthesis. When measure on
a ry weight basis, an optimum C:N ratio for aerobic
bacteria is about 25:1.
Maintaining C:N
A small han ful of starter mulch per person per
ay or approximately 1 quart per person every
week is a goo rule of thumb to maintain a
helpful C:N ratio, absorb excess moisture, an
maintain pores in the composting material.
Use and Care
To ensure that your BTS 33 will operate at its peak
potential an that the en pro uct (calle Humus)
will be hygienically safe to han le an to recycle on
your property, pay close attention to the following
irections.
Precautions
• Always observe goo biohazar safety
practices when working on the BTS 33.
Wear goggles, isposable rubber gloves an
clothing to prevent contact with unprocesse
human excrement. Unprocesse human
excrement contains potentially angerous
human pathogens, which may cause illness.
• NEVER put cigarettes or ot er burning or
glowing materials into your BTS 33!
• Do not put sanitary napkins, foo scraps, or
animal excrement in your BTS 33. Your BTS
33 is inten e for the isposal of human
urine, fecal matter an toilet paper ONLY.
Intro uction of other materials may hin er
the composting process or ecrease the
capacity of your toilet
Adding starter mulc
It is very important to a starter mulch to your toilet
on a regular basis in or er to promote aeration, a
carbon an to improve the compost's ability to
absorb liqui . During regular operation a a
minimum of 1 quart of starter mulch per week per
person. Therefore, one shoul make it a habit to a
about 1/2 cup of starter material after each fecal
use.
Approve mulches
Use of only BioLet Toilet Systems approve
starter mulches is recommen e . Approve

9
mulches will carry the BioLet Toilet Systems
logo. Using any other mulch may cause a
ecrease in the efficiency of your toilet an may
voi the warranty on parts if their failure is
etermine to be cause by usage of
unapprove mulch.
Homema e mulch
If you esire to make your own mulch you can
use the following recipe for 10 gallons of starter
mulch:
• 6 ½ gal – Blon high fibrous, Cana ian
sphagnum peat moss (ALL PEAT MOSS IS
NOT THE SAME)
• 3 ½ gal - Pine woo shavings (obtainable
from nearly any livestock fee store as
livestock be ing) DO NOT USE
SAWDUST OR CHAINSAW CHIPS
• 2 cups – Goo rich gar en soil from first 6”
layer of soil (ENSURE FROM AN AREA
WHERE PESTICIDES ARE NOT USED)
• 1 poun – Dry molasses.
• 1 poun – Hulls of buckwheat, wheat,
peanuts or cocoa.
• 1 poun – Coarse Perlite
Keep your mixture ry an allow it to breathe.
Except for when starting your BTS 33, o not
ampen. The mulch will mix in an ampen
with bathroom use.
*** IMPORTANT ***
BioLet Toilet Systems cannot guarantee t e
operation of your unit unless you are using
approved mulc .
Emptying t e Compost Bin
In a full-time resi ential setting, the compost bin
shoul be emptie when the bin is about 3/4 the way
full or once every 6 months, whichever comes first.
In a part-time cabin/cottage setting, the compost bin
shoul be emptie when the bin is about 3/4 the way
full or once a year whichever comes first.
1.
Remove the top of the toilet by lifting straight up.
2.
Position the compost bin li on top of the
compost bin an press own firmly on the outer
e ges to lock the bin in place.
3.
Move bin han le into upwar s position.
4.
Slowly lift on han le until you are sure it is safe
to carry out the bin.
5.
Remove the primary bin an move it outsi e to
finish composting.
6.
Place the secon ary bin into the unit with the
curve en facing the front of the unit.
7.
Pour in 2 gallons of Starter Mulch to make a 2” –
3” covering insi e the bin.
8.
Replace the top of the unit, ensuring it is evenly
sitting on the base.
If t e secondary bin contains umus, dispose of
it by adding it to an existing outside compost
pile for finis ing or w en an existing compost
pile is not available, by mixing it wit soil or
compost and trenc it in around ornamental
trees and plants and cover it wit a minimum of
5" topsoil, or dispose of it in a manner approved
by your local ealt aut orities.
S utting down your toilet
If your BTS 33 is going to be i le an not use for
perio s of two ays or more:
A about one quart of humus starter per week that
you will be away or one gallon (whichever is less)
an mix it well into the compost.
When you are rea y to use the toilet again:
• Visually inspect the material insi e to ensure
it is moist.
• If necessary a enough water to moisten
the material.
• Mix the material.
In case of paper build up
If a buil -up of toilet paper occurs, sprinkle a small
amount of water over it to make it issolve an mix
into the compost.
Cleaning
Use a sponge or sponge style toilet brush an liqui
soap or some other mil etergent when cleaning
your BTS 33. Never use scouring pow er or other
strong etergent that coul scratch the surface.
Insect control
The presence of insects in an aroun your BTS 33
is frequently an in ication of excess moisture. If
there is excess moisture you will nee to reme y this
situation to be able to completely remove the insects
from your toilet. Use of mulch not authorize for use
in your BTS 33 may also intro uce insect larvae into
your toilet.
To ri your toilet of insects: Insert a Hot-Shot No
Pest Strip (blue an white envelope type package),
Spectraci e Bug Stop Pest Strip (green an yellow
envelope type package) or similar pro uct
containing Dichlorvos as the ONLY active ingre ient
insi e the unit but outsi e the compost bin. These
items are rea ily available at your local har ware
store or epartment store in their gar en centers.
Helpful hints
• Keep a small seale container, with starter
mulch an a ½ cup measurer in it, next to
the toilet for convenience of a ing mulch
after each fecal use.

10
• Hang a sign above the toilet, for the
convenience of guests, that states ‘To
“flush”: A ½ cup starter mulch after each
fecal use.’
Troubleshooting
Odors in bat room
If you etect a pungent or ammonia o or in your
bathroom there is a possibility of insufficient airflow
from your toilet. Please check the following:
• All vent pipe connections airtight?
• Is the vent pipe inside the rubber connector
on the back of the toilet?
• Vent pipe en s at least 6” above anything
within 10’ (see “Installation”)?
• Vent pipe unobstructe ?
• Is the vent pipe insulate in all uncon itional
(i.e. attic) areas?
• If there is a ventilation fan in the ceiling or
wall of your bathroom, o not use it. The fan
will raw air from the bathroom, causing a
back raft through the toilet.
• If there is a win ow in your bathroom an
the air is rawn out through it, you shoul
close the win ow.
• If the o or is etecte uring perio s when
there is a breeze outsi e. Install an
approve win irectional cap that is
available from BioLet Toilet Systems.
Odors outside t e structure
The presence of o ors outsi e the structure is a
positive in ication that the vent pipe is in an area of
air turbulence above the roof. The vent pipe must be
raise to get the top above the air turbulence.
Excess moisture in t e toilet
If you etect excess moisture insi e the toilet:
• Check that there is a goo flow of liqui from
the rain tube.
• Ensure the mulch is not compacte an
causing a “ amming effect”, preventing the
liqui from getting to the rain.
• Ensure you are using the toilet within its
limits of 4 people full time use an 6 people
part-time use. A bins, if necessary.
Excess moisture in t e composting bin
If you notice the material insi e the composting bin
is not loamy an appears to be hol ing excessive
moisture:
• Ensure you are using approve starter
mulch (see “a ing starter mulch” in the
“use an care” section above).
• Ensure you are a ing a sufficient amount
of starter mulch.
• Ensure there is sufficient ventilation from the
toilet (see “O ors in the bathroom” above)
• Ensure you are using the toilet within its
limits of 4 people full time use an 6 people
part-time use.
• If all else fails a 1 quart of coarse Perlite
(available from most nurseries) to each
gallon of starter mulch.
Warrant
Limited Lifetime Parts Warranty:
During the lifetime of the original owner, BioLet Toilet Systems will repair or replace any parts that are efective in material or workmanship ue to
normal noncommercial use in accor ance with the owner’s manual supplie by BioLet Toilet Systems. Proof of purchase may be require by BioLet
Toilet Systems either in the form of a warranty registration car on file or copy of original invoice. After assessment by an authorize BioLet Toilet
Systems service technician, BioLet Toilet Systems will ship replacement parts an instructions for replacement to the customer. Labor for the
replacement of the efective parts is the responsibility of the customer. In the event the customer is unable to service the unit themselves they may
elect, at their expense, to completely sanitize the unit an return it to BioLet Toilet Systems for repair. Any unit receive by BioLet Toilet Systems
for service that is not sanitize will be refuse an returne at the customer’s expense. No unit may be returne to BioLet Toilet Systems for repair
without an authorize Return Material Authorization (RMA). Any returns receive without a proper Return Material Authorization (RMA) will be
refuse an returne at the customer’s expense. This warranty exten s to the replacement of efective parts only; any a itional costs are the
responsibility of the customer.
Limited Lifetime Body Warranty:
In a ition to the Limite Lifetime Parts Warranty escribe above, BioLet Toilet Systems will replace unit bo y parts (top, seat, base, an tray
oor), which are efective in material or workmanship ue to normal noncommercial use in accor ance with the owner’s manual supplie by BioLet
Toilet Systems for the lifetime of the original owner. In the event the exact replacement part is not available BioLet Toilet Systems will supply the
customer with mo ifiable parts or issue a cre it equal to the value of the part to be e ucte from the purchase of a new unit.
Exclusions and Exceptions of Incidental or Consequential Damage:
Neither the manufacturer, its agents, or ealers accept responsibility, legal or otherwise for inci ental or consequential amage to property or
persons resulting from the use of its pro ucts.
Some areas o not allow the above, so this exclusion may not apply.
This warranty gives you specific legal rights an you may have other rights which may vary from area to area.
This warranty is in lieu of all other warranties either expresse or implie an no person is authorize to enlarge our warranty responsibility, which
is limite to the terms of this certificate. The company reserves the right to change, improve or mo ify its pro ucts without obligation to install these
improvements on equipment previously manufacture .

11
BTS 33 Warrant Registration
To vali ate your warranty an help us serve you better please fill out an return this registration car . Un er NO
circumstances will BioLet Toilet Systems ever sell or give away this information. You will not receive mailings, telephone
calls or email unless you in icate below that you woul like to receive perio ic information on up ates an specials.
Date Purchase :
Purchase From:
A ress:
City: State: Zip:
Mo el:
Serial #:
Owner’s Name:
A ress:
City: State: Zip:
Phone:
Email:
I woul like to receive perio ic mailings or emails about pro uct up ates an specials from BioLet Toilet Systems.
A ress of Installation:
City: State: Zip:
Number of floors in buil ing where installe ? Installe on which floor?
Type of vent installation?
Straight up
Angle insi e
Angle through the wall
Other
I woul like to participate in a 10 minute customer survey an receive a coupon for $10 off a bag of starter mulch.
I woul like to receive a free bag of starter mulch. I am sen ing you pictures of my installation an a brief letter about
my buying an installation experience. I un erstan that all pictures will become the property of BioLet Toilet Systems
an give my permission for BioLet Toilet Systems, Inc. to use my pictures an letter for the purposes of a vertising
an referral.
Signature: Date:

12
Fold Here
Business Reply Mail
Affix
Postage
BioLet Toilet Systems
830 West State Street
Newcomerstown, OH 43832
USA
Table of contents
Other Biolet Toilet manuals
Popular Toilet manuals by other brands
DURAVIT
DURAVIT SensoWash Starck f Plus operating instructions

GREEN LOO
GREEN LOO CF 4 manual
Ferguson Enterprises
Ferguson Enterprises PROFLO PF9002SWH installation instructions
Kohler
Kohler REACH K-3991T-HC installation instructions
Thetford
Thetford Porta Potti 565e owner's manual
Zoeller
Zoeller QWIK JON PREMIER 201 Quick reference guide
