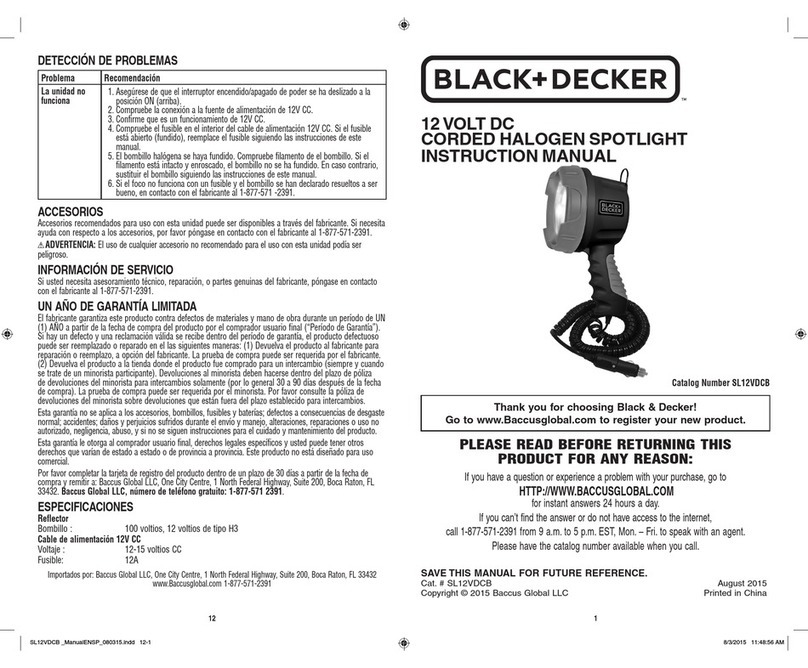
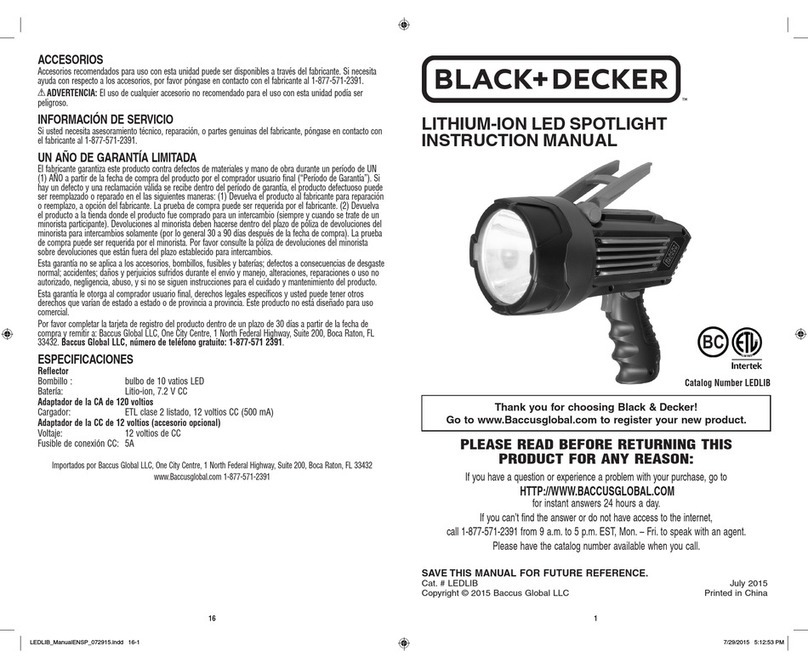
BLACK DECKER 1,000,000 POWER SERIES User manual

116
(por lo general 30 a 90 días después de la fecha de compra). La prueba de compra puede ser requerida
por el minorista. Por favor consulte la póliza de devoluciones del minorista sobre devoluciones que están
fuera del plazo establecido para intercambios.
Esta garantía no se aplica a los accesorios, bombillos, fusibles y baterías; defectos a consecuencias de desgaste
normal; accidentes; daños y perjuicios sufridos durante el envío y manejo, alteraciones, reparaciones o uso no
autorizado, negligencia, abuso, y si no se siguen instrucciones para el cuidado y mantenimiento del producto.
Esta garantía le otorga al comprador usuario final, derechos legales específicos y usted puede tener otros derechos
que varían de estado a estado o de provincia a provincia. Este producto no está diseñado para uso comercial.
Por favor completar la tarjeta de registro del producto dentro de un plazo de 30 días a partir de la fecha de
compra y remitir a: Baccus Global LLC, One City Centre, 1 North Federal Highway, Suite 200, Boca Raton, FL
33432.
Baccus Global LLC, número de teléfono gratuito: 1-877-571 2391
.
ESPECIFICACIONES
Bombillo para reflector: 6 voltios y 75 vatios de tipo H3
Batería: Ácido de plomo sellado, 6 voltios, 4.5 amperios por hora
No requiere mantenimiento
Cargador CA: 120VCA, 60Hz, 7 vatios
Importados por: Baccus Global LLC, One City Centre, 1 North Federal Highway, Suite 200, Boca Raton, FL 33432
www.Baccusglobal.com 1-877-571-2391
1,000,000 POWER SERIES™ SPOTLIGHT
INSTRUCTION MANUAL
Catalog Numbers VEC157BD / VEC157BDC
SAVE THIS MANUAL FOR FUTURE REFERENCE.
Cat. # VEC157BD / VEC157BDC January 2016
Copyright © 2016 Baccus Global LLC Printed in China
Thank you for choosing Black & Decker!
Go to www.Baccusglobal.com to register your new product.
PLEASE READ BEFORE RETURNING THIS
PRODUCT FOR ANY REASON:
If you have a question or experience a problem with your purchase, go to
HTTP://WWW.BACCUSGLOBAL.COM
for instant answers 24 hours a day.
If you can’t find the answer or do not have access to the internet,
call 1-877-571-2391 from 9 a.m. to 5 p.m. EST, Mon. – Fri. to speak with an agent.
Please have the catalog number available when you call.
BC
VEC157BD_VEC157BDC_ManualENSP_012216.indd 16-1 1/22/2016 10:47:57 AM

2 3
This device complies with part 15 of the FCC rules. Operation is subject to the following two conditions: (1) this device
may not cause harmful interference, and (2) this device must accept any interference received, including interference
that may cause undesired operation.
This equipment has been tested and found to comply with the limits for a Class B digital device, pursuant to part 15 of
the FCC Rules. These limits are designed to provide reasonable protection against harmful interference in a residential
installation. This equipment generates, uses and can radiate radio frequency energy and, if not installed and used
in accordance with the instructions, may cause harmful interference to radio communications. However, there is no
guarantee that interference will not occur in a particular installation. If equipment does cause harmful interference to
radio or television reception, which can be determined by turning the equipment off and on, the user is encouraged to
try to correct the interference by one or more of the following measures:
• Reorient or relocate the receiving antenna.
• Increase the separation between equipment and receiver.
• Connect the equipment into an outlet on a circuit different from that to which the receiver is connected.
• Consult the dealer or an experienced radio/TV technician for help.
Changes or modifications not approved by the party responsible for compliance could void user’s authority to operate
the equipment.
SAFETY GUIDELINES / DEFINITIONS
DANGER:
Indicates an imminently hazardous situation which, if not avoided, will result in death or serious
injury.
WARNING:
Indicates a potentially hazardous situation which, if not avoided, could result in death or serious
injury.
CAUTION:
Indicates a potentially hazardous situation which, if not avoided, may result in minor or moderate
injury.
CAUTION:
Used without the safety alert symbol indicates potentially hazardous situation which, if not avoided,
may result in property damage.
RISK OF UNSAFE OPERATION.
When using tools or equipment, basic safety precautions should always be
followed to reduce the risk of personal injury. Improper operation, maintenance or modification of tools or
equipment could result in serious injury and property damage. There are certain applications for which tools
and equipment are designed. Manufacturer strongly recommends that this product NOT be modified and/or
used for any application other than for which it was designed. Read and understand all warnings and operating
instructions before using any tool or equipment.
IMPORTANT SAFETY INSTRUCTIONS
WARNING:
This product or its power cord contains lead, a chemical known to the State of California to
cause cancer and birth defect or other reproductive harm. Wash hands after handling.
GENERAL SAFETY WARNINGS AND INSTRUCTIONS
READ ALL INSTRUCTIONS
WARNING:
Read all instructions before operating product. Failure to follow all instructions listed below may
result in electric shock, fire and/or serious injury.
WARNING – TO REDUCE THE RISK OF FIRE, ELECTRIC SHOCK, EXPOSURE TO EXCESSIVE UV
RADIATION, OR INJURY TO PERSONS:
•
Lighted lamp is HOT.
•Turn off/unplug and allow to cool before replacing the Halogen bulb.
•Halogen bulb gets HOT quickly!
•Do not touch the bulb at any time when operating.
•Only contact switch/plug when turning on.
•Do not touch hot lens or enclosure.
•Do not remain in light if skin feels warm.
•Use only with a 6 volt/75 watt or smaller halogen bulb.
•When changing bulb, use a soft cloth. Oil from skin may damage bulb.
•Do not operate the spotlight with a missing or damaged lens or enclosure.
WARNING – WHEN USING ELECTRICAL APPLIANCES, BASIC PRECAUTIONS SHOULD ALWAYS BE
FOLLOWED, INCLUDING THE FOLLOWING:
•To reduce the risk of injury, close supervision is necessary when the spotlight is used near children.
•Use only attachments recommended or sold by the manufacturer.
WARNING: TO REDUCE THE RISK OF ELECTRIC SHOCK:
•Charge indoors only.
•Do not put the spotlight in water or other liquid. Do not place or store the spotlight where it can fall or be
pulled into water or become wet.
•Do not clean this appliance with a water spray or the like.
•Use only the charger supplied by the manufacturer to recharge.
•When an extension cord is used:
– The marked rating of the detachable power supply cord or extension cord should be at least as great as the
electrical rating of this appliance.
– The cord should be arranged so that it will not drape over the countertop or tabletop where it can be tripped
over, snagged, or pulled on unintentionally (especially by children).
– The extension cord should be kept dry and off the ground.
– Make sure your extension cord is in good condition. When using an extension cord, be sure to use one
heavy enough to carry the current your product will draw. An undersized cord will cause a drop in line
voltage resulting in loss of power and overheating. The following table shows the correct size to use
depending on cord length and nameplate ampere rating. If in doubt, use the next heavier gage. The smaller
the gage number, the heavier the cord.
– When tool is used outdoors, use only extension cords intended for use outdoors and so marked.
MINIMUM GAGE FOR CORD SETS
Volts Total Length of Cord in Feet
120V 0-25 26-50 51-100 101-150
(0-7.6m) (7.6-15.2m) (15.2-30.4m) (30.4-45.7m)
240V 0-50 51-100 101-200 201-300
(0-15.2m) (15.2-30.4m) (30.4-60.9m) (60.9-91.4m)
Ampere Rating Extension Cord Length
More Not more 0’-25’ 26’-50’ 51 ’-100 ’ 101’ -150 ’
Than Than American Wire Gage (AWG)
0 - 6 18 16 16 14
6 - 10 18 16 14 12
10 - 12 16 16 14 12
12 - 16 14 12 Not Recommended
WARNING: FIRE HAZARD:
Never contact combustible material to the lens and never tape or tie the switch
in the on position.
CAUTION: TO REDUCE THE RISK OF INJURY OR PROPERTY DAMAGE:
•All halogen lights give off heat:
– Do not touch lens while operating.
– Keep combustibles away from spotlight lens. Extreme heat can cause fires.
– Never place the light face down on any surface when lit, charging or not in use. Never store the light face
down on any surface.
•Never look directly into the light or shine the light into another person’s eyes.
•Keep sharp objects away from lens — it is glass and can break.
•Do not immerse spotlight in water.
•Do not expose this unit to extremely high temperatures.
•Do not drop or throw spotlight. It contains glass and a sealed lead acid battery.
•Use only with AC charger provided with unit. Plug in the extension cord to the spotlight first, then plug into the
power source.
•After charging/recharging, disconnect the extension cord and wait 5 minutes before use.
•Do not crush, cut, pull or expose the extension cord to extreme heat.
•Position charging cords so they do not become entangled or become a safety hazard. Keep charging cords away
from sharp edges.
VEC157BD_VEC157BDC_ManualENSP_012216.indd 2-3 1/22/2016 10:47:57 AM

4 5
•Use in a dry location only.
•Except for the bulb, there are no user-serviceable parts inside. Do not attempt to disassemble any other parts
of the unit.
•To reduce risk of damage to electric plug and cord, pull by plug rather than cord when disconnecting.
•Do not attempt to charge the unit if the 120 volt AC charger plug is damaged – return the unit to manufacturer
for repair.
SAVE THESE INSTRUCTIONS
INTRODUCTION
Thank you for choosing the Black & Decker
®
Rechargeable Spotlight. Please read this guide carefully
before use to ensure optimum performance and to avoid damage to the unit.
FEATURES
ON/OFF TRIGGER
RUBBER BEZEL
LED AREA LIGHTS
AREA LIGHT
ON/OFF BUTTON
BUILT-IN 120 VOLT AC
CHARGER (BACK OF UNIT)
BATTERY STATUS LED
INDICATOR
TRIGGER LOCK
QUARTZ HALOGEN BULB
EASY GRIP HANDLE
PISTOL GRIP HANDLE
CHARGING/RECHARGING THE LIGHT
This unit is shipped in a partially charged state. Charge unit after purchase and BEFORE first use using
the 120 volt AC charger until the green Battery Status LED Indicator LED lights (approximately 10
hours). Charge after each use.
IMPORTANT: When the unit is not in use, we recommend that the battery is charged at least every 30
days.
CAUTION: TO REDUCE THE RISK OF PROPERTY DAMAGE:
•Never place the light face down on any surface when charging.
•Failure to keep the battery charged will cause permanent damage and result in poor performance.
Charging/Recharging Using the 120 Volt AC Charger and a Standard Household
Extension Cord (not included)
BUILT-IN 120V AC
CHARGER
BATTERY STATUS LED
INDICATORS
HOUSEHOLD EXTENSION CORD
(NOT INCLUDED)
•Make sure the Spotlight is OFF (the Trigger Lock is in the OFF position and the Trigger is not depressed).
•Lift the AC charger cover located at the back of the unit and connect a standard North American 120 volt AC
extension cord to the 120 Volt AC Charger. Plug the other end of the cord into a standard 120-volt AC wall
outlet.
•Charge for one additional hour after the green Charge Status LED Indicator lights (approximately 10 hours).
OPERATING INSTRUCTIONS
Operating the Spotlight
TRIGGER
TRIGGER LOCK
1. Disconnect from charger.
2. The ON/OFF trigger is located in the front of the pistol-grip handle of the spotlight.
3. To turn the spotlight ON, squeeze the trigger.
4. To turn OFF the spotlight, release the trigger.
Note:
The ON/OFF trigger can be locked in the ON position using the trigger lock ON switch on the side of the unit.
Operating the LED Area Lights
The ON/OFF pushbutton for the LED Area Lights is located on the top of the Spotlight.
IMPORTANT:
The Battery Status LED Indicators will not light when the spotlight is turned on. The Battery
Status LED Indicators will light when the LED Area Lights are operated. (When all three battery status LEDs
light, it indicates a full battery. Only one red battery status indicator light indicates that the unit needs to be
recharged.)
CARE AND MAINTENANCE
All batteries lose charge with time, especially when they are warm. Recharge the unit every 30 days
when not in frequent use, preferably using the 120 volt AC method.
Never submerge the unit in water. If the unit gets dirty, gently clean the outer surfaces of the spotlight unit with a
soft cloth moistened with a mild solution of water and detergent.
The quartz halogen bulb is the only user-replaceable part in the Spotlight. Periodically inspect the condition of
cords, connectors and wires. Contact Technical Support toll-free at 1-877-571-2391 to replace any components
that have become worn or broken.
Spotlight Bulb Replacement
IMPORTANT: Before proceeding with bulb replacement, check the filament to determine if the bulb needs
to be replaced.
To replace the bulb, you will need a small Phillips screwdriver and a 6 volt H3 75 watt replacement bulb. During
installation, avoid touching the glass part of the bulb. Bulb life may be shortened by installing a bulb with dirt or
fingerprints on it. The bulb can be wiped clean with a cloth moistened with alcohol.
RETAINING RING RUBBER
“O” RING
REFLECTOR
RUBBER
END CAP
RUBBER BEZEL COVER
TRIGGER
(OFF) LOCK
TRIGGER
SWITCH
QUARTZ HALOGEN
BULB
VEC157BD_VEC157BDC_ManualENSP_012216.indd 4-5 1/22/2016 10:47:58 AM

6 7
BULB
REFLECTOR
HAIRPIN RETAINING
WIRES
PHILLIPS
HEAD
SCREWS
1. Disconnect the unit from any charging cords; and lock the trigger in the OFF position.
2. Push the rubber bezel forward toward the front of the spotlight to reveal two small Phillips screws in the
retaining ring.
3. Using the screwdriver, remove (counterclockwise) the two screws. Set them aside.
4. Lift off the retaining ring, glass lens and rubber “O” ring and set them aside.
5. Carefully remove the reflector and bulb assembly.
6. Disconnect the bulb wire from the red power wire.
7. Unsnap the hairpin retaining wires from the reflector’s flange.
8. Using the screwdriver, loosen the retaining screw to remove the bulb from the reflector (no need to
completely remove this screw).
9. Lift out the bulb and detach wire.
10. Insert the replacement bulb into the reflector’s flange.
11. Put back and secure the hairpin retaining wires.
12. Connect the bulb power wire to the red power wire.
13. Tighten the retaining screw on the flange.
14. Place the reflector in position in the body of the spotlight.
15. Replace the rubber “O” ring in the groove around the perimeter of the reflector.
16. Replace glass and retaining ring so the screw holes are aligned.
17. Secure retaining ring with two screws.
18. Replace rubber bezel.
19. Operate switch to ensure proper operation of spotlight.
WARNING: To reduce the risk of electric shock, replace bulb with 6 volt H3 75 watt only.
Battery replacement/disposal
BATTERY REPLACEMENT
The battery should last the service life of the unit. Service life is dependent on a number of factors
including but not limited to the number of recharge cycles, and proper care and maintenance of the
battery by the end user. Contact manufacturer for any information you may need.
SAFE BATTERY DISPOSAL
Contains a maintenance-free, sealed, non-spillable, lead acid battery, which must be disposed
of properly. Recycling is required. Failure to comply with local, state and federal regulations
can result in fines, or imprisonment.
Please recycle.
WARNINGS:
•Do not dispose of the battery in fire as this may result in an explosion.
•Before disposing of the battery, protect exposed terminals with heavy-duty electrical tape to prevent shorting
(shorting can result in injury or fire).
•Do not expose battery to fire or intense heat as it may explode.
TROUBLESHOOTING
Problem Recommendation
No Battery Status Indicator
LEDs Light When Charging 1. Check connection to the 120 Volt AC Charger.
2. Check connection to AC power source.
3. Confirm there is a functioning AC current.
Unit Will Not Operate 1. If you suspect the bulb is blown, check the filament. If the filament
is coiled and unbroken, the bulb is not blown. If bulb is blown,
replace it.
2. The battery may be completely discharged. Charge the unit following the
directions in this manual.
3. If the Spotlight does not operate after recharging as directed, contact
Technical Support toll-free at 1-877-571-2391.
ACCESSORIES
Recommended accessories for use with this unit may be available from the manufacturer. If you need
assistance regarding accessories, please contact manufacturer at 1-877-571-2391.
WARNING:
The use of any accessory not recommended for use with this appliance could be hazardous.
SERVICE INFORMATION
Whether you need technical advice, repair, or genuine factory replacement parts, contact the
manufacturer at 877-571-2391.
ONE-YEAR LIMITED WARRANTY
The manufacturer warrants this product against defects in materials and workmanship for a period of ONE (1)
YEAR from the date of retail purchase by the original end-user purchaser (“Warranty Period”).
If there is a defect and a valid claim is received within the Warranty Period, the defective product can be
replaced or repaired in the following ways: (1) Return the product to the manufacturer for repair or replacement
at manufacturer’s option. Proof of purchase may be required by manufacturer. (2) Return the product to the
retailer where product was purchased for an exchange (provided that the store is a participating retailer).
Returns to retailer should be made within the time period of the retailer’s return policy for exchanges only
(usually 30 to 90 days after the sale). Proof of purchase may be required. Please check with the retailer for their
specific return policy regarding returns that are beyond the time set for exchanges.
This warranty does not apply to accessories, bulbs, fuses and batteries; defects resulting from normal wear and
tear, accidents; damages sustained during shipping; alterations; unauthorized use or repair; neglect, misuse,
abuse; and failure to follow instructions for care and maintenance for the product.
This warranty gives you, the original retail purchaser, specific legal rights and you may have other rights which
vary from state to state or province to province. This product is not intended for commercial use.
Please complete the Product Registration Card and return within 30 days from purchase of the product to:
Baccus Global LLC, One City Centre, 1 North Federal Highway, Suite 200, Boca Raton, FL 33432.
Baccus
Global LLC, toll-free number: 1-877-571-2391.
SPECIFICATIONS
Spotlight Bulb: 6 volt, H3 series, 75 watt
Battery: Maintenance-free, sealed lead acid,
6 volt, 4.5 amp hour
AC Charger: 120VAC, 60Hz, 7W
Imported by: Baccus Global LLC, One City Centre, 1 North Federal Highway, Suite 200, Boca Raton, FL 33432
(877) 571-2391 www.Baccusglobal.com
VEC157BD_VEC157BDC_ManualENSP_012216.indd 6-7 1/22/2016 10:47:58 AM

98
MANUAL DE INSTRUCCIONES DEL
LINTERNA LED IMPERMEABLE
Números de catálogo VEC157BD / VEC157BDC
CONSERVE ESTE MANUAL PARA FUTURAS CONSULTAS.
Cat. # VEC157BD / VEC157BDC Enero 2016
Derechos Reservados © 2016 Baccus Global LLC Impreso en China
¡Gracias por elegir Black & Decker!
Visite www.Baccusglobal.com para registrar su nuevo producto.
LEA EL MANUAL ANTES DE DEVOLVER
ESTE PRODUCTO POR CUALQUIER MOTIVO:
Si tiene una consulta o algún inconveniente con su producto, visite
HTTP://WWW.BACCUSGLOBAL.COM
para obtener respuestas instantáneas las 24 horas del día.
Si no encuentra la respuesta o no tiene acceso al Internet, llame al 1-877-571-2391 de
Lunes a Viernes de 9 a.m. a 5 p.m. hora del este para hablar con un agente.
Cuando llame, tenga a mano el número de catálogo.
BC
VEC157BD_VEC157BDC_ManualENSP_012216.indd 8-9 1/22/2016 10:47:58 AM

10 11
ADVERTENCIA: AL UTILIZAR APARATOS ELÉCTRICOS, SIEMPRE SIGA LAS PRECAUCIONES
BÁSICAS, INCLUYENDO LO SIGUIENTE:
•Reducir el riesgo de lesión, la supervisión cercana es necesaria cuando una aplicación se utiliza cerca de niños.
•Utilice solamente los accesorios recomendados o vendidos por el fabricante.
ADVERTENCIA: PARA REDUCIR EL RIESGO DE DESCARGA ELÉCTRICA:
•Cargue bajo techo solamente.
•No ponga el proyector en agua o otro líquido. No coloque ni almacene el artefacto donde puede bajar o ser tirado
en una tina o un fregadero.
•No limpie el linterna con una aspersión de agua o similares.
•Utilice solamente el cargador provisto por el fabricante a la recarga.
•Cuando se utiliza un cable de extensión:
– El calibre marcado en el cable de suministro eléctrico desmontable o el cable de extensión debe ser por lo
menos tan grande como la clasificación eléctrica del aparato.
– El cable debe acomodarse de modo que no cuelgue del mostrador o mesa donde pueda tropezar con él,
enganchado, o halar involuntariamente (especialmente los niños).
– El cable de extensión debe ser mantenido seco y fuera de la tierra.
– Asegúrese de que el cable de extensión esté en buenas condiciones. Cuando utilice un cable de extensión,
asegúrese de que tenga la capacidad para conducir la corriente que su producto exige. Un cable de menor
capacidad provocará una disminución en el voltaje de la línea, lo cual producirá una pérdida de potencia
y sobrecalentamiento. La siguiente tabla muestra la medida correcta que debe utilizar según la longitud
del cable y la capacidad nominal en amperios indicada en la placa. En caso de duda, utilice el calibre
inmediatamente superior. Cuanto menor es el número de calibre, más grueso es el cable.
– Cuando utilice la herramienta al aire libre, utilice solamente cables de extensión diseñados para su uso al aire
libre o marcados como tales.
CALIBRE MÍNIMO PARA LOS JUEGOS DE CABLES
Voltios Largo total del cable en pies
120V 0-25 26-50 51-100 101-150
(0-7.6m) (7.6-15.2m) (15.2-30.4m) (30.4-45.7m)
240V 0-50 51-100 101-200 201-300
(0-15.2m) (15.2-30.4m) (30.4-60.9m) (60.9-91.4m)
Grado del amperio Longitud de la
cable de extensión
Más No más 0’-25’ 26’-50’ 51 ’-100 ’ 101’ -150 ’
que que Calibrador de alambre Americano (AWG)
0 - 6 18 16 16 14
6 - 10 18 16 14 12
10 - 12 16 16 14 12
12 - 16 14 12 No recomendado
ADVERTENCIA: RIESGO DE INCENDIO:
Nunca entre en contacto con el material combustible a la lente y
nunca grabe o ate el interruptor en la posición de trabajo.
PRECAUCIÓN: PARA REDUCIR EL RIESGO DE LESIONES O DAÑOS A LA PROPIEDAD:
•Todas las luces halógenas emiten calor.
– No toque el lente mientras la unidad esté en uso.
– Mantenga cualquier combustible lejos del lente del reflector. El calor extremo puede ocasionar incendios.
– Nunca coloque la luz encendida hacia abajo en cualquier superficie, cargando o si no está en uso. Nunca
almacene la luz hacia abajo sobre cualquier superficie.
•Nunca mire directamente a la luz ni la apunte directamente a los ojos de otra persona.
•Mantenga los objetos afilados lejos del lente del reflector – el vidrio puede romperse.
•No sumerja el reflector en agua.
•No exponga esta unidad extremadamente a las temperaturas altas.
•No tire ni deje caer el reflector. Contiene vidrio y una batería sellada con ácido de plomo.
•Utilice solamente con el cargador de CA suministrado con la unidad. Conecte el cable de carga o cable de
extensión a la linterna en primer lugar, a continuación, en la fuente de carga.
•Después de cargar/recargar, desconecte el cable de extensión eléctrica y espere 5 minutos antes usar el
reflector.
Este dispositivo cumple con la parte 15 de las normas de la Comisión Federal de Comunicaciones de Estados Unidos
(FCC). La operación está sujeta a las dos condiciones siguientes: (1) este dispositivo no puede causar interferencia
perjudicial y (2) este mecanismo debe aceptar cualquier interferencia recibida, incluida la interferencia que puede
provocar una operación no deseada.
Este equipo ha sido probado y se encontró que cumple con los límites para dispositivo digital Clase B, según la parte 15
de las normas de la FCC. Estos límites están diseñados para brindar protección razonable contra interferencia perjudicial
en una instalación residencial. Este equipo genera, usa y puede irradiar energía en frecuencia de radio y si no se instala
y se usa de acuerdo con las instrucciones, puede provocar interferencia perjudicial en las comunicaciones de radio.
Sin embargo, no hay garantía de que la interferencia no ocurra en una instalación en particular. Si el equipo provoca
interferencia perjudicial en la recepción de radio o televisión, lo que se puede determinar al apagar y encender el equipo,
el usuario debe tratar de corregir la interferencia mediante una o más de las siguientes medidas:
• Cambiar la orientación o la ubicación de la antena de recepción.
• Aumentar la separación entre el equipo y el receptor.
• Conectar el equipo a un tomacorriente sobre un circuito diferente de aquel al que está conectado el receptor.
• Consultar al vendedor o pedir la ayuda de un técnico en radio y televisión con experiencia.
Los cambios o las modificaciones no aprobados por el partido responsable de conformidad podían anular la autoridad
del usuario para funcionar el equipo.
NORMAS DE SEGURIDAD / DEFINICIONES
PELIGRO: Indica una situación de peligro inminente que, si no se evita, provocará la muerte o lesiones graves.
ADVERTENCIA:
Indica una situación de peligro inminente que, si no se evita, provocará la muerte o lesiones
graves.
PRECAUCIÓN:
Indica una situación de peligro potencial que, si no se evita, puede provocar lesiones leves o
moderadas.
PRECAUCIÓN:
Utilizado sin el símbolo de alerta de seguridad indica una situación de peligro potencial que, si
no se evita, puede provocar daños a la propiedad.
RIESGO DE OPERACIÓN INSEGURA.
Cuando se utilizan herramientas o equipos, siempre se deben respetar
las precauciones de seguridad para reducir el riesgo de lesiones personales. La operación, el mantenimiento
o la modificación incorrectos de herramientas o equipos pueden provocar lesiones graves y daños a la
propiedad. Las herramientas y los equipos están diseñados para usos determinados. Fabricante recomienda
encarecidamente que NO se modifique este producto y que NO se utilice para ningún otro uso que aquél para
el que fue diseñado. Lea y comprenda todas las instrucciones operativas y las advertencias antes de utilizar
cualquier herramienta o equipo.
INSTRUCCIONES IMPORTANTES DE SEGURIDAD
ADVERTENCIA:
Este producto o su cable de alimentación contiene plomo, una sustancia química reconocida
por el Estado de California como causante de cáncer, defectos de nacimiento u otros problemas reproductivos.
Lávese las manos después de utilizarlo.
INSTRUCCIONES Y ADVERTENCIAS DE SEGURIDAD GENERALES
LEA TODAS LAS INSTRUCCIONES
ADVERTENCIA - REDUCIR EL RIESGO DE FUEGO, DE DESCARGA ELÉCTRICA, DE EXPOSICIÓN A LA
RADIACIÓN ULTRAVIOLETA EXCESIVA, O DE LESIÓN A LAS PERSONAS:
•
El reflector encendido se calienta.
•Apague/desenchufe y permita refrescarse antes de substituir el bombillo de halógeno.
•¡El bombillo halógena se CALIENTA rápidamente!
•No toque el bombillo en cualquier momento al funcionar.
•Entre en contacto solamente con el interruptor/el enchufe.
•No toque el lente caliente o el recinto.
•No permanezca en la luz si la piel se siente caliente.
•Utilice solamente con 6 voltios/75 vatios o un bombillo de halógeno más pequeño.
•Al cambiar el bombillo, utilice un paño suave. El aceite de la piel puede dañar el bombillo.
•No utilice el proyector con un lente o recinto dañado o que haga falta.
VEC157BD_VEC157BDC_ManualENSP_012216.indd 10-11 1/22/2016 10:47:58 AM

12 13
•No aplaste, corte, hale o exponga el cable de extensión al calor extremo.
•Coloque los cables del cuerda de carga de manera que no se enreden o se conviertan en un peligro de
seguridad. Mantenga los cables del cuerda de carga alejados de bordes afilados.
•Use la unidad en lugares secos solamente.
•A excepción de la bombilla, no hay piezas que el usuario pueda reparar. No intente desmontar ninguna otra
partes de la unidad.
•Para reducir el riesgo de daños al enchufe o al cable eléctrico, tire por el enchufe más bien que por el cable al
desconectar del cargador de CA de 120 voltios.
•No trate de cargar la unidad si el enchufe del cargador de 120 voltios CA está dañado – devuelva la unidad al
fabricante para reparación.
CONSERVE ESTAS INSTRUCCIONES
INTRODUCCIÓN
Gracias por comprar el Reflector V-2 Power Series™ de Black & Decker
®
.Antes de usarlo, por favor
lea cuidadosamente esta guía para asegurar un desempeño óptimo de la unidad y evitarle daños.
CARACTERÍSTICAS
Controles y funciones
DISPARADOR DE
ENCENDIDO/APAGADO
BORDE SALIENTE
DE GOMA
LUCES LED DEL
ÁREA
BOTÓN CON./DESC.
DEL LUCES ÁREA
CARGADOR DE CA DE 120
VOLTIOS INCORPORADO
(POSTERIOR DE LA UNIDAD)
INDICADOR LED DEL ESTADO DE
CARGA DE LA BATERÍA
CERRADURA DEL DISPARADOR
BOMBILLO DE HALÓGENO
DE CUARZO
FÁCIL DE AGARRADERO
DE LA MANIJA
ASA TIPO PISTOLA PARA AGARRAR
CARGA Y RECARGA DEL LUZ
Esta unidad se envía en un estado parcialmente cargado. Cargue esta unidad después de compra y
ANTES del primer uso usando el cargador de la CA de 120 voltios por 10 horas o hasta que se encienda
la luz LED verde del indicador de carga de la batería. Carga después de cada uso.
IMPORTANTE: Cuando la unidad no esté en uso, recomendamos cargar la batería al menos cada 30
días.
PRECAUCIÓN: PARA REDUCIR EL RIESGO DE DAÑOS A LA PROPIEDAD:
•Nunca coloque la luz hacia abajo en cualquier superficie cuando se carga.
•Si no se mantiene la batería cargada puede causar daños permanentes y resultar en un pobre rendimiento.
Carga/recarga desde una fuente de 12 voltios CC
PUERTO DE CC DE
12 VOLTIOS
CABLE DE CARGA DE 12 VOLTIOS DE CC
•Asegúrese que la linterna está apagado (la cerradura del disparador está en la posición de apagado y el
disparador no se pulsa).
•Enchufe la punta tubular metálica del cable de 12 voltios de CC al puerto de recarga de 12 Volitos CC.
•Introdusca el tomacorriente de 12 voltios al enchufe para accesorios de su vehículo o a cualquier otra fuente
de alimentación de 12 voltios.
•Carga durante una hora adicional después de que el indicador LED verde de estado de carga se ilumina
(aproximadamente de 10 horas).
Nota:
Cuando utilize el enchufe para accesorios de 12 voltios de un vehículo como fuente de carga, preste atención a que algunos vehículos
requieren que se encienda la marcha para alimentar el enchufe de accesorios.
La linterna se puede utilizar con el cargador enchufado; sin embargo, la función de carga se detendrá hasta que el interruptor de
encendido / apagado y el disparador del seguro se libera del gatillo.
ADVERTENCIA: PARA EVITAR EL RIESGO DE DAÑOS A LA PROPIEDAD:
•
NUNCA CONECTE LA UNIDAD A UN VEHÍCULO POSITIVO TIERRA.
•El cable de carga de 12 voltios de CC sólo se debe conectar a baterías con un voltaje nominal de 12 voltios. La
unidad no funcionará con una batería de 6 voltios y sufrira daños permanentes si se conecta a una batería de
24 voltios.
•
NUNCA TRATE DE USAR EL CARGADOR INCORPORADO DE 120 VOLTIOS CA Y EL PUERTO DE
12 VOLTIOS CC PARA CARGAR A LA MISMA VEZ.
INSTRUCCIONES PARA EL FUNCIONAMIENTO
Funcionamiento del proyector
DISPARADOR
CERRADURA DEL
DISPARADOR
1. Desconexión del cargador.
2. El disparador CON./DESC. está situado en el frente de la manija del pistola-apreto’n del proyector.
3. Para encender el proyector, exprima el disparador.
4. Para dar vuelta APAGADO al proyector, lance el disparador.
Nota:
El disparador CON./DESC. se puede trabar en la posición de trabajo usando la cerradura del disparador EN el interruptor en el lado de
la unidad.
IMPORTANTE:
Los indicadores LED de estado de la batería no se enciende cuando el foco está encendido. El
estado de la batería Indicadores LED se ilumina cuando las luces LED de la zona son operados. (Cuando los tres
estado de la batería LED de luz, que indica que la batería completa. Sólo un estado rojo la luz indicadora de la
batería indica que la unidad necesita ser recargada.)
Funcionamiento de la luz LED de áera
El botón de ENCENDIDO/APAGADO (ON/OFF) para las luces de área se encuentra en la parte de arriba
del reflector.
CUIDADO Y MANTENIMIENTO
Todas las baterías pierden carga con el tiempo, especialmente cuando están tibias. Recargue la unidad
cada 30 días si no la usa con frecuencia, preferiblemente por medio del método de 120 voltios CA.
No sumerja este reflector en agua. Si la unidad se ensucia, limpie las superficies exteriores con cuidado. Utilize
una tela suave humedecida con una mezcla diluida de agua y detergente.
El bombillo halógeno de cuarzo es la única parte del reflector reemplazable por el usuario. Periódicamente
inspeccione la condición de los puertos de carga, conectores y cables.
Si algun componente se ha roto o desgastado, llame gratis al departamento de Apoyo Técnico al 1-877-571-
2391 para reemplazarlo.
VEC157BD_VEC157BDC_ManualENSP_012216.indd 12-13 1/22/2016 10:47:59 AM

14 15
Reemplazo de bombillo del reflector
IMPORTANTE: Antes de proceder con el reemplazo del bombillo, revise el filamento para determinar si el
bombillo necesita ser substituido.
Para reemplazar el bombillo de 6 voltios tipo H3 de 75 vatios usted necesitará un destornillador Phillips pequeño
y un bombillo de reemplazo. Durante la instalación, evite tocar la parte de vidrio del bombillo. Las huellas
dactilares y la mugre pueden acortar su duración si se instala sucio. El bombillo puede limpiarse con una tela
humedecida en alcohol.
ANILLO “O”
DE GOMA
REFLECTOR
FUNDA
DE GOMA
POSTERIOR
GOMA PROTECTORA
CERRADURA DEL
DISPARADOR
DISPARADOR
BOMBILLO DE
HALÓGENO DE
CUARZO
ANILLO
SUJETADOR
BOMBILLO
REFLECTOR
HORQUILLA DE CABLES
SUJETADORES
TORNILLOS
DE CABEZA
PHILLIPS
1. Desconecte la unidad de cualquier cuerda de carga; y trabe el disparador en la posición de reposo
2. Empuje la goma protectora de borde saliente hacia la parte delantera del reflector para acceder a los dos
tornillos pequeños Phillips que están en el anillo sujetador.
3. Usando el destornillador, remueva los dos tornillos (contrario al sentido de las
manecillas del reloj). Colóquelos a un lado.
4. Quite el anillo sujetador, el lente de vidrio y el anillo de goma en forma de “O”
y colóquelos a un lado.
5. Retire cuidadosamente el montaje de reflector y bombillo.
6. Desconecte el cable del bombillo del cable rojo de electricidad.
7. Separe las horquillas de los cables sujetadores de la pestaña del reflector.
8. Utilizando el destornillador, afloje el tornillo sujetador para remover el bombillo
del reflector (no necesita sacar el tornillo por completo).
9. Saque el bombillo y desprenda el cable.
10. Coloque el bombillo de reemplazo en la pestaña del reflector.
11. Coloque de nuevo las horquillas de los cables sujetadores y asegúrelas.
12. Conecte el cable de electricidad del bombillo al cable rojo de electricidad.
13. Apriete el tornillo sujetador en la pestaña.
14. Coloque el reflector en su posición dentro de la unidad.
15. Coloque el anillo sujetador “O” en la ranura que está alrededor del perímetro del reflector.
16. Coloque el vidrio y el anillo sujetador de manera que los huecos de los tornillos coincidan.
17. Asegure el anillo sujetador con dos tornillos.
18. Coloque el borde saliente de goma.
19. Presione el interruptor para asegurarse que el reflector está operando adecuadamente.
ADVERTENCIA: Pare reducir el riesgo de descarga eléctricasólo reemplace con bombillos de 6
voltios y 75 vatios de tipo H3.
Reemplazo/desecho de la batería
REEMPLAZO DE LA BATERÍA
La batería debe durar la vida útil de la unidad. La vida de servicio depende en un número de factores,
incluyendo pero no limitado al número de ciclos de recarga, y el cuidado y mantenimiento adecuado de
la batería por el usuario. Comuníquese con el fabricante para cualquier información que pueda necesitar.
ELIMINACIÓN SEGURA DE LAS BATERÍAS
Contiene una batería de plomo-ácido sellada, que debe ser eliminado adecuadamente. Se
requiere reciclaje. El no cumplir con las regulaciones locales, estatales y federales puede
resultar en multas o prisión.
Por favor, recicle.
ADVERTENCIAS:
•No deseche la batería en el fuego ya que puede ocasionar una explosión.
•Antes de desechar la batería, proteja las terminales descubiertas con cinta eléctrica para trabajos pesados. De
esta manera previene cortos circuitos (los cortos circuitos pueden ocasionar lesiones e incendios).
•No exponga la batería al fuego o al calor extremo ya que puede explotar.
DETECCIÓN DE PROBLEMAS
Problema Recomendación
Durante la carga no se
enciende ninguna luz LED
en el indicador de estado de
carga de la batería
1. Verfique la conexión al cargador de 120 Voltios CA.
2. Verifique la conexión a la fuente de alimentación CA.
3. Confirme que hay corriente CA.
La unidad no funciona 1. Si sospecha que el bombillo está fundido, examine el filamento. Si
el filamento está intacto y enroscado, el bombillo no está fundido.
Si el bombillo está fundido, reemplácelo.
2. La batería puede estar descargada por completo. Cargue la unidad
siguiendo las instrucciones en este manual.
3. Si el reflector no funciona después de recargarlo como se indica, llame
gratis al departamento de Apoyo Técnico al
1-877-571-2391
.
ACCESORIOS
Accesorios recomendados para uso con esta unidad puede ser disponibles a través del fabricante. Si
necesita ayuda con respecto a los accesorios, por favor póngase en contacto con el fabricante al 1-877-
571-2391.
ADVERTENCIA:
El uso de cualquier accesorio no recomendado para el uso con esta unidad podía ser
peligroso.
INFORMACIÓN DE SERVICIO
Si usted necesita asesoramiento técnico, reparación, o partes genuinas del fabricante, póngase en
contacto con el fabricante al 1-877-571-2391.
UN AÑO DE GARANTÍA LIMITADA
El fabricante garantiza este producto contra defectos de materiales y mano de obra durante un período
de UN (1) AÑO a partir de la fecha de compra del producto por el comprador usuario final (“Período
de Garantía”). Si hay un defecto y una reclamación válida se recibe dentro del período de garantía, el
producto defectuoso puede ser reemplazado o reparado en el las siguientes maneras: (1) Devuelva el
producto al fabricante para reparación o reemplazo, a opción del fabricante. La prueba de compra puede
ser requerida por el fabricante. (2) Devuelva el producto a la tienda donde el producto fue comprado
para un intercambio (siempre y cuando se trate de un minorista participante). Devoluciones al minorista
deben hacerse dentro del plazo de póliza de devoluciones del minorista para intercambios solamente
VEC157BD_VEC157BDC_ManualENSP_012216.indd 14-15 1/22/2016 10:47:59 AM
This manual suits for next models
2
Table of contents
Languages:
Other BLACK DECKER Spotlight manuals
Popular Spotlight manuals by other brands

Philips
Philips Ledino 57903/87/16 user manual

iDance
iDance PAR 12 247 user manual

Occhio
Occhio 3d body pico Mounting instructions

Gamma Led Vision
Gamma Led Vision SPEKTRA FRESNEL 300W LED user manual

Black & Decker
Black & Decker BSL301 instruction manual

Braun
Braun 59224 Owner's manual & safety instructions

Kaufmann
Kaufmann PRO4000 Owner's manual & operating instructions

Brinkmann
Brinkmann Q-Beam 800-1700-0 owner's manual

Larson Electronics
Larson Electronics LED10W-LT user manual

Philips
Philips SmartSpot 57963/48/16 user manual

DeWalt
DeWalt XR LI-ION DCL043 instruction manual

Ozito
Ozito PXSLS-018 instruction manual