Blackbird QUADRIBENT EZ-CLASSIC Reference guide

E Z - C L A S S I C Q U A D R I B E N T C U S T O M E R I N S T R U C T I O N S A N D U S E R G U I D E
1
By Blackbird Designs Inc.
BlackbirdBikes.net
Mark 5 2017
EZ-CLASSIC QUADRIBENT
™
Customer Instructions
And User Guide

E Z - C L A S S I C Q U A D R I B E N T C U S T O M E R I N S T R U C T I O N S A N D U S E R G U I D E
2
General Rules for Safe Riding
1. Adults should supervise children at all times.
2. Always wear a CPSC approved helmet and some form of eye protection.
3. Always ride with a rear view mirror attached to your helmet or mounted to your vehicle.
4. Obey all traffic rules and regulations, signs and signals.
5. Ride on the side of the road, going in the same direction as the traffic.
6. Use proper hand signals when turning or stopping.
7. Be alert at all times, especially watch for cars pulling out into traffic and for opening doors.
8. See EZ-CLASSIC Owner’s Manual for more information: EZ- CLASSIC Riding Tips, Night Riding Tips, Wet
Weather Riding Cautions, and Fitting Your EZ- CLASSIC.
Rules for Riding Your EZ-CLASSIC Quadribent
1. DO NOT ALLOW ANYONE TO STAND OR SIT ON THE CARGO PLATFORM OR ANY
QUADRIBENT CONNECTING PARTS, OR TO RIDE ANYWHERE EXCEPT TO SIT ON THE SEAT.
2. Inspect your EZ-CLASSIC Quadribent before every ride. Make sure all nuts and bolts on the EZ- CLASSIC and
accessory Quadribent frame are securely tightened. Check your brakes by applying them and pushing the
Quadribent forward and backward to make sure they are engaging properly. Check tires for proper air pressure as
indicated on the sidewall of the tires. Make sure the quick release levers on the wheels and seat are properly closed
and secure. Make sure all of the Quadribent mounting hardware is properly installed. Check to see that the quick
release pins on the steering tie rod are properly inserted and locked. Stop vehicle and discontinue riding if any
mechanical problems arise, including but not limited to any sudden changes in: vehicle stability, steering control, or
pedaling difficulty.
3. Check and adjust your seat position/seat recline before mounting your Quadribent. Never attempt to readjust the
seat position while vehicle is in motion.
4. Always ride your Quadribent with a partner. Never ride the Quadribent “solo” for the vehicle may lose stability
in turns and can tip over resulting in serious injury.
5. Co-Captain Steering links the handlebars of both EZ- CLASSIC recumbents together allowing either rider to pilot
the Quadribent. Each rider should always keep both hands on the handlebars when the vehicle is in motion. Each
rider is responsible for steering around obstructions to avoid collisions with people or objects.
6. Remove the factory supplied “Parking Brake” red Velcro strap after mounting the vehicle. Always reinstall the
“Parking Brake” strap before exiting the vehicle.
7. As a courtesy to your riding partner and for the safe operation of the Quadribent, both riders should communicate
all non-emergency turns, braking, starts and stops before they are executed.
8. For the safety of both riders, it is recommended the vehicle be slowed to less than 10 miles per hour (mph) before
initiating any turns of 90 or more degrees.
9. The EZ- CLASSIC Quadribent is designed for use on streets and bike paths only. Off-road, off-trail, mountain
trail or open field riding is not recommended and should not be attempted.
10. The Quadribent can be separated into two recumbent bikes for “solo” riding, but unbolting/rebolting it on a
regular basis is not recommended. An optional Quick Release Kit can be ordered at initial sale or added later to
allow easy separation for riding, transporting or storage. The Quick Release pins replace several bolts and can
be installed and removed without tools.
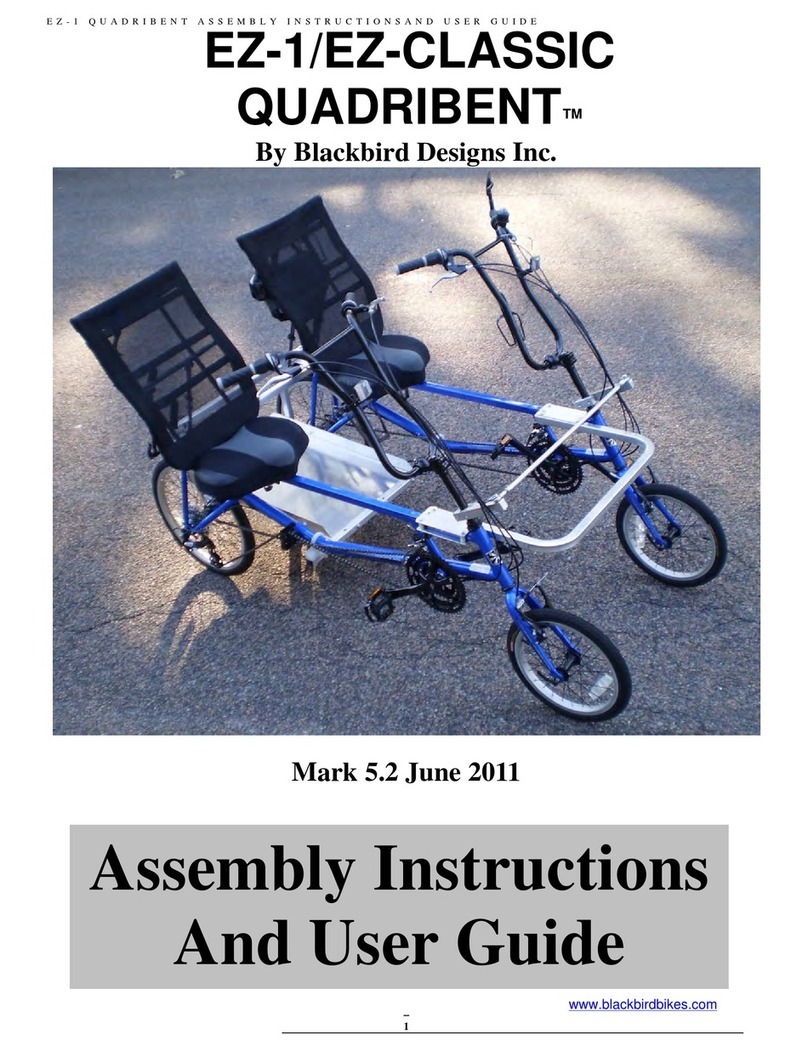
The
Quadribent
is a 2-seat, side-by-
side, human powered vehicle that enables almost anyone to enjoy cycling.
The 4-wheel design maximizes stability. The recumbent seating position maximizes comfort. Heads-up design
reduces neck, shoulder, and hand discomfort. Co-Captain steering allows either rider to pilot the vehicle. The
dual-drive allows people with different physical abilities to ride together with either rider generating from 0 to
100 percent of the pedal power. The Quadribent
makes it possible for people of different ages, sizes, and
abilities to ride together.

E Z - C L A S S I C Q U A D R I B E N T C U S T O M E R I N S T R U C T I O N S A N D U S E R G U I D E
3
Helpful Tips
The EZ-CLASSIC Quadribent™ Mark 5 is made for EZ- CLASSIC models.
The EZ-CLASSIC Quadribent is intended to be sold in a fully assembled and adjusted condition
factory direct. If bought from a bike shop they are responsible for final assembly and adjustment.
The Quadribent is manufactured to be assembled and maintained with basic hand tools:
metric wrenches, metric socket set, metric Allen wrenches, and a tape measure.
Do not modify, drill holes or mount accessories to Quadribent cross beams or frame.
For questions about the Quadribent structural assembly, contact Blackbird Designs Inc.
When replacing worn O.E.M. tires supplied with the EZ- CLASSIC, Blackbird Designs recommends
high pressure Maxxis Hookworm (110 psi max 16” front and 110 psi max 20” rear) tires. This is a
very tough tire with low rolling resistance. Check with your local bike shop for availability.
DO NOT ALLOW ANYONE TO STAND OR SIT ON ANY OF THE
QUADRIBENT CONNECTING PARTS. SIT ONLY ON EITHER OF THE 2
BIKE SEATS OR UP TO 150 POUND PERSON ON AN OPTIONAL JUMP
SEAT ATTACHED TO THE REAR CARGO FRAME/TAILSTAND.
FOR TECHNICAL SUPPORT:
BlackbirdBikes a division of Blackbird Designs Inc.
Jim Black, President
12721 Apple View Lane
Burnsville, MN 55337
Phone: (612) 991-0078
http://www.Blackbirdbikes.net
Email:
jim @blackbirdbikes.com

E Z - C L A S S I C Q U A D R I B E N T C U S T O M E R I N S T R U C T I O N S A N D U S E R G U I D E
4
1) Red Velcro “Parking Brake” (included) - Install
on either of the ‘drivers’ brake levers (Figure 1).
Apply brake, wrap it around, fuzzyside out,
through the loop and attach it to itself. The parking
brake is intended to keep the Quadribent from
rolling on relatively flat ground, when not in use.
Never park facing uphill or downhill.
FRONT END WHEEL ALIGNMENT
2) Check front-end wheel alignment by measuring
the distance between the front rims of the two
bikes (Figures 2, 3 & 4). (Tape measure included)
Two measurements are required: axle height on
the leading edge of the front rims; axle height on
the trailing edge of the front rims. These
measurements should be approximately 1/8” –1/4”
smaller leading edge measurement than the trailing
edge. This is commonlycalled “toe-in.”
5) If the two measurements show the front wheels
are out of alignment, loosen the two Allen screws
of the steering lever with the ‘Z’ wrench (included)
and rotate it as needed. Then remeasure.
After adjusting the steering levers, retighten the
screws and visually check that they are about the
same angle outboard, with the two front wheels
straight.
Wheel alignment should be checked regularly,
before & after a longride, and after riding on
rough roads.
Figure 1
Figure 2
Figure 1
Figure 4
Figure 3

E Z - C L A S S I C Q U A D R I B E N T C U S T O M E R I N S T R U C T I O N S U S E R G U I D E
5
QUICK RELEASE PINS FOR QUADRIBENT
Removable steering tie rod, removable front beam.
Pins through top rear beam.
Large pin through lower beam.
Install lower beam first to connect and
remove last to disconnect.
Pin through cargo platform.

E Z - C L A S S I C Q U A D R I B E N T C U S T O M E R I N S T R U C T I O N S U S E R G U I D E
6
6) TALL RIDER bracket. If the inboard seatback
stay is blocked bythe Quad frame when the seat is
pushed all the way back, and you need more seat
adjustment, then add the bracket to the Quad
frame. The staywill need to be bolted M6-18MM
to the bracket (Figure 6).
7) An OPTIONAL Seat Belt can be installed on
the seat back, low across the lap. A second seat
belt can be installed higher across chest or the two
belts may be crisscrossed at the chest. (Figure7).
SPECIAL NEEDS CUSTOMIZATION
Toe clips can be added to the pedals to secure feet
to the pedals. An extra Velcro strap can be added
to go around the heel to keep the foot from
slipping to the back. Contact Blackbird Designs
for the latest in accessories for people with
“special-needs.”
Figure 6
Figure 7
Table of contents
Other Blackbird Bicycle manuals
