Blakeslee D-18 Parts list manual

COD.: 3050E
Ed. 02 - 05/2016
APPLICARE ETICHETTA
MATRICOLA
Istruzioni per l'installazione, l'uso e la
manutenzione
IT
Instructions for Installation, Use and
Maintenance
HOOD-TYPE
D-18
USA


Thank you for choosing our appliance.
The installation, use and maintenance instructions given in this manual have been prepared
to ensure the long life and correct operation of your appliance.
Follow these instructions carefully.
We have designed and manufactured this appliance according to the latest technological
developments. Now, it is in your care.
Your satisfaction is our greatest reward.

USA
page 19
TRANSLATION OF THE ORIGINAL INSTRUCTION
WARNING: FAILURE TO COMPLY (EVEN PARTIALLY) WITH THE RULES GIVEN IN THIS MANUAL
WILL INVALIDATE THE PRODUCT WARRANTY AND RELIEVES THE MANUFACTURER OF ANY
RESPONSIBILITY.
READ THE INSTRUCTIONS CAREFULLY BEFORE INSTALLING THE MACHINE.
SUMMARY Page
IMPORTANT INFORMATION 20
1. SERIAL NUMBER DATA 22
INSTALLER SECTION
2. MACHINE INSTALLATION 23
2.1 Receiving the machine 23
2.2 Water connections 23
2.3 Electrical connection 24
2.4 Temperature adjustment 24
2.5 Rinse aid dispenser operation 24
3. DETERGENT DISPENSER INSTALLATION 26
3.1 Electrical connection 26
3.2 Water connection 26
3.3 Dispensing the detergent 26
4. TECHNICAL DATA AND USEFUL INFORMATION ON PUMPS 26
4.1 Drain pump (optional) 26
USER SECTION
5. CONTROL PANEL AND RELATIVE SYMBOLS 27
6. OPERATION 27
6.1 Cutlery and crockery loading 27
6.2 Detergent use 28
6.3 Rinse aid use 28
6.4 Compliance with hygiene regulations, H.A.C.C.P. and NSF 29
6.5 Drain pump (optional) 29
7. MAINTENANCE 29
7.1 Routine maintenance 29
7.2 Extraordinary maintenance 29
8. THE ENVIRONMENT 30
8.1 Packing 30
8.2 Disposal 30
9. ECOLOGICAL ASPECTS 30
9.1 Recommendations for optimal use of energy, water and additives 30
10.TROUBLESHOOTING 31

USA
page 20
IMPORTANT INFORMATION
Always keep this instruction manual near the dishwasher for future
consultation. If the appliance is sold or transferred to another User, make
sure this manual always remains with the machine to enable the new
owner to be informed about operation of the appliance and the relative warnings.
The dishwasher shall be installed in accordance with local codes, or in the absence
of local codes, installed in accordance with the applicable requirements in the
National Electrical Code, NFPA 70, Canadian Electrical Code (CEC), Part 1, CSA
C22.1, and Standard for Ventilation Control and Fire Protection of Commercial
Cooking Operations, NFPA 96.
These warnings are provided to safeguard the user in conformity with technical
standards UL 921 and NSF.
They must be read carefully before installation and use of the dishwasher.
• Theelectricalandplumbingconnectionsforinstallingthedishwashermustonly
bemadebyqualiedandauthorizedpersonwhowillcomplywithallavailable
Federal, State, and Local Health, Electrical, Plumbing and Safety codes.
• Thisdishwashermustbeusedbyadultsonly.Thisisaprofessionalmachinetobeused
byqualiedpersonnel,andinstalledandrepairedexclusivelybyaqualiedtechnical
assistance service. The Manufacturer declines any responsibility for improper use,
maintenance or repair.
• Theapplianceisnottobeusedbychildrenorpersonswithreducedphysical,sensoryor
mentalcapabilities,orlackofexperienceandknowledge,unlesstheyhavebeengiven
supervision or instruction.
• Childrenbeingsupervisednottoplaywiththeappliance.
• Accompanythedoorinopeningandclosing.
• Makesurethedishwasherisnotrestingontheelectricalfeedcablesorthellingand
emptying pipes, otherwise adjust the feet of the appliance and make sure that it is perfectly
level.
• Donotusetheapplianceoranypartofitasastepladderormeansofsupportasithas
beendesignedexclusivelytobeartheweightofthedishrackcontainingdishestobe
washed.
• Thedishwasherisdesignedonlyand exclusivelyfor washing plates, glasses
andcrockeryingeneralwithresidualsoffoodstus.Neverwashanyunspecied
item, anything overly fragile or unable to withstand the washing process. Do not
use acidic corrosive chemical products or alkaline and solvents or chlorine based
detergents.
• Neveropenthedishwasherdoorandneverswitchitoduringoperation.Alwaysswitch
itobeforeaccessingtheinside.Thedishwasherhasasafetydevicewhichimmediately
stops it if the door is accidentally opened, preventing water spillage.
• Thismachinemustbedisconnectedfromthemainelectricalsupplyafteruseat
theendofthedayandforanyservice/maintenanceoperation.Switchothemain

USA
page 21
switch located on the wall, which shall be installed by a professional installer. Shut
the water supply valve(s). Disregarding the aforesaid prescriptions is a serious
misuse and can cause damages and injures to property an people, and will relieve
the manufacturer from whatever liability.
• Undernocircumstancesshouldtheuserattempttocarryoutrepairs.Contactaqualied
and authorized technician.
• Technical assistance for this dishwasher must only be carried out by qualied and
authorized operators.
Note: Only use original replacement parts. Otherwise the product warranty is
invalidated and the manufacturer is no longer responsible.
• Donotuseoldloadpipe,butonlynewones.
• Someimportantrulesmustbefollowedforusingthisappliance:
1) never touch the appliance with wet hands or feet
2) never use the appliance when barefoot
3)donotinstalltheapplianceinplacesexposedtowatersprays.
• Donotdipbarehandsintowatercontainingdetergent.Ifthisshouldoccur,washthem
immediately with plenty of water.
• Onlyfollowtheinstructionsgiveninthemanufacturer’sbookletforcleaningoperations
(chap. 7).
• Minimumroomtemperatureforoperationis50°F(10°C).
• Donotusewatertoputoutresonelectricalparts.
• Donotclogtheintakeordissipationgrids.
• Onlyqualiedpersonnelcanaccessthecontrolpanelafterpowerisswitchedo.
• ThemachinehasanIPX3ratingofprotectionagainstaccidentalsplashesofwater.It
is not protected against pressurized jets of water, so it is recommended that pressure
cleaning systems not be used.
NOTICE: This machine must be operated with an automatic detergent dosing pump
and, if applicable, an automatic chemical sanitizer dosing pump, including a visual
means to verify that detergents and sanitizers are delivered or a visual or audible
alarm to signal if detergents and sanitizers are not available for delivery to the
respective washing and sanitizing systems. Please see instructions for electrical
and plumbing connections located in this manual.
N.B.: The Manufacturer declines any responsible for damage or injury caused by
failure to follow the above rules.
IMPORTANT: WAIT AT LEAST 10 MINUTES AFTER THE MACHINE HAS
BEEN SWITCHED OFF BEFORE CLEANING INSIDE IT.
DO NOT INSERT HANDS AND/OR TOUCH THE PARTS AT THE BOTTOM
OF THE TANK WITH THE MACHINE ON AND/OR HOT.
USA
page 22
A Power source
B Total power installed
C Envelope protection degree
D Total electricity absorption
E Total motors power
F Electrical protection index
G Dynamic pressure
AD
E
F
G
B
C
S/N DW L 10XXXXX
ANNO
YEAR
ANNÉE
ANO
JAHR
NUMERO DI SERIE
SERIAL NUMBER
NUMÉRO DI SÉRIE
NUMERO DI SERIE
SERIENNUMMER
G=2012 - 2013
H=2013 - 2014
I=2014 - 2015
L=2015 - 2016
CODE DWXXXX
FAMIGLIA PRODOTTO
PRODUCT FAMILY
FAMILLE DU PRODUIT
FAMILIA PRODUCTO
FAMILIE DES PRODUKTES
CODE DWXXXX.YYYY
FAMIGLIA PRODOTTO
PRODUCT FAMILY
FAMILLE DU PRODUIT
FAMILIA PRODUCTO
FAMILIE DES PRODUKTES
CODICE MODELLO
MODEL CODE
CODE ARTICLE
CODIGO MODELO
KODE VON MODELL
Model S/N
Model DESCRIPTION
S/N DWL10XXXXX Type ..........
xx°C
200-500 kPa
xxxkpA
xxA
IPXX
MADE IN ITALY
ANNO PROD.: 2016
Temperatura massima acqua in ingresso
Température max eau à l'entrée
Maximum water-infeed temperature
Maximale Zulaufwassertemperatur
Pressione dinamica alimentazione idrica
Pression dynamique arrivée d'eau
Dynamic pressure water supply
Fließdruck Wasserzulauf
Pressione dinamica vapore saturo
Pression dynamique vapeur saturée
Saturated steam dynamic pressure
Dynamischer Dampfdruck
Code DWXXXX.YYYY CL/Part
xxxxW xxxW
400V 3N 50HZ xA
RoHS
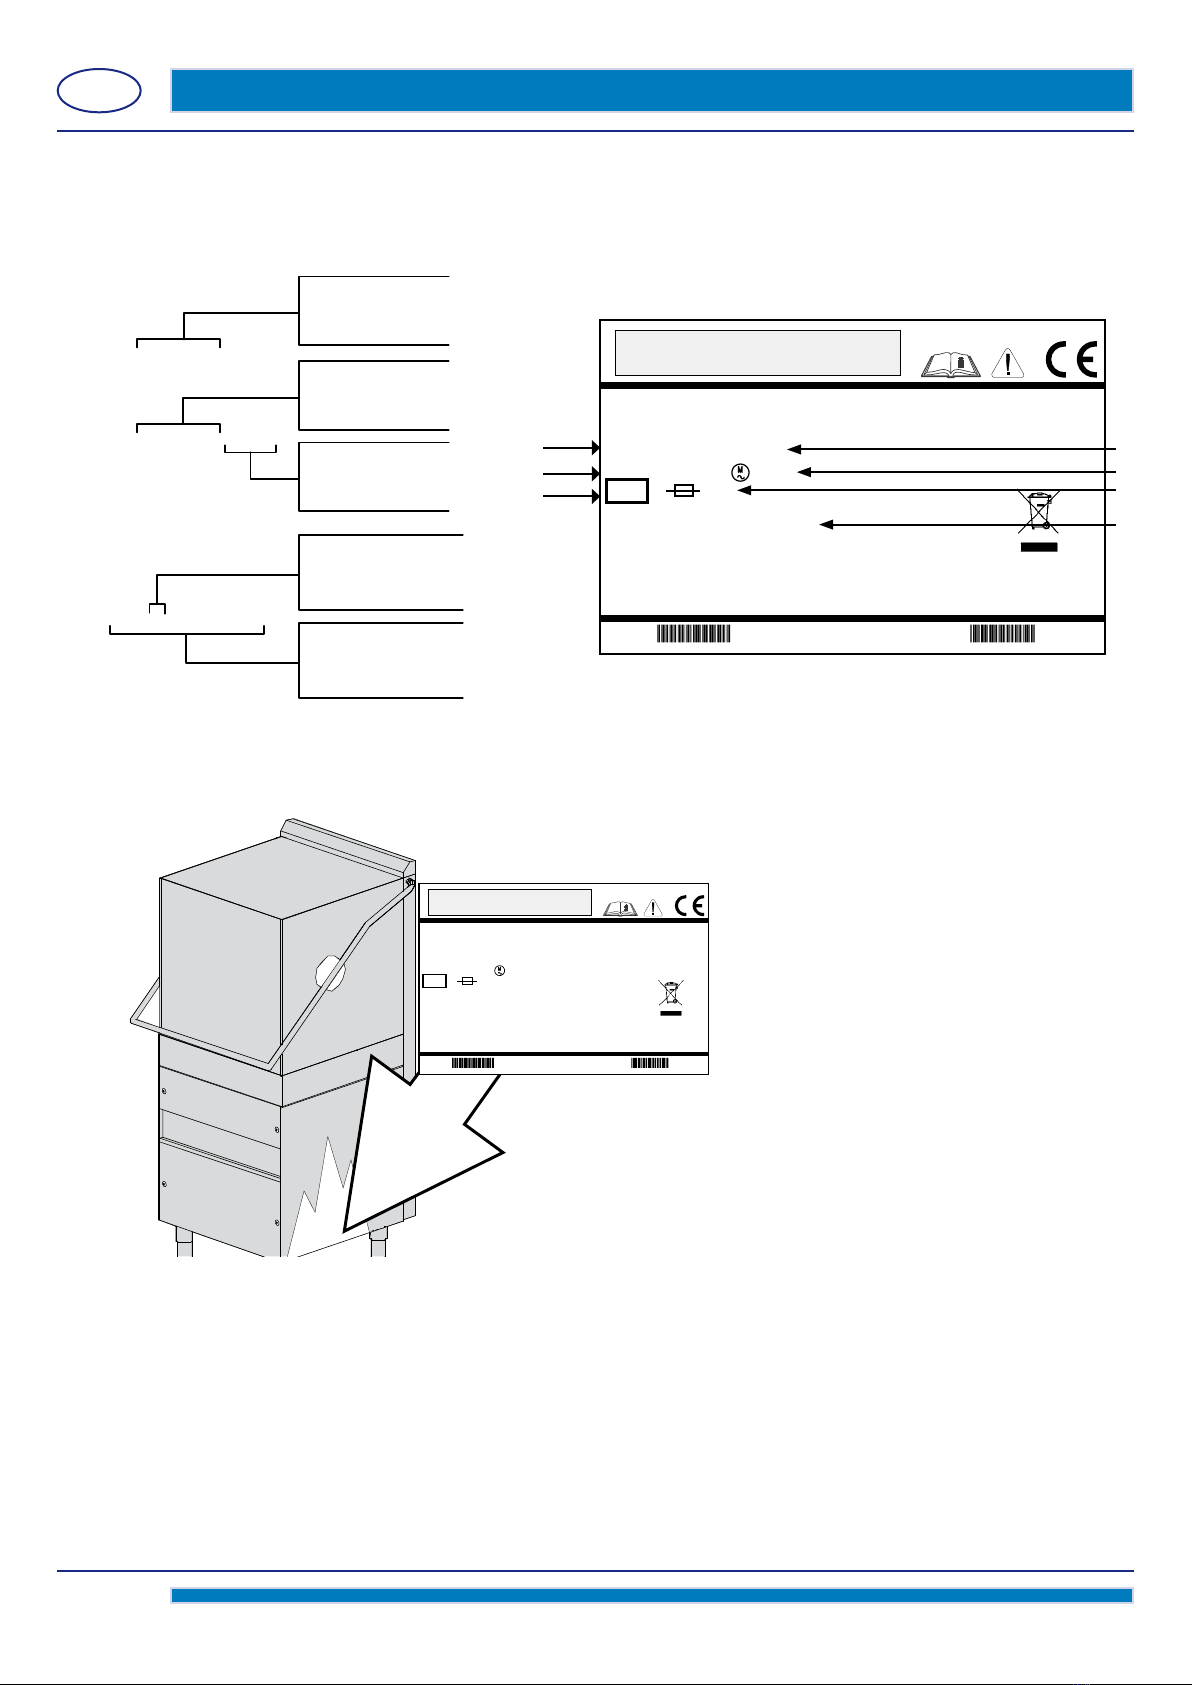
1. SERIAL NUMBER DATA
Model S/N
Model DESCRIPTION
S/N DWL10XXXXX Type ..........
xx°C
200-500 kPa
xxxkpA
xxA
IPXX
MADE IN ITALY
ANNO PROD.: 2016
Temperatura massima acqua in ingresso
Temperature max eau a l'entre
Maximale Wasseranschluss temperatur
Maximum Water temperature infeed
Pressione Dinamica alimentazione idrica
Pression dynamique arrivée d'eau
Dynamic pressure water supply
Dynamischer Druck Wassereinlauf
Pressione dinamica vapore saturo
Pression dynamique vapeur saturée
Dynamischer Druck gesattigter Dampf
Saturated steam dynamic pressure
Code DWXXXX.YYYY CL/Part
xxxxW xxxW
400V 3N 50HZ xA
RoHS
USA
page 23
INSTALLER SECTION
ATTENTION:
Attheendofinstallationmakesuretoremovethepartsofthisbookletrelevanttotheinstaller,forfutureconsultation.
2. MACHINE INSTALLATION
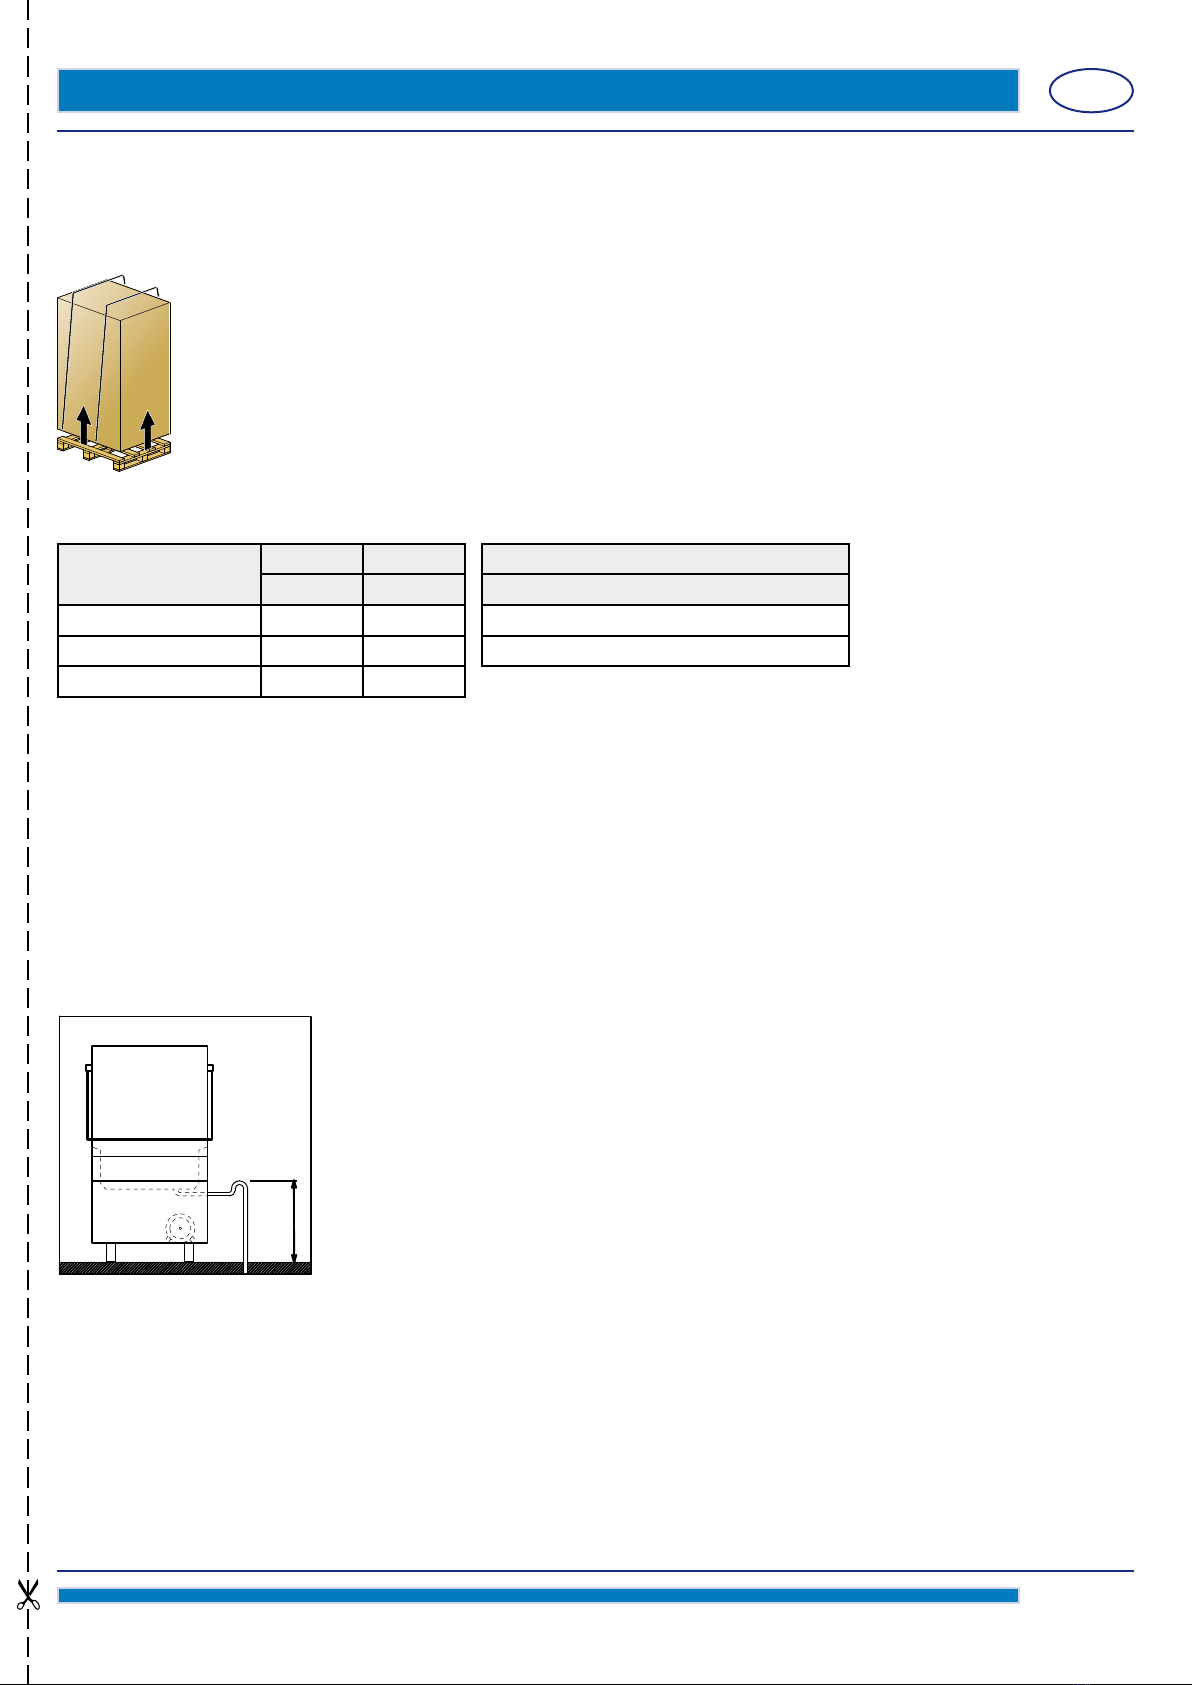
2.1 Receiving the machine
Afterunpacking,makesurethemachinehasnotbeendamagedduringtransportation.Ifso,donotifythe
sellerimmediatelyabouttheproblem.Ifthedamagemightquestionthemachinesafety,donotinstallit.
Doublecheckthermtightnessofallhose-clampsonpiping,nuts,boltsandelectricalconnection
that might have come loose during transportation, to prevent water dripping leakages, or other
damages, during the machine operation.
Seechap.8 for disposing the packing material.
2.2 Water connections
Connectthemachine'swatersupplywithaninterruptvalvecapableofquicklyandcompletelyshuttingowaterintake.
TheWatersystemmusthavecharacteristicsbetweentheparametersspeciedintable1.
Ifitislessthan30Psidynamicpressure(200kPa)apressurepumpmustbeinstalledtoguaranteeoptimalmachineoperation.
If,however,thewatersupplypressureisgreaterthan60Psi(400kPa),apressurereducingdevicemustbeinstalled.
Forwaterwithaveragehardnessgreaterthan10°f,awatersoftenermustbeused.Thiswillresultincleanerdishesand
longer life of the appliance.
Eachmachineisprovidedwitharubbertubewitha¾"threadedattachmentforwaterlling.
Itisadvisabletoconnectthehosetoawatersupplynotabove150°F(65,5°C),ifconnectedtothehotwater.
Connecttheemptyingtube,suppliedwiththeappliance,totheunionelbowlocatedunderthetubsothatwaterowsfreely.
Ifitisnotpossibletoemptythewateratalevellowerthanthedrainoftheappliance,itisadvisabletoinstallanemptying
pump, which can be provided by request.
The emptying tube should always be connected to a siphon to prevent odor back-up from the screen.
Pressure table Min. Max.
Psi (kPa) Psi (kPa)
StaticPressure 30 (200) 60(400)
DynamicPressure 30 (200) 50 (350)
Water Hardness 2°f 10°f
table 1
H2O supply temperature table
H2O Hot
140°F≤t≤150°F
60°C≤t≤65.5°C
table 2
max 19
11/16
inches
(500 mm)
pict. 1

USA
page24
INSTALLER SECTION
2.3 Electrical connection
The electrical connection must be made according to current technical standards.
Ensure that the mains voltage corresponds to the value given on the machine dataplate.
Installasuitableomnipolarthermalmagneticcircuitbreaker,dimensionedaccordingtoabsorption,withopeningcontact,
in according to current standards.
Thiscircuitbreakermustbeexclusivelyusedforthispurposeandinstalledintheimmediatevicinity.
Themachinemustbeturnedowiththisswitch.
Make sure that the electrical systems are suitably earthed.
On the back of the appliance there is a terminal marked with the symbol which is provided for equipotential connection
betweendierentappliances.Thespecialdataplategivesthemax.powervalueinwatts(W),amperes(A)andfuse,for
dimensioning of the line, cable and switches.
The dealer/importer/installer must adapt the power cable insulation class according to the work environment, in
conformitywithcurrentTechnicalStandards.
Cable characteristics: Usecoppercablesonly,correctlydimensionedfortheamperageindicatedonthemachine
andmadetooperateatminimum167°F(75°C).
Warning:someversionsofthismachinecandissipatemorethan10mAtoearth.
Ifthemachineisttedwithathree-phasepump,checkcorrectmotorrotation(directionofarrowsonthe
casing-seepict.2).Theproblemdoesnotexistifthepumpissingle-phase(standard).
2.4 Temperature adjustment
Ifnecessary,thewatertemperatureofthewashandrinsecyclescanbeadjustedbymeanstherespective
thermostats.
Therecommendedtemperaturesare160°F(71°C)forthewashcycle(tub)and185°F(85°C)forthe
rinse cycle (boiler).
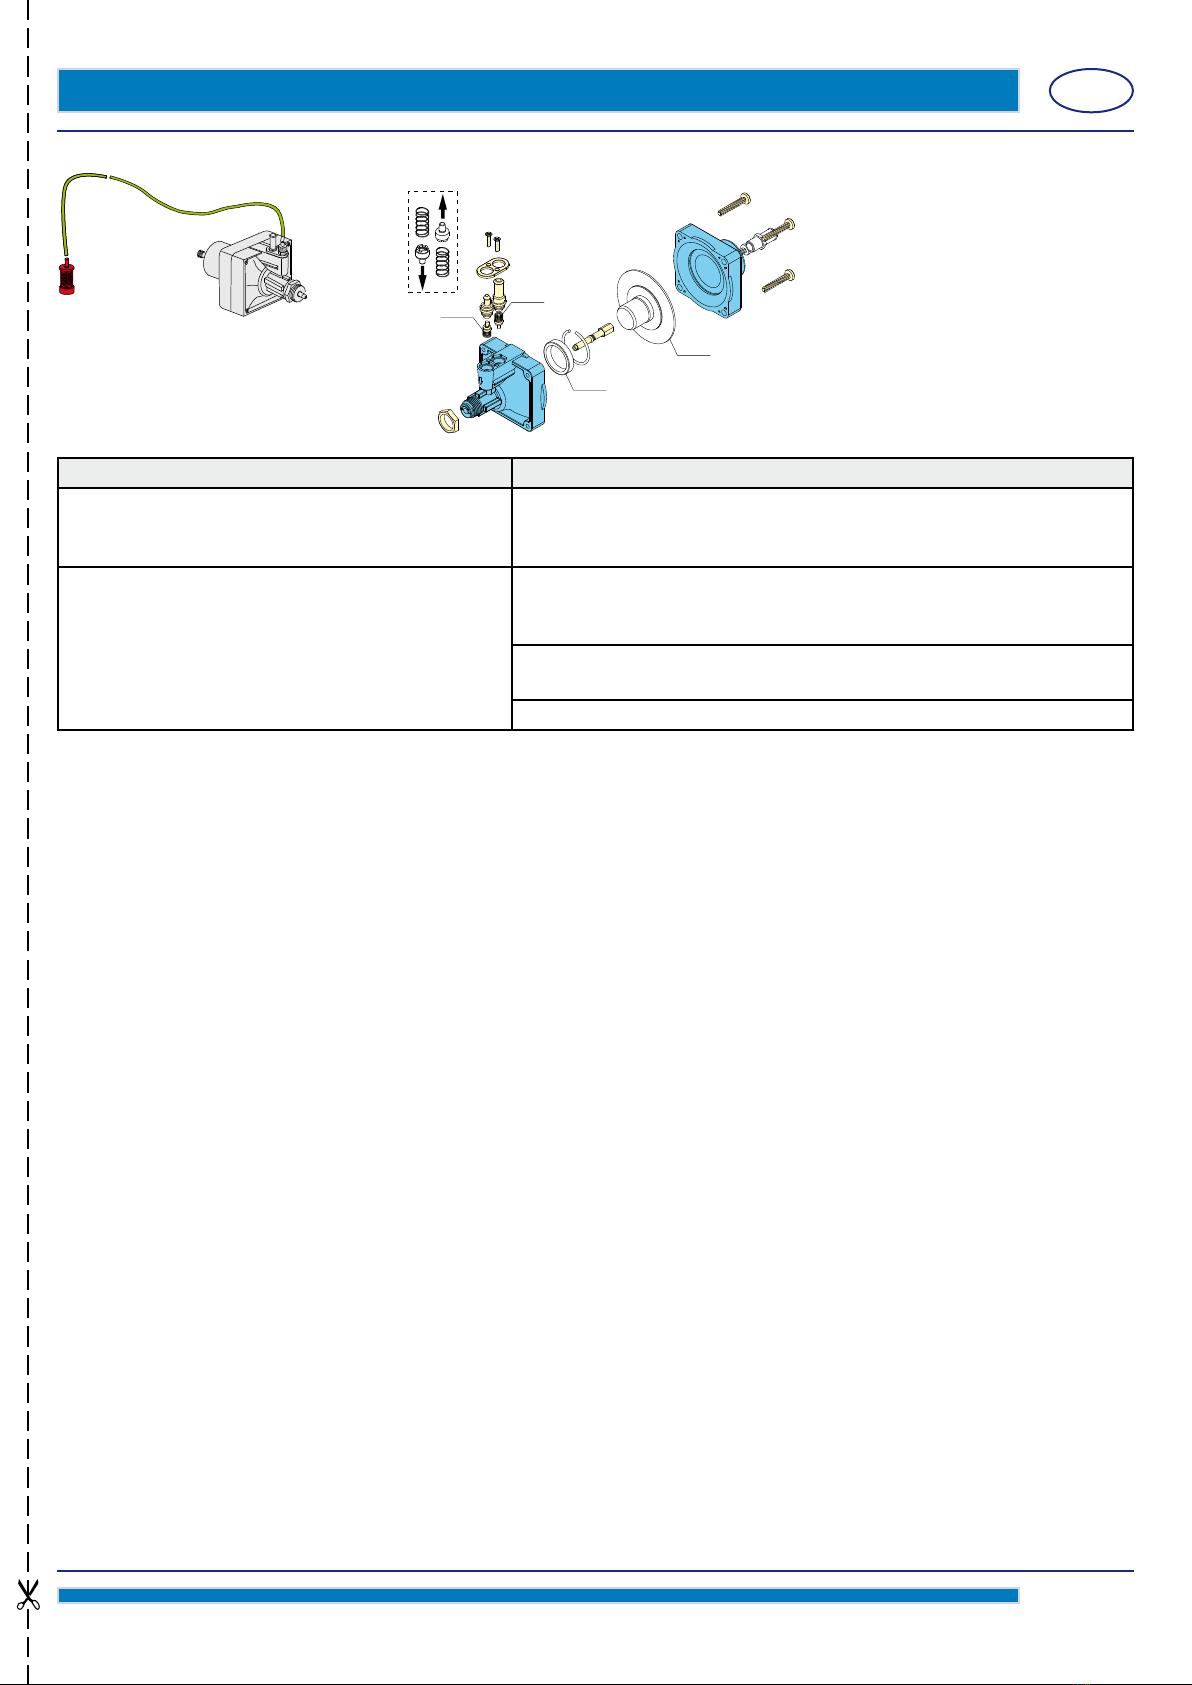
2.5 Rinse aid dispenser operation
Technical characteristics:
Operation: it utilizes the wash pump starting pressure and the water circuit pressure in the rinse phase. Min. water pressure
30Psi(200kPa).
Water connection:
1)ConnectthedispensertubettingAto the pump, by means of the rubber tube installed in the appliance (pump pressure).
2)ConnectthesmallblackrubbertubebythebrassdeliveryttingBto the connection near the boiler (injector).
3)MakesurethatthegreenproductsuctiontubeisinsertedonthespecialttingCandthatthesmalllterandtheballast
are inserted in the rinse aid tank.
Priming: To carry out priming, start the machine and carry out a few complete wash and rinse cycles. To speed up restoration
press the adjustment screw Dduring the wash cycle and open the hood; press pin Dagain and close the hood; press pin
Dagain and close the hood for a few seconds, open the hood again and press pin Dagain and close the hood. Repeat this
operationuntilthegreentubeiscompletelylled.
Adjustment: Witheveryrinsethedispenserdrawsaquantityofrinseaidadjustablefrom0to2cubicinches(from0to4
cm3), equivalent to a length of 0 to 11 inches (from 0 to 30 cm).
Min. delivery is obtained by turning the adjustment screw Dclockwisealltheway,whereasmax.deliveryisobtainedby
turningtheadjustmentscrewapprox.20turnsanticlockwise.
For the right amount of product see the paragraph Rinse aid use.
Note:foreveryturnofthescrewtheamountofrinseaiddrawninthetubevariesby5/8inches(1,6cm)equalto13/16cubic
inches/run (0,2 cm3/turn-approx0,01onces/run-0,21gr/turnwithrinseaiddensityof0,60onces/cubicinches-1,05g/cm3).
Therinseaiddispensercannotworkcorrectlyifthedierenceinlevelbetweenthebottomofthemachineandthetankis
morethan31inches(80cm).
THEDISPENSERSAREPRESETFORDRAWING2"(5cm)FOLLOWINGAFUNCTIONALCHECKDURINGTHETESTING
PHASE.THISVALUEMUSTALWAYSBEMODIFIEDACCORDINGTOTHETYPEOFRINSEAIDANDTHEHARDNESS
OFTHEWATER.
pict. 2
USA
page 25
INSTALLER SECTION
code 10799
C
D
B
A
10807
10806
10805
10805
10805
PROBLEMS CAUSES AND SOLUTIONS
Waterexitsfromtherinseaidsuctiontube Thesuctionvalves10805anddeliverydonotsealduetoforeignbodies
intheclosingseats.Cleanthevalves10805,checkthattherinseaid
suctionlterispresent,andlterthewaterenteringthedishwashwer
The dispenser does not draw rinse aid a)Thedeliveryvalve10805doesnotsealduetoforeignbodiesinthe
closingseats.Cleanthevalve10805,checkthattherinseaidsuction
lterispresentandlterthewaterenteringthedishwasher
b)Thepistonseal10806doesnotholdbecauseitisdamaged.
Replacetheseal10806withanoriginal
c)Checkthediaphragm10807

USA
page 26
INSTALLER SECTION
3. DETERGENT DISPENSER INSTALLATION
3.1 Electrical connection
Follow the wiring diagram attached to the machine.
3.2 Water connection
a)Removethecapfromtheholeandtthedeliveryconnection.
b) Correctly mount the injector Cusingtheappropriatextures.
c)Connectthesuctiontubetothesuctionattachmentofthedispenser(seepict.4-pointA).
d)Connectthedeliverytubetotheotherattachmentofthedispenser,andthedeliverytting(seepict.4
point B).
e)Insertthesuctiontubewithlterinthedetergenttank.
f)Primethedetergentandproceedtodispense.
3.3 Dispensing the detergent
The detergent dispenser capacity can be adjusted using a screwdriver as shown in picture 3.
Every 13/16 (2 cm) of product drawn into the tube corresponds to 1/64 cubic inches (0,25 cm³) equivalent to 0,01
oz (0.3 g - th a concentration of 1/16 oz/cubic inches - 1,2g/cm³). For proper dispensing see paragraph 6.2.
IMPORTANT: DO NOT INVERT THE TUBES INTHE PRODUCTS; IF THIS
OCCURS IT WOULD RUINTHE METERING PUMPSAND COMPROMISE
DISHWASHEROPERATION.
4. TECHNICAL DATA AND USEFUL INFORMATION ON PUMPS
4.1 Drain pump (optional)
When installing, pay particular attention to the position of the emptying tube (see pict. 5).
Max.drainheight <39 inches (<1mt), there must be a trap downstream of the drain.
For the electrical connection see the wiring diagram notes.
max 39 inches (1 mt)
pict. 5
g.3
A
B
C
min1"1/4
(3 cm)
PuntoB
CONNECTION DIAGRAM
pict. 4

USA
page 27
USER SECTION
5. CONTROL PANEL AND RELATIVE SYMBOLS
6. OPERATION
• Inserttheoverowpipeinthespecialseatinsidethetank.
Makesurealltheltersareproperlyttedintheirseats.Theltersmustbecleanedevery40-50washcyclesandwhenever
necessary.
Donotoperatethemachinewithoutlters,andinparticularthepumpsuctionlters.
• Openthewatervalve.
• Turnonthemainwallswitchandputtheselectoron (it is not a total disconnecting switch).
• Insertthespecialgreenrinseaiddispensertubeintheliquidrinseaidcontainerandcheckthatthequantityissucient
for the daily requirement.
• Makesurethattheselectorison .
• Usingthehandle,lowerthemachinehoodandthetankllingphaseautomaticallystarts.Theautomaticelectricdetergent
dispenser supplies to the dosage of the detergent.
• Afterlling,themachineautomaticallystartstheheatingphase.
• Themachinewillbereadyforwashingonlywhentheboilerthermometer4and tank thermometer 5indicate that the
requiredtemperatureshavebeenreached,whichare185°F(80-85°C)forboilerand160°F(71°C)forthetank.
• Selectthewashtimewiththeselector3.
Pos.1=short
Pos.2=long(NSF)
Thisinmachinesequippedwiththermostop,inordertoguaranteetheexactrinsetemperature,thewashingtimecan
increasetoallowtheboilerwatertemperaturetoreachthesettemperature(185°F/80°-85°C)
• Insertthebasketwithdishesorvariousarticlestobewashedandclosethehood(seepar.6.1). The wash cycle starts
automatically, immediately followed by the rinse cycle. The cycle is signalled by the indicator 2.
• Thecycleisnishedwhentheindicatorgoeso.
• Theapplianceisreadyforanothercycle.
Note:Itisadvisabletochangethetankwater,bymeansofanotherlling,atleastevery40-50washesortwiceaday.
Clean the machine at the end of the day (see chap. 7 Maintenance).
Positiontheselector3on the position 0.
Switchthemachineoandclosethewatervalve.
N.B.: therstcyclecarriedoutafterchangingthetimewiththemechanicaltimerwillnotyetbeliketheonesetpreviously:
thetimerrequiresacompletewashingcycleinordertorealignthecamsaccordigntothesettime.Selecting the cycle
won’tstartbyclosingthehood.
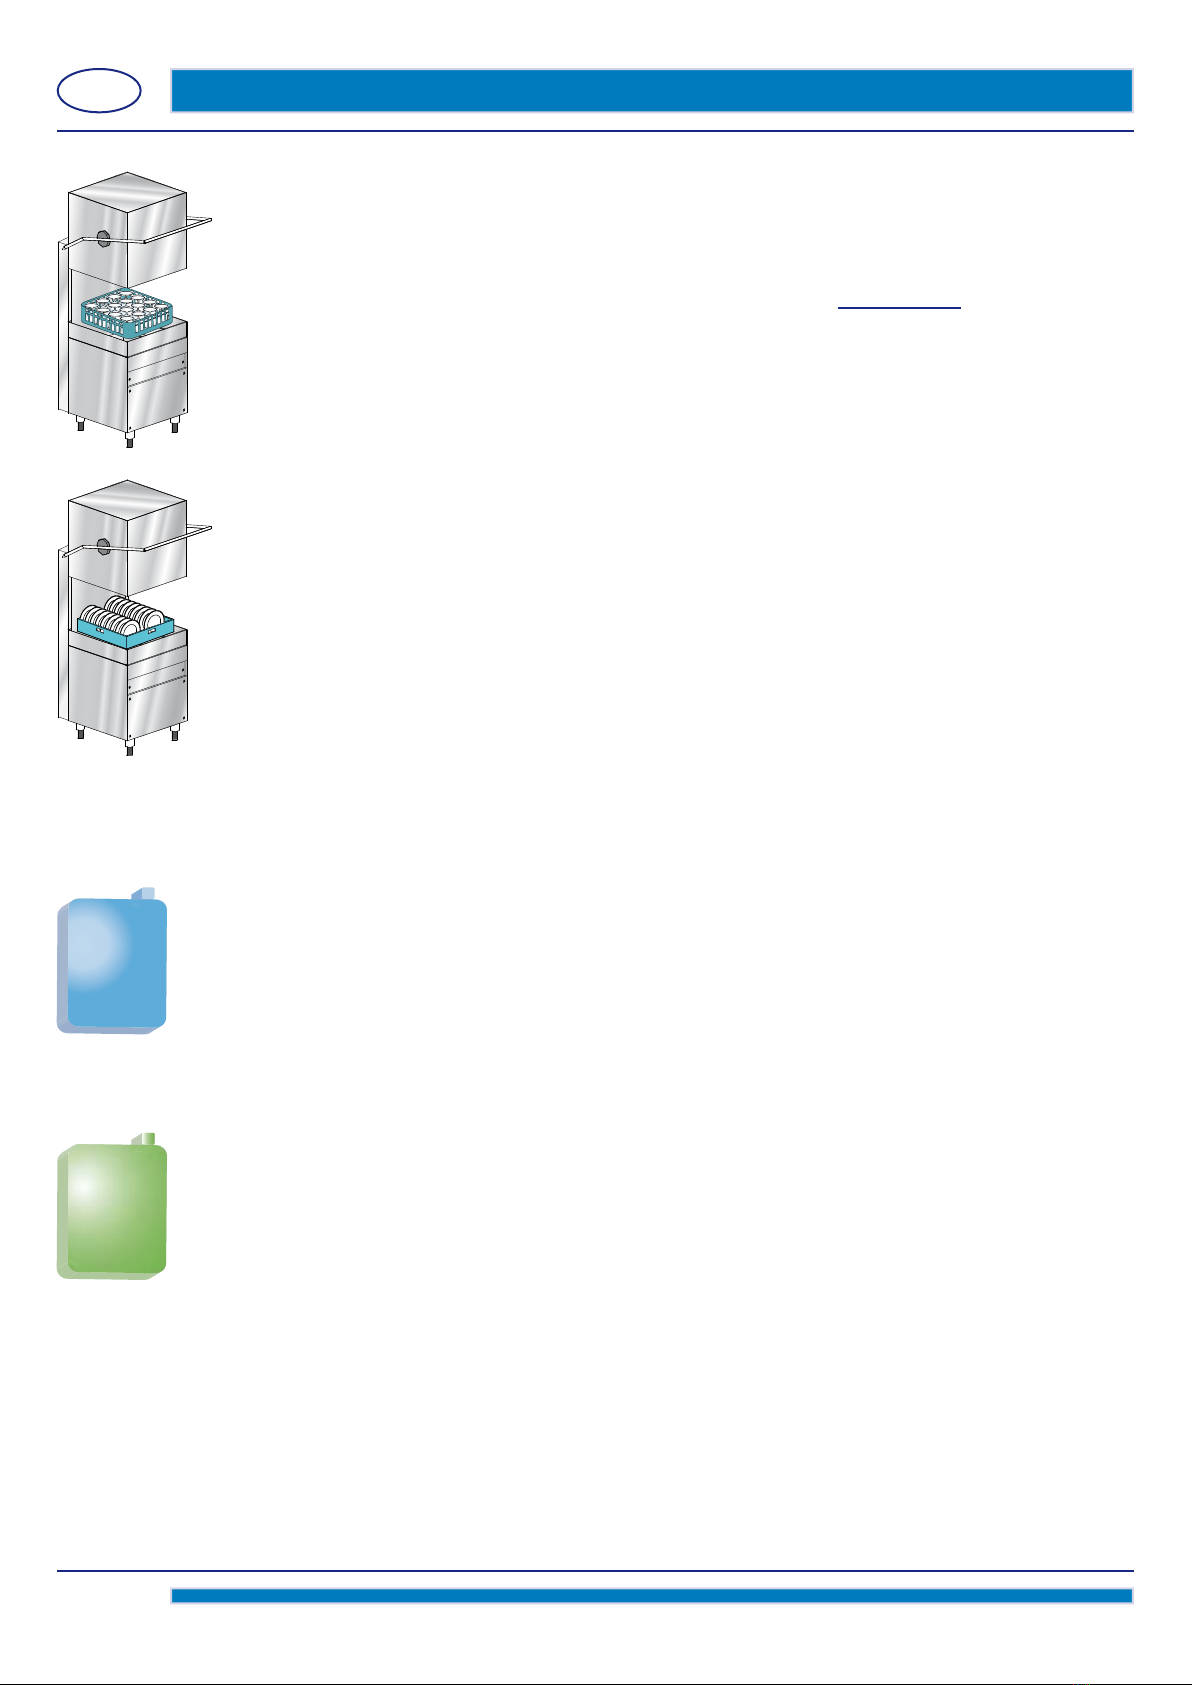
6.1 Cutlery and crockery loading
Beforecutleryandcrockeryloadinginthemachine,coarselycleanthemfromtheleftoverfood.
Itisn'tnecessarytorinsethecutleryancrockeryunderwater.
ATTENTION: Do not wash articles polluted with petrol, paint, chips of steel or iron, ash, sand, wax, lubricant grease.
These substances damage the machine. Do not wash fragile objects or material not resistant to the washing process.
CONTROLS INDICATORS
Cycle indicator
Cycle time selector
0=o
=loadingonly
1=120s
2=180s(NSF)
Boilerthermometer
Tank thermometer
Manual-automatic
draining button
(optional)
USA
page28
USER SECTION
Note the following recommendations:
•Crockeryandcutleryshouldnotbeinsertedinsideoneanother,coveringeachother.
•Placethecrockeryinordertoallsurfacescanbereachedbywater;otherwisethedishesarenotwashed.
•Makesureallthecrockeryareinastablepositionandthatthehollowcontainersdon'toverturn(cups,
glasses, bowls, etc.) .
•Placeintherackallthehollowcontainerssuchascups,glass,etc.upside-down.
•Placethecrockerywithdeephollowwithupperfacedownwards,sothatwatercanowout.
•Makesurethesmallercrockerydonotfallfromtherack.
•Checkallthewasharmsrunsfreelyandtheyarenotblockedbytootallortooprominentcrockery.
Eventually, run a manual rotation of the arms to check it.
Somefoods,suchascarrots,tomatoes,andothers,maycontainsomenaturaldyessubstances,thatin
large amounts, can alter the crockery and plastic parts colors.
Anydiscolorationdoesnotmeanthattheplasticisnotheatresistant.
Crockery and cutlery not suitable for dishwasher
Not suitable for dishwasher:
•Woodencrockeryandcutleryorwithwoodenparts;waterathightemperaturecausesdeformationto
wood.Alsotheadhesivesusedarenotsuitablefortreatmentinthedishwasher;aconsequencecould
be the handles detachment.
•Crafts,preciousvasesordecoratedglasses.
•Notheat-resistantplasticcrockery.
•Copper,brass,pewteroraluminumobjects:theymaybecomediscoloredoropaque.
•Thedecorationsonglass,afteracertainnumberofwashes,canlosegloss.
•Fragileglassesorcrystalitems,ifoftenwashed,canbecomeopaque.
Werecommendtobuyexclusivelycrockeryandcutlerysuitablefordishwashing.
Afterseveralwashes,theglasscanbecomeopaque.
It is mandatory to repeat the washing cycle if at the end of the cycle the crockery are not well clean or if there are
washing residues (glasses, cups, bowls, etc. with liquid inside).
6.2 Detergent use
ThedetergentshallbetheNOFOAMtype,suitableforindustrialdishwashers.Theuseofgoodqualityliquid
detergents is recommended.
Putthedetergentdirectlyinthetub.Followthemanufacturer’srecommendationsforchemicaldosage.By
request, the dishwasher can be equipped with an electric detergent dispenser .
3/8inches (1cm) of the product drawn into the tube is equal to about 3/32 Dramme(0,15g).Acorrectamountof
detergent is very important for a successful wash.
Thismachinemustbeoperatedwithanautomaticdetergentdosingpump.Verifythecorrectoperationbycheckingthe
detergentowinthetransparentsuctionhosefromthedetergentcanister.Makethecheckduringthetankllingorrinsephase.
6.3 Rinse aid use
The machine is equipped with a rinse aid dispenser. The machine automatically draws the product. The amount
dispensedcanberegulatedbyoperatingthene-adjustmentscrewonthedispenser.Reducetheamountby
turning the screw clockwise, increase by turning it anticlockwise.
The recommended amount is 7/8- 1 15/16 inches (2-5cm) of product measured on the suction tube.
3/8inches (1cm) of the product drawn into the tube is equal to about 1/16 Dramme(0,13g).Acorrectamountof
rinse aid is very important for a quick and clean drying.
N.B.: toomuchproduct,orfoam,reducestheeciencyofthewashpump.
DETERGENT
RINSE AID

USA
page 29
USER SECTION
6.4 Compliance with hygiene regulations, H.A.C.C.P. and NSF
• Themachinesareequippedwithatemperatureindicatortoindicatetheboilerandtanktemperature.Waituntiltheset
temperaturesarefullyreached:atleast160°Fforthewashingtuband185°Ffortherinse.Verifythatthepressureofthe
rinsingisbetween15and25Psi.
• Removesolidsformthecrockery,notcloglters,nozzlesandpipes.
• Drainthewashtanksandcleantheltersatleasttwiceaday.
• Checkthatdetergentandrinseaiddosingiscorrect(asrecommendedbythesupplier).Beforestartingthemachine
makesuretheamountofchemicalsinthetanksissucientforthedailyrequirement.
• Keepthetablessurfacesclean.
• Removethebasketfromthemachinewithcleanhandsorgloves,nottocontaminatethecutlery.
• Donotdryorpolishthecrockerywithunsterilecloths,brushesorrags.
6.5 Drain pump (optional)
Toemptythetank:removetheoverowandleavethehoodopen,thenpressthekey6to start the automatic total emptying
time.
Foranotherload,inserttheoverowandswitchthemachineonagain.
Duringthewash-rinsecycletheexcesswaterisautomaticallydischarged.
7. MAINTENANCE
7.1 Routine maintenance
ATTENTION: The machine is not protected against pressure water jets, therefore do not use such
cleaning systems on the cabinet.
It is also advisable to contact cleaning product dealers for detailed information on methods and
products for periodical sanitizing of the machine.
Donotusebleachorchlorine-baseddetergentstocleanthedishwasher.
Perfectmachineoperationdependsoncarefulcleaning,whichmustbecarriedoutatleastonceaday,inthefollowingway:
• TurnotheON/OFFswitchto0.
• Turnothewatervalve.
• Drainthewaterremovingtheoverowpipe.
For appliances provided with emptying pump, see par. 6.5.
• Removetheltersandcleanthemwithabrushunderastrongjetofwater.
• Removetheimpellersbyundoingthexingscrewsandcarefullycleanthenozzles,washarms,andrinseunderrunning
water.
• Retallthepartsandarrangetheimpellersintheirseats,securingthemwiththerelativexingscrew.
• Carefullycleanthetank;donotusechlorine-baseddetergents.
• Attheendofthedayitisadvisabletoleavethemachinehoodopen.
Note:Itisadvisabletochangethetankwater,bynewlling,atleastevery40-50washesortwiceaday.
Do not use metal scouring pads and/or corrosive products for cleaning the dishwasher.
7.2 Extraordinary maintenance
Onceortwiceayearhavethemachinecheckedbyaqualiedtechnician,to:
1Cleanthesolenoidvalvelter;
2 Remove scale from the heating elements;
3 Check the tightness of seals;
4Checktheintegrityand/orwearofcomponents;
5 Check the functionality of the dispensers.
6HavetheelectricalconnectionterminalstightenedatleastonceayearbyTechnicalAssistance.
USA
page 30
USER SECTION
8. THE ENVIRONMENT
8.1 Packing
The packing consists of the following:
•awoodenpallet
•anylon(LDPE)bag
•amultilayercardboardbox
•polystyrenefoam(PS)
•polypropylene(PP)straps.
Please dispose of the materials listed above, according to the current regulations.
8.2 Disposal
The machine must be disposed of according to current regulations: contact the Municipalized Firm responsible
for collection of urban solid waste.
Beforedisposingoftheappliance,disconnectallwaterandelectricalconnections.
Cut the electrical cable in such a way as to prevent further use.
Asallmetalpartsarestainlesssteel,theyarethereforerecyclable.
Recyclableplasticpartsareidentiedbytheplasticsymbol.
9. ECOLOGICAL ASPECTS
9.1 Recommendations for optimal use of energy, water and additives
Usethemachinefullyloadedwhenpossible
This shall prevent detergent, rinse aid, water and energy waste.
Detergent and rinse-aid
Usedetergentand rinse-aid chemicalswith high biodegradability, torespectthe environment best.Verify the
properdosageinrelationtowaterhardnessatleastonceayear.Excessofproductpollutesriversandseaswhile
aninsucientdosingwillcauseunsatisfactorydishwashingand/orhygiene.
Tank and boiler temperatures
The tank and boiler temperatures are set by the manufacturer in order to obtain the best washing results with detergents on
the market. These may be re-set by the installer according to your detergent (see paragraph 2.5).
Cleaningo
Carefullyremovesolidsothekitchenwareusingwateratroomtemperaturesoastomakeremovalofanimalfatseasier.
To remove encrusted matter, soaking in hot water is recommended.
Notes:
Washtheobjectsassoonaspossibleinordertopreventthedepositsfromdryingandjeopardizingtheeectivenessofthe
washing.Togetanecientwash,itisadvisabletoregularlycleanandmaintainthemachine(seechap.7).
Disregarding the points listed above and any information contained in this manual can cause energy, water and
detergent waste with a subsequent increase in running costs and/or performance reduction.
USA
page 31
USER SECTION
10. TROUBLESHOOTING
Type of problem Possible causes Cure
The machine does not
turn on
Main switch not ON. Turn switch ON.
The machine does not
load water.
Water valve shut. Open the water valve.
The spray arm nozzles or the
solenoid lter are clogged and/or
caked with lime deposists
Cleantherinsingarmnozzles,thepipesandthelter.Check
thatthewaterhardnessis<10°f.Equipthemachinewith
anexternalwatersoftener
Faulty pressure switch Replacethepressureswitch(calltheTechnicalAssistance
service)
Washing results are
unsatisfactory.
The washing nozzles are obstructed
or the rack does not rotate.
Unscrewand clean the nozzles and the rotationshaft
carefully,retthemcorrectlyintheirseats
Filters are dirty. Removelters,cleanwithbrushunderajetofwaterand
replace in original position.
Presenceoffoam Useanon-foamingdetergentorreducetheamountofthat
used. Check the rinse aid dispenser
Fats or starches are not removed Detergent concentration too low
Check the tank temperature (it
mustbeabout160°F-71°C)
Adjustthe thermostat or check correct heating element
operation
Lengthofwashingcycleinadequate
for type of grime build-up
Choose a longer cycle if possible, otherwise repeat wash
cycle
Wash water too dirty Emptywaterfromthetank,cleanlters;rellthetankand
correctlyretthelters
Glassesordishesarenot
completely dried
Insucientrinseaid Increasetheamountofrinseaidbyturningthescrewon
the dispenser (see paragraph Rinse aid use)
The rack is unsuitable for the
glasses and dishes
Useasuitablerackenablingthedishestobetiltedsowater
canruno
The dishes have been too long in
the tank
Assoon as the wash cycle is nished, pull the rack out
immediately, allowing the air to dry the glasses and dishes
more quickly
Rinse water temperature is less
than185°F(85°C)
Check the temperature of the booster thermostat. Call the
TechnicalAssistanceservicetoadjust
Surfaceofdishesandglassestoo
rough or porous for material wear.
Replace type of dishes and glasses used
Streaks and spots on
glasses and dishes.
Too much rinse-aid chemical. Reduce the rinse aid amount by turning the micrometric
dispenser screw (see par Rinse aid use)
Too hard water. Check the water quality. Water must not exceed 10°f in
hardness.Equipthemachinewithanexternalwatersoftener
Saltpresentindishwashertub Thoroughly clean and rinse the appliance, and avoid spilling
saltwhenllingthecontainer.
The machine suddenly
stops during the cycle
The machine is connected to an
overloaded circuit
Connect the machine separately (call the Technical
Assistanceservice)
Asafetydevicehasbeenactivated Checksafetydevices(calltheTechnicalAssistanceservice)
During wash cycle the
machine stops and draws
water
Water from the previous day has
not been replaced
Emptythetankandrellit
Faulty pressure switch HavetheTechnicalAssistanceservicecheckthethermostat
and the pressure switch
The overflow tube is incorrectly
positioned
Removetheoverowtubeandcorrectlyrepositionit
Note For any other problems, contact the Technical Assistance service.
The manufacturer reserves the right to alter the technical characteristics without prior notice.
Table of contents
Other Blakeslee Kitchen Appliance manuals


