7.
1-6
0-9
8. ZOOM
Q
9. BND
II
10.
ROM
11. INT
12.
~11
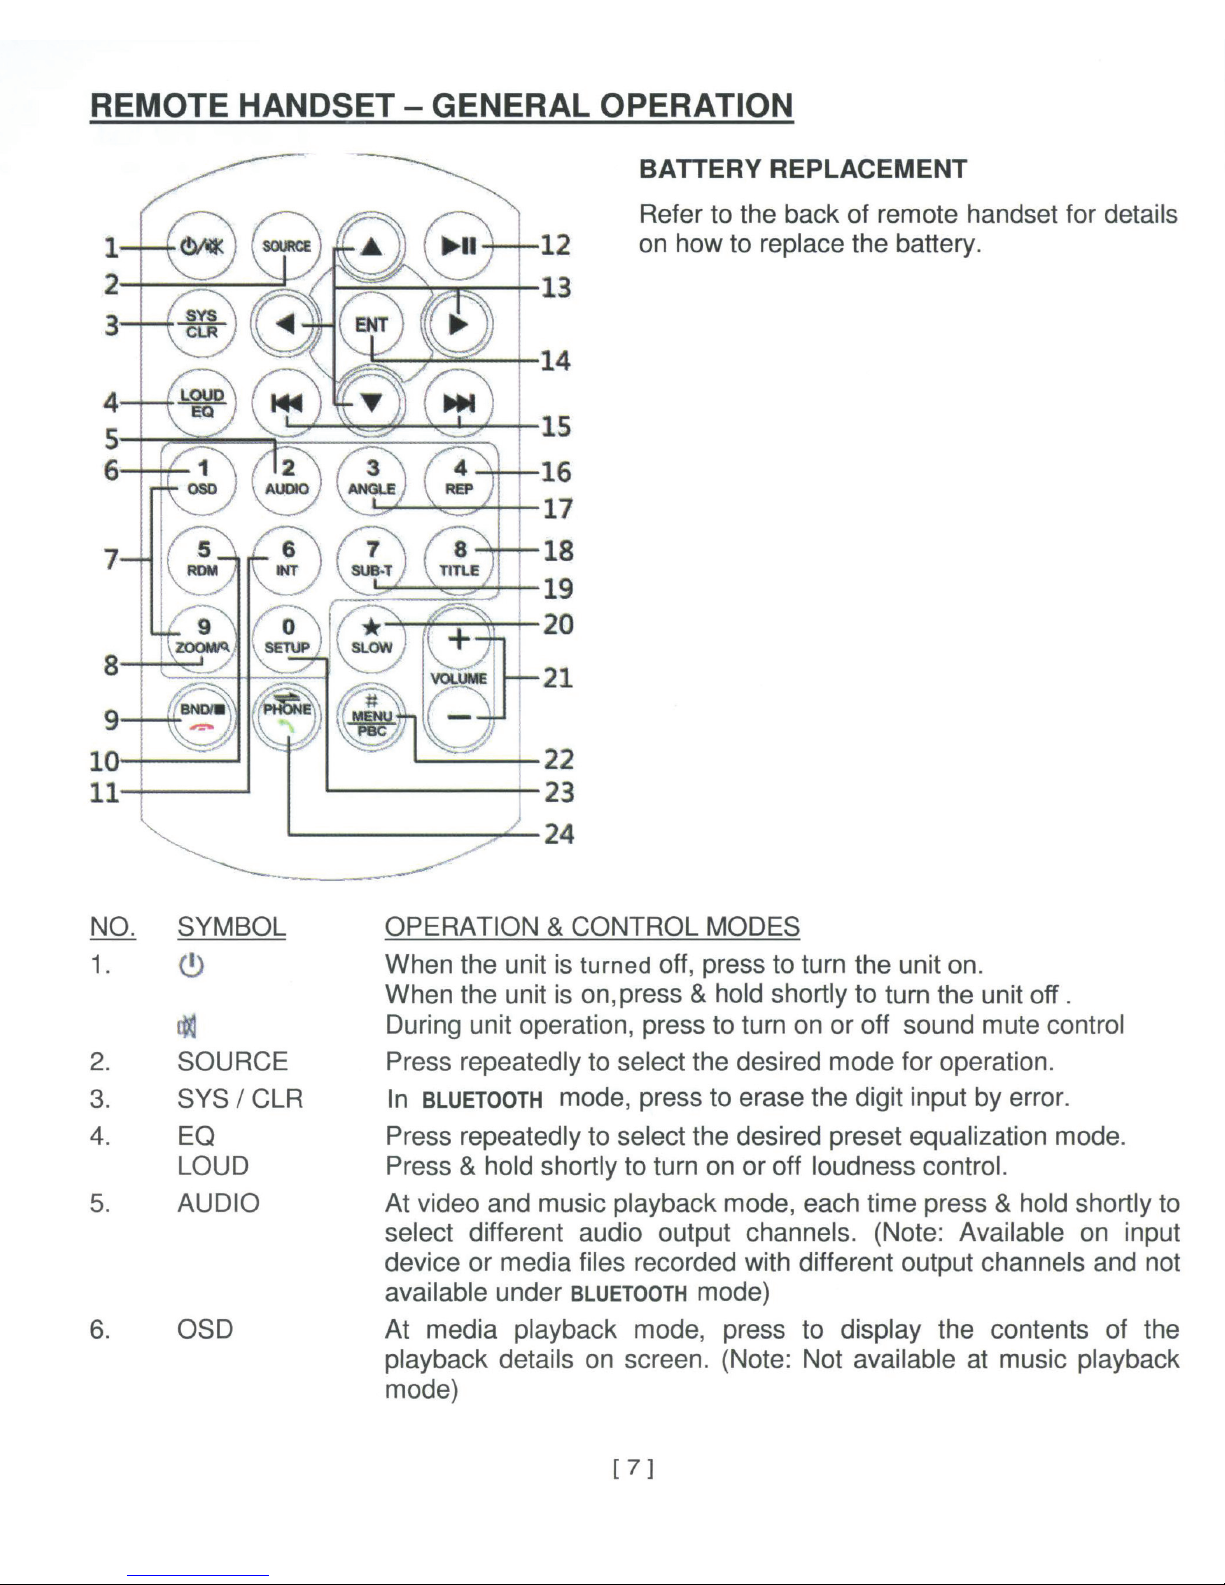
Radio Mode
Press any one of the number
keys
1-6 to select a station that had
been stored in the preset memory number key 1-6 for broadcasting.
Press & hold shortly the number key 1-6 to store the current
broadcasting frequency or station into the respective preset memory
key number 1-6.
Disc I USB I SD I iPod Input Mode
Press directly to input the number of track for playback.
BLUETOOTH
Mode
Press directly to input the phone number for dial out.
TV Mode
Press directly to input the number of
channels
that
have
been
memorized for broadcasting.
Disc I USB I SD Input Mode
At video & photo playback, each time press & hold shortly to select
various
zooming
in
and
out
of
the
screen
for viewing.
Radio Mode
Press to start scanning all the preset stations on memory and stop
for a few seconds for broadcasting.
Press & hold shortly to start searching the frequency and storing the
strongest signal stations into the preset memory stations (total 20
preset stations on each radio band). After storing the stations, the
unit starts scanning all the preset stations on memory and
stops
for a
few seconds for broadcasting.
TV Mode
Press to start scanning all the preset channels on memory and stop
for a few seconds for broadcasting.
Radio Mode
Press repeatedly to select the desired radio band for broadcasting.
Disc I USB I SD Input Mode
At video playback mode under disc input, press to stop playback.
At music I photo playback mode under disc input and playback mode
under USB I SD input, touch to stop playback temporarily and will
resume normal playback after a few seconds.
BLUETOOTH
Mode
Press to hang up or refuse
an
incoming call.
At disc I USB I SD input playback mode, press & hold shortly to turn
on or off random playback of the input device
At music playback mode, press & hold shortly to turn on or off intro
playback of the input device. (Note: Not available at
BLUETOOTH
mode)
At disc I USB I SD I input &
BLUETOOTH
mode, press to pause, resume
or start playback.
[ 8 ]