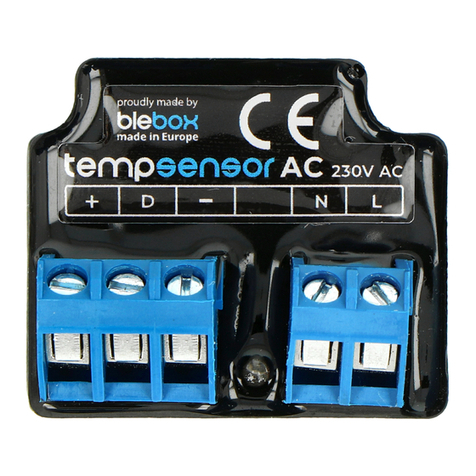
BleBox tempsensor User manual

Improper connections may be dangerous, it can damage the
controller, and loss of the warranty.
The installation of the device to a power mains that does not
meet the quality requirements dened by EN 50081-1, EN
50082-1, UL508, EN 60950, will result in the loss of the warranty.
DANGER! Risk of electric shock! Even with the device turned o,
the outputs may be live. All assembly work should be ALWAYS
performed with the disconnected power circuit.
MINIATURE TEMPERATURE SENSOR
Disconnect supply voltage circuit before installing the controller. Remember
that any mounting works should be carried out when the main voltage is dis-
connected (switch o the mains fuse or disconnect the power supply from the
socket).
The device should be mounted in a place protected from direct adverse
environmental conditions, in particular atmospheric precipitation. The
measurement probe is waterproof. It is not allowed to install the probe in
a place exposed to contact with oils, liquid fuels, solvents and caustic substan-
ces, as well as in places exposed to the direct action of high temperatures.
Remember that metallic elements (wires, elevation elements, window frames,
barriers) negatively inuence the range of the radio system of the device and,
therefore, the comfort of use. It is recommended that the device be mounted
in a stable and xed position.
Connect the 5V DC power cable to the micro USB connector.
Run the device by switching on the power supply (switch on the mains fuse or
connect the power supply to the socket). The correct operation of the device
is signaled every time by the blink of a green LED. The red LED indicates a sen-
sor error, the appropriate message is also visible in the wBox software (more
information about the wBox application later in the manual). In this situation
it will be necessary to check whether the probe or connection cable has been
damaged.
The temperature regulator requires a hysteresis congura-
tion, it means, a certain dierence between the switch on
temperature and the switch o temperature. In the case of
the radiator control, the switch on temperature must be
lower than the switch o temperature, e.g. "Temperature
lower than: 19°C, action: turn on", "Temperature higher
than 21°C, action: turn o".
The main screen of the controller shows the reading of the current temperatu-
re, below show a trend indicator for its changes.
Historical measurement data is available by clicking on the diagram icon in
the upper right corner of the screen.
3MEASURING DATA
Go to the conguration ("Settings" icon in the upper right corner of the
screen). In the "Main conguration" section, you can change the name of the
device that is displayed in the wBox application. The "Status LED enabled"
option allows you to turn o the built-in LED on the device.
To communicate with the device from outside the local Wi-Fi network, from
anyplace in the world, through the wBox application, the option "Enable
remote access" must be set to "Yes". Selecting the option "Yes" also means
accepting to send measurement data to blebox.eu server in order to process
them and archive them together with the location. Setting this option to "No",
will cause no access to the controller from outside the internal network or
access to the historical data; it will only be possible to obtain a visualization of
the current values.
4DEVICE SETTINGS
The controller allows you to send control commands to other controllers of
the wBox series through the home WiFi network, through the so-called API,
which allows you to build a temperature control system. Go to the "Inputs"
section, where you can program up to 10 actions that will be carried out after
reaching a certain temperature. When editing actions, such as "Action type"
select "Get URL", as "Trigger" select "Temperature bigger than" or "Temperatu-
re smaller than". In the "Temperature" eld, enter the temperature limit value,
expressed in degrees Celsius, by which, after being reached, the action will be
triggered, e.g. "20".
In the "URL" eld, enter the API command preceded by the http protocol prex
and the IP address of the wBox device which will be controlled. The IP address
is available in the device settigs. Caution! All the controllers must be in the
same subnet, usually the subnet of a home router.
The most popular API commands for switchBox and shutterBox are presented
below. It was assumed that the IP address of the device which will be con-
trolled is: 192.168.1.123
A detailed description of how to control other controllers of the wBox series
is available in the "Extended instructions for wBox devices", while all
the technical documentation API of the wBox controllers is available at:
http://technical.blebox.eu
Switching on the radiator via switchBox: http://192.168.1.123/s/1
Switching o the radiator via switchBox: http://192.168.1.123/s/0
Opening the roller shutter via shutterBox: http://192.168.1.123/s/u
Closing the roller shutter via shutterBox: np. http://192.168.1.123/s/d
5TEMPERATURE REGULATOR
temperature sensor
with the μWiFi technology
SAFETY RULES
1INSTALLATION - BASICS
2 FIRST START
Download the free wBox application.If you have an Android mobile device,
you will nd the application in the Play Store. For iOS devices the application
is in the App Store.
By using your mobile phone or tablet, connect it to the device wireless
network. To do this, enter to your smartphone or tablet settings, then go to
setting of the WiFi network and nd the network name „tempSensor-
-xxxxxxxxxx” where xxxxxxxxxx is the serial number of the device. Connect to
this network.
Turn on the wBox application. A device will appear at the top of the screen. To
add it to the application, click on "plus" on the right side of the name. To pre-
congure the controller, click on the default device name.
You can also set the conguration using the web browser
of your phone / tablet. After connecting to the wireless
network of the controller, turn on the browser and go
website www.blebox.eu

6ACCESS POINT AND WIFI NETWORK SETTINGS
Go to "Connect to WiFi network" section, where you can connect the device to
the WiFi home network to be able to connect to it via it or from anyplace in the
world. To do this, select the network name from the list and press "Connect".
If required, enter the WiFi network password. When connecting the device to
the home network, the phone / tablet may be disconnected from the device's
network.
After completing the WiFi network conguration, you can disconnect from
the device network and connect the phone / tablet directly to your home WiFi
network. Control from the wBox application will work in the same way as
when the phone / tablet is connected to the device's network. If as a user you
leave the local network, eg leaving your home or enclosing mobile data, the
wBox application will signal this status as "Remote mode". In this case, you will
have access to the device data, but for security reasons settings options will
not be available.
In the "Access point settings" section, you can change the name and give the
password of the WiFi network emitted by the device. Remember that
changing the network name or password can cause disconnection with the
device immediately after clicking the "Save" button, so you should reconnect
to the WiFi network.
ADDITIONAL INFORMATION
SOFTWARE UPDATE
LOCATION AND TIME OF THE DEVICE,
SCHEDULE
To update the software in the controller, connect it to your home WiFi network
(see "Access Point and WiFi settings" section) which is connected to the
Internet. Go to “Settings” (icon at the top-right corner of the screen) and click
the "Get new rmware" button in the nal section on settings. Wait about
1 minute, do not close the interface and don’t perform other actions. The
device will download the latest software. The software version number,
hardware version and device identier can be read at the bottom of the
settings screen.
To be able to use historical air quality data, it is necessary to set the clock and
location of the device. Go to the "Device time" section of the settings and then
click "Change zone". Select your region and locations from the list, conrming
your selection with the "Save" button. The device will synchronize its time with
the time server (if the controller is in a WiFi network with Internet access) or it
will download time from the phone/tablet.
Next, in the "Device location" section, click "Set locations". The application/
browser will ask whether to share locations - allow. In the "Coordinates" eld,
the approximate coordinates of your location should appear. If the "Set
locations" button blinks red with the word "error" or the "Coordinates" eld
did not change the value from "Not set" to numeric data, a failure occurred in
the location download. You should then make sure that the phone / tablet has
a GPS module and that the location sharing support is enabled on the phone.
high quality ABS plastic
5V by microUSB connector
from -20°C to 50°C
wired, waterproof, cable length 1m
< 1W
from -55°C to 125°C
± 0,5°C in the range of -10°C to 85°C
IP32
TECHNICAL SPECIFICATIONS
bi-directional, encrypted
2.4 GHz
μWiFi, compatible with WiFi, 802.11g
31 x 45 x 15 mm
mode
compatible
devices and systems
power supply
controller
operating temperature
housing
type of probe
energy consumption
measurement range
measurement accuracy
protection level
communication standard
dimensions
for more information
visit our website
www.blebox.eu
or send us an email to:
support is available at
direct connection (as Access Point),
Wi-Fi connection via a standard
router, connection with access from
any location in the world (requires
only access to the Internet)
Apple iPhone, Apple iPad, iPad
Mini, Android, computers and
mobile devices supporting HTML5
transmission type
radio frequency
Other BleBox Temperature Controllers manuals
