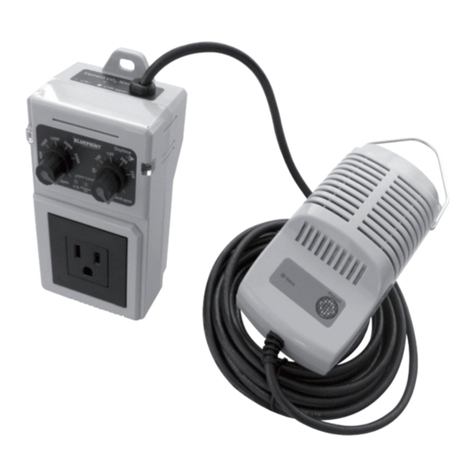
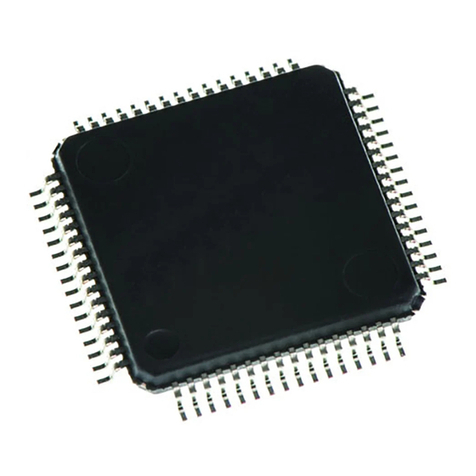
Blueprint Controllers BDTC-1 User manual

Features of your Blueprint Digital Day/Night
Temperature Controller, BDTC-1
•Preciselycontrola120Vcoolingorheatingdevice
•Integratedphotocellallowsday,nightor24-houroperation
•Remotesensorona6.5’cableaccuratelymonitorstemperature
•Storesminimumandmaximumtemperaturevalues
•Wallmountable
•3-yearwarranty
Specications
InputVoltage:120V
MaximumAmperage:14.5A@120V
TemperatureControlRange:32-150ºF
SeparateDayandNightSettings:PhotocellControl
TemperatureDeadband:1-10ºF
Dimensions:3”x6”x3.5”
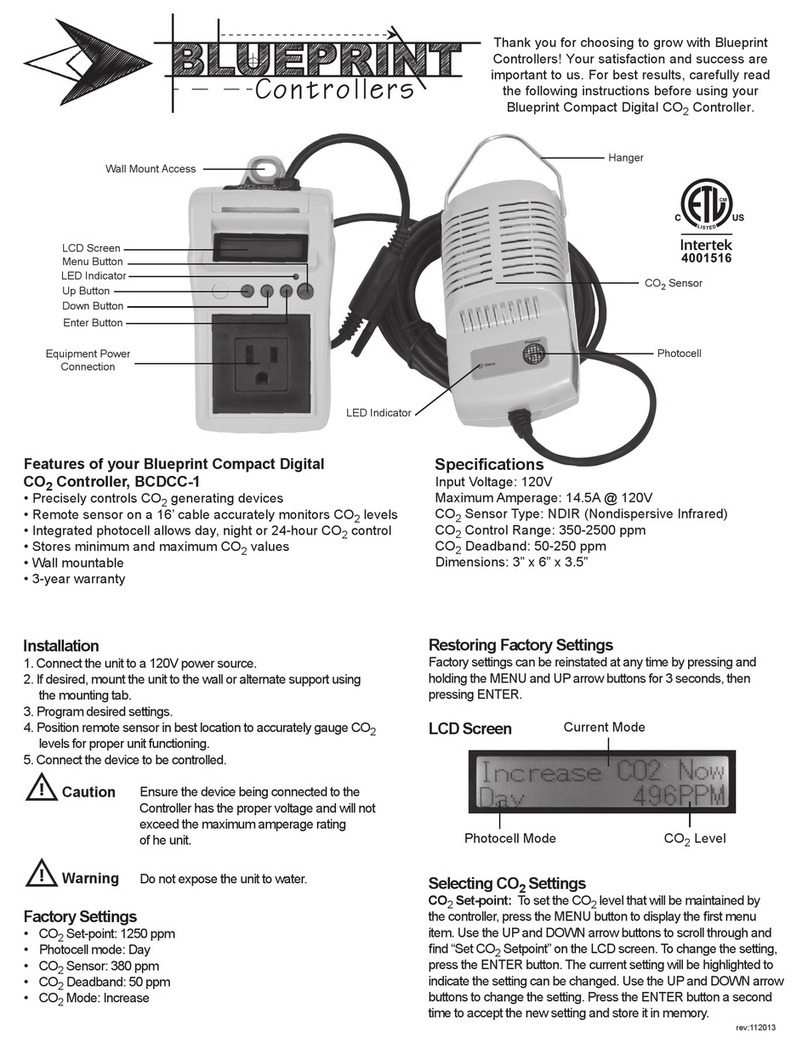
EquipmentPower
Connection
WallMountAccess
LCDScreen
MenuButton
LEDIndicator
EnterButton
Photocell
UpButton
DownButton
TemperatureSensor
ThankyouforchoosingtogrowwithBlueprint
Controllers!Yoursatisfactionandsuccessare
importanttous.Forbestresults,carefullyreadthe
followinginstructionsbeforeusingyourBlueprint
DigitalDay/NightTemperatureController.
Installation
1. Connecttheunittoa120Vpowersource.
2. Ifdesired,mounttheunittothewalloralternatesupport
usingthemountingtab.
3. Programdesiredsettings.
4. Positionremotesensorinbestlocationtoaccuratelygauge
environmentaltemperaturesforproperunitfunctioning.
5. Connectthedevicetobecontrolled.
Ensurethedevicebeingconnectedtothe
Controllerhasthepropervoltageandwill
notexceedthemaximumamperagerating
oftheunit.
Donotexposetheunittowater.
Factory Settings
• DayTemperature:78.0ºF
• NightTemperature:75.0ºF
• TemperatureDeadband:2.0ºF
• ControlMode:Cooling
• TemperatureDisplay:F
Restoring Factory Settings
Factorysettingscanbereinstatedatanytimebypressingandholding
theMENUandUPbuttonsfor3seconds,thenpressingENTER.This
willresetallsettingsexceptfortheTemperatureDisplay(willnotreturn
toºFifithasbeensettoºC).
LCD Screen
Selecting Controller Settings
Day Temperature:Tosetthetemperaturetheunitwilluseto
controltheoutputwhenthephotocelldeterminesitisdaytime,
presstheMENUbutton.UsetheUPandDOWNarrowbuttons
toscrollthroughandnd“SetDayTemp”ontheLCDscreen.To
changethesetting,presstheENTERbutton.Thecurrentsetting
willbehighlightedtoindicatethesettingcanbechanged.Use
theUPandDOWNbuttonstochangethesetting.Pressthe
ENTERbuttonasecondtimetoacceptthenewsettingandstore
itinmemory.
Night Temperature:Tosetthetemperaturetheunitwilluseto
controltheoutputwhenthephotocelldeterminesitisnighttime,
presstheMENUbutton.UsetheUPandDOWNarrowbuttons
toscrollthroughandnd“SetNightTemp”ontheLCDscreen.
Tochangethesetting,presstheENTERbutton.Thecurrent
settingwillbehighlightedtoindicatethesettingcanbechanged.
UsetheUPandDOWNbuttonstochangethesetting.Pressthe
ENTERbuttonasecondtimetoacceptthenewsettingandstore
itinmemory.
Temperature Deadband:Tochangethetemperaturedeadband,
presstheMENUbuttontodisplaytherstmenuitem.Usethe
UPandDOWNarrowbuttonstoscrollthroughandnd“Set
Deadband”ontheLCDscreen.Tochangethesetting,pressthe
ENTERbutton.Thecurrentsettingwillbehighlightedtoindicate
thesettingcanbechanged.UsetheUPandDOWNarrowbut-
tonstochangethesetting.PresstheENTERbuttonasecond
timetoacceptthenewsettingandstoreitinmemory.
Caution
Warning
PhotocellStatus CurrentTemperature
ControlStatus
rev:112013

Minimum Temperature:Theunitrecordstheminimumtemperature
measuredbythesensor.Toresettheminimumtemperature,press
theMENUbuttontodisplaytherstmenuitem.UsetheUPand
DOWNarrowbuttonstoscrollthroughandnd“MinimumTemp”on
theLCDscreen.Toreset,presstheENTERbuttontwiceafterthe
valueisdisplayed.
Maximum Temperature:Theunitrecordsthemaximumtemperature
measuredbythesensor.Toresetthemaximumtemperature,press
theMENUbuttontodisplaytherstmenuitem.UsetheUPand
DOWNarrowbuttonstoscrollthroughandnd“MaximumTemp”
ontheLCDscreen.Toreset,presstheENTERbuttontwiceafterthe
valueisdisplayed.
Control Mode: Theunitwilloperatetoincreaseordecreasethetem-
peraturedependingonthedeviceconnectedtotheunit.Tochange
theControlMode,presstheMENUbuttontodisplaytherstmenu
item.UsetheUPandDOWNarrowbuttonstoscrollthroughandnd
“ControlMode”ontheLCDscreen.Tochangethesetting,pressthe
ENTERbutton.Thecurrentsettingwillbehighlightedtoindicatethe
settingcanbechanged.UsetheUPandDOWNarrowbuttonsto
changethesetting.PresstheENTERbuttonasecondtimetoaccept
thenewsettingandstoreitinmemory.
Temperature Display:Theunitwilldisplaythetemperaturein°For
°C.TochangetheTemperatureDisplay,presstheMENUbuttonto
displaytherstmenuitem.UsetheUPandDOWNarrowbuttons
toscrollthroughandnd“SetTempDisplay”ontheLCDscreen.To
changethesetting,presstheENTERbutton.Thecurrentsettingwill
behighlightedtoindicatethesettingcanbechanged.UsetheUPand
DOWNarrowbuttonstochangethesetting.PresstheENTERbutton
asecondtimetoacceptthenewsettingandstoreitinmemory.
Troubleshooting
The LCD screen is blinking and showing an error
message.
Alldetectederrorswillcausetheunittogointo“safemode.”Itwillshut
downtheconnecteddeviceanddisplayoneofthefollowingerrors:
Temp Sensor(problemwithsensor)
Overload (currentdrawexceeds10A)
HoldingtheENTERbuttonfor3secondswillresetanyerrorexcept
forOVERLOAD.Inthiscase,disconnecttheunitfromtheelectrical
supplytoresettheerror.Itmaybenecessarytoreducethesizeofthe
connectedequipment(ifitexceedsa10Adraw)topreventtheOVER-
LOADerrorfromreoccurring.
Seewarrantyprocedureinformationifyouresettheunitandtheerror
codecontinuestoappear.
How can I calibrate the temperature sensor?
Thesensordoesnotrequireanycalibration.
The unit is turning on and off at the wrong temperatures.
Makesureyouhaveselectedthecorrectcontrolmodeforthedevice
connectedtotheunit.
Limited 3-Year Warranty Terms
SunleavesGardenProductswarrantsthattheBlueprintDigitalDay/NightTemperatureControllerwillremainfreefrom
appearanceofdefectsinworkmanshipandmaterialsfor3yearsfromdateoforiginalretailpurchase.Thiswarrantyis
subjecttothefollowinglimitations:(a)manufacturer’sliabilityislimitedtothereplacementorrepairoftheunit,asdecided
bythemanufacturer;(b)adefectiveunitmustbereturned,prepaid,withproofofpurchasetothepointofpurchaseoras
instructedbelow;and(c)thiswarrantydoesnotapplytodefectsresultingfromthealteration,abuse,accidentaldamage,
unauthorizedrepairormisuseoftheunit.Thiswarrantyisgiveninlieuofallotherwarranties,guaranteesandconditions
onmanufacturer’spart,andthemanufacturershallhavenotortiousorotherliabilityinrespecttothisBlueprintDigital
Day/NightTemperatureController.
Blueprint Digital Day/Night Temperature Controller Warranty Is Void If:
• NOTACCOMPANIEDBYTHEORIGINALPROOFOFPURCHASE.
• BLUEPRINTDIGITALDAY/NIGHTTEMPERATURECONTROLLERHASBEENUSEDINANONSTANDARDWAY,INCLUDINGGENERALMISUSE
ANDOUTDOORUSE.
• BLUEPRINTDIGITALDAY/NIGHTTEMPERATURECONTROLLERHASBEENDAMAGEDASARESULTOFACCIDENT,IMPROPER
INSTALLATION,ALTERATION,ORFIRE,FLOODOROTHERNATURALDISASTER.
Blueprint 3-Year Limited Warranty
All Blueprint Digital Day/Night Temperature Controllers are protected against manufacturer defect by a limited
3-year manufacturer’s warranty.
Sunleaves Product Warranty Claims
To obtain warranty service in the event that your product fails to operate, return the product to the place of purchase. Often the retailer will be able
to examine the product in closer detail, determine the problem and even fix the product on site.
For technical support and warranty information, call our toll-free number at 888-464-9676
7854 North State Road 37
Bloomington, IN 47404 rev:112013
This manual suits for next models
1
Other Blueprint Controllers Controllers manuals
Popular Controllers manuals by other brands
emmeti
emmeti RCE user manual
Bosch
Bosch Rexroth IndraControl L40 Project planning manual
Kockum Sonics
Kockum Sonics TYFON Ti98 OPERATING AND INSTALLATION Manual
Sentiotec
Sentiotec PRONET WEB SERVER Instructions for installation and use

AAT Holding
AAT Holding KaDe KDH-KZ620U installation manual
Baker Hughes
Baker Hughes Masoneilan 78 Series instruction manual
