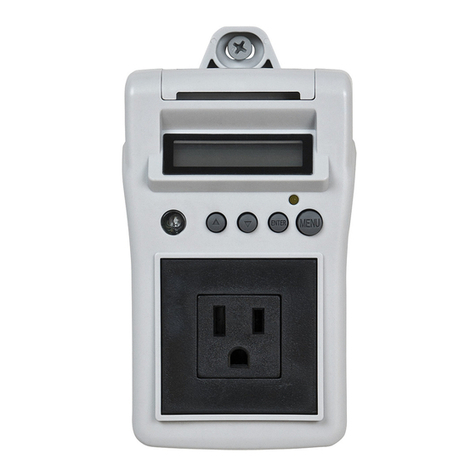
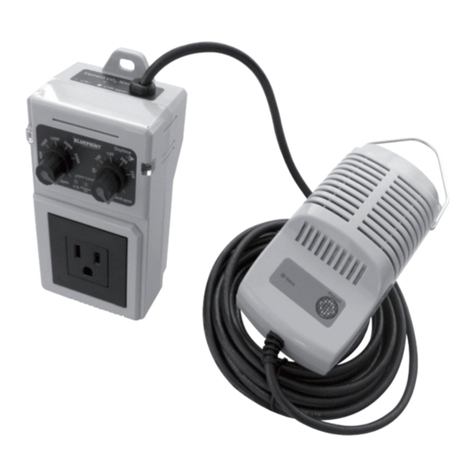
Blueprint Controllers BCDCC-1 User manual

Thank you for choosing to grow with Blueprint
Controllers! Your satisfaction and success are
important to us. For best results, carefully read
the following instructions before using your
Blueprint Compact Digital CO2Controller.
Features of your Blueprint Compact Digital
CO2Controller, BCDCC-1
•PreciselycontrolsCO2generating devices
•Remotesensorona16’cableaccuratelymonitorsCO2levels
•Integratedphotocellallowsday,nightor24-hourCO2control
•StoresminimumandmaximumCO2values
•Wallmountable
•3-yearwarranty
Specications
InputVoltage:120V
MaximumAmperage:14.5A@120V
CO2SensorType:NDIR(NondispersiveInfrared)
CO2ControlRange:350-2500ppm
CO2Deadband:50-250ppm
Dimensions:3”x6”x3.5”
Menu Button
LEDIndicator
LEDIndicator
Enter Button
Up Button
Down Button
EquipmentPower
Connection
CO2Sensor
Hanger
LCDScreen
WallMountAccess
Photocell
Installation
1.Connecttheunittoa120Vpowersource.
2.Ifdesired,mounttheunittothewalloralternatesupportusing
the mounting tab.
3.Programdesiredsettings.
4.PositionremotesensorinbestlocationtoaccuratelygaugeCO2
levels for proper unit functioning.
5.Connectthedevicetobecontrolled.
Ensure the device being connected to the
Controller has the proper voltage and will not
exceedthemaximumamperagerating
of he unit.
Donotexposetheunittowater.
Factory Settings
• CO2Set-point:1250ppm
• Photocellmode:Day
• CO2Sensor:380ppm
• CO2Deadband:50ppm
• CO2Mode:Increase
Restoring Factory Settings
Factory settings can be reinstated at any time by pressing and
holdingtheMENUandUParrowbuttonsfor3seconds,then
pressingENTER.
LCD Screen
Selecting CO2Settings
CO2Set-point: To set the CO2level that will be maintained by
thecontroller,presstheMENUbuttontodisplaytherstmenu
item.UsetheUPandDOWNarrowbuttonstoscrollthroughand
nd“SetCO2Setpoint”ontheLCDscreen.Tochangethesetting,
presstheENTERbutton.Thecurrentsettingwillbehighlightedto
indicatethesettingcanbechanged.UsetheUPandDOWNarrow
buttonstochangethesetting.PresstheENTERbuttonasecond
time to accept the new setting and store it in memory.
Caution
Warning
PhotocellMode CO2Level
Current Mode
rev:112013

CO2Deadband: To change the CO2deadband,presstheMENUbut-
tontodisplaytherstmenuitem.UsetheUPandDOWNarrowbuttons
toscrollthroughandnd“SetCO2Deadband”ontheLCDscreen.To
changethesetting,presstheENTERbutton.Thecurrentsettingwill
behighlightedtoindicatethesettingcanbechanged.UsetheUPand
DOWNarrowbuttonstochangethesetting.PresstheENTERbuttona
second time to accept the new setting and store it in memory.
Minimum CO2Level: The unit records the minimum CO2level mea-
suredbythesensor.Toresettheminimumlevel,presstheMENUbutton
todisplaytherstmenuitem.UsetheUPandDOWNarrowbuttonsto
scrollthroughandnd“MinCO2”ontheLCDscreen.Toreset,pressthe
ENTERbuttontwiceafterthevalueisdisplayed.
Maximum CO2Level:TheunitrecordsthemaximumCO2level mea-
suredbythesensor.Toresetthemaximumlevel,presstheMENUbutton
todisplaytherstmenuitem.UsetheUPandDOWNarrowbuttonsto
scrollthroughandnd“MAXCO2”ontheLCDscreen.Toreset,press
theENTERbuttontwiceafterthevalueisdisplayed.
CO2Mode:TheunitwilloperatetoIncreaseorDecreaseCO2levels.In
most indoor growing and greenhouse applications, the unit should be set
to increase CO2levels. To change the CO2Mode,presstheMENUbut-
tontodisplaytherstmenuitem.UsetheUPandDOWNarrowbuttons
toscrollthroughandnd“SetCO2Mode”ontheLCDscreen.Tochange
thesetting,presstheENTERbutton.Thecurrentsettingwillbehighlight-
edtoindicatethesettingcanbechanged.UsetheUPandDOWNarrow
buttonstochangethesetting.PresstheENTERbuttonasecondtimeto
accept the new setting and store it in memory.
Selecting Photocell Settings
TheunitwilloperateduringtheDay,Nightor24-hoursmode.Abuilt-in
photocell on the remote sensor detects the lighting level and automati-
cally activates the CO2output only during the hours the user selects. To
changethePhotocellsettings,presstheMENUbuttontodisplaytherst
menuitem.UsetheUPandDOWNarrowbuttonstoscrollthroughand
nd“PhotocellMode”ontheLCDscreen.Tochangethesetting,press
theENTERbutton.Thecurrentsettingwillbehighlightedtoindicate
thesettingcanbechanged.UsetheUPandDOWNarrowbuttonsto
changethesetting.PresstheENTERbuttonasecondtimetoacceptthe
new setting and store it in memory.
Calibrating the CO2Sensor
The CO2sensor is factory calibrated, but should be calibrated once a
year.Placethesensoroutsideinashadedareaawayfrompeopleand
other sources of CO2.Plugintheunitandallowthesensortooperatefor
10-15minutes.PresstheMENUbuttontodisplaytherstmenuitem.
UsetheUPorDOWNarrowbuttonstoscrollthroughandnd“Calibrate
380PPM”ontheLCDscreen.PressENTERtwicetostartthecalibration
process.Whenthecalibrationprocessiscomplete,theunitwillreturnto
normaloperationafterbrieydisplaying“380CalibrationComplete”on
the LCD screen.
Troubleshooting
The LCD screen is blinking and showing an error message.All
detectederrorswillcausetheunittogointo“safemode.”Itwillshut
downtheconnecteddeviceanddisplayoneofthefollowingerrors:
Sensor Error(problemwithsensor)
Overload(currentdrawexceeds10A)
HoldingtheENTERbuttonfor3secondswillresetanyerrorexcept
forOVERLOADandSENSOR.Forasensorerror,ensurethesen-
sor cable is properly connected to the unit. For an overload error,
disconnecttheunitfromtheelectricalsupplytoresettheerror.Itmay
benecessarytoreducethesizeoftheconnectedequipment(ifitex-
ceedsa10Adraw)topreventtheOVERLOADerrorfromreoccurring.
Seewarrantyprocedureinformationifyouresettheunitandtheerror
code continues to appear.
Why doesn’t the unit function immediately when plugged in?
Whentheunitispluggedin,itwilltakeabout5-10minutesforthe
CO2sensor to warm up. During this time, the display will read
“WARMINGUP.”
How can I tell if the photocell is working correctly?
Thephotocellwilldetectevendimlylitareasasbeing“Daytime.”
Whenthephotocellsensesenoughlight,itwillactivatetheDaytimer
settingsandtheunitwillread“Day”ontheleftsideofthedisplay.
Whenitdoesn’tdetectlight,thedisplaywillread“Night.”
The unit seems to be reading the CO2level incorrectly.
Ensure there is air circulation around the CO2sensor. Do not breathe
near or directly on the CO2sensor. To quickly verify the CO2sensor
is measuring CO2correctly, connect the unit to a power source away
from people or other sources of CO2.After10minutestheCO2read-
ingshouldbebetween375and425ppm.Ifitdoesnot,recalibratethe
CO2sensor.
rev:112013

Limited 3-Year Warranty Terms
SunleavesGardenProductswarrantsthattheBlueprintCompactDigitalCO2Controller will remain free from
appearanceofdefectsinworkmanshipandmaterialsfor3yearsfromdateoforiginalretailpurchase.This
warrantyissubjecttothefollowinglimitations:(a)manufacturer’sliabilityislimitedtothereplacementorrepair
oftheunit,asdecidedbythemanufacturer;(b)adefectiveunitmustbereturned,prepaid,withproofofpur-
chasetothepointofpurchaseorasinstructedbelow;and(c)thiswarrantydoesnotapplytodefectsresulting
from the alteration, abuse, accidental damage, unauthorized repair or misuse of the unit. This warranty is given
inlieuofallotherwarranties,guaranteesandconditionsonmanufacturer’spart,andthemanufacturershall
have no tortious or other liability in respect to this Blueprint Compact Digital CO2Controller.
Blueprint Compact Digital CO2Controller Warranty Is Void If:
• NOTACCOMPANIEDBYTHEORIGINALPROOFOFPURCHASE.
• BLUEPRINTCOMPACTDIGITALCO2CONTROLLERHASBEENUSEDINANONSTANDARDWAY,INCLUDINGGENERALMISUSEAND
OUTDOORUSE.
• BLUEPRINTCOMPACTDIGITALCO2CONTROLLERHASBEENDAMAGEDASARESULTOFACCIDENT,IMPROPERINSTALLATION,
ALTERATION,ORFIRE,FLOODOROTHERNATURALDISASTER.
Blueprint 3-Year Limited Warranty
All Blueprint Compact Digital CO2Controllers are protected against manufacturer defect by a limited
3-year manufacturer’s warranty.
Sunleaves Product Warranty Claims
To obtain warranty service in the event that your product fails to operate, return the product to the place of purchase. Often the retailer will be able
to examine the product in closer detail, determine the problem and even fix the product on site.
For technical support and warranty information, call our toll-free number at 888-464-9676
7854 North State Road 37
Bloomington, IN 47404
rev:112013
Other Blueprint Controllers Controllers manuals
Popular Controllers manuals by other brands
DOLD
DOLD MINISTART BL 9028 Translation of the original instructions
Digital Dream
Digital Dream DDCS V3.1 user manual
ComAp
ComAp InteliDrive DCU Industrial Global Guide
Hacker
Hacker TENSORIC 10 manual

M2 Antenna Systems
M2 Antenna Systems RC2800PX-AZ operating instructions
BIFFI
BIFFI HLAS-C Series Installation, operation and maintenance manual
