BlueSpot 09109 User manual

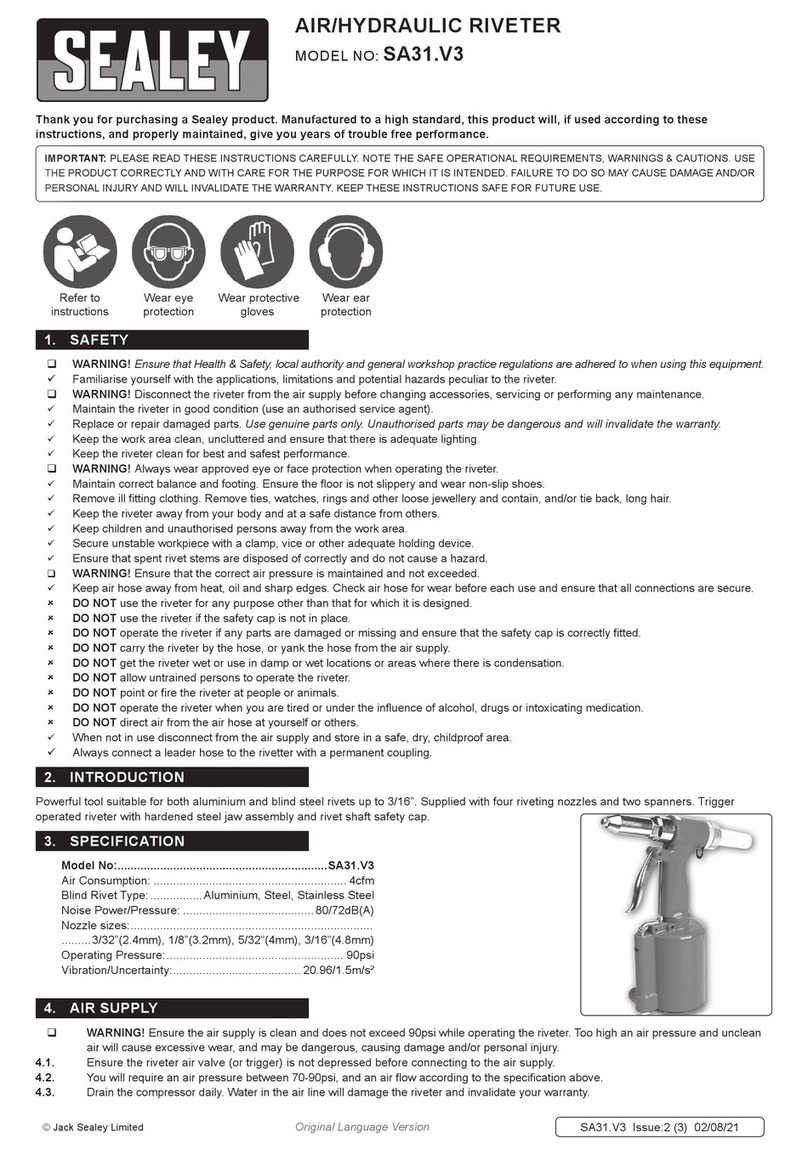
360° SWIVEL HEAD
MULTI RIVETER
(RIVET/NUT/THREADED RIVET STUDS)
User Manual
09109

01
Thank you for purchasing a Blue Spot Tools product, you can find further information
on our range at www.BlueSpot.uk.com. Please ensure that you are using the product
correctly and that all guidance and cautions are followed in accordance with the
instructions. Please retain these instructions for future reference.
General Information
Please make sure that you read these instructions carefully in order to avoid injury when
using the riveter. Follow all health and safety rules and regulations. If in doubt and available
please contact a more knowledgeable source.
DO NOT use if damaged.
• Maintain tool in good and clean condition for best and safest performance.
• Keep the work area clean, uncluttered and ensure there is adequate lighting.
• Maintain correct balance and footing. Ensure the floor is not slippery and wear
non-slip shoes.
• Keep children and unauthorised persons away from the work area.
• If the riveter is damaged do not use.
• NEVER leave the riveter unattended. When you have finished using the riveter it
should be stored away in a safe place that is out of reach of children.
• NEVER try to get the riveter to perform a task that it was not made for. Do not
overload or misuse the tool.
• ALWAYS dress appropriately – clothing should be close fitted and long hair tied back.
Jewellery should be removed and shoes should be worn with a non-slip sole.
• ALWAYS wear the correct eye or face protection when operating the riveter.
• ALWAYS wear approved respiratory protection. This will help protect you
from any dust.
• ALWAYS ensure you work in a well ventilated room.
• ALWAYS ensure that adjusting keys and wrenches have been removed before using
the tool. If a key or wrench is still attached when the tool is used this could
cause damage to property or cause injury.
• NEVER operate the tool if you are under the influence of drugs or alcohol as
this is dangerous.
• DO NOT operate the riveter if you are tired as this is dangerous.
• DO NOT get the riveter wet. Always use in dry locations/conditions.
• ALWAYS check and adhere to national regulations when disposing of the riveter.
Safe use

02
Introduction
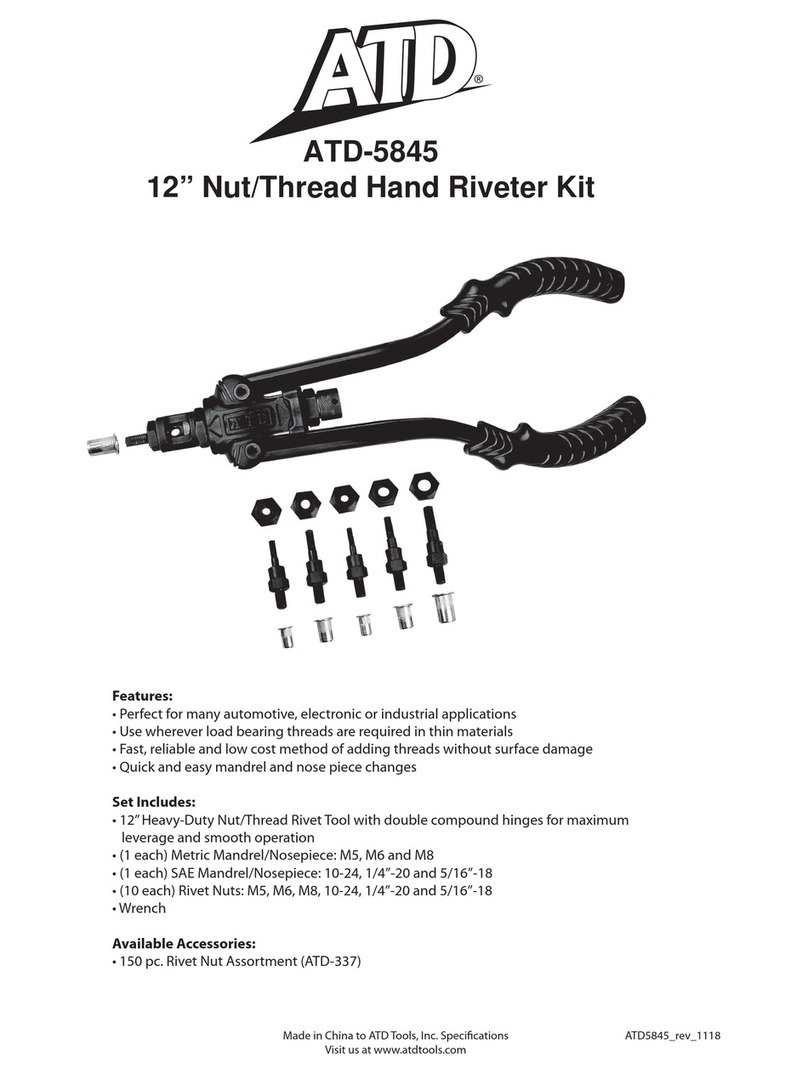
The Blue Spot Tools 360° Swivel Head Multi Riveter (Rivet/Nut/Threaded Rivet Studs) is ideal
for professional and DIY use. Suitable for use with steel and aluminium rivet nuts, rivets and
threaded studs.The 360° swivel head makes it ideal for accessing hard to reach areas. Heavy-duty
ergonomic handles. Suitable for rivet nuts M3-M6, rivets 2.4mm to 4.8mm and stud rivets M4,
M5 and M6.
Contents: Standard rivets: 2.4mm (3/32") / 3.2mm (1/8") / 4.0mm (5/32") / 4.8mm (3/16").
Rivet nuts: M3 x 0.5 / M4 x 0.7 / M5 x 0.8 / M6 x 1. Stud rivets: M4 x 0.7 / M5 x 0.8 / M6 x 1.
Included within the box
Parts Diagram
5
1
3
29
8
7
6
21
19
17
16
4
11
10
13
15
18
14
12
20

03
Parts Diagram (continued)
1 Screw depth adjustment / Pull bar
2 Riveter
3 Front sleeve for nose pieces
4 4mm Nose piece
5 Front sleeve for mandrels
6 2.4mm Riveting nose piece
7 3.2mm Riveting nose piece
8 4.8mm Riveting nose piece
9 Mandrel for riveting studs – M6 x 1
10 Mandrel for riveting studs – M5 x 0.8
11 Mandrel for riveting studs – M4 x 0.7
12 Mandrel holder – M3 x 0.5
13 Mandrel for nuts – M3 x 0.5
14 Mandrel holder – M4 x 0.7
15 Mandrel for nuts – M4 x 0.7
16 Mandrel holder – M5 x 0.8
17 Mandrel for nuts – M5 x 0.8
18 Mandrel holder – M6 x 1
19 Mandrel for nuts – M6 x 1
20 Jaw Case
21 Spanners

Note – We always recommend testing this first on a test piece of material until you become
comfortable operating the nut riveter.
1. Assemble the riveter by fitting the jaw case (20) on the tool and the front sleeve for
nose pieces (3). From the body of the riveter select the correct sized nose piece (4, 6,
7 or 8) and securely attach into the front sleeve (3).
2. Open the handles of the riveter so they are as wide as they can be.
3. With the handles on the riveter remaining open, insert the rivet shaft securely into
the nose piece (4, 6, 7, or 8).
4. Place the rivet into the hole of the workpiece.
5. Close and squeeze the handles on the riveter to release the rivet into the workpiece.
6. If the rivet does not release, repeat the process again from step 2.
6. The rivet will now be securely inserted into the workpiece.
Rivets - Operation
04
Riveting Nose Piece
Front Sleeve For Nose Pieces
Jaw Case

05
Threaded Nut Rivets - Operation
Note – We always recommend testing this first on a test piece of material until you
become comfortable operating the nut riveter.
1. Assemble the riveter by attaching the front sleeve for mandrels (5) into
the riveter.Then select the correct sized mandrel for nut (13, 15, 17 or 19)
for the size of the nut rivet that you are going to be using and securely screw
into the riveter. Screw the corresponding mandrel holder (12, 14, 16 or 18)
into the end of the front sleeve (5).
2. On the workpiece drill a hole where the diameter is slightly wider than the size
of the nut rivet diameter.
3. Open the handles of the riveter so they are as wide as they can be.
4. Securely screw the nut rivet onto the mandrel so that the end of the rivet is
level with the end of the mandrel and doesn’t protrude.To ensure that the
nut rivet is level with the end of the mandrel the mandrel holder (12, 14, 16
or 18) may need to be screwed further into the front sleeve (5).
5. Adjust the mandrel holder (12, 14, 16 or 18) to ensure it is touching the
rivet head and make sure it is securely locked into position with the lock nut.
6. Place the rivet into the pre drilled hole of the workpiece and press down so
that the nut flange is held firmly against the upper face of the workpiece.
7. Close and squeeze the handles of the riveter so that the nut rivet is compressed.
8. When the rivet has formed a bulge against the workpiece unscrew the
mandrel from the nut rivet by unscrewing the screw depth adjustment
(1) on the riveter.
Mandrel Holder
Lock Nut
Mandrel For
Nuts
Front Sleeve for Mandrels

06
Stud Rivets - Operation
Note – We always recommend testing this first on a test piece of material until you
become comfortable operating the nut riveter.
1. Assemble the riveter by attaching the front sleeve for mandrels (5) into the riveter.
Then select the correct sized mandrel for riveting studs (9, 10 or 11) for the
stud rivet to be used and securely screw into the riveter. Select the smallest
mandrel holder (12, 14, 16 or 18) that the threaded end of the stud rivet to be
used will slide into and screw this into the front sleeve (5).
2. On the workpiece drill a hole where the diameter is slightly wider than the size
of the stud rivet diameter.
3. Open the handles of the riveter so they are as wide as they can be.
4. Securely screw the stud rivet into the mandrel as far as it can go. Ensure the
mandrel holder (12, 14, 16 or 18) is screwed completely
down into the front sleeve (5) to enable the task ahead to be carried out.
The mandrel holder (12, 14, 16 or 18) may need to be adjusted slightly to
ensure that it is touching the rivet head and make sure it is securely locked
into position with the lock nut.
5. Place the stud rivet into the pre drilled hole of the workpiece and press down
so that the nut flange is held firmly against the upper face of the workpiece.
6. Close and squeeze the handles of the riveter so that the stud rivet is compressed.
When the stud rivet has formed a bulge against the workpiece unscrew the
mandrel from the stud rivet by unscrewing the screw depth adjustment (1)
on the riveter.
7. When the stud rivet has formed a bulge against the workpiece unscrew the mandrel
from the stud rivet by unscrewing the screw depth adjustment (1) on the riveter.
Mandrel Holder
Lock Nut
Front Sleeve for Mandrels
Mandrel for Riveting
Studs

07
Disposal
Always check and adhere to national regulations when disposing of any tools that are no
longer functional and cannot be repaired.
• Contact your local waste disposal authority for information on how to correctly
dispose of tools.
Environmental Protection
Recycle unwanted materials instead of disposing of them as waste. All tools, accessories and
packaging should be sorted, taken to a recycling centre and disposed of in a manner which is
compatible with the environment. When the product becomes completely unserviceable and
requires disposal, drain any fluids (if applicable) into approved containers and dispose of the
product and fluids according to local regulations.
Contact
Find out more about the Blue Spot Tools®Lifetime Guarantee at www.BlueSpot.uk.com
Tel: 0800 093 0115
Email: [email protected]
Unit 64, Boswell Way,
Stakehill Industrial Estate,
Middleton M24 2RW
Cleaning & Maintenance
To clean just use a dry cloth to wipe over the riveter.
Storage
ALWAYS ensure the riveter and riveter nuts is stored out of reach of children.
Store the tool in a secure, dry place.
Table of contents
Other BlueSpot Rivet Tools manuals
