Blumfeldt Vesta User manual

Vesta
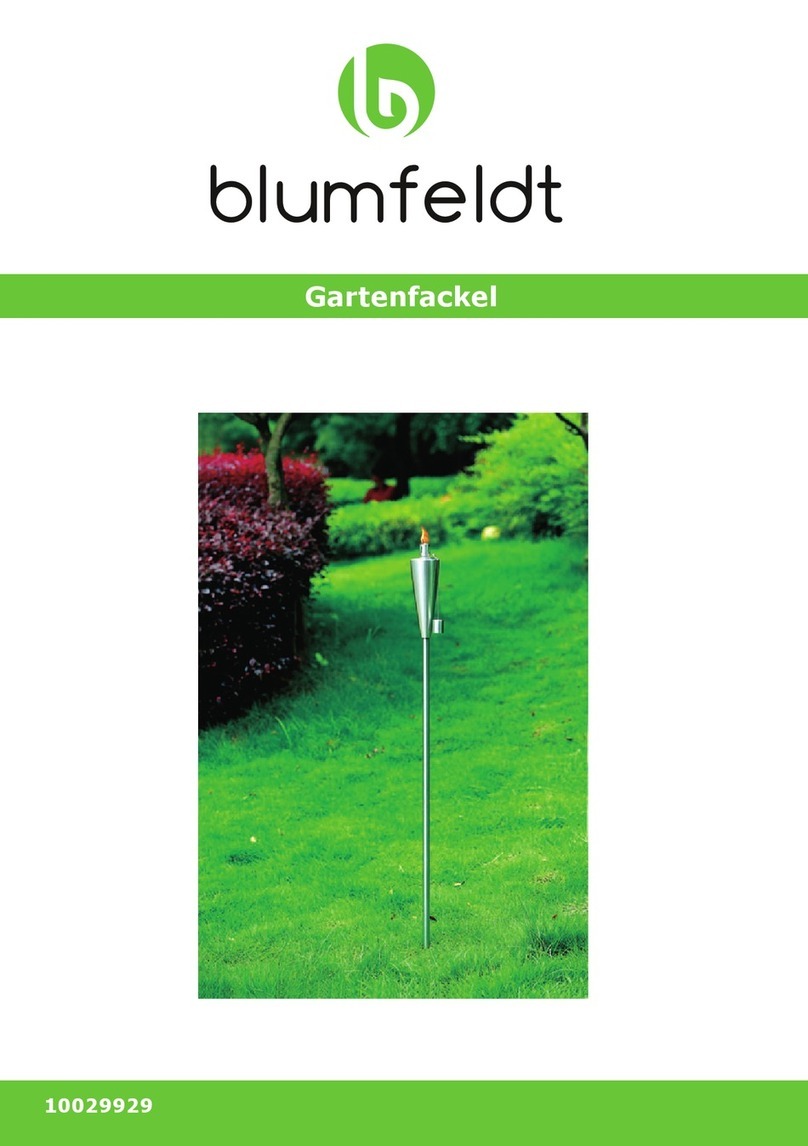
Gartenfackel
Garden Torch
Antorcha para jardín
Torche de jardin
Torcia da giardino
10029929


3
DE
Sehr geehrter Kunde,
wir gratulieren Ihnen zum Erwerb Ihres Gerätes.
Lesen Sie die folgenden Hinweise sorgfältig durch und
befolgen Sie diese, um möglichen Schäden vorzubeugen.
Für Schäden, die durch Missachtung der Hinweise und
unsachgemäßen Gebrauch entstehen, übernehmen wir
keine Haftung. Scannen Sie den folgenden QR-Code,
um Zugriff auf die aktuellste Bedienungsanleitung und
weitere Informationen rund um das Produkt zu erhalten:
INHALTSVERZEICHNIS
Sicherheitshinweise 4
Produktübersicht 5
Benutzung 6
Reinigung und Pege 8
TECHNISCHE DATEN
Artikelnummer 10029929
Höhe 120 cm
Volumen des Ölbehälters 330 ml (mit 245 ml Lampenöl
befüllbar)
HERSTELLER & IMPORTEUR (UK)
Hersteller:
Chal-Tec GmbH, Wallstraße 16, 10179 Berlin, Deutschland.
Importeur für Großbritannien:
Chal-Tec UK limited
Unit 6 Riverside Business Centre
Brighton Road
Shoreham-by-Sea
BN43 6RE
United Kingdom
English 9
Español 15
Français 21
Italiano 27

4
DE
SICHERHEITSHINWEISE
• Verwenden Sie nur empfohlenes Lampenöl.
• Verwenden Sie nie Benzin, Kerosin oder andere ent ammbare
Flüssigkeiten.
• Halten Sie die Fackel von Kindern und Tieren fern.
• Nur für den Außengebrauch. Nicht in abgeschlossenen Räumen
verwenden.
• Nicht in der Nähe der Fackel ent ammbarer Gegenstände verwenden.
• Nicht unbeaufsichtigt lassen.
• Bewegen Sie die Fackel nicht, wenn sie angezündet oder heiß ist.
• Verwenden Sie zum Ersticken der Flamme den Kerzenlöscher.
• Beachten Sie Warnhinweis auf der Fackel auf der Verpackung des
Lampenöls, das Sie verwenden.
• Die Fackel und der selbstverlöschende Deckel können sehr heiß werden.
Befüllen Sie die Fackel erst, wenn sie abgekühlt ist. Achten Sie darauf, dass
die Fackel vor der Lagerung abgekühlt ist.
• Bewahren Sie diese Bedienungsanleitung zum späteren Nachschlagen auf
und machen Sie diese Informationen Dritten zugänglich, die die Fackel
verwenden.
• Die Gartenfackel aufrecht in festem Grund stecken, bevor Sie angezündet
wird.
• Drücken Sie die Fackel fest in den Boden (mindesten 30 cm), um Stabilität
zu gewährleisten.
• Überprüfen Sie die Stabilität in regelmäßigen Abständen.
WARNUNG
Lebensgefahr! Für kleine Kinder reicht ein Schluck vom
Lampenöl oder auch nur das Saugen am Docht aus, um einen
lebensgefährlichen Lungenschaden herbeizuführen. Falls
Lampenöl verschluckt wird, führen Sie keinen Brechreiz herbei.
Suchen Sie sofort ärztlichen Rat auf oder wenden Sie sich an ein
Giftnotrufzentrum.

5
DE
PRODUKTÜBERSICHT
Fackelkopf
Dochthalterung
Flammenlöscher
Erdspieß in 3 Teilen

6
DE
BENUTZUNG
Die Gartenfackel ist ca. 120 cm
hoch. Das spitze Ende des Stiels wird
verwendet, um die Fackel in den Boden
zu rammen.
Befüllen Sie den Lampe mittels Trichter
mit dem empfohlenen Lampenöl.
Beachten Sie die maximale Füllmenge
(245 ml). Überfüllen Sie die Lampe nicht.
Achten Sie darauf, dass das Lampenöl
nicht überläuft. Falls das Öl doch nach
außen gelaufen ist, entfernen Sie das Öl
vollständig und trocknen Sie die Fackel,
bevor Sie die Lampe entzünden.
Die Öllampe hat ein Sicherheitssystem
mit einem Dochtschutz, so dass
Kinder nicht mit dem Lampenöl
in Berührung kommen oder am
Docht lecken. Lassen Sie die Fackel
trotz des Sicherheitssystems
nicht unbeaufsichtigt. Im
Auslieferungszustand ist der Docht
bereits gesichert. Der Docht sollte
ca. 5 mm über die Dochthalterung
herausragen
Stecken Sie den Dochtschutz mit dem
Docht in den Ölbehälter. Lassen Sie ihn
los und drehen Sie den Kopf gleichzeitig
im Uhrzeigersinn, so dass der drehbare
Dochtschutz in die längliche Vertiefung
des Dochthalters einrastet und im
Uhrzeigersinn weiter ins Gewinde
geschraubt werden kann.

7
DE
Entzünden der Fackel
• Warten Sie vor dem Anzünden 5
Minuten bis der Docht sich mit Lampenöl
vollgesogen hat.
• Achten Sie darauf, dass sich an Ihren
Händen kein Lampenöl bendet.
• Verwenden Sie zum Anzünden der
Gartenfackel Streichhölzer.
Löschen der Flamme
• Stülpen Sie den Löschdeckel über die
Flamme, bis die Flamme vollständig
erloschen ist.
• Berühren Sie den Löschdeckel nicht, bis er
völlig abgekühlt ist.
• Warten Sie, bis die Fackel völlig abgekühlt
ist, bevor Sie die Fackel transportieren oder
wieder auffüllen.
Auffüllen der Fackel
Um die Fackel wieder aufzufüllen, drücken Sie den Brennkopf nach oben
und drehen sie gleichzeitig im entgegensetzten Uhrzeigersinn, so dass der
drehbare Dochtschutz mit der länglichen Vertiefung der Dochthalterung
ineinandergreift. Schrauben Sie den Kopf entgegen dem Uhrzeigersinn ab.

8
DE
REINIGUNG UND PFLEGE
Allgemeine Pege
Es ist nicht notwendig die Gartenfackel in besonderer Weise zu pegen, da
sie aus qualitativ hochwertigem Edelstahl gefertigt ist. Sie können die Fackel
pegen, indem Sie ein Tuch und ein für Edelstahl geeignetes Reinigungsmittel
verwenden, um den natürlichen Glanz des Edelstahls wiederherzustellen.
Falls nötig, können Sie Asche am Docht mit einem Tuch wegwischen. Die
Entfärbung des Materials im Bereich der Flamme durch die Hitze ist eine
natürliche Eigenschaft von Edelstahl und stellt keinen Qualitätsmangel dar.
Wenn die Fackel nicht in Gebrauch ist, empfehlen wir einen Schutz vor dem
Aussetzen gegenüber der Atmosphäre.
Dochtpege
Die Gartenfackel darf nur mit den empfohlenen runden Glasfaserdochten
verwendet werden, die ca. 6,5 mm groß sind. Achten Sie bei Einsetzen darauf,
dass der Docht fest in der Dochthalterung sitzt und dass die Dochtenden ca.
5mm über der Dochthalterung stehen:
Die Dochtöffnung muss völlig dicht sein. Durch die rein kapillare Wirkung des
mitgelieferten Dochtes brennt er nicht runter und muss nicht ausgetauscht
werden.

9
EN
Dear customer,
Congratulations on the purchase of your appliance.
Please read the following instructions carefully and
follow them to prevent potential damage. We accept
no liability for damage caused by disregarding the
instructions or improper use. Please scan the QR code to
access the latest operating instructions and for further
information about the product.
CONTENTS
Safety Instructions 10
Product overview 11
Use 12
Cleaning and Care 14
TECHNICAL INFORMATION
Product code 10029929
Height 120 cm
Oil tank volume 330 ml (can be lled with 245 ml
lamp oil)
MANUFACTURER & IMPORTER (UK)
Manufacturer:
Chal-Tec GmbH, Wallstraße 16, 10179 Berlin, Germany.
Importer for Great Britain:
Chal-Tec UK limited
Unit 6 Riverside Business Centre
Brighton Road
Shoreham-by-Sea
BN43 6RE
United Kingdom

10
EN
SAFETY INSTRUCTIONS
• Only use recommended lamp oil.
• Never use petrol, paraf n or other ammable liquids.
• Keep the torch away from children and animals.
• For outdoor use only. Do not use in closed rooms.
• Do not use ammable objects near the torch.
• Do not leave unattended.
• Do not move the torch when it is lit or hot.
• Use the candle extinguisher to smother the ame.
• Observe the warning on the are on the packaging of the lamp oil you are
using.
• The torch and the self-extinguishing lid can become very hot. Do not ll
the are until it has cooled down. Make sure that the are has cooled
down before storing it.
• Keep these operating instructions for future reference and make this
information available to third parties who use the are.
• Stick the garden torch upright in solid ground before lighting it.
• Press the torch rmly into the ground (at least 30 cm) to ensure stability.
• Check the stability at regular intervals.
WARNING
Risk of death! For small children, a sip of the lamp oil or even just
sucking on the wick is enough to cause life-threatening lung
damage. If lamp oil is swallowed, do not induce vomiting. Seek
medical advice immediately or contact a poison control centre.

11
EN
PRODUCT OVERVIEW
Torch head
Wick holder
Flame extinguisher
Ground spike in 3 parts

12
EN
USE
The garden torch is approx. 120 cm high.
The pointed end of the handle is used to
ram the torch into the ground.
Fill the lamp with the recommended
lamp oil using a funnel. Note the
maximum lling quantity (245 ml). Do
not overll the lamp. Make sure that the
lamp oil does not overow. If the oil does
leak out, remove the oil completely and
dry the torch before lighting the lamp.
The oil lamp has a safety system with
a wick protector so that children do
not come into contact with the lamp oil
or lick the wick. Do not leave the are
unattended despite the safety system.
When delivered, the wick is already
secured. The wick should protrude
approx. 5 mm above the wick holder
Insert the wick protector with the wick
into the oil container. Release it and turn
the head clockwise at the same time so
that the rotating wick guard engages in
the elongated recess of the wick holder
and can be screwed further into the
thread in a clockwise direction.

13
EN
Lighting the torch
• Before lighting, wait 5 minutes until the
wick is saturated with lamp oil.
• Make sure that there is no lamp oil on your
hands.
• Use matches to light the garden torch.
Extinguishing the ame
• Put the extinguisher lid over the ame until
the ame is completely extinguished.
• Do not touch the extinguishing lid until it
has cooled down completely.
• Wait until the are has cooled down
completely before transporting or relling
the are.
Filling up the torch
To rell the torch, push the ring head upwards and at the same time turn
it anticlockwise so that the rotating wick guard engages with the elongated
recess of the wick holder. Unscrew the head in an anticlockwise direction.

14
EN
CLEANING AND CARE
General maintenance
It is not necessary to maintain the garden torch in a special way, as it is made
of high-quality stainless steel. You can maintain the torch by using a cloth and
a cleaning agent suitable for stainless steel to restore the natural shine of the
stainless steel. If necessary, you can wipe away ash on the wick with a cloth.
The discolouration of the material in the area of the ame due to the heat is
a natural property of stainless steel and does not represent a quality defect.
When the torch is not in use, we recommend protection against exposure to
the atmosphere.
Wick care
The garden torch may only be used with the recommended round glass bre
wicks, which are approx. 6.5 mm in size. When inserting the wick, make sure
that it is rmly seated in the wick holder and that the wick ends are approx. 5
mm above the wick holder:
The wick opening must be completely tight. Due to the purely capillary effect
of the wick supplied, it does not burn down and does not need to be replaced.

15
ES
Estimado cliente:
Le felicitamos por la adquisición de este producto. Lea
atentamente el siguiente manual y siga cuidadosamente
las instrucciones de uso con el n de evitar posibles
daños. La empresa no se responsabiliza de los daños
ocasionados por un uso indebido del producto o por
haber desatendido las indicaciones de seguridad.
Escanee el siguiente código QR para obtener acceso al
manual de usuario más reciente y otra información sobre
el producto.
ÍNDICE
Indicaciones de seguridad 16
Resumen del producto 17
Utilización 18
Limpieza y cuidado 20
DATOS TÉCNICOS
Número del artículo 10029929
Altura 120 cm
Volumen del depósito de aceite 330 ml (puede llenarse con 245 ml
de aceite para lámparas)
FABRICANTE E IMPORTADOR (REINO UNIDO)
Fabricante:
Chal-Tec GmbH, Wallstraße 16, 10179 Berlín, Alemania.
Importador para Reino Unido:
Chal-Tec UK limited.
Unit 6 Riverside Business Centre
Brighton Road
Shoreham-by-Sea
BN43 6RE
Reino Unido

16
ES
INDICACIONES DE SEGURIDAD
• Utilice únicamente el aceite para antorchas recomendado.
• No utilice nunca gasolina, para na u otros líquidos in amables.
• Mantenga la antorcha fuera del alcance de los niños y los animales.
• Solo para exteriores. No utilizar en habitaciones cerradas.
• No utilizar objetos in amable cerca de la antorcha.
• No dejar sin vigilancia.
• No mueva la antorcha cuando esté encendida o caliente.
• Utilice el extintor de velas para sofocar la llama.
• Tenga en cuenta la advertencia en el envase del aceite para antorchas que
esté utilizando.
• El soplete y la tapa autoextinguible pueden calentarse mucho. No llene la
e hasta que se haya enfriado. Asegúrese de que la antorcha se ha enfriado
antes de guardarla.
• Conserve estas instrucciones de uso para futuras consultas y ponga esta
información a disposición de terceros que utilicen la antorcha.
• Clava la antorcha de jardín en posición vertical en tierra rme antes de
encenderla.
• Presiona la antorcha rmemente en el suelo (al menos 30 cm) para
asegurar su estabilidad.
• Compruebe la estabilidad a intervalos regulares.
ADVERTENCIA
¡Peligro de muerte! Para los niños pequeños, un sorbo del aceite
de la lámpara o incluso el simple hecho de chupar la mecha es
su ciente para causar daños pulmonares potencialmente
mortales. En caso de ingestión de aceite para lámparas, no
inducir el vómito. Acudir inmediatamente al médico o a un
centro de toxicología.

17
ES
RESUMEN DEL PRODUCTO
Cabeza de linterna
Soporte para
mechas
Extintor de llamas
Pico de tierra en 3 partes

18
ES
UTILIZACIÓN
La antorcha de jardín tiene una altura
aproximada de 120 cm. El extremo
puntiagudo del mango se utiliza para
clavar la antorcha en el suelo.
Llene la lámpara con el aceite
recomendado para lámparas utilizando
un embudo. Tenga en cuenta la cantidad
máxima de llenado (245 ml). No llene la
antorcha en exceso. Asegúrese de que el
aceite de la antorcha no se desborde. Si
se produce una fuga de aceite, elimine el
aceite por completo y seque la antorcha
antes de encender la lámpara.
La lámpara de aceite tiene un sistema
de seguridad con un protector de mecha
para que los niños no entren en contacto
con el aceite de la lámpara ni laman la
mecha. No deje la antorcha sin vigilancia
a pesar del sistema de seguridad. Cuando
se entrega, la mecha ya está asegurada.
La mecha debe sobresalir unos 5 mm por
encima del porta-mechas
Introduzca el protector de mecha con
la mecha en el recipiente de aceite.
Suéltelo y gire al mismo tiempo el
cabezal en el sentido de las agujas del
reloj para que el protector de mecha
giratorio encaje en el hueco alargado del
soporte de mecha y pueda enroscarse
más en la rosca en el sentido de las
agujas del reloj.

19
ES
Encender la antorcha
• Antes de encenderla, espera 5 minutos
hasta que la mecha esté saturada de aceite
para lámparas.
• Asegúrate de que no hay aceite de lámpara
en tus manos.
• Utilice cerillas para encender la antorcha de
jardín .
Extinción de la llama
• Coloque la tapa del extintor sobre la llama
hasta que ésta se extinga por completo.
• No toque la tapa de extinción hasta que se
haya enfriado completamente.
• Espere a que la bengala se haya enfriado
completamente antes de transportarla o
rellenarla.
Llenando la antorcha
Para rellenar el soplete, empuje el cabezal de cocción hacia arriba y gírelo al
mismo tiempo en sentido contrario a las agujas del reloj para que el protector
de mecha giratorio encaje en el hueco alargado del soporte de mecha.
Desenrosque el cabezal en sentido contrario a las agujas del reloj.

20
ES
LIMPIEZA Y CUIDADO
Mantenimiento general
No es necesario realizar un mantenimiento especial del soplete de jardín, ya
que está fabricado en acero inoxidable de alta calidad. Puede mantener el
soplete utilizando un paño y un producto de limpieza adecuado para el acero
inoxidable para recuperar el brillo natural del mismo. Si es necesario, puedes
limpiar la ceniza de la mecha con un paño. La decoloración del material en la
zona de la llama debido al calor es una propiedad natural del acero inoxidable
y no representa un defecto de calidad. Cuando la linterna no esté en uso, se
recomienda protegerla contra la exposición a la atmósfera.
Cuidado de la mecha
La antorcha de jardín sólo puede utilizarse con las mechas redondas de bra
de vidrio recomendadas, que tienen un tamaño aproximado de 6,5 mm. Al
insertar la mecha, asegúrese de que está rmemente asentada en el soporte de
la mecha y de que los extremos de la mecha están aproximadamente 5 mm por
encima del soporte de la mecha:
La abertura de la mecha debe ser completamente hermética. Gracias al efecto
puramente capilar de la mecha suministrada, ésta no se consume y no es
necesario sustituirla.
This manual suits for next models
1
Table of contents
Languages:
Other Blumfeldt Outdoor Light manuals

Blumfeldt
Blumfeldt 10029812 User manual

Blumfeldt
Blumfeldt 10029929 User manual

Blumfeldt
Blumfeldt 10030168 User manual

Blumfeldt
Blumfeldt Loomy L User manual

Blumfeldt
Blumfeldt Mandala User manual

Blumfeldt
Blumfeldt Moody STX User manual

Blumfeldt
Blumfeldt Moody ST User manual
Blumfeldt
Blumfeldt Moody SOLAR ST User manual