BMI 81238 User manual

copyright © 2010 BMI # 81238 RC Airplane & Helicopters LED Lights System
Manual Manuel d’instructions
Manual
GB
Manuel d’instructions
F
Thanks for purchasing this product which is easy to install and operate.
Your airplane & helicopter will look much more realistic with this position
lighting system which can also be used for night fl ights.
We recommend to read carefully this manual before any operation in order
to obtain the right functions.
Specifi cations.
Input Voltage: 4V to 6V
Consumption: 30mA
Control box size: 35mmx24mmx8mm
LED size: 5mm
Weight: 35g
Installation
1.The fl ight LED system consists of
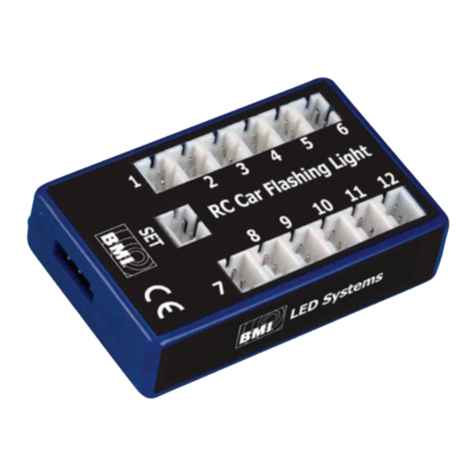
• The main control box
• Twin white LEDs, lighting permanently
• One green LED, lighting permanently
• One red LED, lighting permanently
• Twin white strobe LEDs, fl ashing quickly
• Twin red LEDs, fl ashing slowly
2. Fix the lights according the following pictures, identical as the lights of a
full scale airplane or helicopter.
3. Connect all the LED leads to the main control box and the connect the
lead of the control box to a free channel of your receiver.
4. Fix the main control box in the cabin with double sided tape and fi x the
wires with self adhesive tape and the position LEDs in their supports.
Instructions
1.The power supply of the lights can either be from your receiver or an
individual 4V to 6V battery pack, but NEVER use both power supplies. A
faulty connection may damage the Control Box or the receiver.
2. Although these LEDs lights use little power, we suggest you always fi x a
battery monitor (# 81197 VOLTSPY) to your receiver or check the state
of your receiver battery (# 19817 Capacity Controller) before take-off.
Don’t use the LEDs if you have low power or if you are unsure about the
status of your receiver battery.
WARNINGS:
1.Small parts are dangerous for children. Avoid swallowing.
2.Avoid any part to become wet as those are not waterproof.
3.Fix properly every part before fl ying.
4.Never connect other LED types to the main control box
Nous vous félicitons pour l’achat de ce produit dont l’installation est aisé.
Equipé de feux de position votre avion ou hélicoptère en sera d’autant plus
réaliste et vous permettra des vols de nuits. Veuillez lire attentivement les
instructions pour obtenir les connections correctes.
Spécifi cations.
Tension: 4V à 6V
Consommation: 30mA
Dimensions de la boîte de contrôle: 35mmx24mmx8mm
Diamètre des LED: 5mm
Poids: 35g
Installation
1. Les feux de position LED comprennent :
• Le boîtier de contrôle
• Deux LEDs blancs, allumés en permanence
• Un LED vert, allumé en permanence
• Un LED rouge, allumé en permanence
• Deux LEDs blancs, à clignotement rapide
• Deux LEDs rouges, à clignotement rapide
2. Fixez les LEDs suivant l’illustration ci-après, identique au feux de posi-
tions des avions ou hélicoptères 1 :1.
3. Connectez les câbles des LEDs au boîtier de contrôle et connectez en-
suite le câble du boîtier à un canal libre de votre récepteur.
4. Fixez le boîtier de contrôle dans la cabine, les câbles des LEDs au moyen
de bande adhésive et les LEDs dans leurs supports.
Utilisation
1. Vous pouvez alimenter la boîte de contrôle LEDs soit par l’alimentation
de votre récepteur ou par une alimentation individuelle de 4V à 6V, mais
n’utiliser JAMAIS deux alimentations en même temps. Une mauvaise
connexion peut détériorer le boîtier de contrôle ou le récepteur.
2. Les LEDs possèdent une très faible consommation, néanmoins nous vous
recommandons d’utiliser un moniteur de tension (# 81197 VOLTSPY) de
contrôle sur l’alimentation de votre récepteur ou de contrôler toujours
la capacité de votre batterie (# 19817 Contrôleur de capacité) avant
chaque décollage. N’utilisez pas les feux de position et ne décollez pas si
la tension de votre batterie est faible ou en cas de doute.
ATTENTION:
1. Ne laissez pas à portée d’enfants, l’ingérence de petites pièces peut être
dangereux.
2. Evitez de mouiller les feux de position. Ceux-ci ne sont pas étanche.
3. Fixez solidement toutes les pièces avant le décollage.
4. Ne connectez jamais d’autres LEDs étranger au boîtier de contrôle.
RC Airplane & Helicopters LED Lights System
Feux de position LED pour avions et hélicoptères
Red 2
Rot
Rouge
Red 1
Rot
Rouge
Red 2
Rot
Rouge
White 1
Weiß
Blanc
White
1
Weiß
Blanc
Green
Grün
Vert
White
2
Weiß
Blanc
White
2
Weiß
Blanc
White
1
Weiß
Blanc
Red 2
Rot
Rouge
Red 2
Rot
Rouge
Red/Rot/Rouge 1
White
1
Weiß
Blanc
White
1
Weiß
Blanc
Red 2
Rot
Rouge
Green
Grün
Vert
Red 1
Rot
Rouge
Red 1
Rot
Rouge
Red 2
Rot
Rouge
Green
Grün
Vert
White: FLASH
Weiß: FLASH
Blanc: FLASH
INPUT 4V-6V
Red: FLASH
Rot: FLASH
Rouge: FLASH
White
Weiß
Blanc
Red
Rot
Rouge
2
1
2
1
# 81238

copyright © 2010 BMI # 81238 RC Airplane & Helicopters LED Lights System
Bedienungsanleitung
Handleiding
Bedienungsanleitung
D
Handleiding
NL
Vielen Dank dass Sie sich entschieden haben für dieses BMI-Produkt, das
sehr leicht einzustellen und einzubauen ist. Ihr Modell wird viel realistischer
aussehen und ist nun für den Nachtfl ug geeignet. Wir empfehlen Ihnen die
Bedienungsanleitung sehr aufmerksam durchzulesen.
TECHNISCHE DATEN
Eingangsspannung: 4V ~ 6V
Stromverbrauch : 30mA
Abmessungen Steuereinheit: 35mmx24mmx8mm
LED Diameter : 5mm
Gewicht: 35g
Einbau
1. Lieferumfang:
• 1x Steuereinheit
• 2x LED Weiß, leuchten dauerhaft
• 1x LED grün, leuchtet dauerhaft
• 1x LED Rot, leuchtet dauerhaft
• 2 x Strobe Weiß LED – Blinken schnell
• 2 x Strobe Rot LED – Blinken schnell
2. Verbinden Sie die LEDs sowie abgebildet.
3. Verbinden Sie jeden LED mit seinem Anschluss an der Steuereinheit.
Stecken Sie das Stromversorgungskabel der Steuereinheit in einen freien
Kanal des Empfängers.
4. Bauen Sie die Steuereinheit mit doppelseitigem Klebeband ein, Schieben
Sie die Leds in die Halter und kleben Sie die Kabel mit Tesafi lm fest.
Gebrauchsanweisung.
1. Verwenden Sie eine 4.8V~6.0V Batterie als Stromversorgung ODER
verbinden Sie die Control Box mit Ihrem Empfänger. Niemals Beide
anschließen. Bei einem Falschen Anschluss kann der Empfänger oder der
Control-Box beschädigt werden.
2. Obwohl diese LEDs wenig Strom verbrauchen, empfehlen wir Ihnen der
Zustand Ihrer Empfängerbatterie vor der Inbetriebnahme des Modelles
zu überprüfen mit einem Monitor (#81197 Volt- Spy oder #19817 Capa-
city Controller) . Die LEDs nicht einschalten und nicht Fliegen wenn Sie
unsicher über den Status Ihrer Empfängerbatterie sind.
WARNUNG!
1. Achtung: Gefährlich für Kinder. Enthält verschluckbare Kleinteile.
2. Schützen Sie das Gerät vor Feuchtigkeit, Regen und Wasser. Das Gerät
sollte nur im Trocknen benutz werden.
3. Kontrollieren Sie ob alle Teile Ordnungsgemäß installiert sind, bevor Sie
mit dem Modell fahren
4. Niemals nicht-originale LEDs anschließen an der Steuereinheit.
Wij feliciteren u met uw aankoop, waarvan de installatie en gebruik zeer
eenvoudig is. Uitgerust met positielichten zal uw model er veel realisti-
scher uitzien en toelaten bij duisternis te vliegen. Gelieve aandachtig deze
instructies door te nemen.
SPECIFICATIES
Ingangsspanning: 4.0V ~ 6.0V
Stroomverbruik: 30mA
Afmetingen Controlbox: 35mmx24mmx8mm
Diameter LEDs: 5mm
Gewicht: 35g
Installatie
1. Deze set bevat:
• Controlbox
• 2 x LED wit : branden constant.
• 1x LED groen : brandt constant
• 1x LED rood : brandt constant.
• 2x LED wit: knipperen snel
• 2x LED rood: knipperen snel
2. Monteer de LEDs volgens de afbeelding hierna, identiek aan de positie-
lichten van vliegtuigen/helikopters.
3. Sluit de LEDs aan op de Controlbox en verbind vervolgens de stroomver-
zorgingskabel van de Controlbox met een vrij kanaal op de ontvanger.
4. Monteer de Controlbox in het model en maak deze vast met dubbelzijde
kleefband. De bekabeling fi xeren met kleefband en de LEDs in hun
steunen vastmaken.
Gebruik
1. U kan de ControlBox van stroom voorzien door gebruik te maken van
de ontvangerstroom op een leeg kanaal of door een aparte voeding
4.0V~6.0V te voorzien. Gebruik nooit twee voedingen tegelijkertijd. Een
verkeerde aansluiting kan uw ControlBox of ontvanger beschadigen.
2. Hoewel het verbruik van de LEDs zeer gering is, raden wij u aan een
spanningsmonitor te gebruiken (#81197 VOLTSPY) om de spanning
ontvangerbatterij te controleren of een Capacity Controller (#19817) te
gebruiken om de capaciteit van de batterij na te gaan voor elke start.
Gebruik geen LED verlichting en stijgt niet op als uw batterijspanning
onvoldoende sterk of twijfelachtig is.
AANDACHT!
1. Buiten bereik van kinderen houden. Het inslikken van kleine onderdelen
is gevaarlijk
2. Vermijd het nat worden van de LEDs, Controlbox en bekabeling. Deze
zijn niet waterproof.
3. Zorg ervoor dat alle onderdelen goed vastzitten, alvorens op te stijgen.
4. Sluit nooit LEDs van andere makelij of type aan op de ControlBox.
LED Positionsbeleuchtung für RC Flugzeuge & Hubschrauber
LED Positielichten voor vliegtuigen en helikopters
Red 2
Rot
Rouge
Red 1
Rot
Rouge
Red 2
Rot
Rouge
White 1
Weiß
Blanc
White
1
Weiß
Blanc
Green
Grün
Vert
White
2
Weiß
Blanc
White
2
Weiß
Blanc
White
1
Weiß
Blanc
Red 2
Rot
Rouge
Red 2
Rot
Rouge
Red/Rot/Rouge 1
White
1
Weiß
Blanc
White
1
Weiß
Blanc
Red 2
Rot
Rouge
Green
Grün
Vert
Red 1
Rot
Rouge
Red 1
Rot
Rouge
Red 2
Rot
Rouge
Green
Grün
Vert
White: FLASH
Weiß: FLASH
Blanc: FLASH
INPUT 4V-6V
Red: FLASH
Rot: FLASH
Rouge: FLASH
White
Weiß
Blanc
Red
Rot
Rouge
2
1
2
1
# 81238
Other BMI Remote Control manuals
