BMW S 1000 RR - 2009 Datasheet
BMW S1000 RR RIDE-ON
Owner’s Manual
with Assembly Instructions
Styles and colours may vary.
Made in China.
The owner’s manual contains important safety information as well as assembly, use and
maintenance instructions.
The Ride-on Car must be assembled by an adult who has read and understands the
instructions in this manual.
Keep the package away from children and dispose of properly before use.
Keep this manual for future reference.

On the purchase of your new Ride-On.
This ride-on car will provide your child with many miles of riding of enjoyment.
To help assure you and your rider a safe ride we ask you to please read this
manual carefully, and keep it for future reference.
Follow the recommendations in this manual, they are designed to improve the
safety and operation of your ride-on car and rider.
Battery
Fuse
Charger
12V7Ah x 1
5A & 13A
15V1000mA
Suitable age:
Load Capacity:
Speed:
Size of car:
Power way:
Charge time:
3~8 Years
Under 30 kgs
2.5~5km/h
110 x 47 x 69 CM
Charging type
8 ~ 12 hours
About Your New Ride-On │1
VER: SMS-JT528(英国)-EN-150611
BMW S1000 RR Children Electric Motorcycle manufactured by Zhejiang
Jiajia Ride-On Co., Ltd.
(Add: Xincang Industrial Zone, Pinghu City, Zhejiang Province,
P.R.China). The BMW logo and the BMW word mark are trademarks of
BMW AG and are used under license.
1
2
3
4
5
6
7
8
9
10
1
1
2
1
7
1
2
1
1
1
5
2
7
6
5
5
3
1
10
9
4
8
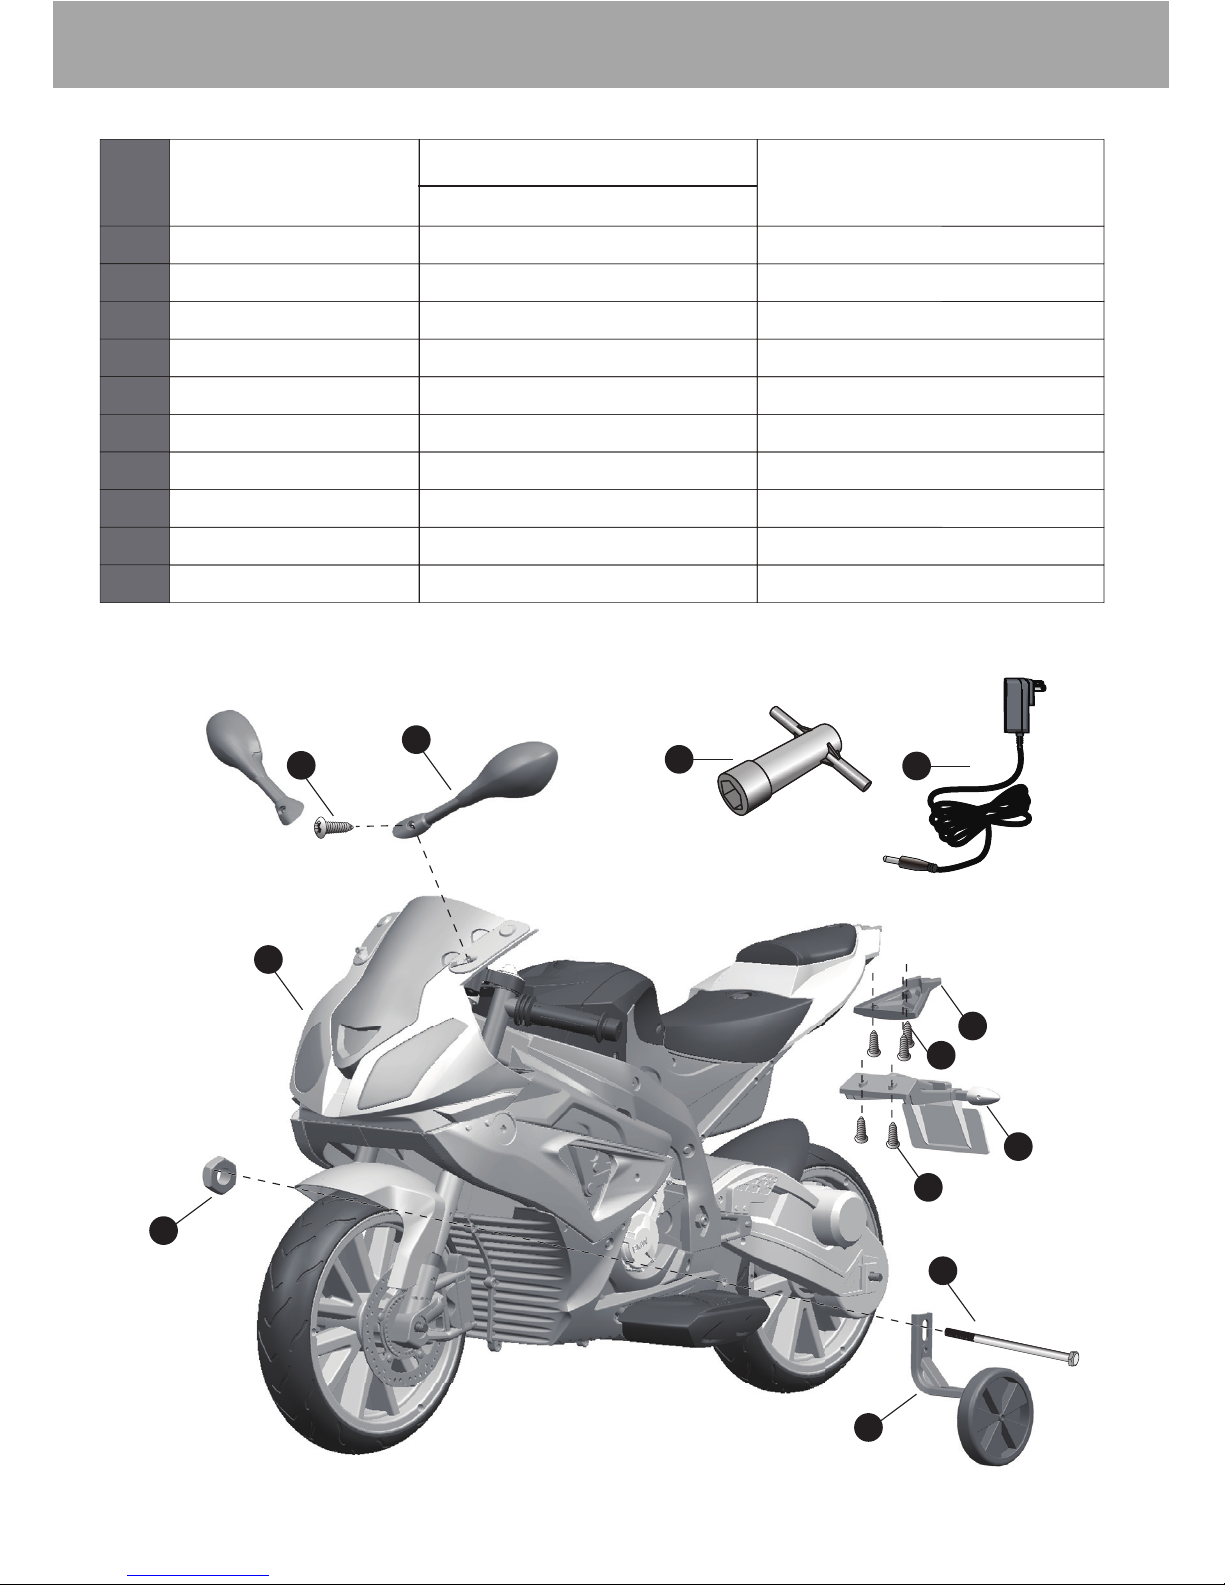
PART
NO.
REMARKS
PART NAME
Q’ty (pcs)
Vehicle body
View mirror
Spanner
Charger
Ø4x12 screw
Bolt
*Side wheel
Ø10 locknut
Tail light
Rear licence plate
One pair
NOTE: Some parts shown are assembled on both sides of vehicle
Parts List │2

FOR THE SAFETY OF YOUR CHILD, PLEASE READ ALL WARNINGS AND
ASSEMBLY/USE INSTRUCTIONS. KEEP THIS GUIDE FOR FUTURE REFERENCE.
• ADULT ASSEMBLY REQUIRED. The product contains small parts, which are for
adult assembly only. Keep children away when assembling.
• Always remove protective material and poly bags and dispose before assembly.
Before You Begin Assembly │3
WARNING!
FOR THE SAFETY OF YOUR CHILD, PLEASE READ ALL WARNINGS AND
ASSEMBLY/USE INSTRUCTIONS. KEEP THIS GUIDE FOR FUTURE REFERENCE.
• ADULT ASSEMBLY REQUIRED. The product contains small parts, which are for
adult assembly only. Keep children away when assembling.
• Always remove protective material and poly bags and dispose before assembly.
• Make sure that the power switch is turned “OFF” before assembling the ride-
on.
• Before first time use, charge the battery for at least 4 to 6 hours.
• Assembly tools required:
WARNING!
Screwdriver
(not included)
Spanner

1
2
34
Attach the Side Wheels │4
1. Fit the side wheel to the vehicle body from the left side.
2. Insert the bolt into the hole in the side wheel support, and through the
vehicle body.
3. Fit the other side wheel onto the bolt.
4. Tighten a Ø10 locknut to the end of the bolt with a spanner.
HINT: An extra spanner has been provided to hold the bolt on the other
side while tightening the lock nut on the other side.
HINT: The kickstand was assemblied by
factory already. If you want to use side
wheel, Remove the kickstand please.
Kickstand

1
2
3
1
2
3
If you wish to use the sound effects, install two AAA Batteries(not included) using
the following steps:
Attach the View Mirror & Battieries │5
1. Fit the View mirror to the facuguard,
2. Tighten a screw to secure it with a
screwdriver.
3. Repeat for the other side.
1. With a small screwdriver remove the screw on the battery cover located in the
center of handle bar
2. Remove the battery cover from the top of the battery compartment.
3. Insert two AAA batteries in their correct
polarities.
4. Replace the battery cover over the battery
compartment and fasten with the screw
you removed in step one.
●Do not mix old and new batteries. Do not mix different types of batteries: alkaline, standard
(carbon-zinc) or rechargeable (nickel-cadmium).
●Insert batteries as indicated inside the battery compartment, anode to anode, cathode to
cathode.
●Remove batteries during long periods of non-use. Always remove exhausted batteries from
the product. Battery leakage and corrosion can damage this product. Dispose of batteries
safely.
●Never short circuit the battery terminals.
BATTERY INFORMATION
1
2
3
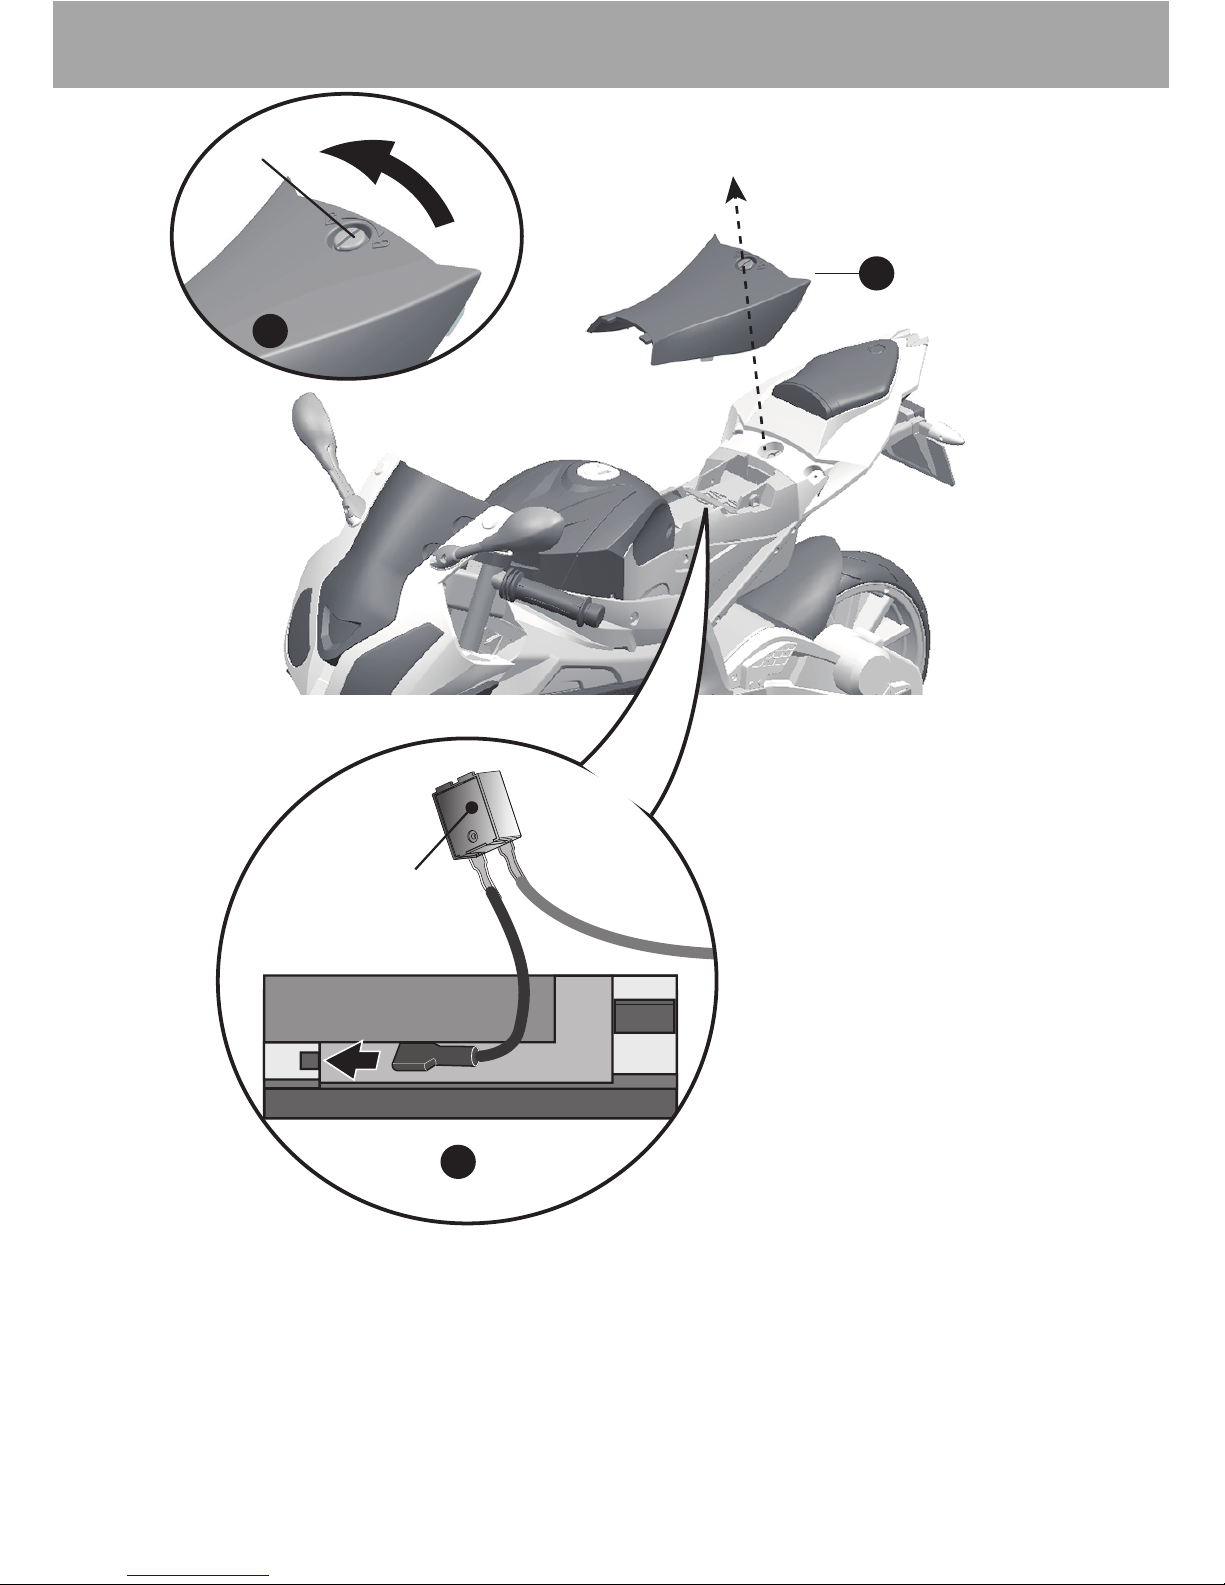
Connect the Power Supply │6
Fuse box
1&2. Turn the Lock on the top of seat and remove the seat.
3. Plug the Red fuse connector into the terminal on battery.
Lock
1
3
4
2
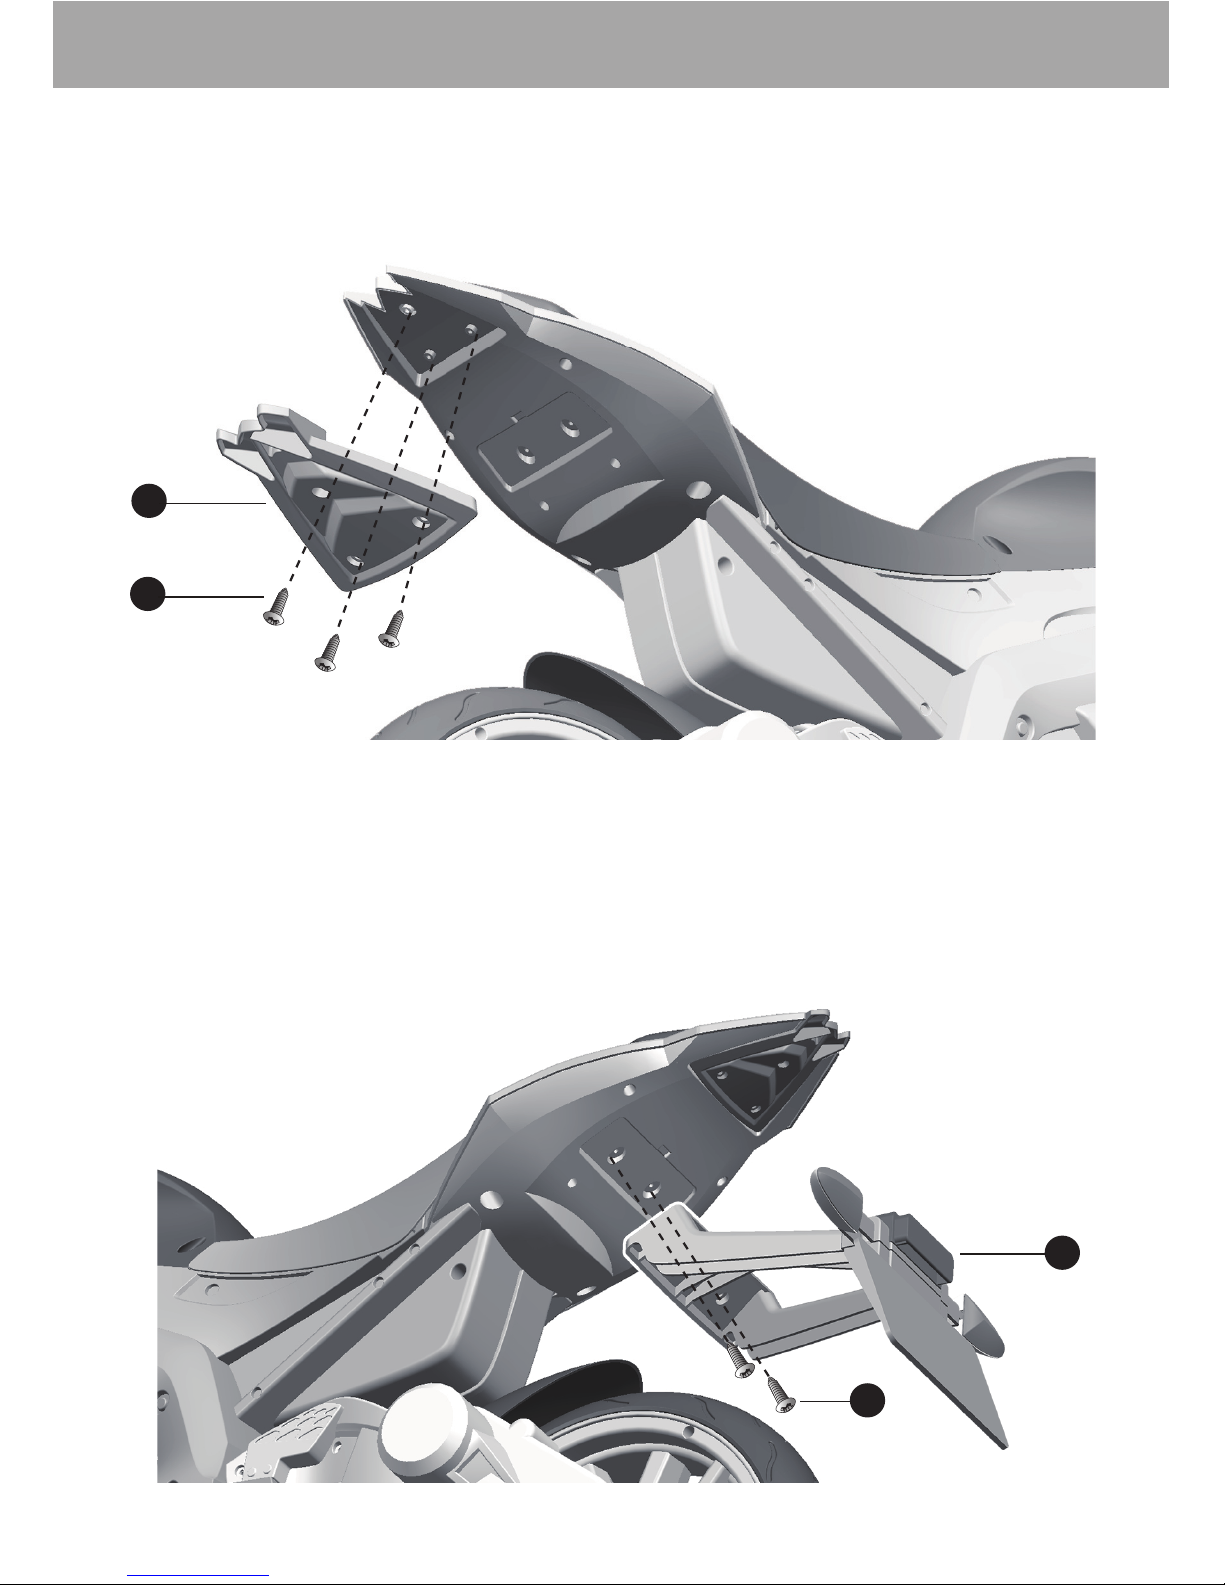
Attach the Tail light & Rear Licence Plate │7
1. Fit the tail light to the vehicle body,
2. Tighten three Ø4x12 screws to secure it with a screwdriver.
3. Fit the rear licence plate to the vehicle body,
4. Tighten two Ø4x12 screws to secure it with a screwdriver.
PREVENT INJURIES AND DEATHS:
• NEVER LEAVE CHILD UNATTENDED. DIRECT ADULT SUPERVISION IS REQUIRED.
Always keep child in view when child is in vehicle.
• This toy should be used with caution since skill is required to avoid falls or
collisions causing injury to the user or third parties.
• Protective equipment should be worn.
• Never use in roadways, near cars, on or near steep inclines or steps,
swimming pools or other bodies of water.
• Always wear shoes.
• Always sit on the seat.
• Not to be used in traffic.
• This toy is unsuitable for children under 3 years due to its maximum speed;
Maximum user weight is 30 kgs.
• This toy has no brake.
Rules for Safe Riding
• Important! Before using the vehicle for the first time, the battery needs to be charged for 4 to
6 hours, no more than 10 hours. Only an adult can charge and recharge the battery.
• Check all the screws, cap nuts and protective coverings regularly and tighten as required.
Must confirm before using that following work which is already finished:
• Keep Children within Safe Riding Areas:
- Never use in roadway, near motor vehicles, on lawn space, on or near steep inclines or steps,
swimming pools or other bodies of water;
• Use the toy only on flat surfaces. Such as inside your house, garden or playground.
• Never use in the dark. A child could encounter unexpected obstacles and have an accident.
Operate the vehicle only in the daytime or a well-lit area.
• It is prohibited to change the circuit or add other electric parts
• Inspect wires and connections of the vehicle periodically.
• Do not let any child touch the wheels or be near them when the car is moving .
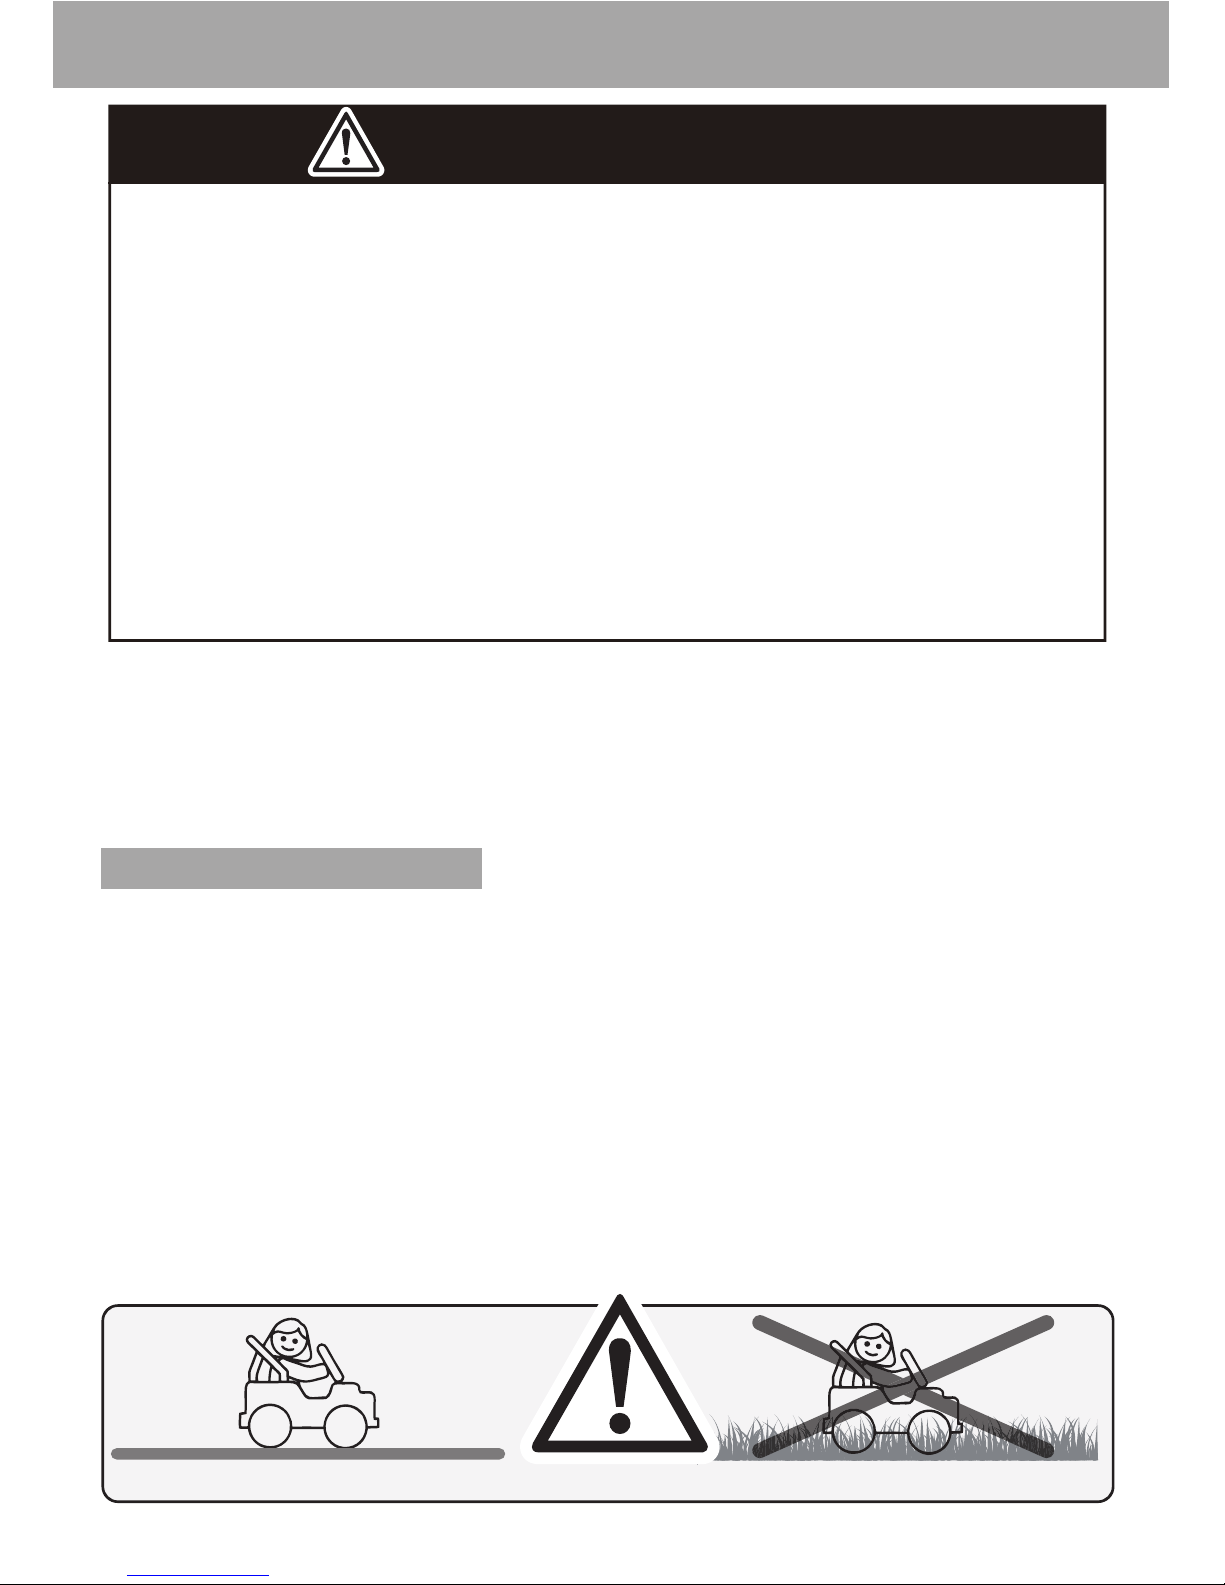
WARNING!
Use the vehicle on generally level ground ONLY! DO NOT Use the vehicle on Lawn space!
Safety │8

1
2
3
4
Make sure your child knows how to steer, how to start and stop the vehicle and knows the rules for safe
driving. The vehicle can be driven at a maximum of 5 km/h.
ADVANCED USE - High speed Drive
1. Power Switch: Turns the vehicle on and off.
2. High/Low speed switch: The switch operates the vehicle to move in low or high
speed.
3. Sounds buttons: Press for sounds playing.
4. Foot pedal: Applies power (speed) to the vehicle.
Use Your Ride-on │9
Other manuals for S 1000 RR - 2009
1
Table of contents


