BN Products BNCE-30-24V Administrator Guide

Page | 1
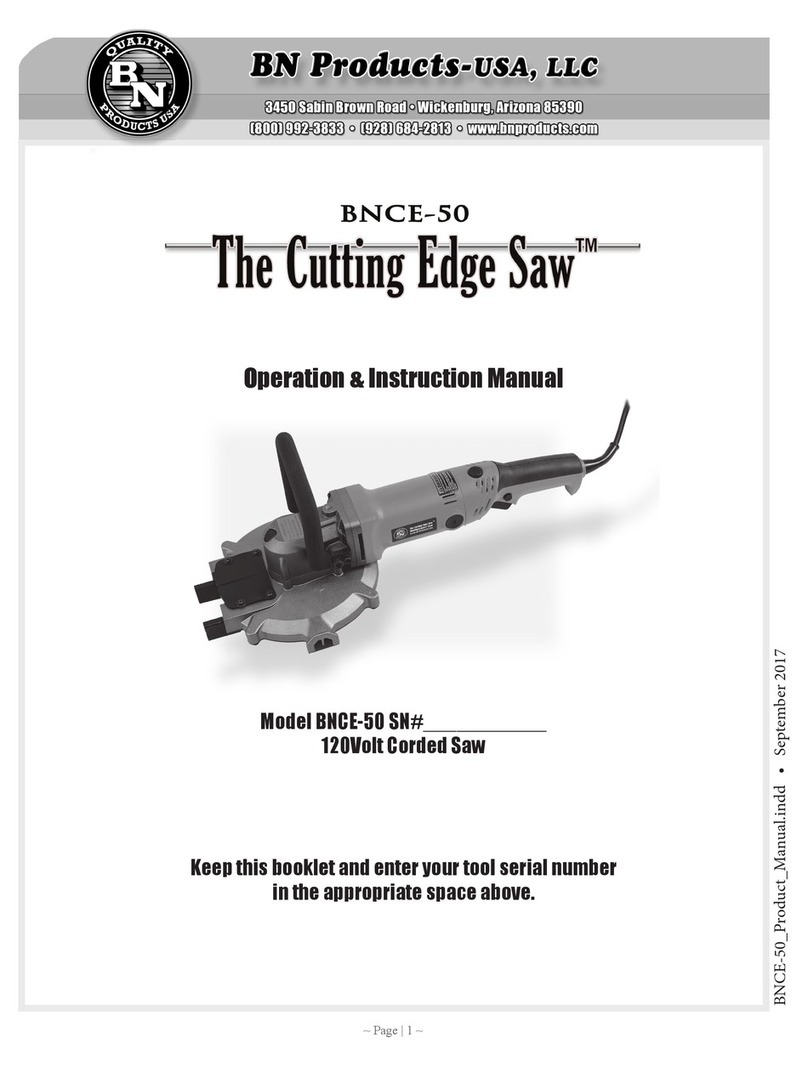
Operation & Instruction Manual
Model BNCE-30-24V SN# ___________
Keep this booklet and enter your tool serial number
in the appropriate space above.
BNCE-30-24V_ Operation s_ Manual_ 2021-small.indd
3 4 5 0 Sa bin B ro w n Ro a d • W icke n bu rg, AZ 8 5 3 9 0
( 8 0 0 ) 9 9 2 -3 8 3 3 • m ail@bn p ro d u cts .co m

Page | 2
Co n te n ts
3 Ge n e ral S afe ty Ru le s
3 W o rk Are a Safe ty
3 Ele ctrica l Safe ty
4 Se rvic e
5 Fu n ctio n s a n d App licatio n s
5 Specication
5 Stan dard Bla de :
5 Op e ra tio n
6 Ope ratio n In s tructio n s
6 Main te n an ce o f th e Ma in Un it
7 RB -BN CE-3 0 B la d e
7 Ge n e ral Ope ra tin g Cau tio n s
8 Abn o rm al D is play Mo de Fu n ctio n
10 In s tallin g an d re m o vin g batte ry
10 Ch argin g
11 Ch arge r Ligh t
11 Ch arge r tro u ble s h o o tin g
Instruction Manual
Please read this manual before operating this tool.
Purpose of this m anual - This manual is intended to provide users with
correct knowledge and the procedures for operation, maintenance and in-
spection of the tool, a multipurpose ush cutting saw for cutting reinforc-
ing bar, coil rod, all-threaded rod, pipe, tubing, and conduit. Improper use
of the tool may possibly lead to a serious accident. Therefore, always read
this instruction manual before using the tool to familiarize yourself with
its correct usage, operating method, and warnings.

Page | 3
Ge n e ral S afe ty Ru le s
Warning! Read and understand all instructions. Failure to follow all
instructions listed below may result in electric shock, re and/or serious
personal injury.
P LEASE S AVE TH ES E IN STR UCTION S !
W o rk Are a Safe ty
• Keep work area clean and well lit. Cluttered or dark areas invite accidents.
• Do not operate power tools in explosive atmospheres, such as in the presence of
ammable liquids, gases or dust. Power tools create sparks which may ignite the
dust or fum es.
• Keep children and bystanders away while operating a power tool. Distractions can
cause you to lose control.
Ele ctrica l Safe ty
Do not expose power tools to rain or wet conditions. Water entering a power tool will
increase the risk of electric shock or damage.
Pe rs o n a l S afe ty
• Always wear eye protection. Care must be taken to prevent chips from hitting other
workers in the same area.
• Stay alert, watch what you are doing and use common sense when operating a power
tool. Do not use a power tool while you are tired or under the inuence of drugs,
alcohol or medication. A moment of inattention while operating power tools may
result in serious personal injury.
• Use personal protective equipment. Always wear eye protection. Protective equip-
ment such as dust m ask, non-skid safety shoes, hard hat, gloves, or hearing protec-
tion used for appropriate conditions will reduce personal injuries.
• Prevent unintentional starting. Ensure the switch is in the o-position before con-
necting to power source and/or battery pack, picking up or carrying the tool. Carry-
ing power tools with your nger on the switch or energizing power tools that have
the switch on invites accidents.
• Rem ove any adjusting key or wrench before turning the power tool on. A wrench or
a key left attached to a rotating part of the power tool may result in personal injury.
• Do not overreach. Keep proper footing and balance at all times. This enables better
control of the power tool in unexpected situations.
• Dress properly. Do not wear loose clothing or jewelry. Keep your hair, clothing and
gloves away from moving parts. Loose clothes, jewelry or long hair can be caught in
moving parts.
• If devices are provided for the connection of dust extraction and collection facilities,

Page | 4
ensure these are connected and properly used. Use of dust collection can reduce dust-
related hazards.
• Keep ngers and body parts away from the blade opening.
Po w e r To o l U s e an d Care
• Do not force the power tool. Use the correct power tool for your application. The cor-
rect power tool will do the job better and safer at the rate for which it was designed.
• Do not use the power tool if the switch does not turn it on and o. Any power tool that
cannot be controlled with the switch is dangerous and must be repaired.
• Disconnect the plug from the power source and/or the battery pack from the power
tool before m aking any adjustments, changing accessories, or storing power tools.
Such preventive safety m easures reduce the risk of starting the power tool acciden-
tally.
• Store idle power tools out of the reach of children and do not allow persons unfamiliar
with the power tool or these instructions to operate the power tool.
• Power tools are dangerous in the hands of untrained users.
• Maintain power tools. Check for m isalignment or binding of moving parts, breakage
of parts and any other condition that may aect the power tool’s operation. If dam-
aged, have the power tool repaired before use. Many accidents are caused by poorly
maintained power tools.
• Keep cutting tools sharp and clean. Properly maintained cutting tools with sharp cut-
ting edges are less likely to bind and are easier to control.
• Use the power tool, accessories and blades in accordance with these instructions,
taking into account the working conditions and the work to be performed. Use of the
power tool for operations dierent from those intended could result in a hazardous
situation.
Se rvic e
Have your power tool serviced only by a qualied repair person using only identical re-
placement parts. This will ensure that the safety of the power tool is maintained.
Cutting Edge Saw™ Package
Upon purchasing the Cutting Edge Saw, open the carrying case and check the contents for
the following:
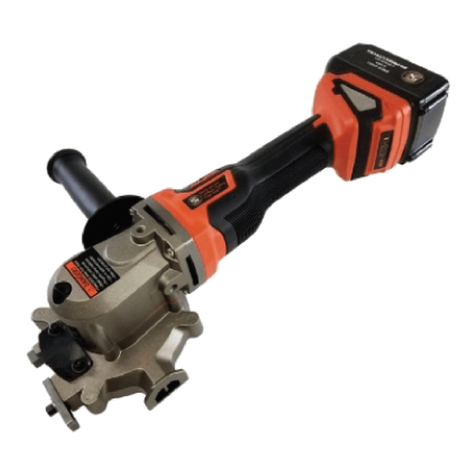
• BNCE-30-24V Cutting Edge Saw with blade
mounted
• Rem ovable Side Handle and chip collector bag
• Allen Wrenches for Blade Removal and Installation
• Additional Saw Blade, Additional Battery
• Operation Manual
If anything is missing or dam aged please do not return this packaged unit to the distribu-
tor, please call the Benner-Nawm an customer service department: 800 -992-3833 or 928-
684-2813

Page | 5
Fu n ctio n s a n d App licatio n s
This section describes the functions, applications, service environment and other aspects
of the Cutting Edge Saw. The Cutting Edge Saw is a power tool developed for fast and ef-
cient cutting of various ferrous and non-ferrous materials. This multipurpose tool can be
used by a variety of contractors however the primary design was for ush cutting or free
cutting reinforcing bars, coil rod and all-threaded rod used in the construction industry.
Applic atio n o f th e To o l - Actual areas of application the Cutting Edge Saw is used for
are as follows:
The BNCE-30-24V can cut up to 1” grade 60 rebar (reinforcing bars, up to 3/5” I.D pipe,
1” O.D. copper water pipe, 1” O.D. tubing, 3/4” EMT conduit, 1” square steel tubing and
bar, up to 1”water pipe sch40 and schedule 80, up to 1-1/8” O.D all-thread rod.
Rules of Use and Storage - To use the tool to its fullest performance, the user is required
to be fully fam iliar with the saw itself, the cutting blades, and storage procedures upon
completion of work.
Specication
The power tool is a multipurpose saw with an enclosed guard and ush cutting capabili-
ties. The specications of the main unit are as follows.
Stan dard Bla de :
(Best for Ferrous Metals)
Supplied with (2) each 5” 127 mm Blade diameter × 1.6mm thickness, 30 teeth. The m axi-
mum blade RPM is 20 00. The blade replacement number is: RB-BNCE-30
Op e ra tio n
• Checking and Preparation of Working Environment
• Check the following before using the Cutting Edge Saw. Always observe the instruc-
tions and prohibited items.
• Checking of weather conditions, do not use in the rain or snow
!DANGER: The Cutting Edge is not a waterproof power tool. If it becomes
wet, the power source system may become faulty or the operator may get
an electric shock. Therefore, when it is raining or snowing, never operate
this saw outdoors, on top of buildings or under roofs where rain or snow
enters freely. Do not use where water accumulates or where water splashes.

Page | 6
Ope ratio n In s tru ctio n s
Locate the front handle in the mounting hole that provides the best grip. To operate the
trigger, depress the trigger and slide forward to start the saw. Start the saw before cutting
and then apply a light pressure m oving forward through the cut.
! DANGER: Electric Shock Hazard. Ignoring this warning may lead to
death or serious injury. When raining or snowing, do not operate
outdoors or indoors where rain or snow enters freely or in extreme
temperatures.
Do not use under high temperature and humidity or extremely cold
temperature conditions. The tool is designed for use under an allowable
environmental temperature of 0 to 120°F.Operation at higher temperature m ay cause the
tool’s main unit to overheat. Operation at high temperature with high humidity may cause
the tool to fail due to condensation.
Also, do not operate the Cutting Edge Saw™ in very cold places or inside refrigerators
where the temperature is freezing or below.
Check The State of Your Work Site.
Before using the tool, check whether the state of the work site is as follows. Is the worksite
free of foreign objects, debris, water, ice, snow, powered electrical cables, and excessive
dust? Is the oor free of obstructions? Is their adequate ventilation? Is the worker prop-
erly insulated from the ground. Follow the operation instructions and avoid prohibited
items.
Rem ove Hazardous Substances.
Since the tool is battery operated, it may spark and cause an explosion or a re if operated
near gas cylinders, thinner, or explosive substances or in a place lled with ammable gas,
etc. Therefore, do not use the tool in places where such hazardous substances are present.
Ignoring this warning may cause death or serious injury. Never use the tool in places lled
with ammable gas or near hazardous substances of high ammability.
Main te n an ce o f th e Ma in Un it
Clean the entire unit occasionally by removing dust, debris and oils. Occasionally remove
the ush cutting bottom plate; then remove any cutting chips that remain lodged in the
area of the cutting blade.

Page | 7
It is also recommended that the cutting blade be removed and inspected for any materi-
als that did not exit out the chip exhaust area. This should be done after 4-8 hours of use.
Most m aterial cutting chips would normally exit out the chip exhaust area and into the
Cutting Chip Catch Bag. It is recommended that the Cutting Chip Catch bag be emptied
when it becomes 2/3 full of cut material.
RB -BN CE-3 0 B la d e
The Blade for the BNCE-30-24V Cutting Edge Saw™ should be replaced when the blade is
dull or chipped and a noticeable increase in cutting time has occurred.
To change the Blade, remove the screws that hold the Blade Cover to the Body. Remove
the cover and unscrew the four bolts holding the blade to the Hub. The replacement
blades that you purchase have new screws to be used when installing the new blade. Make
sure that when you remove the blade you clean out any metal debris that has not escaped
the tool.
Ge n e ral Ope ra tin g Cau tio n s
The following describe the general cautions for operating the tool. Always observe the
cautions stated in each item.
• Do not press the operation switch if the tool is pointed towards anyone. Operating the
tool by holding it toward anyone may cause injury from contact with the blade.
• Do not use the Cutting Edge Saw for purposes it is not intended.
• Do not use the tool for lifting or ham mering etc. instead, only use this tool for cutting.
Otherwise, the main unit may be broken or damaged, causing injury.
Charger for BNCE-24VLI Battery
Model BNCE-24VCHGR
Input A.C. 120 V 50 -60 Hz
Output D.C. 14.4V - 21.6V
Weight 1 lbs. (.45 kgs)
IMPORTANT SAFETY INSTRUCTIONS
SAVE THESE INSTRUCTIONS —This manual contains important safety and operating
instructions for battery charger. Before using battery charger, read all instructions and
cautionary markings on (1) battery charger, (2) battery, and (3) product using battery.

Page | 8
CAUTION —To reduce risk of injury, charge only 24V BN Prod-
ucts-USA rechargeable batteries marked on the charger label. Other
types of batteries m ay burst causing personal injury and damage.
• Non-rechargeable batteries cannot be charged with this battery
charger.
• Use a power source with the voltage specied on the nameplate
of the charger.
• Do not charge the battery cartridge in presence of ammable liquids or gases.
• Do not expose charger to rain or snow.
• Never carry charger by cord or yank it to disconnect from receptacle.
• After charging or before attempting any maintenance or cleaning, unplug the charger
from the power source. Pull by plug rather than cord whenever disconnecting charger.
• Make sure cord is located so that it will not be stepped on, tripped over, or otherwise
subjected to dam age or stress.
• Do not operate charger with damaged cord or plug. If the cord or plug is damaged, ask
BN Products-USA authorized service center to replace it in order to avoid a hazard.
• Do not operate or disassem ble charger if it has received a sharp blow, been dropped,
or otherwise damaged in any way; take it to a qualied serviceman. Incorrect use or
reassembly may result in a risk of electric shock or re.
• The battery charger is not intended for use by young children without supervision.
• Young children should be supervised to ensure that they do not play with the battery
charger.
• Do not charge battery cartridge when room temperature is BELOW 10 °C (50°F) or
ABOVE 40°C (104°F). When the battery temperature is under 0°C (32°F), charging
may not start.
• Do not attempt to use a step-up transformer, an engine generator or DC power recep-
tacle.
• Do not allow anything to cover or clog the charger vents.
Abn o rm al D is play Mo de Fu n ctio n
In case of abnormal mode during operation, the remaining amount display LED light
shows the current status of the tool as shown in this manual.
LED operation automatically turns o after 10 seconds.

Page | 9
Po w e r Gau ge
If you press the switch on the bottom of the power tool to check the battery status, the
LED light will turn o after a few seconds. Check the battery level as follows.

Page | 10
In s tallin g an d re m o vin g batte ry
Do not use force when inserting the battery. To insert the battery, align the tongue on the
battery with the groove in the housing and slip into place. Always insert it all the way until
it locks in place with a little click. If not, it may accidentally fall out of the tool.
Ch argin g
• Plug the battery charger into the proper AC voltage source. Charging light will start
blinking green.
• Insert the battery cartridge into charger.
• When the battery cartridge is inserted, the red charging light will light up and charg-
ing will begin.
• When the battery is charged, the charging light will change from red to green.
• After charging, remove the battery cartridge from charger and unplug the charger.

Page | 11
N OTE: The battery charger is for charging a BN Products-USA-battery
cartridge. Never use it for other purposes or for other manufacturer’s
batteries. If charging light ashes red/green, battery condition is as
below and charging may not start.
• Hot battery cartridge from just-operated tool or battery cartridge that has been left in
a location exposed to direct sunlight for a long time.
• Battery cartridge that has been left for a long time in a location exposed to cold air.
• When the battery cartridge is too hot, charging will begin after the cooling fan in-
stalled in the charger cools the battery cartridge. Charging will begin after the battery
cartridge temperature reaches the degree at which charging is possible. When the
temperature on battery is more than approx. 70°C, two charging lights may ash in
red color, and when approx. 50°C – 70 °C, one charging light in red color.
If the charging light ashes alternately in green and red color, charging is not possible. The
terminals on the charger or battery cartridge are dirty or the battery cartridge is worn out
or damaged.
Ch arge r Ligh t
• Blinking Green Light waiting to charge.
• Solid Red Light as the battery charges
• Solid Green Light the battery is fully charged.
• Red Green Light damage or overheat signal
Ch arge r tro u ble s h o o tin g
1. If the LED lamp does not work.
• Check connection of power cord into the outlet.
• Check the cleanliness of power cord and battery terminal.
• Insert another battery to check the charger working normally.
2. The green LED ickering when the battery is applied.
• Low temperature: Let stand at room temperature until normal temperature occures.
If Checking does not solve the problem, please contact BN Products-USA, LLC or an au-
thorized service center nearest you.

Page | 12

Page | 13

Page | 14
Parts List for BNCE-30-24V
No. Description Part No. Qty Note
1 BNCEP1-71 HEXAGON SOCKET SCREW (M5X14) 4 Part
2 BNCEP30-02 BOTTOM PLATE GUARD (BNCE-30) 1 Part
3 BNCEP1-73 HEXAGON SOCKET SCREW (M5X8) 4 Part
4 RB-BNCE-30 BLADE, REPLACEMENT (BNCE-30) 1 Part
6 BNCEP1-75 BLADE FLANGE AND SPINDLE 1 Part
7 BNCEP-07 HEX BOLT (M5X30) 4 Part
8 BNCEP-08 SPRING WASHER 5 Part
9 BNCEP-09 PLAIN WASHER (5 mm) 4 Part
10 BNCEP-20 HEX BOLT (M5X15) 1 Part
11 BNCEP-66 PLATE WASHER (5mm) 1 Part
12 BNCEP30-18 MOVEABLE CUTTING GUIDE BLOCK 1 Part
13 BNCEP30-17 FIXED CUTTING GUIDE BLOCK (30) 1 Part
14 BNCEP30-16 LEFT/ RIGHT RUBBER PLATE (30) 2 Part
15 BNCEP-22 PLAIN WASHER (4mm) 2 Part
16 BNCEP-23 RETAINER WASHER (4mm) 2 Part
17 BNCEP-24 CAP BOLT (M4X20) 2 Part
18 BNCEP-78 FLAT KEY - 5X5X14 1 Part
19 BNCEP-12 GASKET SEAL 1 Part
20 BNCEP-25 BALL BEARING (6002-2RS) 1 Part
21 BNCEP-26 SPACER 1Part
22 BNCEP-27 BIG GEAR 1 Part
23 BNCEP-28 RETAINING RING 1 Part
24 BNCEP24V-24 BALL BEARING (608-2Z) 2 Part
25 BNCEP30-10 ALUMINUM HOUSING (BNCE-30) 1 Part
26 BNCEP24V-26 BALL BEARING (628-2Z) 1 Part
27 BNCEP24V-27/28 BIG BEVEL GEAR ASSEMBLY 1 Assy
29 BNCEP-29 PIN (A5X16) 1 Part
30 BNCEP24V-30 ALUMINUM GEAR BOX HOUSING 1 Part
31 BNCEP-31 STEEL RING (6mm) 1 Part
32 BNCEP-32 SPRING FOR LOCK BUTTON 1 Part

Page | 15
Parts List for BNCE-30-24V
No. Description Part No. Qty Note
33 BNCEP-33 BLADE LOCKING BUTTONS 1 Part
34 BNCEP24V-34 SCREW TAPPING PAN HEAD T15 TOR 4 Part
35 BNCEP24V-35 NUT 1Part
36 BNCEP24V-36 BEVEL PINION 1 Part
37 BNCEP24V-37 BALL BEARING 608-2RS 1 Part
38 BNCEP24V-38 DIAPHRAGM 1 Part
39 BNCEP24V-30A ROTOR ASSY 1 Assy
40 BNCEP24V-40 BALL BEARING 696-2RS 1 Part
41 BNCEP24V-41 STATOR 1 Part
42 BNCEP24V-42 SWITCH ASSY 1Part
43 BNCEP-67 3 - POSITION SIDE HANDLE 1 Part
44 BNCEP24V-44A BUTTON ASSY 1 Assy
45 BNCEP24V-45 POLE SWITCH 1 Part
46 BNCEP24V-46A HOUSING PAIR 1 Part
47 BNCEP24V-47A DUST PROTECTION PAIR 1 Part
48 BNCEP24V-48 SCREW TAPPING PAN HEAD T10 TOR 6 Part
49 BNCEP24V-49 LEFT HOUSING 1 Part
50 BNCEP24V-50 DUST PROTECTION-LEFT 1 Part
51 BNCE-24VLI RECHARGEABLE BATTERY 24V 2 Part
52 BNCE-24VCHGR CHARGER, BNCE-24V CORDLESS 1 Part
BNCEP-CASE-
30-24V
CASE, BNCE-30-24V BMC 1 Part

Page | 16
Sa fe - Minimal sparks or burrs
V e r s a t i le - Flush cutting capability up to 1-1/8” diameter steel rod
Eco n o m ic a l - Up to 350 cuts on # 5 - 60 grade rebar per blade
D u r a b le - One-year warranty includes a carrying case, extra 24V
Battery, Charger and two cutting blades
Chip Exhaust Port (shown without
attachable Cutting Chip Catch Bag)
Safety Trigger Switch
Removable Side Handle
(Three Positions)
Flush Cutting Bottom Plate
Cutting Slot Opening
And Blade
Adjustable Slot
For Cutting
Blade Spindle Locking Button
Lithium -Ion 24V Battery (2)
With Charger
Special Tungston
Carbide Tipped Cutting Blades
Model No. BNCE-20-24V Cutting Edge Saw™
Power Supply 24V Lithium-Ion Battery (2 Supplied)
No-Load Blade Speed 2,200 RPM
Max Cutting Capacity 1” # 8 Rebar (25mm )
Cutting Blade RB-BNCE-30 (TCT Type Blade)
Proprietary (Two Supplied)
Blade Diameter 5” (127 mm) Tungsten Carbide Tipped
Other manuals for BNCE-30-24V
1
Table of contents
Other BN Products Saw manuals


