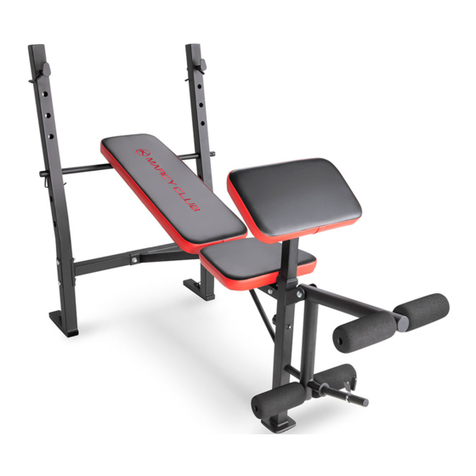
Bo-Lang B1 User manual

Please read the User Manual carefully before using this product and retain for
future reference.
BOLANG
Adjustable Bench
B1
USER MANUAL
1

2
CONTENTS
1. SAFETY INSTRUCTIONS 3
2.EXPLODED VIEW 4
3.PARTS LIST 5
4.ASSEMBLY INSTRUCTION 6
5.ADJUSTMENT INSTRUCTIONS 10
6.11
EXERCISE GUIDE
1YEAR MANUFACTURER WARRANTY,
30 DAYS MONEY BACK,
24/7 CUSTOMER SERVICE.
Free to contact us if you have any issues

3
1.SAFETY INSTRUCTIONS
Safety Precautions – Please Read the Instruction before Using!
1. Please keep this manual in safe place for your reference when necessary.
2. Please do not assembly or use this equipment until you read this manual thoroughly and
carefully. The safety and efficiency only can be achieved when the equipment is fully assembled,
maintained and used properly. Before using the equipment, check seat, back, nuts and
bolts
are secured tightened. It’s your responsibility to ensure all the users are well informed of all
the warnings and precautions.
3. For totally safe use, stable and leveled surface is required. Protect floor with a mat. Do not use
the equipment in a damp areas such as swimming pool sauna, etc. For safety space, the
equipment must have at least 2.0 meter of free space all around it. Before starting any
exercise program, you must consult your doctor to determine if you have any physical or health
conditions that could create a risk to your health and safety, or prevent you from using the
equipment properly. Your doctor’s advice is essential if you are taking medication that affects
your heart rate, blood pressure or cholesterol level.
4. Be aware of your body’s signals. Incorrect or excessive exercise can damage your health.
Stop exercising if you experienced any of the following symptoms: Pain, Tightness in your chest,
Irregular heartbeat, Extreme shortness of breath, feeling light Headed, Dizzy or Nauseous. If you
do experience any of these conditions, you must consult your doctor before continuing with your
exercise program.
5. This exercise equipment is not toy, please refrain children from playing with it, as injuries
might occur, and thus, shall be used for exercise purposes only. The equipment must be
assembled and used by adults only and it’s not suitable for therapeutic use.
6. The equipment is designed for home use only.
7. For adjustable parts, BEAR the maximum position in your mind, do not exceed the maximum
posi�on , otherwise will cause risk.
8. Always use the equipment as indicated. If you find any defective components while
assembling or checking the equipment or if you hear any unusual noises coming from the
equipment during use, stop immediately. Do not use the equipment until the problem has
been solved.
9. Wearing proper clothing while exercising, avoid wearing loose clothing that may get caught in
the equipment or that may restrict or prevent movements. Keep your back straight while using.
10. All moveable parts require weekly maintenance.
Checking them before using every time. If anything broken or loose, please fix them
immediately.
11. Be careful when lifting or moving the equipment so as not to injure your back. Always use
proper lifting techniques or seek assistance if necessary.
12.To protect the environment, never discard packages or batteries, and please put them into
a designated dustbin or other waste collection point.

5
3. PARTS LIST
PARTS
A
B1
B2
B3
C1
C2
D1
D2
E1
E2
E3
E4
E5
E6
E7
NO . QYT
MAINFRAME
FRONT STABILIZER
REAR STABILIZER
LEVER FOOT
FOOT SUPORT
FOAM
SEAT PAD
BACK PAD
HEXAGON BOLT M8X16
CURVED WASHER Φ8
FLAT WASHER Φ8
PLUM BLOSSOM KNOB
HEXAGON BOLT M8X40
BAND BOLT
SPRING KNOB
1
1
1
4
1
2
1
1
6
4
10
1
8
2
1
E1 E2 E3 E4 E5 E6 E7

4. ASSEMBLY INSTRUCTIONS
STEP 1:
6
E6
E6
E6*2
Spread MAINFRAME(A) as shown in the picture, insert 2pcs of ROUND HEAD BOLT(E6) to fix
MAINFRAME(A).

7
STEP 2:
a.Attach FRONT STABILIZER(B1)to MAINFRAME(A) using 3pcs of HEXAGON BOLT
M8x16 (E1), 2pcs of CURVED WASHER Φ8(E3) and 1pcs of FLAT WASHER Φ8(E2).
b.Repeat step a. to install REAR STABILIZER(B2) to MAINFRAME(A1) using 3pcs of
HEXAGON BOLT M8x16 (E1), 2pcs of CURVED WASHER Φ8(E3) and 1pcs of FLAT
WASHER Φ8(E2).
c.Lever the machine,
The user can tighten or loose 4*LEVER FOOT(B3) to level the machine if needed.
Tighten 4*LEVEL FOOT(B3) to make the machine stable before starting work out.
E1*3 E2*1 E3*2
*2
B3
E2
E2
E3
E3
E1
E1
E1
E1

8
STEP 3:
a.Place FOOT SUPORT(C1) onto MAINFRAME(A), then fixing them with PLUM BLOSSOM
KNOB(E4)
b.Put FOAM(C2) onto FOOT SUPORT(C1)
E4*1
E4

10
9
STEP 4:
Attach SEAT PAD(D1) and BACK PAD(D2)to MAINFRAME(A) using 8pcs of HEXAGON
BOLT M8x40(E5) and 8pcs of FLAT WASHER Φ8(E3)
E3
E5
E3
E3
E3
E5
E5
E5
E3*8 E5*8

ADJUSTMENT INSTRUCTIONS
10
To adjust the seat, pull out ROUND HEAD BOLT(E6), position the vertical seat post for the desired
height so that holes are aligned, then push ROUND HEAD BOLT(E6) into the hole.
To adjust the back, slacken the spring knob(E7) and secondary knob and pull both knobs back. Slide
the handlebar post along the housing on the main frame to the desired height, and with the holes
aligned correctly, tighten the spring adjusting knob and then the secondary knob.
E7
E7

EXERCISE GUIDE
11
PLEASE NOTE: Before beginning any exercise program, consult your physician. This is impor-
tantespecially if you are over the age of 45 or individuals with pre-existing health problems.
The pulse sensors are not medical devices, Various factors, including the user's movement, mayaf-
fect the accuracy of heart rate readings. The pulse sensors are intended only as an exercise aid
indetermining heart rate trends in general.
Exercising is great way to control your weight, improving your fitness and reduce the effect of aging and-
stress. The key to success is to make exercise a regular and enjoyable part of your everyday life.
The condition of your heart and lungs and how efficient they are in delivering oxygen via your blood to
yourmuscles is an important factor to your fitness. Your muscles use this oxygen to provide enough energy
fordaily activity. This is called aerobic activity. When you are fit, your heart will not have to work so hard. It
willpump a lot fewer times per minute, reducing the wear and tear of your heart.
So as you can see, the fitter you are, the healthier and greater you will feel.
Warm-up
Start each workout with 5 to 10 minutes of stretching and some light exercises. A proper warm-up increas-
esyour body temperature, heart rate and circulation in preparation for exercise. Ease into your exercise.

12
Training Zone Exercise
After warming up, increase the intensity to your desired exercise program. Be sure to maintain your intensi-
tyfor maximum performance. Breathe regularly and deeply as you exercise-never hold your breath.
Cool Down
Finish each workout with a light jog or walk for at least 1 minute. Then complete 5 to 10 minutes of
stretching to cool down. This will increase the flexibility of your muscles and will help prevent post-exerci-
seproblems.
THIS IS HOW YOUR PULSE SHOULD BEHAVE DURING GENERAL FITNESS EXERCISE.REMEMBER
TO WARM UP AND COOL DOWN FOR A FEW MINUTES.
The most important factor here is the amount of effort you put in. The harder and longer you work, the
morecalories you will burn. Effectively this is the same as if you were training to improve your fitness,
thedifference is the goal.
Workout Guidelines
TARGET ZONE

1.
Examine the equipment
periodically in order to detect
any damage or wear which
may have been produced. The
safety level of the equipment
can be maintained only if it is
examined regularly for
damage and wear, e.g. ropes,
pulleys, connection points
2. Lubricate moving parts with
light oil periodically to prevent
premature wear. Special
attention to components most
susceptible to wear.
3. Inspect and tighten all parts
before using the equipment,
replace any defective parts
immediately, and do not use
the equipment again until it is
in perfect working order.
4. The equipment can be
cleaned using a damp cloth
and mild non-abrasive
detergent. Do not use
solvents.
5. Do not attempt to repair this
equipment yourself. Should you
have any difficulty with assembly,
operation or use of your exercise
product or if you think that you
may have parts missing, contact
the manufacturer, their approved
service agent.
Care and Maintenance
The free area must be at least 0.6m greater than the training area. This is a space where you can safely
dismount, without obstruction, in case of an emergency. Where two pieces of equipment are positioned
adjacent to each other the free area may be shared.
Workout Area
13
Table of contents
Other Bo-Lang Home Gym manuals

