BOCK Zephyr EXL User manual
Quick Start
1
Technical Support: 814-777-3890
© 2022 Bock Industries, Incorporated.
All Rights Reserved.
Operation 1/2
1. Operator & bystander safety is your 1st priority!
Wear safety glasses and always point the
Zephyr in a safe direction.
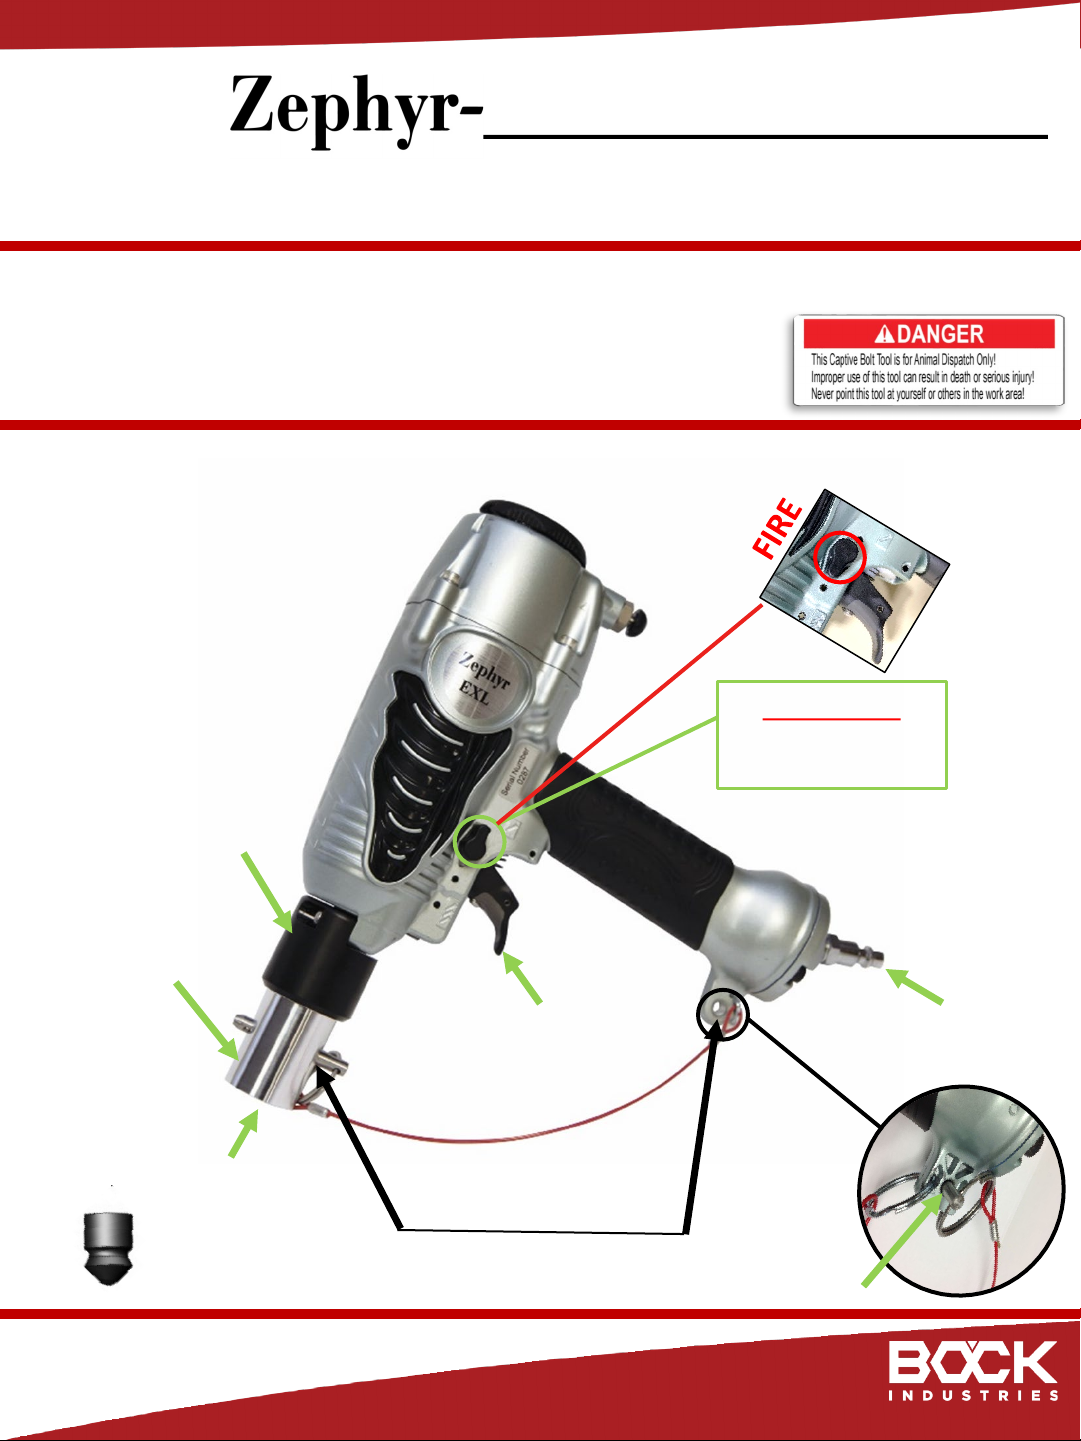
2. Zephyr Components & Specifications
Energy = 28 Joules
Bolt Velocity = 27 m/s
Mass = 1.1 kg
EXL
Adapter
Bolt Head
(retracted, not shown)
Guide
Trigger
Safety Lever
-Up is SAFE (shown)
-Down is FIRE
Safety Pin Hole
(shown in safe location)
Pneumatic
Fitting
(125-130 psi)
Storage: push safety pin thru hole
Complies with the requirement of The Protection of Animals at the Time of Killing
(Amendment) (England) Regulations 2022 (Legislation.gov.uk) for piglets under 10 kg.
(example)
Video Training
bock-industries.com
Quick Start
2
Technical Support: 814-777-3890
© 2022 Bock Industries, Incorporated.
All Rights Reserved.
3. Engage Zephyr Safeties:
3.1 Insert SAFETY PIN thru the ADAPTER to block bolt travel.
3.2 Turn SAFETY LEVER “up” towards operator to
disengage trigger.
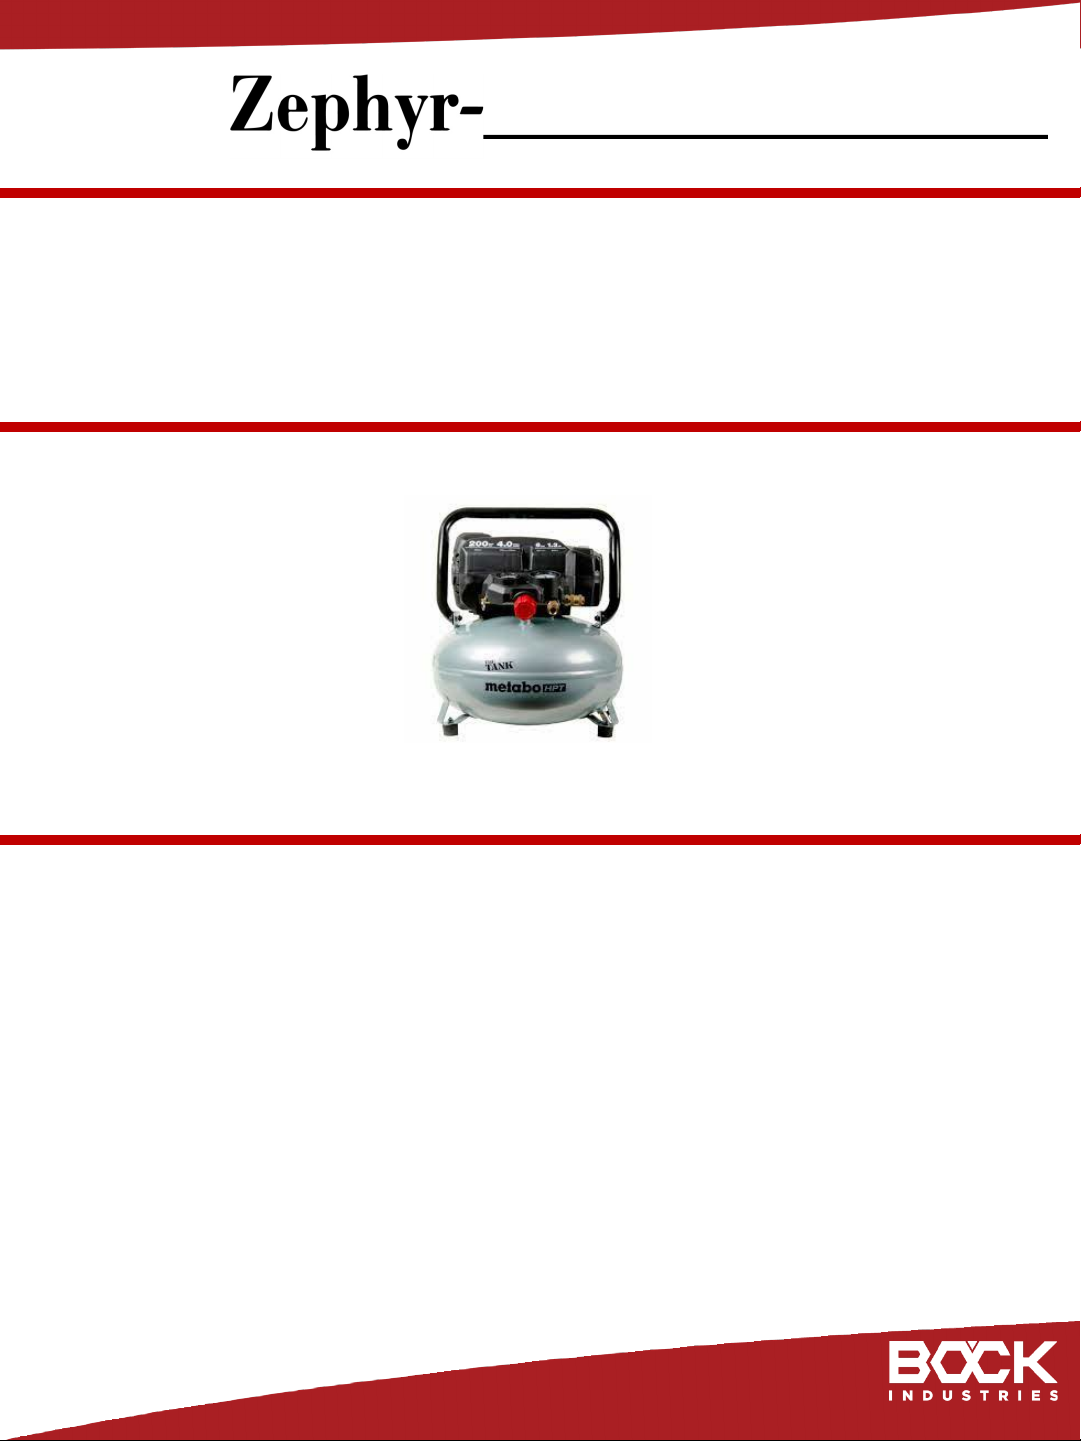
4. Connect Zephyr to Air Compressor Set at 125-130psi
For Example: Metabo HPT "THE TANK" Pancake Air Compressor, 200 PSI, 6 Gallon (EC914S)
Minimum compressor rating
4 CFM @ 90psi
(Recommended, not included)
Operation 2/2
EXL
Video Training
bock-industries.com

Quick Start
3
Technical Support: 814-777-3890
© 2022 Bock Industries, Incorporated.
All Rights Reserved.
1. Specific requirements for non-penetrating captive bolt use. A non-penetrative captive bolt device
can be used for slaughter, depopulation and other situations for killing piglet, within certain
specified parameters:
1.1 Species: Piglets of less than 10 kg of live weight.
Refer to page 4.
1.2 Parameters: The device must deliver a minimum kinetic energy of 27.7 Joules.
Refer to page 1.
1.3 Monitor Efficacy: Confirm the physical signs of insensibility & death.
e.g., no rhythmic breathing, no corneal reflex and no response to nose prick.
1.4 Recommended Maintenance: To ensure consistent device minimum kinetic energy.
Refer to pages 5 -7.
2. General requirements of legislation for non-penetrating captive bolt use.
2.1 Piglets of less than 10 kg of live weight. Minimum kinetic energy 27.7 Joules.
2.2 Kids of less than 4 kg of live weight. Minimum kinetic energy 27.8 Joules.
2.3 The non-penetrative captive bolt device remains a permitted method for simple stunning
for cattle, sheep and goats (ruminants) under 10kg live weight, as well as poultry, rabbits
and hares. It can be used for slaughter, depopulation and other situations of poultry,
rabbits, hares and lambs of less than 10kg live weight and kids of less than 10kg live
weight and slaughter only for other ruminants.
2.4 The operator must apply the device in the proper position and use the correct strength of
cartridge or other propellant in accordance with the manufacturer’s instructions to
produce an effective stun or kill, as appropriate.
Legislation 1/1
EXL
Video Training
bock-industries.com
Complies with the requirement of The Protection of Animals at the Time of Killing
(Amendment) (England) Regulations 2022 (Legislation.gov.uk) for piglets under 10 kg.
Quick Start
5
Technical Support: 814-777-3890
© 2022 Bock Industries, Incorporated.
All Rights Reserved.
1. Disengage Zephyr Safety measures:
1.1 Remove SAFETY PIN and store it as shown (page 1).
1.2 Turn SAFETY LEVER “down” to firing position.
1.3 Point the Zephyr in a safe direction (down) and
squeeze the trigger 2X to confirm proper operation.
3. Firing Sequence:
3.1 In one motion: Press the ADAPTER firmly on target and
immediately squeeze trigger.
3.2 Confirm physical signs of insensibility & death.
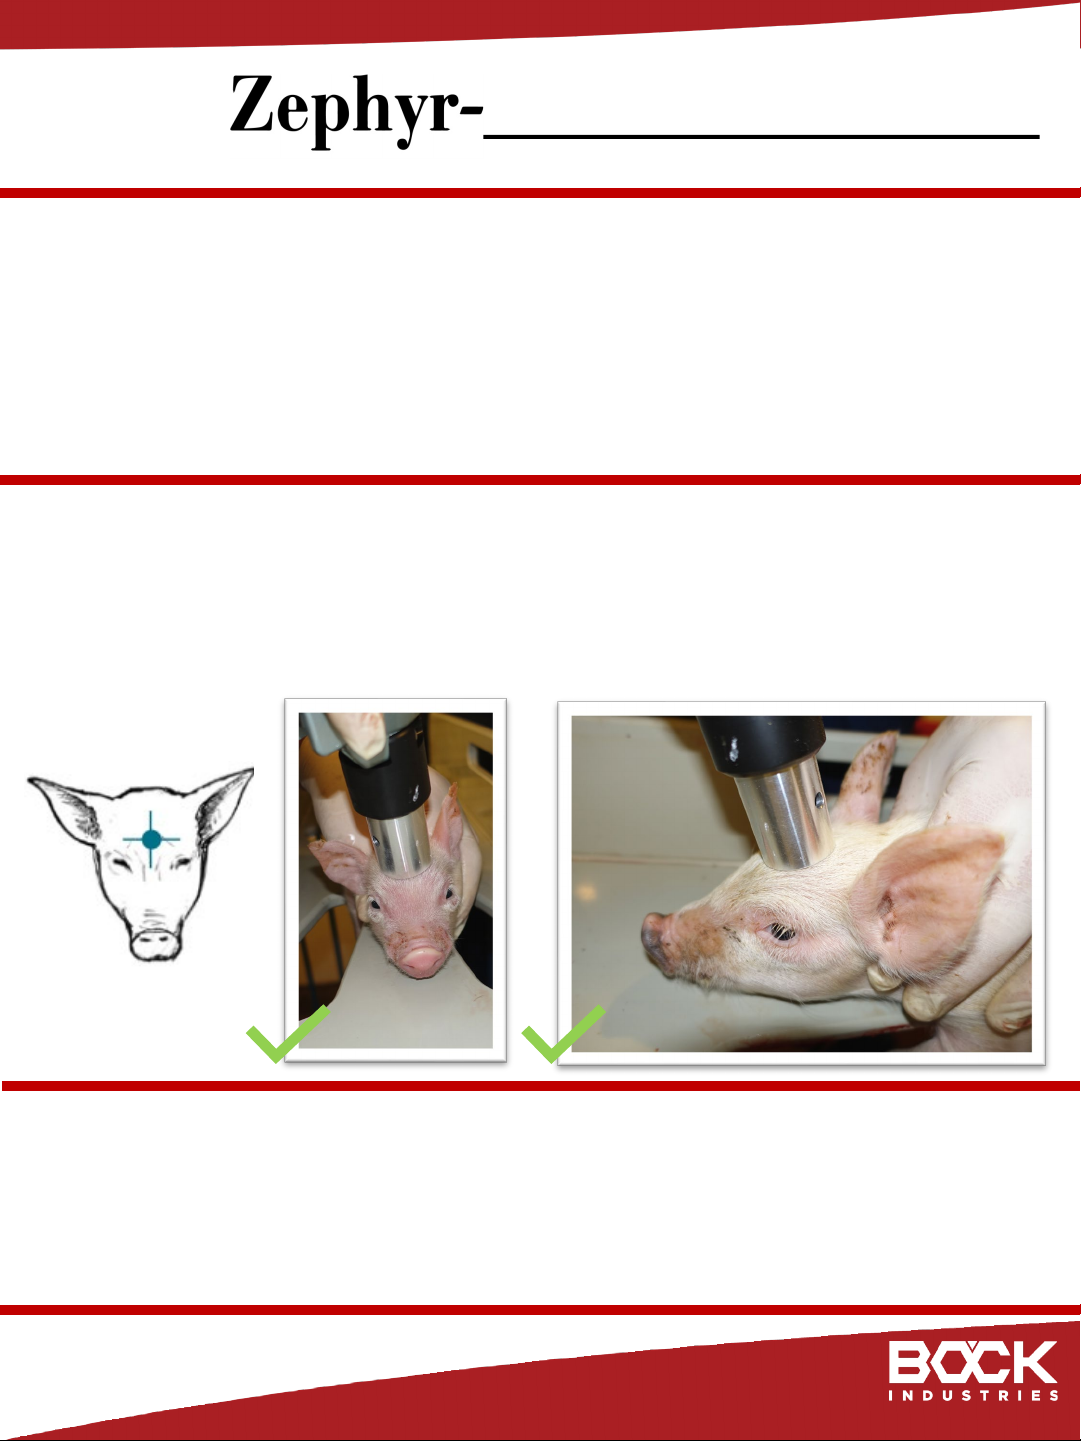
2. Targeting:
2.1 Support the piglet’s head against a solid surface. Use
Bock Industries piglet restraint if available.
2.2 Locate target: Top center of head, between eyes & ears.
Targeting 1/1
EXL
Video Training
bock-industries.com

Quick Start
7
Technical Support: 814-777-3890
© 2022 Bock Industries, Incorporated.
All Rights Reserved.
We recommend standard air tool oil be added directly into
the air hose connector on the Zephyr daily.
During depopulation, clean and add air tool oil after every
500 shots.
1. Daily Cleaning and Maintenance:
1.1 Remove air line from Zephyr.
1.2 Unscrew ADAPTER to expose BOLT.
1.3 Descend BOLT by grasping or shaking downward.
1.4 Clean and disinfect exposed BOLT and ADAPTER with
Lysol®/ Dettol®. Disinfectant wipes as available.
1.5 Reassemble ADAPTER and confirm BOLT moves freely
in ADAPTER. BOLT should be able to be shaken down.
Dried matter on the inside of the ADAPTER will block
BOLT during firing and may damage Zephyr.
1.6 Add 2 drops of air tool oil into the air hose
connector on the Zephyr.
1.7 Connect to air line and dry fire 5x to distribute the oil.
1.8 Disconnect from air line and turn SAFETY LEVER “up”
to engage safety.
1.9 Return Zephyr to case and store in a secure location.
Maintenance 1/2
EXL
Video Training
bock-industries.com
Table of contents
Popular Farm Equipment manuals by other brands

Schaffert
Schaffert Rebounder Mounting instructions

Stocks AG
Stocks AG Fan Jet Pro Plus 65 Original Operating Manual and parts list

Cumberland
Cumberland Integra Feed-Link Installation and operation manual

BROWN
BROWN BDHP-1250 Owner's/operator's manual

Molon
Molon BCS operating instructions

Vaderstad
Vaderstad Rapid Series instructions


