Bodycare TENS Obi TENS+ Troubleshooting guide
Obi TENS+
Instructions for use
78
10 11 12
9
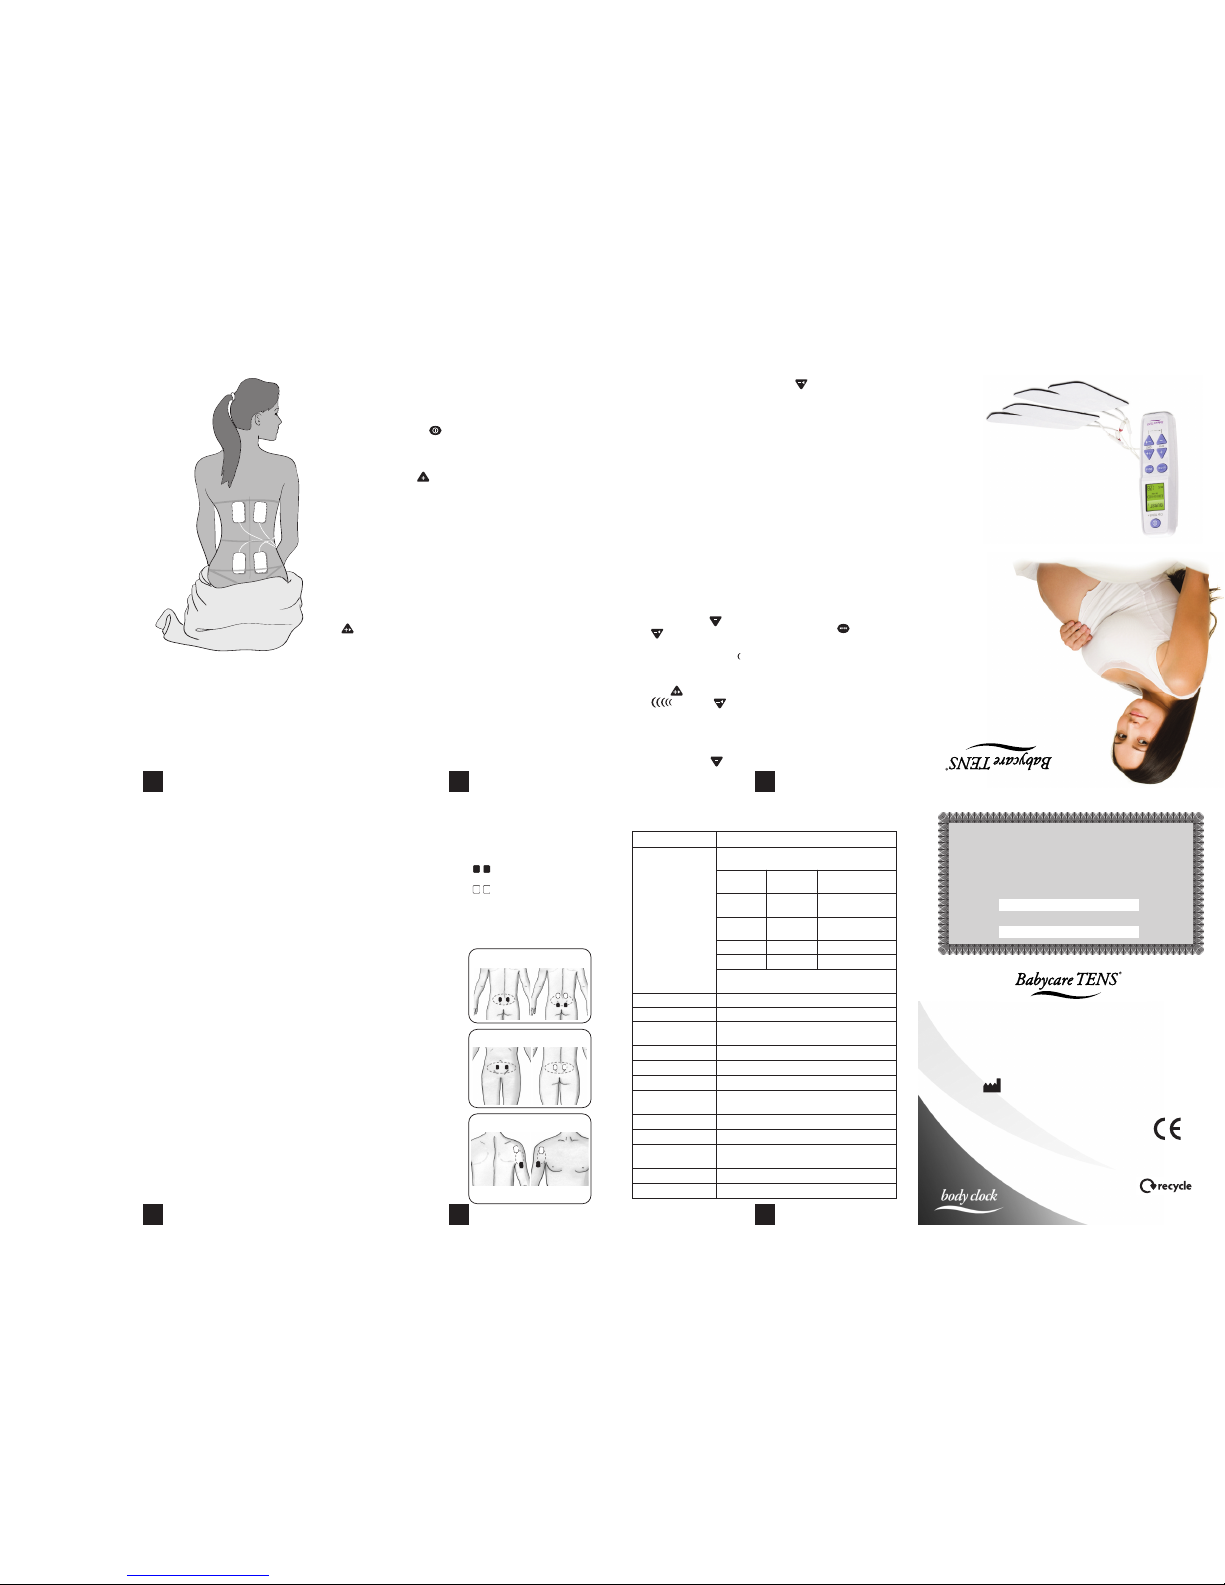
Suggested Electrode
Placement Chart
The sticky electrode pads need
to be placed in the correct
position for maximum pain relief.
It is preferable to obtain
assistance from either your
birthing partner or medical
adviser when positioning the
pads. Please read the following
instructions carefully:
1.Ensure unit remains switched
off. Carefully peel the pads from
the plastic backing using your
forefinger and thumb. Do not pull
on the lead wires.
2. Position the top two pads
(connected to the left socket
CH1) approximately 4cm either
side of the spine and 4-5cm
above the imaginary navel line as
seen in the diagram.
3. Position the bottom two pads
(connected to the right socket
CH2) approximately 4cm either
side of the spine and 4-5cm
below the imaginary navel line as
seen in the diagram.
Reference: Cluett E. (1994) SRN
RM ADM PGCEA. Analgesia in
Labour: A review of the TENS
method. Professional Care of
Mother and Child. Mar;4 (2):
50-2.
Bra line
Navel line
Panty line
Using Your bi TENS +
a) You are now ready to start
using your Obi TENS +. Switch
the unit on by pressing the
on/off button. The Obi TENS+ will
always start up in BURST 1 mode.
b) Begin by pressing the
CH1+ key. Each time you press
this key, a small ‘half-moon’
shape will appear on the screen
increasing in number and size as
the intensity is increased. You
will begin to feel a pulsating
sensation which will burst in time
with the small arrow flashing on
the screen. Ensure that you
increase the intensity slowly.
c) Repeat the previous step with
the CH2+ key. You will now
feel a sensation in both sets of
pads.
d) BURST 1 (use between
contractions): This is the first
mode that you will use. It feels
like a bursting, tingling sensation
i.e. the pulses are off and on
periodically. This mode will help
to promote those all-important
natural pain-killing chemicals
known as ‘endorphins’ and
‘encephalins’.
e) B ST 1 (use during
contractions): When
experiencing a contraction,
simply press the ‘boost’ button
located on the left side below the
screen. The Obi TENS+ will then
switch automatically into the
BOOST 1 mode for that extra
surge of power required to
combat the pain during
contractions. This will feel like a
continuous sensation.
f) Once the contraction has
passed, simply press the
‘BOOST’ button. The Obi TENS+
will return to the original BURST
1 mode. Continue this cycle
during your early stages of
labour.
Using the Between Contraction
Timer (BCT) timer
When in BURST mode, the unit
automatically measures your BCT.
This appears at the bottom of the
display. When you switch to
BOOST, the last BCT will remain at
the bottom of the display. The
BCT will always refresh when re-
entering the BURST mode from
the BOOST mode and will record
the next BCT.
N.B. The bi TENS+ starts up in
BURST Mode. The BCT only
appears after one cycle of
pressing the Boost Button on
and off.
Recalling contraction history
To recall a list of your last 5
‘BCTs’ press the CH1- and
CH2- buttons
simultaneously. The 1st symbol
you will see is a single moon
which is the last BCT.
Use CH2+ to reveal up to 5
BCTs . Use CH2- to
review more recent BCTs.
Recalling the contraction history
will not disable functionality of
the unit. To return to the main
screen press the CH1- and
CH2- buttons simultaneously.
N.B. To avoid losing contraction
history, do N T switch unit off.
Remove the battereis if you wish
to reset the contraction history.
The Mode Button
There are two modes available
on the Obi TENS+, each with a
BURST and BOOST function.
Mode 1 (Burst 1 and Boost 1),
which has been described
above, is primarily used for the
earlier stages of labour.
Mode 2 (Burst 2 and Boost 2)
can be used when your labour
advances and your contractions
become more frequent.
Press the Mode button to
switch between modes. You will
see from the User Display, that
the number next to the BURST or
BOOST will change from 1 to 2
and vice-versa.
NB. Both modes are
interchangeable and can be
used according to your
preference, not necessarily for
the stage of labour you are in.
Mode 2 can be operated in the
same way as mode 1.
Useful Information
1. Continue stimulation for as
long as necessary, unless you
experience discomfort.
2. If you stimulate for a number
of hours ensure the pads do
not become dry.
If this occurs, switch off the
unit, disconnect the
electrodes, and apply a small
drop of water to them.
3. The pads can be used several
times. Replace the pads
when they stop sticking to
the skin. Replacement pads
are available from
www.babycaretens.com.
4. Always ensure that the unit is
switched off before you
remove all the leads and
pads. Do not pull the wires.
ALWAYS remove the jack plug
from its socket by holding
the plug between the
forefinger and thumb and
pulling gently.
5. The Obi TENS + can also be
used as a standard TENS unit
for relief of numerous
conditions, including after
pains and post operative
pains. It is worth bearing this
in mind if you have
a caesarean section.
Please seek medical
advice first.
Post-Natal Pad Placement
Diagrams
KEY:
=first pair of electrodes
=second pair of electrodes.
N.B. Electrodes supplied with this unit
are all the same colour - the black and
white squares show suggested
electrode placement only.
Frequently Asked Questions
Q When shall I start using my
bi TENS +?
A Use as early as you can after
the onset of labour to allow
time for your body’s pain-
killing chemicals to rise.
Q Can I try the bi TENS +
before going into labour?
A Yes, place 2 pads attached to
one leadwire on your forearm
to feel the different pulse
sensations following the
instructions on page 6.
Q Can I combine the bi TENS
+ with other medication?
A Yes, you can still use
analgesics such as gas and
air (entinox) or pethidine.
Q Can the bi TENS + be used
in hospital?
A Yes. However, a midwife may
ask you to switch it off
temporarily.
Q Can I use the bi TENS +
if I am considering a water
birth?
A Yes, but not in the water
itself.
Troubleshooting Questions
Q Why does the stimulation
not appear to be as strong
after you have used the bi
TENS + for a while?
A Increase the intensity, you
may have become used to a
lower setting.
Q Why does the stimulation
feel strong but ineffective?
A You may need to switch off
the unit and reposition the
electrode pads.
Q Why does the stimulation
not feel sufficiently strong
even on a high setting?
A The batteries may need
replacing.
Q What do I do if there is no
stimulation, intermittent
stimulation, or weak
stimulation felt even with a
new battery?
A Check electrode contact.
Check leads.
Check batteries.
Call our customer careline
on +44 (0)208 5329 5959.
0120
July 2017 (1)
Babycare TENS
108 George Lane, South Woodford,
London E18 1AD
Tel (+44) (0)20 8532 9595
Fax (+44) (0)20 8532 9551
www.babycaretens.com
e-mail [email protected]
Fuji Dynamics Ltd, Unit C,3/F, Manley Tower,
No828 Cheung Sha Wan Rd, HK
This manual is recyclable
Babycare TENS is part of the
Body Clock group of companies
Guarantee
Your bi TENS + machine is guaranteed for a period of 1 year against
manufacturer’s defects. Please record purchase details in the space
provided below for your record purposes. The guarantee does not
include leads, electrodes or battery. Applies to purchases only.
Date of purchase:
Invoice number:
2
2
1
1
Display TN type LCD
peration Mode
Burst 1
Burst 2
Boost 1
Boost 2
4 treatment modes:
Burst 1, Burst 2, Boost 1, Boost 2
Pulse (Hz)
Frequency
Pulse Width
(µs)
Description
16 150 1 Burst/sec and
8 pulses per burst
32 150 2 Burst/sec and
8 pulses per burst
80 150 Constant
100 150 Constant
- Output Voltage: 0 – 55V zero to peak at 500Ω load
- Output Waveform: Symmetrical biphasic rectangular
Automatic Power ff 5 Minutes
utput Channel Two Channel
utput Voltage 0 – 55V (zero-to-peak) across a 500Ω load;
adjustable in 14 steps
utput Intensity 0 – 110 mA (max.) into a 500Ω load
utput Waveform Symmetrical bi-phasic rectangle
utput Jacks CE Touch-proof jacks
Load Detector Contact detection between the device and human skin
(This feature is activated from Level 2 and up)
Battery 2 X 1.5V AAA Battery
Battery Low Detect 2.2V ±0.2V
Tolerances All output parameters are subjected to a ±20% tolerance
unless other specified.
Weight 52g
Size 40 x 125 x 20mm
Period Pain
Lower Back Pain
Shoulder Pain and Frozen Shoulder
Outer and inner aspect of shoulder
bi TENS + Technical Data

How Will The bi TENS +
Help Your Pain?
TENS (Transcutaneous Electrical
Nerve Stimulation) works by
passing mild electrical impulses
through the skin, via electrode
pads, into the nerve fibres which
lie below. The TENS impulses
help your body produce its own
pain killing chemicals, such as
‘endorphins’ and ‘encephalins’.
The level of pain relief obtained
varies from person to person.
Some find that the Obi TENS +
provides all the pain relief
required during the whole of
labour, whereas others find that
other analgesics are also needed
during the later stages of labour.
Introduction To The bi TENS +
The Obi TENS + uses a state-of-
the-art, efficient method of drug-
free pain relief with no known
side effects. In order to obtain
maximum benefit, it is advised
that you seek guidance from your
medical adviser as well as
reading this instruction guide.
Precautions And
contraindications
1. TENS must NOT be used
before the 37th week
of pregnancy.
2. If you are pregnant, do NOT
place the electrodes over
your abdomen.
3. Do NOT use if you have
a pacemaker or any other
implanted electrical device.
4. Check with your healthcare
professional before using if
you suffer from a heart
condition, epilepsy,
undiagnosed pain, have any
metal implants, or any
doubts whatsoever.
5. Do NOT use if you experience
an allergic reaction to the
electrodes.
6. Never use TENS to mask
undiagnosed pain since this
could require urgent
treatment.
bi TENS +
Quick Reference Guide
If you are in labour, please use the
quick reference guide set out
below. It is however recommended
that you read the section entitled
“Setting Up Your Obi TENS +”
found on page 5 to obtain the best
performance from your unit.
Before using the Obi TENS +,
please read the
contraindications and
warnings on pages 1 to 2.
1. Ensure the Obi TENS + unit is
switched off.
2. Insert 2 x AAA batteries in the
compartment at the back of
the unit (see figs 1 and 2,
page 6).
3. Insert the leadwire plugs into
the bottom of the unit
(see fig 3, page 6).
4. Insert the pins at the other
end of the leadwires into the
sockets attached to the
electrode pads. Do not
remove the electrodes from
their backing at this stage
(see fig 4, page 6)
5. Position the electrode pads
on the body as indicated on
page 7. A pair of electrodes
must be connected to each
lead wire in order for you to
feel any sensation. The
electrode pads must be
peeled away from their
backing and placed directly on
your body for you to feel any
sensation.
6. Press the (on/off) to turn
the unit on. The unit will
automatically begin operating
in burst mode.
7. Now push the (CH1 +) key
until you feel a pulsating
sensation in the first pair of
electrodes.
8.Repeat the same with the
(CH2+) key for the second
pair of electrodes.
9. At the onset of a contraction
press the ‘boost’ button
for the additional surge of
power needed to combat the
pain.
10. Press the ‘boost’ button
again once the contraction
has passed and continue in
the BURST 1 mode as before.
11. See page 9 for using the
Contraction Timer.
1 2
34 5 6
General Precautions
1. Do NOT use this unit without
first reading these
instructions.
2. Do NOT immerse the Obi
TENS + in any liquid. Do not
use in the bath or the shower
3. Do NOT place it close to any
source of excessive heat or
operate it in the presence of
flammable gas.
4. Do NOT drop this unit onto a
hard surface.
5. Do NOT attempt to dismantle
the Obi TENS +.
6. Only use specified batteries
and electrodes.
7. If damaged, do not use.
Return to supplier.
8. Remove the batteries when
not in use.
9. Do NOT use while driving or
operating potentially
dangerous machinery or
while using a microwave.
10. Keep out of the reach of
children.
11. Do NOT place electrodes on
or near the eyes, in the
mouth, over the front or
sides of the neck or across
the head or the heart.
12. Do NOT place the electrodes
on varicose veins or recent
scarring or on any area of
broken, inflamed, infected or
numb skin. Electrodes
should generally only be
applied to skin with normal
sensation unless under
medical supervision.
13. Do NOT use in the presence
of tuberculosis, malignant
tumours, very high or very
low blood pressure, high
fever or acute inflammatory
disease unless under
medical supervision.
14. A mild shock may be caused
if one electrode is
accidentally removed. In the
event of this happening the
unit should be turned off
immediately.
Controls For The bi TENS +
The Obi TENS + is very simple to use. However, it is advisable to read
these instructions to obtain the most out of the unit. Please ensure that
all of the precautions and contraindictions have been read thoroughly.
See pages 1 to 2.
Left Channel
Intensity Keys
Hoop for attaching
neck cord used for
portability during
labour
Right Channel
Intensity Keys
On/Off Button
Boost Button -
used for extra
surge during
contractions
Leadwire ack Plug Socket Connectors
User Display
Mode Key
Display Symbols And Their
Meanings
Power Bar: This shows the output
from 0 to 15 for both left and right
channels. Each segment
represents approximately 7% of
the total output.
Pressing the ‘Boost’ button
activates the Boost mode. This
function is used during
contractions. There are two Boost
modes available indicated by a 1
or 2 next to the word BOOST.
You can switch between them by
pressing the Mode key.
This function is used at the onset
of labour and in-between
contractions. There are two Burst
modes available indicated by a 1
or 2 next to the word BURST.
You can switch between them by
pressing the Mode Key.
Low Battery Indicator:
This sign will start flashing if the
batteries are running low. If this is
the case, change both batteries.
Please refer to page 5 for
instructions.
Between Contraction
Timer.
This automatically measures the
time interval between your
contractions.
Pad contact warning
(safety cut-out)
This symbol will appear if any of
your pads are not attached
securely to the skin.
Setting Up Your bi TENS +
Check the following contents:
• 1 x Obi TENS + unit
• 1 x Pack of 4 self adhesive
electrodes (40mm x 100mm)
• 2 x Leadwires
• 2 x AAA batteries
• 1 x Carrying pouch
• 1 x Easy-release neck cord
• 1 x Instruction manual
• 1 x EMC documentation
The Assembly Stage
a) Remove the cover to reveal
the battery compartment
(see fig 1, page 6).
b) Insert 2 x AAA batteries (see
fig 2, page 6), ensuring the
positive (+) and negative (-)
terminals are correctly
positioned as marked in the
battery compartment.
Replace the cover. Ensure
the unit is switched off.
c) Take the two white leadwires
and insert each of the black
jack plugs (at one end of
each leadwire) into the
sockets at the bottom of the
Obi TENS + unit (see fig 3,
page 6).
d) Now insert the pins (at the
other end of the leadwires)
into the sockets attached to
the sticky electrodes. Each
leadwire has two pins,
ensure each pin is attached
to an electrode. Do not
remove the electrodes from
the backing at this stage
(see fig 4, page 6).
NB. Each leadwire has a red and
black pin. It makes NO
difference whatsoever
which electrode they are
attached to!
e) If you wish, attach the easy-
release neck cord which
enables you to hang the Obi
TENS + from your neck
whilst in labour (see fig 5,
page 6). Now position your
electrodes (see page 7).
Inserting the battery
Remove the cover to
reveal the battery
compartment.
Fig re 1 Fig re 2
Insert 2 x AAA
batteries as shown on
the diagram inside the
battery compartment.
Connecting the leads
Insert both black jack
plugs into the sockets.
Useful Diagrams
Fig re 3
Connecting the
Electrode Pads
Insert a red and black
pin (at the end of each
lead wire) into each
pair of electrodes.
Fig re 4 Fig re 5
Using the Neck Cord for mobility during labour
Thread the loop of the neck cord through the
space at the top of the unit. Slip the other end
of the neck cord through the loop and pull into
position.
Contents
Obi TENS + Quick Reference Guide
How Will The Obi TENS + Help Your Pain? 1
Introduction To The Obi TENS +........... 1
When Should TENS Not Be Used?...... 2
Controls For The Obi TENS +................ 3
Display Symbols and their Meanings.4
Setting Up Your Obi TENS +................. 5
Useful Diagrams................................... 6
Suggested Electrode Placement Chart.... 7
Using Your Obi TENS +......................... 8
Troubleshoooting Questions............. 10
Frequently Asked Questions.............. 10
Useful Information............................... 11
Post natal pad placement diagrams...11
T
echnical Specifications..................... 12
Explanation of Symbols on Unit
Equipment providing a
particular degree of
protection against electric
shock particularly regarding
allowable leakage currents
having an F type (floating)
applied part.
Warning - refer to page 2 of
these instructions.
Please keep device away
fromsprays of water or
rain.
The first number 2:
Protected against access to
hazardous parts with a
finger, and the jointed test
finger of12 mmФ,80
mmlength, shall have
adequate clearance from
hazardous parts, and
protected against solid
foreign objects of
12.5 mmФand greater.
The second number 2:
Protected against vertically
falling water drops when
enclosure tilted up to 15˚.
Vertically falling drops shall
have no harmful effects
when the enclosure is tilted
at any angle up to15˚ on
either side of the vertical.
Denotes a product which
must be disposed of safely.
This symbol indicates the
serial number of the device
and includes the year of
manufacture.
The serial number can be
found in the battery
compartment of this device.
IP22
SN
This unit needs special precautions regarding EMC and needs
to be installed and put into service according to the EMC
information provided in the ACCMPANYING D CUMENT.


