manuals.online logo
Brands
  1. Home
  2. •
  3. Brands
  4. •
  5. BOMBARDIER
  6. •
  7. Snowmobile
  8. •
  9. BOMBARDIER ski-doo Elite 1973 User manual

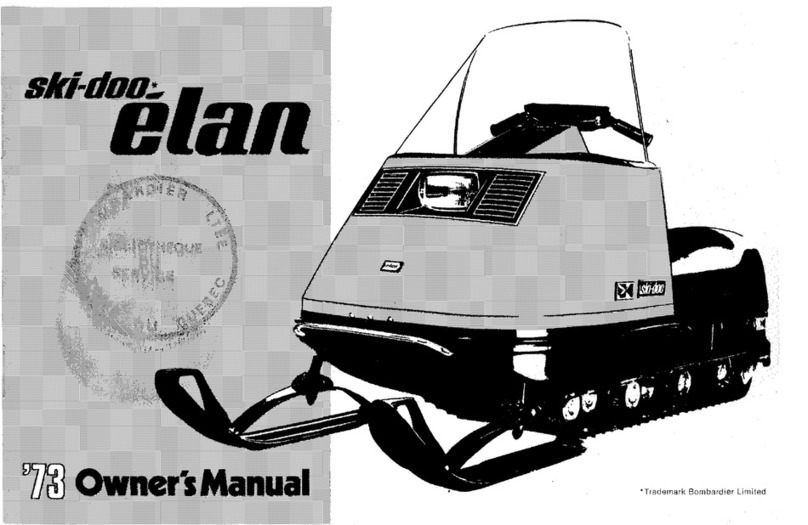
BOMBARDIER ski-doo Elite 1973 User manual

"Tradsmark Bornb!irdier Limited
4804054
LiU-)'d ir;
Canada
'The are trade marks of
Bomb-
ardier
Lll
III
lOU
Atl
STARTI PROCEDURE
LUBRICATION ..m
11,12,13
MAINTENANCE...
14-,
15,
16,
11,18,19
Off
SEASON CARE 19
PRE·SEASON PREPARATION 19
TROUBLE SHOOTING m
......
WARRANTY m
mm
22,23
SPECIFICATIONS m
..
IN CASE ENCY 9
YOU SHOULD
KNIOW
BEFORE
fIRST
RIDE m
•••••••
2
SERVICE AR ..
m.m
3
DO'S
4-
DONT'S " " 5
CONTROLSII 6,7
L
""
"."
...,.. 8
the tol-
Sk.mdic
Carry·Boose
Bombardier
01/2
7
Fi28172
.o:
249
F/31317
and
'316
-D32.479
-
D32.53f;
-
UJ,:,iJCJ'"
t')'6J:;7
D'\2661
to,
'669
~
-33'",933"'-
34,006
~nd
'007
States Design Pater.ts
Des, 2;:
1.332
to
'334
-
Des,
221.637
and
'638
Des
247
No.
6038-
104,756
51,444
SKi-DOG Va!mo!1t
SKi-Boose
T'NT
Nordic
f~an
Alpine
Blizz.m:l
PATENTS and DESIGNS
In
1957
and
1958,
tests began Oil
what
is considered the forerunner of the
Ski-Doo"_
We
experimented with rnanv
different frames and enqines-i-in search
of a lioht
machine
tor one or t\NG oas-
senge;s Bythe fali of
'58,
the
first pro-
totype was ready. lnitial tests made It
obvious the
machine
could
hoid its
own
in the recreation market Production be-
gan one year
later
and
225
machines
wete sold at
about
$;'I
,000
each.
Like it'S predecessors the
'73
Ski-Doo
snowmobile
is a
combination
of iight-
ness, economy, strength and depend-
ability And yet, With ali this. it has one
other
additional
feature.
, . personality
Each model In each ser.es has a
com-
plexity of
characteristics
that
distin-
guishes itself as part of a bold breed
. " " the
SkH)oo
sncwmcbiles.
At Bombardier, we fully realize
that
the
purchase of a
snowmobile
is a very im-
portant
decision. For this reason, we
have ensured
that
each Ski-Doo snow-
mobile
is backed up by an international
Ski-Doo
Distributor
and Dealer
Network
whose
factory
trained personnel are
equipped to give you
prompt
and ef-
ticient
service
wherever
you are :n
Snow
Country.
Furthermore, each dealer is prepared to
serve you
with
information, parts and
accessories. Feel free to
contact
him.
At this
time
we
would
like to thank you
for your
patronage
and
welcome
you to
Winter.
Enjoy vourself
but
remember:
Safety depends on you, the driver, the
condition
of
your
vehicle and nature of
the
terr
3m.
Ail of the
information.
illustrations and
component
/system descriptions con-
tained in this manual am
correct
at the
time
of
publication
However, Bomb-
ardier
L.iiTilted
reserves
the
right
to
make
changes
in desiqn and specifica-
tions. and / or
to
make additions to or
improvements
in its products
without
impOSing any obhqations upon Itself to
instal!
them
on
Its
products previously
manufactured.
This manual has been published by the
Technical
Information
Centre, Bomb-
ardier Limited.
8600
Decarie Blvd.
Montreat
307,
Quebec, Canada.
Observe
the
10110\1;;111'9
precautlene:
@
Throttle
mechanism
should
be
checked for free
movement
before
parts of your snowmobile
GYour snowmobile is
not
designed
to
be on streets, road or
highways. Moreover, in
most
States and
Provinces, It is considered an
operation
@Hidden telephone guy wires or road-
side
ditches
can
cause
serious
accidents.
@Your snowmobile is
riot
to
be driven or on black top, bare
earth, or
other
abrasive surfaces Abnor-
rna!
and excessive
wear
of critical parts
IS inevitable.
@
wear
an snow-
mobile safety helmet. informed on
local laws legislating the sport
@
Maintain
your vehicle in top mechani-
cal condition at al! times
Please
read
and
understand
aU
other
contained
elsewhere
irl
this
manIAs!.
seat belt is
the vehicle.
Make sure the
fastened
while
can to be dangerous.
erun the engine at
R.P.M.
when the tracks of the vehicle are raised
off
the ground.
@It can be
rbnf1,orr,'!e
to run engine
with
the engine cover open.
@The
EJ
ite is to carry
two
per-
SOilS the operator and one
passenger.
$Gasoline is flammable and
under certain conditions. Alwavs pertorrn
in a well ventilated area. Do
not
smoke or allow open flames or sparks
in the I,: fumes are no-
ticed while the cause should be
determined and corrected
without
@Under no circumstances should you
wear loose Of
scarves
that
could become
with
e
Never
installed
To many of us,
Wlntef
is arevealing ex-
Weather,
condi-
tions,
snow
surfaces, individual
habits and vehicle usage have consider-
able affects. We ask
that
you familiarize
yourself
with
them.
.
read
the
owner's
manual; !t has been prepared to ac-
quaint you
with
the operation of your ve-
hicie. its safety aspects and systems as
well
as
preventative
maintenance
that
m~st
be,
pertodically
all airneo
towaro
a more en-
VI/inter
season.
CANADIAN
DISTRUUJTORS
Lower
Michigan
lnoiana
Ohio
Tennessee
North
Dakota
South Dakota
Minnesota
\/'llscons
in
Iowa
II!mols
Missouri
Upper
Michigan
HEATH INTERNATIONALINC,
33737
- 32 Mile Road,
Richmond,
Mich.
48062
HALVORSON INCORPORATED
325
South
Lake Avenue,
Duluth
2, iv1inn.
55802
California
New
MeXICO
Nevada Arizona
Montana
Kansas
Idaho Nebraska
Wyoming
Washington
Utah
Oregon
Colorado
Co"erage
Are!!
Massachusetts
Connecticut
Rhode Island
Name
of
Distributors
BOMBARDIER EASTINC:
Railroad
St.
Lee,
Massachusetts
01238
BOMBARDIER
WEST INC,
609
West
Broadway,
Idaho Falls, Idaho 83401
Prince Edward Is!and
Magdalen Island
Nova Scotia
New
Brunswick
Coverag<llArea
Briflsh
Columbia
Ontario
NlJlme
of
Oistril:mtol1ll
ALPINEDISTRIBUTORS
3206
-
28th
Ave,
Vernon,
B.C
ATLANTICSKi-DOO LTD
PO
Box
670,
Shediac. N.B,
BOMBARDIER ONTARIO LTD.
28 Currie
St.
Barrie
Ont
BOMBARDIER QUE LTD. Quebec
350
Nobe! St. Bouchervihe. Que,
BROOKSEQUiPMENT LTD
Box
985,
Winnipeg
21,
Man
HUDSON'S BAYCO
2 Richmond \IV.
Torcnto.Ont
JIN
RANDALL
LTD
PO
Box
757,
Comer
Brook,
Newfoundland
TRACTEQUIPMENT LTD
14325·
114th
ANa.,
Edmonton,
Alta
Manitoba
Saskatchewan
North-West
Territories
Newfound1and
Yukon
Atberta
CR,II.1G
P.Q Box
Alaska
EQUiPMENT
CO Alaska
,Anchorage.
New
York
New
Maryland
Delaware
Drstrict of Columbia
Virginia
TIMBERLAND MACHINES INC
10
Main
St.
North.
Lancaster.
New
Hampshire
03584
Maine
New
Hampshire
Vermont
3
@
V\fhen
your Ski-Doo snow-
mobile.
secure
so1
at both
ends!
protect it with a cover then check
that
trailer hitch and chain are
secure and
that
brake, flashers,
and are all in order,
on sudden stops.
@Use a hitch or tow-bar when
anv sled or trailer behind
your
Ski-
snowmobile. R hitches prevent
downhill or
@When
with
others, limit your actions
to the of the main bodv
Show the driver
how
to
Or!)OI8rlV
handle a snowmobile.
eIf you are to
areas, leave word of your approximate
whereabouts and estimated
turn
with
someone
make a ful! stop then look
careruuv in both directions before cross-
\Nhen in or in 8
group, have one
member
direct
the
oth-
ers
across
e travel
with
at least one
other
snowmobile, in unfamiliar ter-
ram or on rides. Even In snow-
rnobumq. abeats one of a kind
eyour Ski-Doo snowmobile at
your nearest
licensing
Bureau, where
State or Provincia! Laws require it, and
affix Plate to the vehicle
your certificate
with
It proof of ownership in
even! that the vehicle
becomes
lost
or stolen
@Obtain your State or Provincial book-
let on It
information on the
mobile trails and the
snowmobile
landowners allow snow-
their property You can
as much fun, even more so,
tr;;,\IAllnn
elsewhere.
"Trademark Bombardier Limited
4
5
@
"If
you
drinl«
don't
snowmobil€l! if
you
snowmobil€l,
don't
drink!"
Re-
member alcohol and
don't
mix.
e
Don't
lend
vour
snowmobile
to
inexoerienced or' drivers. In
man'y cases it is the owner and
not the rider
that
is for
rrusnaos. Check State or Provincia! min-
imum age limits for drivers.
1$
Don't
leave your
switch It presents
thieves and a to children.
@
Don't
drive your snowmobile ill the vi-
of skiers and off ski trails.
,<'..1-
respect the of those who
winter
in
vvay
@
Don't
cross ariver or lake
without
first
oosit.ve that the thickness of the
sufficient to both you and
vehicle
Your
may
depend 01'1
if at all doubt. take an alternate
route.
@Unless you are certain of a
never travel further than
1/
2of the
tank. Even
Remem-
ber
that
a does not neces-
travel the same distance each
time
on the same
amount
of fuel. A lot
depends on snow conditions of
the
tr
ai
and
adjustment
of
the
carburetor.
States and
®
Don't
cut across in front of the line of
travel of another snowmobile.
Don't
tail-
gate; collision, or the threat of it, is
serious with any vehicle.
@
Don't
fisk or to your
machine
with
needless a
foolish
Don't
" your snow-
mobile
This
should
be
"stunt"
men
@Never cut U
l1\JU\:;j1
Ifences or atternpt
to
run over them
®
Never
ride on tracks The
sound of your vehicle drown
out noise of aooroacbino trains. Your
vehicle
track
Provinces
snowrnobil
on rat
tracks constitutes an infraction of the
law
Rotation
the
handlebar causes a push-
!action Oil
the
linkage and
the
skis to
turn
in the recuired
direction. incorporated in the
handlebar are
the
dimmerswitch.
kill
but-
ton, brake and
throttle
levers.
Throttla
lever
Located on right side of handlebar. When
depressed,
the
lever controls
the
and
the the
transmission. When lever is
the
en-
speed returns to idle
and
the
transmission.
Brake
lever
Located on left side of handlebar. When
lever is depressed,
the
brake is ied.
When released,
it
automatically
the
brake
mechanism.
effect
is
to
the
appl led pressure on
switch knob
to
Heacliami[J
Dimmer Switch
The
dimmer
switch allows you to
alternate
between or low headlamp beams. To
obtain
Hi or Low beams, simply deoress
switch. A Hi beam indicator Iis
mounted in the tachometer dia]. H
beam should
not
be used when ap-
comino vehicles.
Note:
The
beams
have been to
rieiiverv
Should
you
ho"di"rnn
chrome
and
turn
screws to obtain
Tachometer
Direct-reading dial indicates (in
the number
of
revolutions per
minute
(R.P.M. L
of
the engine.
fuel
Gauge diai indicates the
amount
of fuel in
the
tank.
Speedometer
Direct-reading diai indicates the
the vehicle in miles per
hour
(M.P
6odometer records
the
number
of
miles travelled.
pops up auto-
(H)
in to activate,
maticallv when
lit.
Gear Shift Lever
Three position lever,
(FORWARD/PARK!
REVERSE). Push
up
for
forward,
center
for
and
dowrrfoff8verse.
Do not gear
shih
le-
ver snowmobile is in motion. When
towing
the
the
drive
beit
must
be
remcved
from
arid
ttle
gear !!I1ift
lever into
forward
gear.
Kil!
Button
A
button
switch located on
side
of
handlebar.
For
emergency stops,
button
down
into
lower
position.
eng!ne always depress
button
into
released
upper
The driver of this vehicle should familia-
rize himself
with
the
function
of this de-
vice using it several times on
first
out-
thereby being mentally
for
emergency situations requiring its use.
After
such a situation, the source of met-
function
should be determined and cor-
rected before rp<t;:,r-c; rlt'
ChOKe
(G)
Pull
button
to
The choke
easier
cold
is warmed up,however, it is
not
necessary
to use choke when
'''~Ir''na~
7
Nwer
l;<l$
tank
oef©re
vehicle in a warm area,
At
certain
ter!rl!)lJif"t,UlJ,S, will and
container
into
the snowmobile tank,
tainer,
6. afunnel 'with a
fine
mesh screen
to prevent the
*Trademark Bombardier UmJted
be determil:'led
lind
corrected
withoot
cle-
Nwa!" add fuel while is
I'lJIl1lnil'lg.
1. Pour the full amount of Ski-Doo oil
for the total
mixture
into the
container.
2. Add approxirnatelv half the amount of
oasoline
to
be mixed.
Shake the container
th,nrflll(lhll/
4. Add the remainder
6. Once
use a
direct-
Gasoline is flammable and ex-
u{lder cert-ain cOl'ltlitiol1s.
a weI!
ilerlltiillrted
or allow
open
flames
vh::!l1iw.
if
fuma<>
eeuse snooid
To
facilitate fuel oil should
at room temperature.
oil is used. observe instructions
on the container. Never use outboard or
straiqht mineral oils.
Which Gasoline
to
Use
The correct is
R~,@u[~?
(not
less
than
88
octane), available
all service stations.
Cootio!"!: Never
experiment
with
other
than
recommended or fuel ratios. Never
use no lead methanol or
similar products.
Which Oil to Use
Use
concentrated
Ski-Doo"
oil
available
from
your
Ski-Doo dealer, This
type
of
oil
has formulated oil
bases
to
meet
the
of
the Born-
bardier-Rotax
Caution:
The carburetors
of
the
1973
Ski-
000
snowmobile have been calibrated
for
a
mixture
of ine and concentrated
Ski-Doo oil.
do not use
important:
drive belt. Check
condition
frequently
and
look
for
or detective
fi1'ler!~el"lCY
Materia!
In to those tools wbich the
manufacturer provides, you should also
carry
the
Iollowlnc:
Note: A tool box is located to
the
of
the
passenger
side
floor.
Emergencv situationsare hazards
with
any vehicle, A rock
or stump on
the
trail or an
empty
fuel
tank
while
miles
from
can cause
of
inconvenience.
Unlike
an automobile,
which
has a
distinct
advan-
in that service stations are usually
wal
snowmobiles
are
spElCil:icl'lliyde:siQlled
to
travel
off
tile
hi~ll-
the
the
driver often has
only
own
and
that
of his 1:0 return
home 9
out
of
0
dif-
ficulties encountered on the trail can be
fixed on
the
spot. However, you must car-
ry at least a
minimum
assortment
ot
tools
and spare parts
to
enable you to effect
minor
VVith Ski-Doo snowmobile
break-in period is required
the vehicle at full
throttle
Manu-
facturer's
recommendation
for
the
Bornbardier-Botax engine is 10 to 15
operating hours. During this period,
maximum
throttle
should not exceed %.
However. brief ful! accelerations and
variations
contribute
to a good
Continued wide
throttle
accelerations,
crursinq
and our-
i
i"!SpectiOfl
After
the break-In we suggest
that
each Ski-Doe snowmobile has an
inspection check This is 81
the discretion and expense of the ve-
hicle
owner
.
9
OFF
not
start,
check
for
possible
cause.
\j'\l<lminlj: Release
throttle
lever
immediate-
starts.
if cold is clifficu:!t to start, conti-
nued
will
only
lead to a
'flooded'
condition.
ne has
not
started
after
the
first few
trvs
but
ready
to
start. return choke
to
De-
press
throttle
lever
the
engine.
1'1
after
if
ne \fill
Amanual
starter
is
standard
on al
Ski-Doo
snowmobile
If
for
some
reason
the
vehicle
cannot
be
started
in
O:\j
position,
man-
5. Release
throttle
and
key imlmed,iateh;
after
has
started.
choke.
6~
Allow
the to warm up before
operating at fu!
throttle.
Caution:
Never
operate
the
Ski-Doo
snow-
mobile
\A/lth the
battery
removed or dis-
connected.
cool
for
2minutes before
r""c=,t;,,,.
pro-
cedure,
the
make
the
reIeased
upper
Ensure
the
!lear
shift
lever is in
PARK
position
before
Nev-
er sun
the
at
when
the
"hifi: lever is in
PARK
or
when
the
tracks
of
the
vehicle lire raised
off
the
gn!lt&lltl.
1
insert
key in
switch.
2~
choke. (Choke
not
necessary
if is warmed
up).
3.
throttle
operation then
apply
throttle
lever sl v,
4.
Turn
kev' clockwise
until
star-
ter
engages"
Cauticn;
00
not
engage
starter
than
30
seconds.
If
does
not
start
on
first
trv.
key"
must be
turned
"fully
back to
C',FF
each time.
Aliow
starter to
Drive Belt Removal
cover and remove
2. Disconnect
the
Sind
the brake cable
earn,
3. Remove the
two
bolts
(el the
lower disc brake bracket to the
then
the
brake bracket assembly
half
aturn.
4.
the
driven
Twist and
open oosition.
5. Pull the
bottom
of belt in
toward
the
front of the driven puHey then
ened belt over the top of the
half..
on
from
bracket.
should be
running
oi1ly
is secured in
when
is recommenued that the
~T",pr;;
nn
rne-
chanism,
the
and
the
driven
lev be lubricated monthlv or after
everv 40 hours of
operation.
Hovvever
,if
the vehicle is
wet
snow, the
suspension and svstern should be
lubricated
more
fr"'nl·,"n~f!\1
tween
the belt out from the drive pui
Irpntr·;f,
.,,,,,1
governor) and remove COTn-
from
vehicle
be-
lev,
To instalI drive
belt,
reverse
nrr,Cf1'i1Ufe
Never
run
the
without
drive
belt
installed.
Running
an
unloaded
engine
can
prove
to
be dangElrous.
Tip
Aspare drive
belt
can be positioned and
secured around the gear box
for
fast ins-
tallation
in
the
fieid.
rv1ake
sure
the
spare
belt
doesn't rub moving parts.
components (steerino arms,
jf
necessary.
Re-
Gear
Box
The gear
box
oil level should be checked
weekly. A
dipstick
is
with
your
tool
To check oil level,
iift
of
seat
ieatherette
and remove the
bolt
the tube. tube is in
front
the gear
shift
lever). Insert di
Slick
into
tube then
withdraw.
Oii
reach
the
F'c.JLl mark on
the
dipstick.
not, remove fiHer cap (red
of gear
box
and
,-",r,:",n;cn
Ski-Dec"
chaincase
oil,
RRin~"t.'lii
bolt.
*Trf\dF;:,nark
Bombardier
Limited
Grease the suspension bogie wheels
with
IOVV-H3rr10. grease.Purnp the grease
at
the
center of each wheel u
nti
I
new grease appears at the
of
inner
side of shaft.
Also
grease rear axles at
grease
using
a
10\1\1
pressure
g(0)3S8
gun.
Drive Pulley
The drive ley needs
to
be lubricated
bi-monthly
or every 20 hrs.
of
operation.
To lubricate the open
the
engine
cover and remove the guard. Using
a greasegun
filled
low-temp.
grease,
pump
once
or
twice
through
the
grease
of
the
pu
Caution:
Too
much
lubricant
in
the
drive
vviH
affect the drive belt. If neces-
sarv. lubricate
the
drive more tre-
Do
not
with
lubricant.
Driven Pultev
With engine cover open, greasethe driven
pulley
shaft as
follows.
1. Remove ou: guard and slip drive
belt
from
driven pul
2.
Thoroughly
dean
the driven
shaft.
3.
Apply
alight coat
of
low-temp. grease
on the shaft. Always lubricate lightlY and
wipe
off
~Uf
fJ!U~.
Note:
Activate
the
slidinq
halt
several
times to
distribute
lubricant
over ful!
of shaft, Be careful
that
lubricant
does
not
get on inner halves of
13
~Jormaf
a wire
feet-
Cautil:lI'!:
a
heat
mage
if
conditions afe greater
intended range.
3. Check
Sf gauge.
4. Hernstali
cover. Disconnect
wires and remove
condition of
G
l-\
brownish reflects ideal conditions
carburetor
heat range,
19
17
16
17
19
19
17
Nuts
Engine
Mount
Nuts
Vehicle General
Drive
Belt
Condition
Drive
Chain Tension
Carburetor
Track
Tension and
M7
we
fvi2
W7
M6
M1
M3
14
15
lock nuts.
and recheck
To correct:
1. Turn inner side MO';'
'O.~¥
bolt counter-
clockwise to closer to center
ink turn to withdraw
track from I
ink
2. link
3. Rotate tracks
Before track
ment, EiI'l:liIUill tniflt
the
are free all
!!:l~lrticiM
which coold be tI1rown
cut
00-
rotation.
Keep
feet
and
c!©'I:I:l
..
clear of
trac~s.
Track Tension and
AI!ignm€lI'lt
Lift
the rear
0"1
vehicle and
~".~n,w"
it
off
the a
track
from
the
middle
The tension of each
track
should be
2
1/4"
±between
top
inside of
track and bottom of side member.
To
i. Loosen
link
located on inner side
2.
Tum
outer side adjuster
wise
to
wise to slacken.
3. Start and
allow
tracks
to
rotate
sl!:.Iw!y.
Check
if
tracks
are well centered
and turn on the rear The
distance and
link
should be
caps then check electro-
level at each ceil.
must touch bottom of
filier
hole,
sarv, add water.
dealer.
Note:
Without
these inserts continual
abrasion
would
wear and
cut
the
track
aor
Tracks
Lift
rear of vehicle and support it off
the
UltJUi'U.
Place gear shift lever in forward
position. With rotate tracks
and
condition.
It bad cuts or
track inserts are noted,
see
your
as needle
Caution: Never operate vehicle
with
air
Intake tube removed as serious
camace
may occur.
Note: Do
not
close
too
needle seat can be damaged.
For final adjustment, start engine and al-
low
it to warm
Turn
Idle
Mixture
Screw
until maximum R.P.M.and
obtain aidle and afast response
of
the to
throttle.
idie Speed AdjustmiO\nt
Turn the Idle
wise to increase
clockwise
to
decrease.
hold carburetor lever in
cable down-
Hetiehten screw.
Turning screw clockwise a leaner
mixture, air/less fuel), counter-
clockwise, 3richer
mixture
(less
air/more
fuel ).
Before starting carbure-
tor
throttle
lever must
return
to idle
tiol"i
contacting
with
the
of Idle
Speed Screw. Never start en-
unless this situation islIerified.
Idie
Mixture
Adjustml~!'!t
Aadjustment (with
off),
should be made by
first
turning idle Mix-
ture Screw clockwise
until
closed,
Back of]' screw
of
a
turn
counter-
clockwise,
bar.
for
maximum loosen
where cable carbure-
Hold
throttle
lever to handle-
tor lever,
Carburetor
Adjustment
The carburetor
for
the Ski-
Doo snowmobile are: Maximum
Throttle
Opening, Idle Speed
Mixture
and Idle
Speed.
Note: A exists between each
correct one
without
Maximum
Throttle Openiii1g
With engine unscrew Idle
Adjusting Screw
until
a gap exists be-
tween screw end and carburetor shah la-
ver.
Depress
the
throttle
lever at handle-
bar and hold. shouId be hori-
zontal when the lever touches the
handlebar
To
16
{W11lJrive Beit Ccnditicm
Check
condition
of drive belt.
for
cracks, fraying or abnormal wear.
(Uneven wear, wear on one side, etc.),
if
abnormal wear is noted, cause
is misalignment of drive and driven
lays. Contact
your
dealer.
If
belt
is less
than
7/8"
wide
it
should be replaced.
iM
11
Battery Connections
Check
that
battery connections are
and free of corrosion.
if
not, remove cor-
rosion a
stiff
brush then
dean
with
asolution of soda and water. Rin-
se and wei!. reconnectinq. coat
terminals and connectors
with
to retard corrosion.
Check
that
battery
is wei secured.
Caution: Do
not
allow
clsanino solution
to enter
It
will
destroy the chem-
ical properties
of
the
electrolyte.
IM2l Carl:nmstor Nuts
After
the
first
2 hours of ooeration check
tightness
of
carburetor nuts. Open
tab locks, nuts and close tab locks.
Caution: The tab locks should be changed
after being three times.
iM3lIJrille Chain Tension
Note: Chain tension shouldalso bechecked
after
the
first
5 hours
of
operation
To check.
1. Run vehicle forward so
that
true free-
play can be obtained.
2. Unfasten passenger seat
belt
unscrew
gear
shift
lever knob. Remove seats and
access
Pull
off
insnection and
check The free-olav should
be
1/4
inch.
If
necessary to
1. Remove capscrew chain ten-
sioner in Chain tensioner is located
on driven side.
2. Rotate
to
obtain correct
3. I tensioner capscrew,
f../PS\r'OI_
tion
access
and seat. Install
knob.
necessarv,
d"p""r<
column
!f
out
of illiiJf1I-nent:
. Remove and loosen the
tie rod lock nuts.
2.
Tum
one or
both
tie rods
until
skis are
the
lock
nuts
the tle
rods.
Re-instal!
foot
Skis should be to each other and
to vehicle when the handlebar is horizon-
tal. To measure distance between
skis at. front and back.
sure
that
the handlebar forms
of 120
with
the
steerinc arrn To obtain,
unlock
upper
rod and
turn
it
until
the arm
Note: Atwavs check the
if
it
'functions
after nn,·frv'-"'r,."
Ifnecessary, loosen stop !
switch lock nuts and to proper
Check ruse
condition.
section
of
the cam of
brake lever. Lock cable in
the cal
friction
is felt.
and install hair
5. Connect brake Heinstal!
and
seats.
Check brake
Check operation
of
brake mechanism
deoressinqbrake lever. Brake should
lever is stili 1 inch
minimum
from
handlebar
(M4) Brake
The brake
mechanism
bile is an essential
mechanism in proper
w(\rkinn
condition
,1\bO\l6 all. do
not
ocerate
your
snowmo-
bile
without
an brake system.
jf is
necessary:
seats
and
access
brake cable h""
'·0;
nil
aporoxirnatelv half way on housino
);~I"V",""t
stop switch
out the
nut.
Slacken
off
the cable
bolt
and
manoeuver the lower brake lever and brake
cable
until
the are seated di-
18

This manual suits for next models

1

Other BOMBARDIER Snowmobile manuals

BOMBARDIER 1983 Elan Install guide

BOMBARDIER

BOMBARDIER 1983 Elan Install guide

BOMBARDIER Ski-Doo Alpine User manual

BOMBARDIER

BOMBARDIER Ski-Doo Alpine User manual

BOMBARDIER Ski-Doo 1978 Series User manual

BOMBARDIER

BOMBARDIER Ski-Doo 1978 Series User manual

BOMBARDIER ski-doo OLYMPIQUE 300 1974 User manual

BOMBARDIER

BOMBARDIER ski-doo OLYMPIQUE 300 1974 User manual

BOMBARDIER ski-doo Elite 2004 Manual

BOMBARDIER

BOMBARDIER ski-doo Elite 2004 Manual

BOMBARDIER Skandic R 1987 User manual

BOMBARDIER

BOMBARDIER Skandic R 1987 User manual

BOMBARDIER ski-doo OLYMPIQUE 1975 User manual

BOMBARDIER

BOMBARDIER ski-doo OLYMPIQUE 1975 User manual

BOMBARDIER ski-doo elan 250 1980 User manual

BOMBARDIER

BOMBARDIER ski-doo elan 250 1980 User manual

BOMBARDIER Ski-Doo Legend Sport 4-Tec Owner's manual
BOMBARDIER

BOMBARDIER Ski-Doo Legend Sport 4-Tec Owner's manual

BOMBARDIER Ski-Doo Alpine 640 ER 1977 User manual

BOMBARDIER

BOMBARDIER Ski-Doo Alpine 640 ER 1977 User manual

BOMBARDIER Safari 377 1988 User manual

BOMBARDIER

BOMBARDIER Safari 377 1988 User manual

BOMBARDIER Ski-Doo MX Z X 440 2004 Manual

BOMBARDIER

BOMBARDIER Ski-Doo MX Z X 440 2004 Manual

BOMBARDIER ski-doo Tundra Scandic 2004 Series Install guide

BOMBARDIER

BOMBARDIER ski-doo Tundra Scandic 2004 Series Install guide

BOMBARDIER Ski-doo MX ZX 440 Manual

BOMBARDIER

BOMBARDIER Ski-doo MX ZX 440 Manual

BOMBARDIER Ski-Doo Alpine 74 1959 User manual

BOMBARDIER

BOMBARDIER Ski-Doo Alpine 74 1959 User manual

BOMBARDIER EVEREST User manual

BOMBARDIER

BOMBARDIER EVEREST User manual
BOMBARDIER 1982 Install guide

BOMBARDIER

BOMBARDIER 1982 Install guide

BOMBARDIER ski-doo RV 340 L/C 1977 User manual

BOMBARDIER

BOMBARDIER ski-doo RV 340 L/C 1977 User manual

BOMBARDIER Alpine 1984 Series User manual

BOMBARDIER

BOMBARDIER Alpine 1984 Series User manual

BOMBARDIER ski-doo MX Z X 440 2001 Owner's manual

BOMBARDIER

BOMBARDIER ski-doo MX Z X 440 2001 Owner's manual

BOMBARDIER ski-doo BLIZZARD 298 1981 User manual

BOMBARDIER

BOMBARDIER ski-doo BLIZZARD 298 1981 User manual

BOMBARDIER ski-doo MX-Z Blair MORGAN Owner's manual

BOMBARDIER

BOMBARDIER ski-doo MX-Z Blair MORGAN Owner's manual

BOMBARDIER ski-doo Elite 1974 User manual

BOMBARDIER

BOMBARDIER ski-doo Elite 1974 User manual

BOMBARDIER formula Plus 1986 User manual

BOMBARDIER

BOMBARDIER formula Plus 1986 User manual

Popular Snowmobile manuals by other brands
Yamaha RX10K Supplementary service manual

Yamaha

Yamaha RX10K Supplementary service manual

Camoplast ATV T4S Installation guidelines

Camoplast

Camoplast ATV T4S Installation guidelines

Ski-Doo 1982 Blizzard 5500 MX Operator's manual

Ski-Doo

Ski-Doo 1982 Blizzard 5500 MX Operator's manual

Lynx RADIEN DEEP SNOW 2022 Series Operator's guide

Lynx

Lynx RADIEN DEEP SNOW 2022 Series Operator's guide

Crafstman 247.887791 Operator's manual

Crafstman

Crafstman 247.887791 Operator's manual

Arctic Cat Bearcat 570 XT Operator's manual

Arctic Cat

Arctic Cat Bearcat 570 XT Operator's manual

Polaris 600 INDY VOYAGEUR 2016 owner's manual

Polaris

Polaris 600 INDY VOYAGEUR 2016 owner's manual

Polaris 2007 Two Stroke Service manual

Polaris

Polaris 2007 Two Stroke Service manual

Polaris 2882859 quick guide

Polaris

Polaris 2882859 quick guide

Arctic Cat 660 cc Service manual

Arctic Cat

Arctic Cat 660 cc Service manual

Polaris 800 RMK 2011 owner's manual

Polaris

Polaris 800 RMK 2011 owner's manual

Arctic Cat Wildcat EFI Mountain Cat 1994 Service manual
Arctic Cat

Arctic Cat Wildcat EFI Mountain Cat 1994 Service manual

Polaris Playmate 1971 Shop Manual

Polaris

Polaris Playmate 1971 Shop Manual

BRP LYNX Commander 800R E-TEC Touratech Operator's guide

BRP

BRP LYNX Commander 800R E-TEC Touratech Operator's guide

Ski-Doo Alpine II 1990 Operator's manual

Ski-Doo

Ski-Doo Alpine II 1990 Operator's manual

Yamaha MM700F owner's manual

Yamaha

Yamaha MM700F owner's manual

Yamaha SnoScoot SXR2NJ Operator's manual

Yamaha

Yamaha SnoScoot SXR2NJ Operator's manual

manuals.online logo
manuals.online logoBrands
  • About & Mission
  • Contact us
  • Privacy Policy
  • Terms and Conditions

Copyright 2025 Manuals.Online. All Rights Reserved.