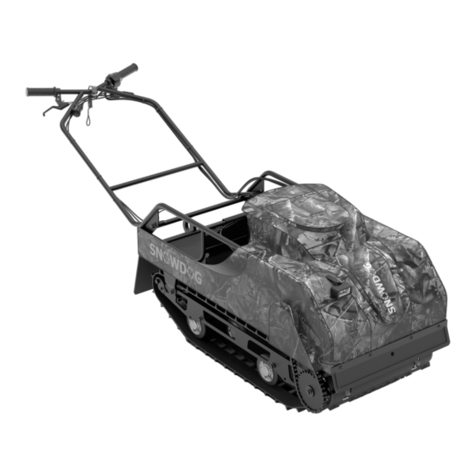
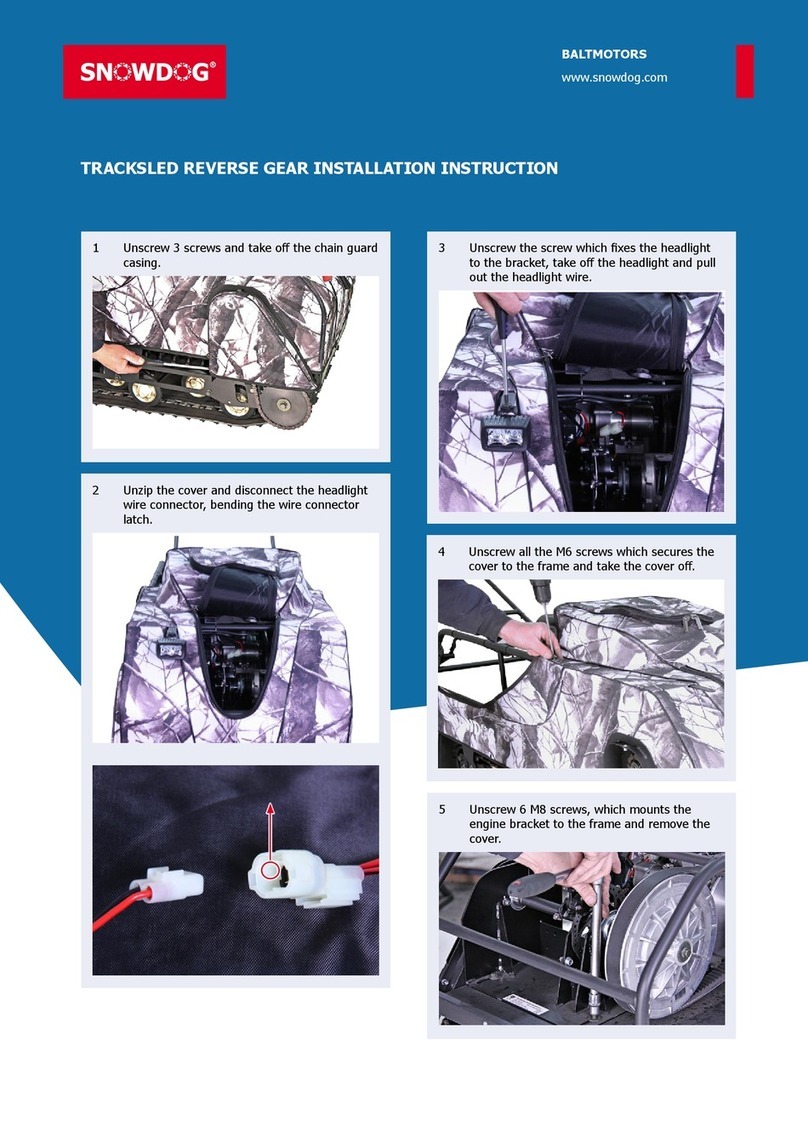
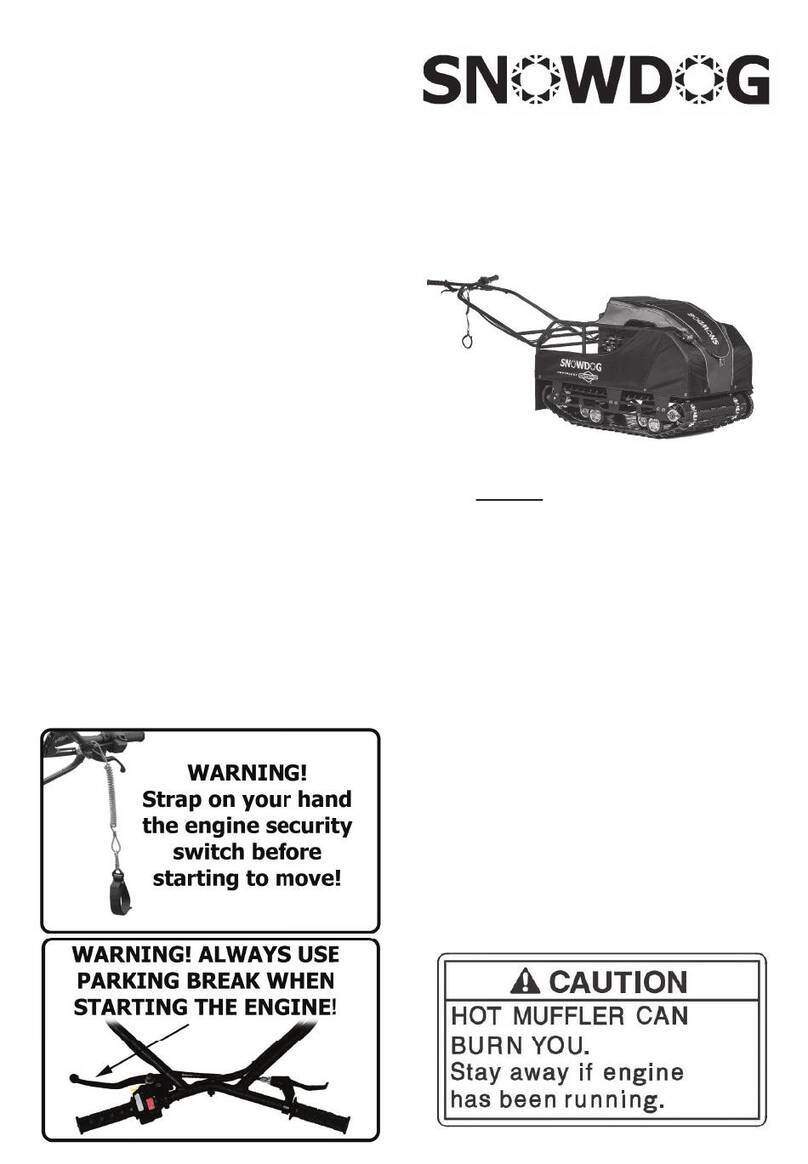
SNOWDOG Snowdog COMPACT Operating instructions

1
SNOWDOG REPAIR
MANUAL
1 Contents
1 General ������������������������������������������������������������ 2
1�1 Precautions����������������������������������������������������� 2
2 Description of SNOWDOG ����������������������������������� 2
2�1 Key elements of SNOWDOG ������������������������������� 2
2�2 SNOWDOG controls������������������������������������������ 2
2.3 SNOWDOG identication, model designation and the
place of information labels �������������������������������������� 3
2.4 Manufacturing number of SNOWDOG ������������������ 3
2.5 Engine marking ����������������������������������������������� 3
3 Preparing for repair and maintenance��������������������� 3
4 Tooling������������������������������������������������������������� 4
4�1 Screwdrivers
�������������������������������������������������� 4
4.2 Wrenches ������������������������������������������������������ 4
4.3 INBUS wrench ������������������������������������������������ 4
5 General principles of troubleshooting and performance
of works �������������������������������������������������������������� 4
5.1 Threaded Joint Tightening Torque Chart ��������������� 5
5.2 Bearings are discarded if they have: ������������������� 5
6 Suspension. Check, removal, disassembly, adjustment5
6.1 Checking the status of the track ������������������������� 5
6.2 Checking track tension�������������������������������������� 6
6.3 Checking the parallelism of the track shafts ���������� 6
6.4 Dismantling the suspension�������������������������������� 6
6.5 Assembling the suspension �������������������������������� 7
6.6 Suspension bogies ������������������������������������������� 7
6.7 Track shafts���������������������������������������������������� 8
7 Transmission ����������������������������������������������������� 9
7.1 Chain drive ����������������������������������������������������� 9
7.2 Chain maintenance ������������������������������������������10
8 Clutch ������������������������������������������������������������� 11
8.1 Comet CVT (ZM184) ���������������������������������������� 11
8.2 CVT Safari. Inspection, maintenance, adjustment�� 12
9 Reverse gear ���������������������������������������������������� 16
9.1 Oil change ����������������������������������������������������� 16
9.2 Removal, disassembly, assembly and installation of
the reverse gear��������������������������������������������������� 16
10 Parking brake�������������������������������������������������� 17
10.1 Break gear. Inspection and maintenance ������������ 17
10.2 Brake caliper. Checking, maintenance ���������������� 18
10.3 Disassembling the caliper�������������������������������� 19
10.4 Brake discs. Check, removal, installation ���������� 19
11 Electrical system���������������������������������������������� 21
11.1 Circuit diagram���������������������������������������������� 21
11�2 Battery� Inspection and maintenance ���������������� 21
11.3 Emergency engine switch, checking ������������������ 22
11.4 Steering switch, checking�������������������������������� 23
11.5 Headlight, inspection, replacement ������������������� 23
11.6 Engine protection by oil protection�������������������� 23
11.7 Removing and installing the engine ������������������ 23
12 Maintenance ��������������������������������������������������� 24
12.1 After the rst 5 hours of SNOWDOG operation ���� 24
12.2 Maintenance every 20 hours of operation����������� 24
13 Storage ��������������������������������������������������������� 24
13.1 Preparation for storage���������������������������������� 24
13.2 Preparing for operation after seasonal storage
(depreservation)��������������������������������������������������� 24
14 Frequency of maintenance of SNOWDOG�������������� 25
15 Complicated operating conditions������������������������ 25

2
Introduction
The Manual for using the SNOWDOG equipment is prepared
specically for the company dealers and their qualied mechanics
and specialists with the skills and understanding of the repair and
maintenance of the SNOWDOG. Repair and maintenance of the
equipment by non-professionals may cause serious damage to
both SNOWDOG and users including anybody else being around.
The SNOWDOG company constantly updates and improves its
entire range of equipment, so the equipment described in the
Manual may differ from any other repaired or maintained.
1 General
The Manual contains the information about maintenance,
adjustment and repair of SNOWDOG. Photos and illustrations
are to help readers cope with any of the above operations. All the
instructions are presented in the step-by-step format and focus
on the mechanics who operate SNOWDOG for the rst time.
1.1 Precautions
The Manual uses special symbols: WARNING and NOTE�
!WARNING
means a danger to life or health, which may arise as a result
of negligence or carelessness. Some damage to equipment
and vehicle may also be caused. You should take seriously the
WARNING sign.
VNOTE
provides the information that is essential for the repair and
maintenance of SNOWDOG�
2 Description of SNOWDOG
2.1 Key elements of SNOWDOG
1� LED-headlight
2� Reverse gearbox
3� Brake disc
4� Fuel tank
5� Air lter
6� Mufer
7� Hooking device
8� Transmission chain
9� Track
10� Axle bearings (self-centering)
11� Driven pulley CVT
12� Driving pulley CVT
13� The battery
14� Wheel trolley of suspension
15� Side plate chassis
16� Track tensioner
2.2 SNOWDOG controls
1� Steering handle
2� Parking brake
3� Steering switch box
4� Throttle lever arm
The Manual describes SNOWDOG models equipped with
the engines Brigs&Stratton: SNOWDOG COMPACT and
STANDARD.

3
2.3 SNOWDOG identication, model designation
and the place of information labels
Tag 1
Tag 2
2.4 Manufacturing number of SNOWDOG
The manufacturing number is applied to the engine mount in the
rear part (under the engine cylinder) by dot peen marking.
On the front of the engine mount glued are two information
manufacturer’s tags, which contain the information about the
manufacturer, model and serial number of SNOWDOG.
2.5 Engine marking
The engine number is caused by dot peen marking on the engine
crankcase at the front.
3 Preparing for repair and
maintenance
1� Remove all dirt before repair and dismantling.
2� Use proper cleaning tools and equipment.
3� When dismantling SNOWDOG keep the joined
components together. It includes mechanisms,
cylinders, pistons and other joined parts that wear
at the joints. The joined components should be
assembled again in the same composition or replaced.
4� During SNOWDOG dismantling, clean all parts and
place them in containers indicating disassembled
mechanisms. This will speed up the assembly time
and make it possible to set them again correctly.
5� Stay away from open re.
6� Use oil and grease recommended by SNOWDOG.
Other brands may be similar in terms of designation
and properties but inferior in quality.
7� In disassembling components and mechanisms all
the damaged or worn-out gaskets, seals and O-rings
should be replaced.
8� All the mounting seats should be cleaned.
9� Properly lubricate all the joined parts and bearings
during assembly. Use lubricants when installing seals.
10� 1Use an anaerobic thread lock where indicated. The
surface of the thread should be cleaned and degreased
before using the lock.

4
4 Tooling
Most of the operations described in the Manual can be performed
with simple hand tools and measuring instruments that mechanics
know quite well. Use the tools exactly as prescribed. Keep them
clean and tidy�
To maintain SNOWDOG, wrenches and heads with sockets and
ratchets of the following metric sizes may be needed, 10, 12, 13,
14, 17, an INBUS wrench of 5 mm, 3 mm and a cross screwdriver.
You may also need pullers.
4.1 Screwdrivers
Use the screwdriver for screwing and unscrewing screws. Do
not try in any other way to remove parts with a screwdriver.
Damaged or worn-out screw drivers should be replaced. When
using a screwdriver with the worn tip, it is quite likely that the
fastening element will be damaged, and it will subsequently
complicate its removal�
4.2 Wrenches
Open-end wrenches, box wrenches and combination wrenches
may be of various types and sizes.
In most cases it is preferable to use a box wrench, particularly for
nal tightening of a mounting element.
!WARNING
DO NOT USE HEADS FOR HAND TOOLS IN
WORKING WITH PNEUMATIC TOOLS. THISMAY
CAUSE THEIR DESTRUCTION AND INJURY.
USE EYE PROTECTION WHEN WORKING WITH
PNEUMATIC TOOLS.
4.3 INBUS wrench
With these models an INBUS wrench is used to adjust and
customize the brake system. A key with the size S=5 mm and 3
mm with a short handle (A~100 mm) or any other hex crest with
the size of 5 and 3 mm with ratchet should be used.
5 General principles of
troubleshooting and performance of
works
Most of the operations described in the Manual are quite simple
and can be performed given the basic tool handling skills.
However, when performing major operations to dismantle the
elements you should reasonably take an unbiased look at your
ability�
1� In working with the engine and suspension parts
SNOWDOG needs to be securely fastened�
2� For all identical parts they need to marked on
SNOWDOG. On the mating surfaces marks indicating
their position relative to each other should be applied.
3� Removable wiring and connectors should be marked
with adhesive tapes and markers.
4� The treated surface should be protected against
physical damage and corrosion. Avoid contact with
gasoline and other chemicals on the treated surface.
5� When working with stubborn and rusted bolts use a
penetrating lubricant, for example, WD-40. If possible,
avoid any strong thermal effects. At high temperature
parts can melt and be deformed as well as the painted
surfaces and plastic parts may be damaged.
6� If you are having trouble removing parts, you should
determine the cause, eliminate and then continue
with the removal.
7� Close all openings to prevent debris and foreign items
from getting into the engine.
8� Before starting the procedure read the instructions
guidelines and compare the parts with the pictures.
9� The term “replace” refers to the replacement of faulty
parts with non-defective ones. The term “rebuild”
means the removal, disassembly, troubleshooting,
measurement, repair and assembly of parts.
10� The term “front side” in the Manual refers to the front
part of SNOWDOG. The front side of a component
is part of the component closest to the front part of
SNOWDOG. The left and right sides are indicated
relative to the driver’s position when he stands in a
sleigh heading forward.
11� Some procedures will require a hydraulic press or a
special puller� Do not attempt to perform a similar
procedure with any improvised means, it may cause
damage of SNOWDOG.
12� It is much easier to repair SNOWDOG if you wash
it before starting repairs. Use a degreasing agent.
Before its use, consult the instructions for use.

5
!WARNING
DO NOT AIM HIGH PRESSURE WATER JET
DIRECTLY AT WHEEL BEARINGS, SUSPENSION
PARTS, MUFFLERS, AIR FILTER AND ELECTRICAL
COMPONENTS. WATER CAN FLUSH OUT THE
GREASE FROM THE BEARINGS AND DAMAGE
GASKETS.
13� Compose the diagrams of similar components. For
example, the housing bolts are often of different
length, and the separated components can get mixed
up making it difcult to reassemble them.
14� Make sure that all gaskets and washers are in place in
the desired position.
15� Usually there are washers in places where the rotating
parts are in contact with the xed ones.
16� Use a new gasket if your old one is damaged.
17� When removing the self-locking fastening elements,
they should be replaced with new ones. Do not
install conventional fasteners instead of self-locking
elements�
18� Use grease for xing small parts, if they fall apart
during assembly. Do not apply grease to brake parts,
working surfaces of the cvt and electrical components.
5.1 Threaded Joint Tightening Torque Chart
Size of wrench, mm Size of
wrench, mm N·m
10 6 5
12, 13, 14 8 15
14, 15, 17 10 30
17, 19 12 55
19 14 85
22 16 130
5.2 Bearings are discarded if they have:
Bearings are discarded if they have:
1� Cracks or traces of metal spalling on the rings or
rolling elements.
2� Shelling.
3� Deep corrosion cavities�
4� Deep risks.
5� Chippings.
6� Through cracks in the separator.
7� Loose rivets in the separator.
8� Chippings and dents on the separator preventing the
smooth rotation of the bearing.
9� Uneven wear of ground threads.
10� The stepped wear of the working surface of the rings
visual and noticeable by touch.
Allowed are scratches and marks on the seating surfaces of the
outer and inner rings, chippings and dents without impeding the
smooth rotation of the bearing as well as the mat surface of
ground threads and rolling elements.
Before testing the ease of rotation, the bearing is immersed in
kerosene or diesel fuel (gasoline with 10% of engine oil possible)
and then wiped with a clean cloth outside.
6 Suspension. Check, removal,
disassembly, adjustment
6.1 Checking the status of the track
1. Lugs
2. Track clips
3. Track window
4� Lintel
The appearance of the track is checked by visual inspection.
The track should not have any deep damage. If there is any
sub-surface damage, it needs to be sealed to prevent moisture
entering the cord of track and its being damaged. No cords
should stick out from the side surface of the track. If there any
protruding cord threads, they need to be cut. Short threads need
to be cauterized. Before every journey check the condition of the
metal clips on the track. If the clip is deformed, it is necessary to
straighten out it. In the absence of clips, set it in place. Operation
of damaged tracks leads to their short life.
Not allowed are defect, such as rubber cracks across the width of
the track of more than 1 mm in depth. In operation of tracks with
defects, rubber cracks will quickly gap and deepen and result in
disjunction leading the track’s eventually breaking down. Tracks
with the following defects are not admitted for use:
1� Destruction of rods of more than 2 pcs. or more in
a row, or piece by piece of 10% or more of the total
(for the track COMPACT 4 rods, STANDARD 5 rods,
MAX 6 rods).
2� Rupture of window lintels 2 pcs� or more�
3� Rupture of one or more lugs across the track width.
4� Rupture of the outer rubber layer and the lining fabric
layer at the base of the lug with the length of 50 mm
on one or both sides of the tracks in an amount of
10% of the total number of lugs (the number of lugs
is equal to the number of rods).
5� Separation and rupture of lugs along the track edges
in portions of 30 mm or more from one or both sides
of the track in an amount of 10% of the total number
of lugs.
6� Transverse rupture of track with the length of 50 mm
or more in the amount of 1 pieces and more.
7� Separation of tracks in cord fabric layers with a length
of 100 mm or more and a depth of 50 mm or more in
the amount of 1 pc or more.
8� Separation and rupture of a fragment of the fabric and
(or) the track rubber with a length of 100 mm or more
in an amount of 1 pc. or more. The track elongation
exceeds the track adjustment on SNOWDOG.
6
6.2 Checking track tension
Before every movement check the condition of the track and
its tension. Over tension leads to engine power loss in the
suspension and causes overloads�
Place the SNOWDOG on a at surface. Set SNOWDOG on a at
horizontal surface.
Put a plate on the track so that it rests on the upper part.
Measure the distance between the plate and slack track in the
middle of its length.
Normally tensioned track deects 15-20 mm (in the middle of its
length) by gravity.
!WARNING
IF THE MODEL IS EQUIPPED WITH CARRIER
ROLLERS, THEN BEFORE CHECKING TENSION AND
ADJUSTMENT, THEY SHOULD BE TEMPORARILY
REMOVED.
Loosen the bolts 1 on both sides of the rear shaft mount. Turn
the tensioner eccentric 2 for axis offset.
VNOTE
TO AVOID TRACK DISTORTION, ECCENTRIC
DISTORTION TENSIONER ECCENTRICS SHOULD
BE EQUALLY MOUNTED ON THE RIGHT AND LEFT
SIDES OF SNOWDOG.
Check the tension of the track.
Tighten the bolts.
6.3 Checking the parallelism of the track shafts
To check the parallelism of the track shafts, measure the distance
between the shafts on both sides of SNOWDOG. The distance
should be the same. In case of discrepancy adjust with the
eccentric of the track adjuster as specied in paragraph 6.2�
6.4 Dismantling the suspension
Remove the chain by disconnecting the chain lock or removing
the driven sprocket. Remove the 10 xing bolts used to fasten
the suspension to the frame, and remove the frame.
Loosen the track, as described under 6�2 .
Unscrew the xing bolts of frames and shafts on one of the side
plates�
Remove the side plate of the suspension.

7
Unscrew the corresponding bolt on the other side plate and
remove the required suspension element. If the full dismantling
of the suspension is necessary, remove all the bolts of the second
side plate and disassemble the suspension into components and
parts�
6.5 Assembling the suspension
To assemble, lay out all the suspension elements and fasten
them with bolts with one of the side plates by snugging up only
by half.
Put the track on the edge and insert the assembled suspension
inside. Then fasten the second side plate. Connect the
suspension to the frame and tighten the xing bolts.
Set the chain.
!WARNING
WHEN TIGHTENING ALL THE SUSPENSION BOLTS
AND THE BOLTS HOLDING SUSPENSION TO THE
BODY, USE THE ANAEROBIC THREAD LOCKER.
Tighten all the bolts holding the suspension to side plates with
the torque indicated in Table 5.1 on page 5 �
6.6 Suspension bogies
The SNOWDOG suspension is based on bogies, two or three
depending on the model. Rubber wheel rollers fail when operated
with high loads, colliding with obstacles and storing under the
load. When springs wear out, SNOWDOG sags, becomes softer,
the range of the track adjuster is insufcient to ensure tension.
The worn-out spring should be replaced. The bogie springs differ
by the direction of winding.
Bogie setup:
1� Rubber roller rim
2� Bolt М8
3� Roller balancer axis
4� Bushing
5� Right roller spring
6� Left roller spring
7� Roller balancer
8� Internal cheek
9� External cheek
10� Plug
11� Plug of roller rim
12� Self-locking nut 6 DIN 985
13� Internal roller balancer
14� Bolt 6x20 DIN 933
15� Bearing 205
16� Washer 10 DIN 125

8
6.6.1 Checking bogie bearings
To check the status of bogie bearings, loosen the track. By
turning the bogie wheel, check for noise and ease of rotation,
the axial and radial runout.
If a bearing is worn-out, replace it. To replace it, remove the
cheek wheel, remove the retaining ring and remove the bearing.
Check the bearing as indicated in 5.2 on page 5 If the
bearing does not meet the parameters, replace it with a new
one�
In mounting the wheel cheek, do not over-tighten fasteners.
Overtightened cheeks may impede the movement of the wheels
and deform the rubber rim. In tightening, check the wheel travel.
If there is any difculty, loosen the fasteners.
6.7 Track shafts
Track shafts are an essential element of the transmission. In the
SNOWDOG of the model year 2016-2017 used are track shafts of
two types�
1. The shafts are rigidly xed to the side plates. The
sprockets rotate on bearings. The shafts are those
driven only�
2. The shafts mounted on bearings. The sprockets are
rigidly xed to the shaft.
Diagnostic principles are similar for all shafts.
The principles of inspection and maintenance of all types of
shafts are the same.
The shafts should not have more than 1 mm beats, nor should
be bent. Operation of any broken shafts can lead to the tracks
getting off the sprockets and jam, which is fraught with falls
and injuries. The sprockets on the shafts should be arranged in
parallel to each other and parallel to the sprockets on the second
shaft. Failure to observe this condition, sprockets will wear the
track in the windows, which can lead to the track’s getting off the
sprockets. Runout of sprockets no more than 5 mm is possible.
Bearings are another important element of the shafts. The main
cause of bearing failures is corrosion due to ingress of water in
overcoming water obstacles. Replace defective bearings. The
driving shafts are at one of its ends has the spline on which the
driven sprocket is set. The spline should not be damaged.
Damage to the shaft at the spline can be easily detected by the
beating of the driven chain sprocket. A damaged shaft should be
replaced. Beating will lead to chain inging, and increased wear
of bearings and the structure as a whole.
To maintain the bearings of the driven shaft, it needs to be
removed from the suspension.
1� Using the wrenches 10 mm, unscrew the 9 bolts and
nuts�
2� Remove the sidewall of the disc and the sprocket.
3� Remove the retaining ring.
4� Remove the bearing.
5� Check the bearing as indicated in 5.2 on page
5. If necessary, replace it with a new one.
6� Install the bearing.
7� Install the sprocket and the sidewall of the disc.
!WARNING
WHEN TIGHTENING THE FASTENERS, DO NOT
OVERTIGHTEN. THIS WILL LEAD TO DEFORMATION
OF THE SPROCKET AND DISC SIDEWALL.
Tighten the nut so that the bolt protrudes 1 mm.
!WARNING
WHEN TIGHTENING UP TIGHT ALL THE SUSPENSION
BOLTS AND THE BOLTS HOLDING SUSPENSION TO
THE BODY, USE THE ANAEROBIC THREAD LOCKER!

9
7 Transmission
7.1 Chain drive
The chain drive should be checked before each journey. The
chain drive includes the driving and driven chains of the sprocket.
The main problem during the operation is the chain wear,
respectively, a worn chain “gnaws” for itself a seat in the teeth of
the sprockets.
1 - chain pulley
2 - sprocket
а - rate of wear of the tooth
b - the outlines of the new sprocket.
The wear of the sprocket teeth exceeding the value of 1/4 of the
size of the tooth is considered critical. If one of the components
is criticality worn-out, it is necessary to change the sprocket set
(driven and driving) and the chain. Inspect the condition of the
driven and driving sprocket wear and fractur.
You should ensure that the driven sprocket and shaft are not
damaged. Collision with obstacles leads to bending of and
damage to the sprocket and shaft. The driving sprocket wears
slightly faster than the driven one but it is not subjected to
shocks when driving over obstacles.
Chains with gland packing 1 O-ring can be mounted on
SNOWDOG�
In such chains grease is put for the entire operation period of the
chain but the seals need regular lubrication. The main purpose
of lubrication of seals is to prevent heating and loss of tightness.
Replace the chain, if the seals are damaged and stick out of it.
The chain life depends on its lubrication. It is necessary to clean
and lubricate the chain after each journey. When runs are more
than 20 km, long movement in the puffy snow or water, the chain
should be lubricated during the journey. It is recommended to
use a special lubricant for chains in aerosol containers.
7.1.1 Checking the chain tension
The normally tensioned chain in the middle between the
sprockets has a free wheeling of 10-20 mm. Free wheeling of
less than 5 mm will lead to a rapid stretching of the chain and
sprockets. An overly loose chain can ing on the move. It is
necessary to tighten a free chain. In the operation, the chain
is extended, and the distance between the links changes. If
the chain length adjustment range is no longer enough, it is
necessary to replace the chain. A chain may not be shortened by
removing one or more links. When cleaning the chain, check the
condition of rubber seals between the plates of the chain. If the
seals are damaged and stick out of the chain, the chain requires
urgent replacement.

10
7.1 .2 Method of chain tension
For the chain tension, loosen the six bolts holding the engine
mount to the frame of SNOWDOG�
Move the engine mount with the engine for tensioning or
loosening the chain.
Tighten six bolts holding the engine mount.
7.2 Chain maintenance
After each journey and every 10 hours of movement it is
necessary to lubricate the chain.
Every 50 engine hours of SNOWDOG or at the end of each
season, whichever comes rst, it is necessary to maintain the
chain. Follow the steps:
1� Clean the chain from dirt.
2� Remove the chain by disconnecting the lock or
loosening sprockets.
3� Wash the chain by putting it in kerosene.
4� Remove the chain from the kerosene and dry it.
5� Check the chain mobility. If mobility is poor and/or
uneven, replace the chain.
6� Set the chain on SNOWDOG and lubricate it.
A drive chain with rubber seals such as O-ring between the chain
plates can be installed on SNOWDOG. Cleaning with steam, high
pressure and the use of solvents may damage the seal. Use only
kerosene to clean the drive chain.
VNOTE
USE THE CHAIN LUBRICANT SUITABLE FOR
CHAINS O-RING OR ENGINE OIL SAE 30~50W.

11
8 Clutch
CVT is a continuously variable automatic V-belt transmission.
The cvt consists of two pulleys, a driving one (hereinafter
the centrifugal adjuster) and a driven one (the driven pulley).
The cvt regulates the transmission ratio by two parameters,
the rate of rotation (RPM) of the engine and the resistance to
movement of the tow. Depending on the combination of these
parameters while moving the tow a certain CVT transmission
ratio is automatically set. The centrifugal adjuster performs the
clutch function. When the engine rotational rate drops below
2200 rpm, the transmission of rotation from the engine shaft to
the transmission stops.
8.1 Comet CVT (ZM184)
As long as the CVT belt wears, wear products fall into the
places of sliding of bushings and the cvt rollers. This impairs
the performance of the cvt and can lead to overheating and
jamming. If a worn belt is replaced; or there visible deterioration
of the cvt performance, it is necessary to maintain the cvt.
8.1.1 Inspection and maintenance
1� Remove the cover from SNOWDOG.
2� Remove the belt from the cvt.
3� Remove the bolt holding the cvt to the crankshaft
and remove the cvt.
4� Disassemble the cvt by releasing the lock washer
and unscrewing the nut.
5� Rinse the seats of cvt bushings, rollers and the
places of rolling of cvt rollers with gasoline.
6� Lubricate with the ice-free lithium grease (e.g.
TEXACO STARPLEX EP 2) the sliding seats on the
shaft sleeve and cvt casing.

12
7� Lubricate with the ice-free lithium grease (for
example, TEXACO STARPLEX EP 2) rollers and the
places of rolling of rollers�
8� Assemble the cvt in the reverse sequence.
9� Set the cvt on the crankshaft of the engine, set the
washer and tighten the bolt using the strong xing
thread locker.
10� Set the cvt belt.
!WARNING
KEEP CLEAN THE WORKING SURFACE OF THE CVT,
IF THERE IS ANY GREASE ON THEM, IMMEDIATELY
CLEAN THEM.
8.2 CVT Safari. Inspection, maintenance,
adjustment
8.2.1 Design and operation of the CVT drive pulley
Cvt components
1� Fixed cone
2� Governor weight
3� Movable cone
4� Stop block
5� Cover
6� Spring
7� Split bushing
8� Insert
9� Roller
10� Axis
11� Belt
12� Shaft
13� Adjustment ring
14� Movable disc
15� Fixed disc
16� Adjustment ring
17� Bolt
18� Key bolt
19� Bolt
20� Adjustment screw
21� Nut

13
The drive pulley comprises a xed cone 1 with the shaft 12; a
movable cone 3 with governor weights 2 rotating on the axes;
stop block 4 with rollers 9, on which the governor weights are
moved; a cover 5 and a spring 6 installed between the stop block
and the cover. The xed cone and stop block are connected to
the shaft with the right hand thread. The xed cone of the pulley
is put on the crankshaft and fastened with the bolt and washer.
It is necessary to x the bolt with the anaerobic thread-locking
adhesive. Be sure to use the key bolt. The spring provides the
idling of the cvt as it spreads pulley cones with a decrease in the
engine rotational rate or stoppage. In the idling mode, between
the belt and the conical surface of the movable cone there should
be a gap of 1 to 3 mm, which is regulated by the rings 13 to be
installed between the stop block and the shaft projection.
The drive pulley operates as follows, when the adjuster is rotated,
the centrifugal force inuencing the governor weights tend to
rotate them so as to move the movable cone from the stop block
and compress the belt in the pulley groove. The centrifugal
forces are counteracted by the return spring, the action of which
is overcome by the governor weights ranging from 2200 rpm.
A further increase in the engine rotational rate results in the
seizure by the cones of the belt and increase in its compression
and tension forces from zero to the working value sufcient for
torque transmission and overcoming the motion resistance force
of SNOWDOG�
8.2.2 Adjustment, disassembly and assembly of the
cvt pulleys
1� Check the distance B between the edges of the cones
15 and 14 of the driven pulley. It should be equal to the
belt width of ±0.5 mm (see Figure). The correctness
of the adjustment can be checked by putting the belt
in the groove of the driven pulley, the belt should not
protrude over the groove by more than 2 mm. If the
belt protrudes over the groove by more than 2 mm,
then unscrew the bolt 17 and remove the xed driven
cone with the puller, remove from the shaft the key
bolt 18, and then install on the shaft one or two rings
16. Assemble in the reverse sequence. Installing one
ring reduces the belt protrusion over the groove by
2 mm�
2� Check the distance A between the ends of the
xed cones of pulleys, it should be 55±0.5 mm. If
necessary, adjust the distance by moving the engine
in the slots of the engine sub-base.
3� Install the belt on the cvt, engage the neutral speed
(if available) or remove the chain. Then rotate the
driven pulley repeatedly for the belt to get to the
outer diameter of the pulley. Check the belt tension.
8.2.3 Maintenance at the end of the operation season
Lubricate the shaft under the split bushing and the bushing of
governor weight axes. For lubrication, use the grease of the
standard NLGI-2.
At the end of each season or every 100 engine hours (whichever
comes rst) check the status of bushes on the axes of governor
weights and the condition of liners. The wear of the bushes of
governor weights can be evaluated by the value of the radial
backlash of governor weights. The allowable backlash magnitude
is not more than 1 mm. The wear of the inserts can be assessed
by the magnitude of the gap between inserts and guide ribs the
movable cone. The amount of the allowable gap is not more than
1�5 mm�
!WARNING
IF THERE IS ANY RUBBER RESIDUE ON THE SHAFT
OF THE ADJUSTER, REMOVE THE RESIDUE WITH
SOME CLOTH SOAKED IN GASOLINE.
!WARNING
PREVENT PASSAGE OF GREASE ON THE CONICAL
SURFACES OF DISCS.
!WARNING
PREVENT PASSAGE OF GASOLINE OR GREASE ON
THE CVT BELT.
Permissible belt wear is not more than 3 mm, if the wear exceeds
the value, it is necessary to replace the belt.

14
8.2.4 Assembly and disassembly of the driven pulley of
the cvt
Before assembly of the driven pulley, the shaft should be
lubricated with grease.
Insert sleeve - for the engine 9 hp - 3 mm, for the engine 15 hp
- 3 mm and 20 mm. Then, set the key bolt and coupling half with
the spring as shown in the photo.
After wearing a movable cvt disc, rotate it clockwise 120° and
lock the shaft, for example, with a wooden wedge.
Fix the thrust washer onto the shaft.
Then, set the key bolt and the xed pulley cone, and for the
model with the engine 15 hp set the bushing of 20 mm. Secure
with the bolt and a washer.
When fastening a bolt, use the anaerobic thread lock. Disassemble
in the reverse sequence.

15
8.2.5 Assembly and disassembly of the drive pulley of
the cvt
To disassemble the drive pulley, unscrew the bolt holding the
pulley�
Unscrew the six bolts securing the cover to the movable cone. In
loosening the last two bolts it is necessary to hold the cover to
avoid the spring’s ‘shooting’.
It is convenient to x cvt models with a hole on the shaft, for
example, with a screwdriver.
The support is screwed with an anaerobic thread-lock, so before
loosening, heat it with a hot air gun.
Unscrew anti-clockwise.
Secure the crankshaft by getting the ywheel locked (or, if the
centrifugal adjuster has a mounting hole, use it).
When disassembling the support, remove the inserts, wash axes
and rollers in kerosene, lubricate them with grease and assemble
the support with new inserts.
Assemble the adjuster in the reverse sequence. The support
torque on the shaft 7 to 8 kg/m.

16
9 Reverse gear
9.1 Oil change
1� Place under the gear unit case a suitable container for
oil collection, then unscrew the oil drain bolt with a
washer.
2� Allow the used oil to drain completely, then reinstall
the oil drain bolt and a new washer, tighten the bolt of
the oil drain with the torque of 21 Nm. .
The oil level in the gear unit is checked by draining and measuring
the amount of discharge.
!WARNING
IT IS RECOMMENDED TO FILL THE REVERSE GEAR
WITH THE ENGINE OIL. THE REQUIRED AMOUNT
OFOIL IN THE GEAR UNIT IS 200 ML
3� Unscrew the breather adapter.
4� Fill with new oil through the breather adapter hole,
then screw the breather adapter with the torque of
21 Nm�
9.2 Removal, disassembly, assembly and
installation of the reverse gear
VNOTE
BEFORE REMOVING THE REVERSE GEAR, FULLY
DRAIN IT.
1� Remove chain protection.
2� Remove chain.
3� Loosen the bearing bolts

17
4� Remove the four bolts 1 holding the gear unit
mounting brackets to the engine mount.
5� Remove the gear case as assembly with the shaft,
brackets the driven pulley of the cvt and the brake
disc�
6� Fix the CVT pulley and unscrew the nut holding the
drive sprocket. Remove the sprocket.
7� Unscrew the two bolts holding the gear unit
mounting bracket.
8� Unscrew the bolts holding the gear unit cover.
9� Remove the gear cover for maintenance.
10� Clean gear parts from dirt and sealant residue.
11� Check the condition of gears, shafts, bearings, seal
rings, seals and the guide fork.
12� Replace the defective and worn-out parts.
13� Spread the sealant on the gear case at the interface
with the cover.
14� Assemble and install the gear unit.
!WARNING
WHEN INSTALLING THE COVER OF THE GEAR
UNIT, USE A SEALANT.
Fill the gear unit with oil.
!WARNING
IT IS RECOMMENDED TO FILL THE REVERSE GEAR
WITH THE ENGINE OIL. THE REQUIRED AMOUNT
OFOIL IN THE GEAR UNIT IS 200 ML.
10 Parking brake
The parking brake consists of a brake caliper with pads, a brake
disc, a drive cable and a brake lever with a lock.
10.1 Break gear. Inspection and maintenance
The brake is a combination of a steel disk placed on the shaft
of the driven cvt, and a device that presses the disc with brake
pads, a caliper. The braking force is transmitted from the brake
crank with a cable.
The parking brake is actuated by a lever with a lock located on
the left handlebar. Check out the free stroke of the lever, it should
be 5-10 mm.
If the braking force on the lever is not enough, for example, when
the brake pads are worn-out, or the steel cable is elongated, you
need to adjust the brake lever stroke.
To do this, loosen the locknut 1 and by rotating counterclockwise
the adjusting screw 2 pull the cable so that the brake lever has a
free wheeling in the range of 5-10 mm.
To loosen the brake cable, loosen the locknut 1 and loosen the
cable 2 by rotating clockwise the adjustment screw.
If the adjustment on the lever is not enough to adjust the
freewheel, adjust the brake caliper and check the condition of
the pads.

18
10.2 Brake caliper. Checking, maintenance
Before setting up the caliper, loosen the brake cable as much as
possible as specied in 10.1 on page 17.
To adjust the brake caliper, remove the cover using a cross
screwdriver�
Caliper parts
1� Bolts to adjust the position of the caliper (parallelism
of the brake pads in respect of the brake disc)
2� Bolts of fastening the caliper
3� Bolt of fastening the brake cable
4� Stop of the tube guide cable of the brake
5� Bolt to adjust the distance between the pads
6� Lock nut of the adjusting bolt
10.2.1 Adjusting the brake caliper
Fully loosen the tension of the brake cable on the lever, as
described in� 10.1 on page 17.
Ensure ease of pushing and return to the starting position of the
lever and the parking brake cable.
At the complicated movement of the parking brake lever, lubricate
or replace the cable.
If the parking brake lever is in the initial position, and the cable
slacks, adjust the tension of the cable on the parking brake
caliper. Loosen the bolt 3 and pull the cable to remove slacking.
Do not create tension of the cable.
Tighten the bolt and check the operation of the parking brake
lever�
By rotating the bolts 1, adjust the position of the caliper relative
to the brake disc. The xed brake pad should be parallel to the
brake disc plane. Adjust the minimal possible distance between
the xed brake pads and the brake disc. Allowed is the brake
pad’s touching the disc, if its rotation is not obstructed.
Loosen the lock nut 5. Tighten the screw 6 until the movable
brake pad’s touching the brake disc. When holding the bolt 6
tighten the locknut 5. Check the brake disk rotation. Allowed is
the brake pads’ touching the disc, if its rotation is not obstructed.
Check the free travel of the parking brake lever. If necessary,
adjust the tension of the cable as described in. 10.1 on page
17
10.2.2 Removal and installation of the brake caliper
By using the INBUS allen wrench or another hex slot, unscrew
the bolts 2.

19
Remove the caliper
Check the condition of the brake pads. The limit of the thickness
(1) of the working material of the brake pads is 0.5 mm. If the
brake pads are worn-out, replace them.
If the brake pads are in order, set and adjust the brake caliper as
described in 10.2.1 on page 18�
10.3 Disassembling the caliper
Loosen the bolts 1 and disassemble the caliper.
1� Caliper
2� Stop
3� Brake pad
4� Spring
5� Caliper cover
6� Bolts of the caliper cover
10.4 Brake discs. Check, removal, installation
Check the disс without removing from SNOWDOG. The disc should
not have any deviations from the plane, signs of overheating in
the form of darkening, blueing.
Allowed is the brake pads’ touching the disc, if its rotation is not
obstructed�
!WARNING
BE VERY CAREFUL IN WORKING WITH THE
PARKING BRAKE. THE ROTATING DISC IS SHARP
ENOUGH TO SEVERELY INJUR YOU. THE BRAKE
DISC IS HEATED DURING OPERATION AND CAN
CAUSE BURN.

20
!WARNING
KEEP THE DISC AND BRAKE PADS FREE FROM
OIL OR GREASE. DO NOT TOUCH THE DISC WITH
HANDS. REPLACE THE PADS, IF OIL OR LUBRICANT
ARE ON THEM. CLEAN THE BRAKE DISC WITH THE
AEROSOL CLEANER FOR BRAKES, IF THERE IS ANY
OIL OR GREASE ON IT.
10.4.1 Removal and installation of a brake disc
To remove the disc, remove with the screwdriver the four bolts
of the chain protection and remove it.
Remove the chain lock and then the chain.
Remove the bolt securing the driving sprocket. Remove the
sprocket.
Remove the bolt holding the driven pulley of the cvt. Remove the
driven pulley�
Unscrew the bolts holding the cases of the housed self-aligning
bearings.
Remove the transmission shaft together with the brake disc. Now
it is available for removal of the disc.
Remove the brake disc by unscrewing the 6 xing bolts with the
IMBUS key of 5 mm.
After installing the new disc, assemble everything in the reverse
order�
!WARNING
DURING THE INSTALLATION OF BOLTS USE THE
ANAEROBIC THREAD LOCK.
This manual suits for next models
1
Table of contents
Other SNOWDOG Snowmobile manuals

SNOWDOG
SNOWDOG COMPACT B7ZE L User manual

SNOWDOG
SNOWDOG Compact B10 ME User manual

SNOWDOG
SNOWDOG Twin Track V14 MER User manual

SNOWDOG
SNOWDOG STANDARD B10 User manual

SNOWDOG
SNOWDOG COMPACT B13ME-WR User manual

SNOWDOG
SNOWDOG COMPACT B13 ME WR User manual

SNOWDOG
SNOWDOG Sport B13 MER User manual

SNOWDOG
SNOWDOG Sport B13 MER User manual

SNOWDOG
SNOWDOG Sport B13R User manual