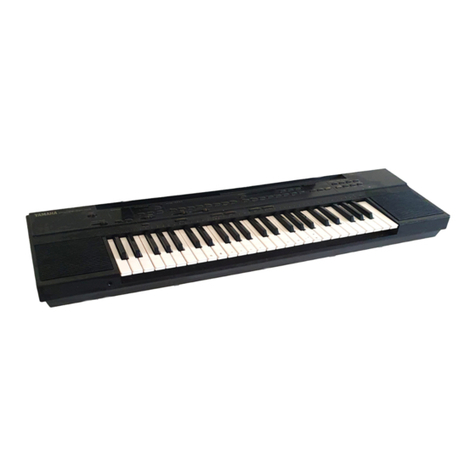
Bontempi 16 5415 User manual

54 key Digital Keyboard
16 5415
GB - OWNER’S MANUAL ...................2
F - MANUEL D’ INSTRUCTIONS ........... 9
D - BEDIENUNGSANLEITUNG..........16
E - LIBRO DE INSTRUCCIONES .......... 23
P - MANUAL DE INSTRUÇÕES .........30
NL - GEBRUIKSAANWIJZING.............37
PL - INSTRUKCJA OBSŁUGI .............44
LT - NAUDOJIMOSI INSTRUKCIJA .......51
LV - LIETOTĀJA INSTRUKCIJA............58
EE - KASUTUSJUHEND .........................65
CZ - NÁVOD K OBSLUZE.....................72
SK - NÁVOD NA OBSLUHU...................79
RO -
MANUALUL PRODUCATORULUI
...86
I - MANUALE DI ISTRUZIONI ................93

2 3
ADVICE ON USING THE BATTERIES
• Non-rechargeable batteries are NOT to be recharged.
• Rechargeable batteries must be removed from the
product before being charged.
• Rechargeable batteries are only to be charged under
adult supervision.
• Different types of batteries or new and old batteries
are not to be mixed.
• Use only batteries of the same or equivalent type.
• Batteries are to be inserted with correct polarity.
• Remove exhausted batteries to prevent leakage.
• Do not short circuit supply terminals.
• Remove batteries during long periods of non-use.
WASTE DISPOSAL STANDARDS
For information regarding the disposal of the items men-
tioned here below, please refer to Council Administration
office regarding specialised waste collection centres.
1 - DISPOSAL OF BATTERIES
Protect the environment by disposing
of batteries in the special containers
provided for this use.
2 - PACKAGING DISPOSAL
Take the paper, cardboard and corrugated board to the
appropriate waste collection centres. Plastic material must
be placed in the relevant collection containers.
The symbols indicating the various types of plastic are:
Key for the different types of plastic materials:
PET= Polyethylene terephtalate
PE= Polyethylene, code 02 for PE-HD, 04 for PE-LD
PVC =Polyvinyl chloride
PP= Polypropylene
PS= Polystyrene, Polystyrene foam
O= Other polymers (ABS, Laminates, etc.)
3. DISPOSING OF ELECTRICAL APPLIANCES
The wheelie bin symbol with a cross indicates
that the product must not be disposed of in
the domestic waste at the end of its useful
life. Instead, it should be taken to your nearest
designated collection point or recycling facility.
Alternatively, check with your retailer and return the pro-
duct when buying a replacement, on a one-to-one basis or
as free of charge in case the size is smaller than 25 cm.
Appropriate disposal promotes the recycling of parts and
materials, as well as helping to protect the environment
and human health. Under current legislation, strict penalties
are enforced against those disposing of products illegally.
For more information about the collection of special waste,
contact your Local Authority.
MAINS SUPPLY
The instrument can be supplied by the AC/DC (Vdc =9V
/ I = 500 mA) positive central adapter
(supplied) conforms to national and international safety
regulations covering electrical appliances. Insert the jack in
the DC 9V socket.
RECOMMENDATIONS: The socket (1) for the adapter plug must
be easily accessible. • Inserting the plug into the socket at the
back of the instrument automatically cuts off supply from the
batteries. • Ensure that the adapter is sufficiently ventilated •
Do not expose the adapter to drops or splashes of water. • The
AC/DC adaptor shall not be exposed to dripping or splashing
and that no objects filled with liquids, such as vases, shall be
placed on apparatus. • The AC/DC adaptor is used as discon-
nect device. • The AC/DC adaptor of apparatus should not be
obstructed OR should be easily accessed during intended used.
• To be completely disconnect the power input, the AC/DC
adaptor of apparatus shall be disconnected from the mains. •
Battery shall not be exposed to excessive heat such as sunshi-
ne, fire or the like. • minimum distances 15cm around the
apparatus for sufficient ventilations. • The ventilation should
not be impeded by covering the ventilation openings with
items such as newspaper, table-cloths, curtains etc. • No naked
flame sources such as lighted candles should be placed on the
apparatus. • Attention should be drawn to the environmental
aspects of battery disposal. • The apparatus should only be
used in moderate climates.
WARNING: All batteries or transformers with safety insulation
must be checked regularly for faults in cable, wire, or plug
insulation or other parts.
NOTE: Rating plate information was located at bottom
enclosure of the apparatus.
BATTERY SUPPLY
This instrument works with six 1.5V IEC R6 /AA batteries
(not supplied) which are inserted in the housing at the
bottom.
To open press on the part of the lid marked OPEN.
Fit the batteries as shown at the bottom of the housing.
POWER SUPPLY
01
PET
02
PE
03
PVC
05
PP
06
PS
07
O
E N G L I S H
R6/AA 1.5V
R6/AA 1.5V R6/AA 1.5V
R6/AA 1.5V
R6/AA 1.5V
R6/AA 1.5V R6/AA 1.5V
R6/AA 1.5V
R6/AA 1.5V
R6/AA 1.5V R6/AA 1.5V
R6/AA 1.5V
1

2 3
⑬VIBRATO -Enables or disables the VIBRATO function
(sound modulation)
⑭100 RHYTHMS -Rhythms list
⑮NUMBER Combination - To select functions, rhythms,
songs and sounds
⑯DEMO ALL -To listen to all pre-recorded songs in
sequence
⑰10 DEMOS -Songs list
⑱SOUND/RHYTHM -To select the sounds or the rhyth-
ms on the keyboard
⑲POWER ON/OFF -Turns the instrument on and off
⑳LESSON -Learning level following a pre-recorded
melody
㉑DEMO ONE -To listen to a pre-recorded song in
sequence
㉒ACC +/– -Adjusts the accompaniment volume
㉓VOLUME +/– -Sets the master volume
㉔100 SOUNDS -Sounds list
㉕USB Play-Pause-Vol -Adjusts MP3 songs read by the
USB port
①START/STOP -Starts/Stops a rhythm or a song
②CHORD OFF -Disables the arrangement of a rhythm
style
③SINGLE -Enables composition of chords on the left
side of the keyboard according to the easy method
④FILL-IN -Enters a rhythmic variation
⑤SYNC -Enables automatic accompaniment, in Single
mode, after composing a chord
⑥TEMPO +/– -Sets the tempo for style performance
and songs.
⑦PROG -Records a rhythmic sequence or animal voices
⑧RECORD -Records what is being played
⑨PLAY -Plays what has been recorded
⑩DRUM/ANIMAL -Selection of rhythm intruments or
animal voices
⑪Rhythm intruments or animal voices
⑫ SUSTAIN -Enables or disables the SUSTAIN function
(prolonged sound)
CONTROL PANEL
SOCKETS
DC 9 V -Socket for adapter (included).
PHONE -
Socket for headphones
(not included)
.
AUDIO IN -Socket for external audio source (MP3
player, smartphone etc.)
MIC -Socket for condenser microphone (not included).
USB -Socket for connecting a USB Flash Drive.
E N G L I S H
① ③ ④ ⑤ ⑥⑦ ⑧ ⑨ ⑩ ⑪ ⑫ ⑬②
㉔ ⑰⑲ ⑭⑯⑱㉕ ⑳㉒ ㉑ ⑮㉓

4 5
DIRECTIONS ON THE KEYBOARD
HOW TO USE THE KEYBOARD
SWITCH ON AND SWITCH OFF
Move the switch to the POWER ON/OFF position to turn the instrument
on or off. When turned on, the keyboard is set to operate with the Piano
sound, the Rumba rhythm and the song Rudolph the red nosed reindeer.
DEMO - Demo song
The instrument has 10 pre-recorded songs.
Press DEMO ONE to hear the song in sequence; the display indicates the
song number (e.g.: d1). Press DEMO ONE again to hear the next song.
Press START/STOP button ①to stop the song.
The DEMO ALL button plays all 10 songs in sequence. Press DEMO ALL
again to stop the song.
When a song is playing, press +/– ⑮to select the next or previous one,
or enter a number from 0 to 09 to select one from the “10 DEMOS” list ⑰.
VOLUME
To regulate the volume of the instrument you must use buttons VOLUME +
(to turn up) or VOLUME – (to turn down) ㉓.
Letters and numbers to play easily
Numbers 1 to 18 indicate the keys to play a melody with the easy musical scores at the end of this manual. The letters
on the left indicate the name of the notes in order to compose a chord in SINGLE Chord and CLASSIC Chord mode (refer
to the relative section).
TECHNICAL CARACTERISTICS
KEYBOARD: 54 Keys (C-F)
DISPLAY: 2 Digit
100 SOUNDS
EFFECTS: Sustain and Vibrato
100 RHYTHMS
REC and PLAY to record and listen
EASY CHORDS
SONGS: 10 pre-recorded songs
General controls: Master Volume, Tempo +/–,
Accompaniment Volume
USB player controls: Volume, next or previous song selection,
pause
POWER SUPPLY: 6 x 1,5 Volt IEC R6/AA batteries
AC/DC Adapter – Input Vdc = 9 V / I = 500 mA
PHONE -
Socket for headphones
(not included)
.
AUDIO IN -Socket for external audio source (MP3 player,
smartphone etc.)
MIC: Socket for condenser microphone
DIMENSIONS: 695 x 230 x 65 mm
E N G L I S H

4 5
SOUNDS
To select one of the 100 sounds recorded in the instrument, press
SOUND/RHYTHM ⑱and enter a number from 0to 99 to select
one from the list of 100 SOUNDS ㉔;
the display shows a dot after the first digit, indicating that you
are selecting sounds.
To select the next or previous sound, press +/- from the nume-
rical keyboard ⑮.
Sustain
Prolongs the sound of a note when the key is released.
To enable or disable this function, press SUSTAIN ⑫.
Vibrato
The vibrato effect is a sound modulation.
To enable or disable this function, press VIBRATO ⑬.
RHYTHM SELECTION
The keyboard has 100 rhythms recorded.
To select them, press SOUND/RHYTHM ⑱followed by a num-
ber from 0to 99 to select one from the list of 100 RHYTHMS;
the display shows a dot after the second digit, indicating that you
are selecting rhythms.
To start or to stop a rhythm press the START/STOP button ①.
To increase or decrease the speed of the song press the two
buttons TEMPO + and TEMPO – ⑥. By holding the button
pressed down, the variation becomes continuous. To go back to
standard rhythm press buttons TEMPO + and TEMPO – together.
The TEMPO + / – buttons are also used to adjust the speed of
a demo.
FILL-IN
Pressing this button ④while a rhythm is playing, reproduces a
rhythmic variation of the drums.
SINGLE CHORD (easy chord)
To compose the simplified chords, play a rhythm by pressing
START/STOP ① : press SINGLE ③for the keyboard to auto-
matically be split into two sections. This way, it is possible to
compose chords on the left side (from C1 to F#2) in easy mode
with one, two or three fingers (refer to the SINGLE CHORD table
at the end of this manual).
SYNC
In SINGLE CHORD mode, instead of pressing START/STOP, press
SYNC ⑤, in this way the rhythm will start after composing the
chord.
E N G L I S H

6 76 7
CHORD OFF
When using chords in SINGLE mode, pressing CHORD OFF ②will exclude automatic arrangement.
CLASSIC CHORD
It is possible to compose chords in classic mode (refer to the CLASSIC CHORD at the end of this manual).
Percussion / animal voices
By pressing the button DRUM/ANIMAL ⑩you can alternatively utilize the
5 pads either to play percussion instruments (DRUM) or to reproduce the
animal voices (ANIMAL).
Programming rhythm / animal voices
This function enables you to record a rhythmic sequence or a sequence
of animal voices. To programme, press PROG ⑦and compose with the
pads ⑪ at least 16 percussion instruments or animal voices (the letter
“P” flashes on the display); press PLAY ⑨to listen to the programming
again and adjust rhythm speed by pressing TEMPO + or TEMPO – ⑥. To
stop playing, press PROG ⑦o START/STOP ①. The programming is not
memorised.
LESSON
Press LESSON ⑳; the letter (d) will appear on the display. Choose one of
10 pre-recorded songs by pressing a white key on the keyboard: the display
shows the selected song number and plays the backing track. Now try to
play the melody of the song by casually and repeatedly pressing one or
more keys on the keyboard, trying to keep tempo with the orchestra. Press
LESSON again to exit the mode.
RECORD/PLAYBACK FUNCTION
This function enables you to record and playback a tune played on the
keyboard. Press RECORD ⑧before playing a tune. When you have finished
press PLAY ⑨to listen to the tune.
USB Player
This keyboard enables you to read MP3 songs on a USB Flash drive (Pen
Drive) when it is connected to a USB port at the back of the instrument.
After connecting the device, the first song will automatically start playing
and will be heard from the speakers on the keyboard. To adjust the volu-
me, keep the
PLAYPAUSE
button pressed; to pause the song,
press
PLAYPAUSE
or
PLAYPAUSE
; to go to the next or previous song,
press
PLAYPAUSE
.
E N G L I S H

7
6 76 7
SONGS
COMPOSING A SONG
Each song is printed on a separate page.
Under the title there is information regarding:
SOUND: the sound needed to create the tune
RHYTHM: the rhythm of the song
TEMPO: the speed of the song
You can use this information to configure the keyboard and play the song at its best. This manual tells you how to select
sound, rhythm and tempo.
The song also indicates:
SINGLE CHORD: the easy chords for song accompaniment
CLASSIC CHORD: the classic chords for song accompaniment
The song is marked by a continuous grey strip that indicates the numbers used to play the melody with your right hand.
Each key must be pressed for some time, depending on the distance that separates each number on the grey strip from
the next.
Basically, above the numbers you will notice a sequence of alternating black
and grey sections within the grey strip. The distance between one black sec-
tion and another represents the unit of musical time known as “beat”, which
corresponds to the movement of the metronome pointer from one end to
the other. Every black and grey section represents a half “beat”.
The instructions (meaning squares with letters) are found under this strip in order to use your left hand to play the accom-
paniment chords.
traditional
writing
simplified
writing
Accompaniment
with left hand
Line showing how long the chord lasts
Numbers that indicate the notes
to be played with the right hand
MARY HAD A LITTLE LAMB
Mar _ y had a lit _ tle lamb
9 98
10 1010 10
E E E
D D
C
C
E
SINGLE CHORD
CG
CLASSIC CHORD
CG
Name of
chord
SOUND
39 VIOLA RHYTHM 16 POPS
TEMPO
16
ONE BEAT
HALF
A BEAT
HALF
A BEAT
andfourandthreetwo andandone - - - -
traditional
writing
simplified
writing
Accompaniment
with left hand
Line showing how long the chord lasts
Numbers that indicate the notes
to be played with the right hand
MARY HAD A LITTLE LAMB
Mar _ y had a lit _ tle lamb
9 98
10 1010 10
E E E
D D
C
C
E
SINGLE CHORD
CG
CLASSIC CHORD
CG
Name of
chord
SOUND
39 VIOLA RHYTHM 16 POPS
TEMPO
16
E N G L I S H

8 9
8
8 9
All musical notes of the song, which use classical wording, are under the grey strip.
For now, it is sufficient to remember that each note has a name:
A, B, C, D, E, F, G, in anglo-saxon notation which correspond to LA,
SI, DO, RE, MI, FA, SOL, in Latin notation and A, H, C, D, E, F, G,
in German notation. This correspondence is illustrated on the next
diagram.
HOW TO PLAY THE SONG IN EASY MODE
MELODY
Each note corresponds to a number on the grey strip. However, as you can see, there is a number on each note as well.
This will help you to find the right key easily.
To play the melody, read the sequence of numbers contained in the grey band and press, one after the other, the white keys
which correspond to the same numbers on the strip above the keyboard. The black keys correspond to the numbers for
example on the music method grey band followed by the “+”. The black key after white key 1 corresponds to the symbol 1+.
Now that you know which key corresponds to which note, try and play the tune following the numbers on the grey strip.
CHORDS
To use accompaniment, press each chord with SINGLE or CLASSIC mode for the time indicated by the line next to the letter
that represents the chord, until you come to the next one.
TROUBLE SHOOTING GUIDE
Problem Solution
The instrument does not play or
the sound is distorted.
The instrument switches on or
off when keys are pressed.
The display does not light up.
Batteries discharged – insert new batteries.
Batteries inserted incorrectly – check. Mains adapter not suitable.
Batteries discharged – insert new batteries.
Check the batteries or the mains adapter.
ATTENTION: In the event of malfunction, remove the batteries and then reinsert them.
Anglo-saxon notation
Latin notation
German notation
traditional
writing
simplified
writing
Accompaniment
with left hand
Line showing how long the chord lasts
Numbers that indicate the notes
to be played with the right hand
MARY HAD A LITTLE LAMB
Mar _ y had a lit _ tle lamb
9 98
10 1010 10
E E E
D D
C
C
E
SINGLE CHORD
CG
CLASSIC CHORD
CG
Name of
chord
SOUND
39 VIOLA RHYTHM 16 POPS
TEMPO
16
8
E N G L I S H

8 98 9
Pour ouvrir cet emplacement presser sur le levier en corre-
spondance avec OPEN; pour placer les piles suivre les indi-
cations graphiques qui apparaissent en relief sur le fond.
CONSEILS POUR L’UTILISATION DES PILES
• Quand les piles sont déchargées, il faut toujours les enlever
de leur emplacement • Recharger seulement les piles du type
“rechargeables” et, de toute façon, avec la supervision d’un adul-
te • Ne pas utiliser en même temps des piles de types différents
• Ne pas utiliser des piles neuves avec des piles déchargées • Ne
pas court-circuiter les terminaux d’alimentation.
REGLES POUR ECOULEMENT DES ORDURES
Pour l’écoulement des matériaux indiqués ci-dessous, se ren-
seigner auprès des Administrations Communales au sujet des
centres d’écoulement spécialisés.
1. ÉCOULEMENT DES PILES
Pour aider la protection de l’environne-
ment ne pas jeter les piles déchargées
parmi les ordures normales, mais dans
des conteneurs spéciaux situés dans les
centres de ramassage.
2. ECOULEMENT DES EMBALLAGES
Remettre les emballages en papier, carton et carton ondulé
dans les centres d’écoulement spécifiques. Les parties en pla-
stique de l’emballage doivent être placées dans les conteneurs
pour la récolte prévus à cet effet.
Les symboles qui repèrent les différents types de plastique
sont:
Légende relative au type de matériau plastique:
• PET= Polyéthylène téréphtalate
• PE= Polyéthylène, le code 02 pour PE-HD, 04 pour PE-LD
• PVC= Chlorure de Polyvinyle
• PP= Polypropylène
• PS= Polystyrène, Polystyrène expansé
• O= Autres polymères (ABS, Couplés, etc.)
3. DISPOSITION POUR APPAREILS ÉLECTRIQUES
Le symbole de la poubelle à roues avec une croix
indique que le produit ne doit pas être déposé
dans les ordures ménagères à la fin de son cycle.
Il doit être mis dans un point de collecte ou de
recyclage approprié. A défaut, vérifier avec votre
revendeur et retourner le produit lors de l’achat du produit
de remplacement ou, si la dimension est inferieur à 25 cm,
on peut le retourner gratuitement. La disposition appropriée
promeut le recyclage des parties et des matériels, aussi bien
quel ‘aide pour protéger l’environnement et la santé humaine.
Conformément à la législation actuelle, des pénalités strictes
sont faites contre ceux disposant des produits illégalement.
Pour plus d’informations sur la collecte de déchets spéciaux,
contacter la Collectivité locale.
Ce clavier électronique peut fonctionner avec alimentation
par réseau ou par piles.
ALIMENTATION SUR SECTEUR
L’instrument peut être alimenté avec l’adaptateur de réseau
fourni. Cet appareil est conforme aux normes nationales et
internationales concernant la sécurité électrique. Vdc = 9V;
I = 500 mA (terminal positif central).
RECOMMANDATION: La prise électrique (1) pour brancher
la fiche de l’adaptateur doit être facilement accessible •
L’introduction de la broche dans la prise située derrière
déconnecte automatiquement les piles • Garantir l’aération
suffisante de l’adaptateur • Ne pas exposer l’adaptateur aux
gouttes ou aux jets d’eau • Éviter d’exposer l’adaptateur AC/
DC à tout écoulement ou éclaboussure et ne poser aucun objet
rempli de liquide, comme un vase, sur l’appareil • L’adaptateur
AC/DC sert de sectionneur • S’assurer que l’adaptateur AC/
DC de l’appareil ne soit pas obstrué et qu’il soit facile
d’accès pendant l’utilisation • Pour sectionner complètement
l’alimentation électrique, débrancher l’adaptateur AC/DC de
l’appareil du secteur • Ne pas exposer la batterie à une chaleur
excessive telle que celle de la lumière du soleil, du feu, et
éléments similaires • Laisser un espace libre de 15 cm autour
de l’appareil pour permettre une ventilation correcte • Ne pas
empêcher la ventilation en couvrant les orifices de ventilation
avec des objets tels que des journaux, des nappes, des
rideaux, etc. • S’assurer de respecter l’environnement lors de
l’élimination des batteries • L’appareil est destiné à être utilisé
uniquement dans des climats tempérés.
ATTENTION: Tout accumulateur ou adaptateur/ transformateur
utilisé, pourvu d’un isolant de sûreté, doit être régulièrement
contrôlé pour éviter les risques dûs aux dommages concernant
le câble, le fil, la fiche, le dispositif d’isolation ou d’autres
parties; l’appareil ne pourra être utilisé, qu’ après la réparation
du dommage.
REMARQUE : La plaque signalétique est située sur le fond
du boîtier de l’appareil.
ALIMENTATION PAR PILES
L’instrument fonctionne avec 6 piles de 1,5V type IEC R6/
AA (qui ne sont pas fournies) que l’on doit disposer dans
l’emplacement spécial situé dans la partie inférieure.
ALIMENTATION
01
PET
02
PE
03
PVC
05
PP
06
PS
07
O
F R A N Ç A I S
R6/AA 1.5V
R6/AA 1.5V R6/AA 1.5V
R6/AA 1.5V
R6/AA 1.5V
R6/AA 1.5V R6/AA 1.5V
R6/AA 1.5V
R6/AA 1.5V
R6/AA 1.5V R6/AA 1.5V
R6/AA 1.5V
1

10 11
⑭100 RHYTHMS -Liste des rythmes
⑮NUMBER Combination - Pour la sélection de fon-
ctions, de rythmes, de chansons et de sons
⑯DEMO ALL -Pour écouter toutes les chansons préen-
registrées en séquence
⑰10 DEMOS -Liste des chansons
⑱SOUND/RHYTHM --Pour sélectionner les sons ou les
rythmes
⑲POWER ON/OFF -Pour allumer ou éteindre l’instru-
ment
⑳LESSON -Niveau d’apprentissage en suivant une
mélodie préenregistrée
㉑DEMO ONE -Pour écouter une chanson préenregistrée
en séquence
㉒ACC +/– -Pour le réglage du volume de l’accompa-
gnement
㉓VOLUME +/– -Pour le réglage du volume général
㉔100 SOUNDS -Liste des sons
㉕USB Play-Pause-Vol -Pour régler les chansons MP3
lues via la prise USB
①START/STOP -Pour faire partir ou arrêter un rythme
ou une chanson
②CHORD OFF -Désactive l’arrangement d’un rythme
③SINGLE -Pour activer la composition des accords, dans
la partie gauche du clavier, selon la méthode simplifiée
④FILL-IN -Pour introduire une variation rythmique
⑤SYNC -Permet de démarrer l’accompagnement auto-
matique, en mode Single, après avoir composé un
accord.
⑥TEMPO +/– -Pour le réglage de la vitesse d’exécution
du rythme et des chansons
⑦PROG -Pour enregistrer une séquence rythmique la
voix des animaux
⑧RECORD -Pour enregistrer ce que l’on joue
⑨PLAY -Pour réécouter l’enregistrement
⑩DRUM/ANIMAL -Sélection des instruments rythmiques
ou voix des animaux
⑪Instruments rythmiques ou voix des animaux
⑫SUSTAIN -Active/désactive la fonction SUSTAIN (pro-
longation du son)
⑬ VIBRATO -Active/désactive la fonction VIBRATO
(modulation du son)
TABLEAU DE COMMANDE
PRISES
DC 9 V -
Prise pour
adaptateur de réseau (fourni).
PHONE -Prise pour casque
(non fournie)
.
AUDIO IN -Prise pour source musicale externe (lecteur
MP3, smartphone etc.).
MIC -Prise pour micro à condensateur (non fourni).
USB -Prise pour connecter une clé USB Flash Drive
(Clé USB).
F R A N Ç A I S
① ③ ④ ⑤ ⑥⑦ ⑧ ⑨ ⑩ ⑪ ⑫ ⑬②
㉔ ⑰⑲ ⑭⑯⑱㉕ ⑳㉒ ㉑ ⑮㉓

10 11
F R A N Ç A I S
LES INDICATIONS SUR LE CLAVIER
UTILISATION DE L’INSTRUMENT
MISE EN MARCHE ET ARRET
L’instrument s’allume en appuyant l’interrupteur sur POWER ON et s’éteint
en le mettant sur POWER OFF. A la mise en marche le clavier est prédi-
sposé pour fonctionner avec le son Piano, le rythme Rumba et la chanson
Rudolph the red nosed reindeer.
DEMO - Morceau de démonstration
L’instrument comprend 10 morceaux préenregistrés.
Enfoncer la touche DEMO ONE pour reproduire un morceau en séquence;
l’écran affiche le numéro du morceau (ex: d1). Si on enfonce une nouvelle
fois la touche DEMO ONE, le morceau suivant est reproduit.
Enfoncer la touche START/STOP ①pour arrêter le morceau.
Avec la touche DEMO ALL, les 10 morceaux sont reproduits en séquence.
Enfoncer de nouveau DEMO ALL pour arrêter le morceau.
Lorsque le morceau est en cours d’exécution, enfoncer les touches +/– ⑮
pour sélectionner le morceau suivant ou précédent ou bien taper un chiffre
de 0 à 09 pour en choisir un dans la liste ⑰.
LE VOLUME
Pour régler le volume général de l’instrument, appuyer sur les boutons
VOLUME + (pour augmenter) ou VOLUME – (pour diminuer) ㉓.
Lettres et chiffres pour jouer facilement
Les chiffres de 1 à 18 indiquent les touches à utiliser pour jouer la mélodie avec des partitions musicales simplifiées,
présentes à la fin de ce manuel. Les lettres à gauche indiquent le nom des notes pour composer un accord dans le mode
SINGLE Chord et CLASSIC Chord (consulter le paragraphe correspondant).
CARACTERISTIQUES TECHNIQUES
CLAVIER: 54 touches (DO-FA)
ÉCRAN: 2 Digit
100 SONS
EFFET: Sustain, Vibrato
100 RYTHMES
REC et PLAY pour enregistrer et réécouter
ACCORDS SIMPLIFIÉS
SONGS: 10 morceaux musicaux préenregistrés
Contrôles généraux: Volume général, Tempo +/–, Volume
pour l’accompagnement
Contrôles USB player: Volume, sélection du morceau suivant
ou précédent, pause.
ALIMENTATION: 6 piles de 1,5 Volt IEC R6 / AA
Adaptateur AC/DC – Input Vdc= 9 V / I = 500 m A
PHONE -Prise pour casque
(non fournie)
.
AUDIO IN -Prise pour source musicale externe (lecteur MP3,
smartphone etc.).
MIC: Prise pour micro à condensateur
DIMENSIONS: 695 x 230 x 65 mm

12 13
LES SONS
Pour sélectionner un des 100 sons mémorisés dans l’instrument,
enfoncer la touche SOUND/RHYTHM ⑱et taper un chiffre de
0à 99 pour en choisir un de la liste 100 SOUNDS ㉔; l’écran
affiche un point après le premier chiffre, pour indiquer que la
sélection des sons est en cours.
Pour sélectionner le son suivant ou précédent, agir sur les tou-
ches +/– du clavier numérique ⑮.
Sustain
Prolonge le son d’une note quand la touche est relâchée.
Pour activer ou désactiver cette fonction, enfoncer la touche SUSTAIN ⑫.
Vibrato
L’effet de vibrato est une modulation du son.
Pour activer ou désactiver cette fonction, enfoncer la touche VIBRATO ⑬.
SÉLECTION DES RYTHMES
Dans le clavier, 100 rythmes sont mémorisés.
On les sélectionne en enfonçant le bouton SOUND/RHYTHM ⑱
et ensuite un chiffre de 0 à 99 pour en choisir un de la liste 100
RHYTHMS; l’écran affiche un point après le deuxième chiffre
pour indiquer que la sélection des rythmes est en cours.
Pour mettre en marche le rythme ou pour l’arrêter, appuyer sur
le bouton START/STOP ①.
Pour augmenter ou diminuer la vitesse d’exécution, utiliser les
boutons TEMPO + et TEMPO – ⑥.
Les touches + / – de TEMPO, servent aussi pour régler la vitesse
d’une démo.
FILL-IN
Si on enfonce ce bouton ④lorsque le rythme est activé, une variation
rythmique de la batterie est reproduite.
SINGLE CHORD (accords simplifiés)
Pour composer les accords simplifiés exécuter un rythme avec le
bouton START/STOP ① : Si on enfonce le bouton SINGLE ③,
le clavier est automatiquement divisé en deux sections et on peut
composer les accords dans la partie gauche (de DO1 à FA#2) en
mode simplifié avec un, deux ou trois doigts (consulter le tableau
des accords “SINGLE CHORD” à la fin de ce manuel).
SYNC
En mode SINGLE, si au lieu d’appuyer sur START/STOP l’on appuie sur le
bouton SYNC ⑤, le rythme démarre après avoir composé l’accord.
F R A N Ç A I S

12 13
F R A N Ç A I S
CHORD OFF
Lors de la composition d’un accord en mode SINGLE, si l’on appuie sur le bouton CHORD OFF ②, l’arrangement auto-
matique est exclu.
CLASSIC CHORD
Les accords on peut les composer aussi selon la méthode classique (consulter le tableau CLASSIC CHORD à la fin de ce
manuel).
Instruments rythmiques / voix des animaux
En pressant le bouton DRUM/ANIMAL ⑩on peut utiliser
les 5 pads alternativement pour jouer la batterie (DRUM) ou
pour reproduire la voix des animaux (ANIMAL).
Programmation rythme / voix des animaux
Cette fonction permet d’enregistrer une séquence rythmique ou une séquen-
ce de cris d’animaux. Pour programmer appuyer sur le bouton PROG ⑦
et composer avec les pads ⑪ au moins 16 instruments à percussions ou
cris d’animaux (la lettre « P » clignote à l’écran) ; appuyer sur PLAY ⑨pour
réécouter la programmation et régler la vitesse du rythme par les touches
TEMPO + ou TEMPO – ⑥. Pour arrêter l’exécution appuyer sur PROG ⑦
ou START/STOP ①. La programmation n’est pas mémorisée.
LESSON
Appuyer sur la touche LESSON ⑳; l’écran affiche la lettre (d). Choisissez
l’une des 10 chansons préenregistrées en appuyant sur une touche blanche
du clavier : l’écran affiche le numéro de la chanson sélectionnée et la base
musicale est exécutée. Maintenant essayez de jouer la mélodie de la chanson
en appuyant au hasard et à plusieurs reprises sur une ou plusieurs touches
du clavier en essayant de suivre le tempo avec l’orchestre. Appuyez de
nouveau sur le bouton LESSON pour sortir du mode.
FONCTION D’ENREGISTREMENT ET D’ECOUTE
Cette fonction permet d’enregistrer et réécouter l’exécution d’un morceau
joué sur le clavier. Pour enregistrer, presser la touche RECORD ⑧avant de
commencer l’exécution du morceau. Pour réécouter le morceau enregistré,
presser PLAY ⑨.
USB Player
Ce clavier permet de lire les morceaux MP3 présents dans une clé USB Flash
drive (Pen Drive), lorsque celle-ci est connectée au port USB situé à l’arrière
de l’instrument. Après avoir connecté le dispositif, le premier morceau sera
reproduit automatiquement à travers les haut-parleurs du clavier.
Pour régler le volume, maintenir enfoncés les boutons
PLAYPAUSE
; pour mettre le morceau en pause, enfoncer les
boutons
PLAYPAUSE
ou
PLAYPAUSE
; pour passer au morceau suivant
ou précédent, appuyer sur les boutons
PLAYPAUSE
.

14
14 15
CHANSONS
COMPOSITION DU MORCEAU MUSICAL
Chaque morceau est reporté sur une page.
Sous le titre se trouvent les informations concernant:
SOUND: le son à utiliser pour jouer la mélodie
RHYTHM: le rythme de batterie de la chanson
TEMPO: la vitesse de la chanson
Avec ces renseignements, il est possible de configurer le clavier pour jouer la chanson le mieux possible. Dans ce manuel
on peut trouver la description de la fonction de sélection du son, du rythme et du réglage du temps.
En outre, dans le morceau, est indiqué:
SINGLE CHORD: les accords dans le mode simplifié, pour l’accompagnement de la chanson
CLASSIC CHORD: les accords dans le mode classique, pour l’accompagnement de la chanson
Le morceau de musique est caractérisé par une bande continue de couleur grise dans laquelle sont indiqués les chiffres
pour jouer la mélodie avec la main droite. Chaque touche est enfoncée pendant un laps de temps plus ou moins long, selon
la distance qui sépare chaque chiffre de la bande grise du chiffre suivant.
Plus particulièrement, au-dessus des chiffres, mais toujours à l’intérieur
de la bande grise, vous noterez une séquence de traits alternés noirs et
gris. La distance entre un trait noir et l’autre représente l’unité de temps
musical, appelée « battue », correspondant au déplacement de l’aiguille du
métronome d’une extrémité à l’autre. Chaque trait noir ou gris représente
une demie « battue ».
En-dessous de cette bande, sont reportées les indications (c’est-à-dire des cases contenant des lettres) pour l’utilisation de
la main gauche jouant les accords de l’accompagnement.
écriture
classique
écriture
facilité
Accompagnement
avec la main gauche
Ligne qui indique la durée de l’accord
Numéros qui indiquent les notes
à jouer avec la main droite
MARY HAD A LITTLE LAMB
Mar _ y had a lit _ tle lamb
9 98
10 1010 10
E E E
D D
C
C
E
SINGLE CHORD
CG
CLASSIC CHORD
CG
Nom de
l’accord
SOUND
39 VIOLA RHYTHM 16 POPS
TEMPO
16
écriture
classique
écriture
facilité
Accompagnement
avec la main gauche
Ligne qui indique la durée de l’accord
Numéros qui indiquent les notes
à jouer avec la main droite
MARY HAD A LITTLE LAMB
Mar _ y had a lit _ tle lamb
9 98
10 1010 10
E E E
D D
C
C
E
SINGLE CHORD
CG
CLASSIC CHORD
CG
Nom de
l’accord
SOUND
39 VIOLA RHYTHM 16 POPS
TEMPO
16
F R A N Ç A I S

15
14 15
En-dessous de la bande grise, sont reportées toutes les notations musicales du morceau à l’aide de l’écriture classique.
Pour le moment il suffit de se rappeler que les notes ont un nom:
A, B, C, D, E, F, G dans la notation anglosaxone qui correspondent à
LA, SI, DO, RE, MI, FA, SOL dans la notation latine et A, H, C, D, E,
F, G, dans la notation allemande.
Cette correspondance est indiquée sur le schéma à côté.
EXÉCUTION D’UN MORCEAU DANS LE MODE SIMPLIFIÉ
LA MELODIE
Sur la bande grise de la méthode, à chaque note correspond un numéro; en regardant le clavier on peut remarquer que sur
chaque touche se trouve également un numéro. De cette façon, on trouve facilement la touche juste.
Pour exécuter la mélodie, lisez la succession numérique contenue dans la bande grise de la méthode et appuyez, l’une après
l’autre, sur les touches blanches correspondant aux mêmes numéros reportés sur la plaquette au-dessus du clavier. Les
touches noires correspondent aux numéros de la bande grise de la méthode suivis du signe “+”. Par exemple, au symbole
1+ correspond la touche noire suivant la touche blanche 1.
Maintenant que l’on sait quelle touche est associée à chaque note, essayer de jouer la mélodie en suivant les numéros sur
la bande grise.
LES ACCORDS
Pour jouer l’accompagnement, enfoncez chaque accord, dans le mode SINGLE ou dans le mode CLASSIC, pendant le temps
indiqué par la ligne en face de la lettre représentant l’accord, jusqu’à ce que vous rencontriez le suivant.
GUIDE A LA SOLUTION D’EVENTUELS PROBLEMES
Problème Solution
L’instrument ne joue pas ou le
son est déformé.
L’instrument s’allume ou s’éteint
en appuyant sur des touches.
L’écran ne s’allume pas.
Piles à plat – introduire de nouvelles piles.
Piles mal introduites – contrôler. Adaptateur de réseau non compatible.
Piles à plat – introduire de nouvelles batteries.
Vérifier les piles ou l’adaptateur de réseau.
ATTENTION : En cas de mauvais fonctionnement, enlever et remettre les piles.
notation anglo-saxonne
notation latine
notation allemande
écriture
classique
écriture
facilité
Accompagnement
avec la main gauche
Ligne qui indique la durée de l’accord
Numéros qui indiquent les notes
à jouer avec la main droite
MARY HAD A LITTLE LAMB
Mar _ y had a lit _ tle lamb
9 98
10 1010 10
E E E
D D
C
C
E
SINGLE CHORD
CG
CLASSIC CHORD
CG
Nom de
l’accord
SOUND
39 VIOLA RHYTHM 16 POPS
TEMPO
16
15
F R A N Ç A I S

16 17
Öffnen Sie dazu den Deckel, indem Sie mit dem Daumen
auf die Markierung OPEN drücken.
HINWEIS BEI BATTERIEBETRIEB:
• Wechseln Sie leere Batterien sofort aus, da diese auslaufen
könnten und somit das Gerät beschädigen.
• Laden Sie erschöpfte Batterien nur unter Aufsicht eines
Erwachsenen auf.
• Verwenden Sie nie gleichzeitig Batterien verschiedener
Marken.
• Verwenden Sie nie gleichzeitig neue und erschöpfte
Batterien.
• Schließen Sie nie den Anschlussstecker kurz.
RICHTLINIEN ZUR ENTSORGUNG:
Bzgl. der Entsorgung der unten aufgeführten Sondermaterialien
informieren Sie sich bitte bei den Gemeindeverwaltungen der
spezialisierten Entsorgungszentren.
1. BATTERIEENTSORGUNG
Aus Umweltschutzgründen sind die
leeren Batterien gemäß den gesetzlichen
Bestimmungenindendafürvorgesehenen
Sammelbehältern zu entsorgen.
2. ENTSORGUNG VON VERPACKUNGEN
Verpackungen aus Papier, Karton und Wellpappe sind in den
entsprechenden Sammelstellen abzugeben. Plastikbestandteile
der Verpackungen müssen in den dafür vorgesehenen
Sammelbehälter entsorgt werden.
Die Symbole der verschiedenen Plastikarten sind:
Legende der Plastiktypen:
• PET= Polyäthylenterephthalat
• PE= Polyäthylen, Code 02 für PE-HD, 04 für PE-LD
• PVC= Polyvinylchlorid
• PP= Polypropylen
• PS=Polysterol, Polysterolschaum
• O= Andere Polymere (ABS, Verbindungen, etc.)
3. ENTSORGUNGSHINWEIS FÜR ELEKTRONISCHE GERÄTE:
Das Symbol der Mülltonne mit Kreuz bedeutet,
das der Artikel am Ende seiner Laufzeit nicht im
Hausmüll entsorgt werden darf. Geben sie diesen
bei ihrem nächstgelegenen Sondermülldepot oder
dafür vorgesehne Rücknahmestellen ab. Oder
fragen sie ihren zuständigen Fachhändler nach
der Rücknahme des Artikels, wenn sie einen Ersatzartikel
kaufen oder kostenlos im Falle, daß die Größe weniger als
25 cm ist. Fachgerechte Entsorgung trägt zum Umweltschutz,
zum Schutz der Gesundheit und zur Resourcenschonung bei.
Illegale Entsorgung verstößt gegen geltendes Gesetz und
wird mit Geldstrafen geahndet. Für mehr Informationen über
fachgerechte Entsorgung fragen sie die zuständigen Behörden.
STROMVERSORGUNG
Das elektronische Keyboard kann mit Adapter oder
Batterien betrieben werden.
NETZANSCHLUSS:
Der Netzanschluss erfolgt entweder über den mitgelieferten
Netzadapter AC/DC : Vdc = 9V; I = 500 mA
(positiv mittlerer Steckerkontakt).
EMPFEHLUNG: Der Netzanschluss (1) des Steckers an den
Adapter muss problemlos zugänglich sein • Die Netzversorgung
schließt den Batteriebetrieb automatisch aus • Die ausreichende
Belüftung des Adapters sicherstellen • Den Adapter nicht
Wassertropfen oder –spritzern aussetzen • Der AC/DC-Adapter
darf keinen Wassertropfen oder -spritzern ausgesetzt werden,
und keine Gegenstände mit Flüssigkeiten (wie Blumenvasen)
dürfen auf dem Gerät abgestellt werden • Der AC/DC-Adapter
wird als Trennvorrichtung eingesetzt • Der AC/DC-Adapter des
Geräts muss frei von Hindernissen sein bzw. er muss während
seiner bestimmungsgemäßen Verwendung gut zugänglich
sein • Zur kompletten Abtrennung des Netzeingangs muss
der AC/DC-Adapter vom Netz getrennt werden • Die Batterie
keiner übermäßigen Hitze wie Sonneneinstrahlung, Feuer
oder Ähnlichem aussetzen • Einen Mindestfreiraum von 15
cm um den Apparat für eine ausreichende Lüftung lassen •
Die Lüftungsöffnungen dürfen nicht mit Gegenständen wie
Zeitungen, Tischdecken, Vorhängen usw. verdeckt werden
• Es dürfen keine offenen Flammen wie Kerzen auf den
Apparat gestellt werden • Bei Entsorgen der Batterie die
Umweltschutzvorschriften beachten • Der Apparat sollte nur in
gemäßigten Klimazonen benutzt werden.
ACHTUNG - Das Isolierschutzmaterial am Adapter muss
regelmäßig auf eventuelle Schäden am Kabel, am Stecker, am
Isoliermaterial sowie an anderen Teilen überprüft werden. Bei
etwaigen Schäden darf das Instrument bis zur Behebung evtl.
Mängel nicht mehr mittels Netzadapter verwendet werden.
HINWEIS: Die Typenschildangaben befinden sich unten
am Gehäuse des Geräts.
BATTERIEBETRIEB:
Die Speisung des Gerätes erfolgt mit 6 Batterien 1.5V
des Typs IEC R6 / AA (nicht im Lieferumfang enthalten),
die auf der Unterseite des Keyboards im entsprechenden
Batteriefach gemäß der Abbildung eingesetzt werden.
STROMVERSORGUNG
01
PET
02
PE
03
PVC
05
PP
06
PS
07
O
D E U T S C H
R6/AA 1.5V
R6/AA 1.5V R6/AA 1.5V
R6/AA 1.5V
R6/AA 1.5V
R6/AA 1.5V R6/AA 1.5V
R6/AA 1.5V
R6/AA 1.5V
R6/AA 1.5V R6/AA 1.5V
R6/AA 1.5V
1

16 17
⑬VIBRATO -Aktiviert/deaktiviert die Funktion VIBRATO
(Klangmodulation)
⑭100 RHYTHMS -Rhythmusliste
⑮NUMBER Combination - Wahl der Funktionen,
rhythmischen Stile, Lieder und Klänge
⑯DEMO ALL -Um alle vorgespeicherten Songs
nacheinander anzuhören
⑰10 DEMOS -Song-List
⑱SOUND/RHYTHM -Wahl der Klänge oder Rhythmen
⑲POWER ON/OFF -Einschalten/Ausschalten des
Instruments
⑳LESSON -Lernstufe nach einer vorher aufgenommenen
Melodie
㉑DEMO ONE -Um einender nacheinander gespeicherten
Songs anzuhören
㉒ACC +/– -Für die Einstellung der Lautstärke der
Begleitung
㉓VOLUME +/– -Wahl der allgemeinen Geräte-
Lautstärke
㉔100 SOUNDS -Klänge Liste
㉕USB Play-Pause-Vol -Um die gelesenen Songs MP3
über die USB-Buchse zu einzustellen
①START/STOP -Einschalten oder Ausschalten eines
rhythmischen Stils oder eines Liedes
②CHORD OFF -Deaktiviert das Arrangement eines
rhythmischen Stils
③SINGLE -Um die Komposition der Akkorde zu
aktivieren, auf der linken Seite der Tastatur, mit der
vereinfachten Methode
④FILL-IN -Um eine rhythmische Variation einzufügen
⑤SYNC -Ermöglicht den Start der automatischen
Begleitung im Modus Single, nachdem ein Akkord
komponiert wurde
⑥TEMPO +/– -Einstellung der Geschwindigkeit der
Stilausführung, der Lieder oder des Metronoms
⑦PROG -Um eine rhythmische Sequenz oder Tierlaute
zu speichern
⑧RECORD -Aufnahme des gerade Gespielten
⑨PLAY -Wiedergabe der Aufnahme
⑩DRUM/ANIMAL -Wahl der rhythmischen Instrumente
oder Tierlaute
⑪Rhythmischen Instrumente oder Tierlaute
⑫SUSTAIN -Aktiviert/deaktiviert die Funktion SUSTAIN
(Klangverlängerung)
BEDIENUNGSTASTEN
BUCHSEN
DC 9 V -Buchse für Netzadapter (enthalten).
PHONE -
Buchse für Kopfhörer
(nicht enthalten)
.
AUDIO IN -Buchse für externe Musikquelle (MP3-Player,
Smartphone, usw.)
MIC -Buchse für Kondensatormikrofon (nicht enthalten).
USB -Buchse zur Verbindung an einen USB Flash
Drive (Pen-Drive).
D E U T S C H
① ③ ④ ⑤ ⑥⑦ ⑧ ⑨ ⑩ ⑪ ⑫ ⑬②
㉔ ⑰⑲ ⑭⑯⑱㉕ ⑳㉒ ㉑ ⑮㉓

18 19
ANGABEN ZUR TASTATUR
BEDIENUNGSANLEITUNG
EINSCHALTEN UND AUSSCHALTEN
Das Instrument wird mit dem POWER ON -Taste ein- und dem POWER OFF
-Taste ausgeschaltet. Beim Einschalten ist die Tastatur auf den Klang Piano,
den Rhythmus Rumba und das Lied Rudolph the red nosed reindeer
eingestellt.
DEMO - Beispielhaftets Musikstück
Das Instrument enthält 10 vorgespeicherte Musikstücke.
Die Taste DEMO ONE drücken, um ein Stück in der Sequenz abzuspielen;
Das Display zeigt die Nummer des Stücks (Beispiel: d1). Wenn nochmals
DEMO ONE gedrückt wird, wird das nächste Stück abgespielt. Nochmals
START/STOP ①drücken, um das Stück zu stoppen.
Mit der Taste DEMO ALL werden alle 10 Musikstücke nacheinander abge-
spielt. Nochmals DEMO ALL drücken, um das Stück zu stoppen. Wenn ein
Stück abgespielt wird, müssen die Tasten +/– ⑮gedrückt werden, um das
nächste oder das vorherige zu wählen, oder man tippt eine Zahl zwischen 0
und 09 ein, um ein Stück aus dem vorhandenen Verzeichnis zu wählen ⑰.
DIE LAUTSTÄRKEN
Die allgemeine Lautstärke des Instruments wird durch mehrmaliges Drücken
der Tasten VOLUME + (lauter) oder VOLUME – (leiser) eingestellt ㉓.
Buchstaben und Zahlen, um auf einfache Art zu spielen
Die Zahlen von 1 bis 18 geben die Tasten an, die zu benutzen sind, um die Melodie mit den am Ende dieses Handbuchs
vorhandenen vereinfachten Partituren zu spielen. Die Buchstaben links geben die Bezeichnung der Musiknote an, um im
Modus SINGLE Chord und CLASSIC Chord einen Akkord zu komponieren (siehe entsprechenden Abschnitt).
TECHNISCHE DATEN
TASTATUR: 54 Tasten (C-F)
DISPLAY: 2 Digit
100 SOUNDS
EFFEKTE: Sustain, Vibrato
100 RHYTHMS
REC und PLAY für Aufnahme und
Wiedergabe
VEREINFACHTE AKKORDE
SONGS: 10 vorgegebene Musikstücke
Allgemeine Kontrollen: Master Volume, Tempo +/–, Begleitung Volume
Steuerungen USB-Player: Lautstärke, Wahl des folgenden oder vorherigen
Musikstücks, Pause
STROMVERSORGUNG: 6 Batterien 1,5V Typ IEC R6 / AA
Adapter AC/DC – Input Vdc= 9 V / I = 500 mA
PHONE -
Buchse für Kopfhörer
(nicht enthalten)
.
AUDIO IN -Buchse für externe Musikquelle (MP3-Player, Smartphone, usw.)
MIC: Buchse für Kondensatormikrofon
GRÖSSE: 695 x 230 x 65 mm
D E U T S C H

18 19
DIE KLÄNGE
Um einen der 100 im Instrument gespeicherten Klänge zu spie-
len, drückt man die Taste SOUND/RHYTHM ⑱und gibt eine
Zahl von 0bis 99 ein, um einen aus der Liste 100 SOUNDS ㉔
zu wählen; auf dem Display erscheint ein Punkt nach der ersten
Ziffer, um zu signalisieren, dass die Klänge ausgewählt werden.
Um den nächsten oder den vorherigen zu wählen, die Tasten
+/– der Zahlentastatur ⑮ drücken.
Sustain
Verlängert den Klang einer Note, wenn die Taste losgelassen wird.
Um diese Funktion zu aktivieren oder deaktivieren, die Taste SUSTAIN ⑫
drücken.
Vibrato
Der Vibrato-Effekt ist eine Modulation des Klangs.
Um diese Funktion zu aktivieren oder deaktivieren, die Taste VIBRATO ⑬
drücken.
WAHL DER RHYTHMEN
Auf der Tastatur sind 100 Rhythmen gespeichert.
Sie werden durch Drücken der Taste SOUND/RHYTHM ⑱und
dann einer Zahl von 0 bis 99 gewählt, um einen Rhythmus aus
der Liste 100 RHYTHMS zu wählen; auf dem Display erscheint
ein Punkt nach der zweiten Ziffern, um zu signalisieren, dass die
Rhythmen ausgewählt werden.
Zum Einschalten oder zum Stoppen des Rhythmus, die Taste
START/STOP ①drücken.
Zum Steigern oder Herabsetzen der Ausführungsgeschwindigkeit,
die Tasten TEMPO + und TEMPO – verwenden.
Die TEMPO-Druckknöpfe +/–dienen der
Geschwindigkeitseinstellung einer Demo.
FILL-IN
Durch Druck auf diese Taste ④während der Rhythmus aktiviert ist, wird
eine rhythmische Variation des Schlagzeugs wiedergegeben.
SINGLE CHORD (vereinfachten Akkorde)
Um die vereinfachten Akkorde zu komponieren, durch Drücken
der Taste START/STOP ①einen Rhythmus abspielen :
Durch Druck auf die Taste SINGLE ③wird die Tastatur automa-
tisch in zwei Bereiche unterteilt und man kann die Akkorde im
linken Teil (von C1 bis F#2) im vereinfachten Modus mit einem,
zwei oder drei Fingern komponieren (siehe SINGLE CHORD
Tabelle am Ende dieses Handbuchs).
SYNC
Wird dagegen im Modus SINGLE CHORD anstelle von START/STOP die
Taste SYNC ⑤gedrückt, wird der Rhythmus erst dann aktiviert, nachdem
der Akkord komponiert wurde.
D E U T S C H

20 2120 21
CHORD OFF
Wird ein Akkord im Modus SINGLE komponiert, wird durch Drücken der Taste CHORD OFF ②das automatische
Arrangement ausgeschlossen.
CLASSIC CHORD
Die Akkorde können auch nach der klassische Methode komponiert werden (siehe CLASSIC CHORD Tabelle am Ende dieses
Handbuchs).
Rhythmische Instrumente / Tierlaute
Durch Betätigung der DRUM/ANIMAL ⑩können die 5 Pads abwechselnd
verwendet werden, um rhythmische Instrumente (DRUM) zu spielen oder
um Tierlaute (ANIMAL) wiederzugeben.
Programmierung Rhythmus / Tierstimmen
Diese Funktion ermöglicht die Aufnahme einer rhythmischen Sequenz oder
einer Sequenz von Tierstimmen. Für die Programmierung die Taste PROG
⑦drücken und mit den Pads ⑪ mindestens 16 Schlaginstrumente oder
Tierstimmen komponieren (der Buchstabe “P” blinkt auf dem Display); auf
die Taste PLAY ⑨drücken, um die Programmierung wieder anzuhören und
die Geschwindigkeit des Rhythmus mit den Tasten TEMPO + oder TEMPO –
⑥einzustellen. Um die Ausführung zu stoppen, die Taste PROG ⑦oder
START/STOP ①drücken. Die Programmierung wird nicht gespeichert.
LESSON
Die Taste LESSON ⑳drücken; auf dem Display erscheint der Buchstabe (d).
Eines der 10 vorher aufgenommenen Lieder durch Drücken einer weißen
Taste auf der Tastatur auswählen: Das Display zeigt die Nummer des
gewählten Stückes und die Grundmelodie wird abgespielt. Versuchen Sie,
die Melodie des Liedes durch zufälliges und wiederholtes Drücken von einer
oder mehreren Tasten der Tastatur im Takt mit dem Orchester zu spielen.
Erneut die Taste LESSON drücken, um den Modus zu verlassen.
SPEICHER – UND ABSPIELFUNKTION
Mit dieser Funktion kann man ein auf dem Keyboard gespieltes Stück
aufnehmen und abspielen RECORD Taste ⑧drücken und dann das Stück
spielen. PLAY Taste ⑨drücken, um das aufgenommene Stück abzuspielen.
USB Player
Diese Tastatur ermöglicht es, in einem USB-Flash Drive (Pen Drive) enthal-
tene MP3-Musikstücke zu lesen, wenn der USB-Stick am USB-Port auf
der Rückseite des Instruments angeschlossen ist. Wenn die Vorrichtung
angeschlossen ist, wird automatisch das erste Musikstück ausgeführt
und über die Lautsprecher der Tastatur abgespielt. Zum Einstellen der
Lautstärke die Tasten
PLAYPAUSE
drücken; um das Stück in
Pause zu versetzen, die Tasten
PLAYPAUSE
oder
PLAYPAUSE
drücken;
um auf das nächste oder das vorherige Stück überzugehen die Tasten
PLAYPAUSE
drücken.
D E U T S C H
Table of contents
Languages:
Other Bontempi Electronic Keyboard manuals
Bontempi
Bontempi Toy Band Star 12 2931 User manual
Bontempi
Bontempi Genius 15 3780 User manual
Bontempi
Bontempi MUSIC METHOD System 5 B 409 User manual
Bontempi
Bontempi Music ACADEMY School User manual
Bontempi
Bontempi MUSIC ACADEMY Genius 12 3210 User manual
Bontempi
Bontempi Toy Band Star 12 3765 User manual
Bontempi
Bontempi PM747 Installation guide
Bontempi
Bontempi PM 695 User manual

Bontempi
Bontempi MUSIC ACADEMY 16 6125 User manual

Bontempi
Bontempi iMusic 15 3790 User manual
