Bontempi MUSIC METHOD System 5 B 409 User manual

B 409
B 499
GB- OWNER’S MANUAL ................3
- MUSIC METHOD ...................10
F - MANUEL D’ INSTRUCTIONS ...17
- METHODE MUSICALE............24
D - BEDIENUNGSANLEITUNG.......31
- MUSIK METHODE .................38
E - LIBRO DE INSTRUCCIONES ...45
- MÉTODO MUSICAL...............52
I - MANUALE DI ISTRUZIONI ....59
- METODO MUSICALE .............66
GUARANTEE-GARANTIE-GARANTIE
GARANTIA-GARANZIA................76

22
GB Insert the music-stand in the special holes.
FInsérer le porte-partitions dans les trous correspondants.
DDen Notenständer in die entsprechenden Bohrungen einsetzen.
EInsertar el atril en los agujeros apropriados.
IInserire il leggìo negli appositi fori.
MUSIC-STAND • PORTE-PARTITIONS
• NOTENSTÄNDER • ATRIL • LEGGÌO
B 409
B 499

3
INDEX
TECHNICAL CARACTERISTICS . . . . . . . . . . . . . . . . . . . . . . 3
POWER SUPPLY . . . . . . . . . . . . . . . . . . . . . . . . . . . . . . . . . . 4
MAINS SUPPLY . . . . . . . . . . . . . . . . . . . . . . . . . . . . . . . . 4
BATTERY SUPPLY . . . . . . . . . . . . . . . . . . . . . . . . . . . . . . 4
BONTEMPI OPTIONAL ACCESSORIES . . . . . . . . . . . . . . . 4
CONTROL PANEL . . . . . . . . . . . . . . . . . . . . . . . . . . . . . . . . . 5
SOCKETS . . . . . . . . . . . . . . . . . . . . . . . . . . . . . . . . . . . . . . . 5
DIRECTIONS ON THE KEYBOARD . . . . . . . . . . . . . . . . . . 5
HOW TO USE THE KEYBOARD . . . . . . . . . . . . . . . . . . . . . 6
SWITCH ON AND SWITCH OFF. . . . . . . . . . . . . . . . . . . 6
DEMO – Chosen excerpt . . . . . . . . . . . . . . . . . . . . . . . . 6
VOLUMES . . . . . . . . . . . . . . . . . . . . . . . . . . . . . . . . . . . . 6
THE SONGS. . . . . . . . . . . . . . . . . . . . . . . . . . . . . . . . . . . 6
THE SOUNDS . . . . . . . . . . . . . . . . . . . . . . . . . . . . . . . . . 6
THE TRANSPOSER . . . . . . . . . . . . . . . . . . . . . . . . . . . . . 7
THE KEYBOARD . . . . . . . . . . . . . . . . . . . . . . . . . . . . . . . 7
ACCOMPANIMENT SOUNDS . . . . . . . . . . . . . . . . . . . . 7
THE STYLES. . . . . . . . . . . . . . . . . . . . . . . . . . . . . . . . . . . 7
TEMPO. . . . . . . . . . . . . . . . . . . . . . . . . . . . . . . . . . . . . . . 7
THE METRONOME . . . . . . . . . . . . . . . . . . . . . . . . . . . . . 7
EASY PLAY . . . . . . . . . . . . . . . . . . . . . . . . . . . . . . . . . . . . 8
DJ STYLE . . . . . . . . . . . . . . . . . . . . . . . . . . . . . . . . . . . . . 8
THE FUNCTIONS. . . . . . . . . . . . . . . . . . . . . . . . . . . . . . . 8
FULL KEYB / SPLIT. . . . . . . . . . . . . . . . . . . . . . . . . . . . . 8
EASY CHORD . . . . . . . . . . . . . . . . . . . . . . . . . . . . . . . . . 8
FREE CHORD . . . . . . . . . . . . . . . . . . . . . . . . . . . . . . . . . 8
MEMORY ON / OFF . . . . . . . . . . . . . . . . . . . . . . . . . . . . 8
MEDLEY SONG ON / OFF . . . . . . . . . . . . . . . . . . . . . . . 8
SUSTAIN ON / OFF. . . . . . . . . . . . . . . . . . . . . . . . . . . . . 8
REVERB ON / OFF . . . . . . . . . . . . . . . . . . . . . . . . . . . . 9
SEQUENCER . . . . . . . . . . . . . . . . . . . . . . . . . . . . . . . . . . 9
SYSTEM 5 . . . . . . . . . . . . . . . . . . . . . . . . . . . . . . . . . . . . 9
MAINTENANCE AND REMARKS . . . . . . . . . . . . . . . . . . . . 9
BONTEMPI MUSIC METHOD . . . . . . . . . . . . . . . . . . . . . .10
INTRODUCTION TO THE METHOD . . . . . . . . . . . . . . 10
THE VARIOUS ASPECTS OF MUSIC . . . . . . . . . . . . . . 10
STRUCTURE OF THE BONTEMPI METHOD . . . . . . . . 10
LEVEL 1: TEMPO . . . . . . . . . . . . . . . . . . . . . . . . . . . . . 10
LEVEL 2: THE NOTES . . . . . . . . . . . . . . . . . . . . . . . . . . 11
PREMISE CONCERNING MUSICAL NOTATION . . . . . 12
LOOKING AT THE KEYBOARD . . . . . . . . . . . . . . . . . . 12
MUSICAL NOTATION . . . . . . . . . . . . . . . . . . . . . . . . . . 12
MODIFICATIONS . . . . . . . . . . . . . . . . . . . . . . . . . . . . . 12
SYMBOLS AND LENGTHS OF THE NOTES . . . . . . . . . 13
LEVEL 3: THE TUNE . . . . . . . . . . . . . . . . . . . . . . . . . . 14
LEVEL 4: THE CHORDS . . . . . . . . . . . . . . . . . . . . . . . . 14
LEVEL 5: THE ACCOMPANIMENT . . . . . . . . . . . . . . . 15
THE SONG . . . . . . . . . . . . . . . . . . . . . . . . . . . . . . . . . . 15
READING A MUSICAL PIECE WITH THE BONTEMPI
MUSIC METHOD. . . . . . . . . . . . . . . . . . . . . . . . . . . . . . . . 16
TROUBLE SHOOTING GUIDE. . . . . . . . . . . . . . . . . . . . . . 16
SOUNDS LIST. . . . . . . . . . . . . . . . . . . . . . . . . . . . . . . . . . . 73
STYLES LIST . . . . . . . . . . . . . . . . . . . . . . . . . . . . . . . . . . . . 74
ACCOMPANIMENT SOUNDS LIST . . . . . . . . . . . . . . . . . . 74
TABLE OF SONGS. . . . . . . . . . . . . . . . . . . . . . . . . . . . . . . . 75
GUARANTEE . . . . . . . . . . . . . . . . . . . . . . . . . . . . . . . . . . . . 76
KEYBOARD B409: 40 midi-size keys (A-C).
KEYBOARD B499: 49 midi-size keys (C-C).
POLYPHONY: maximum 16 notes
BASIC SOUNDS: 100 polyphonic tones
TRANSPOSER: range +/– 6 semitones
ACCOMPANIMENT SOUNDS: 6 polyphonic tones
EFFECTS: REVERBS and SUSTAIN
STYLES: 32 rhythms
DJ STYLES: 6 styles with 13 effects and 12 loop
Controls: START/STOP, DOWN BEAT, TEMPO +/–,
METRONOME: with immediate control
SEQUENCER: REC and PLAY to record and listen
AUTOMATIC ACCOMPANIMENT: Free Chord and Easy
Chord
Controls: MEMORY ON/OFF, Full Keyb./Split
General controls: ON/OFF, Master Volume, Numeric
keyboard, Easy Play, Style, Song, Sound
DEMO: Demo song
SONGS: 32 pre-recorded songs with Medley ON/OFF
SYSTEM 5: 5 learning levels
AMPLIFICATION: 1,5 watt (RMS)
A high efficiency Ø 77 mm speaker (B409)
Two high efficiency Ø 77 mm speakers (B499)
POWER SUPPLY: 6 x 1,5 Volt IEC R6 / AA batteries
AC/DC Adapter – Input Vdc= 9 V / I = 400 mA
DIMENSIONS B409: (600 x 232 x 65) mm
DIMENSIONS B499: (680 x 240 x 63) mm
WEIGHT B409: 1,4 Kg
WEIGHT B499: 1,9 Kg
TECHNICAL CARACTERISTICS
BONTEMPI S.p.A. reserves all rights to modify specifications of this product without notice.
Read and keep this manual for future reference.
INTRODUCTION

4
[1] ON/OFF - Turns the instrument on and off.
[2] SEQUENCER REC - Records what is being played.
[2] SEQUENCER PLAY - Plays what has been recorded.
[3 VOLUME +/– - Selects the master volume.
[4] TRANSPOSER +/– - Allows pitch of notes to be
changed.
[5] TEMPO +/– - Sets the tempo for style performance,
songs or metronome.
[6] START/STOP - Starts/Stops a rhythm style or a song.
[7] STYLES - Selects the rhythm styles.
[8] METRONOME - Switches on and off the metronome beat.
[9] SONGS - Selects the pre-recorded songs.
batteries or new and old batteries are not to be mixed. •
Use only batteries of the same or equivalent type. •
Batteries are to be inserted with correct polarity. • Remove
exhausted batteries to prevent leakage. • Do not short cir-
cuit supply terminals. • Remove batteries during long
periods of non-use.
WASTE DISPOSAL STANDARDS
For information regarding the disposal of the items mentio-
ned here below, please refer to Council Administration
office regarding specialised waste collection centres.
1 - DISPOSAL OF BATTERIES
Protect the environment by disposing
of batteries in the special containers
provided for this use.
2 - PACKAGING DISPOSAL
Take the paper, cardboard and corrugated board to the
appropriate waste collection centres. Plastic material must
be placed in the relevant collection containers.
The symbols indicating the various types of plastic are:
Key for the different types of plastic materials:
PET= Polyethylene terephtalate
PE= Polyethylene, code 02 for PE-HD, 04 for PE-LD
PVC =Polyvinyl chloride
PP= Polypropylene
PS= Polystyrene, Polystyrene foam
O= Other polymers (ABS, Laminates, etc.)
3 - WASTE DISPOSAL OF USED ELECTRICAL AND
ELECTRONIC APPLIANCES
All articles displaying this symbol on the body,
packaging or instruction manual of same, must
not be thrown away into normal disposal bins
but brought to specialised waste disposal cen-
tres.
Here, the various materials will be divided by characteristi-
cs and recycled, thus making an important contribution to
environmental protection.
MAINS SUPPLY
The instrument can be supplied by the AC/DC “ADS 0904”
(Vdc =9V / I = 400 mA) positive central adap-
ter (not supplied) conforms to national and international
safety regulations covering electrical appliances.
• The toy is not intended for children under 3 years old.
• The toy must only be used with the recommended adaptor
• The toy is to be disconnected from the adaptor before cleaning
• The mains adaptor is NOT a toy.
RECOMMENDATIONS: The socket (1) for the adapter plug
must be easily accessible. Inserting the plug into the socket
at the back of the instrument automatically cuts off supply
from the batteries. Ensure that the adapter is sufficiently
ventilated and that the ventilation slits are not covered with
objects such as newpapers, tablecloths, curtains, etc. Do not
expose the adapter to drops or splashes of water.
WARNING: All batteries or transformers with safety insula-
tion must be checked regularly for faults in cable, wire, or
plug insulation or other parts.
BATTERY SUPPLY
This instrument works with six 1.5V IEC R6 /AA batteries
(not supplied) which are inserted in the housing at the
bottom.
To open press on the part of the lid marked OPEN.
Fit the batteries as shown at the bottom of the housing.
ADVICE ON USING THE BATTERIES
• Non-rechargeable batteries are NOT to be recharged. •
Rechargeable batteries must be removed from the product
before being charged. • Rechargeable batteries are only to
be charged under adult supervision. • Different types of
INTRODUCTION
1
POWER SUPPLY
01
PET
02
PE
03
PVC
05
PP
06
PS
07
O
BONTEMPI OPTIONAL ACCESSORIES
ADS 0904
Mains supply adaptor.
Vdc = 9V; I = 400 mA

5
DIRECTIONS ON THE KEYBOARD
Letters on the left: Indicate the basic note for the name of the chord.
Numbers on the right: Indicate the keys to press to perform the melody with the simplified BONTEMPI musical
scores.
DJ STYLE sections: The DJ CHORD is on the left side of the keyboard and is used to play the tonality. The DJ LOOP
is in the centre and is used to play the complex harmonies. The DJ EFFECTS is on the right and is used to play the DJ
STYLE characteristic effects.
[10] EASY PLAY - Depending on the style, selects right-
hand tone, the best tempo for the performance and
sets the FREE CHORD setting on the keyboard. In
the 32 songs, it selects the sound and the tempo
connected to the songs.
[11] SOUNDS - To select the sound on the keyboard.
[12] DJ STYLE - Enables the DJ STYLE rhythm with the
“complex harmonies” and effects on the right side
of the keyboard.
[13] Numeric keyboard 0-9 - To select functions,
rhythm style, songs and sounds.
[14] SYSTEM 5 - Enters the 5 levels learning mode.
[15] DEMO - Plays the demo song.
[1] ON/OFF - Turns the instrument on and off.
[2] SEQUENCER REC - Records what is being played.
[2] SEQUENCER PLAY - Plays what has been recorded.
[3 VOLUME +/– - Selects the master volume.
[4] TRANSPOSER +/– - Allows pitch of notes to be
changed.
[5] TEMPO +/– - Sets the tempo for style performance,
songs or metronome.
[6] START/STOP - Starts/Stops a rhythm style or a song.
[7] STYLES - Selects the rhythm styles.
[8] METRONOME - Switches on and off the metronome beat.
[9] SONGS - Selects the pre-recorded songs.
CONTROL PANEL
SOCKETS
INPUT DC 9 V -Switches the instrument on with an AC/DC
adapter.
B409
B499
INTRODUCTION

6
SWITCH ON AND SWITCH OFF
Move the switch to the ON/OFF position to turn the instrument on or off.
When turned on, the keyboard is set to operate with the Stage Piano sound,
the Pop rhythm and the song La Cucaracha.
Note: to avoid unnecessary battery use, an alarm will sound (Save Power
Alarm) to indicate that the keyboard has not been used for more than two minutes.
DEMO – Chosen excerpt
Switching on the demo button, a melody that will emphasise the characteristics
of the keyboard will play. To turn off the melody press the demo button.
VOLUMES
To regulate the volume of the instrument you must use buttons volume +
(to turn up) or volume – (to turn down). By holding the button pressed
down, the variation becomes continuous.
To restore the standard volume press both volume + and volume – buttons
together.
THE SONGS
The instrument contains 32 classic pieces.
To select the piece, press the SONGS button (light on) and type in a two digit number from the SONGS list (e.g. 03 Jingle
Bells, type in the 0 on the numeric keyboard then the 3) and press the start/stop button to activate the musical piece or to
stop execution.
When the first number is typed, the light blinks until the selection is complete. When the piece is playing, other songs can
be listened to immediately by typing in the number which corresponds to the piece.
The easy play control sets the melody of the song and the standard TEMPO on the keyboard.
THE SOUNDS
The keyboard features 100 sounds divided into 6
families (e.g. 031-050 ORGAN).
They are selected when the SOUNDS button is on
by entering a three digit number between 001 and
100 of the SOUNDS list you will find at the end of
the Instructions Manual.
Example: for the Full Organ sound type the number
034 (first 0, then 3and then 4 with the numeric
keyboard).
HOW TO USE THE KEYBOARD
When the first number is typed, the light blinks until the selection is complete. When the piece is playing, other songs can
When the first number is typed, the light blinks until the selection is complete. When the piece is playing, other songs can
HOW TO USE THE KEYBOARD

7
IMPORTANT: With some sounds you might notice a slight difference of volume or sound quality when playing
them in different areas of the keyboard. This is an inevitable consequence of multiple sampling and not a tech-
nical problem.
THE TRANSPOSER
The transposer +/– controls shift the whole keyboard tonality by +/– 6
semitones.
By simultaneously pressing the “+/–“ buttons of transposer, you will return
to the standard 00 value.
THE KEYBOARD
It has 40 midi size keys (49 keys for mod. B499) and can be used in the following ways:
1. When simply turned on, one single sound is enabled over the whole keyboard.
2. By entering 73 Full Keyb / Split, the keyboard will be divided into two sections: one dedicated to accompaniment to
form chords (keys on the left) and the other one to play the melody (keys on the right).
Chords can be played in the FREE CHORD mode, which means in the traditional way, or in the EASY CHORD mode, which
means in the BONTEMPI simplified mode (see the EASY CHORD paragraph).
ACCOMPANIMENT SOUNDS
The selection of ACCOMPANIMENT sounds is achieved by typing a code between 80 and 85, when the
rhythm is off and the keyboard is split.
THE STYLES
The keyboard has 32 rhythmic styles enriched by auto-
matic accompaniments and completed by drums.
They are sub-divided into 6 families (e.g. 22-28 LATIN) ,
see the list on page 74. To select them press the STYLES
button and then a 2 digit figure from the STYLES list.
Example: to select Samba rhythm, digit number 23 (2,
and 3).
To start or to stop a rhythm press the start/stop button.
To increase or decrease the speed of the song press the two buttons tempo + and tempo – .
By holding the button pressed down, the variation becomes continuous.
To go back to standard rhythm press buttons tempo + and tempo – together.
The STYLES button lights the start of each beat or measure.
When a rhythm is on function and you select a new style this latter starts at the end of the previous rhythm pattern.
TEMPO
The tempo +/– buttons can be used to set the tempo of the rhythm or of a song.
THE METRONOME
The metronome helps you to learn the music, giving the beat during musical exercises and simulating the traditional time-
marking instrument.
It can be turned on and off with the Metronome button. To change the tempo, use the tempo +/– buttons.
ACCOMP. SOUNDS
80
81
82
83
84
85
Piano
Hammond
Jazz Guitar
Strings
Trumpet
Slow Strings
start/stop
button.
To start or to stop a rhythm press the
HOW TO USE THE KEYBOARD

8
EASY PLAY
Depending on the rhythm, Easy Play sets the tone for the right hand, the best tempo for the performance and splits the
keyboard to play chords in the FREE CHORD mode.
DJ STYLE
The DJ STYLE control activates the DJ effects in the
last 13 keys on the keyboard, a DJ rhythm style and
particular complex harmonies. The keyboard splits
automatically into three sectors: playing a key on
the left side, select the tonality and the rhythm
automatically starts, in the centre of the keyboard
“complex harmonies” can be played and on the right side DJ Style characteristic effects can be played. They are selected
by pressing the DJ STYLE button and then a number from 33 to 38 (see the Style list at the end of this Instructions Manual).
THE FUNCTIONS
Full Keyb/Split
To split the keyboard with two sounds or set a single sound.
Number 73 activates Full Keyb, i.e. a single sound on the entire keyboard, or Split with the keyboard split to use two
different sounds.
Easy Chord
This function allows you to compose chords on the left side of
the keyboard with the Bontempi simplified mode:
one key will provide a major chord, two keys a minor
chord and three keys a dominant 7th chord.
It is activated by typing number 74 Easy Chord.
The fundamental note of the chord (the most important one and the one that gives the name to the chord) is represented
by the key pressed on the far left. For example, by pressing simultaneously C, Dand E, you will get a C7 dominant chord.
Free Chord
Chords are played in the traditional way and all the main chords are identified.
It is activated by typing number 75 Free Chord or when Easy Play is selected.
Memory On / Off
With a rhythm running, the played chord remains memorized even if the key is released.
It is activated by typing number 76 Memory On and is deactivated with 77 Memory Off.
It is normally active.
Medley Song On / Off
This function allows you to listen to all the songs one after the other, starting with the one you selected. It can be enabled
by entering 78 Medley Song On and disabled with 79 Medley Song Off.
Sustain On / Off
This prolongs the sound of a note after the key is released.
To switch on, digit number 86 Sustain On, and to switch off number 87 Sustain Off.
MAJOR
CHORD
MINOR
CHORD
SEVENTH
CHORD
HOW TO USE THE KEYBOARD

9
Reverb On / Off
This creates an effect as if you were playing music in an large empty room.
To switch on digit number 88 Reverb On, and to switch off digit number 89 Reverb Off.
SEQUENCER
The sequencer section allows you to record and listen to everything you play.
It can be enabled by pressing the rec. button. The three lights will cyclically blink.
Press rec. again to stop recording and then press play to listen to what has been recorded. Press play again to stop listening.
You can memorize up to 330 events.
When memory is full, the lights stop flashing.
After a recording session, while PLAY is active, variations made on the control panel can alter recorded events.
Recorded data is memorised as long as the keyboard is switched on.
SYSTEM 5
The SYSTEM 5 section helps you in the music learning process
just as if a real musical teacher were there with you, teaching
you five fundamental aspects:
1. Tempo 2. Note 3. Melody
4. Chord 5. Accompaniment
1st level: Tempo of the song
At the 1st level, you can become familiar with the melody notes
and learn the tempo of the song.
=== How to do it:
After having chosen a tune, select level 1 first by pressing the System 5 button (the light of the SONGS button blink)
and then number 1 with the numeric keyboard.
Use the start/stop control to start and stop the performance.
When the introduction touches are complete try playing the melody by pressing one or more keys and keeping time with
the orchestra.
During your performance, the accompaniment will automatically follow you.
You can quicken or slow down the tempo by using the tempo +/– buttons.
You will be able to change tune by pressing the corresponding button on the SONGS list.
If you wish to listen to the whole song, press start/stop, then press SONG and then start/stop again.
To perform the other levels, i.e.:
2. melody notes, 3. song melody, 4. song chords and 5. accompaniment with orchestra, press the System 5
button and then select the level number and then start/stop. For additional information, see the Method section.
MAINTENANCE AND REMARKS
To ensure that the instrument works perfectly and has a long life, please follow the recommendations below:
• Avoid exposing the instrument to heat sources or keeping it in humid places.
• Keep packaging and all its components to replace and store instrument in case of periods of inactivity or transporta-
tion.
• Should you notice any malfunction, please contact your nearest authorized dealer.
• If returning the instrument for repair, you should send it in its original packing or pack it in such a way that avoids
damage in transit.
• Do not use alcohol, solvents or similar chemical substances for cleaning. Use a soft cloth dampened in a bland solution
of water and neutral detergent. Dip the cloth in the solution and then wring it until it is nearly dry.
HOW TO USE THE KEYBOARD

1010
BONTEMPI MUSIC METHOD
INTRODUCTION TO THE METHOD
This method has been designed for those who are learning music for the first time and want to do it in an easy way, within
a short time and have fun.
There are five learning levels (System 5).
1. Tempo 2. Note 3. Melody
4. Chord 5. Accompaniment
You may choose the first step to begin with or choose the way
that you consider to be the most suitable for your level of
skill.
It is important for you to repeat the exercises, without expec-
ting to learn everything at once.
The keyboard will help as if a teacher were seated next to you and will guide you through the wonderful world of music.
THE VARIOUS ASPECTS OF MUSIC
Any musical piece can be reduced into a series of simple elements. Let’s look at the principal ones: the melody and the
accompaniment.
THE MELODY
The melody is a succession of sounds (notes) of varying pitches and lengths, played
one after the other. The flute, for example, is an instrument which plays the melody.
Even when you whistle a tune, you are whistling the melody.
THE ACCOMPANIMENT
The accompaniment is formed of chords (groups of 3 notes or more notes played simultaneously) which
support the melody. Instruments suitable for playing accompaniment are: the guitar, the piano, etc.
STRUCTURE OF THE BONTEMPI METHOD
The Bontempi Music Method consists of a continuous blue band (grey
in these instructions) with all the indications for using the right hand to
play the melody.
Above and below this band, you will find the indications for the use of your
left hand which plays the accompaniment chords.
Below the blue band (grey in these instructions) there is the musical notation of the piece. Later on, we’ll take a look
together at the correct use of this kind of musical notation and its meaning.
For now, it is sufficient to remember that each note has a name: A, B,
C, D, E, F, G, in anglo-saxon notation which correspond to LA, SI, DO,
RE, MI, FA, SOL, in Latin notation and A, H, C, D, E, F, G, in German
notation. This correspondence is illustrated on the next diagram.
LEVEL 1: Tempo
As said before, a melody is made up of a series of notes with a very clearly defined pitch and duration. If we whistle a tune
we notice that some notes last longer than others and if we do not respect their length the music no longer sounds the
same. So first of all we will deal with the length of the notes.
Each number on the blue strip (grey in these instructions) of the method corresponds to a note and so to a key on the
keyboard.
Anglo-saxon notation
Latin notation
German notation
BONTEMPI MUSIC METHOD

1111
TEMPO
Each key should be pressed for a certain length of time according to the distance
between the number and the one following it. To make this easier the upper part of the
blue band (grey in these instructions) shows a sequence of alternating black and white
dashes. The distance between one black dash and the next represents a musical unit
known as beat and corresponds to the movement of the metronome from one side to
the other. Therefore each grey or black dash represents half a beat.
The letter P (pause) which sometimes appears in the blue band (grey in these instructions) shows that playing should not
continue until the next number appears.
Most music is written in a series of groups of notes the length of which, when added up, corresponds to 3 or 4 beats and
are respectively called 4/4 or 3/4.
These numbers indicate the rhythm of the song and are shown at the beginning.
Each group is between two vertical strokes. The space between the two strokes is called a measure or a beat.
The length of each sound or pause must be respected for proper use of the rhythmic section.
The beginning of each measure or beat is shown by the flashing light which sets the rhythm.
Level 1 - The tempo. Off we go!
Choose a song and listen to it a few times: you will notice it has a melody, and an orchestra accompanying it. While you
are listening to it try to follow the tempo or tap your foot at the right time. Try to follow the notes of the tune on the music
score of the Music Book.
Now select System5 - Level 1.
The keyboard will only play the accompaniment to the song selected.
An orchestra will accompany you as you play the tune.
At this level it is not necessary to know which key to press: they will all play
the right note.
Just choose a key and concentrate on keeping time.
Press the start/stop key and, when the introduction touches are complete, begin playing.
Remember that at this level any key will play the right note.
Even if you make a mistake and stop the accompaniment will wait for you.
LEVEL 2: Note
Each note corresponds to a number on the blue strip (grey in these instructions) of the method. However, as you can see,
there is a number on each note as well. This will help you to find the right key easily.
To play the melody, read the sequence of numbers contained in the blue
band of the method and press, one after the other, the white keys which
correspond to the same numbers on the strip above the keyboard. The
black keys correspond to the numbers for example on the music method
blue band (grey in these instructions) followed by the “+”. The black key
after white key 1 corresponds to the symbol 1+.
Now that you know which key corresponds to which note, try and play the
tune following the numbers on the blue band (grey in these instructions). Remember the tempo!
At this level it is not necessary to know which key to press: they will all play
key and, when the introduction touches are complete, begin playing.
BONTEMPI MUSIC METHOD

1212
Level 2 –The notes. Off we go!
Choose a song and select System5 - Level 2.
As for level 1 the keyboard will play the accompaniment alone.
This time you will need to keep time and play the right key.
Press the start/stop key and, when the introduction touches are complete, begin playing.
If you hit the wrong note, the key will not play and the accompaniment will stop until you hit the right one.
Check the Music Book score for the right note to use
PREMISE CONCERNING MUSICAL NOTATION
Underneath the blue band method (grey in these instructions), the
classical musical notation is shown with the treble clef, the time of
the piece (3/4, 4/4 and so on), the notes with their anglo-saxon
names (letters). After having played the pieces in the music books
several times, try playing them again, this time following the clas-
sical notation in order to gradually familiarize yourself with this
“traditional” world of music. You will then be able to see the close
relationship that exists between the Bontempi Method and classical musical notation.
LOOKING AT THE KEYBOARD
The keyboard is made up of white and black keys. The black keys are arranged in groups of 2 or 3 which may be of help
to you as you learn to recognize the positioning of the notes.
1) the white key immediately to the left of the two black keys is C (DO).
2) The white key immediately to the left of the three black keys is F (FA).
3) By point 1 and 2 you can locate the other notes on keyboard.
MUSICAL NOTATION
Notes and pauses are written on five parallel horizontal lines and
the four spaces between these lines. This group of five lines is called
the stave.
The correspondence between the notes and their position on the
keyboard is given on the next diagram.
MODIFICATIONS
Sometimes, next to the treble clef at the beginning of the stave or next to a single note, these signs will appear: (flat)
or (sharp).
These signs mean that all the notes on that line, in that space or the single note itself are flat or sharp notes, that is, they
are to be played on the relevant black keys. It’s easy to recognize them because they are indicated in the blue band (grey
in these instructions) of the method with a number followed by the plus (+) sign.
The (bequadro) sign (natural) which you may find on the line of the stave means that the previous (flat) or (sharp)
indications are to be cancelled. All variations are indicated in the blue band (grey in these instructions), so always refer to
this should you have any doubts.
BONTEMPI MUSIC METHOD

1313
SYMBOLS AND LENGTHS OF THE NOTES
WHOLE NOTE AND CORRESPONDING PAUSE (SEMIBREVE)
= play for the duration of 4 beats:
one - and two - and three - and four - and
= suspend the music for the duration of 4 beats:
one - and two - and three - and four - and
HALF NOTE AND CORRESPONDING PAUSE (MINIM)
= play for the duration of 2 beats:
one - and two - and
= suspend the music for the duration of 2 beats:
one - and two - and
QUARTER NOTE AND CORRESPONDING PAUSE (CROTCHET)
= play for the duration of 1 beat:
one - and
= suspend the music for the duration of 1 beat:
one - and
EIGHTH NOTE AND CORRESPONDING PAUSE (QUAVER)
= play for the duration of half a beat :
one -
= suspend the music for the duration of half a beat:
one -
DOTTED NOTE
A dot after a note increases its value by half.
For example: 3 beats = 2 beats + 1 beats
TIE When a curved line joins two or more notes together, the first note is
prolonged by the value of the note(s) it is joined to, keeping the key
pressed down.
= press the key for a total of three beats.
In the Bontempi music books, the 2nd note and the others which may
follow have no name to indicate that the key must be kept held down.
REPEAT SIGNS (CHORUS)
REPEAT SIGNS WITH “AD LIBITUM”
REPEAT SIGN (REFRAIN) WITH TWO FINAL MEASURES (DOUBLE ENDINGS)
DOUBLE BARS CHORD WITH BRACKET
DAL AL FINE
DA CAPO AL FINE
The sign is used especially
when a song has a series of
lyrics or a tune which has parts
that have to be repeated. It is
therefore necessary to repeat
the music included between
these repeat
signs whenever
they appear.
Some songs are characterized by the fact that
they have a refrain with more than one final
measure. In these cases, they are marked by
the “double ending” sign. 1 and 2. The whole
piece is played, therefore, as far as the measu-
re which ends the song, indicated by the num-
ber 1. The song is then repeated entirely,
skipping over the first concluding measure and
going directly on to the second to finish.
The double bars indicate
the end of a piece of
music.
The piece of music
contained between
these signs can
repeated as many times as you like.
Whenever this sign appears,
the chord is be interrupted.
When you see this indication, play the whole piece, then repeat it again
from the beginning until you get to the word “Fine” (the phrase “Da
Capo al Fine” is in fact italian for “From beginning to end”).
When you encounter this sign, repeat the piece
from the indication up to the word “Fine”.
BONTEMPI MUSIC METHOD

1414
LEVEL 3: Melody
Now you are ready to play the tune of a song. If you go wrong the orchestra will play the accompaniment with your mista-
kes. All the keys will play and the orchestra will not wait for you.
Level 3 – The tune. Off we go!
Choose a song and select System 5 - Level 3. Press start/stop and begin playing.
If you hit the wrong note the song will be out of tune. If you do not follow the right tempo the orchestra will not wait and
you will be out of tempo. Try to follow the notes of the tune on the music score of the Music Book.
LEVEL 4: Chord
Until now we have talked about the tune, now we will try with the accompaniment. Information about the score can be
found above and below the blue strip (grey in these instructions).
To play the accompaniment, hold each chord for the time indicated by
the line next to the letter representing the chord until you come to the
next one.
How to play the chords:
It may seem difficult to play a chord or, in other words, press a combination of 3 or more keys, but the keyboard offers
you the chance to use two performance modes: Easy Chord and Free Chord.
1. EASY CHORD
Easy Chord is the first level of chord playing.
The keyboard is automatically split into two parts and you can play the Bontempi single finger chords.
The Bontempi music method uses three types of chords: major chord, minor chord, and seventh chord:
To form major chord, (for example C Major) by means of the control Single Finger Chord, all you need do is press
with one finger on the key which corresponds to the same letter C.
To play a minor chord, (for example C Minor) you must press the key corresponding to the letter C together with
any key to the right of this one - e.g. (the one on it’s immediate right).
To form a seventh chord, (for example C Seventh) you should press the key which corresponds to the letter C
together with any 2 keys to its right - e.g. (the next two on the right).
To help you play the chords, little black squares are shown next to the relative symbols. These squares indicate the number
of fingers needed to play each chord.
You may need to form a chord on a flat note, which corresponds to a black key (e.g. =
D flat major). In this case, the chord is played by pressing the black key immediately to the
left of the D key.
To form a chord on a sharp note (e.g. = D sharp major), the chord is played by pressing
the black key immediately to the right of the D key.
More complex chords, such as chords on a flat or sharp note, minor or seventh, for example
or , are formed by pressing the black key corresponding to the letter Cor
Dand any other two keys (white or black) to the right of the previous one.
To facilitate playing the chords, the black squares next to the symbol indicate the number of
fingers necessary for forming the chord.
The table with all the chords is at the end of the Music Book.
MAJOR
CHORD
MINOR
CHORD
SEVENTH
CHORD
BONTEMPI MUSIC METHOD

1515
2. FREE CHORD
The Free Chord selection is the most evolved way to compose a chord or, in other words, effectively press the note keys
which accompany it. With this level you can compose free chords according to classic musical notation.
Level 4 - Chords. Off we go!
Choose a song and select System5 - Level 4.
At this level the rhythm and tune of the song are played.
Your task will be to learn the chords and then select to play them on the keyboard using the two modes: Easy Chord or
Free Chord.
Press start/stop and start playing following the chords in the Music book score.
N.B.: In the BONTEMPI scores, including the MUSIC BOOK ones, the numbers above the blue band (grey in this
explanation) show which chords should be played using the 6 CHORD PROGRAM keys present in other
BONTEMPI keyboards.
The metronome sound will give you the tempo to play the first chord.
If you make a mistake, the melody will wait until you get it right. Be careful when changing chords, otherwise you will be
offbeat.
LEVEL 5: Accompaniment
This level is like the previous one but here you will play the part of the orchestra and you will have to play the accompa-
niment without making a mistake.
Select the mode to play the chords:
1. Easy Chord;
2. Free Chord.
Now all that remains for you to do is select System5 - Level 5.
Press start/stop and start playing following the chords in the Music book score.
If you play the wrong chord, it will be heard and the song will be out of tune.
THE SONG
As you can see, with the help of the keyboard and a bit of practice you managed without difficulty to play the tune or
accompaniment to the songs. Now you will be able to play the music from the songbook provided, or from the huge
BONTEMPI collection.
BONTEMPI MUSIC METHOD
B409 B499

1616
BONTEMPI MUSIC METHOD
MUSIC BOOKS
Music books represent an essential element of the system. Each song is printed on a separate page.
Next to the original title of the song there is the translation of the title in other languages. The composer’s name is on the
right of the title. Under the title there is information regarding:
SOUND: the sound needed to create the tune
STYLE: the rhythm of the drums and arrangement of the song
TEMPO: the speed of the song
You can use this information to configure the keyboard and play the song at its best. The keyboard manual tells you how
to select sound, rhythm and tempo.
READING A MUSICAL PIECE WITH THE BONTEMPI MUSIC METHOD
If we look at the first line of a piece we realize that we know all the signs shown.
1. The numbers on the continuous blue band (grey in these instructions) indicate the keys for playing the melody.
2. The letters beneath the continuous blue line (grey in these instructions) indicate the accompaniment chords that can
be played using the BONTEMPI simplified mode (the line to the right indicates how long the chord should be
held).
GB - TROUBLE SHOOTING GUIDE
Problem Solution
The instrument does not play or
the sound is distorted.
The instrument switches on or
off when keys are pressed.
Batteries discharged – insert new batteries.
Batteries inserted incorrectly – check. Mains adapter not suitable.
Batteries discharged – insert new batteries.
ATTENTION: In the event of malfunction, remove the batteries and then reinsert them.
Problem
Solution
TROUBLE SHOOTING GUIDE
16

17
TABLE DE MATIÈRES
CARACTERISTIQUES TECHNIQUES . . . . . . . . . . . . . . . . . 17
ALIMENTATION . . . . . . . . . . . . . . . . . . . . . . . . . . . . . . . . . 18
ALIMENTATION SUR SECTEUR . . . . . . . . . . . . . . . . . . 18
ALIMENTATION PAR PILES. . . . . . . . . . . . . . . . . . . . . . 18
ACCESSOIRES D’ORIGINE EN OPTION . . . . . . . . . . . . . 18
TABLEAU DE COMMANDE . . . . . . . . . . . . . . . . . . . . . . . . 19
PRISES . . . . . . . . . . . . . . . . . . . . . . . . . . . . . . . . . . . . . . 19
LES INDICATIONS SUR LE CLAVIER . . . . . . . . . . . . . . . . 19
UTILISATION DE L’INSTRUMENT. . . . . . . . . . . . . . . . . . . 20
MISE EN MARCHE ET ARRET . . . . . . . . . . . . . . . . . . . 20
DEMO - Morceau de démonstration . . . . . . . . . . . . . . 20
LES VOLUMES. . . . . . . . . . . . . . . . . . . . . . . . . . . . . . . . 20
LES CHANSONS. . . . . . . . . . . . . . . . . . . . . . . . . . . . . . . 20
LES SONS . . . . . . . . . . . . . . . . . . . . . . . . . . . . . . . . . . . 20
LE TRANSPOSER . . . . . . . . . . . . . . . . . . . . . . . . . . . . . 21
LE CLAVIER . . . . . . . . . . . . . . . . . . . . . . . . . . . . . . . . . . 21
LES SONS POUR L’ACCOMPAGNEMENT . . . . . . . . . . 21
LES STYLES . . . . . . . . . . . . . . . . . . . . . . . . . . . . . . . . . . 21
TEMPO. . . . . . . . . . . . . . . . . . . . . . . . . . . . . . . . . . . . . . 21
LE METRONOME. . . . . . . . . . . . . . . . . . . . . . . . . . . . . . 21
EASY PLAY . . . . . . . . . . . . . . . . . . . . . . . . . . . . . . . . . . . 22
DJ STYLE . . . . . . . . . . . . . . . . . . . . . . . . . . . . . . . . . . . . 22
LES FONCTIONS (FUNCTIONS) . . . . . . . . . . . . . . . . . . 22
FULL KEYB / SPLIT. . . . . . . . . . . . . . . . . . . . . . . . . . . . 22
EASY CHORD . . . . . . . . . . . . . . . . . . . . . . . . . . . . . . . . 22
FREE CHORD . . . . . . . . . . . . . . . . . . . . . . . . . . . . . . . . 22
MEMORY ON / OFF . . . . . . . . . . . . . . . . . . . . . . . . . . . 22
MEDLEY SONG ON / OFF . . . . . . . . . . . . . . . . . . . . . . 22
SUSTAIN ON / OFF. . . . . . . . . . . . . . . . . . . . . . . . . . . . 22
REVERB ON / OFF . . . . . . . . . . . . . . . . . . . . . . . . . . . 23
SEQUENCER . . . . . . . . . . . . . . . . . . . . . . . . . . . . . . . . .23
SYSTEM 5 . . . . . . . . . . . . . . . . . . . . . . . . . . . . . . . . . . . 23
ENTRETIEN ET DIVERS. . . . . . . . . . . . . . . . . . . . . . . . . . . 23
METHODE MUSICALE BONTEMPI. . . . . . . . . . . . . . . . . . 24
INTRODUCTION A LA METHODE . . . . . . . . . . . . . . . 24
LES PARTIES DE LA MUSIQUE . . . . . . . . . . . . . . . . . . 24
COMPOSITION DE LA METHODE BONTEMPI . . . . . . 24
NIVEAU 1: LE TEMPS . . . . . . . . . . . . . . . . . . . . . . . . . 24
NIVEAU 2: LES NOTES . . . . . . . . . . . . . . . . . . . . . . . . 25
PRELIMINAIRES A L’ECRITURE MUSICALE . . . . . . . . 26
UN COUP D’OEIL AU CLAVIER . . . . . . . . . . . . . . . . . . 26
ECRITURE MUSICALE . . . . . . . . . . . . . . . . . . . . . . . . . 26
ALTERATIONS . . . . . . . . . . . . . . . . . . . . . . . . . . . . . . . . 26
SYMBOLES ET DUREE DES NOTES . . . . . . . . . . . . . . 27
NIVEAU 3: LA MELODIE. . . . . . . . . . . . . . . . . . . . . . . .28
NIVEAU 4: LES ACCORDS . . . . . . . . . . . . . . . . . . . . . .28
NIVEAU 5: L’ACCOMPAGNEMENT . . . . . . . . . . . . . . . . 29
LA CHANSON. . . . . . . . . . . . . . . . . . . . . . . . . . . . . . . . . 29
COMMENT LIRE LE MORCEAU SELON LA METHODE
BONTEMPI . . . . . . . . . . . . . . . . . . . . . . . . . . . . . . . . . . . . 30
GUIDE A LA SOLUTION D’EVENTUELS PROBLEMES . .30
LISTE DES SONS . . . . . . . . . . . . . . . . . . . . . . . . . . . . . . . . 73
LISTE DES STYLES . . . . . . . . . . . . . . . . . . . . . . . . . . . . . . . 74
LISTE DES SONS POUR L’ACCOMPAGNEMENT . . . . . . . 74
LISTE DES CHANSONS . . . . . . . . . . . . . . . . . . . . . . . . . . . 75
GARANTIE. . . . . . . . . . . . . . . . . . . . . . . . . . . . . . . . . . . . . . 76
CLAVIER B409: 40 touches taille midi (LA-DO)
CLAVIER B499: 49 touches taille midi (DO-DO)
POLYPHONIE: 16 notes maximum
SONS DE BASE: 100 timbres polyphoniques
TRANSPOSER: déplacement +/- 6 demi-tons
SONS POUR L’ACCOMPAGNEMENT: 6 timbres polypho-
niques
EFFET: REVERB et SUSTAIN
STYLES: 32 rythmes
DJ STYLES: 6 styles avec 13 effets et 12 loop
Contrôles: START/STOP, DOWN BEAT, TEMPO +/–
METRONOME: avec commande immédiate
SEQUENCER: REC et PLAY pour enregistrer et réécouter
ACCOMPAGNEMENT AUTOMATIQUE: Free Chord et Easy
Chord
Contrôles: Memory ON/OFF, Full Keyb./Split
Contrôles généraux: ON/OFF, Master Volume, Clavier
numérique 0-9, Easy Play, Style, Song, Sound
DEMO: Morceau démonstratif
SONGS: 32 morceaux musicaux préenregistrés avec
Medley ON/OFF
SYSTEM 5: 5 niveaux d’apprentissage
AMPLIFICATION: 1,5 watt (RMS)
Un haut-parleur à efficience élevée Ø 77 mm (B409)
Deux haut-parleurs à efficience élevée Ø 77 mm (B499)
ALIMENTATION: 6 piles de 1,5 Volt IEC R6 / AA
Adaptateur AC/DC – Input Vdc= 9 V / I = 400 mA
DIMENSIONS B409: (600 x 232 x 65) mm
DIMENSIONS B499: (680 x 240 x 63) mm
POIDS B409: 1,4 Kg
POIDS B499: 1,9 Kg
CARACTERISTIQUES TECHNIQUES
BONTEMPI S.p.A. se réserve tous les droits de modifier les détails de ce produit sans préavis.
Lire et conserver ce manuel pour le rendre accessible pour de futures consultations.
INTRODUCTION

18
CONSEILS POUR L’UTILISATION DES PILES
• Quand les piles sont déchargées, il faut toujours les enle-
ver de leur emplacement. • Recharger seulement les piles
du type “rechargeables” et, de toute façon, avec la supervi-
sion d’un adulte. • Ne pas utiliser en même temps des piles
de types différents. • Ne pas utiliser des piles neuves avec
des piles déchargées. • Ne pas court-circuiter les terminaux
d’alimentation.
REGLES POUR ECOULEMENT DES ORDURES
Pour l’écoulement des matériaux indiqués ci-dessous, se
renseigner auprès des Administrations Communales au
sujet des centres d’écoulement spécialisés.
1 - ÉCOULEMENT DES PILES
Pour aider la protection de l’environne-
ment ne pas jeter les piles déchargées
parmi les ordures normales, mais dans
des conteneurs spéciaux situés dans les centres de ramassage.
2 - ECOULEMENT DES EMBALLAGES
Remettre les emballages en papier, carton et carton ondulé
dans les centres d’écoulement spécifiques. Les parties en
plastique de l’emballage doivent être placées dans les con-
teneurs pour la récolte prévus à cet effet.
Les symboles qui repèrent les différents types de plastique
sont:
Légende relative au type de matériau plastique:
• PET= Polyéthylène téréphtalate
• PE= Polyéthylène, le code 02 pour PE-HD, 04 pour PE-LD
• PVC= Chlorure de Polyvinyle
• PP= Polypropylène
• PS= Polystyrène, Polystyrène expansé
• O= Autres polymères (ABS, Couplés, etc.)
3 - ECOULEMENT DE VIEUX PRODUITS ELECTRIQUES ET
ELECTRONIQUES
Tous les articles qui portent ce symbole sur le
corps du produit, sur l’emballage ou dans les
instructions ne doivent pas être jetés dans les
ordures normales mais doivent être remis dans
les centres de récolte spécialisés.
Là les matériaux seront divisés sur la base de leurs carac-
téristiques et par la suite réutilisés pour contribuer large-
ment à la protection de l’environnement.
Ce clavier électronique peut fonctionner avec alimentation
par réseau ou par piles.
ALIMENTATION SUR SECTEUR
L’instrument peut être alimenté par un adaptateur de rése-
au AC/DC “ADS 0904” (qui n’est pas fourni) qui aura en
sortie les caractéristiques suivantes: Vdc = 9V; I = 400mA
(terminal positif central). Cet appareil est
conforme aux normes nationales et internationales concer-
nant la sécurité électrique.
• Le jouet ne convient pas aux enfants de moins de trois ans.
• Le jouet doit être utilisé avec l’adaptateur de réseau conseillé
• Le jouet doit être débranché de l’adaptateur avant un éventuel
nettoyage. •L’adaptateur sur secteur N’EST PAS un jouet.
RECOMMANDATION: La prise électrique (1) pour brancher la
fiche de l’adaptateur doit être facilement accessible. L’introduction
de la broche dans la prise située derrière déconnecte automati-
quement les piles. Garantir l’aération suffisante de l’adaptateur;
les fissures d’aération ne doivent pas être couvertes par des
objets tels que journaux, nappes, rideaux, etc.. Ne pas exposer
l’adaptateur aux gouttes ou aux jets d’eau.
ATTENTION: Tout accumulateur ou adaptateur/ transforma-
teur utilisé, pourvu d’un isolant de sûreté, doit être réguliè-
rement contrôlé pour éviter les risques dûs aux dommages
concernant le câble, le fil, la fiche, le dispositif d’isolation ou
d’autres parties; l’appareil ne pourra être utilisé, qu’ après
la réparation du dommage.
ALIMENTATION PAR PILES
L’instrument fonctionne avec 6 piles de 1,5V type IEC R6/
AA (qui ne sont pas fournies) que l’on doit disposer dans
l’emplacement spécial situé dans la partie inférieure. Pour
ouvrir cet emplacement presser sur le levier en correspon-
dance avec OPEN; pour placer les piles suivre les indica-
tions graphiques qui apparaissent en relief sur le fond.
ALIMENTATION
ACCESSOIRE D’ORIGINE EN OPTION
ADS 0904
Adaptateur pour alimentation
de réseau.
Vdc = 9V; Imax = 400 mA
01
PET
02
PE
03
PVC
05
PP
06
PS
07
O
INTRODUCTION

19
LES INDICATIONS SUR LE CLAVIER
Les lettres à gauche: Indiquent la note fondamentale pour le nom de l’accord.
Les chiffres à droite: Indiquent les touches qu’il faut jouer pour exécuter la mélodie avec les partitions musicales
simplifiées BONTEMPI.
Les sections du DJ STYLE: Dans la partie gauche du clavier, il y a DJ CHORD pour jouer la tonalité, dans la par-
tie centrale il y a le DJ LOOP pour jouer les tours harmoniques et dans la partie droite il y a le DJ EFFECTS pour obte-
nir les effets caractéristiques du DJ STYLE.
[10]EASY PLAY -Selon le style courant sélectionne le
timbre de la main droite, la vitesse optimale d’exécu-
tion du style et met le clavier en condition de FREE
CHORD. Dans les 32 chansons, sélectionne le son et
le temps assortis aux morceaux de musique.
[11]SOUNDS -Pour sélectionner le son sur le clavier.
[12] DJ STYLE -Habilite le rythme DJ STYLE avec les
“tours harmoniques” et les effets dans la partie droite
du clavier.
[13]Clavier numérique 0-9 -Pour la sélection de fon-
ctions, de styles rythmiques, de chansons et de sons.
[14]SYSTEM 5 -Pour entrer dans la modalité d’apprentis-
sage sur 5 niveaux.
[15] DEMO -Pour écouter le morceau de démonstration.
[1] ON/OFF - Pour allumer ou éteindre l’instrument.
[2] SEQUENCER REC pour enregistrer ce que l’on joue
et PLAY pour réécouter l’enregistrement.
[3] VOLUME + / – -Pour la sélection du volume général.
[4] TRANSPOSER +/– -Permet de changer la tonalité
des notes.
[5] TEMPO +/– -Pour le réglage de la vitesse d’exécution
du style, des chansons ou du Métronome.
[6] START/STOP -Pour faire partir ou arrêter un style
rythmique ou une chanson.
[7] STYLES -Pour sélectionner les styles rythmiques.
[8] METRONOME -Pour enclencher ou désactiver le
temps battu par le métronome
[9] SONGS -Pour sélectionner les chansons préenregistrées
TABLEAU DE COMMANDE
PRISES
INPUT DC 9 V -Permet d’alimenter l’instrument grâce à un
adaptateur AC/DC.
INTRODUCTION
B409
B499

20
MISE EN MARCHE ET ARRET
L’instrument s’allume en déplaçant l’interrupteur sur on et s’éteint en le
mettant sur off. A la mise en marche le clavier est prédisposé pour fonction-
ner avec le son Stage Piano, le rythme Pop et la chanson La Cucaracha.
Note - Pour éviter une consommation inutile des batteries, le son d’une sonnette
(dispositif “Save Power Alarm”) signale que le clavier n’a pas été utilisé depuis plus de deux minutes.
DEMO - Morceau de démonstration
En pressant le bouton demo, un morceau qui met en évidence les caractéri-
stiques musicales du clavier est en voie d’exécution.
Pour interrompre l’exécution, appuyer de nouveau sur le bouton demo.
LES VOLUMES
Pour régler le volume général de l’instrument, appuyer sur les boutons
volume + (pour augmenter) ou volume – (pour diminuer). En maintenant
le bouton appuyé, la variation devient continue. Pour retourner au volume
standard, appuyer sur les deux boutons ensemble volume + et volume –.
LES CHANSONS
L’instrument contient 32 morceaux de musique du répertoire classique.
Pour sélectionner les morceaux , appuyer sur la touche SONGS (voyant allumé) et taper un numéro à deux chiffres selon
la liste SONGS (ex. 03 Jingle Bells, taper sur le clavier numérique le 0, et puis le 3) et appuyer sur la touche start/stop
pour faire partir le morceau ou pour arrêter l’exécution.
Lorsqu’on tape le premier chiffre, le voyant clignote jusqu’à ce que la sélection soit terminée.
Lorsqu’un morceau est en exécution, on peut écouter d’autres chansons de façon immédiate en tapant le numéro qui cor-
respond au morceau choisi.
La commande Easy Play introduit sur le clavier le son de la mélodie correspondant à la chanson et le TEMPO standard.
LES SONS
Le clavier comprend 100 sons subdivisés en 6
familles (ex. 031-050 ORGAN).
On peut les sélectionner lorsque la touche SOUNDS
est allumée et en composant un numéro à trois
chiffres de 001 à 100 de la liste SOUNDS qui se
trouve dans la partie finale du Mode d’emploi.
Exemple: pour le son Full Organ composer le
numéro 034 (d’abord le 0, puis le 3et enfin le 4sur
le clavier numérique).
UTILISATION DE L’INSTRUMENT
INSTRUCTIONS POUR L’UTILISATION
(dispositif “Save Power Alarm”) signale que le clavier n’a pas été utilisé depuis plus de deux minutes.
Lorsqu’on tape le premier chiffre, le voyant clignote jusqu’à ce que la sélection soit terminée.
Lorsqu’on tape le premier chiffre, le voyant clignote jusqu’à ce que la sélection soit terminée.
Lorsqu’on tape le premier chiffre, le voyant clignote jusqu’à ce que la sélection soit terminée.
This manual suits for next models
1
Table of contents
Languages:
Other Bontempi Electronic Keyboard manuals
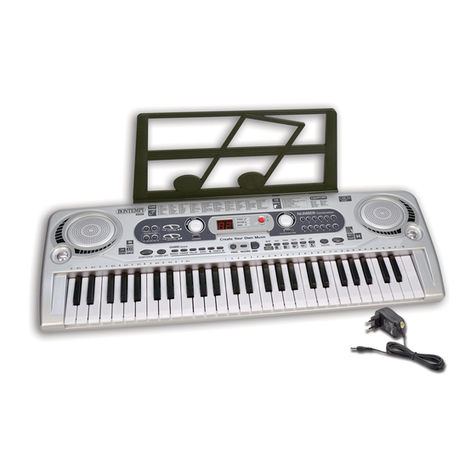
Bontempi
Bontempi 16 5415 User manual
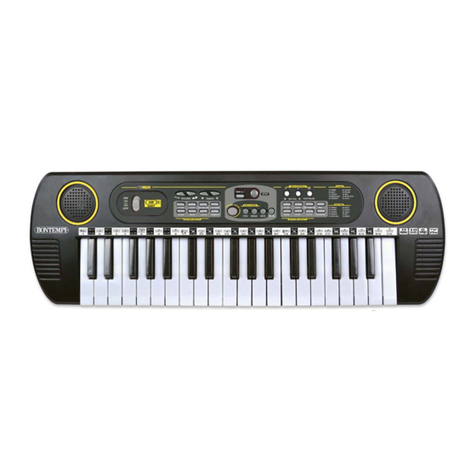
Bontempi
Bontempi Genius 15 3780 User manual

Bontempi
Bontempi MUSIC ACADEMY 16 6125 User manual
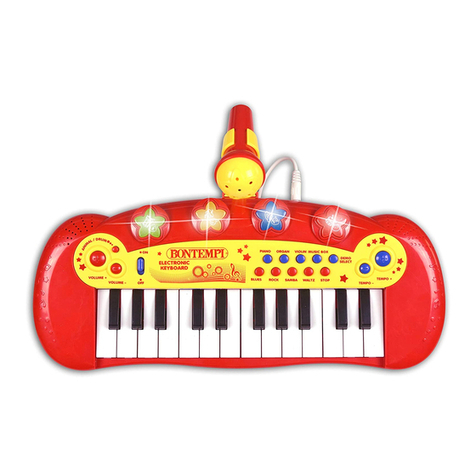
Bontempi
Bontempi Toy Band Star 12 2931 User manual
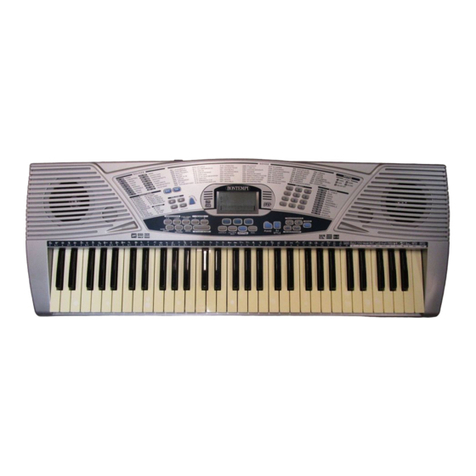
Bontempi
Bontempi PM747 Installation guide
Bontempi
Bontempi PM 695 User manual

Bontempi
Bontempi iMusic 15 3790 User manual
Bontempi
Bontempi Music ACADEMY School User manual
Bontempi
Bontempi Toy Band Star 12 3765 User manual
Bontempi
Bontempi MUSIC ACADEMY Genius 12 3210 User manual
