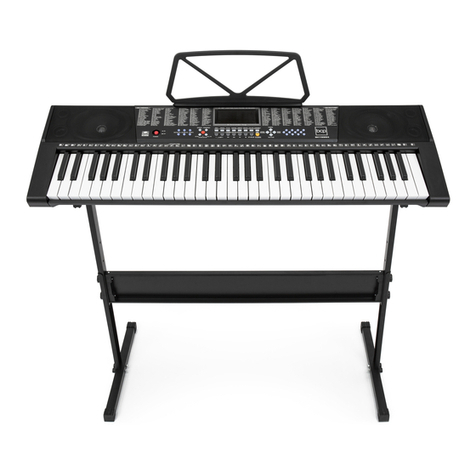
Bontempi PM747 Installation guide

Quick Manual to use Bontempi keyboards w ith the Computer
Bontempi keyboards equipped with Midi or Usb-Midi socket can be connected to a
Personal Computer. The keyboard sends and receives information (notes, volumes, etc…)
using the MIDI communication protocol.
They can be used with any program to play or record Midi Files (Windows Media Player,
Van Basco, Cakewalk, Cubase, Logic, Jazz+ + , etc.)
Bontempi makes this manual available to its customers who choose to use Windows Media
Player and Jazz+ + to make a number of important functions simple and intuitive:
1) How to connect a Bontempi Keyboard to a computer
2) How to reproduce a Midi file with Windows Media Player
3) Installation of Jazz+ +
4) How to record, save and listen to a sequence of notes recorded with Jazz+ +

1) CONNECTI ON OF THE KEYBOARD TO A PERSONAL COMPUTER
What is MI DI ?
The acronym MIDI is the abbreviation of "Musical I nstrument Digital I nterface" and represents a
standard for the transmission of data via cables between an electronic musical instrument and a
personal computer or another electronic musical instrument.
The General Midi ( GM) system
This keyboard adopts the General Midi (GM) system, a standard which allows users to receive or
send data in MIDI format to a per¬ sonal computer or to another keyboard without compatibility
problems between musical instruments of different brands. The PM747 keyboard is equipped with
a USB-MI DI plug for connection to the personal computer. The connection takes place using the
cable supplied as shown in the figure:
Minimum system requirements
Personal computer with Pentium 3 800Mhz processor equipped with USB plug.Windows XP or later
operating system.
Procedure for connection to the computer - Windows XP
Prior to connecting the keyboard, make sure that the computer is switched on and the keyboard
switched off. Carry out the connection with the cable supplied. Switch on the instrument. After a
few seconds, a series of messages will appear on the computer:
At this point, the keyboard is correctly connected and recognised by the computer. Note:The
recognition of the keyboard by the computer takes places during the first connection; in
subsequent connection no mes¬ sage will appear. Only the characteristic sound produced by the
computer to indicate the insertion of a USB device will be heard.. Attention:
• If the keyboard is not recognised by the computer and a USB device not recognised error
message appears, repeat the operation. If the problem persists, check that the minimum
requirements are respected.

Procedure for connection to the computer - Windows VI STA
To connect the keyboard to PC with Windows Vista it is necessary to install a driver. The
installation program is BontempiKeyboardSetup.exe available in the “download area” of website
www.bontempi.com. After the download of the installation program please:
•Launch the programm BontempiKeyboardSetup.exe. This image will appear:
•Push the botton “I nstall Driver”. This new image will appear:
•Push OK. The installation is completed: please disconnect and reconnect the keyboard.

2) Reproduction of a Midi file using Windows Media Player
“Windows Media Player” is included in the Windows packet. I t is a program that can read
Midi files and send the notes to the Bontempi keyboard connected to the computer.
To perform a MIDI file using “Windows Media Player” follow the operations below:
• Open the “Windows Media
Player” program
• In the most recent versions
the program does not have the
“Open file” option. I n this case,
press CTRL M (Control M).This
control shows a classical menu
in which the open file option is
displayed.
• Select File | Open | filename.mid where “filename.mid can be any MIDI file (as for
example the file C:\ WI NDOWS\ Media\ fluorish.mid, present in Windows XP can be
selected) and send it to be executed.
• To listen to the piece, press the Play button
situated in the lower centre; Press the Stop button to stop it.
• The keyboard will play the selected sequence.
Usable Programmes
In addition to WI NDOWS Media Player, many other computer programmes are
commercially available. They offer the possibility to expand the range of functions of the
keyboard. Some allow the registration of pieces in Midi format. In other cases, it is
possible to register on the computer what is being played on the keyboard. Later, the
piece can be replayed, and its musical score can be visualised or printed. It is also possible
to correct errors, change sounds, etc. Many of these software programmes are also
available on the I nternet in Demo or Shareware format.
How to find the Midi Files
On the I nternet or in music stores, countless Midi Files can be found for modern or
classical music of all kinds. They can be played with the keyboard, or used as an
orchestral base to play a melody. Note: The Midi Files available on the I nternet have
sometimes been made for specific instruments. Some are Midi devises that do not respect
the MI DI standard, others have their own specific additional functions. In such cases, it is
possible that the musical piece will not be played with the same sounds and effects that
are supposed to be used. In any event, the keyboard respects the GM standard, and has
many commonly used functions that can be seen on the map on the instrument’s manual.

Attention:
• I f the keyboard or the computer freeze, switch off both devices and then switch on the
keyboard again.
• Correct operation cannot be guaranteed if the instrument is switched off or the USB
cable disconnected while a MIDI application is operational.
• Leave at least 10 seconds between switching off and switching on the keyboard and
between the disconnection and connection of the USB cable.
• Make sure that the Midi application is closed prior to switching off the instrument of
disconnecting the USB cable. I f this should happen, close the Midi application, switch off
instrument then switch it back on again and restart the Midi application.
Important note: in Vista the “Midi Mapper” does not exist. I n Windows XP “Midi mapper”
allows to address Midi data to the Bontempi keyboard or to an other midi destination. For
this OS please to use Jazz+ + program.

3) How to install JAZZ+ +
Jazz+ + is a Midi sequencer, a program able to record Midi events (notes, volumes etc.)
played with the keyboard reproducing them identically.
Installation:
1) download the programm from: www.bontempi.com download section.
Two versions are available:
•a “zip” version that needs the Winzip program or Windows XP (“.zip” extension)
folder compressor
•a self-extraction version (“.exe” extension)
2) Decompressing one of the two files a folder called "JAZZ" is created
3) Start the installation program “SETUP.EXE” and follow the simple istructions.
4) How to record, play and listen a sequence recorded with Jazz+ +
After installation of Jazz+ + available on internet on www.bontempi.com it is possible to
record a sequence in a very friendly way following the instructions shown below
Connect the keyboard to the
Computer and turn it on
Open Jazz+ + programm
Only for the first execution of
JAZZ+ + select “USB Speakers” in
“I nput MIDI device” option
Only for the first execution of
JAZZ+ + select “USB Speakers” in
“I nput MIDI device” option

Only for the first execution of
JAZZ+ + select “GM” in “Synth type”
option
Select File| New
With the left mouse button, press the
field indicated by the red arrow
A – Write the name of the track on
which to record the notes
B – With the mouse “click” on “Force
channel number onto all events on
track” box so it remains white
C – Press OK

A – Select “Settings | Midi Thru” and
open the window "Midi Thru Setting"
[ fig. A7]
B – With the mouse "click" on the
"Software MI DI Thru" box so it
remains white
C – Press OK
A – With the mouse press button A to
select track where to record
B – Press the record button with the
red circle (record)
C – Play some notes on the keyboard,
start a style or a song – the program
records the notes on the PC memory.
A – To stop the recording press the
button with the red circle again
(Record)
B – To re-listen to the recorded music
press Play indicated by the letter B
A – To save the recorded sequence
select :
File | Save As
B – Write the file name you want to
save
C – Press OK
The file is saved and is available to be
re-listened to or changed

Midi Source and Midi destination.
Selecting the menu Settings | Midi Device a number of windows called "I nput MIDI device"
and "Output MIDI device" are activated sequentially. To connect the Bontempi keyboard
select "USB Speakers" or "Bontempi Midi USB Device", where it appears.
Note:
"Bontempi Midi USB Device" appears only when a Bontempi driver is installed on the PC.
Otherwise "USB Speaker" appears.

How to edit notes and other controls
using “Piano roll” w indow
Click with the right mouse button on a track of the main page of the program (area with
discontinuous black lines) and a window appears (piano roll) displaying the notes and their
length. On the left part of this window the image of a piano keyboard makes it
immediately clear which the notes of the song are.
20 buttons are present in the "piano roll" window (described below from the left to the
right) that can considerably modify the content of the song recorded.
1) Buttons to change the operation of the left mouse button:
* select an area (drawing a rectangle)
* change length (pressing the desired location of the note with the left mouse button)
* show dialog box to edit an existing event or to create a new one
* cut/ paste (great for fast note-by-note editing)

2) Buttons to set the most common snap values (pasted events will be placed at nearest
'snap' value, similar to a 'grid' in a graphics paint system) in “quantize” function (see point
3)
•set snap to 1/ 8 note
•set snap to 1/ 12 note
•set snap to 1/ 16 note
•set snap to 1/ 24 note
3) Buttons to manipulate events:
•Cut
•Delete
•Quantize (shortens or lengthens the note on the basis of resolution required)
•Shift left
•Shift right
•Enable multi track mode (to edit events of other tracks)
4) Buttons for other operations:
•Undo
•Redo
•Panic (MIDI reset) Turn off the notes using Midi
•Help
Other Bontempi Electronic Keyboard manuals

Bontempi
Bontempi iMusic 15 3790 User manual
Bontempi
Bontempi Toy Band Star 12 2931 User manual
Bontempi
Bontempi PM 695 User manual

Bontempi
Bontempi MUSIC ACADEMY 16 6125 User manual
Bontempi
Bontempi 16 5415 User manual
Bontempi
Bontempi Music ACADEMY School User manual
Bontempi
Bontempi Toy Band Star 12 3765 User manual
Bontempi
Bontempi Genius 15 3780 User manual
Bontempi
Bontempi MUSIC METHOD System 5 B 409 User manual
Bontempi
Bontempi MUSIC ACADEMY Genius 12 3210 User manual
