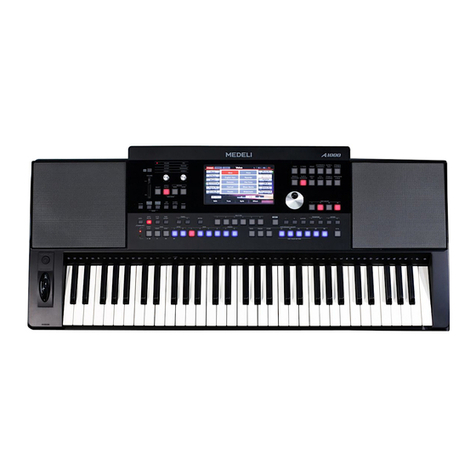
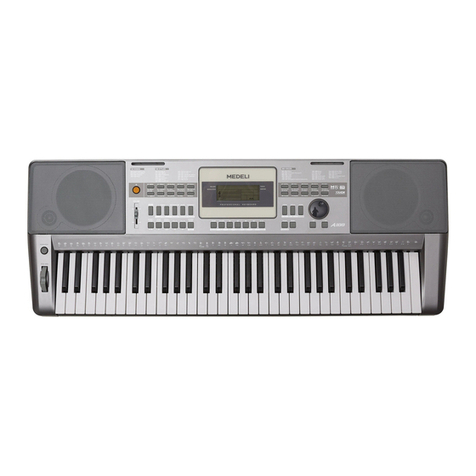
Medeli A1000 User manual

Electronic
Keyboard
Quick Start Guide
1212
0
5
25
75
95
100
aw_A1000_QuickStartGuide_G08_130506_PA
201356 17:27:30

INFORMATION FOR YOUR SAFETY!
THE FCC REGULATION WARNING (for USA)
This equipment has been tested and found to comply with
the limits for a Class B digital device, pursuant to Part 15 of
the FCC Rules.
These limits are designed to provide reasonable protection
against harmful interference in a residential installation. This
equipment generates, uses, and can radiate radio frequency
energy and, if not installed and used in accordance with the
instructions, may cause harmful interference to radio
communications. However, there is no guarantee that
interference will not occur in a particular installation.
If this equipment does cause harmful interference to radio or
television reception, which can be determined by turning the
equipment off and on, the user is encouraged to try to
correct the interference by one or more of the following
measures:
Reorient or relocate the receiving antenna.
Increase the separation between the equipment and
receiver.
Connect the equipment into an outlet on a circuit
different from that to which the receiver is connected.
Consult the dealer or an experienced radio/TV technician
for help.
Unauthorized changes or modification to this system can
void the user's authority to operate this equipment.
CAUTION
The normal function of the product may be disturbed by
Strong Electro Magnetic Interference. If so, simply reset
the product to resume normal operation by following the
owner's manual. In case the function could not resume,
please use the product in other location.
PRECAUTIONS
PLEASE READ CAREFULLY BEFORE PROCEEDING
Please keep this manual in a safe place for future reference.
Power Supply
Please connect the designated AC adaptor to an AC outlet
of the correct voltage.
Do not connect it to an AC outlet of voltage other than that
for which your instrument is intended.
Unplug the AC power adaptor when not using the
instrument, or during electrical storms.
Connections
Before connecting the instrument to other devices, turn off
the power to all units. This will help prevent malfunction and
/ or damage to other devices.
Location
Do not expose the instrument to the following conditions to
avoid deformation, discoloration, or more serious damage:
Direct sunlight
Extreme temperature or humidity
Excessive dusty or dirty location
Strong vibrations or shocks
Close to magnetic fields
Interference with other electrical devices
Radios and televisions placed nearby may experience
reception interference. Operate this unit at a suitable
distance from radios and televisions.
Cleaning
Clean only with a soft, dry cloth.
Do not use paint thinners, solvents, cleaning fluids, or
chemical-impregnated wiping cloths.
Handling
Do not apply excessive force to the switches or controls.
Do not let paper, metallic, or other objects into the
instrument. If this happens, unplug the AC adaptor from the
wall outlet. Then have the instrument inspected by qualified
service personnel.
Disconnect all cables before moving the instrument.
2
Regarding the display
This display is a precision device created
using extremely high technology, and careful attention
has been paid to its product quality. Although you may
notice some of the issues listed below, please be aware
that these are due to the characteristics of LCD displays,
and are not malfunctions.
• There may be pixels in the display that are always dark
(unlit) or always bright (lit).
• Depending on the displayed content, the brightness of
the display may appear uneven.
• Depending on the displayed content, horizontal stripes
of shading may be visible.
• Depending on the displayed content, flickering or moire
patterns may be visible.
instrument
0
5
25
75
95
100
aw_A1000_QuickStartGuide_G08_130506_PA
201356 17:27:30

Contents
Introduction
Panel & Display Description
Front Panel..........................................................4
Rear Panel..........................................................5
Main Display........................................................6
Setup
Power Supply......................................................7
Setting a Music Stand.........................................7
Connecting a Footswitch.....................................7
Connecting a Volume Pedal................................7
Connections
Connecting a pair of Headphones.......................8
Connecting an Audio Equipment.........................8
Connecting an MP3/CD Player...........................8
Connecting a Computer......................................9
Connecting external MIDI devices......................9
Quick Start
Basic Operations
Selection Operation...........................................10
Soft Keyboard Operation...................................10
Setting Operation..............................................11
Playing the Demos.......................................12
Playing Voices..............................................13
Playing with a Style......................................14
Playing Songs...............................................15
Recording Your Performance to MIDI......16
Recording Your Performance as Audio...17
Using a USB Storage Device.....................18
3
Appendices
Troubleshooting
Specification..................................................19
Appendices
Voice List...........................................................20
Style List............................................................26
Song List...........................................................29
Demo List..........................................................29
Chord List..........................................................30
MIDI Implementation List..................................31
............................................19
0
5
25
75
95
100
aw_A1000_QuickStartGuide_G08_130506_PA
201356 17:27:30

1212
Panel & Display Description
Front Panel
4
1. POWER ON/OFF BUTTON
Turn the power on or off.
2. MASTER VOLUME SLIDER
Adjust the master volume.
3. SELECT BUTTON
Select the four effect combinations
of GROUP KNOBS sequentially.
4. GROUP KNOBS
Effect1: Adjust volume, pan of the
current part(R1/R2/R3/L).
Effect2: Adjust attack time, release
time of the current part
(R1/R2/R3/L).
Effect3: Adjust the filter cutoff
frequency, the amount of
resonance applied at the
filter cutoff frequency of the
current part(R1/R2/R3/L).
Effect4: The knob effect can be
assigned separately. See
“Controller”.
5. EFFECT ON/OFF BUTTON
Turn the special effect such as
arpeggio, harmony, or chopper on
or off.
6. RECORD SONG BUTTON
Enter the RECORD SONG interface.
You’ll record your performace in SMF
format.
7. RECORD AUDIO BUTTON
Enter the audio recording is in ready
state. You’ll record your performace in
WAV format.
8. SCORE BUTTON
Show the staff of the current song
(SMF).
9. SONG SELECT BUTTON
Enter the SONG SELECT interface.
10. STYLE SELECT BUTTON
Enter the STYLE SELECT interface.
11. USB DEVICE BUTTON
Enter the USB DEVICE interface.
12. GLOBAL SETTING BUTTON
Enter the GLOBAL SETTING
interface.
13. MIXER BUTTON
Enter the MIXER interface.
14. A.B.C. BUTTON
Turn the A.B.C. MODE on or off.
15. AUTO FILL IN BUTTON
Turn the AUTO FILL IN on or off.
16. O.T.S. LINK BUTTON
Turn the O.T.S. LINK on or off. If it
is turned on, the One Touch Settings
can be changed when you select
different style.
17. FADE IN/OUT BUTTON
Turn the FADE IN or OUT on or off.
18. TEMPO +, TEMPO – BUTTONS
Adjust the current tempo.
1
2
3
4
567
8 9 10 11 12 13
14 15 16 17 19
20 21 22 23 24
18
25 26
27
19. METRO. BUTTON
Turn the Metronome on or off.
SONG CONTROL
20. PLAY/STOP BUTTON
Start playing the song or stop
the song playback.
21. PAUSE BUTTON
Pause the song playback.
22. RW BUTTON
Rewind the song.
23. FF BUTTON
Fast forward the song.
STYLE CONTROL
20. START/STOP BUTTON
Start or stop playing the style.
21. SYNC. START BUTTON
Turn the SYNC. START on or
off.
22. SYNC. STOP BUTTON
Turn the SYNC. STOP on on or
off.
23. INTRO 1 BUTTON
Play the intro 1.
24. INTRO 2 BUTTON
Play the intro 2.
25. MAIN A, B, C, D BUTTONS
Play the main part.
26. ENDING 1, 2 BUTTONS
Play the ending.
0
5
25
75
95
100
aw_A1000_QuickStartGuide_G08_130506_PA
201356 17:27:31

28
29
30
31
32
33
34 35
36 37 38
39 40
Panel & Display Description
27. MULTI PAD BUTTONS
Add spice to your performance
with special dynamic phrases
by pressing them.
28. VOICE BUTTONS
Enter the VOICE SELECT
interface. You’ll select a voice
category.
29. DATA DIAL
Change the value of current
selection.
30. PART ON/OFF BUTTONS
Turn LEFT, RIGHT1, RIGHT2,
RIGHT3 on or off individually.
31. EXIT BUTTON
Exit the current interface and
return to the previous display.
32. +, - BUTTONS
Increase and decrease the
value by 1.
33. SUSTAIN BUTTON
Turn the sustain effect on or
off.
34. TRANSPOSE+, TRANSPOSE-
BUTTONS
Adjust the TRANSPOSE value.
35. OCTAVE+, OCTAVE-
BUTTONS
Adjust the OCTAVE value.
36. BANK BUTTON
Select a performance memory
bank.
37. FREEZE BUTTON
Turn the FREEZE function on or
off.
38. STORE BUTTON
Save the panel setups to one of the
performance memories.
39. M1-M6 BUTTONS
PERFORMANCE MEMROY:
Recall the panel setups from one of
the performance memories.
O.T.S (M1-M4):
Call up all the settings (voice,
effect, etc) that match the current
style.
40. O.T.S. BUTTON
Switch to the O.T.S. function.
41. MODULATION BUTTON
Apply a vibrato effect.
42. PITCH BEND
Bend note up and down.
43. PHONES
Connect the headphones to the
keyboard.
44. USB PORT
Connect the USB storage device.
Rear Panel
1. USB JACK
Connect to a computer.
2. MIDI IN/OUT/THRU JACKS
Connect other products equipped
with a MIDI interface.
3. SUSTAIN JACK
Connect a sustain pedal.
4. VOLUME JACK
Connect a volume pedal.
5. AUX. OUT JACK
Connect to your amplifier/audio.
6. AUX. IN JACK
Connect any external audio source,
such as an MP3 or CD player.
7. DC 12V
Connect DC 12V power adaptor.
(Optional)
134567
2
43
42
41
44
5
0
5
25
75
95
100
aw_A1000_QuickStartGuide_G08_130506_PA
201356 17:27:33

1. Voice
Display voice name and octave data of each part.
(Right1, Right2, Right3, Left)
How to select the voice for each part?
For example:
1. Pressing anywhere in the R1 display area makes the
R1 part selected.
2. Pressing again will call up the Voice Selection display.
Now, you can select the voice for R1.
2. Style&Song
Display the currently selected style name, for example
“8Beat Ballad”. Pressing this name will call up the Style
Selection.
Pressing song tab will display the currently selected song
name, for example “Brahms Waltz”. Pressing this name
will call up the Song Selection display.
3. Performance
Display the currently selected performance name.
Pressing this name will call up the Performance
Selection display.
Main Display
12
3
4
5
6
CB
A
4. Chord
Display the chord name and related information.
A. Chord Name
B. Chord Mode
C. Split
5. Shortcut to setup pages
Pressing “Split Point” will call up the Split Setting quickly.
Pressing “Effect” will call up the Effect Setting quickly.
Pressing “Controllers” will call up the Controllers display
quickly.
6. Others
The amount of transposition in semitone units.
Current tempo.
Current playback position.
Current time signature.
Panel & Display Description
6
0
5
25
75
95
100
aw_A1000_QuickStartGuide_G08_130506_PA
201356 17:27:33

Setup
This section contains information about setting up your instrument and preparing to play. Please go through this section carefully

before turning the power on.
1. Move the MASTER VOLUME slider downwards to set the minimum
volume level.
2. Connect the AC/DC adaptor to the power supply jack.
3. Plug the AC/DC adaptor into an AC outlet.
4. Turn the power ON. The LCD on the panel will light up.
Note:
When the keyboard is not in use or in the time of thunderstorm, please
disconnect the power for safety purpose.
Power Supply
Setting a Music Stand
The instrument is supplied with a music stand that can be attached to

the instrument by inserting it into the slot at the rear of the panel.
Connecting a Footswitch
The sustain function lets you produce a natural sustain as you play by
pressing a footswitch. Plug an optional footswitch into this jack and use
it to switch sustain on or off.
Connecting a Volume Pedal
An optional volume control can be plugged into the volume jack for
adjusting the volume of sound.
7
1212
0
5
25
75
95
100
aw_A1000_QuickStartGuide_G08_130506_PA
201356 17:27:34

Connections
Connecting a pair of Headphones
When an optional pair of stereo headphones is connected with the
headphones jack, the sound from speakers will switch off automatically
resulting in only the sound from headphone to be heard for private
practice or late-night playing.
Note:
Do not listen with the headphones at high volume for long periods of
time. Doing so may cause hearing loss.
Connecting an Audio Equipment
Connect the rear-panel AUX.OUT jack to amplified speakers, amplifiers
or domestic hi-fi units for external amplification.
Note:
To avoid damaging the speakers, please ensure that the volume has
been set to the minimum level before connecting the power and other
devices.
Connecting an MP3/CD Player
Connect the audio output of an MP3/CD player or other audio source
to the stereo AUX. IN jack on the rear panel.
The input signal is mixed with the instrument signal, allowing you to
play along.
8
1212
0
5
25
75
95
100
aw_A1000_QuickStartGuide_G08_130506_PA
201356 17:27:35

Connections
Connecting a Computer
You can simply connect the computer with USB cable via the USB
connector.
You can use a commercially available MIDI interface to connect the
keyboard to the computer via the MIDI connectors.
Note:
The default MIDI I/O device is USB, So please first set this device as
MIDI, and then connect to the computer. (The setting operation see
Global Setting-MIDI IN/OUT.)
After the driver is installed and initialization is finished, you can choose
USB MIDI Keyboard in the device menu of the software to transfer
MIDI data.
Note:
Do not select USB MIDI Keyboard in both of input and output settings
together, otherwise the sound overlaps.
Connecting external MIDI devices
You can use standard MIDI cables to connect external MIDI devices.
MIDI IN: Receive MIDI message from an external MIDI device.
MIDI OUT: Transmits MIDI message generated by the instrument.
MIDI THRU: Simply relays the MIDI message received at MIDI IN.
Note:
To avoid damages, please be sure to turn off the power switches
before you disconnect the related devices from the keyboard.
The default MIDI I/O device is USB, So please first set this device as
MIDI, and then connect to the external MIDI device. (The setting
operation see Global Setting-MIDI IN/OUT.)
MIDI OUTMIDI IN
MIDI OUT MIDI IN
9
1212
0
5
25
75
95
100
aw_A1000_QuickStartGuide_G08_130506_PA
201356 17:27:36

Selection Operation
10
There are some selection interfaces: voice selection, style selection,
song selection, performance selection, etc.
How to select the file in these selection interfaces?
For example:
1. Location of data
Preset: Location where pre-programmed (preset) data is stored.
User: Location where recorded or edited data is saved.
USB: Location where data on USB storage device is saved.
2. Category of data
The files are divided into categories according to their types. The
categorization will be selected by pressing this categorization name
on LCD. For example: The voice file (Grand Piano) is in the Piano
categorization. Pressing “Piano” will select the Piano
categorization.
3. Flip and File Browsing
If there are too many files in one category, the files will be on
paging show. You can select your desired page by pressing the
cursor button on LCD.
4. File Selecting
Select the desired file by pressing the file name on the current page.
1
22 4
3
Using the Soft Keyboard
When you name or rename a file or a folder, you should call up soft
keyboard display.
1. Deleting characters:
Press the delete button.
2. Moving the cursor:
Press the right or left cursor button.
3. Entering capital characters:
Press the CAPS button, the capital characters will be displayed.
4. Entering space:
Press the space button.
5. Entering numbers or marks:
Press the numbers button, the numbers and marks will be
displayed.
Enter the number or mark by pressing its button.
Press the OK button to actually enter the new name and return to
the previous display.
Press the CANCEL button to canel operations and return to the
previous display.
Previous Page
Next Page
Current Page
Page Num
3
54
1
2
Basic Operations
0
5
25
75
95
100
aw_A1000_QuickStartGuide_G08_130506_PB
201356 17:42:43

Basic Operations
Setting Operation
On
11
Normal
100
There are three types on parameter setting.
1. ON/OFF as in the picture: )
Press this “ON” button to switch the keyboard touch response
ON or OFF.
2. LIST (as in the picture: Curve )
Press this “Normal” button, all available parameters would be
listed.
You can choose any one of 3 ways below:
1. Press your desired parameter on LCD to select it.
2. Use the DATA DIAL to select your desired parameter.
3. Press the [+] or [-] button to select your desired parameter.
The selected parameter will be highlighted.
3. DATA (as in the picture: Flat velocity )
Press this “100” button to display a pop-up box.
You can choose any one of 3 ways below:
1. Press the “+” or “-” button to adjust the data.
2. Use the DATA DIAL to adjust the data.
3. Press the [+] or [-] button to adjust the data.
(
0
5
25
75
95
100
aw_A1000_QuickStartGuide_G08_130506_PB
201356 17:42:43

Playing the Demos
The instrument features 2 wonderful demos. Please refer to DEMO
LIST.
Press the [SONG SELECT] and [STYLE SELECT] buttons
simultaneously to start playing the demo.
Select your desired demo
Press the Demo name on LCD or use the DATA DIAL, the [+] or the
[-] button to select your desired demo.
Pause the demo
Press the [PAUSE] button to pause the demo playing or continue
playing the demo.
Stop the demo
Press the [PLAY/STOP] button to stop the demo playback.
Adjust the tempo of the demo playback
Press the [TEMPO+] or [TEMPO-] button to adjust the tempo of the
playback demo.
Exit the demo
Press the [EXIT] button to stop the demo playback and return to the
main display.
12
0
5
25
75
95
100
aw_A1000_QuickStartGuide_G08_130506_PB
201356 17:42:43

Playing Voices
The instrument features exceptionally realistic 672 voices(Including 256 GM2 instrument voices and 15 drum kits), including
piano, guitar, strings, brass and many more. Please refer to Voice List.
Turn the R1 PART on
Press the PART ON/OFF [RIGHT 1] button to turn the R1 part on.
You can play different voices simultaneously or play different voices
with the left and right hands. First, turn on the corresponding part.
Select a Voice for R1 PART
1.
Press one of the VOICE buttons to select a voice category and call
up the Voice Selection display.
Press the R1 display area on Main Display to call up the Voice
Selection display. Press one of the voice categories NAME on the
Voice Selection display.
2. Press the cursor button on LCD to select your desired voice page.
3. Press the voice NAME to select the desired voice on the current
page display.
You can also select the user voice, details see Voice.
There are 2 methods to select the voice category.
Play the Voice Demo
Press the “Voice Demo” on the Voice Selection display to start the
demo for the selected voice. Press the “Voice Demo”again to stop it.
Note:
If there isn't voice demo for the selected voice, “Voice Demo” will not
be displayed.
Play the keyboard and listen to the selected voice.
13
0
5
25
75
95
100
aw_A1000_QuickStartGuide_G08_130506_PB
201356 17:42:44

Playing with a Style
The instrument features 240 styles in a variety of different musical genres. Try selecting some of the different styles
(Refer to Style List) and play with the auto accompaniment.
Select a Style
1.
Press the [STYLE SELECT] button.
Press STYLE Name on the Main Display.
2. Press one of the style categories NAME on the Style Selection
display to select the style category.
3. Press the cursor button on LCD to select your desired style page.
4. Press the style NAME to select the desired style on the current
page display.
You can also select the user style, details see Style.
There are 2 methods to call up the Style Selection display.
Start a Style
1. Press the [A.B.C.] button, the specified left-hand section of the
keyboard becomes the “Auto Accompaniment” section, and chords
played in this section are automatically detected and used as a
basis for fully automatic accompaniment with the selected style.
2. Press the [SYNC START] button to set Auto Accompaniment to
standby—letting you simultaneously start the accompaniment as
soon as you start playing.
3. As soon as you play a chord with your left hand, the
accompaniment starts.
4. Press the [START/STOP] button to stop the accompaniment.
14
0
5
25
75
95
100
aw_A1000_QuickStartGuide_G08_130506_PB
201356 17:42:44

Playing Songs
The instrument features 90 songs.
Select a Song
1.
Press the [SONG SELECT] button.
Press Song Name on the Main Display.
2. Press the song NAME to select the desired song on the current
page display.
You can also select the user song, details see Song.
There are 2 methods to call up the Song Selection display.
Playback a Song
1.
The LED of [PLAY/STOP] will light up.
2. Press the [PAUSE] button to pause the playing song, Press the
[PAUSE] button again to continue it.
3. Press the [PLAY/STOP] button to stop the playing song.
Press the [PLAY/STOP] button to start playback the selected song.
15
0
5
25
75
95
100
aw_A1000_QuickStartGuide_G08_130506_PB
201356 17:42:44

Record Your Performance to MIDI
1. Press the [RECORD SONG] and [EFFECT ON/OFF] buttons
simultaneously to call up the Recording Display. A blank song
(“New Song”) is called up for recording. The LED of [RECORD
SONG] is flashing that means it is in the recording standby mode.
2. Press the [PLAY/STOP] button or play the keyboard to start
recording. The LED of [RECORD SONG] will light up.
3. Press the “STOP” button on the Recording Display or press the
[RECORD SONG] button to stop recording and call up soft
keyboard display. The LED of [RECORD SONG] will be turned off.
4. Enter the new name and press “OK” to save the new user song.
5. Press the [PLAY/STOP] button to playback the recorded user song.
If you want to record R1, R2, R3, L simultaneously or record melody
and accompaniment simultaneously, you may refer to
MIDI RECORDING for details.
16
0
5
25
75
95
100
aw_A1000_QuickStartGuide_G08_130506_PB
201356 17:42:44

Recording Your Performance as Audio
You can record your performance as CD quality audio file to a USB
device.
1. Please connect your USB storage device drive to the keyboard.
Press the [RECORD AUDIO] button to start recording your
performance. The LED of [RECORD AUDIO] will light up.
3. Press the [RECORD AUDIO] button again to stop recording your
performance and call up soft keyboard display. The LED of
[RECORD AUDIO] will be turned off.
3. Enter the name and press “OK” to save the audio file you just
recorded.
4. Press the [PLAY/STOP] button to play the recorded audio song.
For details see Audio Recording.
2.
17
0
5
25
75
95
100
aw_A1000_QuickStartGuide_G08_130506_PB
201356 17:42:44

Using a USB Storage Device
By connecting a USB storage device to your instrument, you can save
data you’ve created to the connected device, as well as read data from
the connected device.
Compatible USB device
Recommended Brand: KINGSTON, SANDISK, SONY, LEXAR,
TRANSCEND
Format: FAT 16/32
Capacity: 1G,2G,4G,8G,16G,32G
Using the USB device
1. Connect the USB storage device to the USB port.
2. Press the [USB DEVICE] button to display the folders and files
under the root directory of USB device.
Press the USB tab on each selection display (such as voice, style,
song, performance), enter the relevant folder directly, and save,
rename or delete the user files from USB device.
Note
If you save your files to your USB storage device in file
displays (like VOICE Selection or Song Selection), the files would be
saved into folder “PianoUser” in the root directory of your USB storage
device.
selection
18
0
5
25
75
95
100
aw_A1000_QuickStartGuide_G08_130506_PB
201356 17:42:47

Troubleshooting
Problem
The speakers produce a “pop” sound whenever the
power is turned ON or OFF.
No sound when the keyboard is played.
When using a mobile phone, noise is produced.
The auto accompaniment does not play back even Sync
is in standby condition and a key is pressed.
Certain notes sound at wrong pitch.
The Harmony function does not operate.
Possible Cause and Solution
This is normal and is no cause for alarm.
The R1/R2/R3/L voice volume (Mixer) settings could be set too
low. Make sure the voice volumes are set at appropriate levels.
Using a mobile phone in close proximity to the instrument may
produce interference. To prevent this, turn off the mobile phone or
use it further away from the instrument.
You may be trying to start accompaniment by playing a key in the
right-hand range of the keyboard. To start the accompaniment with
Sync Start, make sure to play a key in the left-hand range of the
keyboard.
Make sure that the Master Tune is set to “440.1hz” and turn off the
Scale Tune.
Harmony cannot be turned on when the Full Keyboard fingering
mode is selected. And Harmony cannot be turned on when a drum
kit is selected for the voice R1.
Specification
Keyboard
61 Keys with touch response
Display
7" TFT,800 x 480 color touch screen
Polyphony
128
Voice
672(Including 256 GM2 instrument voices and 15 drum kits)
Effect
Reverb, Chorus, Master EQ, Arpeggio, Harmony, Chopper
Style
240
Style Control
STYLE SELECT, START/STOP, SYNC STOP, SYNC
START, INTRO 1, INTRO 2, MAIN A, MAIN B, MAIN C,
MAIN D, ENDING 1, ENDING 2, A.B.C., AUTO FILL IN,
O.T.S. LINK, FADE IN/OUT
Song
90 Preset Songs
Song Control
SONG SELECT, PLAY/STOP, PAUSE, RW, FF
SCORE
Display the Music Notation
Record
MIDI Recorder and USB Audio Recorder
Demo
2
Tempo
30-280, Tap Tempo
Performance Memory
10(BANK)*6(M1-M6), FREEZE, STORE
Multi Pad
6
Other Control
MASTER VOLUME SLIDER, SELECT, 2 KNOBS, EFFECT
ON/OFF, GLOBAL SETTING, MIXER, VOICE DIRECT
BUTTONS, DATA DIAL, +, -, PART ON/OFF BUTTONS,
EXIT, SUSTAIN, TRANSPOSE+, TRANSPOSE-, OCTAVE+,
OCTAVE-, O.T.S., MODULATION, PITCH BEND, MASTER
TUNE, SCALE TUNE, METRONOME
USB Device
Save the user data (Ex: User voices, User Song, User
Memory, etc.)
Play the User Song (Format: SMF/WAV/MP3/WMA)
Connectors
DC IN, Headphones, AUX. IN, AUX. OUT, Sustain Pedal,
Volume Pedal, USB, MIDI IN, MIDI OUT, MIDI THRU, USB
PORT.
Power Supply
DC 12V
Speaker
15W+15W, 25W+25W
Dimensions
970(W)X390(D)X160(H)mm
Weight
9Kg
* All specifications and appearances are subject to change
without notice. 19
0
5
25
75
95
100
aw_A1000_QuickStartGuide_G08_130506_PB
201356 17:42:47

Voice List
No.
1
2
3
4
5
6
7
8
9
10
11
12
13
14
15
16
17
18
19
20
21
22
23
24
25
26
27
28
29
30
31
32
33
34
35
36
37
38
39
40
41
42
43
44
45
46
47
48
49
50
51
52
53
54
55
Full Name
Acoustic Grand Piano
Acoustic Grand Piano (wide)
Acoustic Grand Piano (dark)
Bright Acoustic Piano
Bright Acoustic Piano (wide)
Electric Grand Piano
Electric Grand Piano (wide)
Honky Tonk Piano
Honky Tonk Piano (wide)
Harpsichord
Harpsichord (octave mix)
Harpsichord (wide)
Acoustic Grand Piano (stereo)
Octave Grand Piano 1
Octave Grand Piano 2
Piano & Strings 1
Piano & Pad 1
Piano & Choir 1
Piano & EP 1
Piano & Vibraphone 1
Jazz Piano
Pop Piano
Rock Piano
Club Piano
Piano & Strings 2
Piano & Pad 2
Piano & Choir 2
Piano & EP 2
Piano & Vibraphone 2
Electric Grand Piano (dark)
Fusion Electric Grand Piano
Club Electric Grand Piano
Wah Electric Grand Piano
Honky Tonk Piano (dark)
Honky Tonk Piano (stereo)
Harpsichord (with key off)
Harpsichord 2
Electric Piano 1
Electric Piano 2
Detuned Electric Piano 1
Electric Piano 1 (velocity mix)
60's Electric Piano
Detuned Electric Piano 2
Electric Piano 2 (velocity mix)
EP Legend
Phase EP 1
Clavi
Pulse Clavi
Fusion Electric Piano
Club Electric Piano
Jazz Electric Piano
Phase EP 2
Tremolo EP 1
Funk EP 1
Modern EP 1
LCD Name
Grand Piano
Grand Piano/Wide
Grand Piano/Dark
Bright Piano
Bright Piano/Wide
Electric Grand
Elec.Grand/Wide
Honky Tonk
Honky Tonk/Wide
Harpsichord
Harpsichord/Octave
Harpsichord/Wide
Stereo Grand Piano
Octave Piano 1
Octave Piano 2
Piano&Strings 1
Piano&Pad 1
Piano&Choir 1
Piano&EP 1
Piano&&Vibra 1
Jazz Piano 1
Pop Piano
Rock Piano
Club Piano 1
Piano&Strings 2
Piano&Pad 2
Piano&Choir 2
Piano&EP 2
Piano&Vibra 2
Elec.Grand/Dark
Fusion Piano
Club Piano 2
Wah Piano
Honky Tonk/Dark
Honky Tonk/Stereo
Harpsichord/KeyOff
Harpsichord 2
E.Piano 1
E.Piano 2
Detuned EP 1
Velocity EP 1
60's EP
Detuned EP 2
Velocity EP 2
EP Legend
Phase EP 1
Clavi
Pulse Clavi
Fusion EP
Club EP
Jazz EP
Phase EP 2
Tremolo EP 1
Funk EP 1
Modern EP 1
Piano
E. Piano
56
57
58
59
60
61
62
63
64
65
66
67
68
69
70
71
72
73
74
75
76
77
78
79
80
81
82
83
84
85
86
87
88
89
90
91
92
93
94
95
96
97
98
99
100
101
102
103
104
105
106
107
108
109
110
111
Warm EP 1
Choir EP 1
Wah EP 1
EP & Strings 1
Tremolo EP 2
Funk EP 2
Modern EP 2
Warm EP 2
Choir EP 2
Wah EP 2
EP & Strings 2
Clavi 2
Phase Clavi
Wah Clavi
E.Clavi
Drawbar Organ
Detuned Drawbar Organ
Italian 60's Organ
Drawbar Organ 2
Percussive Organ
Detuned Percussive Organ
Percussive Organ 2
Rock Organ
Church Organ
Church Organ (octave mix)
Detuned Church Organ
Reed Organ
Soft Stereo Drawbar Organ
Mellow Drawbar Organ
Detuned Drawbar Organ 2
Bright Drawbar Organ 1
Bright Drawbar Organ 2
70's Percussive Organ
Light Click Organ 1
Light Click Organ 2
Detuned Percussive Organ 2
Stereo Rotary Organ
Rock Organ 2
Rotary Organ 1
Rotary Organ 2
Slow Rotary Organ
Church Organ 2
Detuned Church Organ 2
Church Organ 3
Puff Organ
Accordion
Accordion 2
Harmonica
Tango Accordion
Accordion 3
Chorus Accordion
Musette
Accord It Solo
Sweet Harmonica
Harmonica 2
Wah Harmonica
Warm EP 1
Choir EP 1
Wah EP 1
EP&Strings 1
Tremolo EP 2
Funk EP 2
Modern EP 2
Warm EP 2
Choir EP 2
Wah EP 2
EP&Strings 2
Clavi 2
Phase Clavi
Wah Clavi
E.Clavi
Drawbar Organ
Detuned DrawOrg
60's Organ
Drawbar Organ 2
Percussive Organ
Detuned PercOrgan
Percussive Organ 2
Rock Organ
Church Organ
ChurchOrg/Octave
Detune ChurchOrg
Reed Organ
Soft St DrawOrg
Mellow DrawOrg
Detuned DrawOrg 2
Bright DrawOrg 1
Bright DrawOrg 2
70's PercOrgan
Light Click Org 1
Light Click Org 2
Detuned PercOrg 2
Stereo RotaryOrg
Rock Organ 2
Rotary Organ 1
Rotary Organ 2
Slow Rotary Organ
Church Organ 2
Detune ChurchOrg 2
Church Organ 3
Puff Organ
Accordion
Accordion 2
Harmonica
Tango Accordion
Accordion 3
Chorus Accordion
Musette
Accord It Solo
Sweet Harmonica
Harmonica 2
Wah Harmonica
Organ
20
Accordion & Harmonica
0
5
25
75
95
100
aw_A1000_QuickStartGuide_G08_130506_PC
201356 17:57:00
Other manuals for A1000
1
Table of contents
Other Medeli Electronic Keyboard manuals

Medeli
Medeli MC-49 User manual

Medeli
Medeli A100 User manual

Medeli
Medeli M311 User manual

Medeli
Medeli Millenium Series User manual

Medeli
Medeli AW M15 User manual

Medeli
Medeli AW830 User manual

Medeli
Medeli Millenium Series Installation guide

Medeli
Medeli MC37A User manual

Medeli
Medeli ELECTRONIC KEYBOARD User manual

Medeli
Medeli MC70 User manual