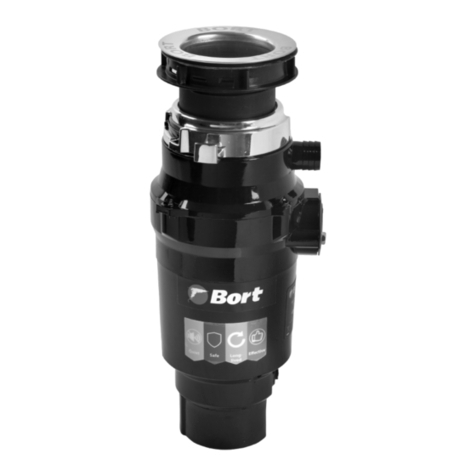
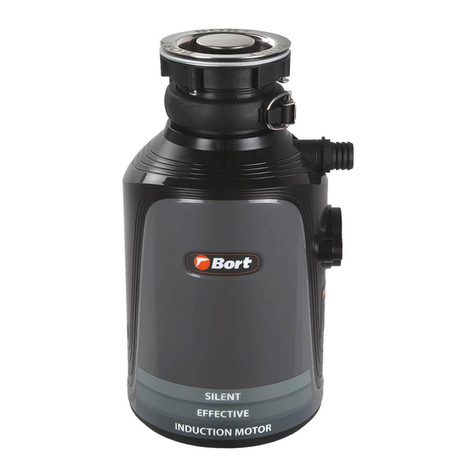
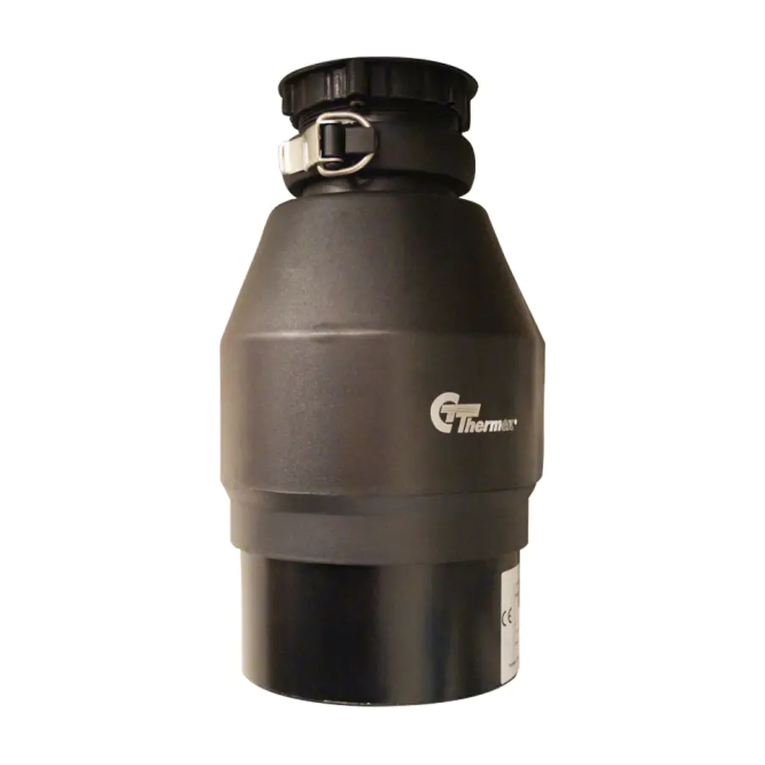
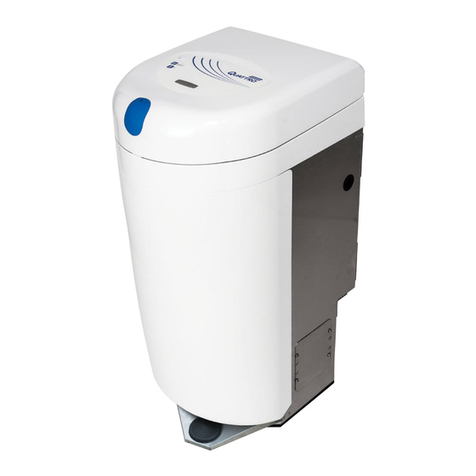
Bort MASTER ECO User manual

IT
RU
FR
DE
GB
Hausmüll zerkleinerer ...................6
Waste disposer.........................11
Déchiqueteuse de déchets .............16
Dissipatore di Riuti....................21
Измельчитель отходов ................21
MASTER
ECO
91275752


3
< 18 mm
390 W 1000
ml
2600
rpm 3,2
kg/min
3,2
4 kg 58 db 3
persons
1
2
3 4 5
360 mm
160 mm
130
mm
130 mm
120 mm
Мойка
Канавка
Пробка
Съёмный
брызгозащитник
Сливной
фланец
< 18mm
Резиновая прокладка
(или герметик)
Картонная
прокладка
Опорное кольцо
(стрелками вверх)
Крепёжное кольцо
Выступы для
затяжки
Патрубок к
посудомоечной машине
Прокладка колена
Выпускное колено
Фланец колена
Винты
Уплотнитель
Бачок
Кнопка
сброса
(спереди)

4
16 17 18
Колено
Сифон
Выступ бачка в положении
временной поддержки
Выступ бачка в
положении фиксации
Крепёжное
кольцо
Выступ
Прорезь
Крепёжное кольцо
должно свободно
двигаться вверх и вниз
Фланец
мойки
Опорное
кольцо
Открытое
отверстие
Нижний край
уплотнителя
Картонная
прокладка
Мойка
Резиновая
прокладка
Верх сливного
фланца
Уплотнитель
Крепёжное
кольцо
Нижний край
сливного
фланца
Канавка
Мойка
Опорное
кольцо
Нижний
выступ
Установка уплотнителя
Резиновая прокладка
Блокировка
6
8
10 11 13
15
14
12
7 9

5
25
19 20
25 26
21
23
24
22

6
DEUTSCHDE
INSTALLATIONSANLEITUNG,
INSTANDHALTUNG
UND VERWENDUNG DES ENTSORGERS
Bevor Sie das Produkt installieren, lesen Sie alles
sorgfältig durch. Installations-, Wartungs- und
Bedienungsanleitung. Vor Beginn der Arbeit Be-
stimmen Sie, welche Werkzeuge, Materialien und
Ausrüstung, die Sie brauchen.
Bevor Sie den Entsorger installieren, stellen Sie si-
cher, dass Sie alle erforderlichen Teile des Produkts
haben.
BEN ÖTIGTE WERKZEUGE UND MATERIALIEN:
- Schraubendreher;
- Scharnierzange;
- Isolierband;
- Schutzbrille.
ERFORDERLICHE INSTRUMENTE, MATERIALIEN
UND OPTIONALE AUSRÜSTUNG:
- Ein Kreuzschlitzschraubendreher;
- Ein Entwässerungsbohrer;
- Elektrische Klemme 9,5 mm,
- Gewindemuttern (2),
- Siphon 38 mm,
- Bohrer 25 mm,
- Hammer,
- Eisensäge,
- Wasserschlauchklemme,
- Rohrzange,
- Kupfer Erdungskabel;
- Geschirrspüler Abussrohr Kit;
- Elektrisch Schalter;
- Verlängerungsrohr.
1. BESCHREIBUNG DES PRODUKTS Abb.1.1)
1. Stopfen;
2. Abnehmbares Spritzblech;
3. Ablauansch;
4. Gummieinlage (oder Dichtungsmittel);
5. Pappedichtung;
6. Tragring (Pfeile nach oben);
7. Montagering;
8. Knaggen für Anzug;
9. Dichtung;
10. Aussparung;
11. Verbindungsrohr zur Spülmaschine;
12. Mahlkammer;
13. Anbindung des Abussbogenstückes;
14. Rücksetztaste (von vorn);
15. Schrauben;
16. Abussbogenstück;
17. Abussbogen.
2. TRENNUNG DES TROPFENHORNS BEACH
TUNG!
Zum Zeitpunkt der Installation des Geräts wird empfohlen
Schutzbrille tragen.
- Lösen Sie die Mutter (1) an der Oberseite der Wasserfalle
(4) mit einem Rohrschlüssel (Abb. 3).
- Lösen Sie die Mutter (2) auf der Oberseite des Verlänge-
rungsrohrs. Entfernen Sie das Verlängerungsrohr.
- Lösen Sie die Mutter (3) an der Unterseite desWaschan-
sches.
- Schieben Sie den Waschansch nach oben durch. Ablauf-
loch der Spüle und entfernen Sie es (Abb. 4).
- Reinigen sie den waschfan-verpackungsort. Aus dem
Dichtsto oder dem Müll.
HINWEIS: Es kann notwendig sein, die Ablaufbohrung für
zu erweitern. Befestigungsvorrichtung für Befestigungs-
ansche. Ausrüstung für die Erweiterung der Entwässe-
rungsbohrung wird separat erworben.
3. MONTAGE DER MONTAGEEINHEIT VON
MASTER ECO
ACHTUNG!: Um des entsorgers zu installieren, sollte
die Dicke der Spüle im Bereich des Abflusslochs
nicht mehr als 18 mm betragen.
1. Drehen Sie den Montagering nach links
(im Uhrzeigersinn) und entfernen Sie die
Montagebaugruppe vom Abfallentsorger.
2. Heben Sie den Befestigungsring an den
Ablaufflansch. Nehmen Sie das
TECHNISCHE ANGABEN (bild. 1)
Netzanschlussleistung 390 W
Leerlaufdrehzahl 2600 UpM
Produktivität 3,2 kg/min
Kammervolumen 1000 ml
Schaltknopf Pneumatisch
Schutzsystem Überlastungs- und
Blockierschutz
Geräuschpegel 58 dB
Gewicht
Ausgelegt für
4 kg
3 Personen
Spannung / Netzfrequenz 220 V / 50 Hz

7
Dichtungsmittel ab. Entfernen Sie den Sicherungsring.
Im Voraus ist es besser
das Einsetzen der Dichtung
Position zu üben. Siehe den Abschnitt
«Dichtungsmerkmale».
3. Schrauben Sie den Stützring vom Ablaufflansch
ab und nehmen Sie die Papierunterlage ab. Jetzt
kann man den Ablaufflansch und Gummidichtung
entfernen.
4. Die Gummidichtung wird an dem Edelstahlausflüsse
statt des Dichtmittels verwendet. Auf den restlichen
Ausflüssen wird der Dichtungsmittel verwendet.
5. Wenn kein Dichtmittel verwendet wird, setzen Sie
den Abflussflansch ein
durch die Gummidichtung in die Ablauföffnung.
Drehen Sie den Abflussflansch nach dem Einbau nicht.
6. Bei Verwendung von Dichtmittel statt der
Einlage fertigen Sie einen Ring um den Boden des
Ablaufflansches (siehe 6).
Setzen Sie den Flansch in das Ablaufloch des
Spülbeckens ein und drücken Sie fest darauf nach
unten, um überschüssiges Dichtmittel auszudrücken
(siehe 6). Löschen Sie das überschüssige extrudierte
Material vom unteren Rand des Lochs.
7. Legen Sie die Pappauflage auf den Flansch, der
unter der Spüle ab Lochendflansch hervorsteht.
Schrauben Sie den Tragring auf den Flansch auf und
ziehen Sie ihn von Hand fest. Danach können Sie
den Zapfen in das Abflussloch einstecken und das
Wasser laufen lassen, um sicherzustellen, dass es keine
Leckage gibt.
8. Schieben Sie den Montagering auf den
Ablaufflansch auf. Stecken Sie die Dichtung so (breite
Seite nach unten) hinein, dass die Nut mit dem
Vorsprung am Ablaufflansch ausgerichtet wäre, wie ein
Deckel an der Kunststoffdose (siehe 7, 8 und 9). Lesen
Sie den Punkt„DICHTUNGSMERKMALE“.
9. Der Abfallentsorger wird so installiert, dass die
Rücksetztaste leicht zugänglich wäre.
DICHTUNGSMERKMALE
Wenn die Dichtung korrekt installiert ist, tritt die
Schulter des Ablaufflansches in die Aussparung
in der Dichtung ein und der Montagering kann
frei gedreht und nach unten entfernt werden. Die
Unterdichtungskante dient als Einlage zwischen der
Unterkante des Ablaufflansches und Oberkante des
Abfallentsorgers (Siehe Abb. 9).
ANSCHLUSS AN DAS ELEKTRISCHE NETZ
1. Hängen Sie den Abfallentsorger an den Strom.
ACHTUNG!: FEHLERHAFTE ERDVERBINDUNG KANN
ZUM STROMSCHLAG FÜHREN. EARTH CHECK MUSS
VON EINEM ERFAHRENEN ELEKTRIKER DURCHGEFÜHRT
WERDEN. DIE PRÜFUNG DER ERDVERBINDUNG MUSS
VON EINEM ERFAHRENEN ELEKTRIKER DURCHGEFÜHRT
WERDEN. WENN DER STECKER TRITT IN DIE STECKDOSE
NICHT, VERSUCHEN SIE IHN NICHT ZU ÄNDERN.
DIE BENÖTIGTE STECKDOSE MUSS VON EINEM
ERFAHRENEN ELEKTRIKER INSTALLIERT WERDEN.
2. Der Abfallentsorger muss geerdet sein. Bei
Fehlfunktionen oder Ausfällen erzeugt die Erdung
eine Leitung mit minimalem Widerstand für
elektrischen Strom, wodurch das Risiko eines
Stromschlags verringert wird. Dieser Chopper ist
mit einem Erdungsdraht und einem Erdungsstecker
ausgestattet. Der Stecker muss in eine geeignete
Steckdose eingesteckt werden, die gemäß den
geltenden Vorschriften und Normen geerdet ist. Wenn
das Netzkabel beschädigt ist, muss es von einem
erfahrenen Elektriker ersetzt werden.
ANBINDUNG DES ABFLUSSBOGENSTÜCKES
1. Befestigen Sie das Abflussbogenstück am
Abfallentsorger (siehe Abb. 10). Schließen den
Häcksler an den Abfluss an und befestigen Sie dann
den unteren Teil des Abflussbogenstückes durch
Anziehen der Gleitmutter (siehe Abb. 11).
2. Vergewissern Sie sich, dass die Leitungen dicht
angeschlossen sind.
ANSCHLIESSEN DES ABFALLENTSORGERS AN
DEN ABFLUSS
1. Richten Sie den Abfallentsorger unter dem Abfluss
aus. Führen Sie die Vorsprünge des Behälters in die
Aussparungen des Montagerings. Drehen Sie den
Befestigungsring um ca. 6 mm Recht für zeitweilige
Unterstützung des Geräts (siehe Abb. 12).
2. Drehen Sie den Befestigungsring und den
Abfallentsorger, bis der Zerhackerkrümmer gegenüber
dem Siphon sich postiert (siehe Abb. 13).
3. Drehen Sie den Befestigungsring nach rechts
(gegen den Uhrzeigersinn), bis er festgezogen ist.
Die Vorsprünge des Behälters müssen sich in den
Befestigungsschlitzen ganz links befinden, siehe Abb.
14 und 15).
4. Wenn der Montagering ist schwer zu drehen, kann
man etwas Vaseline oder Flüssigseife auf die Ränder
des Behälters geben. Lassen Sie Wasser laufen und
prüfen Sie die Dichtigkeiten.
GEBRAUCHSANLEITUNG
Beim Einschalten des Abfallentsorgers wird
möglicherweise ein Klicken gehört. Es zeigt die
normale Arbeitsposition der Nocken an.
1. Entfernen Sie den Stopfen aus dem Abfluss. Lassen
Sie kaltes Wasser laufen.
2. Drücken Sie den Schalter; der Motor läuft mit voller
8
Geschwindigkeit an und ist einsatzbereit.
3. Jetzt kann man Lebensmittelabfälle entsorgen:
Krümel, Schalen, Enthäutung, Körner, Obstsamen,
kleine Knochen, Kaffeesatz. Um die Verarbeitung
zu beschleunigen, kann man Krusten und Stücke
brechen oder hacken. Knochen und faserige Abfälle
erfordern eine erhebliche Mahlzeit. Machen Sie sich
keine Sorgen, wenn der Abfallentsorger beim Schleifen
langsamer wird. Es ist in Ordnung.
4. Lassen Sie das Wasser laufen, bevor Sie die Mühle
ausschalten, und lassen Sie es 5 Sekunden lang laufen,
nachdem das Schleifen beendet ist. Dies gewährleistet
eine vollständige Spülung und Entsorgung des Abfalls.
5. Es wird nicht empfohlen, beim Arbeiten mit dem
Abfallentsorger heißes Wasser zu verwenden. Kaltes
Wasser unterhält einen festen Zustand von Abfällen
und Fetten und deren Auswaschen in Form von
Partikeln.
4. REINIGUNG DER ABLAUFROHRE
Wenn Sie das Abussrohr nicht reinigen, kann es verstop-
fen.
1. Entfernen Sie den Wasserabscheider. (Abb. 11)
2. Entfernen Sie mit einem Reiniger alle Feststoe Nie-
derschlag im horizontalen Teil der Entwässerung Rohre,
bewegt sich mit Seite des Siphons in Richtung der Haupt-
leitung Rohr.
WENN DER GESCHIRRSPÜLER NICHT SEIN WIRD AN DEN
ENTSORGER VERBUNDEN, GEHEN SIE ZU TEIL 7 DIESER
ANLEITUNG.
5. ANSCHLUSS DES GESCHIRRSPÜLERS MA
SCHINEN UND TRANSFERANSCHLUSS
Wenn das Spülbecken mit Flüssigkeit überfüllt ist, soll man
es zum Abfallentsorger durch die Einlauönung in seinem
oberen Teil anschließen. (Abb. 16)
Bei allen Modellen im Saugrohr gibt es Partition. Die Parti-
tion muss entfernt werden (Abb. 16).
PLATTE/ PARTITION ENTFERNEN
1. Legen Sie den Entsorger auf eine Seite und legen Sie
ihn Schraubenzieher in den Anschluss für den Geschirr-
spüler, schieben Sie es bis es wird nicht an der Trennwand
am Ende des Abzweigrohrs anliegen.
2. Mit mehreren Hammerschlägen das Septum im Ab-
zweigrohr ausbrechen (Abb. 16).
3. Entfernen Sie die geprägte Trennwand von der Entsor-
gungsschale.
Wenn Sie den Geschirrspüler anschließen möchten, muss
er an den Einlass der Überlaufauslassrohre angeschlossen
werden. Zum Anschluss an den Überlauf-Einlass entfer-
nen Sie die Abdeckung des Auspurohrs, indem Sie den
Deckel abschrauben.
6. SCHALTEN SIE DAS GERÄT EIN / AUS
Luftschalter
Die Disposer sind mit einem luftschalter und einem Ver-
bindungsrohr ausgestattet.
Der Schalter sollte sich an einem gelegenen (sicheren für
Kinder) Ort über der Tischplatte benden.
Um den Schalter an der Wand zu befestigen, verwenden
Sie doppelseitiges Klebeband.
Um das Gerät an- oder abzuschalten, halten Sie die Taste
2-3 Sekunden lang gedrückt.
7. INSTALLATION OF AIR SWITCH
1. Drill a hole with a diameter of 25 mm in suitable top
or top the panel of a sink. Some sinks may already have
a suitable A hole for the opening of which is necessary
remove the cover.
2. Unscrew the nut from the body of the push button,
while holding the stainless steel washer and rubber gas-
ket in place. Place one end of the PVC tube on the spout
on the body Press the other end to A hole in the table top
and a nut located under the countertop. (Fig. 20)
3. Place the push button housing in the hole and tighten
the nut underneath countertop (enough arm eort). Do
not use the key to tighten nut. (Fig. 20)
4. Take the other end of the duct and tightly put it on
the spout of the air switch located on the bottom of the
disposer. (Fig.22) Hand tighten the clamping nut. The di-
sposer installation is complete. Before using the product,
read all of the instructions. operation and safety contained
in paragraph 10 of this manual. In conclusion, install the
plug in the sink in the Closed position. Fill the sink with
water, Remove the plug and check the connections on the
a water leakage.
!!! ATTENTION !!!
8. IMPORTANT INSTRUCTIONS FOR SAFETY
• If the air switch does not work, remove the plug power
supply from the outlet and check the air duct pneumatic
switch and delivered to the outlet electricity.
• This product is designed for grinding food residues at
home; the ingress of substances other than food into the
disposer may cause injury and/ or damage property. To
reduce the risk of Do not use a washer with an installed
disposer not for food purposes (for example, for bathing a
child or washing your head).
• Children should be supervised adults and should not
play with a disposer. To reduce the risk of injury.
• It is necessary to keep a watchful eye on children use of
the product.

9
• If the wedging in the disposer is eliminated, turn o the
appliance and disconnect it from the electrical network.
• Use a wrench for self-removal of jammed waste accord-
ing to description in the section „Elimination of jamming
disposer„.
• Use tongs or pliers to remove foreign objects from the
product.
• To reduce the risk of injury from particles that are thrown
out by the disposer, it is prohibited to use grinders with-
out noise shielding screen (Fig. 2).
• Place the plug in the drain hole. Do not allow the follow-
ing items to fall into the disposer: shells, including oyster,
caustic means for cleaning pipes or similar chemical prod-
ucts, glass, porcelain or plastic, large (hollow) bones, metal
objects (bottle caps, cans, or kitchen appliances), hot fat
or other hot liquids.
• Replace worn noise glossy screen/ installation gasket/
protective reector if they are worn and are no longer able
to prevent waste or water.
• Wenn der Entsorger ausgeschaltet ist, verwenden Sie
einen Stopper, um dies zu verhindern Fremdkörper beim
Schleifen Kamera. Stellen Sie sicher, dass die Macht des
Entsorgers ist behindert.
• Bevor Sie den Reset-Knopf drücken, den Stau beseitigen
oder Fremdkörper aus der Zerkleinerungskammer entfer-
nen, stellen Sie sicher, dass Das Essen ist ausgeschaltet.
• Halten Sie Hände und Finger außerhalb der Reichweite
von Entsorgungskammer.
BRANDGEFAHR:
Um die Möglichkeit zu minimieren Nicht in der Nähe von
Feuerlöschern lagern Gegenstände wie Lumpen, Papier
oder Aerosoldosen.
Lagern oder benutzen Sie kein Benzin oder ähnliches
brennbare Dampf-Gas-Gemische und Flüssigkeit in der
Nähe des Entsorgers.
Folgendes nicht zulassen Kamera-Produkte: Farben, Lö-
sungsmittel, Haushalt Reinigungsmittel und Chemikalien,
Automobilüssigkeiten, Kunststoverpackungen.
9. HANDBUCH
1. Verwenden Sie den Luftschalter (Abb. 23), um den Ent-
sorger zu starten.
2. Senken Sie die Lebensmittelabfälle langsam in die
Kammer und installieren Sie das Filtergitter in einer verti-
kalen Position (so dass es durchießt Wasser) um Lärm zu
reduzieren und möglich Werfen von Abfall während des
Schleifens (Abb. 24).
3. Nachdem der Schleifvorgang abgeschlossen ist, schal-
ten Sie die Entsorger und lassen Sie das Wasser für min-
destens 15 laufen s, um die Abussleitung zu spülen.
SOLLTE...
• Speisereste unter Druck mahlen kaltes Wasser nicht we-
niger als 6 Liter/ min.
• Mahlen Sie Feststoe wie kleine Knochen und
Fruchtrückstände zum Reinigen Hackkammern.
• Grind Zitrusfrüchte, Melonen, Gemüse und Kaeeboh-
nen.
• Lassen Sie das Wasser nach dem Schleifen auslaufen min-
destens 15 Sekunden, um den Abuss zu spülen Pipeline.
• Ziehen Sie das Produkt aus der Steckdose, bevor Sie den
festsitzenden Rotor mit einem Werkzeug entfernen.
• Speichern Sie keine Objekte unter dem Display, um den
Zugri auf die Schaltäche zu gewährleisten Neustart.
UNTERLASSEN SIE...
• Verwenden Sie kein heißes Wasser beim Schleifen Reste
von Produkten (obwohl heiß Wasser durch das Produkt
zwischen Schleifen).
• Schalten Sie das Wasser oder das Produkt erst aus, wenn
das Schleifen beendet ist. Es ist ein Geräusch von laufen-
dem Motor und Laufen Wasser.
• Mahlen Sie keine großen Mengen Ei Schalen, faserige
Materialien zum Beispiel Mais Schalen, Artischocken, etc.,
um ein mögliches Verstopfen des Rohres zu vermeiden.
• Nur Lebensmittel mahlen.
• Verwenden Sie dieses Gerät nicht zum Schleifen von har-
ten Materialien wie Glas und Glas Metall.
• Gießen Sie niemals Fett, Öl oder Fett hinein Shell, da dies
zu Verstopfungen führen wird Entwässerungs- und Ab-
wassersysteme.
• Befüllen Sie die Entsorgungskammer nicht mit einer
großen Menge an Reinigungsmitteln Gemüse. Schalten
Sie stattdessen zuerst das Wasser ein und Entsorger und
senken Sie es allmählich Reinigung.
REINIGUNG DER ENTSORGUNGSKAMMER
Im Laufe der Zeit können Fett/ Nahrungsmittelpartikel
in der Mahlkammer anreichern und schützen Reektor,
der einen unangenehmen Geruch verursacht. Zum Reini-
gungsmahlkammer und Reektor:
1. Schalten Sie das GERÄT aus und trennen Sie es vom
Stromnetz.
2. Durch die Abussönung mit einem Schwamm Zum
Waschen den Boden reinigen Oberächen Schutzreek-
tor und Innenoberteil Kanten der Hackkammer.
3. Setzen Sie den Stopfen in das Abussloch und füllen
Sie das Waschbecken mit halbem Wasser.

10
4. Mischen Sie 60 ml Backpulver mit Wasser. Schalten Sie
das Produkt ein und ziehen Sie den Stecker aus der Spüle.
Waschen von Fremdpartikeln.
EMPFEHLUNGEN ZUR VERBESSERUNG DER
ARBEIT
1. Bevor Sie den angeschlossenen Geschirrspüler
in Betrieb nehmen, vergewissern Sie sich, dass das
Gerät leer ist und keine Hindernisse zum Ablassen
vorhanden sind.
2. Um das versehentliche Eindringen der Gegenstände
um zu verhindern, kann man den Schutzstopfen in die
Ablauföffnung des Abfallentsorgers wieder einstecken.
3. Der Abfallentsorger verfügt über eine robuste
Konstruktion, die für langjährige Arbeit ausgelegt ist.
Es verarbeitet alle Lebensmittelabfälle, kann jedoch
aber NICHT Plastik, Kappen, Flaschenverschlüsse, Glas,
Porzellan, Leder, Stoff, Gummi, Seile, Austernschalen,
Aluminiumfolie und Vogelfedern zermahlen.
BESEITIGUNG DES KOLBEN-ENTSORGERS
Wenn während des Betriebs der Entsorger Motor angehal-
ten, möglicherweise verklemmte bewegliche Teile.
Um Jammen zu beseitigen:
1. Schalten Sie den Entsorger aus und schalten Sie das
Wasser aus.
2. Stecken Sie ein Ende des Schlüssels in das mittlere Loch
an der Unterseite des Produkts, um einen eigenständigen
Stecker zu erhalten Beseitigung von festsitzendem Abfall.
Drehen Sie den Schlüssel vor und zurück bis so lange wie
Er wird keine volle Drehung machen. Mitnahme Schlüssel.
3. Entfernen Sie fremde Objekte aus dem Hilfe tickt mit
langen Handgrien. Geben zum Motor des Produkts 3 bis
5 Minuten abkühlen lassen und den roten Reset-Knopf an
der Unterseite des Entsorgers drücken (Abb. 26) (Wenn
der Motor nicht anspringt, überprüfen Sie die Schutz-
schild für die Anwesenheit von Leistungsschalter und aus-
gebrannt Sicherungen).
PFLEGE UND WARTUNG
!!! VERSUCHEN SIE NICHT, DEN
ABFALLENTSORGER ZU SCHMIEREN !!!
Der Elektromotor hat ein nicht austauschbares
Schmiermittel. Der Abfallentsorger kann selbst
Innenteile bei jedem Gebrauch reinigen.
Gießen Sie NIEMALS Alkalien und andere
Reinigungsmittel in die Abflußöffnung, da diese die
Metallteile des Geräts korrodieren lassen können.
Darüber hinaus erlischt die Produkthaftung dabei.
Mineralablagerungen aus Wasser führen zum
Blühen auf den Oberflächen rotierender Teile des
Abfallentsorgers, die aus Edelstahl gefertigt sind. Es
sollte keine Sorgen machen, da hier kein Rost sich
bilden kann.
Wenn Sie Wartungsarbeiten durchführen müssen oder
reparieren Sie das Produkt, wenden Sie sich an einen au-
torisierten Händler Service Center oder zu Ihrem Händler.
Die Garantie erlischt in folgenden Fällen:
- wenn das Produkt mit Beeinträchtigungen verwendet
wurde Anforderungen dieses Handbuchs
- in Gegenwart von Spuren der Önung des Körpers des
Produkts zur Selbstreparatur
Weitere Informationen zu den Garantiebedingungen n-
den Sie in der Garantie Coupon.

11
ENGLISHGB
INSTALLATION INSTRUCTIONS, MAINTENANCE
AND USING THE DISPOSER
Before installing the product, read everything
carefully. Installation, maintenance and use man-
ual. Before starting work determine which tools,
materials, and equipment you need.
Before installing the disposer, make sure that you
have all the necessary parts of the product.
REQUIRED TOOLS AND MATERIALS:
- Screwdriver;
- Hinged pliers;
- Insulation tape;
- Protective glasses.
REQUIRED INSTRUMENTS, MATERIALS AND
OPTIONAL EQUIPMENT:
- A phillips screwdrive;
- A drainage drill;
- Electrical terminal 9.5 mm;
- Threaded nuts (2);
- Siphon 38 mm;
- Drill 25 mm;
- Hammer;
- Hacksaw;
- Water hose clamp;
- Pipe pliers;
- Copper grounding wire;
- Dishwasher drainage pipe kit;
- Electric switch;
- Extension pipe.
1. DESCRIPTION OFTHE PRODUCT Fig.2
1. Stopper;
2. Removable mudguard;
3. Drain ange;
4. Rubber shim (or sealant material);
5. Fiberboard gasket;
6. Base ring (arrows up);
7. Retention ring;
8. Lugs for torquing;
9. Sealing;
10. Gorge;
11. Reducing pipe to dishwasher;
12. Grinding chamber;
13. Pipe elbow’s tting;
14. Reset button (in front);
15. Screws;
16. Elbow’s ange;
17. Outlet elbow.
2. DISCONNECTION OF THE DROP HORN
ATTENTION!
At the time of installation of the device is recommended
Wear safety glasses.
- Loosen the nut (1) on the top of the water trap (4) with a
pipe wrench (Fig. 3). Loosen the nut (2) on the top of the
extension pipe. Remove the extension pipe.
- Loosen the nut (3) at the bottom of the washing ange.
- Push the washing ange upwards through drain hole of
the sink and remove it (Fig. 4).
- Clean the wash fan wrapping place from the sealant or
the garbage.
NOTE: It may be necessary to expand the drain hole for
installation ange fastening disposer. Equipment for
extending the drainage hole is purchased separately.
3. INSTALATION OF MOUNTAING MASTER
ECO
ATTENTION!: To install the disposer, the thickness
of the sink in the area of the drain hole should be
no more than 18 mm.
1. Remove disposer mounting assembly by turning
the mounting ring to the left (clockwise).
2. Raise the fixing ring to the drain flange. Remove
seal. Remove retaining ring. It is advisable to pre-
practice installing the seal in the desired position. See
section «Seal Features».
3. Unscrew the support ring from the drain flange and
remove the cardboard pad. Now you can remove the
TECHNICAL SPECIFICATIONS (g. 1)
Watt consumption 390 W
Rate of rotation 2600 rpm
Output 3,2 kg/min
Chamber volume 1000 ml
Start button Pneumatic
Protective system Overloading and
seizure protection
Noise level 58 db
Weight
Designed for
4 kg
3 persons
Voltage / Current frequency 220 V / 50 Hz

12
drain flange and rubber gasket.
4. Rubber gasket is used instead of sealant on stainless
steel sinks. The rest of the drains use sealant.
5. If sealant is not used, insert the drain flange
through the rubber gasket into the drain hole. Do not
turn the drain flange after it has been fitted.
6. When using sealant, form a ring around the
underside of the drain flange instead of a gasket (see
6). Insert the flange into the drain hole of the sink,
press it down firmly to squeeze out excess sealant (see
6). Remove squeezed excess from the bottom edge of
the hole.
7. Attach the cardboard gasket to the end of the
flange that projects under the sink from the hole.
Screw the support ring, located with the arrows up,
onto the flange and tighten it by hand until the flange
sits firmly. After that, you can install the plug in the
drain hole and open the water to make sure that there
is no leakage.
8. Place the fixing ring on the drain flange and, while
holding it, insert the seal (wide side down) so that the
groove inside it is aligned with the protrusion on the
drain flange, like the lid on a plastic jar (see 7, 8, 9).
Read the item “SEAL FEATURES”.
9. The disposer is installed so that the reset button is
easily accessible.
SEAL FEATURES
If the seal is installed correctly, the protrusion of the
drain flange enters the recess inside the seal and
the mounting ring can be freely removed down and
rotated. The lower lip of the seal serves as a gasket
between the lower edge of the drain flange and the
upper edge of the chopper (Pic. 9).
ELECTRIC CONNECTION
1. Plug in disposer into power outlet.
ATTENTION!: INCORRECT EARTH CONNECTION MAY
RESULT IN ELECTRIC SHOCK. EARTH CHECK MUST BE
PERFORMED BY AN EXPERIENCED ELECTRICIAN. IF
THE PLUG IS NOT INCLUDED IN THE SOCKET, DO NOT
ATTEMPT TO CHANGE IT. EXPERIENCED ELECTRICIAN
MUST INSTEL THE NECESSARY SOCKET
2. The disposer must be grounded. If it malfunctions
or fails, grounding creates a line with minimal
resistance for electric current, which reduces the risk
of electric shock. This disposer is equipped with a
wire having a grounding conductor and a grounding
plug. The plug must be plugged into an appropriate
outlet, installed and grounded in accordance with
current regulations and standards. If the power cable
is damaged, it must be replaced by an experienced
electrician.
CONNECTING DRAIN PIPE
1. Connect the drain pipe to the disposer (see Fig. 10),
connect the disposer to the drain and then attach the
lower part of the elbow by tightening the sliding nut
(see Fig. 11).
2. Make sure plumbing connections are tight.
CONNECTING DISPOSER TO THE DRAIN
1. Align the disposer under the drain. Guide the
projections of the tank into the cutouts of the
mounting ring. Turn the fixing ring about 6 mm to the
right for temporarily support the disposer (see Fig. 12).
2. Turn the mounting ring and the disposer until the
disposer elbow is opposite the siphon (see Fig. 13).
3. Turn the fixing ring to the right (counterclockwise)
until it is tightened. The tank protrusions should be in
the leftmost position in the mounting slots (see Fig.
14 and 15).
4. If the mounting ring does not turn easily, you can
add a little Vaseline or liquid soap on the ledges of the
tank. Open water and check for leaks.
INSTRUCTIONS FOR USE
When you turn on the food waste disposer, you may
hear a click. This indicates the normal working position
of the cams.
1. Remove the plug from the drain. Open cold water.
2. Turn on the switch; the motor starts at full speed
and is ready for use.
3. Discard food waste: crumbs, peels, peeling, grains,
fruit seeds, small bones, coffee grounds. To speed up
processing, break or chop crusts and pieces. Bones
and fibrous waste require significant grinding time.
Do not worry about the disposer slowing down when
grinding. This is normal.
4. Before turning off the disposer, let the water flow
and let it run for about 5 seconds after grinding
is completed. This ensures complete flushing and
disposal of waste.
5. It is not recommended to use hot water during the
operation of the grinder. Cold water maintains the
solid state of the waste and its leaching in the form of
particles.
4. CLEANING THE DRAIN PIPE
If you do not clean the drain pipe, it can clog.
1. Remove the water trap. (Fig. 11)
2. Using a cleaner, remove all solid precipitation in the
horizontal part of the drainage pipes, moving with side of
the siphon towards the main pipe.
IF THE DISHWASHER WILL NOT BE CONNECTED TO THE
DISPOSER, GO TO PART 7 OF THIS INSTRUCTION.

13
5. CONNECTING THE DISHWASHER MACHINES
AND TRANSFER CONNECTION
If the sink is full of liquid it can be discharged into the
disposer through the inlet in its upper parts. (Fig. 16)
On all models inside the intake pipe there is partition. The
partition must be removed (Fig. 16).
REMOVING THE PLATE / PARTITION
1. Place the disposer on one side and place it screwdriver
into the connection for the dishwasher, pushing it until it
will not rest against the partition in the end of the branch
pipe.
2. With several blows of the hammer, knock out the
septum in the branch pipe (Fig. 16).
3. Remove the embossed partition from the disposer
bowl. If necessary to connect the dishwasher, then it
should be connected to the inlet of the overow outlet
pipes To connect to the overow inlet, remove the
exhaust pipe cover by unscrewing the cover.
6. TURN ON/OFF DEVICE
Depending on the models BORT disposer are equipped
with two types of control: a wireless (wall) switch or a
pneumatic switch.
AIR SWITCH
Disposer is equipped with an air switch and a connecting
pipe.
The switch should be located in a convenient (safe for
children) place above the table top.
For instal the switch to the wall, use double-sided tape.
For activate/ deactivate the device, hold down the key for
2-3 seconds.
7. INSTALLATION OF AIR SWITCH
1. Drill a hole with a diameter of 25 mm in suitable top
or top the panel of a sink. Some sinks may already have
a suitable A hole for the opening of which is necessary
remove the cover.
2. Unscrew the nut from the body of the push button,
while holding the stainless steel washer and rubber
gasket in place. Place one end of the PVC tube on the
spout on the body Press the other end to A hole in the
table top and a nut located under the countertop. (Fig. 20)
3. Place the push button housing in the hole and tighten
the nut underneath countertop (enough arm eort). Do
not use the key to tighten nut. (Fig. 20)
4. Take the other end of the duct and tightly put it on
the spout of the air switch located on the bottom of the
disposer. (Fig. 22) Hand tighten the clamping nut. The
disposer installation is complete. Before using the product,
read all of the instructions. operation and safety contained
in paragraph 8 of this manual. In conclusion, install the
plug in the sink in the Closed position. Fill the sink with
water, Remove the plug and check the connections on the
a water leakage.
!!! ATTENTION !!!
8. IMPORTANT INSTRUCTIONS FOR SAFETY
• If the air switch does not work, remove the plug power
supply from the outlet and check the air duct pneumatic
switch and delivered to the outlet electricity.
• This product is designed for grinding food residues at
home; the ingress of substances other than food into the
disposer may cause injury and/ or damage property. To
reduce the risk of Do not use a washer with an installed
disposer not for food purposes (for example, for bathing a
child or washing your head).
• Children should be supervised adults and should not
play with a disposer. To reduce the risk of injury It is
necessary to keep a watchful eye on children use of the
product.
• If the wedging in the disposer is eliminated, turn o the
appliance and disconnect it from the electrical network.
Use a wrench for self-removal of jammed waste according
to description in the section “Elimination of jamming
disposer“.
• Use tongs or pliers to remove foreign objects from the
product.
• To reduce the risk of injury from particles that are thrown
out by the disposer, it is prohibited to use grinders
withoutnoise shielding screen (Fig. 2).
Do not allow the following items to fall into the disposer:
shells, including oyster, caustic means for cleaning pipes
or similar chemical products, glass, porcelain or plastic,
large (hollow) bones, metal objects (bottle caps, cans, or
kitchen appliances), hot fat or other hot liquids.
• Replace worn noise glossy screen/ installation gasket/
protective reector if they are worn and are no longer able
to prevent waste or water.
• If the disposer is switched o, use a stopper to prevent
foreign objects in the grinding camera. Make sure that the
power of the disposer is disabled.
• Before pressing the reset button, cleaning the jam or
removing foreign objects from the shredding chamber,
make sure that the food is turned o.
• Keep hands and ngers out of the reach of disposer
chamber.
FIRE RISK:
To minimize the possibility of Do not store near re
extinguishing articles such as rags, paper or aerosol cans.
Do not store or use gasoline or other ammable vapor-gas

14
mixtures and liquid near the disposer.
Do not allow the following camera products: paints,
solvents, household cleaning agents and chemicals,
automotive liquids, plastic packaging.
9. USER’S MANUAL
1. Use air switch (Fig. 23) for starting disposer.
2. Slowly lower food waste into the chamber and install
the lter grid in a vertical position (so that it ows through
it water) to reduce noise and possible throwing waste
during grinding (Fig. 24).
3. After the grinding is completed, turn o the disposer
and let the water run for at least 15 s to ush the drain line.
SHOULD...
• Grind food waste under pressure cold water not less than
6 liters/ min.
• Grind solids, such as small bones and fruit residues, for
cleaning chopping chambers.
• Grind citrus fruits, melons, vegetables and coee beans.
• After the grinding is nished, let the water run out at
least 15 seconds to ush the drain pipeline.
• Unplug the product from the socket before removing the
seized rotor with a tool.
• Do not store any objects under the display to ensure
access to the button restart.
DO NOT...
• Do not use hot water when grinding remains of products
(although hot water through the product between
grinding).
• Do not turn o the water or the product until the
grinding is completed, there is a noise of running engine
and running water.
• Do not grind large amounts of egg shells, brous
materials, for example corn husks, artichokes, etc., in order
to avoid possible clogging of the pipe.
• Grind only food.
• Do not use this appliance to grind hard materials, such
as glass and metal.
• Never pour fat, oil or fat in shell, as this will lead to
clogging drainage and sewerage systems.
• Do not ll the disposer chamber with a large amount of
cleaning vegetables. Instead, turn on the water rst and
disposer and gradually lower it cleaning.
CLEANING THE DISPOSER CHAMBER
Over time, fat/ food particles can accumulate in the
grinding chamber and protective reflector, causing an
unpleasant smell. For cleaning grinding chamber and
reflector:
1. Turn o the EQUIPMENT and disconnect it from the
mains.
2. Through the drain hole using a sponge for washing,
clean the bottom surfaces protective reector and inner
upper edges of chopping chamber.
3. Place the plug in the drain hole and ll the sink with
hot water halfway.
4. Mix 60 ml of baking soda with water. Turn the product
on and remove the plug from the sink. washing of foreign
particles.
RECOMMENDATIONS FOR IMPROVING WORK
1. Before starting the operation of the connected
dishwasher, make sure that the disposer is empty and
there are no obstacles to drain.
2. You can reinsert the safety plug in the drain hole
of the sink to prevent objects from accidentally falling
into it.
3. The disposer has a robust design, designed for
many years of work. It recycles any ordinary food
waste, but is NOT able to grind plastic, caps, bottle
caps, glass, porcelain, leather, fabric, rubber, ropes,
sinks, aluminum foil and bird feathers.
ELIMINATION OF JUMMING DISPOSER
If during the operation of the disposer motor stopped,
possibly jammed moving parts.
To eliminate jamming:
1. Turn o the power of the disposer and shut o the
water.
2. Insert one end of the wrench into the center hole on
the bottom of the product for a self-contained removal of
stuck waste. Turn the wrench back and forth until as long
as he will not make one full turn. Take out wrench.
3. Remove foreign objects from the help ticks with long
handles. Give to the engine of the product cool for 3-5
minutes and press the red reset button on the bottom of
the disposer (Fig. 26) (If the engine does not start, check
the protective shield for the presence of circuit breakers
and burnt out fuses).
CARE AND MAINTENANCE
!!! DO NOT ATTEMPT TO LUBRICATE THE DISPOSER !!!
The electric motor has a non-replaceable grease. The
chopper is able to independently clean its internal
parts with each use.
NEVER pour alkalis or other cleaning agents into the

15
shredder, as they can corrode the metal parts of the
shredder. In addition, the warranty is lost. Mineral
deposits from water lead to plaque formation on
the surfaces of rotating parts of the grinder made of
stainless steel. THIS SHOULD NOT CAUSE ANXIETY,
since rust cannot form here.
If you need to perform maintenance or repair the product,
contact an authorized service center or to your dealer.
The warranty is canceled in the following cases:
- if the product was used with impairments requirements
of this manual
- in the presence of traces of the opening of the body of
the product for self-repair
For more details about the terms and conditions of the
warranty, see the warranty coupon.

16
FRANÇAISFR
INSTRUCTIONS D’INSTALLATION,
ENTRETIEN ET UTILISANT LE DISPOSITIF DE
DISTRIBUTION
Avantd’installerleproduit,liseztoutattentivement.
Manuel d’installation, d’entretien et d’utilisation.
Avant de commencer le travail déterminer quels
outils, matériaux et équipement dont vous avez
besoin. Avant d’installer le broyeur, assurez-vous
d’avoir toutes les pièces nécessaires du produit.
OUTILS ET MATÉRIELS REQUIS:
- Tournevis;
- Pince à charnière;
- Ruban isolant;
- Lunettes de protection.
INSTRUMENTS, MATÉRIAUX ET INSTRUMENTS
REQUIS ÉQUIPEMENT OPTIONEL:
- Un tournevis cruciforme;
- Une perceuse de drainage;
- Borne électrique 9,5 mm;
- Écrous letés (2);
- Siphon 38 mm;
- Foret 25 mm;
- Marteau;
- Scie à métaux;
- Collier de tuyau d’eau;
- Pince de tuyau;
- Cuivre l de mise à la terre;
- Kit de tuyau de drainage pour lave-vaisselle;
- Électrique interrupteur, tuyau d’extension.
1. DESCRIPTION DU PRODUIT Fig.2
1. Bouchon;
2. Garde-boue amovible;
3. Bride de vidange;
4. Garniture en caoutchouc (ou obturateur de
joints);
5. Joint en carton;
6. Anneau de support (èches vers le haut);
7. Bague de montage;
8. Tenons pour blocage;
9. Garniture d’étanchéité;
10. Rainure;
11. Tuyau de connexion à lave-vaisselle;
12. Cuve;
13. Le joint du coude de sortie;
14. Bouton de réinitialisation;
15. Vis;
16. Bride du coude;
17. Coude de sortie.
2. DÉCONNEXION DE LA CORNE DE GOUTTE
ATTENTION!
Au moment de l’installation de l’appareil est
recommandé Porter des lunettes de sécurité.
- Desserrer l’écrou (1) sur le dessus du piège à eau (4) avec
une clé à pipe (Fig. 3).
- Desserrez l’écrou (2) sur le dessus du tuyau d’extension.
Retirez le tuyau d’extension.
- Desserrez l’écrou (3) au bas de la bride de lavage. Poussez
la bride de lavage vers le haut à travers vidangez le trou de
l’évier et retirez-le (Fig. 4).
- Nettoyer le lieu d’enveloppement du ventilateur de
lavage du scellant ou des ordures.
NOTE: Il peut être nécessaire d’élargir le trou de drainage
pour bride d’installation broyeur de xation.
L’équipement pour l’extension du trou de drainage est
acheté séparément.
3. MONTAGE DU GROUPE DE FIXATION DE
MASTER ECO
ATTENTION!: Pour installer le broyeur à déchets,
l’épaisseur de l’évier dans la zone du trou de vidange
ne doit pas dépasser 18 mm.
1. Démontez le groupe de fixation du broyeur de
déchets en tournant la bague de montage vers la
gauche (dans le sens horlogique).
2. Soulevez la bague de montage vers la bride
d’écoulement. Décoller la garniture d’étanchéité.
Retirez la bague de retenue. Il est désirable de pratiquer
à l’avance l’installation de la garniture d’étanchéité en
CARACTÉRISTIQUES TECHNIQUES (g. 1)
Consommation énergétique 390 W
Vitesse de rotation 2600 tours par
minute
Débit 3,2 kg/min
Volume de la cuve 1000 ml
Bouton de marche Pneumatique
Système de sécurité Protection contre
les surcharges et
le blocage
Niveau sonore 58 db
Poids
Prévu pour
4 kg
3 Personnes
Tension / fréquence du courant 220 V / 50 Hz

17
position correcte. Voir la section «Caractéristiques de la
garniture d’étanchéité».
3. Dévissez l’anneau de support de la bride
d’écoulement et retirez le joint en carton. Vous pouvez
maintenant retirer la bride d’écoulement et joint en
caoutchouc.
4. Un joint en caoutchouc est utilisé au lieu du mastic
sur éviers en acier inoxydable. La mastic est utilisé sur
les éviers d’autres types.
5. Si aucun obturateur de joints n’est utilisé, insérez
la bride d’écoulement à travers le joint en caoutchouc
dans le trou d’écoulement. Ne tournez pas la bride
d’écoulement après son montage.
6. Lorsque vous utilisez du mastic au lieu de la garniture
d’étanchéité, formez anneau autour du bas de la bride
d’écoulement (voir fig. 6). Insérez la bride dans le trou
d’écoulement de l’évier, appuyez fermement vers le
bas pour extrader l’excès de mastic (voir fig. 6). Effacer
l’excès extrudé du bord bas du trou.
7. Mettez le joint en carton sur le bride dépassant
sous l’évier du trou. Vissez l’anneau de support, les
flèches vers le haut, sur la bride et serrez-le à la main
jusqu’à ce que la bride soit robustement fixée en place.
Après ça vous pouvez installer le bouchon dans le trou
d’écoulement et ouvrir l’eau, pour vous assurer qu’il n’y
a pas de fuite.
8. Mettez la bague de montage sur la bride
d’écoulement et insérez le joint en le maintenant côté
large vers le bas ainsi, que la rainure à l’intérieur est
alignée avec la saillie sur la bride d’écoulement, comme
le couvercle d’un pot en plastique (voir fig. 7, 8 et 9).
Lisez l’article «CARACTÉRISTIQUES DU JOINT».
9. On installe le broyeur de déchets de manière à ce que
le bouton de réinitialisation soit facilement accessible.
CARACTÉRISTIQUES DU JOINT
Si la garniture d’étanchéité est installé correctement,
la saillie de la bride d’écoulement pénètre dans
l’évidement à l’intérieur du joint et la bague de
montage peut être librement retirée et tournée. La
lèvre inférieure de la garniture d’étanchéité sert de joint
entre le bord inférieur de la bride d’écoulement et le
bord supérieur du broyeur de déchets (voir fig. 9).
CONNEXION AU RÉSEAU ÉLECTRIQUE
1. Branchez le broyeur de déchets dans une prise
électrique domestique.
ATTENTION!: UNE MISE À LA TERRE INCORRECTE PEUT
PROVOQUER UN CHOC ÉLECTRIQUE. LE CONTRÔLE DU
CONTACT À LA TERRE DOIT ÊTRE EFFECTUÉ PAR UN
ÉLECTRICIEN EXPÉRIMENTÉ. SI LA FICHE MÂLE NE PEUT
PAS ÊTRE INCLUSE DANS LA PRISE, N’ESSAYEZ PAS DE LE
CHANGER. LA PRISE NÉCESSAIRE DOIT ÊTRE INSTALLÉE
PAR UN ÉLECTRICIEN EXPÉRIMENTÉ.
2. Le broyeur de déchets doit être mis à la terre. En cas
de dysfonctionnement ou d’échec, la mise à la terre
crée une ligne avec une résistance minimale au courant
électrique, ce qui réduit le risque du choc électrique. Ce
broyeur de déchets est équipé d’un fil ayant un brin de
mise à la terre et une fiche de mise à la terre. La fiche
doit être branchée dans une prise appropriée, qui est
mise à la terre conformément aux réglementations
et normes en vigueur. Si le câble d’alimentation est
endommagé, il doit être remplacé par un électricien
expérimenté.
LE JOINT DU COUDE DE SORTIE
1. Fixez le coude de sortie au broyeur de déchets (voir
fig. 10), connectez le broyeur de déchets au drain puis
attachez la partie inférieure du tuyau en serrant écrou
coulissant (voir fig. 11).
2. Assurez-vous que les connexions de plomberie sont
hermétiques.
RACCORDEMENT DU BROYEUR DE DÉCHETS
AU DRAIN
1. Alignez le broyeur de déchets sur le drain. Mettez
les saillies du réservoir dans les mortaises de la bague
de montage. Tournez la bague de montage environ de
6 mm droit pour soutenir temporairement le broyeur
(voir fig. 12).
2. Tournez la bague de fixation et le broyeur jusqu’à ce
que le coude de sortie soit opposé au siphon (voir fig.
13).
3. Tournez la bague de fixation vers la droite (dans
le sens antihoraire) jusqu’à ce qu’elle soit serrée. Les
saillies du réservoir doivent être dans la position la plus
à gauche dans les mortaises de montage (voir fig. 14
et 15).
4. Si la bague de fixation ne tourne pas facilement,
vous pouvez ajouter un peu de vaseline ou de savon
liquide sur les rebords du réservoir. Ouvrez le robinet
et vérifiez les fuites.
MODE D’EMPLOI
Lorsque vous faites marcher le broyeur de déchets
alimentaires, vous pouvez entendre un clic. Cela
indique la position de travail normale des cames.
1. Retirez le bouchon du drain. Ouvrez le robinet d’eau
froide.
2. Enclenchez l’interrupteur.; le moteur démarre à
pleine vitesse et est prêt à l’emploi.
3. Jeter les déchets alimentaires: miettes, pelures,
zeste, grains, noyaux des fruits, petits os, marc de
café. Pour accélérer le traitement, cassez ou hachez
les croûtes et les gros morceaux. Les os et les déchets
fibreux nécessitent un temps de broyage durable. Ne

18
vous inquiétez pas du ralentissement du broyeur lors
du broyage. C’est normal.
4. Avant d’éteindre le broyeur, laissez couler l’eau et
laissez l’appareil fonctionner pendant 5 secondes après
le broyage terminé. Cela garantit un rinçage complet et
l’élimination des déchets.
5. Il n’est pas recommandé d’utiliser de l’eau chaude
pendant que le broyeur travaille. L’eau froide maintient
un état solide de déchets et de graisses et leur lessivage
sous forme de particules.
4. NETTOYAGE DU TUYAU DE VIDANGE
Si vous ne nettoyez pas le tuyau de vidange, il peut se
boucher.
1. Retirez le piège à eau (Fig. 11).
2. En utilisant un nettoyant, retirez tous les solides
Précipitation dans la partie horizontale du drainage
pipes, se déplaçant avec côté du siphon vers la
principale tuyau.
SI LE LAVE-VAISSELLE NE SERA PAS CONNECTÉ À
LA RAMASSEUSE, ALLEZ À LA PARTIE 7 DE CETTE
INSTRUCTION
5. RACCORDEMENT DU LAVE-VAISSELLE MACHINES
ET RACCORDEMENT DE TRANSFERT
Si l’évier est rempli de liquide, il peut être déchargé dans
le broyeur par l’entrée dans ses parties supérieures. (Fig.
16)
Sur tous les modèles à l’intérieur du tuyau d’admission,
il y a cloison. La partition doit être supprimée (Fig. 16).
RETRAIT DE LA PLAQUE / CLOISON
1. Placez le broyeur d’un côté et placez-le tournevis dans
la connexion pour le lave-vaisselle, en le poussant jusqu’à
ce que il ne reposera pas contre la partition à l’extrémité
du tuyau de branchement.
2. À plusieurs coups de marteau, faire tomber le septum
dans le tuyau de dérivation (Fig. 16).
3. Retirez la cloison en relief du bol de broyeur. Si
nécessaire pour connecter le lave-vaisselle, il doit être
connecté à l’entrée des tuyaux de sortie de trop-plein.
Pour raccorder l’entrée de trop-plein, retirer le couvercle
du tuyau d’échappement en dévissant le couvercle.
6. ALLUMER/ ÉTEINDRE L’APPAREIL
Interrupteur pneumatique
Les concasseurs sont équipés d’un interrupteur
pneumatique et d’un tuyau de raccordement.
L’interrupteur doit être placé dans un endroit pratique (sûr
pour les enfants) au-dessus du dessus de la table.
Pour installer l’interrupteur au mur, utilisez du ruban
adhésif double face.
Pour activer/ désactiver l’appareil, maintenez la touche
enfoncée pendant 2-3 secondes.
7. INSTALLATION OF AIR SWITCH
1. Drill a hole with a diameter of 33 mm in suitable top
or top the panel of a sink. Some sinks may already have
a suitable A hole for the opening of which is necessary
remove the cover.
2. Unscrew the nut from the body of the push button,
while holding the stainless steel washer and rubber
gasket in place. Place one end of the PVC tube on the
spout on the body Press the other end to A hole in the
table top and a nut located under the countertop. (Fig. 20)
3. Place the push button housing in the hole and tighten
the nut underneath countertop (enough arm eort). Do
not use the key to tighten nut. (Fig. 20)
4. Take the other end of the duct and tightly put it on
the spout of the air switch located on the bottom of the
disposer. (Fig. 22) Hand tighten the clamping nut. The
disposer installation is complete. Before using the product,
read all of the instructions. operation and safety contained
in paragraph 8 of this manual. In conclusion, install the
plug in the sink in the Closed position. Fill the sink with
water, Remove the plug and check the connections on the
a water leakage.
!!! ATTENTION!!!
8. IMPORTANT INSTRUCTIONS FOR SAFETY
• If the air switch does not work, remove the plug power
supply from the outlet and check the air duct pneumatic
switch and delivered to the outlet electricity.
• This product is designed for grinding food residues at
home; the ingress of substances other than food into the
disposer may cause injury and/ or damage property. To
reduce the risk of Do not use a washer with an installed
disposer not for food purposes (for example, for bathing a
child or washing your head).
• Children should be supervised adults and should not
play with a disposer. To reduce the risk of injury It is
necessary to keep a watchful eye on children use of the
product.
• If the wedging in the disposer is eliminated, turn o the
appliance and disconnect it from the electrical network.
Use a wrench for self-removal of jammed waste according
to description in the section “Elimination of jamming
disposer“.
• Use tongs or pliers to remove foreign objects from the
product.
• To reduce the risk of injury from particles that are thrown
out by the disposer, it is prohibited to use grinders without
noise shielding screen (Fig. 2).
Place the plug in the drain hole. Do not allow the following
items to fall into the disposer: shells, including oyster,
caustic means for cleaning pipes or similar chemical
products, glass, porcelain or plastic, large (hollow) bones,

19
metal objects (bottle caps, cans, or kitchen appliances),
hot fat or other hot liquids.
• Replace worn noise glossy screen/ installation gasket/
protective reector if they are worn and are no longer able
to prevent waste or water.
• If the disposer is switched o, use a stopper to prevent
objets étrangers dans le broyage caméra. Assurez-vous
que le pouvoir de l’éliminateur est désactivé
• Avant d’appuyer sur le bouton de réinitialisation, de
nettoyer le bourrage ou d’enlever des objets étrangers
de la chambre de déchiquetage, assurez-vous que la
nourriture est éteinte.
• Gardez les mains et les doigts hors de la portée de
chambre de broyeur.
RISQUE D’INCENDIE
Pour minimiser la possibilité de Ne pas entreposer près
d’un extincteur des articles tels que des chions, du papier
ou aérosol. Ne pas stocker ou utiliser de l’essence ou autre
mélanges de gaz et de vapeurs inammables liquide
près du broyeur. Ne permettez pas les éléments suivants
produits photographiques: peintures, solvants, produits
ménagers produits de nettoyage et produits chimiques,
liquides automobiles, emballages en plastique.
9. MANUEL D’UTILISATION
1. Utiliser l’interrupteur d’air (Fig. 23) pour démarrer le
broyeur.
2. Réduisez lentement les déchets alimentaires dans la
chambre et installez la grille de ltre dans une position
verticale (de sorte qu’il circule à travers elle l’eau) pour
réduire le bruit et possible jeter les déchets pendant le
meulage (Fig. 24).
3. Une fois le meulage terminé, éteignez le broyeur et
laisser l’eau couler pendant au moins 15 s pour vider la
ligne de vidange.
DEVRAIT...
• Broyer les déchets alimentaires sous pression eau froide
pas moins de 6 litres/ min.
• Broyer les solides, tels que les petits os et les résidus de
fruits, pour le nettoyage chambres à découper.
• Broyer les agrumes, les melons, les légumes et les grains
de café.
• Une fois le meulage terminé, laissez l’eau s’écouler au
moins 15 secondes pour vider le drain pipeline.
• Débranchez le produit de la prise avant de retirer le rotor
grippé avec un outil.
• Ne stockez aucun objet sous l’écran pour garantir l’accès
au bouton redémarrer.
NE PAS...
• N’utilisez pas d’eau chaude lors du meulage restes de
produits (bien que chaud eau à travers le produit entre le
broyage).
• N’éteignez pas l’eau ou le produit tant que le meulage
n’est pas terminé, il y a un bruit de moteur en marche et
de course eau.
• Ne pas broyer de grandes quantités d’œufs coquilles,
matériaux breux, par exemple blé des coques, des
artichauts, etc., an d’éviter le colmatage éventuel de la
pipe.
• Ne moudre que des aliments.
• N’utilisez pas cet appareil pour meuler des matériaux
durs, tels que du verre et métal.
• Ne jamais verser de graisse, d’huile ou de graisse dans
shell, car cela conduira à un engorgement systèmes de
drainage et d’assainissement.
• Ne pas remplir la chambre du broyeur avec beaucoup
de nettoyage des légumes. Au lieu de cela, allumez
l’eau en premier et broyeur et abaisser progressivement
nettoyage.
NETTOYAGE DE LA CHAMBRE À DISPOSITION
Au l du temps, les particules de graisse/ aliments
peuvent
s’accumuler dans la chambre de broyage et protéger
réecteur, provoquant une odeur désagréable.
Pour nettoyage de la chambre de broyage et du réecteur:
1. Éteignez l’ÉQUIPEMENT et débranchez-le du secteur.
2. À travers le trou de vidange en utilisant une éponge
pour laver, nettoyer le fond surfaces réecteur de
protection et tige intérieure bords de la chambre de
hachage.
3. Placez le bouchon dans le trou de vidange et
remplissez-le d’eau chaude à moitié.
4. Mélanger 60 ml de bicarbonate de soude avec de l’eau.
Allumez le produit et retirez la che de l’évier. lavage de
particules étrangères.
ELIMINATION DU JUMMING DISPOSER
Si pendant le fonctionnement du moteur de broyeur
arrêté, éventuellement coincé des pièces mobiles. Pour
éliminer le brouillage:
1. Éteignez le broyeur et fermez l’eau.
2. Insérez une extrémité de la clé dans le trou central sur le
bas du produit pour une solution autonome. enlèvement
des déchets collés.Tournez la clé d’avant en arrière jusqu’à
ce que aussi longtemps que il ne fera pas un tour complet.
Sortir clé.
3. Retirez les objets étrangers du aider les tiques avec de
longues poignées. Donner au moteur du produit refroidir
pendant 3-5 minutes et appuyez sur le bouton rouge de
réinitialisation sur le fond du broyeur (Fig. 26) (Si le moteur
ne démarre pas, vériez bouclier de protection pour la
présence de disjoncteurs et brûlé fusibles).

20
RECOMMANDATIONS POUR L’AMÉLIORATION
DU TRAVAIL
1. Avant d’utiliser le lave-vaisselle connecté, assurez-
vous que le broyeur est vide et qu’il n’y a pas d’obstacles
à la vidange.
2. On peut réinsérer le bouchon de sécurité dans le
trou de vidange de l’évier pour éviter que des objets n’y
tombent accidentellement.
3. Le broyeur a une construction durable, conçue
pour de nombreuses années de travail. Il recycle tous
les déchets alimentaires ordinaires, mais n’est PAS
en mesure de broyer le plastique, les bouchons, les
couvercles pour bocaux, le verre, la porcelaine, le cuir,
le tissu, le caoutchouc, les cordes, les coquillages, le
papier d’aluminium et les plumes d’oiseaux (Fig. 26).
ENTRETIEN ET MAINTENANCE
!!! N’ESSAYEZ PAS DE LUBRIFIER LE BROYEUR DE
DÉCHETS !!!
Le moteur électrique a une graisse inchangeable. Le
broyeur de déchets est capable de nettoyer de manière
autonome ses pièces internes à chaque utilisation.
NE VERSEZ JAMAIS d’alcalis ou d’autres agents de
nettoyage dans le broyeur, car ils peuvent corroder
les parties métalliques de l’appareil. De plus, en cela la
garantie s’éteint. Les dépôts minéraux de l’eau forment
l’efflorescence sur les surfaces des pièces tournantes du
broyeur, qui sont faites de l’acier inoxydable. CECI NE
DEVRAIT PAS CAUSER D’ANXIÉTÉ, car la rouille ne peut
pas se former ici.
Si vous devez eectuer une maintenance ou réparer le
produit, contacter un autorisé centre de service ou à votre
revendeur.
La garantie est annulée dans les cas suivants:
- Si le produit a été utilisé avec des déciences exigences
de ce manuel
- en présence de traces d’ouverture du corps du produit
pour l’auto-réparation
Pour plus de détails sur les termes et conditions de la
garantie, voir la garantie coupon
Other manuals for MASTER ECO
4
This manual suits for next models
1
Table of contents
Languages:
Other Bort Garbage Disposal manuals