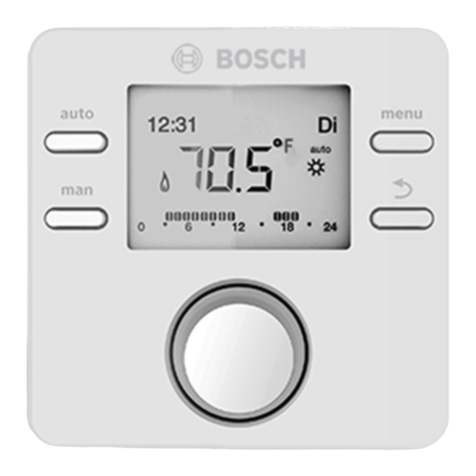
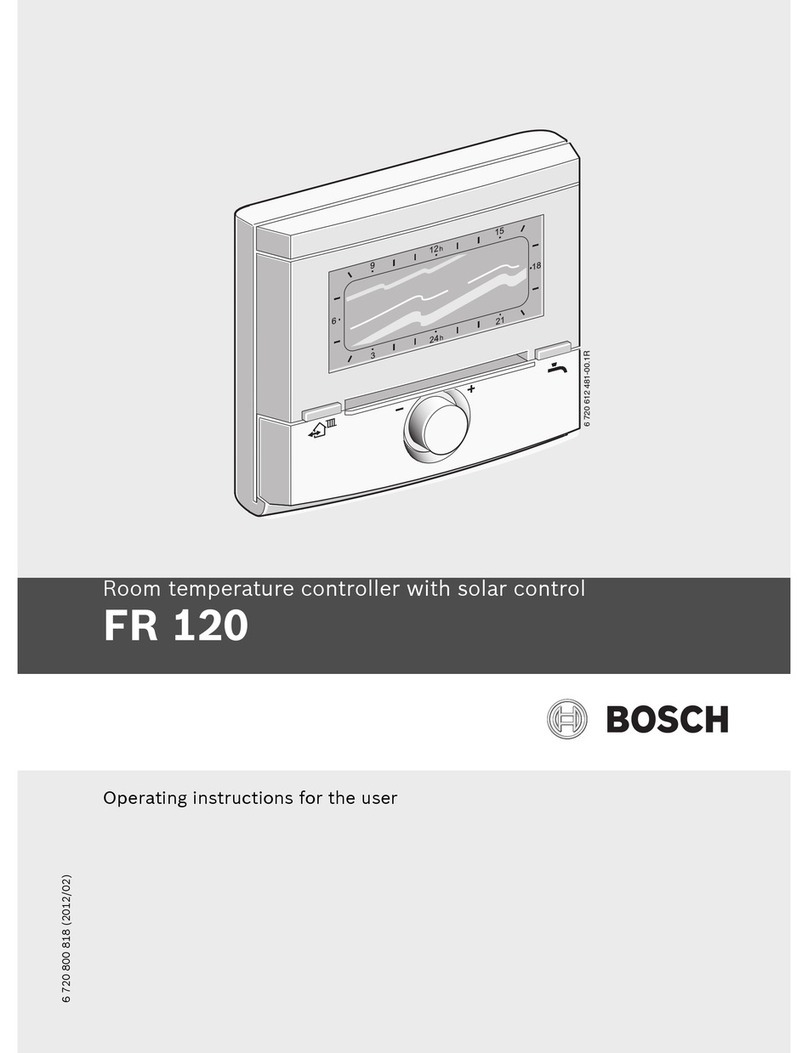
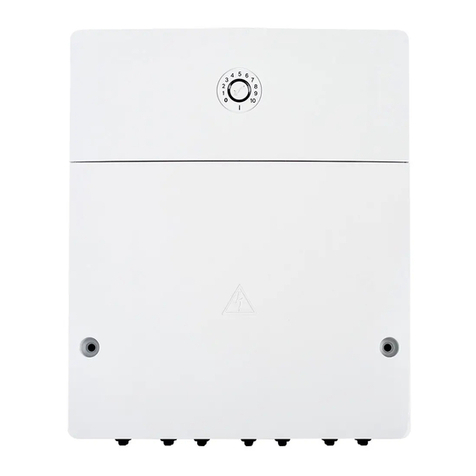
Bosch FB 100 User manual

Operating Instructions for the User
Remote Control and Room Sensor
FB 100
6 720 612 481-00.1R
6 720 643 265 (2010/05)

6 720 643 265 (2010/05)
2| US/CA
Dear Customer,
The remote control is the “brain” of your heating
system. We have set it at the factory so that the
settings will be appropriate for most cases. This
way, daily operation is easy. The large, clear
display of the remote control “speaks plain text”
and shows all relevant information.
Heat with program
With the remote control you can set how warm
you want it at what times. We have already set
various scenarios from which you can choose.
An example: do you work and therefore not at
home during the day? Then perhaps you only
need full heating comfort in the mornings and the
evenings. During the day you save energy in
“economy mode” and at night, the heat is
reduced further still. Perhaps you have entirely
different needs because you are at home all day?
Whatever your lifestyle and your habits may be –
the heating system will adapt itself to your needs.
Even for unforeseen cases: 100% comfort
Did you get home earlier than planned and would
you like to have the house warm right away even
though your boiler is in “economy mode”? In this
case the remote control switches to “heating
mode” right away with the press of a key. In just
a short time, you will be as comfortable as usual.
Another example: you would like to shower even
though your boiler is currently running in
“economy mode”? Here too, the press of a key
can help you. The water is heated and in just a
short time you can enjoy your hot shower.
Depending on the type of hot water heating, the
system returns to “economy mode” automatically
after half an hour or after an hour.
Solar optimization
With our patented
“SolarInside-ControlUnit” process, you save
energy. You can find information about the solar
yield on the remote control's Info menu.
These operating instructions
These operating instructions contain the most
important information on daily operation of the
remote control.
There is a listing of other interesting functions of
the remote control in section 6.
If you would like to learn more, there is a detailed
description of all available functions in the
detailed installation and operating instructions.
Specialized terms are explained for you at the
end of these operating instructions.
We hope you will enjoy your new Bosch product.
Your Bosch team

6 720 643 265 (2010/05)
Contents | 3US/CA
Contents
1 Explanation of symbols and safety
information . . . . . . . . . . . . . . . . . . . . . . . . 4
1.1 Explanation of symbols . . . . . . . . . . 4
1.2 Safety instructions . . . . . . . . . . . . . . 4
2 Details about the remote control . . . . . . . 5
2.1 Certifications . . . . . . . . . . . . . . . . . . 5
2.2 Disposal . . . . . . . . . . . . . . . . . . . . . . 5
2.3 Cleaning the housing . . . . . . . . . . . . 5
3 Display reading . . . . . . . . . . . . . . . . . . . . . 6
4 Operation with closed flap . . . . . . . . . . . . 7
4.1 Controls . . . . . . . . . . . . . . . . . . . . . . 7
4.2 If it is too cold or too warm for you . 8
4.3 If you would like to change the
heating program temporarily . . . . . . 8
4.4 If you would like to change the DHW
program temporarily . . . . . . . . . . . . 9
5 Operation with open flap . . . . . . . . . . . . 10
5.1 Controls . . . . . . . . . . . . . . . . . . . . . 10
5.2 Changing room temperatures
permanently for the
heating program . . . . . . . . . . . . . . 12
5.3 Constant room temperature . . . . . . 14
5.4 Selecting and adapting a heating
program . . . . . . . . . . . . . . . . . . . . . 15
5.4.1 Activating a heating program . . . . . 16
5.4.2 Adapting a heating program
individually . . . . . . . . . . . . . . . . . . 16
5.4.3 Resetting heating program to
factory settings . . . . . . . . . . . . . . . 18
5.5 Setting up a vacation program . . . . 19
5.5.1 Setting the beginning of vacation . . 19
5.5.2 Setting the end of vacation . . . . . . 20
5.5.3 Starting vacation mode . . . . . . . . . 20
5.5.4 Canceling the vacation
program early . . . . . . . . . . . . . . . . 20
5.6 Changing the time and date . . . . . . 21
6 Information about additional functions 22
7 Environmental protection . . . . . . . . . . . 23
8 Troubleshooting . . . . . . . . . . . . . . . . . . . 24
8.1 Eliminating “sensed” faults . . . . . 24
8.2 Eliminating displayed faults . . . . . 26
9 Energy saving tips . . . . . . . . . . . . . . . . . 27
10 Menu structure . . . . . . . . . . . . . . . . . . . 28
Technical terms . . . . . . . . . . . . . . . . . . . 30

6 720 643 265 (2010/05)
4| Explanation of symbols and safety information US/CA
1 Explanation of symbols and safety information
1.1 Explanation of symbols
Warnings
Signal words at the beginning of a warning are
used to indicate the type and seriousness of the
ensuing risk if measures for minimizing damage
are not taken.
•NOTE indicates that minor damage to
property may occur.
•CAUTION indicates possible minor to medium
personal injury.
•WARNING indicates possible severe personal
injury.
•DANGER indicates that severe personal injury
may occur.
Important information
Additional symbols
1.2 Safety instructions
BTo ensure proper function, follow these
instructions.
BDanger of scalding due to thermal
disinfection:
If the thermal disinfection function is enabled,
a thermostatic mixing valve must be installed.
BWhen there is a risk of frost, leave the boiler
switched on and follow the frost protection
information.
Risk of damage due to operator error
Operator errors can cause injury and damage to
property.
BEnsure that children never operate the remote
control unsupervised or play with it.
BEnsure that only individuals who can operate
the remote control correctly have access to it.
Warnings are indicated in the text
by a warning triangle and a gray
background.
In case of danger due to electric
current, the exclamation point on
the warning triangle is replaced
with a lightning symbol.
Important information that
presents no risk to people or
property is indicated with this
symbol. It is separated by
horizontal lines above and below
the text.
Symbol Meaning
BSequence of steps
ÆCross-reference to other points in
this document or to other
documents
•Listing/list entry
–Listing/list entry (2nd level)
Tab. 1

6 720 643 265 (2010/05)
Details about the remote control | 5US/CA
2 Details about the remote control
2.1 Certifications
2.2 Disposal
BDispose of packaging in an environmentally
responsible manner.
2.3 Cleaning the housing
BIf necessary, clean the remote control housing
with a damp cloth; do not use any aggressive
or acidic cleaning agents for this.
This product has been tested
and is certified for both the US
and Canadian markets, and
meets all applicable US and
Canadian standards.

6 720 643 265 (2010/05)
6| Display reading US/CA
3 Display reading
Fig. 1 Symbols on the display (sample figures)
Item Symbol Designation Explanation
1Temperature
display
Current or desired room temperature.
2Time and day
of the week
Current time and day of the week.
3Flashing
segment
Current time (1 segment = 15 minutes, here 1:45pm (13:45) to
2:00pm (14:00)) or switch time in the heating program.
4Full segments Period of the operating mode Comfort (high room temperature),
1 segment = 15 minutes.
5Empty
segments
Period of the operating mode Economy (medium room
temperature), 1 segment = 15 minutes.
6No segment Period of the operating mode Frost (low room temperature).
7Header Name of the superior menu level, of the program, etc.
83 text lines Menu options, info texts, set values, etc.
9Back Jump back to the higher menu level.
10 Additional
texts
If the text displayed has more than 3 lines, this is indicated by the
directional arrow. The additional text can be viewed by turning
the dial.
11 Burner
operation
The boiler is heating.
12 Operating
mode
Current operating mode Comfort / Economy / Frost.
13 Automatic
mode
Automatic change of the operating modes to the set switch times
according to the heating program.
14 Vacation The vacation program is active.
Tab. 2 Symbols on the display
6 720 643 262-30.1O
912 h15
18
2124h
3
6
912 h15
18
2124h
3
6
3
246
12
5
1
9
8
11
7
1314 10
12 h
15
9
3

6 720 643 265 (2010/05)
Operation with closed flap | 7US/CA
4 Operation with closed flap
4.1 Controls
Fig. 2 Operating elements with closed flap
Item Element Designation Explanation
1Dial •Turning dial:
change the room temperature temporarily.
•Press the dial to confirm the setting.
2“Come/go” button Start the next operating mode Comfort / Economy /
Frost of the heating program immediately. The
heating program is thus changed temporarily.
3“DHW single charge”
button
Start the hot water heating immediately. The DHW
program is thus changed temporarily.
Tab. 3 Operating elements with closed flap
23
1
912 h15
18
2124h
3
6
6 720 643 262-01.1O

6 720 643 265 (2010/05)
8| Operation with closed flap US/CA
4.2 If it is too cold or too warm for
you
You can read the current temperature from the
display.
Displaying the temperature setting
BTurn dial one click.
Changing the temperature setting temporarily
With the flap closed, you can temporarily change
the room temperature with the dial .
BRotate dial until the desired day room
temperature is displayed.
The temperature display flashes.
-or-
BTurn the dial to set the heating WARMER or
COOLER.
The position arrows on the display bars flash.
BPress the dial.
The change applies until the next switch point
of your heating program has been reached.
After this, the settings of the heating program
resume.
4.3 If you would like to change the
heating program temporarily
If you go to bed earlier, leave home longer or
come back earlier, you can use the button
to set the next operating mode Comfort /
Economy / Frost of the heating program right
away. The heating program is thus changed
temporarily until the next switch point is
reached.
Start “Come/Go”
BBriefly press button.
The next operating mode Comfort / Economy
/ Frost of the heating program is started right
away. The change is shown in the display.
Ending “Come/Go” early
BBriefly press button.
“Come/Go” is ended and the remote control
returns to the heating program.
The desired room temperature is an
orientation value that the remote
control tries to achieve. Deviations
from the actually-achieved room
temperature can occur.
You can also change the room
temperature permanently
(Æsection 5.2).
The operating mode switch under
the flap must be in the position
(ÆFig. 3 [2], page 10).

6 720 643 265 (2010/05)
Operation with closed flap | 9US/CA
4.4 If you would like to change the
DHW program temporarily
If you would like to shower even though your
boiler is currently running in “Eco” mode, you can
use the button to start hot water heating right
away. The DHW program is thus changed
temporarily.
Starting “DHW single charge”
BBriefly press button.
The change is shown in the display.
–For hot water heating with a domestic hot
water tank, heating up to the set hot water
temperature occurs for 60 minutes.
–For hot water heating with a combi boiler,
the comfort operation is active for
30 minutes.
Ending “DHW single charge” early
BBriefly press button.
“DHW single charge” is ended and the DHW
program resumes.
See the operating instructions for
the boiler for additional information
about comfort operation.

6 720 643 265 (2010/05)
10 | Operation with open flap US/CA
5 Operation with open flap
5.1 Controls
Fig. 3 Controls with open flap
1
2
3
4
5
6
912 h15
18
2124h
3
6
6 720 643 262-22.1O

6 720 643 265 (2010/05)
Operation with open flap | 11US/CA
Item Element Designation Explanation
1Dial •Turn the dial:
–Temporarily change room temperature.
–Move in the menu and change the value.
•Press the dial.
–Open the menu.
–Confirm the setting.
2Operating mode selector •:
Heat according to heating program.
•/ / :
Permanent heat according to operating mode
Comfort / Economy / Frost (the heating program
is switched off).
3Menu button Open and close main menu.
4Info button Open and close info menu. Display of current
information about the heating system, e.g. heating,
solar.
5“Delete” button Delete/reset value on the menu.
6“Back” button Jump back to the higher menu level.
Tab. 4 Controls with open flap
menu
info

6 720 643 265 (2010/05)
12 | Operation with open flap US/CA
5.2 Changing room temperatures
permanently for the heating
program
The remote control has 3 temperature levels for
controlling the room temperature:
•Comfort: 70 °F (21 °C) (factory setting)
adjustment range 32 °F ... 86 °F
(0.0 °C ... 30.0 °C), however higher than Eco
•Economy: 60 °F (15 °C) (factory setting)
adjustment range 32 °F ... 86 °F
(0.0 °C ... 30.0 °C), however higher than Frost
and lower than Comfort
•Frost: 42 °F (5 °C) (factory setting)
adjustment range 32 °F ... 86 °F
(0.0 °C ... 30.0 °C), however lower than Eco
If you wish to change the room temperature for a
longer time, proceed as follows:
Display set temperature level
BOpen flap.
BTurn operating mode selector to the positions
/ / one after another.
The set room temperatures are displayed.
Changing the set temperature level
BPress the menu button.
The MAIN MENU is displayed, the Vacation
menu option is marked.
Fig. 4 Vacation menu option
BTurn the dial to mark the Heating menu
option.
Fig. 5 Heating menu option
BPress the dial.
The HEATING menu is displayed, the Program
menu option is marked.
Fig. 6 Program menu option
BTurn the dial to mark the Parameter menu
option.
Turn the operating mode selector
further back to the initial position
. Only then is an automatic
change of the temperature level in a
heating program possible.
912
h
15
18
2124
h
3
6
6 720 643 262-38.1O
912
h
15
18
2124
h
3
6
6 720 643 262-09.1O
6 720 643 262-12.1O
912
h
15
18
21
24
h
3
6

6 720 643 265 (2010/05)
Operation with open flap | 13US/CA
BPress the dial.
The HEATING PARAMETERS menu is
displayed, the Heating levels menu option is
marked.
Fig. 7 Heating levels menu option
BPress the dial.
The TEMPERATURE LEVELS menu is
displayed, the Comfort menu option is
marked.
Fig. 8 Comfort menu option
Example: Change temperature level Economy.
BTurn the dial to mark the Economy menu
option.
BPress the dial.
The input field for the desired room
temperature flashes.
Fig. 9 Desired room temperature input field
BTurn dial to set the desired room temperature.
BPress the dial to confirm the setting.
The Economy menu option is marked again.
BTurn the dial to change the settings for
Comfort and Frost in the same manner.
-or-
BPress the menu button to leave the menu.
The remote control works with the changed
settings.
912
h
15
18
2124
h
3
6
6 720 643 259-02.1O
912 h15
18
2124h
3
6
6 720 643 262-26.1O
912 h15
18
2124h
3
6
6 720 643 262-27.1O

6 720 643 265 (2010/05)
14 | Operation with open flap US/CA
5.3 Constant room temperature
If, however, you would like to specify a constant
room temperature for a longer time, then you can
set constant operation with the operating mode
selector.
The following constant room temperature
settings are possible:
•: Comfort in constant operation
The remote control constantly regulates the
set (high) room temperature for the Comfort
operating mode. (Factory settings): 70 °F
(21 °C).
•: Economy in constant operation
The remote control constantly regulates the
set (medium) room temperature for the
Economy operating mode. (Factory settings):
60 °F (15 °C).
•: Frost in constant operation
The controls constantly regulates the set
(low) room temperature for the Frost
operating mode. (Factory settings): 42 °F
(5 °C). If the boiler is switched on, there is
frost protection for the system. Please
observe the other notes in the boiler
operating instructions.
BOpen flap.
BTurn operating mode selector to the desired
position.
If possible, leave the operating
mode selector in the position.
Only this way can you benefit from
the full comfort of the heating
program.
NOTICE: Make sure that the lower
room temperature is tolerable for
plants and house pets.
You can change the set
temperature with the dial
(Æsection 4.2). If the operating
mode selector is turned, the
changed temperature is discarded.

6 720 643 265 (2010/05)
Operation with open flap | 15US/CA
5.4 Selecting and adapting a heating program
At the factory, various heating programs are
preprogrammed that are appropriate for most
cases. The program A (e.g. for families) is already
activated.
In this section you will learn how you can activate
another heating program and how you can
individualize the activated heating program.
Comfort 70 °F (21 °C) (factory setting)
Economy 60 °F (15 °C) (factory setting)
Frost 42 °F (5 °C) (factory setting)
Program Factory settings for the program points P1 to P6
Day
Switch
time P1
Switch
time P2
Switch
time P3
Switch
time P4
Switch
time P5
and P6
Program A
(e.g. for
families),
factory
default
Monday –
Thursday
06:00am 10:00pm – – – – – –
Friday 06:00am 11:30pm – – – – – –
Saturday 07:00am 11:30pm – – – – – –
Sunday 08:00am 10:00pm – – – – – –
Program B
(e.g. for
people who
work during
the day)
Monday –
Thursday
06:00am 08:00am 05:00pm 10:00pm – –
Friday 06:00am 08:00am 05:00pm 11:30pm – –
Saturday 07:00am 11:30pm – – – – – –
Sunday 08:00am 10:00pm – – – – – –
Program C
(e.g. for
seniors)
All days 07:00am 11:00pm – – – – – –
Tab. 5 Factory settings for the heating programs A, B, and C
The settings for a heating program
will be explained using the example
of Program A.

6 720 643 265 (2010/05)
16 | Operation with open flap US/CA
5.4.1 Activating a heating program
BOpen flap.
BPress the menu button.
The MAIN MENU is displayed, the Vacation
menu option is marked.
BTurn the dial to mark the Heating menu
option.
BPress the dial.
The HEATING menu is displayed, the Program
menu option is marked.
BPress the dial.
The HEATING PROGRAM menu is displayed,
the Activate menu option is marked.
Fig. 10 Activate menu option
BPress the dial.
The input field for the heating program
flashes.
BTurn the dial to select a heating program, e.g.
A:Program A or B:Program B.
BPress the dial to confirm the selection.
The Activate menu option is marked again.
BPress the menu button to leave the menu.
The remote control works with the selected
heating program.
5.4.2 Adapting a heating program individually
If the settings (temperature or switch times) for
a heating program do not meet your needs, you
can change this heating program.
BOpen flap.
BPress the menu button.
The MAIN MENU is displayed, the Vacation
menu option is marked.
BTurn the dial to mark the Heating menu
option.
BPress the dial.
The HEATING menu is displayed, the Program
menu option is marked.
BPress the dial.
The HEATING PROGRAM menu is displayed,
the Activate menu option is marked.
BTurn the dial to mark the Edit menu option.
Fig. 11 Edit menu option
BPress the dial.
The EDIT HEATING PROGRAM menu is
displayed, the A:Program A menu option is
marked.
BTurn the dial to select another heating
program.
-or-
BPress the dial.
The EDIT PROGRAM A menu is displayed, the
Replace with preset program menu option is
marked.
912
h
15
18
2124
h
3
6
6 720 643 262-13.1O
912
h
15
18
2124
h
3
6
6 720 643 262-06.1O

6 720 643 265 (2010/05)
Operation with open flap | 17US/CA
BTurn the dial to mark the desired group of
days, e.g. Monday.
The following groups of days are available:
–All days (all days of the week)
–Mon - Fri (all weekdays)
–Sat + Sun (Saturday and Sunday)
–Monday, Tuesday... (each weekday
individually)
BPress the dial.
The EDIT PROGRAM A MON menu is
displayed, the P1 menu option is marked.
Fig. 12 Edit program A on Monday (P1)
BTurn the dial to select another program, e.g.
P3.
-or-
BPress the dial.
The segment display and the input field for the
switch time of P1 flashes.
BTurn the dial to set the desired switch time,
e.g. 6:30am (06:30).
Fig. 13 Setting the switch time
BPress the dial to confirm the setting.
The segment display and the input field for the
operating mode of P1 flash.
BTurn the dial to select another operating
mode, e.g. Economy.
Fig. 14 Setting the operating mode
BPress the dial to confirm the setting.
The program P1 is marked.
BTurn the dial to select another program, e.g.
P3.
-or-
BPress the menu button to leave the menu.
The remote control works with the changed
settings.
912 h15
18
2124h
3
6
6 720 643 262-10.1O
912 h15
18
2124h
3
6
6 720 643 262-11.1O
If you have changed a heating
program that was not already
activated (factory setting is
A:Program A), you must select the
corresponding heating program in
the HEATING menu with the
Activate menu option and activate it
(Æsection 5.4.1).
912 h15
18
2124h
3
6
6 720 643 262-14.1O

6 720 643 265 (2010/05)
18 | Operation with open flap US/CA
5.4.3 Resetting heating program to factory
settings
If you need a heating program with its original
settings, you can reset the heating program to its
factory settings.
BOpen flap.
BPress the menu button.
The MAIN MENU is displayed, the Vacation
menu option is marked.
BTurn the dial to mark the Heating menu
option.
BPress the dial.
The HEATING menu is displayed, the Program
menu option is marked.
BPress the dial.
The HEATING PROGRAM menu is displayed,
the Activate menu option is marked.
BTurn the dial to mark the Edit menu option.
BPress the dial.
The EDIT HEATING PROGRAM menu is
displayed, the A:Program A menu option is
marked.
BTurn the dial to select another heating
program.
-or-
BPress the dial.
The EDIT PROGRAM A menu is displayed, the
Replace with preset program menu option is
marked.
BTurn the dial to mark the Reset factory
settings menu option.
Fig. 15 Reset factory settings menu option
BPress the dial.
The input field No flashes.
BTurn the dial to set Yes.
BPress the dial to confirm the setting.
The message The heating program A has
been reset to factory settings is displayed.
BPress the dial.
The Reset factory settings menu option is
marked again.
BPress the menu button to leave the menu.
The remote control works with the heating
program's factory settings.
912
h
15
18
2124
h
3
6
6 720 643 262-03.1O

6 720 643 265 (2010/05)
Operation with open flap | 19US/CA
5.5 Setting up a vacation program
If you leave the house for several days, you can
set in the vacation program that there will be
neither heat nor hot water produced during this
time.
The heating program otherwise applicable is not
changed by doing this. The frost protection is
also guaranteed during the vacation program.
The vacation program works with the following
factory settings:
•Heating: Frost
5.5.1 Setting the beginning of vacation
BOpen flap.
BPress the menu button.
The MAIN MENU is displayed, the Vacation
menu option is marked.
Fig. 16 Vacation menu option
BPress the dial.
The vacation menu is displayed, the Start
menu option is marked.
BPress the dial.
The input field for the year flashes.
BTurn the dial to set the year.
BPress the dial to confirm the setting.
The input field for the month flashes.
BSet the month and day in the same manner as
the year.
After confirmation of the day, the Start menu
option is marked again.
The factory settings guarantee
energy-saving and safe operation
during your vacation.
If you would nevertheless like to
change the factory settings, you
will find the possible settings in
the detailed installation and
operating instructions.
If you have set the vacation
program to start on today's date, it
will start immediately.
Otherwise the vacation program
will start at 12:00am (00:00) on the
set day.
912
h
15
18
2124
h
3
6
6 720 643 262-38.1O

6 720 643 265 (2010/05)
20 | Operation with open flap US/CA
5.5.2 Setting the end of vacation
BTurn the dial to mark the End menu option.
BPress the dial.
The input field for the year flashes.
BTurn the dial to set the year.
BPress the dial to confirm the setting.
The input field for the month flashes.
BSet the month and day in the same manner as
the year.
After confirmation of the day, the End menu
option is marked again.
5.5.3 Starting vacation mode
BPress the menu button to leave the menu.
The vacation program will start on the set
date.
•During the run time of the vacation program,
the display shows and the set vacation
end, e.g. VACATION UNTIL 09/30/2010
(30.09.2010).
•After the end of the vacation program, the
remote control works again with the set
heating program.
5.5.4 Canceling the vacation program early
BOpen flap.
BPress the menu button.
The main menu is displayed, the Vacation
menu option is marked.
BPress the dial.
The vacation menu is displayed, the Start
menu option is marked.
BPress the dial.
The input field for the year flashes.
BPress the button to delete the date for the
vacation start.
The display shows --/--/---- (--.--.----).
BPress the dial to confirm the setting.
The date for the vacation end is also deleted.
BPress the menu button to leave the menu.
The vacation program is ended.
The vacation program ends at
11:59pm (23:59) on the set day.
Other manuals for FB 100
1
Table of contents
Other Bosch Temperature Controllers manuals

Bosch
Bosch FR 120 Instruction Manual

Bosch
Bosch 8733951033 User manual

Bosch
Bosch EMS plus MM100 User manual

Bosch
Bosch HEZ39050 User manual

Bosch
Bosch FR 120 User manual

Bosch
Bosch HEZ39050 User manual

Bosch
Bosch FR 100 Installation guide

Bosch
Bosch CRC200 User manual

Bosch
Bosch FW 100 User manual

Bosch
Bosch CLIMO A D00 A40 103 User manual
Popular Temperature Controllers manuals by other brands

Golander
Golander GL102B user guide

Digilent
Digilent Pmod HYGRO Reference manual

WITA
WITA SM WR FR Series installation manual

aci
aci ROOM Series Installation & operation instructions

CARLO GAVAZZI
CARLO GAVAZZI T2000 Series CGI Tempware Software Manual

Oregon Scientific
Oregon Scientific THGR511 user manual