6 •English L1 Pro8/Pro16 Portable Line Array System •Owner's Guide
PRO.BOSE.COM
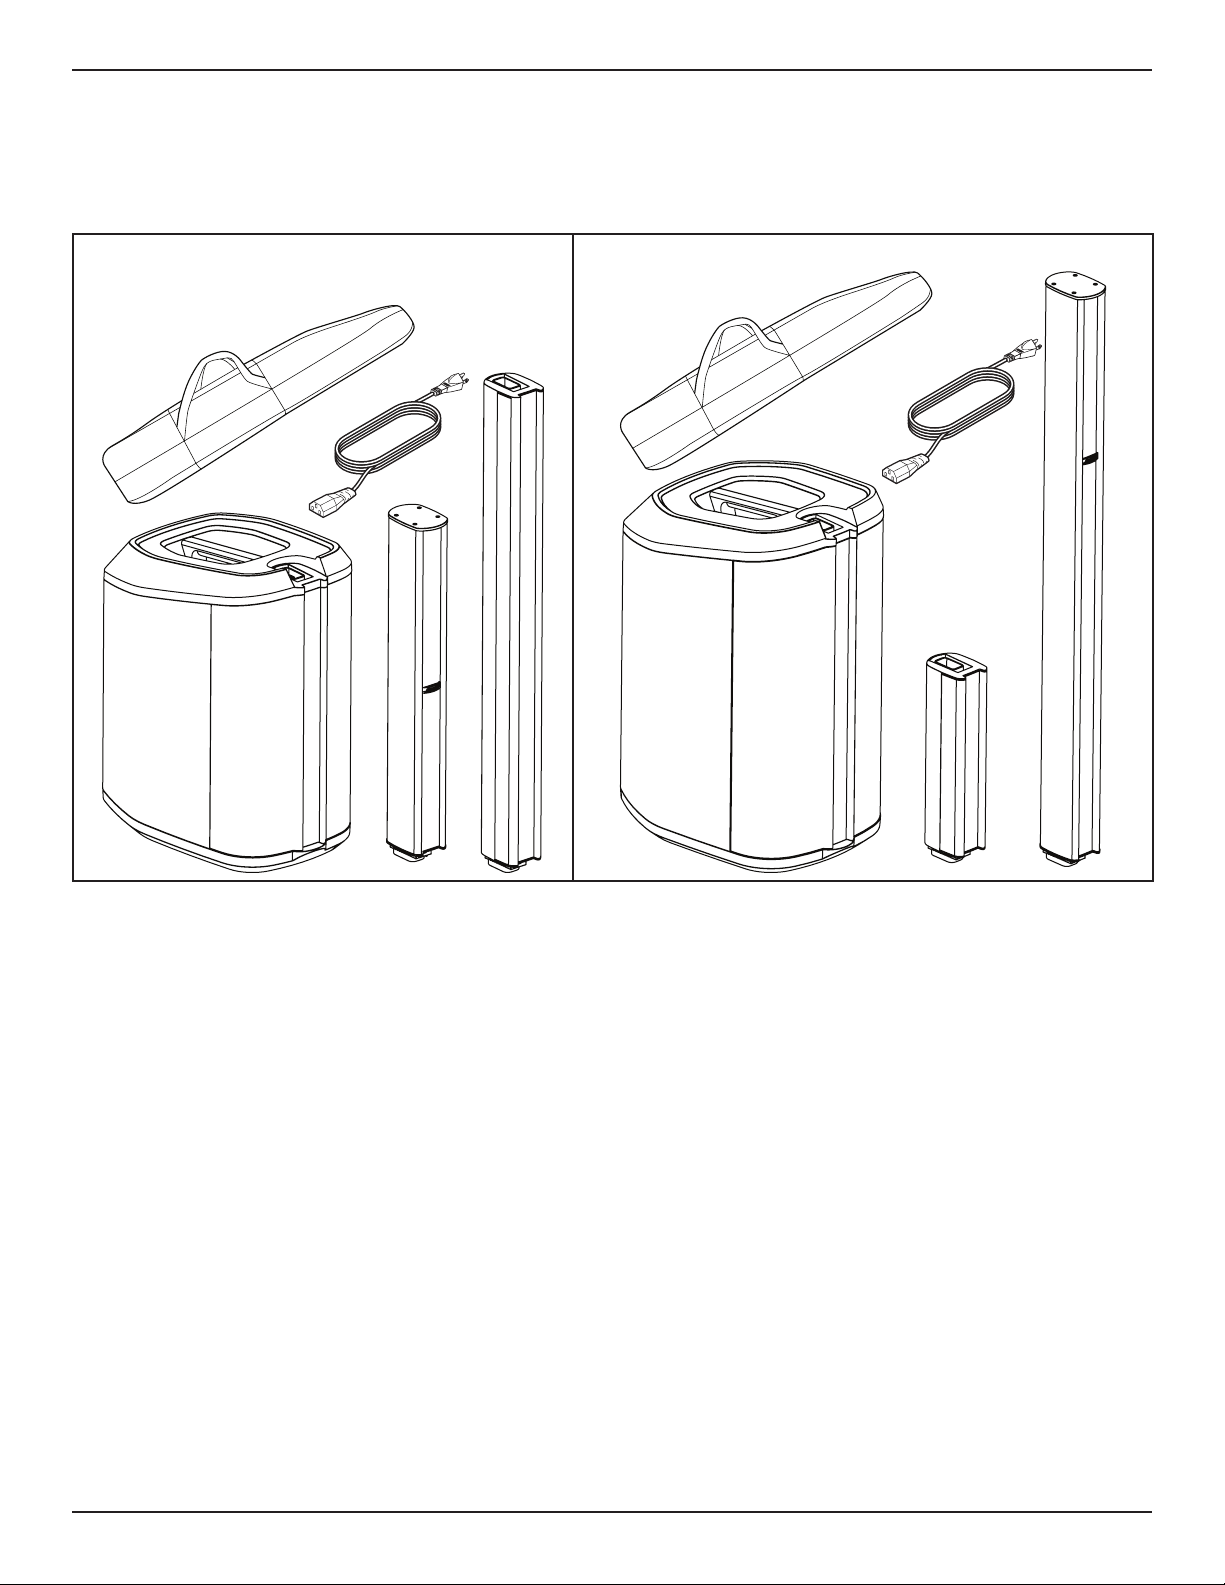
System Setup
System Setup
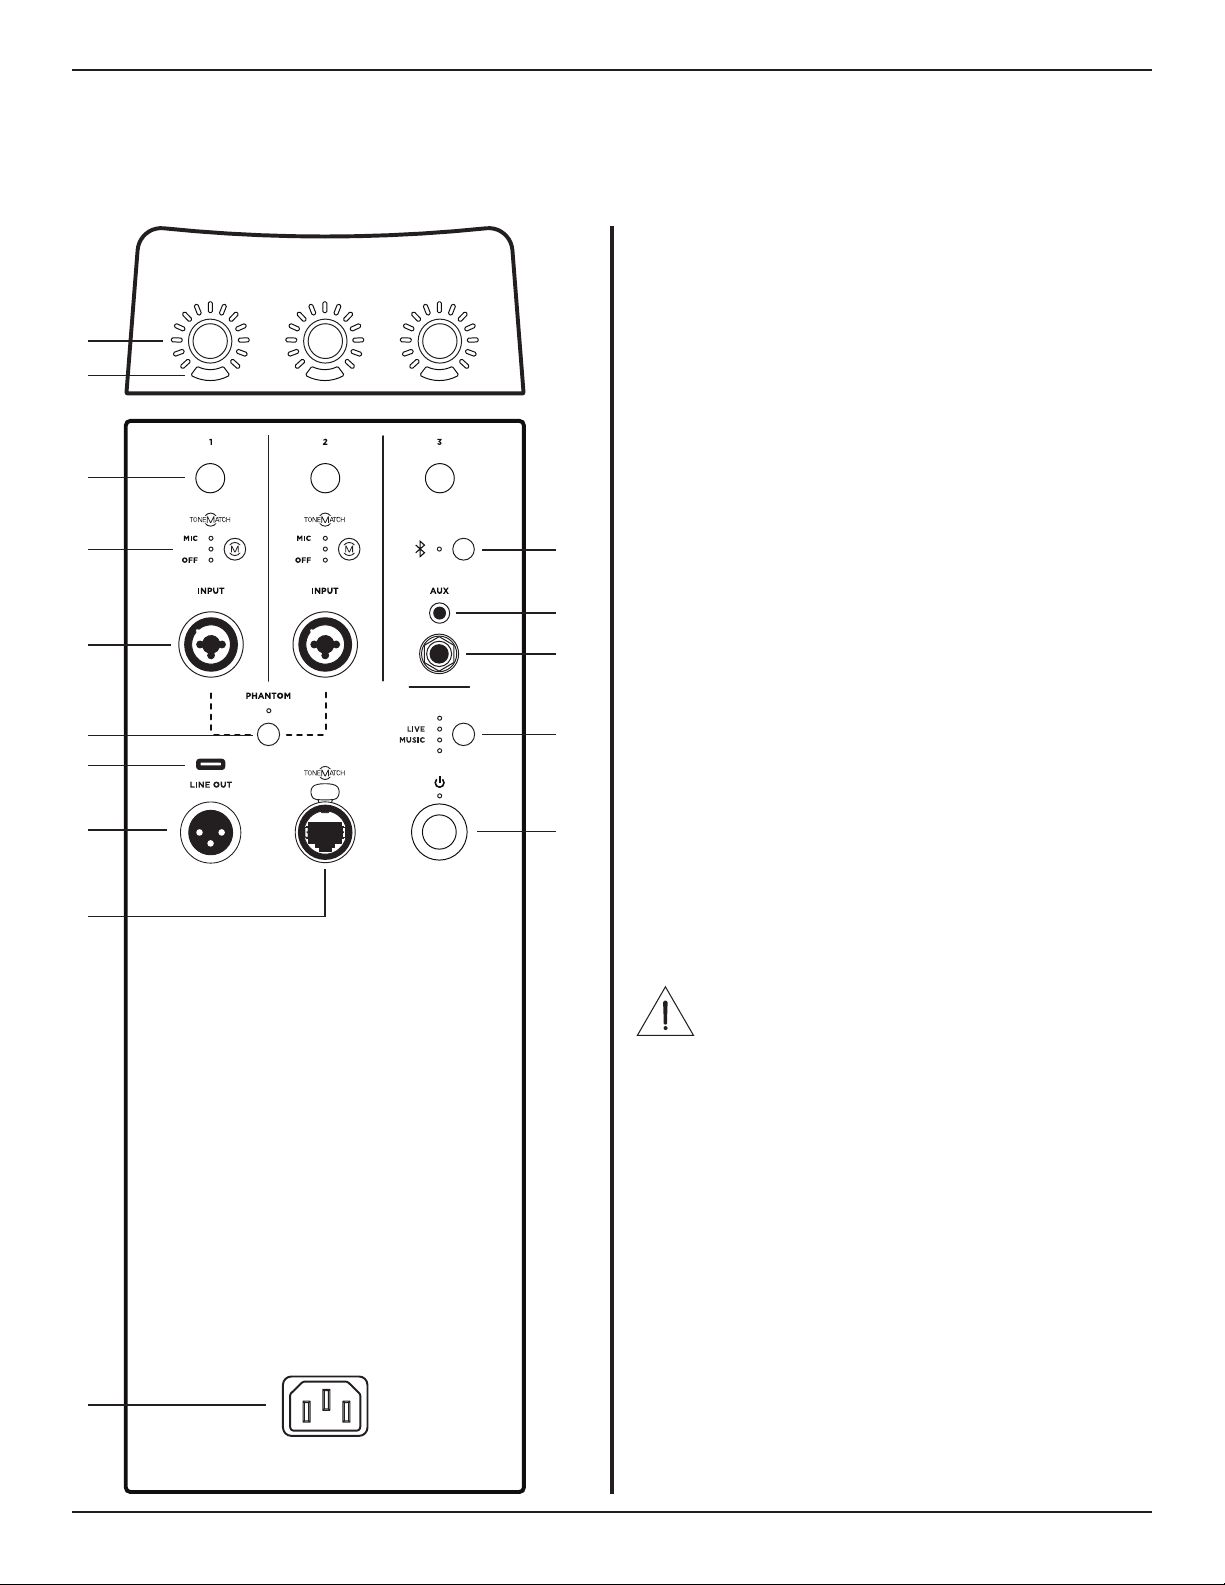
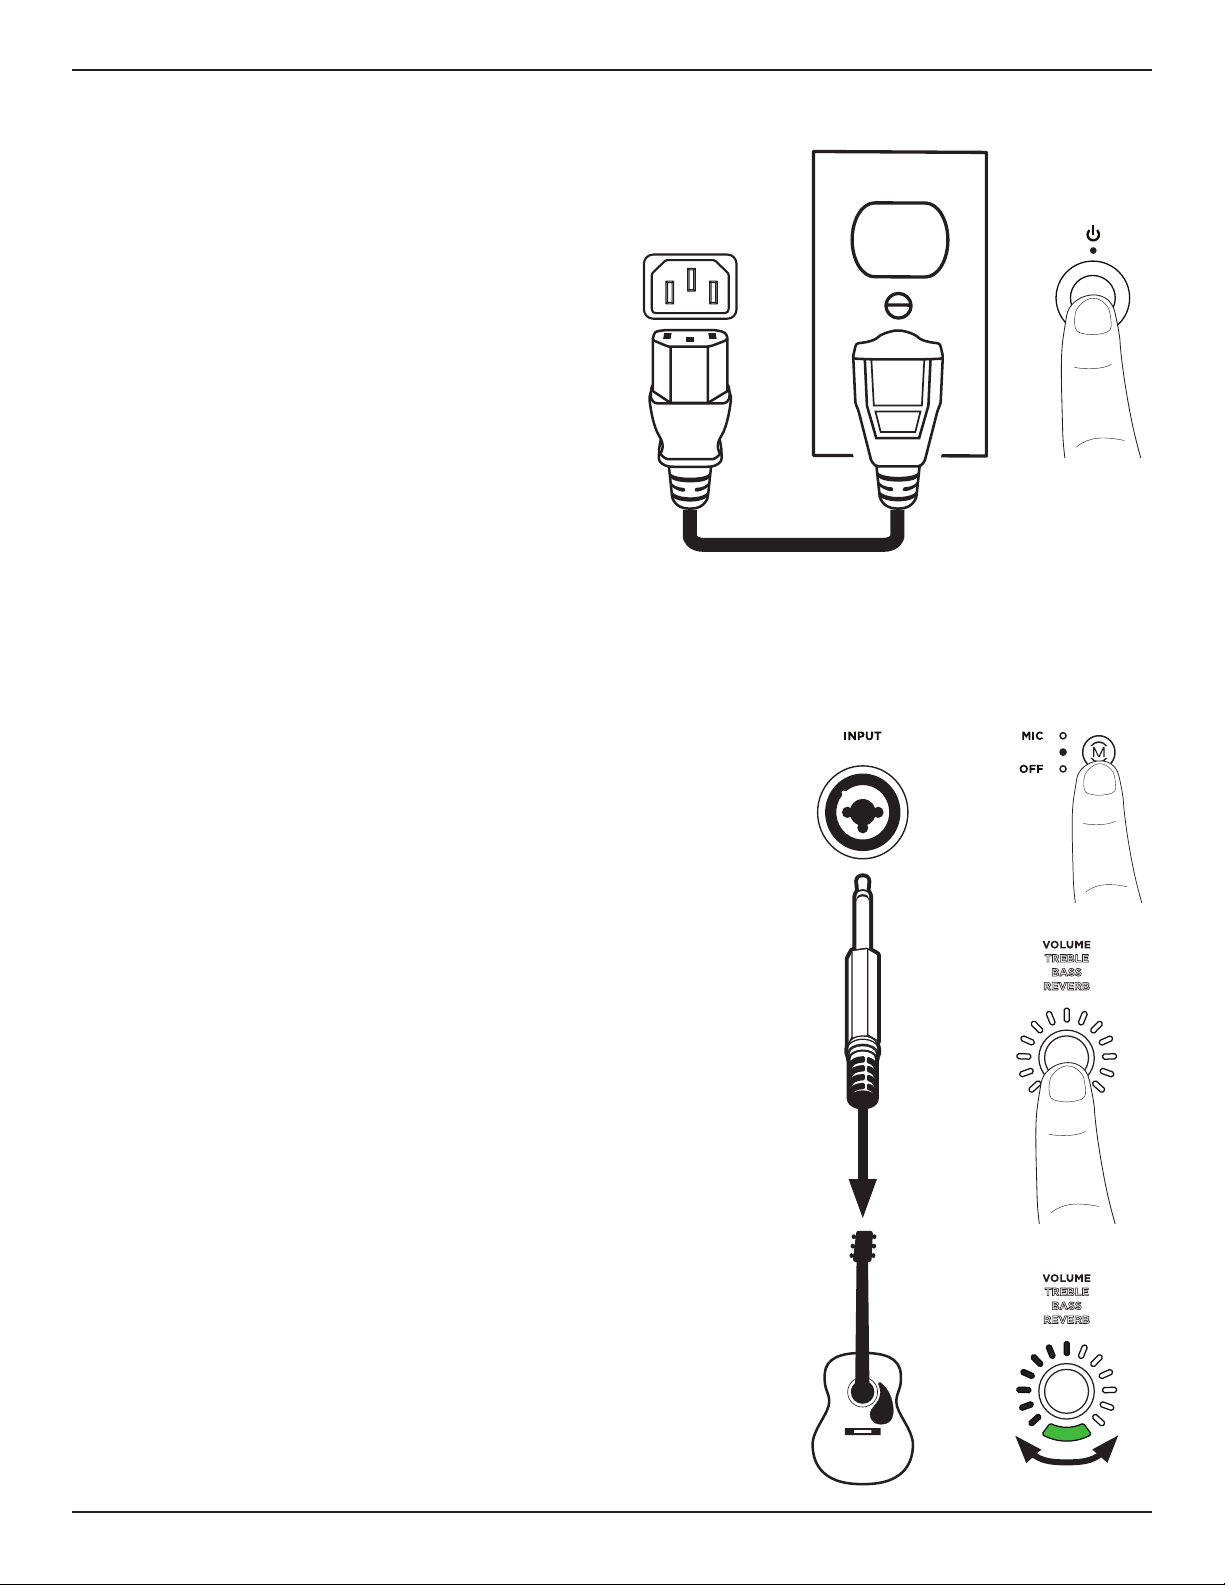
qChannel Parameter Control: Adjust the level of
volume, treble, bass, or reverb for your desired
channel. Press the control to switch between
parameters; rotate the control to adjust the level
of your selected parameter.
wSignal/Clip Indicator: The LED will illuminate
green when a signal is present and will illuminate
red when the signal is clipping or the system is
entering limiting. Reduce the channel or signal
volume to prevent signal clipping or limiting.
eChannel Mute: Mute the output of an individual
channel. Press the button to mute the channel.
While muted, the button will illuminate white.
rChannel ToneMatch Button: Select the
ToneMatch preset for an individual channel. Use
MIC for microphones and use INST for acoustic
guitar. The corresponding LED will illuminate
white while selected.
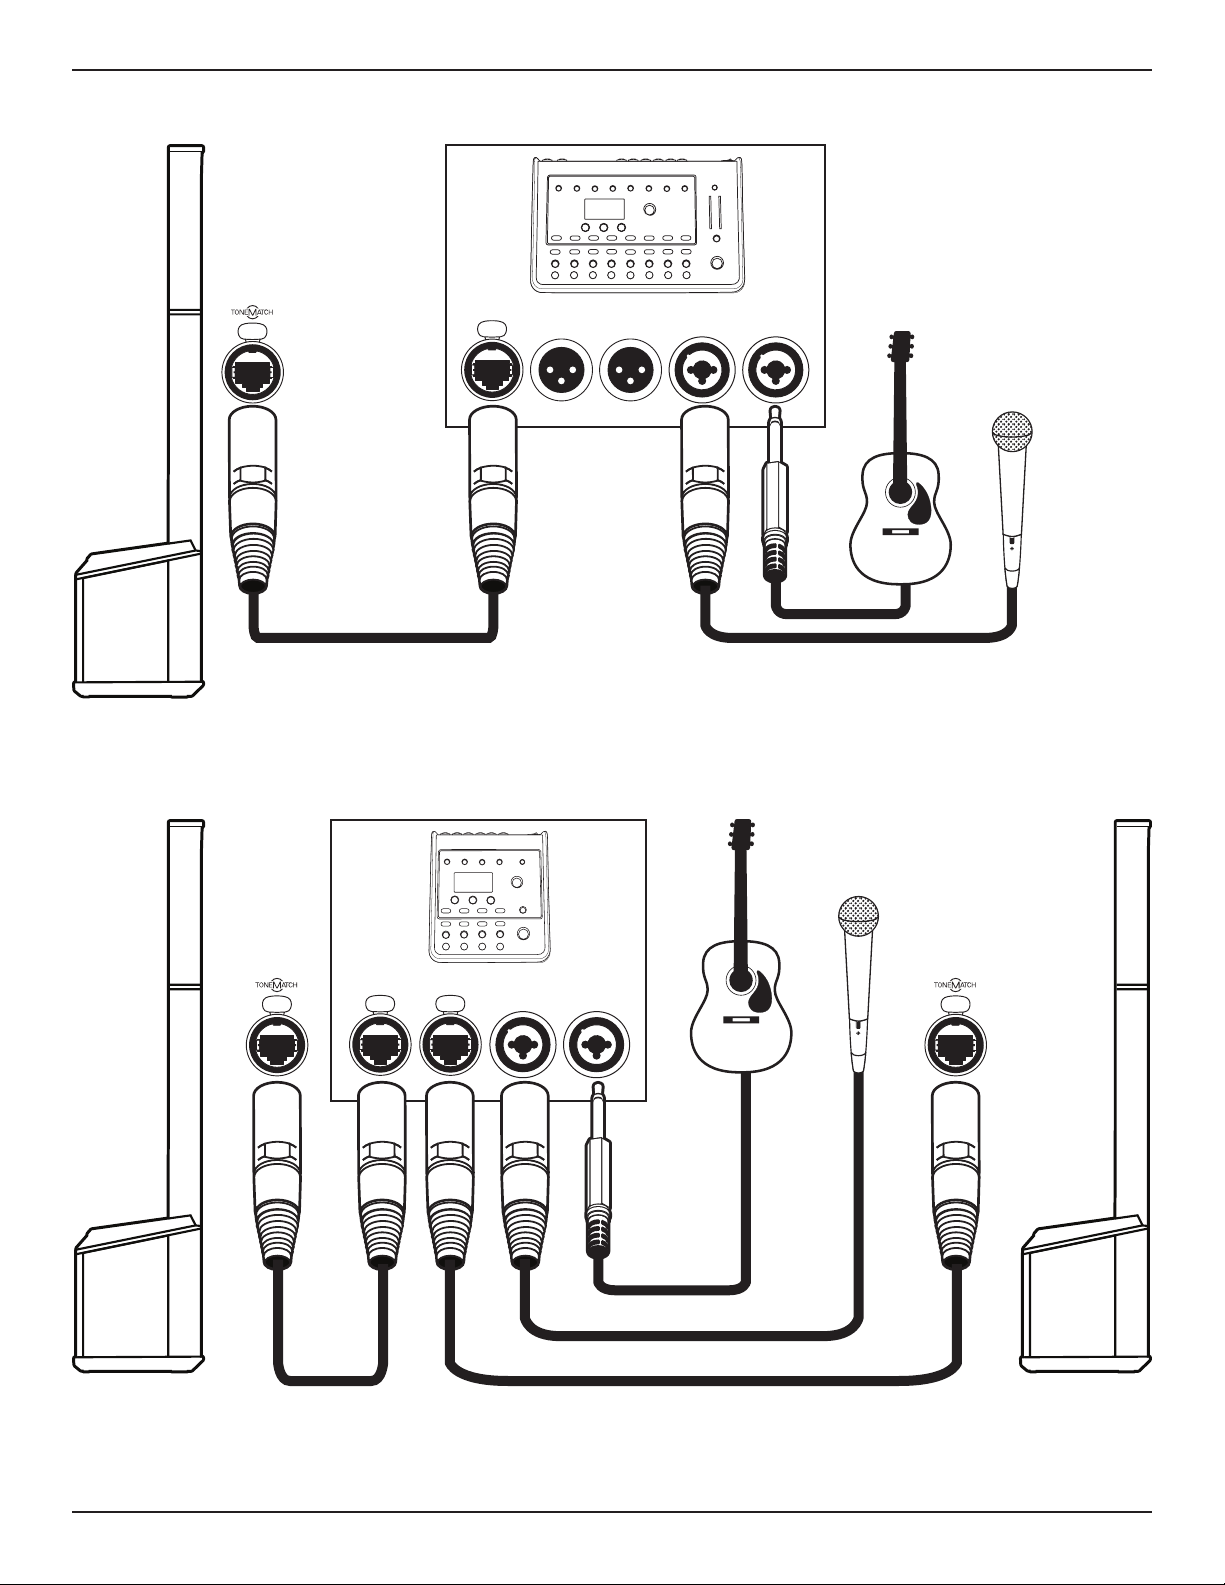
tChannel Input: Analog input for connecting
microphone (XLR), instrument (TS unbalanced),
or line level (TRS balanced) cables.
yPhantom Power: Press the button to apply 48-
volt power to channels 1 and 2. The LED will
illuminate white while phantom power is applied.
uUSB Port: USB-C connector for Bose service use.
Note: This port is not compatible with
Thunderbolt 3 cables.
iXLR Line Output: Use an XLR cable to connect
the line-level output to a Sub1/Sub2 or another
bass module.
oToneMatch Port: Connect your L1 Pro to a T4S or
T8S ToneMatch mixer via a ToneMatch cable.
CAUTION: Do not connect to a computer or
phone network.
aPower Input: IEC power cord connection.
sStandby Button: Press the button to power on
the L1 Pro. The LED will illuminate white while the
system is on.
dSystem EQ: Press the button to scroll through
and select a master EQ suitable for the use case.
The corresponding LED will illuminate white while
selected.
fTRS Line Input: Use a 6.4-millimeter (¼-inch) TRS
cable to connect line-level audio sources.
gAux Line Input: Use a 3.5-millimeter (⅛-inch) TRS
cable to connect line-level audio sources.
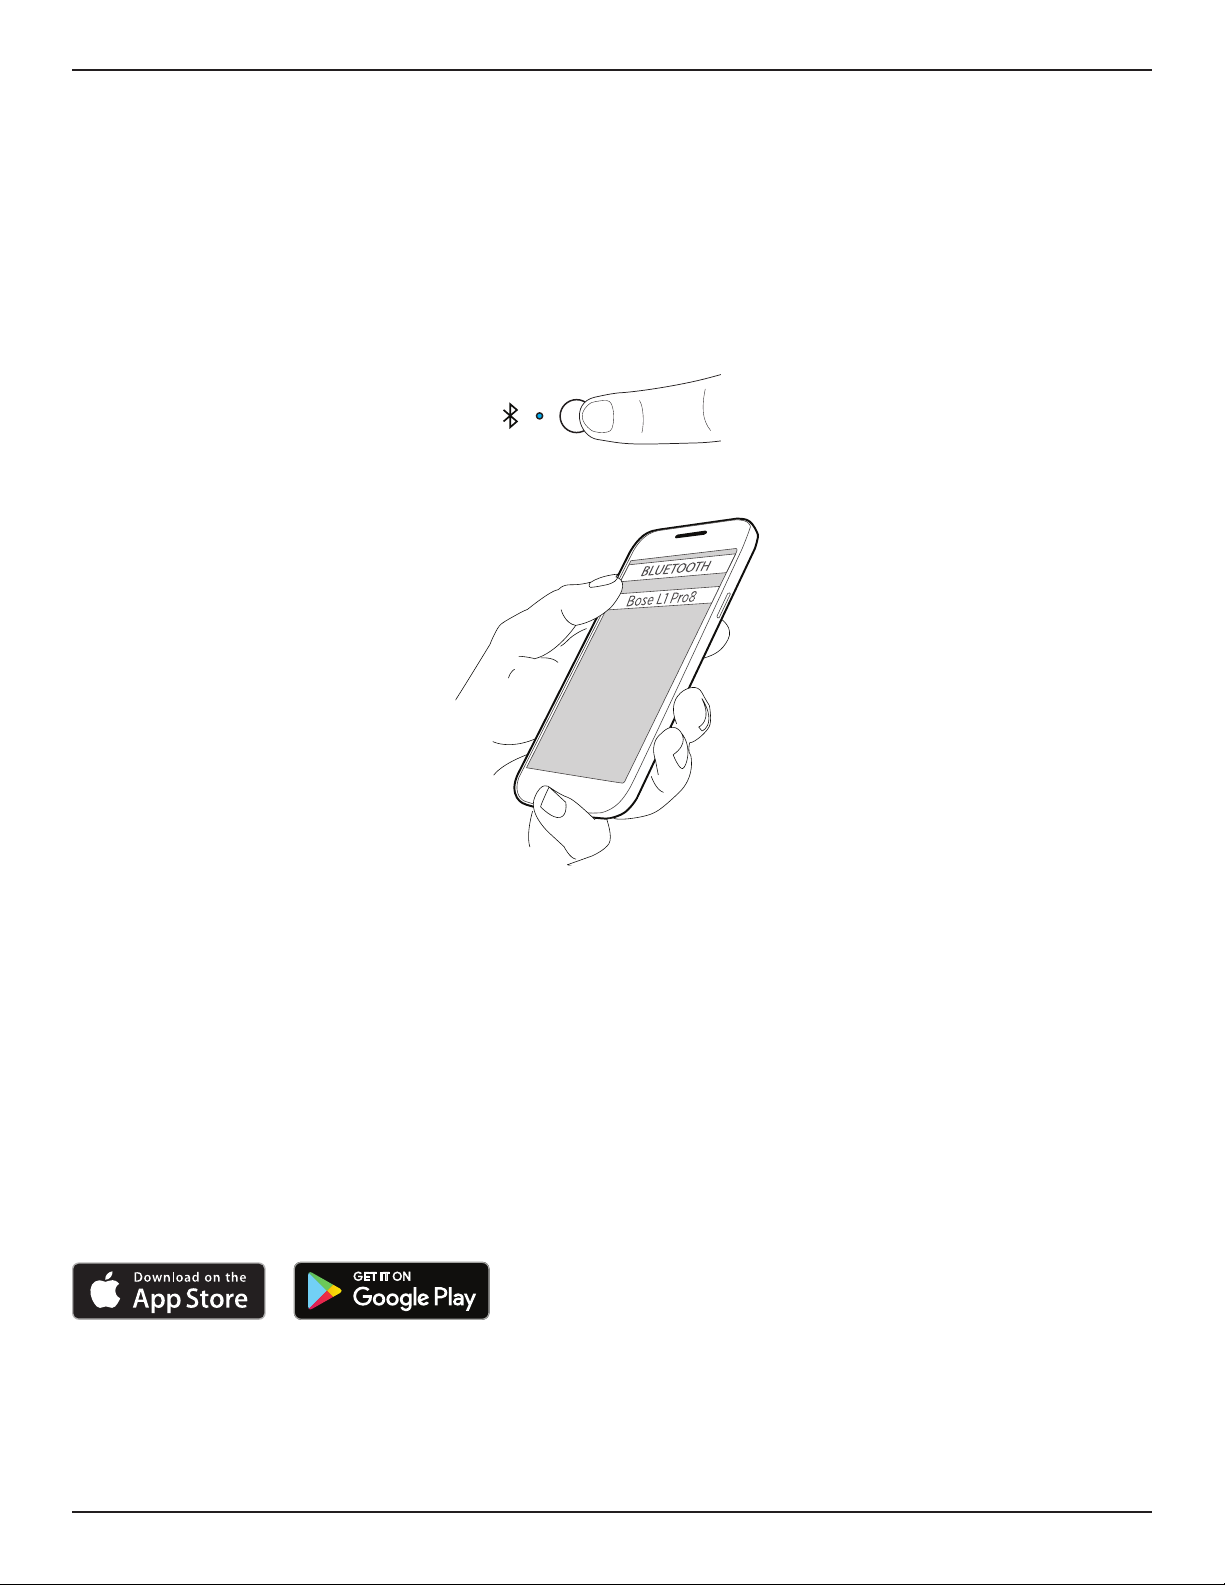
hBluetooth® Pair Button: Set up pairing with
Bluetooth capable devices. The LED will flash
blue while the L1 Pro is discoverable and
illuminate solid white when a device is paired for
streaming.
MUTE MUTE MUTE
PUSH
VOLUME
TREBLE
BASS
REVERB
VOLUME
TREBLE
BASS
REVERB
VOLUME
TREBLE
BASS
TREBLE
BASS
REVERB
VOLUME
TREBLE
BASS
REVERB
VOLUME
TREBLE
BASS
SYSTEM EQ
INST INST
OFF
SPEECH
q
w
e
r
t
y
u
is
o
a
d
f
g
h
Connections and Controls