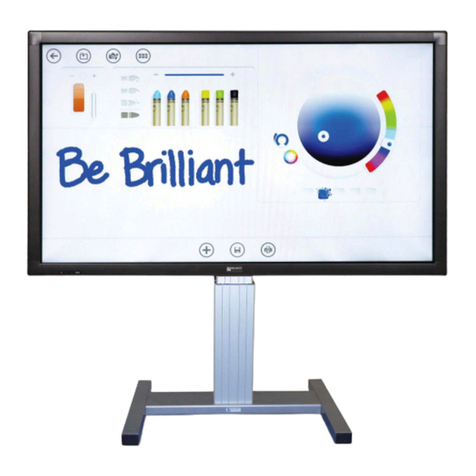
BOXLIGHT ProColor User manual

Contents
--------------------------------------------------------- 2, 3
---------------------------------------------------- 4, 5, 6, 7
Package Contents --------------------------------------- 8
Front ----------------------------------------------------- 9
Rear 84”------------------------------------------------ 10
Rear 70”65”55”----------------------------------------- 11
----------------------------------------------------------- 12
Connecting a Computer ------------------------------- 13
Picture Menus ------------------------------------------ 14
Sound Menus ------------------------------------------ 16
Time Menus -------------------------------------------- 17
Input Menus -------------------------------------------- 18
Setup Menus ------------------------------------------- 20
Language ----------------------------------------------- 21
Touch Calibration -------------------------------------- 23
84”System Specifications ------------------------------ 25
84”LED Panel Specifications --------------------------- 25
Ratings of Environment -------------------------------- 25
Input / Output Description ---------------------------- 26
70”System Specifications ------------------------------ 28
70”LED Panel Specifications --------------------------- 28
Ratings of Environment -------------------------------- 28
Input / Output Description ---------------------------- 29
65”System Specifications ------------------------------ 31
65”LED Panel Specifications --------------------------- 31
Ratings of Environment -------------------------------- 31
Input / Output Description ---------------------------- 32
55”System Specifications ------------------------------ 35
55”LED Panel Specifications --------------------------- 35
Ratings of Environment -------------------------------- 35
Input / Output Description ---------------------------- 37
Important safety Instructions
Safety Precautions
Instructions
Remote Control
Connection
Adjusting the LED Display
Specifications
Mechanical Layout

Important Safety Instructions
1. Read these instructions.
2. Keep these instructions.
3. Heed all warnings.
4. Follow all instructions.
5. Do not use this apparatus near water. Do not install the product in a place where water can splash onto it or near
devices such as air conditioners where water may accumulate.
6. Clean only with dry cloth. Avoid spraying aerosols or liquids directly on the product.
7. Do not use accessories or attachments that have not been recognized by the manufacturer.
8. Install in accordance with the manufacturer’s instructions.
9. Do not install near any heat sources such as radiators, heat registers, stoves, or other apparatus (including
amplifiers) that produce heat.
10. Do not remove the housing or blades of the polarized or grounding-type plug. A polarized plug has two blades
with one wider than the other. A grounding type plug has two blades and a third grounding prong. The wide
blade or the third prong is provided for your safety. If the provided plug does not fit into your outlet, consult an
electrician for replacement of the obsolete outlet.
11. Route the power cord so that it is not walked on or pinched. Make sure the cable is uninterrupted at receptacles
or power bars and at the point where it exits from the display.
12. Only use attachments/accessories specified by the manufacturer.
13. Move and mount only with a cart, stand, tripod, bracket, or table specified by the manufacturer, or sold with the
product. Be careful moving cart/apparatus combinations to avoid injury from tip-over.
14. Unplug this apparatus during lightning storms or when unused for long periods of time.
15. Seek repair by a professional in any of the following conditions. Be sure to unplug the display from its power
source.
a. When the product was exposed to liquids or foreign objects.
b. When the power cord or plug is damaged.
c. When the product does not operate properly in either touch performance or picture display. Do not attempt
to adjust controls beyond those described in the instructions, as this may cause damage.
d. When the product has been dropped or damaged
16. To completely disconnect this apparatus from the AC Mains, disconnect the power supply cord plug from
the AC receptacle.
17. The mains plug of the power supply cord shall remain readily operable.

18. Use the cables provided with this product, and be sure that other cables used are properly shielded.
19. Conduct a safety inspection after installation or repair to confirm that the above precautions have been adhered
to.
Note: Prolonged use of the display at high volume may cause damage to your ears.
WARNING: To reduce the risk of fire or electric shock, do not expose this apparatus to rain or moisture.
Household users should contact either the retailer where they purchased this product, or their local
government office, for details of where and how they can take this item for environmentally safe recycling.
Business users should contact their supplier and check the terms and conditions of the purchase contract.
This product should not be mixed with other commercial wastes for disposal
The above contents may change without notification.
This symbol is intended to alert the user to the presence of un-insulated
"dangerous voltage" within the product's enclosure that may be of
sufficient magnitude to constitute a risk of electric shock to persons.
This symbol is intended to alert the user to the presence of important
operating and maintenance (servicing) instructions in the literature
accompanying the product.
(Applicable in the European Union and other European countries
with separate collection systems)
This marking shown on the product or its literature, indicates that it
should not be disposed of with other household waste at the end of its
working life. To prevent possible harm to the environment or damage to
health from uncontrolled waste disposal, please separate this from other
types of waste and recycle it responsibly to promote the sustainable reuse
of material resources.

Safety Precautions
Note
The color and appearance of the product may vary depending on the model, and the product specifications are
subject to change without prior notice for reasons of performance enhancement.
Please read the following safety instructions as they are designed to prevent damage to property
and harm to the user.
Warning / Caution
Failure to follow directions noted by this symbol could result in bodily harm or damage
to the equipment.
Notational Conventions
Prohibited Important to read and understand at all times
Do not disassemble Disconnect the plug from the outlet
Do not touch Ground to prevent an electric shock
Power
When not used for an extended period of time, set your computer to DPM.
If using a screen saver, set it to active screen mode.
The images here are for reference only, and are not applicable in all cases (or countries).
Do not use a damaged or loose plug.
This may cause electric shock or fire.
Do not pull the plug out by the wire or touch the plug with wet hands.

This may cause electric shock or fire.
Use only a properly grounded plug and receptacle.
An improper ground may cause electric shock or equipment damage.
Insert the power plug firmly so that it does not come loose.
A bad connection may cause fire.
Do not excessively bend the plug and wire, or place heavy objects
upon them, as this could cause damage.
This may cause electric shock or fire.
Do not connect too many extension cords or plugs into one outlet.
This may cause fire.
Do not disconnect the power cord while using the LED Display.
A surge may be caused by the separation and may damage the LED Display.
Do not use the power cord when the connector or plug is dusty.
If the connector or plug of the power cord is dusty, clean it with a dry cloth.
Using the power cord with a dusty plug or connector may cause electric shock or fire.
To disconnect the apparatus from the mains, the plug must be pulled out from the
mains socket, therefore the mains plug shall be readily operable.
This may cause electric shock or fire.

Installation
Failure to adhere to the following may cause serious damage to your LED Display.
Do not drop the LED Display when moving it.
This may cause damage to the product or the person carrying it.
Keep any flammable objects such as candles, insecticides or cigarettes away from the product.
Otherwise, this may cause fire.
Keep any heating devices away from the power cable.
A melted coating may cause electric shock or fire.
Lift and place down the LED Display carefully only by its handles. Do not lift and move the display by
its corners or sides, as causing strain to these sections may cause damage.
Failing to do so may damage the LED Display.
Do not place the LED Display face down.
This may damage the LED screen’s surface.
The installation of the bracket must be done by a qualified professional.
Installation of the bracket by unqualified personnel may result in injury.
Always use a mounting device specified in the owner's manual.
When installing the product, make sure to keep it away from the wall (4cm or more)
for ventilation purposes.
Poor ventilation may cause an increase in the internal temperature of the product, resulting in a
shortened component life and degraded performance.
Do not spray water or detergent directly onto the LED Display.
This may cause damage, electric shock or fire.
LED Interactive support feet should be fixed to furniture or support by screws.

Clean
When cleaning the LED Display case or the surface of the screen,
wipe with a dry or slightly moistened, soft fabric.
Keep the product away from places exposed to oil, smoke or moisture; do not install inside a vehicle.
This may cause a malfunction, electric shock or fire.
In particular, avoid operating the LED Display near water or outdoors where
the LED Display could be exposed to snow or rain.
Others
When removing batteries from the remote control, be careful that they are not swallowed
by children. Keep the batteries out of children's reach.
If the batteries are swallowed, see a doctor immediately.
When replacing batteries, place the batteries in the correct +/- polarity position as indicated
on the battery holder.
The incorrect polarity may cause a battery to break or leak and may cause
Fire, injury, or contamination (damage).
Use only specified standard batteries. Do not use new and used batteries together.
This may cause a battery to break or leak and may cause fire, injury, or
contamination (damage).
The batteries (and rechargeable batteries) are not ordinary refuse and must be
returned for recycling purposes. The customer is responsible for returning the used or
rechargeable batteries for recycling purposes as the consumer.
The customer can return used or rechargeable batteries to a nearby public
recycling center or to a store selling the same type of the battery or rechargeable battery.

Introduction
Package Contents
Note
• Please make sure the following items are included with your LED Display.
If any items are missing, contact your dealer. Contact a local dealer to buy optional items.
Components List
LED Display
Manual:
User Manual (CD)
Cables
&
Others:
RGB USB For TOUCH Power plug Remote Control & PEN *2
3V Battery(CR-2025x1)
Options:
ProColor-Tray (general use)
USB Cable(2Ea), Screw(14Ea), Bracket (2Ea)

Front
1) POWER( )
Turns the LED Display On/Off.
2) LED
Shows Power ON mode -- BLUE
Shows Power Saver mode by blinking RED.
Shows Power OFF mode -- RED.
3) SOURCE (INPUT )
Switches from PC mode to Video mode.
Changing the source is only allowed for external devices that are connected to the LED Display at the time.
4) IR Sensor
Aim the remote control towards the IR sensor to send commands using your display’s remote control.
LED
IR SENSOR

Input / Output Description - 84”only
1. SPEAKER Out L. (2ch 10W , 8 Ohm )
2. SPEAKER Out R. (2ch 10W , 8 Ohm )
3. AUDIO LINE Out 4. PC AUDIO Input 5. PC RGB Input
6. DISPLAY PORT Input 7. HDMI 3 Input 8. HDMI 2 Input
9. HDMI 1 Input 10. RS232C 11. USB (Reserve) 12. USB for Touch
13. OPS DC 12V, 5A Power In (Option) 14. AC Power In. (100V ~ 240V)
15. Data cable OPS (Option)
PC Connection
1. Connect RGB cable to ⑤, an Audio connection will be made to ④using a stereo cable.
2. HDMI cable may be connected to⑦⑧ or ⑨. Both Video and Audio are transmitted by HDMI.
3. External speakers will be connected to ①and ②inputs using a Ø3.5 stereo cable following the drawing below. L,
and R connections are the same. Internal speakers are muted if external speakers are connected.
(Note) Do not connect NC.
Aim the remote control towards the IR sensor to send commands using your display’s remote control.

Remote Control
How to insert the battery.
Insert the battery with the polarities facing as shown.

Connection
Connecting a Computer
1. Connect the LED display’s power cord to the display and the appropriate electrical plug. Turn the display
on by pressing the Power button on the display or remote.
2. Using the D-sub (Analog) connector on the video card: Connect the D-sub to the 15-pin, RGB port on
the back of your LED Display and the 15 pin D-sub port on the computer.
3. Using the HDMI(DVI) connector on the video card: Connect the HDMI(DVI) Cable to the HDMI (HDCP)
port on the back of your LED Display and the HDMI(DVI) port on the computer.
4. Using the USB (TOUCH) connector on the PC USB terminal: Connect the USB(A-B) Cable to the USB port
on the back of your LED Display and the USB port on the computer.
USB
for TOUCH

Adjusting the LED Display
Turning the Display On/Off
Once the display is connected, use either the Power button on the front of the display, or the power button found
on the remote control. Confirm your display’s status by checking the LED light on the front of your display.
Status
Status of the Monitor
Blue
Power is On
Red
Power is Off (Standby Mode)
Red Flashing
Waiting for Input Signal
Picture Menus
◆ Press the [MENU] Button.
The OSD Main MENU will be shown.
◆Enter the PICTURE MENU
Press the ▲/▼buttons to move through options in
the PICTURE Menu. When you have moved to the
option you would like to adjust, press the ENTER
button and you will enter its settings.
◆Adjustment CSM(Color Status Mode)
Press the ▲/▼buttons to move to CSM. Press the
ENTER Button to select it.
Press the ▲/▼buttons to move to either Cool,
Normal, Warm, or User. Cool, Normal and Warm are
preset color options. If you want to adjust the color
settings individually, select USER and press the
ENTER Button.

◆Custom adjustment CSM
Press the ▲/▼buttons to highlight the Red, Green
or Blue level. Next, press the ENTER button to select
one of them.
Once selected, press the ◁/▷buttons to adjust
the Red, Green, or Blue level.
◆Picture Select mode
Press ◁or the Menu button to move or go back
to the previous menu options.
Press the ▲/▼buttons to highlight PSM (Picture
Status Mode), and press the ENTER button to see
the available options.
Press the ▲/▼buttons to select highlight either
Dynamic/Standard/Mild/Game/User, and press
ENTER to select one. User is the default setting.
◆Backlight Adjustment
Press ◁or the Menu Button to move or go back
to the previous menu options.
Press the ▲/▼buttons to highlight Backlight, and
press the ENTER button to change the setting.
Note that the backlight value is related to power
consumption. If you set your backlight at a higher
level, you may be using more energy.
◆Contrast and Brightness Adjustment
Press ◁or the Menu Button to move or go back
to the previous menu options.
Press the ▲/▼buttons to highlight Contrast or
Brightness, and press the ENTER button to change
either of their settings.
Press the ◁/▷buttons to adjust both the Contrast
and Brightness levels.
After finishing, press the [Exit] Button to exit the
OSD MENU.

Sound Menus
◆ Press [MENU] Button.
The OSD Main MENU will be shown.
◆Entering the Sound MENU
Press the ▲/▼buttons to move up to the SOUND
Menu. Press the ENTER button to enter the menu.
◆Select Sound Status Mode
Press the ▲/▼buttons to move up to the SSM
(Sound Status Mode) Menu, and press the ENTER
button to view the settings. Press ▲/▼Button to
select either Flat/Music/Movie/Speech/User, and
press the ENTER button to select one.
◆Sound Balance
Press ◁or the Menu Button to move or go back
to the previous menu options.
Press ▲/▼Button to highlight the Balance Menu,
and press the ENTER button to adjust the settings.
Press the ◁/▷buttons to adjust the Left/Right
Balance value.

◆Equalizer Adjustment
Press ◁or the Menu Button to move or go back
to the previous menu options.
Press ▲/▼Button to highlight the Equalizer
Menu, press the ENTER button to view the
settings.
Press the ▲/▼buttons to highlight one of the
0.1/0.5/1.0/5.0/10kHz values. Press the ENTER
button to select the value and change its setting.
Press the ◁/▷buttons to adjust the frequency
setting.
AVL mode is not supported.
After finishing your adjustments, press the [Exit] button to exit the OSD MENU.
Time Menus
Setup your system’s clock and automatic ON/OFF times.
◆ Press the [MENU] Button.
The OSD Main MENU will be shown.
◆Entering the TIME MENU
Press the ▲/▼buttons to move up to the TIME
Menu. Press the ENTER button to view the options
in the menu.
◆Setup System Clock
Press the ▲/▼buttons to highlight the Clock Menu.
Press the ENTER button to view and adjust the time
setting. Your display will not automatically detect
the time. You must set the time manually. Auto
mode is not available.
Press the ▲/▼buttons to highlight Manual, and
press the ENTER button to select it.

Press the ▲/▼buttons to adjust the time, and press
the ENTER button to confirm it.
◆Setup System OFF Time
Press ◁or the Menu Button to move or go back
to the previous menu options.
Press the ▲/▼buttons to highlight Off Time, and
press the ENTER button to select it.
Press the ▲/▼buttons to highlight Off, and press
the ◁/▷buttons to turn this feature on or off.
Press the ▲/▼buttons to highlight the time, and
press ◁/▷buttons to adjust the minutes and
hours. Set the time you would like the display to
automatically power off. Exit to save these settings.
◆Setup System ON Time
Press ◁or the Menu Button to move or go back
to the previous menu options.
Press the ▲/▼buttons to highlight On Time, and
press the ENTER button to adjust the settings.
Press the ▲/▼buttons to highlight the time, and
press ◁/▷buttons to adjust the minutes and
hours. Set the time you would like the display to
automatically power off.
Use the ▲/▼buttons to highlight VOL and use the
◁/▷buttons to set the volume level you would
like the display to automatically turn on at. The
other options allow you to choose how often you
want the display to automatically turn on
(once/daily). Finally, you can choose to have this
feature ON or OFF. Exit to save your settings.

◆Setup Auto Sleep
If Auto Sleep mode is ON, the screen will go to
sleep when no input signal is received and 5
minutes have passed.
Press ◁or the Menu Button to move or go back
to the previous menu options.
Press the ▲/▼buttons to highlight Auto Sleep,
and press the ENTER button to change the
settings.
Press the ▲/▼buttons to select OFF or ON, and
press the ENTER button to select it.
After finish your adjustments, press the [Exit] Button to exit out of the OSD MENU.
Input Menus
◆ Press the [MENU] Button.
The OSD Main MENU will show.
◆Entering the Input MENU
Press ▲/▼Button to highlight Input, Press the
ENTER button to enter and view the available
settings.

◆Input source select
Press the ▲/▼buttons to highlight either
PC/HDMI1/ HDMI2/HDMI3/DP. Once the desired
input is highlighted, press the ENTER button to
select it.
Only sources that are connected to the display can
be selected.
◆Selecting the screen ratio
Press ◁or the Menu Button to move or go back
to the previous menu options.
Press the ▲/▼buttons to highlight ARC (Auto Ratio
Control), and press the ENTER button to view the
available settings.
Press the ▲/▼buttons to select either AUTO/16:9/
14:9/4:3/Zoom1/Zoom2/Spectacle. After highlighting
the desired screen ration, press the ENTER button to
select it.
After finishing the adjustment, Press the [Exit] Button to exit the OSD MENU.
Setup Menus
◆ Press the [MENU] Button.
The OSD Main MENU will be shown.
◆Entering the SETUP MENU
Press the ▲/▼buttons to highlight SETUP and
press the ENTER Button.
Other manuals for ProColor
1
Table of contents
Other BOXLIGHT Monitor manuals

BOXLIGHT
BOXLIGHT CLEVERTOUCH CTL-86DS94KV2 User manual

BOXLIGHT
BOXLIGHT ProColor 652U User manual

BOXLIGHT
BOXLIGHT ProColor 653U User manual

BOXLIGHT
BOXLIGHT ProColor Series User manual

BOXLIGHT
BOXLIGHT ProColor 70 User manual

BOXLIGHT
BOXLIGHT MimioPro 4 User manual

BOXLIGHT
BOXLIGHT CLEVERTOUCH 75 CM Pro User manual

BOXLIGHT
BOXLIGHT MimioDisplay 3 Operation manual

BOXLIGHT
BOXLIGHT Mimio ProColor Pen Tray User manual