Boyd Flex Base 6000 User manual


Wireless Remote Control ……………………………………………………………………
…
Remote Pairing ….……………………………………………………………………………
…
Memory Setting ………………………………………………………………………………
…
Setting Up Two Bases ………………………………………………………………………
…
Bracket Installation.. …………………………………………………………………………
…
Trouble Shooting ..……………………………………………………………………………
…
Base Functions.………………………………………………………………………………
…
01
03
04
05
06
08
11
12
13
14
15
16
http://www.boydspecialtysleep.com
Safety Instructions ……………………………………………………………………………
…………
Parts List ………………………………………………………………………………………
…
Under Bed View ………………………………………………………………………………
Electronics Overview ….………………………………………………………………………
Installation ……………………………………………………………………………………
……
Table of Contents

Keep the base unplugged from the electrical outlet before operating any part of the base. To prevent the risk of
electric shock, always unplug the base before cleaning. For your safety, ensure the base is in a flat position with all
motors turned off, disconnected from the power source, and keep the power cord away from heated surfaces.
This bed base is intended to be used only as described in this manual. Do not use any accessories/attachments that
are not recommended by the manufacturer. Close supervision is required when the bed base is used by or near
children, convalescents or dis-abled persons.
Please ensure you connect the base properly to the power supply. Any incorrect power connection may cause
electric Shock or Fire.FOR OPTIMAL SAFETY, YOUR ADJUSTABLE BED SHOULD BE PLUGGED INTO A
SURGE PROTECTOR (not supplied with this adjustable bed). Always unplug this adjustable bed frame from the
electrical outlet before any cleaning or maintenance of the bed frame. To safely disconnect, remove the plug from the
outlet. Keep cord away from heated surface. Use only indoors.
The control box, motors, and remote (except battery compartments) should not be opened or tampered with. Opening or
tampering with these components without authorization will void the warranty.
This bed base contain noedymium magnets which may interfere with magnetic fields of devices such as pacemakers,
ICD'S etc. Some pacemakers may falsely interpret the optional massage vibrations as movement or exercise. The
owner of such medical devices should consult their physician before using this product.
This product is designed to be used by an adult. Do not allow children to operate this bed without adult supervision.
Immediately dispose of all packing materials as they can pose a smothering risk to children and pets. Injury could
occur if children or pets are permitted to play on or under the bed.
In-Home use only
Pacemaker Notice:
all instructions carefully before using this adjustable base. Save these instructions for future reference.
If the power cord or plug becomes damaged, or if the bed base is wet or not working properly, stop using the bed
base and contact customer service
Children and Pets:
http://www.boydspecialtysleep.com
BOYD SPECIALTY SLEEP adjustable bed bases are designed exclusively for in home use only.
Do not use this base with oxygen therapy equipment or near explosive gases.
Electrical Safety: Connect to a surge protector (not included).
Safety Instructions
Attention:
Safety Disclaimer
Thank you for purchasing a BOYD SPECIALTYSLEEP adjustable bed base. For your safety, please read

The lift motors are not designed to operate continuously for more than (2) minutes in an (18) minutes time period.
Attempting to circumvent or exceed this rating will shorten the life expectancy of the product and may void the
warranty.
This product is not rated to support weights exceeding 850 pounds including the mattress and bedding. The base will
structurally support this weight, provided it is evenly distributed across the bed base. The adjustable base is not
designed to support or lift this amount in the head or foot sections alone. Exceeding this weight restriction could
damage the bed and/or cause injury and will void the warranty.
http://www.boydspecialtysleep.com
To prolong the life of your fabric, protect it from direct sunlight whenever possible. For spot cleaning, wipe area with a
light damp sponge or vacuum with a soft brush attachment to remove particles. Keep at a minimum of 30cm (12
inches) away from direct heat sources. For deeper cleaning, blot liquid spills with a clean dry cloth. Wipe with a clean
cloth dampened with warm water. Do not moisten excessively. A soft bristle brush may be used to remove ingrained
soil. Avoid scratching by brushing gently. Wipe with a clean cloth dampened with warm water to remove residues. Dry
in a shaded area away from direct heat. If persistent marks remain visible after cleaning, seek professional advice.
Safety Instructions
FCC Compliance:
This device complies with part 15 of the FCC Rules. Operation is subject to the following two
conditions: (1) This device may not cause harmful interference, and (2) this device must
accept any interference received, including interference that may cause undesired operation.
To comply with the FCC RF exposure requirements, no change to the antenna or the device
is permitted. Any change to the antenna or the device could result in the device exceeding
RF exposure requirement an void user's right to operate the device.
Radio Frequency: 2.4GHz
Product Ratings:
Weight Limits:
Acoustics:
The massage function will emit a noticeable tone during operation. As the massage intensity level is increased, the
tone will intensify. The volume of this tone is directly related to the location environment. For example, when
demonstrated in a show room, the surrounding environmental noise will cover some of massage noise. However,
when installed in a home setting with wooden floors, carpeted or not, the massage volume will be more noticeable. In
normal base operation, the legs support of the base will create a contact noise with floor. When entering, exiting, or
shifting weight on the base, this contact noise may be louder as the legs make contact. This is normal.
Fabric Care:

http://www.boydspecialtysleep.com
J)
K)
L)
M) Sync Cable [1] (Optional)
I) Long Bolts [6]
A)
B)
C)
D)
E)
F)
G)
H)
I)
J) Short Bolt [8]
K) Small Washers [12]
Parts List
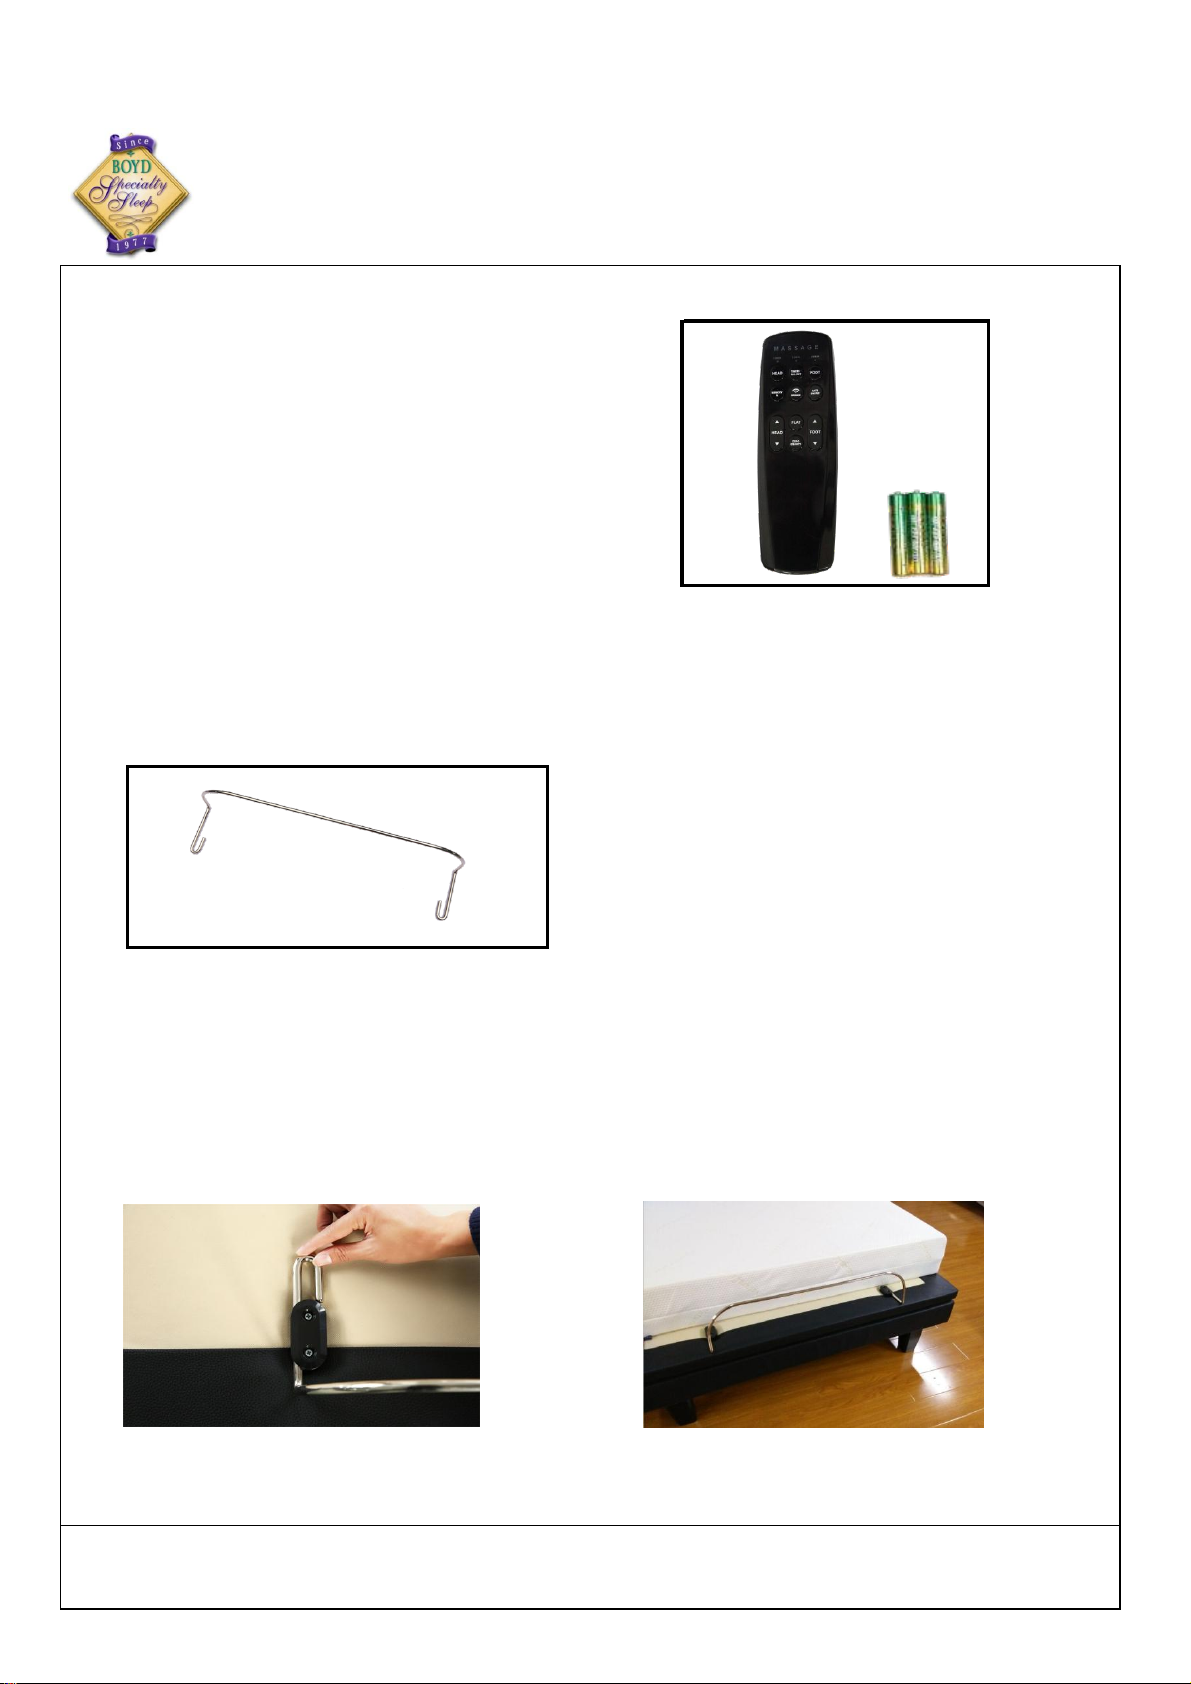
C) Mattress Retainer [1]
D) Power Supply [1]
E) Power Cord [1]
Parts List:
G) Headboard T-Bar [2]
L) Hex Key [1]
Ensure you have received all the parts listed below before discarding the packing materials.
A) Wireless Remote Control and AAA batteries [3]
B) Legs and Washer (Note that the legs are two piece legs) [4]
M)
F) Headboard Bracket [2]
H) Large Washers [2]


Plug the power cord into the power supply as shown.
To prevent damage to the Power Supply (Part D), please
ensure the Power Supply is placed outside the perimeter of
the adjustable base frame.
STEP 2: Remove the bed from the box
STEP 1: Remove packing materials
Remove the bed base from the box keeping the bottom of
the base facing upwards. Install the 4 legs to the four
corners as shown. Tighten the legs by hand. Ensure the
legs are secured tightly. (Note that the legs are adjustable by
unscrewing the small part of the leg from the larger part of
the leg. This allows you to adjust the height of your bed).
P.S. Install the headboard brackets at the same time if
attaching to a headboard. See the page 14.
Carefully turn the base over using two people. Do not lay the
base on its side to prevent damage to the side button, fabric
or legs.
STEP 4: Connect power supply
STEP 3: Overturn the bed base carefully
http://www.boydspecialtysleep.com
Put the bed base in a desired place with the bottom of the
box facing up. Remove box cover, take out all of the packing
materials and put aside, Make sure not to puncture the bed
with any sharp objects.
Installation
Installation
STEP 5: Remote
After the base is connected to the power supply, install three
AAA batteries into the remote battery compartment. See
pages 9 and 10 to learn how to operate the remote.
*Locate the mattress retainer as shown below [1)];
Insert the mattress retainer into the hooks at the foot of the
bed as shown [2)]. Slide the mattress retainer into place.
Ensure it is securely tightened. Place the mattress on the
bed base as shown [3)].
STEP 6: Install mattress retainer
http://www.boydspecialtysleep.com
1)
2)
3)


The MASSAGE button inclreases
and decreases the head and foot
massage intensities. There are three
levels.
The ALL/OFF button shut off all
massage features.
One touch MEMORY allows you to
preset your favorite postion.
http://www.boydspecialtysleep.com
Wireless Remote Control
Massage Feature
The HEAD button start or stop the
head massage function
The FOOT button start or stop the
foot massage function
The buttons of 10MIN, 20MIN or
30MIN sets the massage feature to
automatically shut off after 10MIN,
20MIN or 30MIN as set.
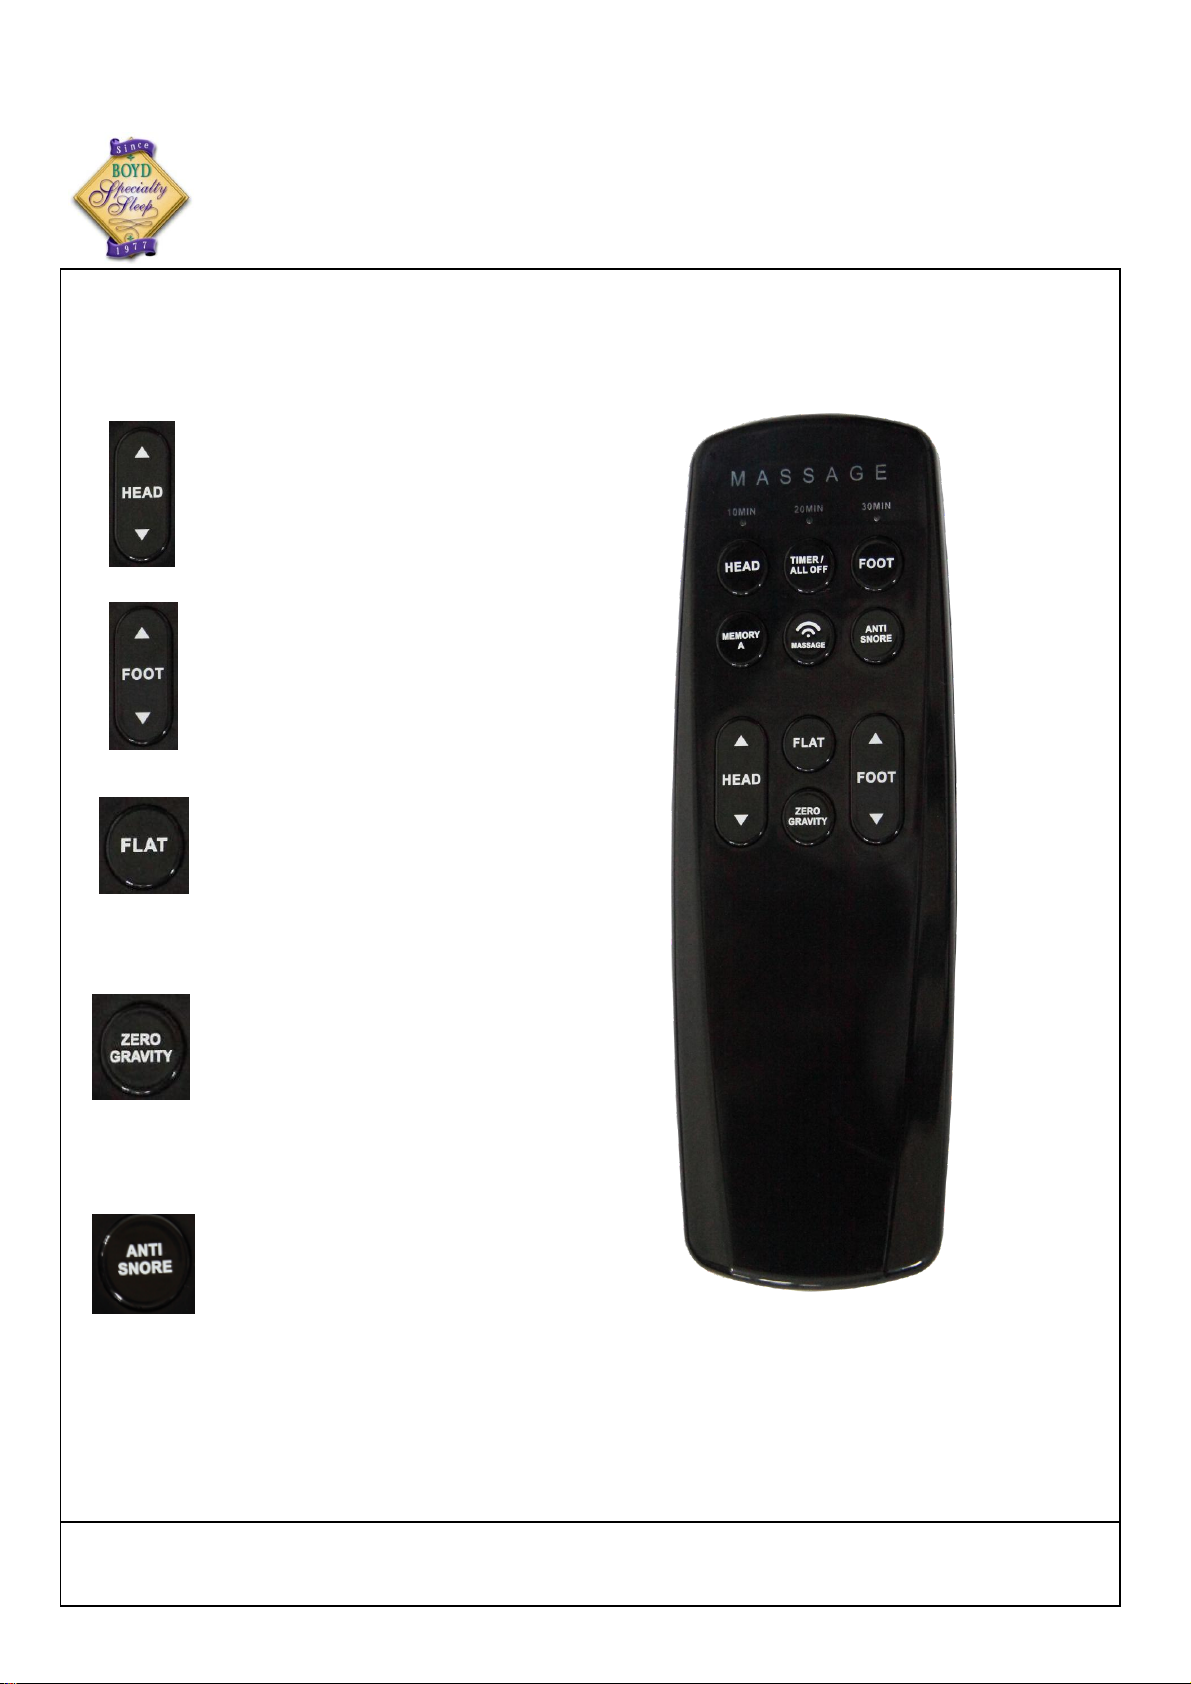
One touch ANTI SNORE preset
position raises the head to assist in
relieving snoring
The HEAD UP/DOWN button
raises/lowers the head section of the
base
Adjusting Features
The FOOT UP/DOWN button
raises/lowers the foot section of the
base
http://www.boydspecialtysleep.com
The one touch FLAT button returns
the head and foot sections to a
horizontal position.
One touch ZERO GRAVITY preset
position, adjust your legs to a higher
level than your heart, to help relieve
pressure off the lower back and
promote body circulation
Wireless Remote Control
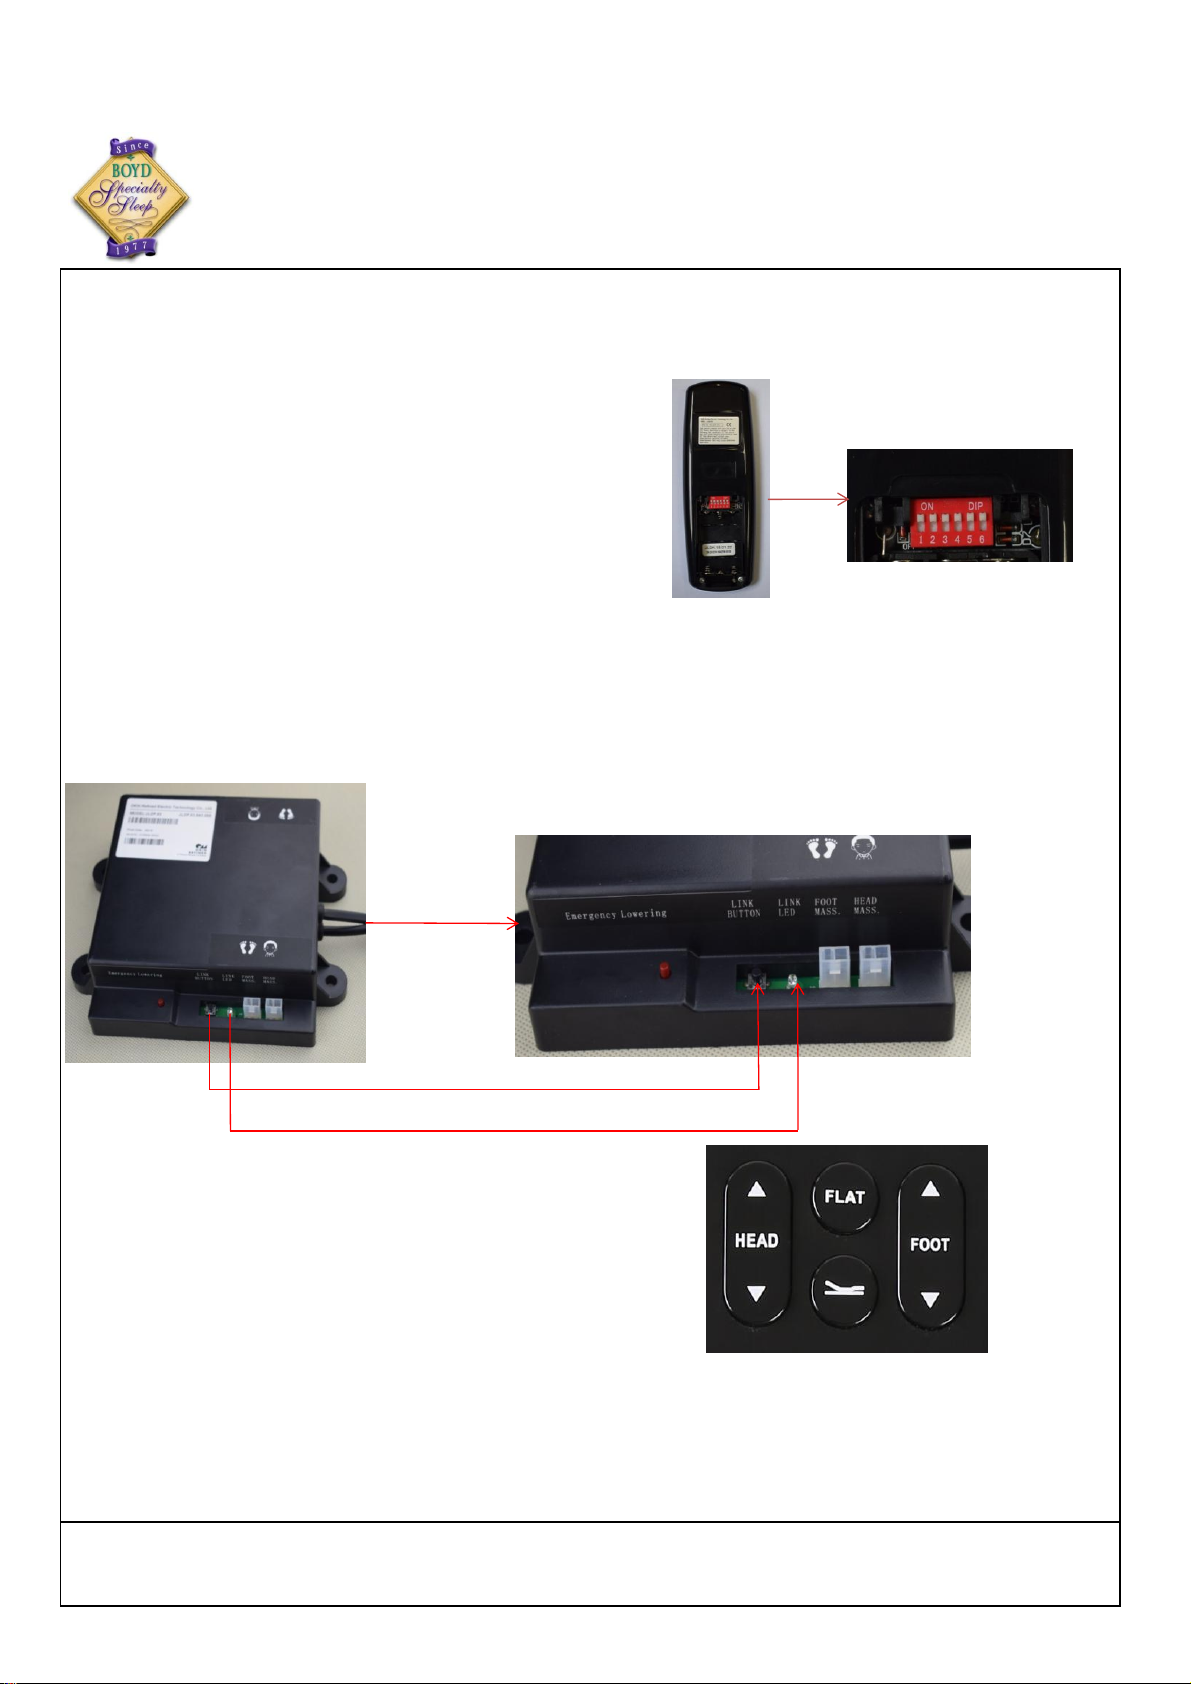
Push the DIP switch on the remote control to a desired position
(different from the position on the other remote controls that are
paired with other nearby bases) and insert the batteries.
Press and hold the "LINK BUTTON" on the control box untill the
LINK LED lights, then release the "LINK BUTTON", after that, the
LINK LED flashes, now the control box are ready for pairing .
Press and hold simultaneously the Head-Up button and Foot-Up
botton on the remote control untill backlight LED flashes, then
release the two buttons. The backlight LED will keep flashing when
it's searching the control box, once both of backlight LED of remote
and LINK LED of control box stop flashing, the pairing operating is
completed.
Very important: Pairing your device must be completed within 2
minutes; Make sure the other base in the room is powered off;
Stronger suggestion: Please use Sync Cable for operate two bases simultaneously (see page 13), more safer
and higher effect.
Attention: All bases are set to the different DIP of the remote for easier use. You need to pair your remote if you need
one remote controls two bases simultaneously. If using only one base normally, proceed to page 12.
http://www.boydspecialtysleep.com
Remote Pairing
STEP 1:
STEP 2:
STEP 3:
○
○
http://www.boydspecialtysleep.com
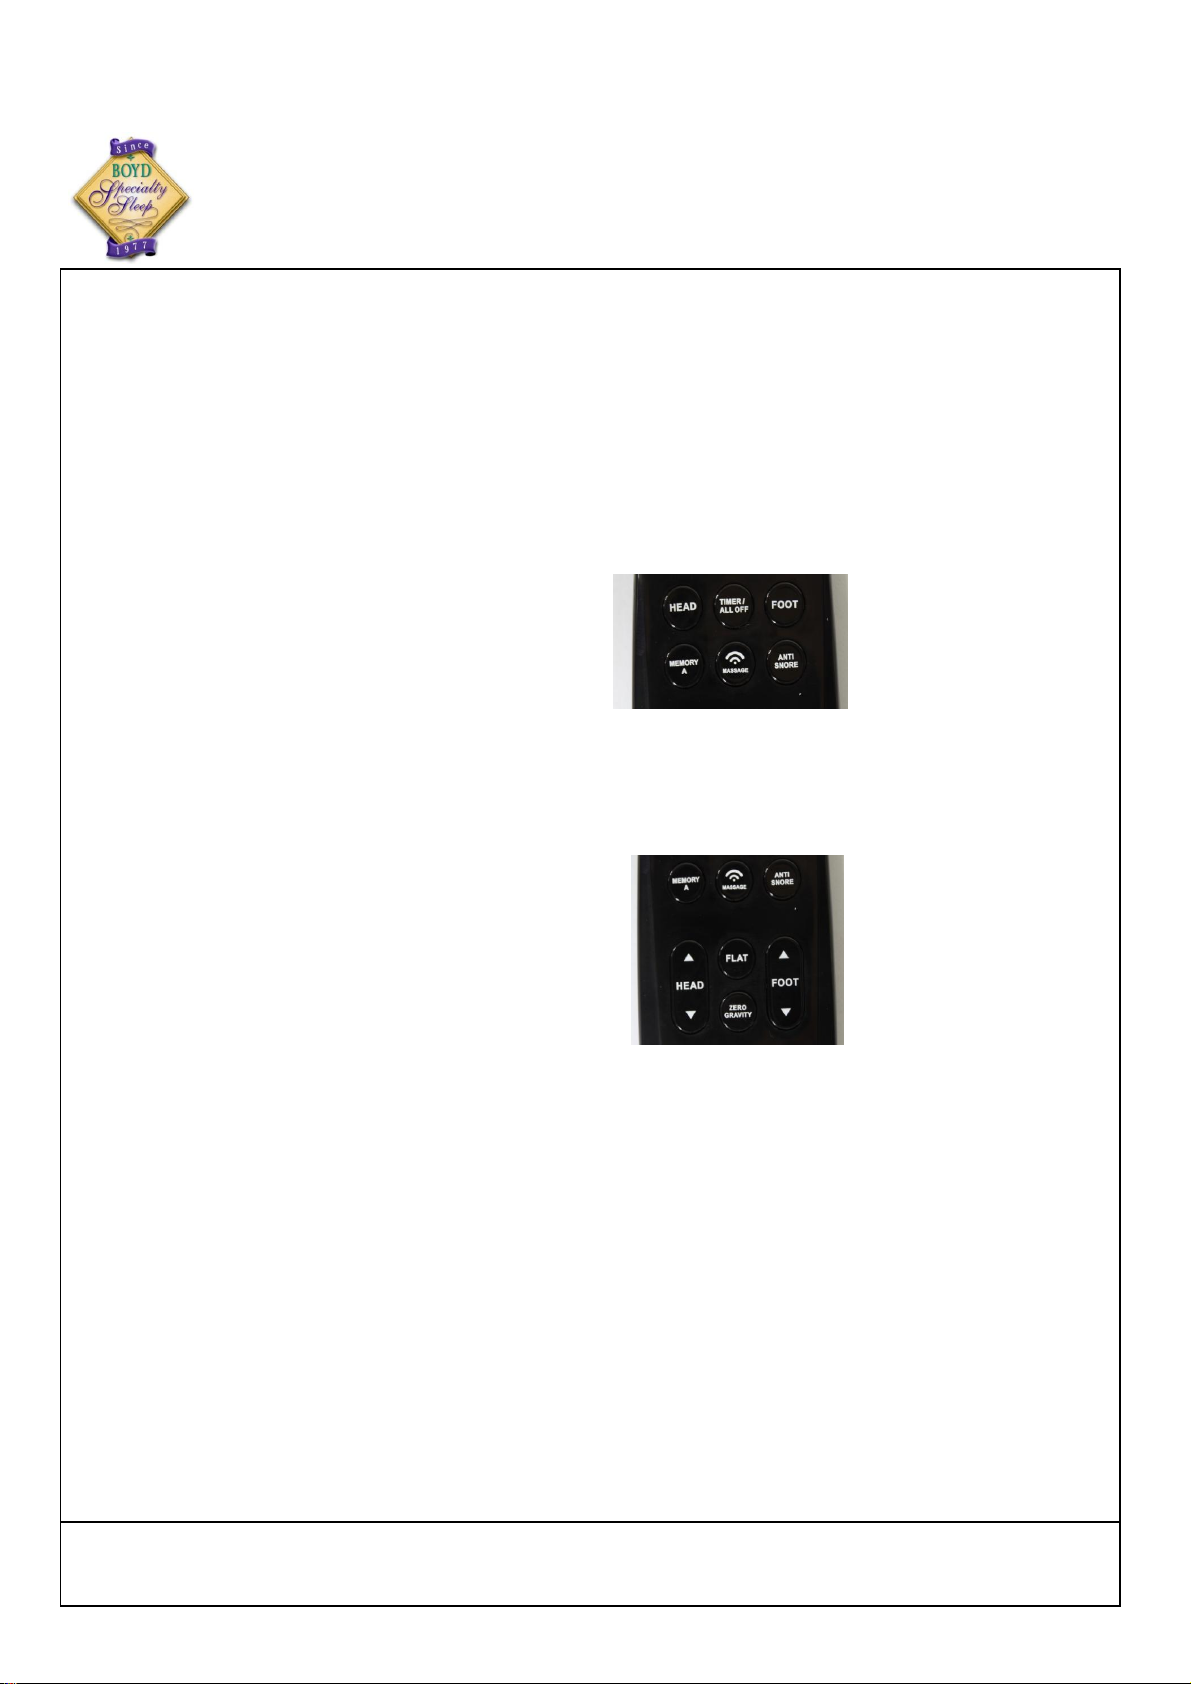
STEP 1:
Ensure the base is connected to the power supply
correctly and the remote control works properly. Ensure
the base is in the Flat position. Make sure the massage,
LED light and other functions are turned off.
STEP 2:
Adjust the HEAD and FOOT to your desired position.
Press the "TIMER/ALL OFF" button until all buttons on
the remote are flashing.
STEP 3:
While the buttons are flashing, press one of these three
buttons "MEMORY A"/"ANTI SNORE"/"ZERO GRAVITY"
until the flashing stops. The selected MEMORY
FUNCTION is now set.
Memory Setting
○
○
○
○

STEP 3:
Sync Cord
Setting Up Two Bases
http://www.boydspecialtysleep.com
How to operate two bed bases simultaneously
STEP 1:
How to disable the synchronizing function
STEP 2:
STEP 4:
Remote A
Remote B
Either Remote A or Remote B can control two bases
simultaneously after connecting the power supply.
The sync cord is needed when connecting two CK or
TXL bases together.
How to synchronize the two bases?
Use the sync cord connecting base A control box in sync
port with base B sync port.
Sync port: SYNCHRO CNTL!
After synchronization, any of the remotes can control the
two bases synchronously.
Unplug the sync cord connecting the two bases. The
sync function is now disabled.
○
The remaining 4 pieces of long bolts and 4 pieces of
small washers can be used to attach the headboard
bracket to your headboard.
Open the headboard bracket accessory package and
confirm that all the pieces listed below are included:
Headboard Brackets [2]
Headboard Connecting Components [2]
Short Bolts (8)
Long Bolts [6]
Large Washers [2]
Small Washers [12]
Hex Key [1]
http://www.boydspecialtysleep.com
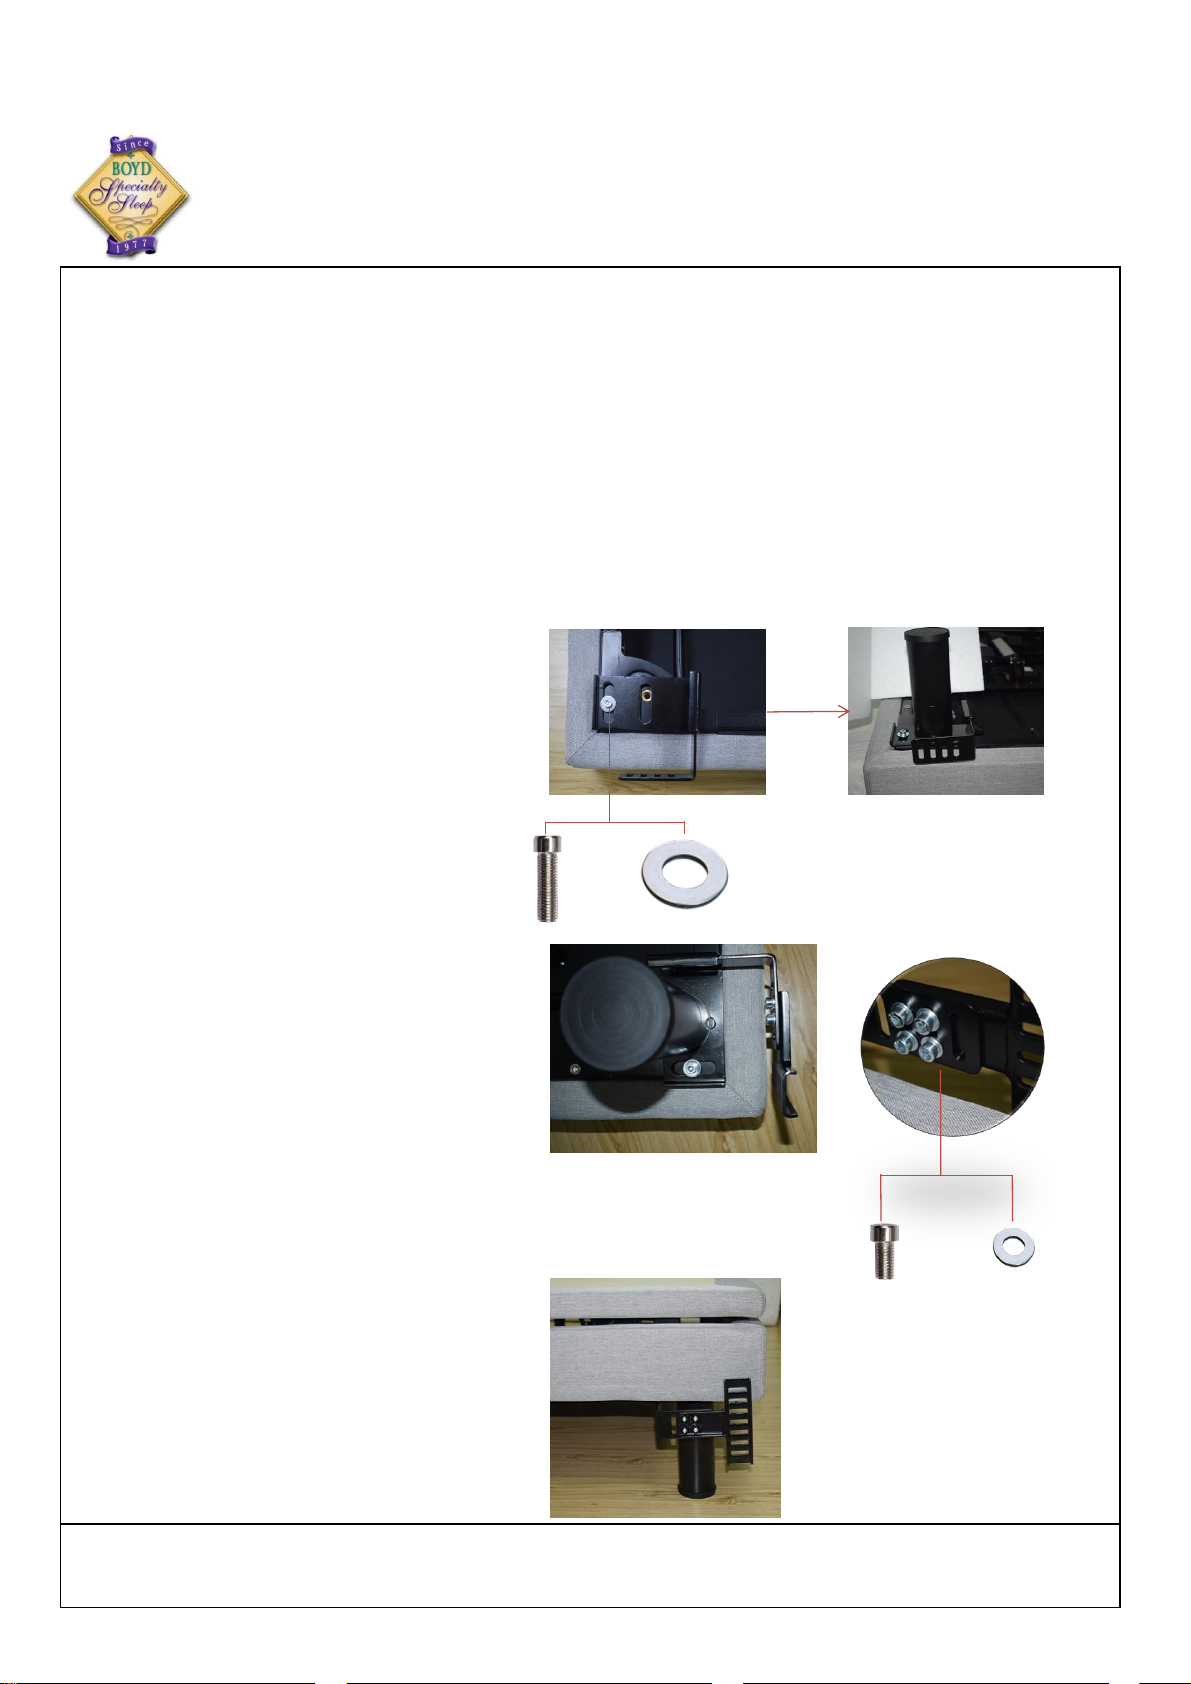
STEP 4
Install the headboard bracket (F) using one long bolt and
one large washer. Install as per the picture to the right.
Use the Hex Key (L) to tighten the bolts. Repeat this
process for the other side of the base.
STEP 3:
Headboard Brackets Installation
Attach the headboard T-Bar (G) to the headboard
bracket(F) using 4 short bolts and 4 small washers as
per the picture to the right. Use the Hex Key to tighten
the bolts. Repeat this process for the other side of the
base.
STEP 1:
STEP 2:
1
2

Trouble Shooting
http://www.boydspecialtysleep.com
If one or more functions on the bed base have stopped operating, please check the
bed as follow:
◎Check under the bed base to verify that the wired connections are secure and that there are no
cords or bedding obstructing the movement of the base.
◎Check to see if the bed base is connected to the power supply correctly. Make sure the power
supply is connected to the outlet.
◎Ensure the batteries in the remote are new and operable.
◎If the power supply is working correctly, unplug the base for 1 hour to reset the electronic
components.
◎After the electronic components have been reset, follow the REMOTE SETTINGS steps on page
11 to reset the base.
If the issue is not resolved by following the instructions above, locate serial number on warranty card
or back of remote and contact customer service at 314-997-5222.
1
2
1
2

Lounge Position
TV Position
Flat
Zero Gravity
Base Functions
Functions
Function Review
Wireless remote
●
●
●
●
●
●
●
Carriage Design
Zero Clearance
Flat
●
●
●
●
Wall hugger
Head Up/Down
Zero Gravity
Foot Up/Down
Memory Preset
Anti-Snore
Massage
1
2
○
Preset
Positions
1
2
1
2
Table of contents
Other Boyd Indoor Furnishing manuals


Popular Indoor Furnishing manuals by other brands


Bell'O
Bell'O WAVS99163 Assembly instructions

eliving FURNITURE
eliving FURNITURE Jun Series Assembly instructions

ofichairs
ofichairs Recaro manual

KI
KI Uniframe Convertible Bench Assembly instructions

FMD Furniture
FMD Furniture COMBI 2 486-002 Assembly instruction

Furniture of America
Furniture of America CM7502Q Assembly instructions