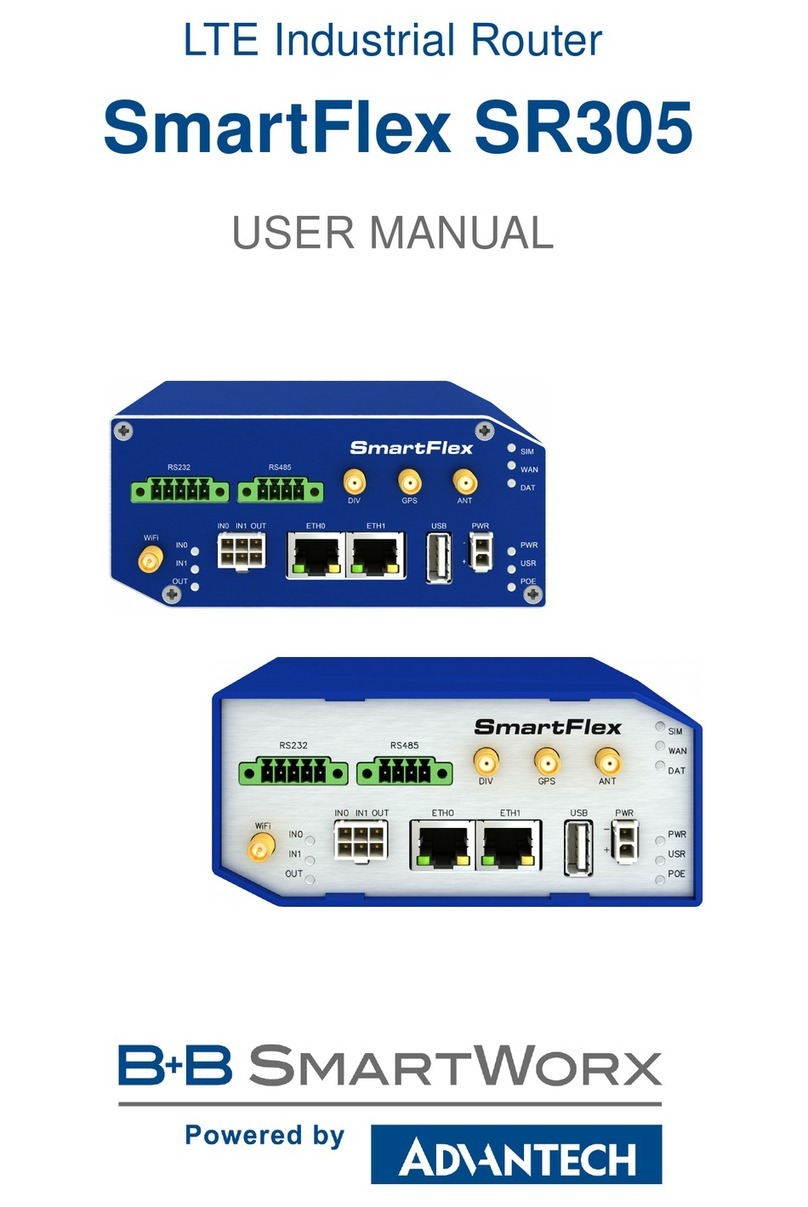
B+B SMARTWORK SPECTRE V3 Instruction sheet

Configuration Manual
for v3 Routers

USED SYMBOLS
Used symbols
Danger – Information regarding user safety or potential damage to the router.
Attention – Problems that can arise in specific situations.
Information, notice – Useful tips or information of special interest.
Firmware version
Current version of firmware is 5.3.4 (March 10, 2016).
GPL licence
Source codes under GPL licence are available free of charge by sending an email to:
Conel s.r.o., Sokolska 71, 562 04 Usti nad Orlici, Czech Republic
Manual Rev. 1 released in CZ, March 11, 2016
i

CONTENTS
Contents
1 Basic Information 1
2 Access to the Web Conf. 3
2.1 Certificates and Preventing the Security Message ................. 4
3 Status 5
3.1 General Status .................................... 5
3.1.1 Mobile Connection .............................. 5
3.1.2 Primary LAN, Secondary LAN, Tertiary LAN, WiFi ............ 6
3.1.3 Peripheral Ports ............................... 6
3.1.4 System Information .............................. 7
3.2 Mobile WAN Status .................................. 8
3.3 WiFi .......................................... 11
3.4 WiFi Scan ....................................... 12
3.5 Network Status .................................... 14
3.6 DHCP Status ..................................... 16
3.7 IPsec Status ..................................... 17
3.8 DynDNS Status .................................... 17
3.9 System Log ...................................... 18
4 Configuration 20
4.1 LAN Configuration .................................. 20
4.2 VRRP Configuration ................................. 26
4.3 Mobile WAN Configuration .............................. 29
4.3.1 Connection to Mobile Network ....................... 29
4.3.2 DNS Address Configuration ......................... 31
4.3.3 Check Connection to Mobile Network Configuration ........... 31
4.3.4 Data Limit Configuration ........................... 32
4.3.5 Switch between SIM Cards Configuration ................. 32
4.3.6 PPPoE Bridge Mode Configuration ..................... 34
4.4 PPPoE Configuration ................................. 37
4.5 WiFi Configuration .................................. 38
4.6 WLAN Configuration ................................. 43
4.7 Backup Routes .................................... 45
4.8 Firewall Configuration ................................ 47
4.9 NAT Configuration .................................. 51
4.10 OpenVPN Tunnel Configuration ........................... 56
4.11 IPsec Tunnel Configuration ............................. 61
4.12 GRE Tunnels Configuration ............................. 67
ii

CONTENTS
4.13 L2TP Tunnel Configuration ............................. 70
4.14 PPTP Tunnel Configuration ............................. 72
4.15 DynDNS Configuration ................................ 74
4.16 NTP Configuration .................................. 75
4.17 SNMP Configuration ................................. 76
4.18 SMTP Configuration ................................. 80
4.19 SMS Configuration .................................. 82
4.19.1 Sending SMS ................................. 84
4.20 Expansion Port Configuration ............................ 89
4.21 USB Port Configuration ............................... 93
4.22 Startup Script ..................................... 97
4.23 Up/Down script .................................... 98
4.24 Automatic Update Configuration .......................... 99
5 Customization 101
5.1 User Modules ..................................... 101
6 Administration 103
6.1 Users ......................................... 103
6.2 Change Profile .................................... 104
6.3 Change Password .................................. 105
6.4 Set Real Time Clock ................................. 105
6.5 Set SMS Service Center Address .......................... 106
6.6 Unlock SIM Card ................................... 106
6.7 Send SMS ...................................... 107
6.8 Backup Configuration ................................ 107
6.9 Restore Configuration ................................ 107
6.10 Update Firmware ................................... 108
6.11 Reboot ......................................... 109
7 Configuration in Typ. Situations 110
7.1 Access to the Internet from LAN .......................... 110
7.2 Backup Access to the Internet from LAN ...................... 112
7.3 Secure Networks Interconnection or Using VPN .................. 116
7.4 Serial Gateway .................................... 118
8 Glossary and Acronyms 120
9 Index 125
10 Recommended Literature 127
iii

LIST OF FIGURES
List of Figures
1 Example of the Web Configuration ......................... 3
2 Mobile WAN status .................................. 10
3 WiFi Status ...................................... 11
4 WiFi Scan ....................................... 13
5 Network Status .................................... 15
6 DHCP Status ..................................... 16
7 IPsec Status ..................................... 17
8 DynDNS Status .................................... 17
9 System Log ...................................... 19
10 Example program syslogd start with the parameter -R .............. 19
11 Example 1 – Network Topology for Dynamic DHCP Server ............ 22
12 Example 1 – LAN Configuration Page ....................... 23
13 Example 2 – Network Topology with both Static and Dynamic DHCP Servers . 24
14 Example 2 – LAN Configuration Page ....................... 24
15 Example 3 – Network Topology ........................... 25
16 Example 3 – LAN Configuration Page ....................... 25
17 Topology of VRRP configuration example ..................... 27
18 Example of VRRP configuration – main router ................... 27
19 Example of VRRP configuration – backup router ................. 28
20 Mobile WAN Configuration .............................. 35
21 Example 1 – Mobile WAN Configuration ...................... 36
22 Example 2 – Mobile WAN Configuration ...................... 36
23 Example 3 – Mobile WAN Configuration ...................... 36
24 PPPoE configuration ................................. 37
25 WiFi Configuration .................................. 42
26 WLAN Configuration ................................. 44
27 Backup Routes .................................... 45
28 Firewall Configuration ................................ 49
29 Topology for the Firewall Configuration Example ................. 50
30 Firewall Configuration Example ........................... 50
31 Example 1 – Topology of NAT Configuration .................... 52
32 Example 1 – NAT Configuration ........................... 53
33 Example 2 – Topology of NAT Configuration .................... 54
34 Example 2 – NAT Configuration ........................... 54
35 OpenVPN Tunnels List ................................ 56
36 OpenVPN tunnel configuration ........................... 59
37 Topology of OpenVPN Configuration Example ................... 60
38 IPsec Tunnels List .................................. 61
39 IPsec Tunnels Configuration ............................. 65
40 Topology of IPsec Configuration Example ..................... 66
iv

LIST OF FIGURES
41 GRE Tunnels List ................................... 67
42 GRE Tunnel Configuration .............................. 68
43 Topology of GRE Tunnel Configuration Example ................. 69
44 L2TP Tunnel Configuration ............................. 70
45 Topology of L2TP Tunnel Configuration Example ................. 71
46 PPTP Tunnel Configuration ............................. 72
47 Topology of PPTP Tunnel Configuration Example ................. 73
48 DynDNS Configuration Example .......................... 74
49 Example of NTP Configuration ........................... 75
50 OID Basic Structure ................................. 77
51 SNMP Configuration Example ............................ 78
52 MIB Browser Example ................................ 79
53 SMTP Client Configuration Example ........................ 80
54 Example 1 – SMS Configuration .......................... 86
55 Example 2 – SMS Configuration .......................... 87
56 Example 3 – SMS Configuration .......................... 87
57 Example 4 – SMS Configuration .......................... 88
58 Expansion Port Configuration ............................ 91
59 Example of Ethernet to serial communication ................... 92
60 Example of serial port extension .......................... 92
61 USB configuration .................................. 95
62 Example 1 – USB port configuration ........................ 95
63 Example 2 – USB port configuration ........................ 96
64 Startup script ..................................... 97
65 Example of a Startup script ............................. 97
66 Up/Down script .................................... 98
67 Example of Up/Down script ............................. 98
68 Example of Automatic Update 1 ........................... 100
69 Example of Automatic Update 2 ........................... 100
70 User modules ..................................... 101
71 Added user module .................................. 101
72 Users ......................................... 104
73 Change Profile .................................... 104
74 Change Password .................................. 105
75 Set Real Time Clock ................................. 105
76 Set SMS Service Center Address .......................... 106
77 Unlock SIM Card ................................... 106
78 Send SMS ...................................... 107
79 Restore Configuration ................................ 107
80 Update Firmware ................................... 108
81 Reboot ......................................... 109
82 Access to the Internet from LAN – sample topology ................ 110
83 Access to the Internet from LAN – LAN configuration ............... 111
84 Access to the Internet from LAN – Mobile WAN configuration .......... 111
v

LIST OF FIGURES
85 Backup access to the Internet – sample topology ................. 112
86 Backup access to the Internet – LAN configuration ................ 112
87 Backup access to the Internet – WLAN configuration ............... 113
88 Backup access to the Internet – WiFi configuration ................ 114
89 Backup access to the Internet – Mobile WAN configuration ............ 114
90 Backup access to the Internet – Backup Routes configuration .......... 115
91 Secure networks interconnection – sample topology ............... 116
92 Secure networks interconnection – OpenVPN configuration ........... 117
93 Serial Gateway – sample topology ......................... 118
94 Serial Gateway – konfigurace Expansion Port 1 .................. 119
vi

LIST OF TABLES
List of Tables
1 Mobile Connection .................................. 5
2 PoE PSE information ................................. 6
3 Peripheral Ports ................................... 6
4 System Information .................................. 7
5 Mobile Network Information ............................. 8
6 Description of Periods ................................ 9
7 Mobile Network Statistics .............................. 9
8 Traffic Statistics .................................... 10
9 Access Point State Information ........................... 11
10 State Information about Connected Clients .................... 11
11 Information about Neighbouring WiFi Networks .................. 12
12 Description of Interfaces in Network Status .................... 14
13 Description of Information in Network Status .................... 15
14 DHCP Status Description .............................. 16
15 Configuration of the Network Interface ....................... 21
16 Configuration of Dynamic DHCP Server ...................... 21
17 Configuration of Static DHCP Server ........................ 22
18 VRRP configuration ................................. 26
19 Check connection .................................. 26
20 Mobile WAN Connection Configuration ....................... 30
21 Check Connection to Mobile Network Configuration ................ 31
22 Data Limit Configuration ............................... 32
23 Default and Backup SIM Configuration ....................... 32
24 Switch between SIM Card Configurations ..................... 33
25 Timeout Configuration ................................ 34
26 PPPoE configuration ................................. 37
27 WiFi Configuration .................................. 41
28 WLAN Configuration ................................. 43
29 Configuration of DHCP Server ........................... 44
30 Backup Routes .................................... 46
31 Filtering of Incoming Packets ............................ 47
32 Forwarding filtering .................................. 48
33 NAT Configuration .................................. 51
34 Configuration of send all incoming packets ..................... 51
35 Remote Access Configuration ............................ 52
36 OpenVPN Tunnels Overview ............................ 56
37 OpenVPN Configuration ............................... 58
38 OpenVPN Configuration Example .......................... 60
39 IPsec Tunnels Overview ............................... 61
40 IPsec Tunnel Configuration ............................. 64
vii

LIST OF TABLES
41 Example IPsec configuration ............................ 66
42 GRE Tunnels Overview ............................... 67
43 GRE Tunnel Configuration .............................. 68
44 GRE Tunnel Configuration Example ........................ 69
45 L2TP Tunnel Configuration ............................. 70
46 L2TP Tunnel Configuration Example ........................ 71
47 PPTP Tunnel Configuration ............................. 72
48 PPTP Tunnel Configuration Example ........................ 73
49 DynDNS Configuration ................................ 74
50 NTP Configuration .................................. 75
51 SNMP Agent Configuration ............................. 76
52 SNMPv3 Configuration ................................ 76
53 SNMP Configuration (R-SeeNet) .......................... 77
54 Object identifier for binary inputs and output .................... 78
55 SMTP client configuration .............................. 80
56 SMS Configuration .................................. 82
57 Control via SMS ................................... 83
58 Control SMS ..................................... 84
59 Send SMS on the serial Port 1 ........................... 84
60 Send SMS on the serial Port 2 ........................... 84
61 Send SMS on ethernet PORT1 configuration ................... 84
62 List of AT Commands ................................ 85
63 Expansion Port Configuration 1 ........................... 90
64 Expansion Port Configuration 2 ........................... 90
65 CD Signal Description ................................ 90
66 DTR Signal Description ............................... 91
67 USB Port Configuration 1 .............................. 93
68 USB Port Configuration 2 .............................. 94
69 CD Signal description ................................ 94
70 DTR Signal Description ............................... 94
71 Automatic Update Configuration .......................... 99
72 User modules ..................................... 102
73 Users Overview .................................... 103
74 Add User ....................................... 103
viii

1. BASIC INFORMATION
1. Basic Information
SPECTRE v3 LTE cellular routers are designed for communication across cellular net-
works using LTE, HSPA+, UMTS, EDGE or GPRS technology. Data transfer speed is up to
100 Mbit/s (download) and up to 50 Mbit/s (upload). The router is an ideal solution for the wire-
less connection of traffic and security camera systems, individual computers, LANs, automatic
teller machines (ATM), other self-service terminals, and many other devices.
Wired router SPECTRE v3 ERT is an ideal device for the realization of a secure connection
of two local area networks (LANs). Interconnection is carried out using two ETHERNET 10/100
interfaces and secure tunnel (IPsec,OpenVPN,L2TP). The other equally important ways to
use this router is to connect any device with RS232, RS485 or RS422 serial interface to the
local network (LAN). For this purpose, SPECTRE v3 ERT is equipped with two ETHERNET
10/100 ports and other interfaces based on the version of the router chosen by the user.
Standard Equipment
Standard features include two Ethernet 10/100 ports, one USB 2.0 Host port, two binary
inputs, one output (I/O connector), and two SIM card readers for 3 V and 1.8 V SIM cards.
The router also has a memory card reader that increases the router’s storage space by up to
64 GB when using a microSD card or up to 32 GB when using SDHC cards.
Optional Features
If desired, the router can be configured with a WiFi module when the router is manufac-
tured. (Note that routers cannot be retrofitted with this feature at some point in the future.)
The SPECTRE v3 router can also be configured with a wide variety of expansion port options.
These can be three switched Ethernet ports, an RS232 port, a combination of galvanically
separated RS232 and RS485 ports, or even a combination of Ethernet and serial lines with
stronger insulation. The router can be provided in either a plastic or metal casing, depending
upon the customer’s requirements. (See the router’s technical manual for details.)
Advantages in relation to v2 concept
The most considerable progress for a new generation of routers is four times more pow-
erful CPU providing significantly higher throughput and faster encryption. The router can also
boast substantially larger memory (512 MB RAM and 256 MB flash). As already mentioned
above, the storage space can be further increased using a memory card. The fact that the
router supports POE (Power over Ethernet) is also worthy of notice. This means that it is pos-
sible to power over data network cable without using any other cable for power supply. It just
depends on the customer whether he gets "v3" router supporting PSE mode (Power Source
Equipment), PD mode (Powered Device) or the router which does not support POE.
1

1. BASIC INFORMATION
Configuration
Configuring SPECTRE routers is made easy by a password protected web interface. The
interface provides detailed statistics about router activities, signal strength, system logs and
more. The router supports the creation of secure VPN tunnels using technologies that include
IPsec,OpenVPN and L2TP. The router also supports DHCP,NAT,NAT-T,DynDNS client,
NTP,VRRP, control by SMS, backup of primary connection and many other functions.
Additional diagnostic features designed to ensure continuous communication include au-
tomatic inspection of PPP connections, an automatic restart feature in case a connection is
lost, and a hardware watchdog that monitors the status of the router. Using a start up script
window, users can insert Linux scripts for various actions. Users may insert multiple scripts
and the router can switch between configurations as needed. Examples would include using
SMS or checking the status of the binary input. SPECTRE v3 routers can automatically up-
date their configurations and firmware from a central server, allowing for mass reconfiguration
of multiple routers at the same time.
Configuration Options
Routers can be configured via web browser or Secure Shell (SSH). Configuration via Web
Browser is described in this Configuration Manual. Commands and scripts applicable in con-
figuration via SSH are described in Commands and Scripts for v2 and v3 Routers – Application
Note [1]. The standard and optional equipment and technical parameters of your router can
be found in User’s Manual of your router. You can use additional software – communication
VPN server SmartCluster [2] and software for router monitoring R-SeeNet [3, 4].
This Configuration Manual describes
•Configuration of the router item by item according to the web interface (chapters 3to 6).
•Examples of these typical configurations of the router (chapter 7):
–Access to the Internet from LAN (Local Area Network) via mobile network
–Backed up access to the Internet (from LAN)
–Secure networks interconnection or using VPN (Virtal Private Network)
–Serial Gateway (connection of serial devices to the Internet)
2

2. ACCESS TO THE WEB CONF.
2. Access to the Web Configuration
Attention! Wireless transmissions only functions when you activate the SIM card for
data traffic and insert it into the router. Remove the power source before inserting the
SIM card.
You may use the web interface to monitor, configure and manage the router. To do so,
enter the router’s IP address in your browser. The default address is 192.168.1.1. Only ac-
cess via secured HTTPS protocol is permitted. So the syntax for the IP address must be
https://192.168.1.1. When accessing the router for the first time you will need to install a se-
curity certificate if you don’t want the browser to show you a domain disagreement message.
To avoid receiving domain disagreement messages, follow the procedure described in the
following subchapter.
The default username is "root". The default password is "root".
Figure 1: Example of the Web Configuration
3

2. ACCESS TO THE WEB CONF.
When you successfully enter login information on the login page, web interface will be
displayed. The left side of the web interface contains a menu tree with sections for monitor-
ing (Status), configuration (Configuration), customization (Customization) and administration
(Administration) of the router.
Name and Location items in the right upper corner display the name and location of the
router in the SNMP configuration (see 4.17). These fields are user-defined for each router.
For increased security of the network connected to the router, change the default router
password. When the default password of the router is still active, the Change password
title is highlighted in red.
After the green LED starts to blink you may restore the initial router settings by pressing
the reset (RST ) button on the back panel. If the reset button is pressed, all configuration will
revert to factory defaults and the router will reboot (the green LED will be on during the reboot).
2.1 Certificates and Preventing the Security Message
There is the self-signed HTTPS certificate in the router. If you want to use your own
certificate (e.g. in combination with the dynamic DNS service), you need to replace the
/etc/certs/https_cert and /etc/certs/https_key files in the router.
If you decide to use the self-signed certificate in the router to prevent the security message
(domain disagreement) from pop up every time you log into the router, you can take the fol-
lowing steps. Note: You will have to use the domain name based on the MAC address of the
router and it is not guaranteed to work with every combination of an operating system and a
browser.
•Add the DNS record to your DNS system: Edit /etc/hosts (Linux/Unix OS) or
C:\WINDOWS\system32\drivers\etc\hosts (Windows OS) or configure your own DNS
server. Add a new record with the IP address of your router and the domain name
based of the MAC address of the router (MAC address of the first network interface seen
in Network Status in the Web interface of the router.) Use dash separators instead of
colons. Example: A router with the MAC address 00:11:22:33:44:55 will have a domain
name 00-11-22-33-44-55.
•Access the router via the new domain name address (E.g. https://00-11-22-33-44-55).
If you see the security message, add an exception so the next time the message will
not pop up (E.g. in Firefox Web browser). If there is no possibility to add an exception,
export the certificate to the file and import it to your browser or operating system.
4

3. STATUS
3. Status
3.1 General Status
Selecting the General item will open a screen displaying a summary of basic information
about the router and its activities. This page is also displayed when you login to the web
interface. Information is divided into several sections, based upon the type of router activity or
the properties area: Mobile Connection,Primary LAN,Secondary LAN,Peripheral Ports and
System Information. If the router is the Ethernet switch or RS-232/485 Ethernet version, there
will be a Tertiary LAN section. If the router is WiFi equipped, there will be a WiFi section.
3.1.1 Mobile Connection
Item Description
SIM Card Identification of the SIM card (Primary or Secondary)
Interface Defines the interface
Flags Displays network interface flags
IP Address IP address of the interface
MTU Maximum packet size that the equipment is able to transmit
Rx Data Total number of received bytes
Rx Packets Received packets
Rx Errors Erroneous received packets
Rx Dropped Dropped received packets
Rx Overruns Lost received packets because of overload
Tx Data Total number of sent bytes
Tx Packets Sent packets
Tx Errors Erroneous sent packets
Tx Dropped Dropped sent packets
Tx Overruns Lost sent packets because of overload
Uptime Indicates how long the connection to the cellular network has
been established
Table 1: Mobile Connection
5

3. STATUS
3.1.2 Primary LAN, Secondary LAN, Tertiary LAN, WiFi
Items displayed in this part have the same meaning as items in the previous part. More-
over, the MAC Address item shows the MAC address of the corresponding router’s interface
(Primary LAN – eth0, Secondary LAN – eth1, Tertiary LAN – eth2, WiFi – wlan0). Visible
information depends on configuration (see 4.1 or 4.5). If the router is equipped with PoE PSE
board, there is also information about it in the Primary LAN or Secondary LAN section (see
table below for description).
Item Description
PoE PSE Status •Disabled – PoE PSE is disabled in the Primary LAN or Sec-
ondary LAN configuration form.
•Undervoltage – Undervoltage, i.e. a lower voltage than the
nominal operating voltage.
•Overcurrent – Overcurrent, i.e. a higher current than the
permissible positive difference of the nominal current.
•Idle – PoE PSE is enabled, but currently not used.
•Class 0 – Power level (classification unimplemented)
•Class 1 – Power level (very low power)
•Class 2 – Power level (low power)
•Class 3 – Power level (mid power)
•Class 4 – Power level (high power)
PoE PSE Power Power of PoE PSE [W]
PoE PSE Voltage Voltage of PoE PSE [V]
PoE PSE Current Current of PoE PSE [mA]
Table 2: PoE PSE information
3.1.3 Peripheral Ports
Item Description
Expansion Port 1 Expansion port fitted to the position 1 (None indicates that this
position is equipped with no port)
Expansion Port 2 Expansion port fitted to the position 2 (None indicates that this
position is equipped with no port)
Binary Input State of binary input
Binary Output State of binary output
Table 3: Peripheral Ports
6

3. STATUS
3.1.4 System Information
Item Description
Firmware Version Information about the firmware version
Serial Number Serial number of the router (in case of N/A is not available)
Profile Current profile – standard or alternative profiles (profiles are used
for example to switch between different modes of operation)
Supply Voltage Supply voltage of the router
Temperature Temperature in the router
Time Current date and time
Uptime Indicates how long the router is used
Table 4: System Information
7

3. STATUS
3.2 Mobile WAN Status
The SPECTRE v3 ERT routers do not display the Mobile WAN status option.
The Mobile WAN menu item contains current information about connections to the mobile
network. The first part of this page (Mobile Network Information) displays basic information
about mobile network the router operates in. There is also information about the module,
which is mounted in the router.
Item Description
Registration State of the network registration
Operator Specifies the operator’s network the router operates in
Technology Transmission technology
PLMN Code of operator
Cell Cell the router is connected to
LAC Location Area Code – unique number assigned to each location area
Channel Channel the router communicates on
Signal Strength Signal strength of the selected cell
Signal Quality Signal quality of the selected cell:
•EC/IO for UMTS and CDMA (it’s the ratio of the signal received
from the pilot channel – EC – to the overall level of the spectral
density, ie the sum of the signals of other cells – IO)
•RSRQ for LTE technology (Defined as the ratio N×RSRP
RSSI )
•The value is not available for the EDGE technology
CSQ Cell Signal Quality, relative value is given by RSSI (dBm). 2–9 range
means Marginal, 10–14 range means OK, 15–16 range means Good,
20–30 range means excellent.
Neighbours Signal strength of neighboring hearing cells
Manufacturer Module manufacturer
Model Type of module
Revision Revision of module
IMEI IMEI (International Mobile Equipment Identity) number of module
ESN ESN (Electronic Serial Number) number of module (for CDMA routers)
MEID MEID number of module
ICCID Integrated Circuit Card Identifier is international and unique serial
number of the SIM card.
Table 5: Mobile Network Information
8

3. STATUS
If a neighboring cell is highlighted in red, there is a risk that the router may repeatedly
switch between the neighboring cell and the primary cell. This can affect the performance of
the router. To prevent this, re-orient the antenna or use a directional antenna.
The next section of this window displays historical information about the quality of the cel-
lular WAN connection during each logging period. The router has standard intervals, such as
the previous 24 hours and last week, and also includes information one user-defined interval.
Period Description
Today Today from 0:00 to 23:59
Yesterday Yesterday from 0:00 to 23:59
This week This week from Monday 0:00 to Sunday 23:59
Last week Last week from Monday 0:00 to Sunday 23:59
This period This accounting period
Last period Last accounting period
Table 6: Description of Periods
Item Description
Signal Min Minimal signal strength
Signal Avg Average signal strength
Signal Max Maximal signal strength
Cells Number of switch between cells
Availability Availability of the router via the mobile network (expressed as a percent-
age)
Table 7: Mobile Network Statistics
Tips for Mobile Network Statistics table:
•Availability is expressed as a percentage. It is the ratio of time connection to the mobile
network has been established to the time that router has been is turned on.
•Placing your cursor over the maximum or minimum signal strength will display the last
time the router reached that signal strength.
9

3. STATUS
The middle part of this page displays information about transferred data and the number
of connections for both SIM cards (for each period).
Item Description
RX data Total volume of received data
TX data Total volume of sent data
Connections Number of connection to mobile network establishment
Table 8: Traffic Statistics
The last part (Mobile Network Connection Log) displays information about the mobile net-
work connections and any problems that occurred while establishing them.
Figure 2: Mobile WAN status
10

3. STATUS
3.3 WiFi
This item is available only if the router is equipped with a WiFi module.
Selecting the WiFi item in the main menu of the web interface will display information about
the WiFi access point (AP) and associated stations.
Item Description
hostapd state dump Time the statistical data relates to
num_sta Number of connected stations
num_sta_non_erp Number of connected stations using 802.11b in 802.11g
BSS connection
num_sta_no_short_slot_time Number of stations not supporting the Short Slot Time
num_sta_no_short_preamble Number of stations not supporting the Short Preamble
Table 9: Access Point State Information
Detailed information is displayed for each connected client. Most of them have an internal
character. Here are two examples:
Item Description
STA MAC address of connected device (station)
AID Identifier of connected device (1 – 2007). If 0 is displayed, the station is
not currently connected.
Table 10: State Information about Connected Clients
Figure 3: WiFi Status
11
Table of contents
Other B+B SMARTWORK Network Router manuals
Popular Network Router manuals by other brands

ZyXEL Communications
ZyXEL Communications Prestige 642 user guide
Alcatel-Lucent
Alcatel-Lucent 7710 SR SONET Configuration guide
Solectek
Solectek SkyWay-MAX installation guide
Asus
Asus 4G-AC53U quick start guide
Juniper
Juniper M7i manual

Weidmüller
Weidmüller IE-SW-AL18M-16TX-2GC Hardware installation guide

