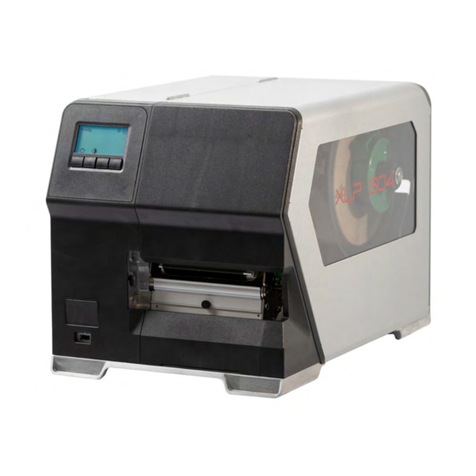
Brady BradyPrinter i7100 User manual

USER MANUAL

2User Manual
Table of Contents
1 Licenses.................................................................................................................................................. 4
1.1 EU Declaration of Conformity ....................................................................................................................................... 4
1.2 FCCandCountry-SpecicAgencyApprovalInformation ............................................................................................. 4
2 Technical Suppot & Repair.................................................................................................................... 6
3 Application Engineering Services ........................................................................................................ 7
4 Introduction ............................................................................................................................................ 8
4.1 Instructions ................................................................................................................................................................... 8
4.2 IntendedUse ................................................................................................................................................................ 8
4.3 SafetyInstructions ........................................................................................................................................................ 9
4.4 Environment ................................................................................................................................................................. 9
5 Installation ............................................................................................................................................ 10
5.1 PrinterOverview ......................................................................................................................................................... 10
5.2 UnpackingandSetting-upthePrinter......................................................................................................................... 12
5.3 ConnectingtheDevice ............................................................................................................................................... 12
5.3.1 ConnectingtothePowerSupply ................................................................................................................................ 12
5.3.2 ConnectingtoaComputerorComputerNetwork ...................................................................................................... 12
5.4 SwitchingontheDevice ............................................................................................................................................. 12
6 Touchscreen Display ........................................................................................................................... 13
6.1 Start Screen................................................................................................................................................................ 13
6.2 NavigationintheMenu............................................................................................................................................... 15
7 Loading Material................................................................................................................................... 16
7.1 LoadingMediafrom Roll............................................................................................................................................. 16
7.1.1 PositioningtheMediaRollontheRollRetainer ......................................................................................................... 16
7.1.2 InsertingtheMediaStripintothePrinthead ............................................................................................................... 17
7.1.3 SettingtheLabelSensor ............................................................................................................................................ 17
7.1.4 WindinguptheMediaStripinRewindMode.............................................................................................................. 18
7.1.5 RemovingtheWoundRoll.......................................................................................................................................... 19
7.1.6 WindinguptheLinerinPeel-Offmode....................................................................................................................... 20
7.2 LoadingFanfoldMedia ............................................................................................................................................... 21
7.3 SettingtheHeadLockingSystem .............................................................................................................................. 22
7.4 RemovingandInstallingtheRewindGuidingPlate,DispensePlateorTear-offPlate ............................................... 22
7.5 LoadingTransferRibbon ............................................................................................................................................ 23
7.6 SettingtheFeedPathoftheTransferRibbon ............................................................................................................ 24
8 Printing Operation................................................................................................................................ 25
8.1 SynchronizationofthePaperFeed ............................................................................................................................ 25
8.2 Tear-offMode.............................................................................................................................................................. 25
8.3 Peel-offMode ............................................................................................................................................................. 25
8.4 InternalRewinding...................................................................................................................................................... 25
9 Cleaning ................................................................................................................................................ 26
9.1 CleaningInformation .................................................................................................................................................. 26
9.2 ApprovedCleaningSwabs ......................................................................................................................................... 26
9.3 CleaningtheRoller ..................................................................................................................................................... 26
9.4 CleaningthePrinthead ............................................................................................................................................... 26
9.5 CleaningtheLabelSensor ......................................................................................................................................... 27
10 Fault Correction ................................................................................................................................... 28
10.1 Error Display............................................................................................................................................................... 28
10.2 ErrorMessagesandFaultCorrection......................................................................................................................... 28
10.3 Problem Solution ........................................................................................................................................................ 30
11 Media ..................................................................................................................................................... 31
11.1 MediaDimensions ...................................................................................................................................................... 31
11.2 PrinterDimensions .................................................................................................................................................... 32
11.3 ReexMarkDimensions............................................................................................................................................. 33
11.4 Cut-outMark(notch)Dimensions............................................................................................................................... 34
12 Index...................................................................................................................................................... 35

3
User Manual
Model Congurations
i7100 i7100Standard(300&600dpi)
i7100Peel(300&600dpi)
Operator's Manual for the following products
Disclaimer
ThismanualisproprietarytoBradyWorldwide,Inc.(hereafter"Brady"),andmayberevisedfromtimetotimewithoutnotice.
Bradydisclaimsanyunderstandingtoprovideyouwithsuchrevisions,ifany.
Thismanualiscopyrightedwithallrightsreserved.Noportionofthismanualmaybecopiedorreproducedbyanymeans
withoutthepriorwrittenconsentofBrady.
Whileeveryprecautionhasbeentakeninthepreparationofthisdocument,Bradyassumesnoliabilitytoanypartyforany
lossordamagecausedbyerrorsoromissionsorbystatementsresultingfromnegligence,accident,oranyothercause.Brady
furtherassumesnoliabilityarisingoutoftheapplicationoruseofanyproductorsystemdescribed,herein;noranyliabilityfor
incidentalorconsequentialdamagesarisingfromtheuseofthisdocument.Bradydisclaimsallwarrantiesofmerchantabilityof
tnessforaparticularpurpose.
Bradyreservestherighttomakechangeswithoutfurthernoticetoanyproductorsystemdescribedhereintoimprovereliability,
function,ordesign.
Trademark
WindowsisaregisteredtrademarkoftheMicrosoftCorporation.
BradyPrinter™isatrademarkofBradyWorldwide,Inc.Allbrandorproductnamesreferencedinthismanualaretrademarks
(™)orregisteredtrademarks(®)oftheirrespectivecompaniesororganizations.©2016BradyCorporation.Allrightsreserved.
Editor
RegardingquestionsorcommentspleasecontactBradyTechnicalSupport.
Topicality
Duetotheconstantfurtherdevelopmentofproductsdiscrepanciesbetweendocumentationandproductcanoccur.Please
checkBradyID.comforthelatestupdate.
Terms and conditions
DeliveriesandperformancesareeffectedundertheGeneralconditionsofsaleofBradyPrinteri7100.
Brady Warranty
Ourproductsaresoldwiththeunderstandingthatthebuyerwilltesttheminactualuseanddetermineforhimorherself
theiradaptabilitytohis/herintendeduses.Bradywarrantstothebuyerthatitsproductsarefreefromdefectsinmaterialand
workmanship,butlimitsitsobligationunderthiswarrantytoreplacementoftheproductshowntoBrady’ssatisfactiontohave
beendefectiveatthetimeBradysoldit.Thiswarrantydoesnotextendtoanypersonsobtainingtheproductfromthebuyer.
THISWARRANTYISINLIEUOFANYOTHERWARRANTY,EXPRESSORIMPLIED,INCLUDING,BUTNOTLIMITEDTO,
ANYIMPLIEDWARRANTYOFMERCHANTABILITYORFITNESSFORAPARTICULARPURPOSE,ANDOFANYOTHER
OBLIGATIONSORLIABILITYONBRADY’SPART.UNDERNOCIRCUMSTANCESWILLBRADYBELIABLEFORANY
LOSS,DAMAGE,EXPENSEORCONSEQUENTIALDAMAGESOFANYKINDARISINGINCONNECTIONWITHTHEUSE,
ORINABILITYTOUSE,BRADY’SPRODUCTS.

4User Manual
1 Licenses
1.1 Reference to the EU Declaration of Conformity
TheprintersoftheBradyprinteri7100seriescomplywiththerelevantfundamentalregulations
oftheEURulesforSafetyandHealth:
• Directive2014/35/EUrelatingtoelectricalequipmentdesignedforusewithincertainvoltagelimits
• Directive2014/30/EUrelatingtoelectromagneticcompatibility
• Directive2011/65/EUontherestrictionoftheuseofcertainhazardoussubstancesinelectricalandelectronicequipment
EU Declaration of Conformity www.bradyeurope.com/conformity
1.2 FCC and Country-Specic Agency Approval Information
NOTE:ThisequipmenthasbeentestedandfoundtocomplywiththelimitsforaClassAdigitaldevice,pursuanttoPart
15oftheFCCRules.Theselimitsaredesignedtoprovidereasonableprotectionagainstharmfulinterferencewhenthe
equipmentisoperatedinacommercialenvironment.Theequipmentgenerates,uses,andcanradiateradiofrequency
and,
ifnotinstalledandusedinaccordancewiththeinstructionmanual,maycauseharmfulinterferencetoradiocommunications.
Operationofthisequipmentinaresidentialareaislikelytocauseharmfulinterferenceinwhichcasetheusermaybe
requiredtocorrecttheinterferenceathisownexpense.Changesormodicationsnotexpresslyapprovedbytheparty
responsibleforcompliancecouldvoidtheuser’sauthoritytooperatetheequipment.ThisdevicecomplieswithPart15of
theFCCRules.Operationissubjecttothefollowingtwoconditions:(1)Thisdevicemaynotcauseharmfulinterference
and,(2)thisdevicemustacceptanyinterferencereceived,includinginterferencethatmaycauseundesiredoperation.
Prop 65 Warning Statement
Prop65informationrelatedtothisproductisavailableatwww.BradyID.com/i7100compliance.
Canada
ICES-003 Class A Notice, Classe A
ThisClassAdigitalapparatusmeetsallrequirementsoftheCanadianInterference-CausingEquipmentRegulations.
CetappareilnumeriquedelaclasseArespectetouteslesexigencesduReglementsurlematerialbroilleurduCanada.
CANICES-3(A)/NMB-3(A)
Europe
RoHS Directive 2011/65/EU
ThisproductisCEmarkedandcomplieswiththeEuropeanUnion'sDirective2011/65/EUOFTHEEUROPEAN
PARLIAMENTANDOFTHECOUNCILof8June2011ontherestrictionoftheuseofcertainhazardoussubstancesin
electricalandelectronicequipment.
Waste Electrical and Electronic Equipment Directive
InaccordancewiththeEuropeanWEEEDirective,thisdeviceneedstoberecycledinaccordancewith
localregulations.
Batteries Directive 2006/66/EC
Thisproductcontainsalithiumcoinbattery.Thecrossed-outwheeledbinisusedtoindicate‘separate
collection’forallbatteriesandaccumulatorsinaccordancewithEuropeanDirective2006/66/EC.Users
ofbatteriesmustnotdisposeofbatteriesasunsortedmunicipalwaste.ThisDirectivedeterminesthe
frameworkforthereturnandrecyclingofusedbatteriesandaccumulatorsthataretobecollected
separatelyandrecycledatendoflife.Pleasedisposeofthebatteryaccordingtoyourlocalregulations.
Notice to Recyclers - To remove the lithium coin battery:
1.Disassembleprinterandlocatethelithiumcellbatterylocatedonthemaincircuitboard.
2.Toremove,slidethebatteryfromthecoincellretainer,removethebatteryfromtheboard,anddisposeofproperly.
ApprovalsforadditionalcountriesareonlewithBradyormaybependingapprovalatthetimeofprintingthismanual.
ContactBradyfordetailsforcurrentagencyapprovalsforaparticularcountry.

5
User Manual
Turkey
TurkishMinistryofEnvironmentandForestry(DirectiveontheRestrictionoftheuseofcertainhazardoussubstancesin
electricalandelectronicequipment).TürkiyeCumhuriyeti:EEEYönetmeliğineUygundur
China
ChinaRoHSDeclarationinformationrelatedtothisproductisavailableatwww.BradyID.com/i7100compliance

6User Manual
Technical Support: Troubleshootingandhow-toguidanceandspecial
servicesviaphoneorweb.
Repair Services: Depot-basedoron-siterepairservicedependingon
Bradylocation,forbothin-warrantyandout-of-warrantyrepairneeds.
Technical Support & Repair
Intheeventyouri7100IndustrialLabelPrinterrequiresserviceorsupport,Bradyofferscomprehensivetrouble-
shootingsupport,setupassistance,how-toguidanceandrepairservicesglobally.Bradyoffersbothfree-of-
chargeandfee-basedlevelsofthissupport.Warrantycoverageperiod,warrantybenetsandavailabilityof
certainservicesmayvarybyBradylocation.Consultyourlocationforcompletedetails.
Contacting Brady Technical Support
ThefollowingchartshowsthelocationsandcontactinformationforBrady'sglobalTechnicalsupportlocations.
Americas
Asia Pacic
Singapore/Malaysia/
Indonesia
Europe, Middle East, Africa
MainSupportCenter +44 333 333 1111 [email protected]
Englishandnativelanguage
supportfor22countries
dependingonlocation
forlocalphonenumberlistvisit:
http://www.brady.eu/technical-support/brady-solution-center
2 Technical Support & Repair

7
User Manual
Application Engineering Services
Bradyoffersfee-basedapplicationengineeringservicesinsomelocations.Ifyouneedassistancewithadvanced
integrationofyouri7100IndustrialLabelPrinterintoacomplexdataowscenariothatisnotsupportedundernormal
techsupportcapabilities,Brady'sApplicationEngineeringTeammaybeabletohelp.Thisteamspecializesin
customizedfee-basedservicesthatinclude:
• Customsoftwareprogramming
• Customfront-endapplicationsoftwareprogramming
• Softwaretemplatecreation
• Labelleconversion
• Scan-to-printmappingassistance
• Advancedintegrationofprinter&dataow
Note:ApplicationEngineeringServicesisnotavailableinallBradylocations-contacttheapplicationsengineering
emailbeloworcontactyourlocalBradyTechSupportlocationforavailabilityoftheseservicesinyourarea.
Contacting Brady Application Engineering
ContactBradyApplicationEngineeringviaemailat[email protected]todiscussyourapplication,
ortolearnabouttheavailabilityofservicesinyourlocation.
Application Engineering Services
Advancedintegrationandcustomprogrammingservicestosolve
complexdataowscenariosintegratingprinters,software,data
collectiondevicesanddatabases.
3 Application Engineering Services

8User Manual
4 Introduction
4.1 Instructions
Importantinformationandinstructionsinthisdocumentationaredesignatedasfollows:
Danger!
Draws attention to an exceptionally great, imminent danger to your health or life due to hazardous
voltages.
!
Danger!
Draws attention to danger with high risk which, if not avoided, may result in death or serious injury.
!
Warning!
Draws attention to danger with medium risk which, if not avoided, may result in death or serious injury.
!
Caution!
Draws attention to danger with low risk which, if not avoided, may result in minor or moderate injury.
!
Attention!
Draws attention to potential risks of property damage or loss of quality.
i
Note!
Advice to make work routine easier or on important steps to be carried out.
Environment!
Givesyoutipsonprotectingtheenvironment.
Handlinginstruction
Referencetosection,position,illustrationnumberordocument.
Option(accessories,peripheralequipment,specialttings).
Time Informationinthedisplay.
4.2 Intended Use
• Thedeviceismanufacturedinaccordancewiththecurrenttechnologicalstatusandtherecognizedsafetyrules.
However,dangertothelifeandlimboftheuserorthirdpartiesand/ordamagetothedeviceandothertangible
assetscanariseduringuse.
• Thedevicemayonlybeusedforitsintendedpurposeandifitisinperfectworkingorder,anditmustbeusedwith
regardtosafetyanddangersasstatedintheoperatingmanual.
• Thedeviceprinterisintendedexclusivelyforprintingsuitablematerialsthathavebeenapprovedbythemanufac-
turer.Anyotheruseorusegoingbeyondthisshallberegardedasimproperuse.Themanufacturer/suppliershall
notbeliablefordamageresultingfromunauthorizeduse;theusershallbeartheriskalone.
• Usagefortheintendedpurposealsoincludescomplyingwiththeoperatingmanual,includingthemanufacturer‘s
maintenancerecommendationsandspecications.

9
User Manual
4 Introduction
4.3 Safety Instructions
• Thedeviceisconguredforvoltagesof100to240VAC.Itonlyhastobepluggedintoagroundedsocket.
• Onlyconnectthedevicetootherdeviceswhichhaveaprotectivelowvoltage.
• Switchoffallaffecteddevices(computer,printer,accessories)beforeconnectingordisconnecting.
• Thedevicemayonlybeusedinadryenvironment,donotexposeittomoisture(spraysofwater,mists,etc.).
• Donotusethedeviceinanexplosiveatmosphere.
• Donotusethedeviceclosetohigh-voltagepowerlines.
• Ifthedeviceisoperatedwiththecoveropen,ensurethatpeople‘sclothing,hair,jewelryetc.donotcomeinto
contactwiththeexposedrotatingparts.
• Thedeviceorpartsofitcanbecomehotwhileprinting.Donottouchduringoperation,andallowtocooldown
beforechangingmaterialandbeforedisassembly.
• Riskofcrushingwhenclosingthecover.Touchthecoverattheoutsideonly.Donotreachintotheswivelrangeof
thecover.
• Performonlythoseactionsdescribedinthisoperatingmanual.
Workgoingbeyondthismayonlybeperformedbytrainedpersonnelorservicetechnicians.
• Unauthorizedinterferencewithelectronicmodulesortheirsoftwarecancausemalfunctions.
• Otherunauthorizedworkonormodicationstothedevicecanalsoendangeroperationalsafety.
• Alwayshaveserviceworkdoneinaqualiedworkshop,wherethepersonnelhavethetechnicalknowledgeand
toolsrequiredtodothenecessarywork.
• Therearevariouswarningstickersonthedevice.Theydrawyourattentiontodangers.
Warningstickersmustthereforenotberemoved,asthenyouandotherpeoplecannotbeawareofdangersand
maybeinjured.
• Themaximumsoundpressurelevelislessthan70dB(A).
Danger!
Danger to life and limb from power supply.
Do not open the device casing.
!
Warning!
This is a class A product. In a domestic environment this product may cause radio interference in which
case the user may be required to take adequate measures.
4.4 Environment
Obsoletedevicescontainvaluablerecyclablematerialsthatshouldbesentforrecycling.
Sendtosuitablecollectionpoints,separatelyfromresidualwaste.
Themodularconstructionoftheprinterenablesittobeeasilydisassembledintoitscomponentparts.
Sendthepartsforrecycling.
Theelectroniccircuitboardofthedeviceisequippedwithalithiumbattery.
Takeoldbatteriestocollectionboxesinshopsorpublicwastedisposalcenters.

10 User Manual
5 Installation
5.1 Printer Overview
3
5
6
7
8
4
1
9
10
2
11
1 Cover
2 Marginstop(center-justied)
3 Marginstop(outer)
4 Roll retainer
5 Ribbonsupplyhub
6 Ribbontake-uphub
7 Internalrewinder
8 Print unit
9 Cover(notonPEELcongurations)
10 Touchscreendisplay
11 LED"Poweron"
Figure1 Overview
13
14
18
19
16
12
21
22
15
17
20
12 Ribbondeection
13 Printheadretainerwithprinthead
14 Labelsensor
15 Allenkey
16 Printheadlockinglever
17 Print roller
18 Guideadjustingknob
19 Guide
20 Dispenseplate
21 Rewindassistroller
(onlyPEELcongurations)
22 Lockingsystem
(onlyPEELcongurations)
Figure2 Print unit

11
User Manual
23
24
27
25
26
29
28
30
31
23 Powerswitch
24 Powerconnectionjack
25 Slot for SD card
26 2USBmasterportsforkeyboard,
scanner,USBmemorystick,Bluetooth
adapterorservicekey
27 USBfull-speedslaveport
28 Ethernet10/100Base-T
29 Serial RS-232 port
30 I/Ointerface(Option)
31 USBmasterportforkeyboard,
scanner,USBmemorystick,Bluetooth
adapterorservicekey
Figure3 Connections
5 Installation

12 User Manual
5 Installation
5.2 Unpacking and Setting-up the Printer
Liftthelabelprinteroutofthebox.
Checklabelprinterfordamagewhichmayhaveoccurredduringtransport.
Setupprinteronalevelsurface.
Removefoamtransportationsafeguardsneartheprinthead.
Checkdeliveryforcompleteness.
Contentsofdelivery:
• Labelprinter
• Powercable
• USBcable
• Operator'sManual
• CDwithWindowsdriveranddocumentation
i
Note!
Please keep the original packaging in case the printer must be returned.
!
Attention!
The device and printing materials will be damaged by moisture and wetness.
Set up label printers only in dry locations protected from liquid.
5.3 Connecting the Device
ThestandardavailableinterfacesandconnectorsareshowninFigure3.
5.3.1 Connecting to the Power Supply
Theprinterisequippedwithawideareapowerunit.Thedevicecanbeoperatedwithasupplyvoltageof
230V~/50Hzor115V~/60Hzwithoutadjustment.
1. Checkthatthedeviceisswitchedoff.
2. Plugthepowercableintothepowerconnectionsocket(24).
3. Plugthepowercableintoagroundedsocket.
5.3.2 Connecting to a Computer or Computer Network
!
Attention!
Inadequate or no grounding can cause malfunctions during operations.
Ensure that all computers and cables connected to the label printer are grounded.
Connectthelabelprintertoacomputerornetworkbyasuitablecable.
FordetailsofthecongurationoftheindividualinterfacesCongurationManual.
5.4 Switching on the Device
Whenallconnectionshavebeenmade:
Switchtheprinteronatthepowerswitch(23).
Theprinterperformsasystemtest,andthenshowsthesystemstatusReadyinthedisplay(10).

13
User Manual
6 Touchscreen Display
Theusercancontroltheoperationoftheprinterwiththecontrolpanel,forexample:
• Issuing,interrupting,continuingandcancelingprintjobs,
• Settingprintingparameters,e.g.heatleveloftheprinthead,printspeed,interfaceconguration,languageand
timeofday(CongurationManual),
• Controlstand-aloneoperationwithamemorymodule(CongurationManual),
• Updatethermware(CongurationManual).
Manyfunctionsandsettingscanalsobecontrolledbysoftwareapplicationsorbydirectprogrammingwitha
computerusingtheprinter’sowncommands.ProgrammingManualfordetails.
Settingsmadeonthetouchscreendisplaymakeupthebasicsettingsofthelabelprinter.
i
Note!
It is advantageous, whenever possible, to make adaptations to various print jobs in the software.
6.1 Start Screen
Afterswitchingon Duringprinting Inpausestate Afterprintjob
Figure4 Startscreen
Thetouchscreendisplayisoperateddirectlybytouch:
• Toopenamenuorselectamenuitemlightlytouchthecorrespondingsymbol.
• Toscrollinlistsslidengerupordownonthedisplay.
Openthemenu Repeatthelastprintedlabel
Interrupttheprintjob Cancelallprintjobs
Continuetheprintjob Feedablanklabel
Table1 Symbolsonthestartscreen
i
Note!
Inactive symbols are shaded.

14 User Manual
Withspecialsoftwareorhardwarecongurationsadditionalsymbolsappearonthestartscreen:
Printingondemand
withoutprintjob
Printingondemand
withinprintjob
Direct cut
withCUorPCU cutterinstalled
Figure5 Optionalsymbolsonthestartscreen
Releaseprintingofasinglelabelwithina
printjobincludingpeeling-off,cutting...
Releaseadirectcutwithoutmediafeed
Figure6 Optionalsymbolsonthestartscreen
Intheheadlineseveralinformationaredisplayedaswidgetsdependingontheconguration:
Figure7 Widgetsinthestartscreen
Displaysthecurrentdatatransferintheformofafallingdrop.
TheSave data streamfunctionisactiveCongurationmanualAllreceiveddataarestoredina.lblle.
WarningribbonendCongurationmanual.Theremainingdiameteroftheribbonsupplyrollundershoots
thesetvalue.
SDcardinstalled
USBmemoryinstalled
gray:Bluetoothadapterinstalled,white:Bluetoothconnectionactive
WiFiconnectionactive.TheWiFistrengthisdisplayedbythenumberofwhitearcs.
Ethernetconnectionactive
USBconnectionactive
Clock time
Table2 Widgetsinthestartscreen
6 Touchscreen Display

15
User Manual
6.2 Navigation in the Menu
Startlevel Selectionlevel Parameter/functionlevel
Figure8 Menulevels
Toopenthemenuselect onthestartscreen.
Selectathemeintheselectionlevel.
Severalthemeshavesubstructuresagainwithselectionlevels.
Toreturnfromthecurrentleveltotheupperoneselect .Toleavethemenuselect .
Continuetheselectionuntiltheparameter/functionlevelisreached.
Startafunction.Thewillcarryoutthefunctionpossiblyafterapreparingdialogue.
-or-Selectaparametertoset.Thesetuppossibilitiesaredependingfromtheparametertype.
Logicalparameters Selectionparameters Numericalparameters Date/time
Figure9 Samplesforparametersetting
Scrollbarforroughvaluesetting
Decreasingthevaluestep-by-step
Increasingthevaluestep-by-step
Returnwithoutsavingthesetting
Returnwithsavingthesetting
Parameterisdisabled,touchingenablestheparameter
Parameterisenabled,touchingdisablestheparameter
Figure10 Buttonsforparametersetting
6 Touchscreen Display

16 User Manual
7 Loading Material
i
Note!
For adjustments and simple installation work, use the accompanying Allen key located in the top section of
the print unit. No other tools are required for the work described here.
7.1 Loading Media from Roll
7.1.1 Positioning the Media Roll on the Roll Retainer
4
3
8
9
6
1
2
5
10
7
Figure11 Loadingmediafromroll
1. Opencover(10).
2. Turnring(2)atthemarginstop(1)counterclockwise,sothatthearrowpointstothesymbol ,andthusrelease
themarginstop.
3. Removethemarginstop(1)fromtherollretainer(4).
4. Loadlabelroll(3)ontherollretainerinsuchawaythatthelabelscanbeinsertedintotheprintheadintheright
position.Theprintingsideofthelabelsmustbevisiblefromabove.
5. Turnring(2)clockwise,sothatthearrow(10)pointstothesymbol ,andthusxthemarginstop(1)ontheroll
retainer(4).
6. Supplylongerlabelstrips:
ForPeel-OfforRewindmode:approx.60cm
ForTear-Offmode:approx.40cm
AllenKey
(pulltoremove)

17
User Manual
7.1.2 Inserting the Media Strip into the Printhead
4
1
5
3
2
76
Figure12 Insertingthemediastripintotheprinthead
1. Turnlever(2)counterclockwisetolifttheprinthead.
2. Adjusttheguide(s)(6)withtheknob(7)insuchawaythatthemediacanpassbetweenthetwoguides.
3. Guidelabelstripovertheinternalrewindertotheprintunit.
4. Guidelabelstripthroughthelabelsensor(5)insuchawaythatitexitstheprintunitbetweentheprintheadand
theprintroller.
5. Moveguide(s)(6)againsttheedge(s)ofthematerialbyturningtheknob(7).
7.1.3 Setting the Label Sensor
Thelabelsensorcanbeshiftedperpendiculartothedirectionofpaperowforadaptationtothemedia.Thesensor
unit(1)ofthelabelsensorisvisiblefromthefrontthroughtheprintunitandismarkedwithanindentationinthelabel
sensorretainer.Whentheprinterisswitchedon,ayellowLEDilluminatesthesensorposition.
Loosenscrew(4).
Positionlabelsensorwithtab(5)insuchawaythatthesensor(1)candetectthelabelgaporareexorperfo-
ration mark.
-or,ifthelabelsdeviatefromarectangularshape,-
Alignlabelsensorusingthetab(5)withthefrontedgeofthelabelinthedirectionofpaperow.
Tightenscrew(4).
Foruseintear-offmodeonly:
Turnlever(2)clockwisetolocktheprinthead.
Thelabelrollisloadedforuseintear-off mode.
7 Loading Material

18 User Manual
7 Loading Material
7.1.4 Winding up the Media Strip in Rewind Mode
6 75
2
4
1
38
Figure13 Guidingthemediastripinrewindmode
Inrewindmode,thelabelsarewoundupinternallyafterprintingforlateruse.
NOTE: a PEEL conguration printer, or standard printer upgraded with PEEL is required.
1. Installrewindguidingplate(7.4onpage22).
2. Liftthepinchroller(4)offtherewindassistroller.
3. Guidelabelstriparoundtherewindguidingplate(2)totheinternalrewinder(7).
4. Holdrewinder(7)rmlyandturnknob(6)clockwiseuntilitstops.
5. Pushlabelstripunderabracket(5)oftherewinderandturnknob(6)counterclockwiseuntilitstops.
Therewinderisfullyspread,thusgrippingthelabelstriprmly.
6. Turnrewinder(7)counterclockwisetotightenthelabelstrip.
7. Turnlever(1)clockwisetolocktheprinthead.
Thelabelrollisloadedforuseinrewindmode.

19
User Manual
7 Loading Material
7.1.5 Removing the Wound Roll
2 3
1
4
Figure14 Removingthewoundroll
1. Turnlever(1)counterclockwisetolifttheprinthead.
2. Cutlabelstripandwinditfullyaroundtherewinder(3).
3. Holdrewinder(3)rmlyandturnknob(2)clockwise.
Therewinderspindlerelaxesandthewoundroll(4)isreleased.
4. Removewoundroll(4)fromrewinder(3).

20 User Manual
7.1.6 Winding up the Liner in Peel-Off mode
6 75
2
3
4
1
8
Figure15 Guidanceofthematerialinpeel-offmode
InPeel-Offmode,thelabelsareremovedafterprinting,andonlythelineriswoundupinternally.
NOTE: a PEEL conguration printer, or standard printer upgraded with PEEL is required.
1. Liftthepinchroller(5)offtherewindassistroller(3).
2. Removelabelsfromtherst100mmoftheliner.
3. Guidelinertotherewinder(8)aroundthedispenseplate(2)andtherewindassistroller(3).
4. Holdrewinder(8)rmlyandturnknob(7)clockwiseuntilitstops.
5. Pushlinerunderabracket(6)oftherewinder(8)andaligntheouteredgeofthestriptothemediaroll.
6. Turnknob(7)counterclockwiseuntilitstops.
Therewinderisfullyspread,thusgrippingthelinerrmly.
7. Turnrewinder(8)counterclockwisetotightentheliner.
8. Positionthepinchroller(5)centrallytotheliner.
9. Swingthepinchroller(5)againsttherewindassistroller(3).
10. Turnlever(1)clockwisetolocktheprinthead.
Thelabelrollisloadedforuseinpeel-offmode.
7 Loading Material
Table of contents
Other Brady Label Maker manuals

Brady
Brady BBP 35 User manual

Brady
Brady BMP 61 User manual

Brady
Brady BradyPrinter S3700 Instruction Manual

Brady
Brady BMP71 Instruction Manual

Brady
Brady M710 User manual

Brady
Brady BSP31 User manual

Brady
Brady BMP 61 User manual

Brady
Brady BBP31 User manual

Brady
Brady BradyPrinter S3100 User manual

Brady
Brady MINIMARK User manual

Brady
Brady BBP31 User manual

Brady
Brady BradyPrinter M611 User manual

Brady
Brady BradyPrinter i5100 User instructions

Brady
Brady BP-PR PLUS Series User manual

Brady
Brady BradyPrinter S3100 User manual

Brady
Brady label maker User manual

Brady
Brady BBP 85 User manual

Brady
Brady BMP 21-PLUS User manual

Brady
Brady TLS PC Link User manual

Brady
Brady Handi User manual