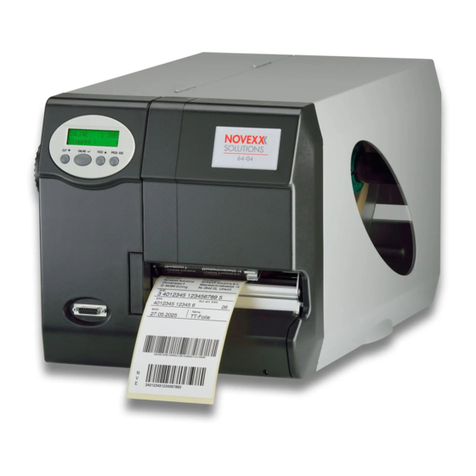
Novexx Solutions XLP 604 User manual

USER MANUAL
XLP 604
Label printer
Edition 2 - 12/2021

User Manual XLP 604
Contents
Please note! - 5
General Notes - 5
Validity of this manual and required compliance - 5
How information is represented - 6
For your safety - 7
Intended use - 7
Safety notes - 8
Warning notes on the machine - 9
Product Description - 11
Technical Data - 11
Dimensions | Connection Data | Ambient Conditions - 11
Label Material - 12
Thermal transfer ribbon - 13
Perfomance Data - 14
Interfaces & Electronics - 17
Certificates and Markings - 18
Design Models - 19
Printer versions - 19
Options and accessories - 20
Functionality - 21
Operating Controls - 23
Operating controls at the XLP 60x - 23
Operating controls on the XLP 60x with internal rewinder - 25
Operating controls on the XLP 60x with internal rewinder and dispensing edge M
(“Dispenser”) - 25
Operating Panel - 27
Operating Controls - 27
Operating Principle - 28
Icons - 30
Key Combinations - 31
Web panel - 32
Web panel - what´s that? - 32
Starting the web panel - 33
Display after the start - 33
Notifications - 35
Production View - 37
Machine settings view - 38
Administration view - 40
Parameter menu - 42
Overview parameter menu - 42
Parameter Reference - 48
Definition of Favorites - 53
Connections - 54
Edition 2 - 12/2021 2Contents

User Manual XLP 604
Before Operation - 56
Electrical Connections - 56
Connecting to the mains power supply - 56
Connecting to a data host - 57
Switching on/off - 58
Basic Settings - 59
Basic settings with the setup wizard - 59
Operation - 61
Insertion Diagram - 61
Inserting and removing ribbon - 63
Inserting ribbon - 63
Removing the used up ribbon - 66
Alternating use of different sorts of ribbon - 67
Inserting and removing label material - 69
XLP 60x Standard: Inserting roll material - 69
XLP 60x Standard: Inserting leporello material - 72
XLP 60x with internal rewinder: Inserting roll material - 75
Setting and Monitoring - 79
Positioning the Label Sensor - 79
Settings in the Parameter Menu - 80
Monitoring functions - 82
Printing - 85
Creating Print Jobs - 85
Transferring a Print Job from a Host by Means of Layout Software - 85
Transferring a Print Job from a Host by Means of a Command file - 86
Starting a Print Job from an External Memory Medium - 88
Starting and Monitoring a Print Job - 90
Standalone Operation - 91
Requirements and Function - 91
Selecting Files from an External Memory Medium - 92
Functions with external keyboard - 93
Executing Different File Types - 95
Disturbances - 97
General information about status reports - 97
Access troubleshooting instructions with your smartphone - 101
Reference of status reports - 102
Cleaning - 106
Cleaning Instructions - 106
Cleaning the print head - 107
Cleaning the rubber rollers - 109
Cleaning the dancer arm roller - 110
Cleaning the ribbon path - 110
Cleaning the label sensor - 111
Cleaning the material end sensor - 114
Edition 2 - 12/2021 3Contents
User Manual XLP 604
Please note!
GENERAL NOTES
Validity of this manual and required compliance
Contents
The complete operating manual for the label printer XLP 604 (also referred to in the following as “XLP
60x”, “machine” or “printer”) consists of the following parts:
Manual Target group Medium Availability
Quick reference guide, Safety
notes Printed Comes with machine
User manual
Operating
personnel NOVEXX Solutions web page
www.novexx.com
Service manual
Spare parts catalog
Service per-
sonnel
PDF file NOVEXX Solutions Partner Portal
www.partner.novexx.com
This user manual refers exclusively to the machine type named above. It is used for proper operation
and adjustment of the machine.
The machine must be properly installed and configured to allow for operation and settings.
• For information about the required qualification, see chapter Qualifications required on page 8.
• For information about installation and configuration, refer to the service manual.
For technical questions not covered in this user manual:
► Follow the instructions of the service manual for the machine
or
► Request a service technician from our sales partner.
Our sales partner's customer service department is available especially for configuration settings and
malfunctions.
Technical release
Technical release: 12/2021
Software version: BEL-4.0
User manual version: 2 - 12/2021
Liability
Novexx Solutions reserves the right:
• to make changes in design, parts and software and to use equivalent parts instead of those specified
for the purpose of technological progress.
• to change information in this manual.
Any obligation to extend these changes to machines previously delivered is excluded.
Edition 2 - 12/2021 5Please note!
General Notes

User Manual XLP 604
Copyright
NOVEXX Solutions retains all rights to this manual and its appendices. Reproduction, reprint or any
other type of duplication, including parts of the manual, are permitted only with written approval.
Printed in Germany
Manufacturer
Novexx Solutions GmbH
Ohmstrasse 3
D -85386 Eching, Germany
Tel.: +49-8165-925-0
Fax: +49-8165-925-231
www.novexx.com
How information is represented
Explanation of symbols
To enhance readability and make information easier to find, different types of information are identified:
► Instruction with no order of tasks assigned
1. Numbered instructions introduced by preceding text
2. The specified order must be followed!
Special note for action that must be performed.
• Enumeration of features
• Other feature
EXPERTS
The Experts symbol identifies activities that are reserved exclusively for qualified and specially
trained personnel.
Warning Notes
Warning notes are specially highlighted::
WARNING!
Warning notes with the signal word WARNING refer to risks that can result in severe
or fatal injuries! The note contains safety measures to protect affected persons.
► Instructions must be followed without exception.
CAUTION!
Warning notes with the signal word CAUTION refer to risks that can result in
property damage or personal injury (minor injuries). The note contains instruc-
tions for preventing damage.
► Instructions must be followed without exception.
Edition 2 - 12/2021 6Please note!
General Notes

User Manual XLP 604
Illustrations
Illustrations appear in the text where required. References to the illustrations are shown in brackets, if
necessary (see table).
Reference to illustration Application
none • Only one illustration
• Reference to the illustration is obvious
• No position number in the illustration
(A) • Only one illustration
• Reference to the illustration is obvious
• Position number in the illustration
(see fig. above) • Several illustrations
• No position number in the illustration
(see fig. above, pos. A) • Several illustrations
• Position number(s) in the illustration
Table 1: Differenet references to illustrations.
Parameters
Parameters in the parameter menu are represented in the format Menu name > Parameter name in
grey type.
FOR YOUR SAFETY
Intended use
The label printers of the XLP 60x series are designed for printing label material, using the thermal or
thermal transfer printing process. In addition, the dispenser version of the printers can dispense self-
adhesive labels and can rewind the remaining backing paper (ar alternatively the complete label ma-
terial). It is possible to use a wide range of label materials and thermal transfer ribbons. Label stock
must be in roll shape or fan-folded. The label web can optionally be pulled-in from outside the printer
through the slots in the rear side or bottom plate.
Observe the technical specifications of the printer, see chapter Technical Data on page 11. Any
other type of or more extensive application will be considered abnormal use.
Operating position: The XLP 60x is a desktop printer. The intended use position is as shown standing
on a firm, flat, horizontal surface (e.g. on a table).
Edition 2 - 12/2021 7Please note!
For your safety

User Manual XLP 604
Fig. 1: Operating position of the XLP 60x.
NOVEXX Solutions shall assume no liability for damage resulting from non-intended use of the ma-
chine.
Safety notes
Follow the instructions
Safe and efficient operation of the printer can only be guaranteed if you observe all necessary informa-
tion.
• Before operating the printer, read the operating instructions and all other notes carefully.
• Observe the additional safety and warning notes on the printer.
Qualifications required
• Trained staff is required for inserting and changing foils and material.
• Users need to be instructed in the use of the printer so they can work safely and independently.
• Users should be able to resolve minor operational issues and faults by themselves.
• At least two users should be instructed.
Requirements for safe operation
• Only use the printer in enclosed areas with environmental conditions matching the values given in
the technical specifications!
• Only operate the printer on a plane, solid support.
• Make sure that the power supply socket for the printer is readily accessible!
• Only trained and authorized personnel should operate the printer!
• During operation, the print head can become hot! Care should be taken when touching the print
head!
• Do not make any modifications or any additional casing for the printer!
• Do not allow any liquids to enter into the printer!
• Repairs to the printer may only be performed by authorized specialists who are aware of the risks in-
volved!
Edition 2 - 12/2021 8Please note!
For your safety

User Manual XLP 604
• Lay the power supply cable, data cables and compressed air hoses (if applicable) in a way that no-
body can stumble over it.
• In case of emergency, switch off the printer and disconnect the power supply cable!
• Only use original accessories!
Protection against injuries by electrical current
• Only operate the printer using the system voltage indicated on the nameplate!
• Only connect the printer to a grounded power socket fitted to authorized standards!
• Connect only devices to the interfaces at the printer that fulfil ES1 circuit requirements according to
EN 62368-1!
Protection against injuries by mechanical action
• Only operate the printer when the cover is closed!
• Don´t wear loose long hair (if necessary, wear a hairnet).
• Keep loose jewellery, long sleeves, etc. away from rotating parts of the printer!
• Be careful when sliding on/removing the ribbon rolls! There are sharp-edged clamping plates on the
ribbon mandrels. Danger of cuts!
Warning notes on the machine
CAUTION!
Warning notes on the machine provide important information for the operating
personnel.
► Do not remove warning notes.
► Replace missing or illegible warning notes.
Fig. 2: Warning note on the XLP 60x.
Edition 2 - 12/2021 9Please note!
For your safety

User Manual XLP 604
Warning note Meaning Article no.
The “Pinch point” warning note warns of the danger posed by
the machine´s rotating parts; they can trap items and draw
them in.
A5346
The “Hot surface” symbol warns of a burn hazard if the
surface is touched. Allow the machine to cool off before
touching it.
A5640
The blue label “Read manual” demands that operators read
the user manual. A5331
Edition 2 - 12/2021 10 Please note!
For your safety

User Manual XLP 604
Product Description
TECHNICAL DATA
Dimensions | Connection Data | Ambient Conditions
Dimensions
• Measures:
–XLP 604: 496 x 312 x 330 mm
• Weight:
–XLP 604 “Basic”: 18.6 kg (w/o options)
464
493
496
330
312
126
(label outcome)
24
141 120
686 (open cover)
481
30
165
122 184
Fig. 3: Measures of the XLP 604.
Connection data
Protection category I
Mains voltage 100 -240 V (AC)
Edition 2 - 12/2021 11 Product Description
Technical Data

User Manual XLP 604
Mains frequency 60 /50 Hz
Input current max. 3.9 A
Power consumption max. 456 W
Ambient conditions
Installation location • Inside buildings
• Protected from wind and spray water
• Dry
• Not in areas with potentially explosive atmosphere
Operating Temperature +5 to +40°C
Storage Temperature -20 to +70°C
Relative Humidity 20 to 85%, non-condensing
Protection category IP 21
Noise 70 dB(A)
Sea level Operation to max. 2000 m above sea level
Transportation to max. 8000 m above sea level
Label Material
Material types
Self-adhesive, card and synthetic materials, suitable for printing in thermal direct process and thermal
transfer process. Use of roll material or leporello possible.
For details refer to Appendix > “Types of label material”.
Material weight
max. 240 g/m2
Material measures
A
B
C
Fig. 4: Material measures (A Material width, B Label width, C Label length)
Edition 2 - 12/2021 12 Product Description
Technical Data

User Manual XLP 604
Machine Material width Label length
XLP 604 15-120 mm 10-2000 mm
XLP 604 Dispenser 30-115 mm 30-500 mm
Table 2: Label measures.
Label roll
Max outer-Ø 210 mm
Inner-Ø 38.1 / 76.2 / 101.6 mm (1.5 / 3 / 4“)
Punch measures
B
B
A
C
Fig. 5: Punches at different material types (A Punch position, B Punch length, C Punch width).
Machine Punch position Punch length Punch width
XLP 604 2-60mm 0.8-14 mm min. 4 mm
Table 3: Punch measures
Related concepts
Label material types on page 120
What to look for when selecting label stock for the XLP 60x.
Thermal transfer ribbon
Specifications of suitable thermal transfer ribbon.
Ribbon type
Regarding thermotransfer ribbon, the following is recommended:
• the reverse side of the ribbon must have an antistatic, friction-reducing coating (backcoating).
• ribbons must be specified for corner edge type print heads.
• ribbons should be suitable for print speeds of up to 12 inch/sec. (300 mm/s).
Edition 2 - 12/2021 13 Product Description
Technical Data

User Manual XLP 604
Ribbon roll
Variable Dimension
Outer Ø max. 105 mm [1]
Core inside Ø 25.4 mm (1“)
Width [2] 25 -110 mm
Table 4: Dimensions of usable ribbon rolls.
Perfomance Data
Print head
•Print technology: Thermal direct or thermal transfer printing
•Print head type: Corner Edge
•Print head characteristics:
Machine Resolution (Dot/mm) Resolution (dpi) Print width(mm)
XLP 604 12.0 300 106
Print speed
Machine Print speed (mm/s) Print speed (inch/s)
XLP 604 75-400 3-16
Impression accuracy
• In printing (y-) direction:
The impression accuracy depends on the print position. With the printout starting directly at the
punch position, the accuracy is ±0.5 mm. A distance between punch (that is label start) and print po-
sition will add ±1% of this distance to the accuracy fault (fig. below)
• X-direction: ± 0.5 mm
1Example: 600 m standard ribbon type NOVEXX 10287-600-140-10 has an outer Ø of 85 mm.
2As a general rule, the thermal transfer ribbon must overlap the label being printed on both sides by 2 mm.
Edition 2 - 12/2021 14 Product Description
Technical Data

User Manual XLP 604
50 100 150 200 mm 300
+3,0
mm
+2,0
+1,5
+1,0
+0,5
0
-0,5
-1,0
-1,5
-2,0
-2,5
-3,0
+1%
-1%
Distance punch to
print position
Max. misalignment of the
print position
Print position 1 Print position 2
Punch
Print direction
Label
Punch position
Max. misalignment at
print position 1 = 1,0 mm
Max. misalignment at
print position 2 = 2,5 mm
Fig. 6: Impression accuracy in printing direction, depending on the printing position.
Label sensor
• Standard: Light-transmission sensor for punched label material
• Option: Reflex sensor for label material with black marks on the bottom side
Setting range:
Setting range (mm)
Machine
Transmission Reflex
XLP 604 2-60 2-60
Punch position and size see chapter “Punch measures” on page 13.
a
b
c
Label sensor Punch Label material
Fig. 7: Adjustment range of the label sensor.
Edition 2 - 12/2021 15 Product Description
Technical Data

User Manual XLP 604
Output modes
1:1 and 100% printable.
Non-printable areas:
• 1 mm from the front label edge (1st edge in feed direction)
• 1 mm from the left band border (right border in feed direction)
Interpreter
Easy Plug, Line Printer, Hex Dump, ZPL
Character sets
• 17 character sets with fixed size (fixedfonts) including OCR-A and OCR-B
• 3 Scalable character set (speedo fonts)
• TrueType character sets are supported (in Unicode as well)
• TrueType, speedo and fixed size fonts can be optionally stored on a memory card.
Character modification
• Scaling in X/Y direction
– Fixfonts up to factor 16
– Speedo fonts up to 6000 pt
• Rotation:
– Resident fonts, bar codes, lines and graphics: 0, 90, 180, 270 degrees
– Truetype fonts: 0 to 359.9 degrees
Bar codes
Codabar Code 128 A, B, C
Code 128 Code 128 UPS
Code 128 Pharmacy ITF
Code 2/5 Matrix MSI
Code 2/5 Interleaved EAN 8
Code 2/5 5-line EAN 13 add-on 2
Code 2/5 Interleaved ratio 1:3 EAN 13 add-on 5
Code 2/5 Matrix ratio 1:2,5 EAN 128
Code 2/5 Matrix ratio 1:3 Postcode (guide and identity code)
Code 39 UPC A
Code 39 extended UPC E
Code 39 ratio 2,5:1 Code 93
Code 39 ratio 3:1
All bar codes scalable in 30 different width and in the height
Edition 2 - 12/2021 16 Product Description
Technical Data

User Manual XLP 604
2-dimensional bar codes
Data Matrix Code (code according to ECC200)
Maxi Code
PDF 417
Codablock F
Code 49
QR Matrix Code
GS1 Databar & CC bar codes
Reduced Space Symbology (GS1 Databar) and Composite Component (CC) bar codes:
GS1 Databar-14 UPC-A + CC-A/CC-B
GS1 Databar-14 truncated UPC-E + CC-A/CC-B
GS1 Databar-14 stacked EAN 13 + CC-A/CC-B
GS1 Databar-14 stacked omnidirectional EAN 8 + CC-A/CC-B
GS1 Databar limited UCC/EAN 128 + CC-A/CC-B
GS1 Databar expanded UCC/EAN 128 + CC-C
Interfaces & Electronics
Interfaces
• Data interfaces:
–Network: Ethernet 10/100/1000
–USB host (Typ A): USB 2.0, 2x rear, 1x front
–USB device (Typ B): USB 2.0
– Serial: RS232, DSub 9
• Signal interfaces:
–BasicIO board (optional): 3 M12 connections with 4 inputs, 4 outputs, PNP configuration, 24 VDC,
JSON configurable, 20 W max. output power
–Basic-USI board (optional): Sub-D15 connector with 4 inputs, 7 outputs, NPN configuration, 24/5
VDC, 20 W max. output power
–8IO board (optional, only in combination with a BasicIO or Basic-USI board): 2 M12 connections
with 8 inputs, 8 outputs, PNP configuration, 24 VDC, JSON configurable
Electronics
Characteristic Details
Processor 32-bit ARM Cortex-A9 CPU (NXP)
RAM 1 GB DDR3
eMMC 2 GB pSLC
Edition 2 - 12/2021 17 Product Description
Technical Data

User Manual XLP 604
Characteristic Details
Realtime clock Standard
Operating panel • 4 buttons
• LC graphics display with 128x64 pixels
• RGB illuminated background
Certificates and Markings
CE, TÜV-Mark, CTÜVUS -Mark, FCC, EAC, CCC
The regulation EN 55032 demands for class A devices the following text to be printed in the manual:
„WARNING: This is a class A product. In a domestic environment this product may cause radio inter-
ference in which case the user may be required to take adequate measures.“
Edition 2 - 12/2021 18 Product Description
Technical Data

User Manual XLP 604
DESIGN MODELS
Printer versions
The XLP 60x is available in the following versions:
Version Features
XLP 60x “Basic” The printed labels can be torn off at the standard tear-off edge.
XLP 60x “Peripheral” Equipment like version “Basic”. In addition, it is possible to operate the
following options for further processing of the printed labels:
• External rewinder
• Cutter
• Applicator LTMA
XLP 60x Dispenser Equipment like version “Peripheral”. In addition, the printer is equipped
with an internal rewinder for the backing paper and a dispensing edge.
Two different dispensing edges are available:
• M type: The dispensed labels are removed by hand
• A type: For operation of the applicator LTMA
In addition, the XLP 60x can be equipped for the respective application by installing various options or
retrofit kits (see following chapter).
Fig. 8: External distinguishing feature: the “Peripheral” version (right) has a D-Sub connector (A) on the front, below the control
panel.
Edition 2 - 12/2021 19 Product Description
Design Models

User Manual XLP 604
Options and accessories
Internal Options
…should be factory-fitted or installed by a service technician:
•Reflex sensor: Light barrier fork that apart from the transmission sensor, also contains a reflex sen-
sor (detects reflex marks on the material bottom side).
•BasicIO: Signal interface (24 V, PNP, 3x M12)
Not yet available.
•Basic-USI: Signal interface (24/5 V, NPN, D-Sub 15)
Not yet available.
•8IO: Signal interface (24 V, PNP, 2x M12)
Not yet available.
•Ribbon saving function: No ribbon is consumed over unprinted areas of the label layout
•Peripheral preparation: Additional D-Sub connector at the front for external devices
•Internal rewinder: Rewinds the printed label web inside of the printer
External Options
…do not require any special alterations to the printer:
•Cutter (prerequisite: printer version “Peripheral”)
•External rewinder for material rolls with 38 mm (1.5”), 75 mm (3”) or 100 mm (4”) cores (prerequisite:
printer version “Peripheral”)
•Dispensing edge (prerequisite: Internal rewinder installed)
–M type: Manual removal of the dispensed labels (dispensing edge with light barrier)
–A type: Automatic processing of the dispensed labels by the LTMA applicator
•Applicator LTMA (prerequisite: printer version Dispenser type A)
Accessories
...require no conversion work or are simply plugged into one of the printer's connections.
•4“ core adapters for the label unwinder for Label rolls with 4“ inner diameter
•Foot switch for foot-operated single label printing. The foot switch is available with M12 or D-Sub
connector (prerequisite: BasicIO board or Basic-USI board installed)
•Keyboard for comfortable data input in standalone mode (USB connector)
Edition 2 - 12/2021 20 Product Description
Design Models
Table of contents
Other Novexx Solutions Label Maker manuals

Novexx Solutions
Novexx Solutions 64-04 User manual

Novexx Solutions
Novexx Solutions ALS/XLS 204 User manual

Novexx Solutions
Novexx Solutions XLS 20x User manual

Novexx Solutions
Novexx Solutions ALS 20 series User manual

Novexx Solutions
Novexx Solutions ALX 92x User manual

Novexx Solutions
Novexx Solutions LA-BO XPA 934 LH User manual

Novexx Solutions
Novexx Solutions XLP 504 User manual

Novexx Solutions
Novexx Solutions AP 5.4 User manual

Novexx Solutions
Novexx Solutions LA-BO Series User manual

Novexx Solutions
Novexx Solutions 64- series User manual