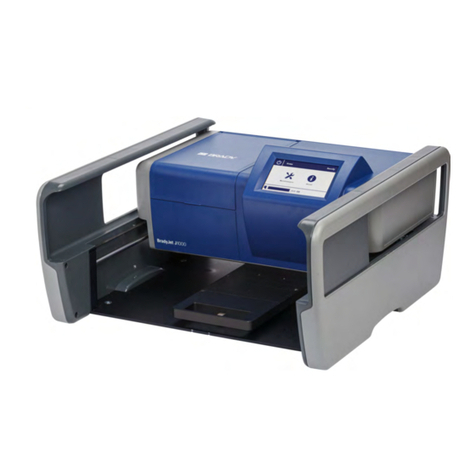
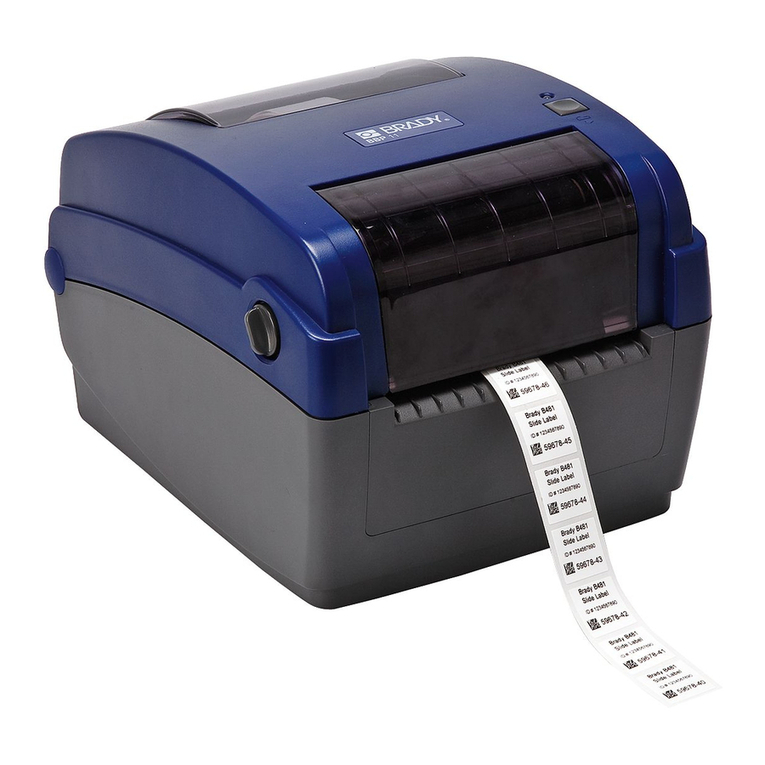
Brady BradyJet J4000 User manual

User Manual

J4000 User Manual ii
Copyright and Trademarks
Disclaimer
This manual is proprietary to Brady Worldwide, Inc. (hereafter “Brady”), and may be revised from time
to time without notice. Brady disclaims any understanding to provide you with such revisions, if any.
This manual is copyrighted with all rights reserved. No portion of this manual may be copied or
reproduced by any means without the prior written consent of Brady.
While every precaution has been taken in the preparation of this document, Brady assumes no liability
to any party for any loss or damage caused by errors or omissions or by statements resulting from
negligence, accident, or any other cause. Brady further assumes no liability arising out of the
application or use of any product or system described, herein; nor any liability for incidental or
consequential damages arising from the use of this document. Brady disclaims all warranties of
merchantability of fitness for a particular purpose.
Brady reserves the right to make changes without further notice to any product or system described
herein to improve reliability, function, or design.
Trademarks
J4000 is a trademark of Brady Worldwide, Inc.
Microsoft, Windows, Excel, Access and SQL Server are registered trademarks of Microsoft
Corporation.
All brand or product names referenced in this manual are trademarks (™) or registered trademarks (®)
of their respective companies or organizations.
© 2021 Brady Worldwide, Inc. All Rights Reserved.
Y5055908
Revision A
Brady Worldwide, Inc.
6555 West Good Hope Road
Milwaukee, WI 53223
bradyid.com

J4000 User Manual iii
Brady Warranty
Our products are sold with the understanding that the buyer will test them in actual use and determine
for him or herself their adaptability to his/her intended uses. Brady warrants to the buyer that its
products are free from defects in material and workmanship, but limits its obligation under this
warranty to replacement of the product shown to Brady’s satisfaction to have been defective at the
time Brady sold it. This warranty does not extend to any persons obtaining the product from the buyer.
THIS WARRANTY IS IN LIEU OF ANY OTHER WARRANTY, EXPRESS OR IMPLIED, INCLUDING,
BUT NOT LIMITED TO, ANY IMPLIED WARRANTY OF MERCHANTABILITY OR FITNESS FOR A
PARTICULAR PURPOSE, AND OF ANY OTHER OBLIGATIONS OR LIABILITY ON BRADY’S PART.
UNDER NO CIRCUMSTANCES WILL BRADY BE LIABLE FOR ANY LOSS, DAMAGE, EXPENSE
OR CONSEQUENTIAL DAMAGES OF ANY KIND ARISING IN CONNECTION WITH THE USE, OR
INABILITY TO USE, BRADY’S PRODUCTS.
Safety and Environment
Please read and understand this manual before using the J4000 printer for the first time. This manual
describes all of the main functions of the J4000 printer.
Precautions
Before using the
J4000 printer
, please note the following precautions:
• Read all instructions carefully before operating the printer and prior to performing any procedure.
• Do not place the unit on an unstable surface or stand.
• Do not place anything on top of the unit.
• Keep the top clear of obstructions.
• Always use the printer in a well ventilated area. Do not block the slots and opening on the unit, which
are provided for ventilation.
• Only use the power source indicated on the rating label.
• Use only the power cord that comes with the unit.
• Do not place anything on the power cord.

J4000 User Manual iv
Technical Support and Registration
Contact Information
For repair or technical assistance, locate your regional Brady Technical Support office by going to:
•
United States:
bradyid.com/techsupport
• Canada:
bradycanada.ca/contact-us
•
Mexico:
bradyid.com.mx/es-mx/contacto
• Latin America:
bradylatinamerica.com/es-mx/soporte-técnico
•
Europe
:
bradyeurope.com/services
•
Australia:bradyid.com.au/technical-support
•
Asia Pacific
:
brady.co.uk/landing-pages/global-landing-page
Registration Information
To register your printer go to:
•
bradycorp.com/register
Repair and Return
If for any reason you need to return the product for repair, please contact Brady Technical Support for
repair and replacement information.
Document Conventions
When using this document, it is important that you understand the conventions used throughout the
manual.
• All user actions are indicated by
Bold
text.
• References to menus, windows, buttons and screens are indicated by
Italicized
text.

BradyJet J4000 User Manual v
Contents
1 • Introduction
System Specifications............................................................................................... 1
System Requirements ............................................................................................... 2
Safety .......................................................................................................................... 2
Electrical Safety ....................................................................................................3
2 • Setup
Unpacking the Printer ............................................................................................... 4
What’s in the Box ..................................................................................................4
Registration ...........................................................................................................4
Printer Components .................................................................................................. 5
External Parts............................................................................................................. 5
Internal Parts.............................................................................................................. 7
Power .......................................................................................................................... 9
Software for Creating Labels.................................................................................... 9
Connecting the Printer ............................................................................................ 10
Ethernet Network ................................................................................................10
Installing the Printer Driver..................................................................................... 11
Installing Label Supply............................................................................................ 11
Installing Ink Cartridges.......................................................................................... 14
Adjusting the Gap Sensor....................................................................................... 15
Circular Label Supply ..........................................................................................16
Through-hole Supply ...........................................................................................16
3 • Using System Tools
Brady PrintHub ........................................................................................................ 17
Settings..................................................................................................................... 18
Adjusting Print Alignment ...................................................................................... 18
Setting the Supply Sensor Mode............................................................................ 21
Sensor Mode Types ............................................................................................21
Setting the Output/Cut Modes ................................................................................ 22
Output Options ....................................................................................................22
Cut Options .........................................................................................................22
Viewing Printer Settings ......................................................................................... 23
Monitoring Supplies ................................................................................................ 24
Cleaning the Ink Cartridge ...................................................................................... 24
Using the Cost Estimator........................................................................................ 25
4 • Printing Labels
Brady Workstation................................................................................................... 26

BradyJet J4000 User Manual vi
Printer Driver............................................................................................................ 26

Page Size ............................................................................................................27
Orientation ..........................................................................................................28
Print Resolution ...................................................................................................29
Color Matching ....................................................................................................29
Ink Saturation ......................................................................................................29
Rotate 180 Degrees ............................................................................................29
Enable Bidi (Bidirectional) Printing ......................................................................29
Launch Brady PrintHub .......................................................................................29
Details .................................................................................................................29
Printing from Other Programs................................................................................ 30
5 • Maintenance
Cleaning the Ink Cartridge & Maintenance Station .............................................. 31
6 • Troubleshooting
7 • Supply Specifications
8 • Regulatory Compliance
Agency Compliance and Approvals ...................................................................... 38
United States ......................................................................................................38
Estados Unidos ...................................................................................................38
Canada ...............................................................................................................39
Mexico .................................................................................................................39
Europe ................................................................................................................39
Turkey .................................................................................................................39
Wireless Regulatory Information ........................................................................... 40
United States ......................................................................................................40
Información reglamentaria sobre conexiones inalámbricas ............................... 41
Canada ...............................................................................................................42
Mexico .................................................................................................................42
European Union ..................................................................................................42
International ........................................................................................................42

BradyJet J4000 User Manual 1
1 Introduction
The BradyJet J4000 Color Label Printer will print razor-sharp text and barcodes, vibrant colors and
even stunning photo-realistic photographs directly onto rolls of labels, card stock and a variety of other
approved media. To get Brady Workstation software, go to http://workstation.bradyid.com/.
For details on programming the printer, please see contact Technical Support. See “Technical Support
and Registration” on page iv.
For instructions on general use, please see “Printing Labels” on page 26 of this manual.
System Specifications
The BradyJet J4000 printer has the following specifications:
• Up to 4800 DPI print resolution
• Draft Mode: 4.5" per second; Normal Mode: 1.8" per second; High Quality Mode: 0.8" per second
print speed
• Single high capacity Cyan, Magenta, Yellow ink cartridge; process black
• 16.7 million colors
• Mobile see-through sensor for die-cut labels
• Supports labels from 0.5" (13mm) min. to 8.25" (209mm) max. width.
(24" (609mm) max. printable height)
• One-year warranty
Physical Dimensions
Environmental Ranges
Physical Metric Units U.S. Units
Dimensions (width, height, depth) 438 x 231 x 438 mm 17.25 x 9.1 x 17.25 in
Weight 16.6 kg 36.5 lb
Environmental Operation Storage
Temperature* 50 to 105°F (10 to 41°C) 0 to 140°F (-18 to 60°C)
Relative Humidity 20 to 80% non-condensing 10 to 95% non-condensing
*Exposing the printer to direct sunlight is not recommended.

BradyJet J4000 User Manual 2
System Requirements
Materials Storage Specifications
Electrical Specifications
System Requirements
Following are the recommended requirements for the computer on which you install the Printer Driver:
• Operating system:
• Microsoft® Windows® 7
• Microsoft Windows 8
• Microsoft Windows 10
Safety
The following information is necessary for the safe operation of the printer. Be sure to read this section
prior to setting up or operating the printer.
Always be sure to adhere to the safety standards regulating your operating environment. Also adhere
to the following safety rules included in or in addition to your specific standards:
CAUTION! Consumable material for use with this unit must be stored in its
original packaging in an environment in which the temperature is
below 80°F and 60% relative humidity.
Input Voltage 100-240 V~
Current 5 A
Frequency 50/60 Hz
WARNING! Do not wear loose clothing—such as long sleeves or scarves—that
could become caught in the unit.
CAUTION! Keep areas around the unit clean at all times.

BradyJet J4000 User Manual 3
Electrical Safety
Safety
Electrical Safety
WARNING! Do not remove exterior panels. No user serviceable parts inside.
CAUTION! Make sure the power outlet is grounded.
WARNING! To prevent fire or shock hazard, do not expose the unit to rain or
moisture.

BradyJet J4000 User Manual 4
2 Setup
Unpacking the Printer
Save all packaging materials! These will be needed if you must ship the printer.
What’s in the Box
Make sure the printer box remains in the upright position at all times. Do not lay the box on its side.
1. Lift the printer out of the box and remove the protective plastic bag.
2. Place the printer on a flat, level surface with enough clearance on all sides to accommodate
air flow and to open the cover.
Note: Do not place the printer near heat sources such as radiators or air ducts, or in a place subject
to direct sun light, excessive dust, mechanical vibration or shock.
3. Remove the following additional items from the box:
• USB flash drive containing the following:
• Printer Driver
• Driver Installation Guide
• J4000 User Manual
• J4000 Quick Start Guide
• Power Adapter
• Power Cord
• USB Cable
• J4000 CMY Ink Tank Cartridge (J40-CMY)
• J4000 Ink Cartridge Storage Caps (J40-CAP)
• J4000 ALIGNMENT ROLL,B2595, 4 inches X 20
feet (101.mm x 6.1m)
Registration
Register your printer online at www.bradycorp.com/register and receive free product support and
updates!
CAUTION! The tear blade in the bottom front of the printer has a sharp edge.

BradyJet J4000 User Manual 5
Registration
Printer Components
Printer Components
External Parts
1. Pause Button: Press to pause a job to allow for loading of label supply and ink cartridges.
The printer pauses after the printing of the current label has finished.
2. Power LED: Illuminates when the printer is on and ready to receive print jobs.
3. Load/Feed Button: Pressed load supply if the printer does not automatically detect the stock.
When supply is loaded each press of the button will cause one label to be fed through the
printer.
4. Ink Low LED: Illuminates when there is 5% or less ink remaining.
5. Unload Button: Unloads the installed supply by reversing it through the printer.
Note: Make sure to tear off the printed labels before pressing the Unload Button.
6. Label Tear Bar: A serrated edge for cleanly tearing finished labels from the printer.
Note: For smoother label feeding leave the tear bar guard in place during printing.
7. Pause LED: Illuminates when the printer is paused.
8. Cover: Open to access inside of printer.
8
1
2
3
4
5
6
7

BradyJet J4000 User Manual 6
Registration
External Parts
1. USB Device Port: Connect the printer to a computer’s USB port to send labels created with
Brady Workstation directly to the printer.
2. Network Jack: Connect the printer to the network with an Ethernet cable.
3. Power Inlet: The printer is equipped with a universal power supply and can be operated at a
voltage of 100 to 240 V~, 50/60 Hz.
4. On/Off Switch: Controls the main power to the unit.
1
2
3
4

BradyJet J4000 User Manual 7
Registration
Internal Parts
Internal Parts
1. Fixed Throat Guide
2. Sensor Adjustment
3. Adjustable Throat Guide
4. Roll Stop
5. Roll Guide
6. Roll Arm
1
2
3
4
5
6

BradyJet J4000 User Manual 8
Registration
Internal Parts
1. Grit Roller
2. Cutter Track
3. Pressure Rollers
4. Cutter Wheel Access Port
5. Maintenance Station (located under Cartridge Carrier)
6. Cartridge Carrier: Houses the ink cartridge
7. Supply Access Panel: Open to clear supply jams
1
2
3
4
5
6
7
3

BradyJet J4000 User Manual 9
Registration
Power
Power
The printer is equipped with a universal power supply and can be operated at a voltage of
100 to 240 V~, 50/60 Hz.
To connect power and turn on the printer:
1. Connect the power cord to the power supply provided.
2. Connect the power supply to the printer and plug into an electrical outlet.
3. Press the power button on the front of the printer.
4. Install the label supply following the instructions “Installing Label Supply” on page 11.
Software for Creating Labels
Install labeling software on your computer, set up the connection to the printer, then use the software
to design labels and send them to the printer.
Brady Workstation software provides a variety of apps to simplify label creation for specific purposes. It
also provides easy-to-use apps for custom label design. The printer comes with a license for the Brady
Workstation Product.
To install Brady Workstation:
1. Make sure your computer is connected to the internet.
2. Go to workstation.bradyid.com/SFID.
3. Follow the instructions on the screen to download and install the software.
4. When you run the software and open an app that requires activation, follow the instructions on
the screen to activate the software. Use the license ID and password on the printed insert that
came with the printer.
For other Brady Workstation software or additional licenses, go to www.workstation.bradyid.com or
contact your Brady representative.
CAUTION! Use only the adapter and power cord provided with the printer.
CAUTION! Make sure the outlet is grounded.

BradyJet J4000 User Manual 10
Ethernet Network
Connecting the Printer
USB
Connect to the labeling software using supplied USB cable.
Plug the provided USB cable into the printer and the computer. Brady Workstation software
automatically detects the printer when connected via USB cable.
Note: If you are not using Brady Workstation software, you need to install the printer driver. See the
Driver Installation Guide PDF file on the USB drive that came with the printer.
Ethernet Network
This section describes how to configure the printer to communicate via an Ethernet (TCP/IP)
connection.
If using a Windows driver it is best to configure the Ethernet connection before installing the driver. If
the driver is already installed before configuring the Ethernet connection, you may need to edit the port
settings for the printer in Windows to update the IP address.
To configure network settings on the printer:
1. Make sure the printer is turned on.
2. Connect an Ethernet cable (not provided) to the back of the printer and the other end to the
Ethernet port on the computer or Local Area Network (LAN).
3. (optional) Create a Host Name for the printer.
• Printer installations using a host name perform best with a dynamically assigned IP address.
4. For IP Settings, select either the DHCP or Static check box.
• DHCP addressing uses a DNS server to dynamically assign an IP address without user
configuration.
• For static addressing, you must supply the printer’s IP address.
5. If Static was selected, connect the printer using the USB cable and fill in the following fields:
• IP Address: Enter the printer’s IP address.
• Subnet Mask: Enter a subnet mask if you are using one.
• Default Gateway: Enter the IP address of the default gateway.
• DNS Server (Primary): Enter the IP address of the primary DNS server.
• DNS Server (Secondary): Enter the IP address of the secondary DNS server.

BradyJet J4000 User Manual 11
Ethernet Network
Installing the Printer Driver
The printer driver for the BradyJet J4000 Color Label Printer can be found on the USB drive provided
with the printer. It can also be downloaded from BradyID.com.
1. Insert the USB drive on your computer.
2. Navigate to the printer driver folder and double-click on it.
3. Double-click on the printer driver executable file and follow the on-screen instructions.
Installing Label Supply
Brady labels come equipped with smart-cell technology that enables the printer and Brady labeling
software to recognize the type of label and automatically set many label formatting details.
Use only genuine Brady J4000 series labels.
1. Turn on the printer.
2. Open the cover using the handle on the side.
3. Lower the Roll Guide and pull it outward.
Lift here

BradyJet J4000 User Manual 12
Ethernet Network
Installing Label Supply
4. Remove any shipping tape from your label stock roll to ensure that it can unroll freely, making
certain that no adhesive portion is exposed.
IMPORTANT! Any exposed adhesive surface can attach itself to the inner workings of the print
mechanism and cause a media jam.
5. Place the supply on the roll arm and push it inward until it touches the roll stop.
6. Flip the roll guide up and slide it inward until it touches the label supply.
The roll guide will automatically pull back slightly to the correct position. There should be
approximately a 1mm gap between the roll guide and the roll.
7. Pull the movable throat guide outward to make room for the label supply.
Roll Stop
Roll Guide
Roll Arm

BradyJet J4000 User Manual 13
Ethernet Network
Installing Label Supply
8. Place the leading edge of the supply under the “label supply” symbols on the throat guides.
The supply should be placed far enough into the throat of the printer to correctly position the
movable throat guide but not yet into the printer itself.
9. Slide the movable throat guide inward until it almost touches the supply.
10. Feed the supply further into the printer until it senses the label and automatically feeds it
through the printer.
If the printer fails to feed the label stock, press the load/feed button on the front panel while
continuing to guide the label into the printer. If the printer does not automatically grab and feed
the supply or continues to feed the labels without stopping check the gap sensor position or
mode, see “Adjusting the Gap Sensor” on page 15 or “Setting the Supply Sensor Mode” on
page 21.
Moveable Throat Guide Fixed Throat Guide
Do Not Pinch!

BradyJet J4000 User Manual 14
Ethernet Network
Installing Ink Cartridges
IMPORTANT! The low ink warning light illuminates when there is 5% ink left in the cartridge.
Pressing the load/feed button will allow you to continue printing but will turn off the
low ink light.
1. Open the cover using the handle on the side.
2. Press the tab on the front of the cartridge carrier to release the ink cartridge.
3. Remove the cartridge from the carrier.
4. Remove the new ink cartridge from its packaging and pull off the tape covering the nozzles.
Remove tape
Table of contents
Other Brady Printer manuals

Brady
Brady BBP12 User manual

Brady
Brady BP-IP300 User manual

Brady
Brady Tagus User manual

Brady
Brady BP-1244 User manual

Brady
Brady Bradyprinter THT 300X-PLUS User manual

Brady
Brady PAM 3000 User manual

Brady
Brady BP-PR PLUS Series Manual

Brady
Brady Bradyprinter 2461 User manual

Brady
Brady BBP72 Series User manual

Brady
Brady PAM 3000 User manual

Brady
Brady TLS2200 User manual

Brady
Brady TLS2200 User manual

Brady
Brady Bradyprinter 200MVP User manual

Brady
Brady Bradyprinter 2461 User manual

Brady
Brady BradyPrinter S3700 User manual

Brady
Brady BradyPrinter M611 User manual

Brady
Brady BradyPrinter A5500 User manual

Brady
Brady BBP16 User manual

Brady
Brady BMP 41 User manual

Brady
Brady IP300 User manual