Brainstorm Electronics DXD/PTP User manual

DXD/PTP
PTP option for the DXD-8 Universal Clock
DXD/GPS
GPS option for the DXD Universal Clock
DXD/OCXO
OCXO option for the DXD Universal Clock
Operations manual
Version 2.10
January 2021
All materials herein © Brainstorm Electronics, Inc.
Brainstorm Electronics reserves the right to change or modify the contents of this manual at any time.
Brainstorm Electronics, Inc.
www.brainstormtime.com

Page 2
DXD/PTP/GPS User Manual (rev 2.10)
1. Introduction!4...............................................................................................................................
2. Installation!4................................................................................................................................
2.1 DXD/PTP INSTALLATION (Firmware) - DXD-8 ONLY!4.................................................
2.2 DXD/GPS & DXD/OCXO INSTALLATION (Hardware)!4.............................................
3. Reference & Sync Menus!5...........................................................................................................
3.1 REFERENCE MENU (MENU 1.1)!5.............................................................................
3.2 SYNC PARAMETERS (MENU 1.2)!5............................................................................
4. PTP Menus!5................................................................................................................................
4.1 PORT MODE (MENU 5.1)!5.......................................................................................
4.2 PTP - CLOCK / GRANDMASTER (MENU 5.2)!6..........................................................
4.3 PORT CONTROLS (MENU 5.3)!6...............................................................................
4.4 PORT TIMING (MENU 5.4)!6....................................................................................
5. GPS Receiver!7............................................................................................................................
5.1 WHY GPS?!7.............................................................................................................
5.2 DXD/GPS RECEIVER!7...............................................................................................
5.3 ANTENNA!7.............................................................................................................
5.4 ANTENNA CABLE!7..................................................................................................
6. GPS Menus!8...............................................................................................................................
6.1 SATELLITES SELECTION (MENU 6.1)!8.......................................................................
6.2 GPS SETTINGS (MENU 6.2)!8...................................................................................
6.3 ADVANCED GPS SETTINGS (MENU 6.3)!8................................................................
7. DXD/OCXO!9..............................................................................................................................
8. Time of Day!9..............................................................................................................................
8.1 RTC (Real Time Clock)!10................................................................................................
8.2 Time Jam!10...................................................................................................................
8.2.1 TIME JAM TO PTP!10..............................................................................................
8.2.2 TIME JAM TO GPS!10............................................................................................
9. Time Menus!11.............................................................................................................................
9.1 TIME STANDARDS (MENU 7.1)!11.............................................................................
9.2 REAL TIME CLOCK (MENU 7.2)!11.............................................................................
9.3 TIME & DATE DISPLAY (MENU 7.3)!12.......................................................................
9.4 LEAP SECONDS (MENU 7.4)!12................................................................................
10. Time Code Menus!12..................................................................................................................
10.1 SMPTE 2059 SETUP (MENU 8.1)!12.........................................................................
10.2 LTC GENERATOR 1 & 2 (MENUs 8.2 & 8.3)!12........................................................
11. Display!13..................................................................................................................................
11.1 Main Rotation!13...........................................................................................................
11.1.1 M A I N ROTAT I O N F O OT E R !13...............................................................................
11.1.2 MAIN ROTATION PAGES!13.................................................................................
11. 2 S t a t u s Pa g e s !14.............................................................................................................
11.2.1 TIMES STATUS PAGE!14........................................................................................
11.2.2 GPS RECEIVER STATUS PAGE!14...........................................................................
Table of Content

DXD/PTP/GPS User Manual (rev 2.10)
Page 3
11.2.3 PTP STATUS PAGE!14............................................................................................
12. General Information on PTP!15....................................................................................................
12.1. TIME AND PHASE!15..............................................................................................
12.2. WHAT IS PTP?!15...................................................................................................
12.3. A/V OVER IP APPLICATIONS!15.............................................................................
12.4. PTP DESCRIPTION!15.............................................................................................
12.5. SELECTING A GRANDMASTER!16..........................................................................
12.6. SYNCHRONIZATION!16........................................................................................
12.7. DELAY MEASUREMENT MECHANISM!17................................................................
12.8. TYPES OF CLOCKS!17............................................................................................
12.9. PTP DOMAINS!17..................................................................................................
12.10. PTP PROFILES!17...................................................................................................
12.11. EPOCH!17............................................................................................................
13. PTP Port States!18.......................................................................................................................
14. Positional change from an External PTP Grandmaster!19...............................................................
14.1 JUMP TO RELOCK!19..............................................................................................
15. Typical PTP use!20......................................................................................................................
15.1 HYBRID SYNC GENERATOR ACCEPTING MULTIPLE REFERENCES!20........................
15.2 DISTRIBUTED PTP VS. INDIVIDUAL GRANDMASTERS WITH GNSS!21.......................
16. Guidelines for configuring PTP (Precision Time Protocol)!22...........................................................
16.1 REQUIREMENTS!22.................................................................................................
16.2 RECOMMENDATIONS!22.......................................................................................
16.3 NETWORKING HARDWARE!23...............................................................................
17. Troubleshooting - Error / Warning Messages!23...........................................................................
17.1 PTP ‘NO PORT’ WARNING!23.................................................................................
17.2 PTP PORT IN PASSIVE STATE!23...............................................................................
17.3 TIME JAM TIME OUT!24..........................................................................................
18. Appendix!25..............................................................................................................................
18.1 Appendix A: Installing the DXD/GPS!25.........................................................................
18.2 Appendix B: Installing the DXD/OCXO!25.....................................................................
18.3 Appendix C: GNSS Antenna Recommendations!26.........................................................
18.3.1 RECOMMENDED ACTIVE ANTENNA!26...............................................................
18.3.2 RECOMMENDED PASSIVE ANTENNA!26.............................................................
18.4 Appendix D: Factory Presets!27.....................................................................................
Page 4
DXD/PTP/GPS User Manual (rev 2.10)
1. Introduction
PTP for the DXD-8: The DXD-8 Universal Clock is designed to be the central source of time in a modern A/V installation. As
a master clock generator it provides WC, AES and Video Sync. But with the addition of PTP, the DXD-8 truly becomes universal
by keeping traditional audio/video equipment and IP networks in perfect sync.
The DXD-8 has the capability of being a PTP Grandmaster or a PTP slave. As a PTP master, the DXD-8 can lock to external sync
sources such as WC, AES, Video Sync and 10 MHz, or to its internal crystal, while generating PTP sync. As a PTP slave, it can
lock to a Grandmaster while generating traditional sync signals (word clock, AES, video sync or 10MHz).
GPS and OCXO give the DXD line access to more stable time sources and gives the DXD’s a higher priority to become PTP
Grandmaster. GPS also allows remote units to be in perfect sync.
2. Installation
2.1 DXD/PTP INSTALLATION (FIRMWARE) - DXD-8 ONLY
Before installing the DXD/PTP, be sure to update your DXD-8 with the latest firmware, available on the Brainstorm website.
When you purchased your DXD/PTP, you received a unique authorization key, a series of 4 numbers, separated by periods.
This key is only valid for the DXD-8 with the serial number used when you placed the order. Note that PTP is optional on the
DXD-8 only. A feature key is not required on the DXD-16.
Enter this key in Menu 9.5, FEATURE KEYS, under the main menu 9.0 UTILITY. After entering the authorization key, you will be
prompted to confirm your entry. A message will confirm that the feature key has been set.
This authorization procedure only needs to happen once, even with subsequent firmware updates.
2.2 DXD/GPS & DXD/OCXO INSTALLATION (HARDWARE)
For instructions on how to install the GPS receiver and the OCXO oscillator, see Appendix A & B. No authorization code is
required for either of these 2 options. New menus and displays will become available after hardware installation.
IEEE-1588
ETHERNET
PTP
INT
OCXO
ANT
GPS
ETHERNET
UNIVERSAL OUTPUTS
1
2
BNC OUT 1 & 2
BNC OUT 3 & 4
BNC OUT 5 & 6
BNC OUT 7 & 8
5
6
7
8
SYNC
SYNC
SYNC
SYNC
3
4
• WC
• AES
• VID
• 10 MHz
• 1PPS
• WC
• AES
• VID
• 10 MHz
• 1PPS
• WC
• AES
• VID
• 10 MHz
• 1PPS
• WC
• AES
• VID
• 10 MHz
• 1PPS
SYNC
TIME SOURCES
(POSITION)
INT
TCXO
REFERENCE SOURCES
(RATE)
SYNC
TIME
SELECT
REFERENCE
SELECT
ETHERNET
BNC IN B
WC
AES
VID
10MHz
BNC IN A
WC
AES
VID
10MHz
NTP
INTERNAL
TIME OF DAY
CLOCK
&
REFERENCE
FRAME
GENERATOR
DXD-8 DIAGRAM
INT
RTC
ETHERNET
PTP (BMCA)
ANT
GPS
PTP (BMCA)
Rate & Position Rate Only Position Only

DXD/PTP/GPS User Manual (rev 2.10)
Page 5
3. Reference & Sync Menus
3.1 REFERENCE MENU (MENU 1.1)
Two new choices are available for reference selection based on the installed options: GPS and PTP Mode.
GPS is straightforward, like the other references available to the DXD-8. When selected, it becomes the DXD reference. If GPS
reception drops out, the DXD will switch to internal crystal until GPS reception resumes. The transition occurs smoothly to avoid
sync shocks.
When using GPS, it is recommended to install the optional OCXO oscillator for better tracking during long dropouts (see ch 7).
PTP Mode is a little different. Selecting PTP Mode as the reference is required for the DXD-8 to be a PTP slave, i.e. ‘referenced’
to a PTP Grandmaster. However, selecting PTP Mode means that the DXD-8 will participate in the PTP Grandmaster selection and
will either be a PTP Slave or the Grandmaster based on the outcome of the BMCA (see 3.5). Explanatory text has been added to
the REFERENCE menu when PTP Mode is activated.
NOTE: When PTP Mode is selected, the PTP port needs to be turned on (menu 5.1). If not,
the DXD-8 will lock to its internal crystal and a ‘PTP"NO"PORT’ warning message will appear
in the middle of the display. The LOCK bar at the bottom of the Main Rotation display will
also indicate NO PORT (for more information, see chapter 22.Troubleshooting).
• LOCAL REF WHEN GM:
When PTP Mode is selected , if GPS is available, this fields enables GPS to be set as the reference when the DXD-8 is the Grandmaster.
Enabling this field will announce the DXD-8 as GPS referenced, giving it a better chance at being selected by the BMCA.
This field only appears if the optional DXD/GPS receiver has been installed.
3.2 SYNC PARAMETERS (MENU 1.2)
New parameters are available in this menu with the PTP or GPS options.
•BNC INPUT TIME JAM SOURCE: Selects the source of a Time Jam (see 8.2).
•BNC INPUT TIME JAM RESYNC: Used for a manual Time Jam (see 8.2)
•PTP JUMP THRESHOLD: When the difference between the internal TOD and the PTP reference is above the value
entered, the DXD will not attempt a smooth transition (slew) but will instead jump instantly to the new time.
Value can be adjusted from 5 msec to 15 sec, or set to ‘Never’. Default value is 5"msec.
4. PTP Menus
4.1 PORT MODE (MENU 5.1)
This menu allows you to have PTP turned on or off.
•When OFF, PTP is disabled (default value).
•When ON, the port is enabled.
With the port enabled, the DXD-8 automatically becomes a candidate for PTP Grandmaster. Keep in mind however that it’s
ability to be a PTP slave depends on the reference selection in menu 1.1:
-if PTP Mode is selected: the DXD-8 can become a PTP slave.
-if another reference is selected: the DXD-8 can only be a PTP master, not a PTP slave.
NOTE: When the port is enabled and a reference other than ‘PTP Mode’ is selected menu 1.1, if the BMCA selects another
unit as PTP Grandmaster, the port will go in the PASSIVE state.

Page 6
DXD/PTP/GPS User Manual (rev 2.10)
4.2 PTP - CLOCK / GRANDMASTER (MENU 5.2)
This menu lets you set the following fields for the Grandmaster PTP port.
•Domain: 0 to 127; default = 0
•Priority 1: 0 to 255
•Priority 2: 0 to 255
Priorities are used in the BMCA to select the grandmaster - lower values have a higher priority (see 12.5 for more
information on the Grandmaster selection).
4.3 PORT CONTROLS (MENU 5.3)
•Profile: Different profiles are supported by the DXD-8:
-PTP - Default PTP profile
-AES 67
-ST2059
•Profile Port Timing Action:
Among other things, IEEE1588 profiles define the range and default values of all configurable attributes. This is
very useful as selecting a specific profile on several networks would set all the parameters to the default values
and allow for a quick set up.
This menu gives you the option to set the timing values to the profile default values.
4.4 PORT TIMING (MENU 5.4)
•Announce Interval: -3 to 4 (1/8sec - 16sec)
Sets the rate at which the master will send Announce messages.
Per IEEE 1588 this value should be uniform throughout a domain.
•Announce Receipt Timeout: 2 to 10 announce intervals
Sets the number of Announce messages that can be missed before it is assumed the master is no longer present and the
process of selecting a new one begins. Per IEEE 1588 this value should be uniform throughout a domain.
•Sync Interval: -7 to 1 (1/128sec - 2sec)
Sets the rate at which the master will send Sync messages
•Min Delay Req Interval: 1 to 32 the number of Sync Interval
Sets the minimum time interval between 2 adjacent Delay Requests. This field shows a quantity of sync intervals:
“n sync intervals”, where n = 1,2,4,8,16,32 (when n=1 it will say “1 sync interval”).
This change does *not* apply to the peer-to-peer “MIN PDELAY REQ INTERVAL”.

DXD/PTP/GPS User Manual (rev 2.10)
Page 7
5. GPS Receiver
The GPS menus will only appear if the optional GPS receiver (model DXD/GPS) is installed in your DXD-8. Otherwise the
following message will appear:
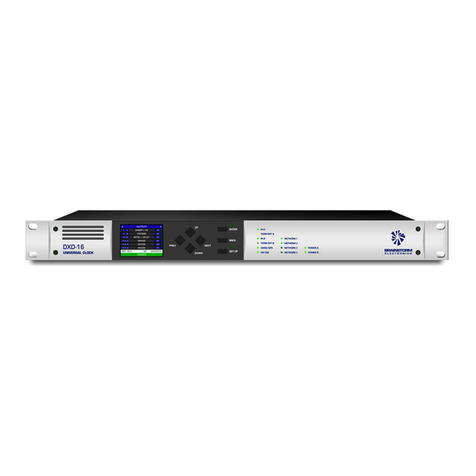
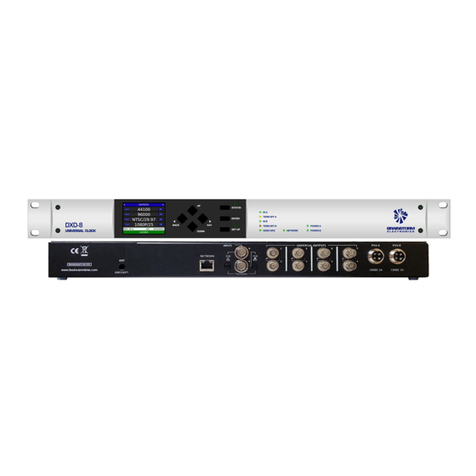
The DXD/GPS is a small board that installs easily inside the DXD-8 or DXD-16. See Appendix A for installation instructions.
5.1 WHY GPS?
In addition to longitude, latitude and altitude, GPS and other Global Navigation Satellite Systems (GNSS) provide time. In
fact, the reason why these systems can provide very precise position is because the satellites and the ground control stations
have extremely accurate atomic clocks.
In the world of PTP, GPS is particularly useful for the DXD Universal clock because a clock locked to GPS is much more stable
and will be in a better position to be selected by the BMCA to be the PTP Grandmaster.
Another important reason for GPS is that, in addition to providing an extremely accurate clock, GPS (or GNSS) allows units
located in remote locations to have their outputs in phase with one another when they are locked to GPS (or GNSS).
5.2 DXD/GPS RECEIVER
The DXD/GPS is a high-stability, high-accuracy timing Multi-GNSS receiver that supports concurrent reception of GPS (US),
GLONASS (Russia), Galileo (Europe), QZSS (Japan - Quasi-Zenith Satellite System) and SBAS (Satellite Based Augmentation
System).
Using multiple satellites constellations concurrently increases the number of satellites in view and improves accuracy.
Simultaneously, using different frequency bands improves robustness against interferences.
5.3 ANTENNA
Once the GPS receiver is installed in your DXD, an antenna will need to be connected to the receiver’s SMA connector
(an antenna is not included with the DXD/GPS). The cable needs an SMA-Male connector on the DXD side.
Ideally the antenna should be mounted on the roof for better view of the satellites. However, the DXD/GPS incorporates
Dynamic Satellite Selection™, a new satellite signal selection algorithm developed by NTT that permits GNSS antennas to be
mounted more freely than ever before. Experimenting will be required to determine the optimal location of your antenna.
Active antennas are recommended and 5v power is provided by the DXD. For detailed antenna recommendations, please see
Appendix C.
5.4 ANTENNA CABLE
It is useful to know the distance in advance between the antenna and the receiver so that the proper cable solution can be
implemented. There are 2 aspects to consider: signal loss and cable delay.
•Signal loss: Since the GPS signal is very weak, the antenna usually amplifies the signal. But the antenna cable offers some
resistance and the GPS signal strength will attenuate as it travels down the cable. Therefore the maximum cable length depends
on the gain of the antenna and the quality of the coax cable. Keep in mind that splitters and connectors will further induce
losses. The general recommendation is that after all system losses there should be 10-15dB of gain left (see appendix C).
As an example, when using a coaxial cable with a loss of 5.2dB per 100 feet at 1575MHz (GPS) and an antenna with 40dB
gain, the cable length could be about 400 feet.
•Cable delay: Signal propagation will cause delay but most likely in the nanoseconds range. If required, the DXD provides
a way to compensate for these delays in menu 6.2 (see below).
DXD/GPS NOT INSTALLED
The GPS Receiver is required for these menus.

Page 8
DXD/PTP/GPS User Manual (rev 2.10)
6. GPS Menus
6.1 SATELLITES SELECTION (MENU 6.1)
The DXD/GPS receiver is a multi-GNSS (Global Navigation Satellite System) timing receiver able to receive concurrently the
signals of multiple navigation satellite systems. GPS was the first GNSS system deployed but today, other satellite navigation
systems are in operation such as GLONASS of Russia, Galileo of Europe, BeiDou (Compass) of China. Moreover, SBAS
(Satellite Based Augmentation System) a network of the geostationary satellite systems (WAAS of United States, EGNOS of
Europe, MSAS of Japan) is in operation and Japan has started the operation of QZSS (Quasi-Zenith Satellite System).
Menu 6.1 lets you select which satellite constellations the DXD/GPS will be connecting to from the following selection:
•GLONASS
•Galileo
•QZSS L1C/A
•SBAS/QZSS L1S
Note that the GPS constellation is always enabled.
If your antenna is multi-GNSS, enabling multiple satellites constellations in this menu will increase the total number of available satellites.
In environments with limited open space, access to more visible satellites will translate into greater synchronization accuracy.
6.2 GPS SETTINGS (MENU 6.2)
•Antenna Cable Delay
This field in menu 6.2 allows you to compensate for cable delay and other latencies with a range of ± 100 µsec with a 1
nsec resolution. The default value is 0.
When designing an antenna system, cable length must be taken into consideration, as it can not only impact the signal
strength but also cause a delay in the signal. Under typical conditions however, the expected cable delay is negligible,
in the nanoseconds range.
The following formula is used to calculate the cable delay: Tc= L/cv, where L is the cable length in meters; c is the speed
of light (3.0 x 10⁸m/s); and v is the velocity factor of the cable expressed as a number less than 1.
The correct value of v can be found in the cable manufacture’s specifications.
•Antenna High Gain
This field gives the option to turn up the LNA gain (Low Noise Amplifier).
Most installations will use a high-gain active antenna therefore the default value is OFF. However, if using a passive
antenna or a low-gain active antenna, this should be ON.
•Estimated Accuracy Threshold
A value in ns from 20 to 9999 can be entered. ‘No Threshold Test’ is the default value. This is one of the criteria used by
the DXD to determine if the GPS signal can be used as a reference. The estimated accuracy is indicated on the GPS
Receiver stays page.
6.3 ADVANCED GPS SETTINGS (MENU 6.3)
Menu 6.3 provides additional parameters, referred to as ‘advanced’, as, in most cases, they will not need to be modified and
are only provided for unusual situations requiring additional adjustments.
•Survey Sigma Threshold
Survey Sigma Threshold has a default value of 10. If your DXD/GPS is having difficulties in achieving lock, increase the
Sigma value.
•Survey Time Threshold
Survey Time Threshold is set by default to 24hrs. This survey time restarts each time the DXD is turned on. If you would
like to achieve lock faster, decrease the Time value.

DXD/PTP/GPS User Manual (rev 2.10)
Page 9
7. DX D / O C XO
The DXD/OCXO is an optional Oven-Controlled Crystal Oscillator for the DXD series. It achieves a very high frequency
stability providing greater long-term time and TOD accuracy (+/-10ppb, equivalent to less than +/-10 frames per year). The
DXD/OCXO is particularly recommended when using the DXD/GPS option as the greater stability of the OCXO will minimize
drift during long GPS dropouts.
After installing the OCXO, no special setting is required. The DXD will automatically use the OCXO as the Internal oscillator
and indicate INTERNAL/OCXO on the different displays.
Installation is very simple and does not require any soldering. For instructions, see Appendix B at the end of this manual.
8. Time of Day
Time of Day is an essential part of the DXD-8 design. In a PTP network, the devices all need to know the Time of Day, i.e. year,
month, day, hour and seconds, even nanoseconds, to achieve frequency and phase synchronization. At the heart of the DXD-8
is the Main Time of Day Clock (TOD) & Reference Frame Generator. This is where System Time is generated and where the
references generated by the DXD-8 are aligned with the PTP epoch.
As shown on the diagram above, some of the reference sources include time and rate information. GPS and PTP for example
carry precise time and date information as well as frequency. However, traditional reference signals, such as video sync or
word clock, only carry the frequency information. When selecting one of those as reference (BNC inputs), the time information
needs to be added from another source. The DXD-8 offers several options.
IMPORTANT NOTE
When using a reference without date & time information such as video sync, there will be a date & time adjustment in
the TOD count so that video frame edges are correctly aligned. The internal TOD is always creating internal
frame references that are aligned as required with Jan 1, 1970 (PTP epoch). To lock to an external
frame edge the DXD has to move the TOD count by up to +/- half a frame to synchronize the internal TOD frame
edge to the incoming edge.
IEEE-1588
ETHERNET
PTP
INT
OCXO
ANT
GPS
ETHERNET
UNIVERSAL OUTPUTS
1
2
BNC OUT 1 & 2
BNC OUT 3 & 4
BNC OUT 5 & 6
BNC OUT 7 & 8
5
6
7
8
SYNC
SYNC
SYNC
SYNC
3
4
• WC
• AES
• VID
• 10 MHz
• 1PPS
• WC
• AES
• VID
• 10 MHz
• 1PPS
• WC
• AES
• VID
• 10 MHz
• 1PPS
• WC
• AES
• VID
• 10 MHz
• 1PPS
SYNC
TIME SOURCES
(POSITION)
INT
TCXO
REFERENCE SOURCES
(RATE)
SYNC
TIME
SELECT
REFERENCE
SELECT
ETHERNET
BNC IN B
WC
AES
VID
10MHz
BNC IN A
WC
AES
VID
10MHz
NTP
INTERNAL
TIME OF DAY
CLOCK
&
REFERENCE
FRAME
GENERATOR
DXD-8 DIAGRAM
INT
RTC
ETHERNET
PTP (BMCA)
ANT
GPS
PTP (BMCA)
Rate & Position Rate Only Position Only

Page 10
DXD/PTP/GPS User Manual (rev 2.10)
8.1 RTC (Real Time Clock)
A backup clock, called the RTC (Real Time Clock) is included in the DXD. It is set at the factory (date & time) and runs
continuously, even when the unit is turned off as it is powered by an internal battery.
The DXD uses the date & time information from the RTC just after power up and transfers it to
the main TOD (System Time). When locking to a new reference, if that reference does not
have date & time, the TOD simply continues counting along its current time sequence; if it has
date & time, that information is transferred to the TOD.
Although the RTC is set at the factory, it can also be set manually by the operator or be
updated automatically (if GPS is available) via the Real Time Clock menu (menu 7.2).
8.2 Time Jam
The BNC inputs can accept Word Clock, AES, Video Sync or 10 MHz. As none of those signals has date and time information,
when one is selected as reference, the DXD-8 can be set to receive time information from another source. Current choices are
PTP and GPS. Since the DXD-8 can only lock to one reference at one time, this would take place as a Time Jam, meaning that
the DXD-8’s TOD will be reset to the time of the master source before locking to the BNC input.
8.2.1 TIME JAM TO PTP
When PTP is selected as the source of TIME JAM (menu 1.2), the DXD-8 will first lock its internal Time of Day clock to PTP.
When that is achieved, the DXD-8 will release the PTP Lock and revert to the BNC source selected in the reference menu.
Reasons to PTP time jam DXD-8’s include:
•Locking to a common video reference (e.g. NTSC) and wanting all of the cross-frame outputs (25 etc.) to be in correct phase
(and epoch), as well as wordclocks and AES.
•In a primarily legacy application this is the way to increase the number of legacy outputs and have them all in phase.
•With a timecode license wanting TOD timecode outputs to be in sync, and with correct cross-framing where applicable.
8.2.1.1 What is the sequence of a complete Time Jam to PTP?
1. LOCK TO PTP: The DXD-8 Lock status indicates HOLD / PTP SYNC on dark pink background.
2. CONFIRMATION: A message confirms that the date and time information has been transferred to the internal Time
of Day successfully (clearing of this message is required).
3. LOCK TO THE BNC INPUT: The DXD-8 indicates it is locked to the BNC reference, Input a / Video in this example.
4. SYSTEM TIME UPDATED: The System Time now indicates the same time as the PTP source
8.2.1.2 What is required for a Time Jam to PTP?
1. Reference must be BNC A or BNC B (menu 1.1). That BNC input must be set properly in menus 2.1 and/or 3.1.
2. The PTP port must be set as the BNC INPUT TIME JAM SOURCE (menu 1.2). The port will now show as set for Time
Jam [BNC Inputs] in menu 5.1 (blue letters indicate status and cannot be altered)
3. The PTP domain of the Time Jam Port must be set to the same domain as the PTP source in the proper menu (Menu 5.5)
8.2.2 TIME JAM TO GPS
With the DXD/GPS option installed, GPS can be selected as a source for a Time Jam in menu 1.2. The sequence is similar to
the Time Jam to PTP. After the DXD has locked its internal Time of Day clock to GPS, it locks to the BNC source selected in
menu 1.1.
Note: Be sure the GPS Receiver is no longer in WARM UP state as it will not be used for Time of Day in that condition.
TIME JAM
A Time Jam to PTP has
completed successfully
Press Any Key to Exit

DXD/PTP/GPS User Manual (rev 2.10)
Page 11
9. Time Menus
9.1 TIME STANDARDS (MENU 7.1)
The following time standards are available on the DXD-8 in addition to the local time:
•TAI: International Atomic Time, an atomic coordinated time that has been measuring time continuously since 1955 with
no leap seconds. It is used as a base by other standards such as UTC.
•UTC: Coordinated Universal Time is the time zone ‘0’ from which all other time zones are calculated. It is based on
TAI and since 1972 has had leap seconds every year or so, depending on the earth’s rotation.
•GPS: Global Positioning System time is used by the atomic clocks in the GPS satellites. It is continuous time (no leap
seconds) measured from the GPS time zero point of midnight January 5, 1980. It is 19 seconds behind TAI.
•Loran: Long Range Navigation time based on atomic clocks. Like GPS, it is continuous time with no leap seconds
measured from the time zero point of midnight January 1st, 1958.
•Local: Local time is based on UTC and can have adjustments for time zone and Daylight Saving (menu 7.1).
Menu 7.1 lets you pick which of these time standards will be used to display the following DXD times:
•System Time, the main Time Of Day clock at the heart of the DXD
•RTC, Real Time Clock, a constantly running, battery-backed-up clock inside the DXD
•Grandmaster, time received on the Ethernet port from the PTP Grandmaster
•GPS, time received from the GPS receiver (optional)
To avoid confusion, it is recommended to use one standard for all DXD times. The default value is TAI. But some users may
prefer to use Local Time instead while others may even prefer different standards for different times.
Be aware that, even though the time source may give Time Of Day, it may not correspond to the time indicated on a
wall clock as it would depend on the standard used or even on the accuracy and settings of the source time.
There are 2 other Local Time parameters in menu 7.1:
•Time Zone: can be adjusted in hours and minutes with a positive or
negative value, relative to UTC (or GMT)
•Daylight Saving: can be adjusted in hours and minutes (typically 1 hr).
DST can only be set manually.
At the bottom of this page a ‘hint’ message appears for setting the time zone
properly: NY -5, Tokyo +9.
9.2 REAL TIME CLOCK (MENU 7.2)
Menu 7.2 lets you set several parameters of the RTC (Real Time Clock), the DXD internal back up clock described in chapter 8
above.
•Set Time: YYYY/MM/DD and HH:MM:SS: These fields let you enter manually a date and a time that will become
the current date and time of the RTC when the [ENTER] key is pressed.
•System Time Jam From RT Clock: With ‘Press ENTER to Jam’ selected, the Main TOD Clock (System Time) will
Jam from the internal RTC Time when the [ENTER] key is pressed.
Note that depending on the offset between the 2 clocks, this action will most certainly create a certain amount of
‘sync shock’ as all the outputs are locked to the System Time.
•Auto Update RT Clock: When this function is turned on, the RTC is automatically updated with the date & time
information from GPS. This update occurs within a second of when the feature is turned on, then every 1.2 hr. Options
are “From GPS” or “Off”.
This field does not appear if the DXD/GPS card is not installed.
At the bottom of this page the RTC Time is displayed along with the Time Standard set up in menu 7.1

Page 12
DXD/PTP/GPS User Manual (rev 2.10)
9.3 TIME & DATE DISPLAY (MENU 7.3)
Menu 7.3 lets you select 2 different DXD times & dates to be displayed in the Time & Date display (see 10.1.2 below). The
choices are:
-No display (lower display only)
-System Time
-Real Time Clock
-Ext PTP Grandmaster
-GPS Receiver
The times and dates displayed will match what has been set in menu 7.1 and that setting will appear to the right of the time.
9.4 LEAP SECONDS (MENU 7.4)
•UTC Leap Second: Menu 7.4 lets you enter manually the number of leap seconds to be applied to TAI.
•Auto Update: This fields lets you set the DXD so that the leap seconds will be updated automatically based on data
from GPS. Options are “From GPS” or “Off”.
This field only appears if the optional DXD/GPS receiver has been installed.
10. Time Code Menus
Time Code is a separate option available for both DXD models, the DXD-8 and the DXD-16. It is described in a separate
manual (DXD/LTC). However, with the PTP option, menu 8.1 SMPTE 2059 SET UP becomes available.
10.1 SMPTE 2059 SETUP (MENU 8.1)
The Daily Jam is a process where the time code generator realigns precisely with the epoch
(midnight on Jan 1, 1970). This process occurs everyday, at the same time, as set in the DAILY
JAM TIME field.
•Daily Jam Time: The value entered in the DAILY JAM TIME field is the amount of time after
midnight, local time, at which the daily jam will occur.
Adjustments can be made in 10 minutes increments. Default value is 01 Hrs 00 Min, i.e. 1:00AM, local time.
•Jam Time Recalculate: Pressing the ENTER key while “Press Enter to Jam” is selected will cause the DXD to recalculate both
Jam Times, the time of the Previous Daily Jam Event and the time of the Next Daily Jam Event.
For time code, the Previous Daily Jam Event is the generator’s anchor point, until the Next Daily Jam Event. When the local
time is too close to the set Daily Jam Time, a manual change will not occur until the next day. By forcing the DXD to recalculate
both jam times manually, the operator has the option to make an immediate change.
10.2 LTC GENERATOR 1 & 2 (MENUs 8.2 & 8.3)
Menus 8.2 and 8.3 require the DXD/LTC. Otherwise, when trying to access these menus, a message will appear indicating
that the Feature Key has not been found.
Please refer to the DXD/LTC manual for information.
To purchase the DXD/LTC, please contact you Brainstorm Electronics dealer.
LTC FEATURE KEY NOT FOUND
To purchase please contact your Brainstorm dealer.
Feature Keys are unique for each serial number.

DXD/PTP/GPS User Manual (rev 2.10)
Page 13
11. D i s p l a y
11.1 M a i n R o t a t i o n
11.1.1 M A I N R OTAT I O N F O OT E R
•Reference: When PTP Mode is selected in the reference menu, the display in the Main Rotation pages indicates REF: PTP on
the left of the reference line with 4 different options to its right:
-“Master: External”
-“Master: Internal”
-“Master: Internal / OCXO”
-“Master: GPS Receiver”
As explained in 3.1 above, selecting PTP Mode in the reference menu means
that the DXD-8 will participate in the PTP Grandmaster selection (see 12.5,
Selecting a Grandmaster). If another unit is selected by the BMCA, “Master:
External” will be displayed in the reference line.
But, if the DXD-8 is selected, one of the other 3 options above will be
displayed: Internal, Internal / OCXO or GPS Receiver.
•Lock Status: The bottom line of the display has the usual LOCK status, but in the case where the DXD-8 is the grandmaster,
when locked it changes to "LOCKED / GRANDMASTER”.
In case the DXD is or becomes a PTP Salve, when locked it changes to “LOCKED / PTP SLAVE”.
Note that, if another source was selected in the reference menu, such as Video Sync, and the DXD-8 was simultaneously a PTP
Grandmaster, the same LOCK status would appear, but the REF line would indicate “REF: Input A/ Vid” (see example at 15.1).
11.1. 2 M A I N R OTAT I O N PA G E S
The Main Rotation Pages are the pages appearing on the main display under normal operations when the DXD is neither in the
Status nor the Set Up mode. With the installation of the PTP and/or GPS options, some pages have been modified, others have
been added.
•REFERENCE SOURCES - PTP Mode
When PTP Mode is selected in the reference menu, the Reference
Sources page indicates the setting and the state of the PTP port in colors
for easy identification as well as the PTP domain to its right. For details
on the PTP states, see Chapter 11, PTP Ports States.
If GPS is available and has been selected in the reference menu as
‘LOCAL REF WHEN GM’, it will appear on the second section in place of
the ALT REF along with its lock status.

Page 14
DXD/PTP/GPS User Manual (rev 2.10)
11. 2 S t a t u s Pa g e s
Status pages are available on the main display while in the STATUS mode. To activate the STATUS mode, press the [STATUS]
key. The Status LED illuminates to confirm your selection. This firmware update includes the following new Status pages.
11.2.1 TIMES STATUS PAGE
The TIMES status page has multiple running counters showing the different DXD
times available as well as an offset:
-System Time: Main DXD TOD clock
-RT Clock: continuously running internal back-up clock
-Grandmaster: time from the external PTP Grandmaster
-GPS: GPS Time from the DXD/GPS receiver
-TOD-GM Ofst: indicates the offset between the internal Time Of Day clock
and the Grandmaster in µsec.
Additional times may appear on this page such as Time Code based on the installed options.
11.2.2 GPS RECEIVER STATUS PAGE
The GPS RECEIVER status page displays the following information:
-Antenna
-Detect (Normal / Shorted / Open / No voltage)
-Environment (Open sky / Semi shielding / High shielding / No
position fix)
-Network: Indicates the number of satellites available for each
constellation
-GPS
-SBAS
-OZSS L1C/A
-QZSS L1S
-GLONASS
-Gallileo
-Frequency Mode (LOCK / FREERUN 0 / FREERUN 1 / PULLIN 0 /
PULLIN 1 / WARMUP)
-Quality (0000-9999 - Lower value is better)
-GPS Leap Seconds (the current number of GPS leap seconds is 18)
This page does not appear if the DXD/GPS card is not installed.
11.2.3 PTP STATUS PAGE
A PTP status page gives detailed information on PTP. This page will be available in a future firmware revision.
Note: Display has been enlarged to show all scrolling options

DXD/PTP/GPS User Manual (rev 2.10)
Page 15
12. General Information on PTP
12.1. TIME AND PHASE
Precise time information has always been crucial in traditional production and broadcast environments. To keep the different
video and audio sources synchronized properly, two different references were typically used, one providing time information
(time code), the other phase information (black & burst or try-level sync for Video and DARS or Word Clock for Audio). With
IP networks, PTP provides both Time Of Day and phase information, replacing and/or coexisting with the traditional ‘legacy’
references.
12.2. WHAT IS PTP?
PTP (Precision Time Protocol) is a method for precisely synchronizing devices over a computer network. On a LAN, PTP can
achieve clock accuracy to within a microsecond. Originally designed for network measurements, PTP has been broadly
adopted in applications ranging from real-time automations to telecom transmissions and financial transactions.
Published in 2002 by IEEE under the 1588-2002 standard (PTP v1) it was revised in 2008 as 1588-2008 (PTP v2). Version 2
brought several improvements but is not backward compatible with version 1.
12.3. A/V OVER IP APPLICATIONS
PTP has been widely adopted in A/V over IP applications. It is the protocol chosen by AES and SMPTE with PTP profiles
included in both the AES67 and ST-2059 standards. The SMPTE ST-2110 suite of standards (digital video over IP with audio,
video and ancillary data as separate streams) uses PTP for synchronization as it is based on ST-2059.
Major A/V over IP systems such as Q-LAN, LiveWire, Wheatnet-IP, Ravenna and Dante all use PTP. Although the original
Dante used PTP v1, with the release of the Dante Domain Manager version 1.1, a Dante system has the ability to clock to a
non-Dante PTP v2 clock.
AVB (Audio Video Bridging) is a set of IEEE standards that facilitate the transport of high performance audio and video on a
LAN. One of those standards, IEEE 802.1AS, defines a specific profile of IEEE 1588-2008 with additional timing features
called gPTP (Generalized Precision Time Protocol).
12.4. PTP DESCRIPTION
Per IEEE 1588, PTP uses a hierarchical Master-Slave architecture for clock distribution. The primary timing source is called the
PTP Grandmaster. Precise timestamps are captured at the Master and Slaves and exchanged to determine the offset between
the two and the network latency so that the Slaves can synchronize their internal clocks to the Master’s.
With the PTP protocol, two activities continually occur on the network:
- All grandmaster-capable devices negotiate to select a grandmaster.
- All devices synchronize to the grandmaster.
•BMCA: The Grandmaster is elected autonomously without any user interaction. Grandmaster-capable devices broadcast
their clock “quality” and other parameters with Announce messages. They each compare the received Announce messages
and, independently of the other devices, determine the most suitable grandmaster. This determination is done through the
Best Master Clock Algorithm (BMCA), which by design ensures that all clocks reach the same conclusion. This best master
clock negotiation continues even after a grandmaster has been selected so that in case the current grandmaster fails another
clock can quickly replace it.
•SYNC: Synchronization to the grandmaster is done using a series of messages. Sync messages are broadcasted periodically
by the grandmaster and contain timestamps from its internal clock. Slaves read these messages and adjust their internal
clocks match exactly the master’s. Every update cycle, the slaves calculate corrections for offset and network latency to
achieve high precision synchronization.

Page 16
DXD/PTP/GPS User Manual (rev 2.10)
12.5. SELECTING A GRANDMASTER
An algorithm called the BMCA (Best Master Clock Algorithm) is used to determine which clock will be used as the PTP
Grandmaster. As defined in the IEEE 1588 standard, this selection is done autonomously based on the following criteria and in
the following order:
-Priority 1
-Clock Class
-Clock Accuracy
-Clock Variance
-Priority 2
-Source Port ID (MAC Address)
Of those fields, two are set manually by the users, Priority 1 and 2, so that preferred masters can be prioritized. It is important
to note that, even though through the use of the Priority fields a user can more or less determine which unit will be selected as
Grandmaster, it is still the BMCA that makes that determination.
When a Grandmaster has been selected, all other devices on the domain will sync their internal clocks to that of the
Grandmaster. If the Grandmaster fails, a new one is selected immediately via the BMCA. If a better suited clock is found, it
will become the Grandmaster.
12.6. SYNCHRONIZATION
There are several different PTP messages used during synchronization, sequenced as follows:
1. The grandmaster sends a Sync message with its transmit timestamp (t1), and an optional Follow Up message, in case of the
two steps operation, which also includes t1.
2. The slave receives the Sync/Follow Up message, keeps its timestamp (t1) and the Sync message arrival time (t2).
3. The slave sends a Delay Request message back to the grandmaster. This message does not include a timestamp, however
the slave keeps the time it sent the Delay Request message (t3).
4. The master receives the Delay Request message and keeps its arrival time (t4). The master then sends back a Delay
Response message including t4.
The slave clock now possesses all four timestamps (t1, t2, t3 and t4) that can be used to compute the offset of the slave clock
relative to the master, and the propagation time between the two clocks. With this, it can now adjust its clock to match the GM
clock.
Master
Clock Time
Slave
Clock Time
t1
t2
t3
t4
Data at
slave clock
t1, t2
t2
t1, t2, t3
t1, t2, t3, t4
Formulaes
Delay = [(t2 - t1) - (t4 - t3)] / 2
Offset = t2 - t1 - Delay

DXD/PTP/GPS User Manual (rev 2.10)
Page 17
12.7. DELAY MEASUREMENT MECHANISM
To synchronize clocks, the delay between the clocks must be known. There are two mechanisms to measure the delay called
End to End (E2E) and Peer to Peer (P2P).
•The E2E delay mechanism was the only one included in the original IEEE1588-2002. It measures the delay between
the master and the slave.
E2E uses the following messages, as described in 1.6. above: Sync, Follow-up (optional), Delay_Req, and Delay_Resp.
It can be used with switches or routers that are not 1588 capable.
•The P2P delay mechanism was introduced in IEEE15880-2008. It measures the delay between directly connected
ports. Peer-to-peer delay measurement works “locally”, from every node to each of its neighbors. For each pair of
directly connected ports, each end periodically measures the round-trip network delay by sending a Pdelay_Req
message and receiving in response a Pdelay_Resp message. This way all ports learn the delay on their link.
P2P uses messages Pdelay_Req, Pdelay_Resp, and Pdelay_Resp_Follow_Up (optional).
NOTE: An ordinary clock, which has just one port, can be configured for end-to-end or for peer-to-peer; a boundary clock,
which can have a single slave port and multiple master ports, can be configured for E2E on some ports and P2P on others.
While a single domain can have both end-to-end and peer-to-peer delay mechanisms running simultaneously, all clocks on a
single PTP communication path must use the same method to measure the time delay.
12.8. TYPES OF CLOCKS
IEEE 1588 defines three different types of clocks:
•Ordinary Clock (OC)
•Boundary Clock (BC)
•Transparent Clock (TC)
Ordinary Clocks (OC) are devices with a single port, usually at either end of a network such as A/V equipment, DAW’s or
speakers. They can be master or slave.
Boundary (BC) and Transparent (TC) Clocks are network devices such as switches or routers.
Since the DXD-8 has 1 Ethernet port, it is an ordinary clock (OC).
12.9. PTP DOMAINS
A PTP domain is a network (or a portion of a network) within which all of the clocks are in sync. A single network can have
multiple PTP domains operating separately, e. g., one set of clocks synchronized to one time scale and another set of clocks
synchronized to an other time scale.
12.10. PTP PROFILES
A PTP Profile defines the range and default values of all configurable attributes as well as all required, permitted, or prohibited
clock types and options for a specific application area. Profiles can be created by recognized standards associations such as
AES or SMPTE. The DXD supports the AES67 Media profile and the SMPTE ST-2059-2 profile. The DXD also support the 1588
default profile.
12.11. EPOCH
PTP uses the concept of an Epoch clock. This is an absolute time value when the clock was set to zero, and the number of
1GHz clock pulses that have occurred since provides the current time, converted with software into year, month, day, hours,
minutes and seconds. The Epoch (or zero time) for PTP was set at midnight on the 1st January 1970.

Page 18
DXD/PTP/GPS User Manual (rev 2.10)
13. PTP Port States
When PTP MODE is selected as the reference, the REFERENCE SOURCES Status Display page indicates the PTP state of the
DXD-8. This is similar to the PTP PORTS page on the DXD-16 where all 4 ports are shown.
The different states are:
•SLAVE: when another unit has been selected as Grandmaster by the BMCA, the DXD-8 acts as a PTP Slave
•GRANDMASTER: when the BMCA chooses the DXD-8 as PTP Grandmaster.
•MASTER: transitional state before the Grandmaster state is confirmed by the BMCA
NOTE: as the DXD-8 has the ability to be a PTP Master or Slave, it means that, per IEEE1588, the state of the port can
change. The BMCA determines what unit becomes the Grandmaster. If the current Grandmaster disappears or looses
GPS, another Grandmaster is selected. For more on the Grandmaster selection, go to 3.5.
The PTP setting is displayed in white letters on a dark grey background. Choices are: Port on / Port off
Then the port’s PTP State is displayed as it changes, in bold letters with the following colors:
The PTP domain number of the DXD-8 is indicated to the right of the PTP state in a small blue rectangle.
If GPS is available and has been selected in the reference menu as LOCAL REF WHEN GM, it will appear on the second
section in place of the ALT REF with its current lock status right under.
- SLAVE
black letters
yellow background
- GRANDMASTER
black letters
bright green background
- MASTER
white letters
green background

DXD/PTP/GPS User Manual (rev 2.10)
Page 19
14. Positional change from an External PTP Grandmaster
When the DXD is referenced to an external PTP Grandmaster and a disruption or an error causes a positional change in
the PTP Grandmaster, the DXD will respond differently based on how it has been set by the operator.
14.1 JUMP TO RELOCK
When the time difference detected between the external PTP GM and the DXD System Time is above the Jump Threshold
value, the DXD will jump to the new time and relock through the normal lock procedure. This will cause disruptions on the
output signals but will be the fastest way to be locked with the external PTP GM.
The Jump Threshold can be adjusted in menu 1.2 from 5 msec to 15 sec or set to ‘Never’ (default value is 5 msec).

Page 20
DXD/PTP/GPS User Manual (rev 2.10)
15. Typical PTP use
The DXD-8 was designed to be a reliable high precision sync generator as well as a very flexible one. Several features were
incorporated in the design with flexibility in mind such as the universal outputs. For PTP, several options are available giving
the user many choices.
15.1 HYBRID SYNC GENERATOR ACCEPTING MULTIPLE REFERENCES
One of the original concept behind the DXD line was to generate ‘legacy’ sync and PTP sync simultaneously so that all
equipment could be kept perfectly synchronized. But, for added flexibility, the DXD-‘s can also be set up to lock to any
‘legacy’ sync or to PTP as illustrated below. These choices are available in the Reference menu.
To reference an IP island to black burst (traditional infrastructure), set the DXD-8 as follows:
-Reference = INPUT A/Vid
-Port Mode = On
-Priority 1 = Low enough to win the BMCA (preferred master)
➡The IP Island locks to the PTP port (Master state)
To reference a legacy island to PTP (IP infrastructure), set the DXD-8 as follows:
-Reference = PTP Mode
-Port Mode = On
➡The Legacy Island locks to BNC outputs (WC, AES, Video Sync, as required)
A/V OVER IP
EQUIPMENT
WORD CLOCK PTP
GRANDMASTER
HOUSE SYNC
BLACK & BURST
This manual suits for next models
2
Table of contents
Other Brainstorm Electronics Clock manuals

Brainstorm Electronics
Brainstorm Electronics DXD-16 User manual

Brainstorm Electronics
Brainstorm Electronics DXD-8 User manual

Brainstorm Electronics
Brainstorm Electronics DXD-8 User manual

Brainstorm Electronics
Brainstorm Electronics DXD-8 User manual

Brainstorm Electronics
Brainstorm Electronics DXD-8 User manual