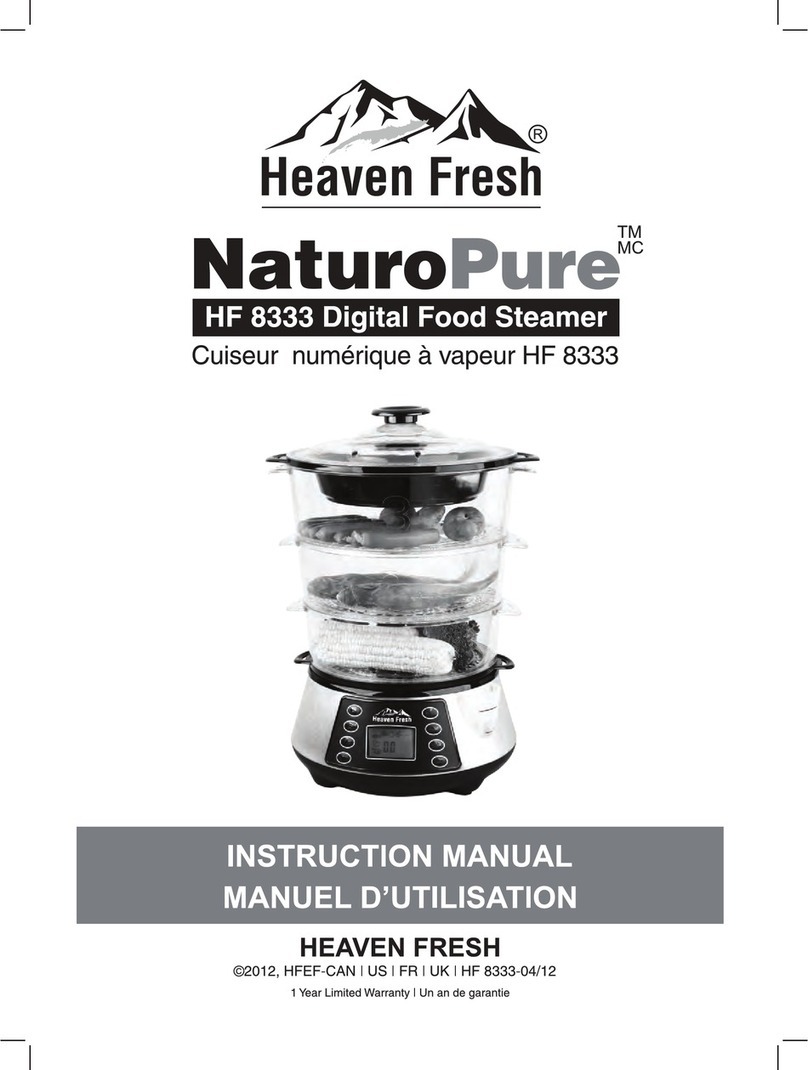
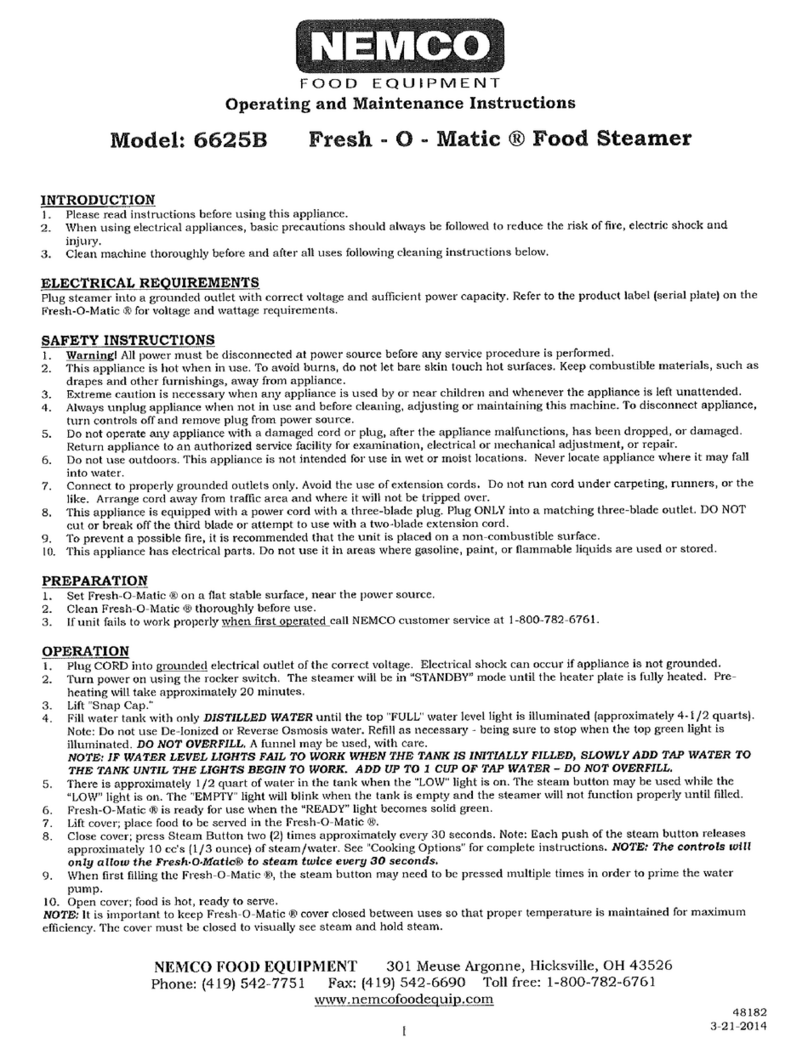
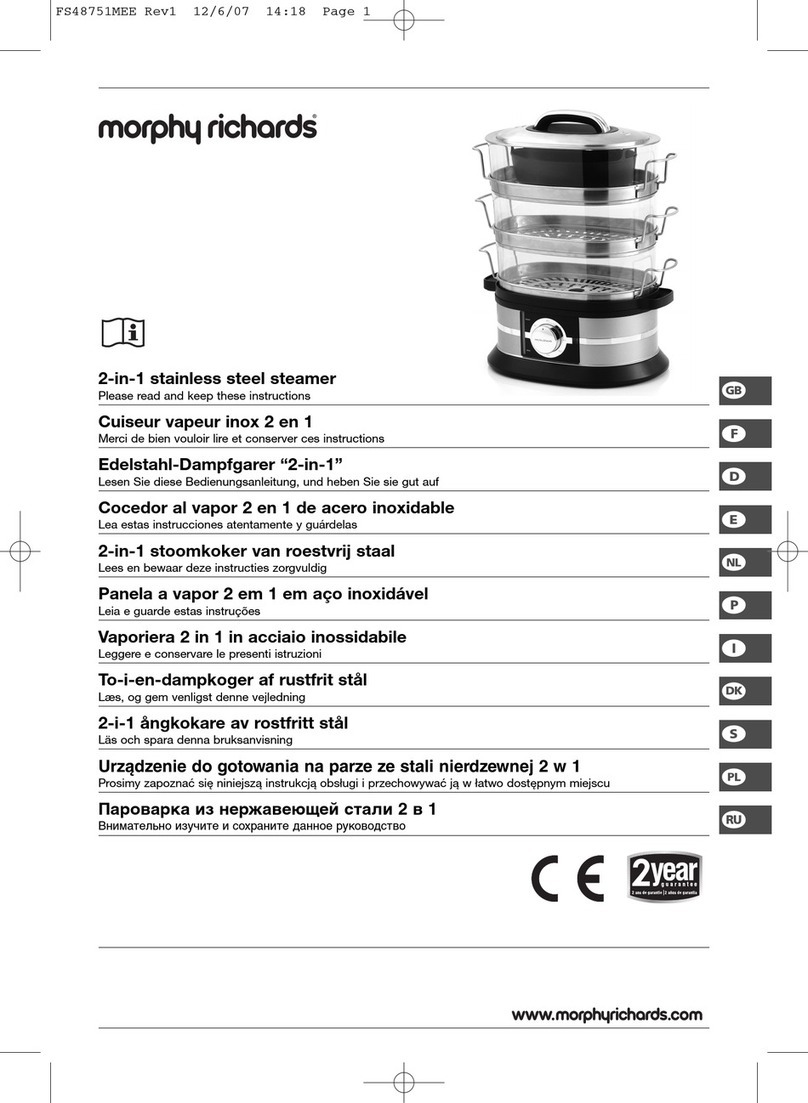
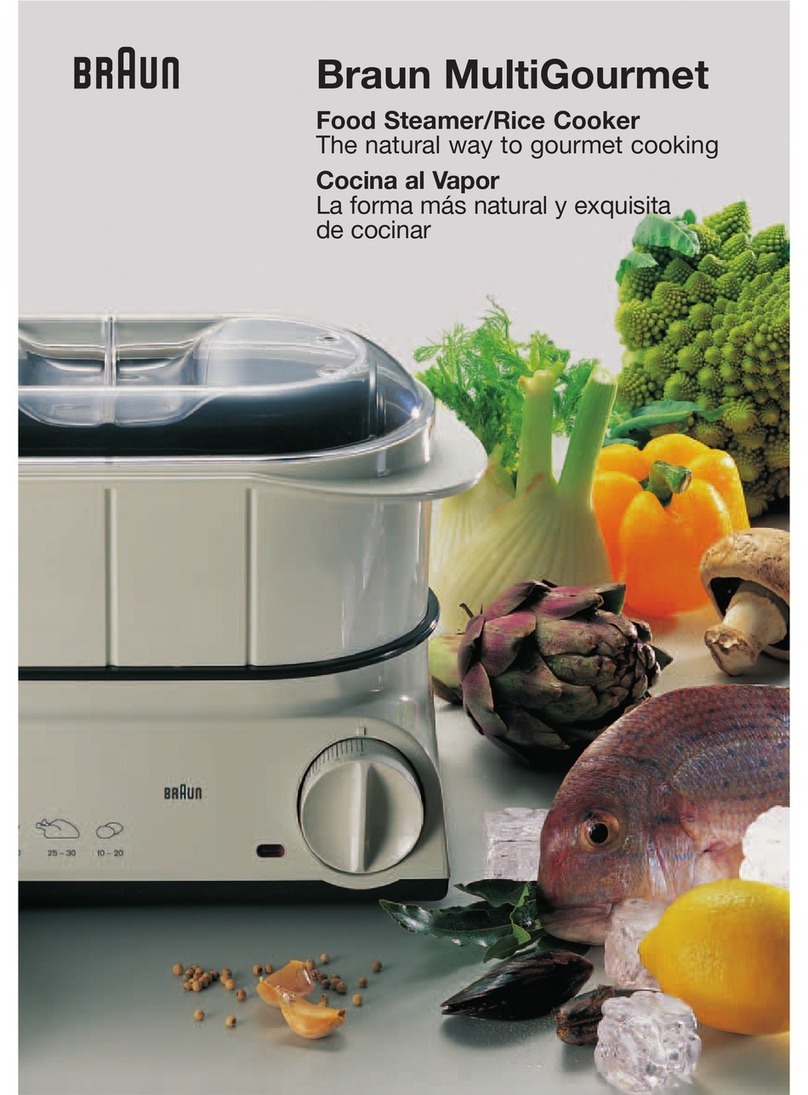
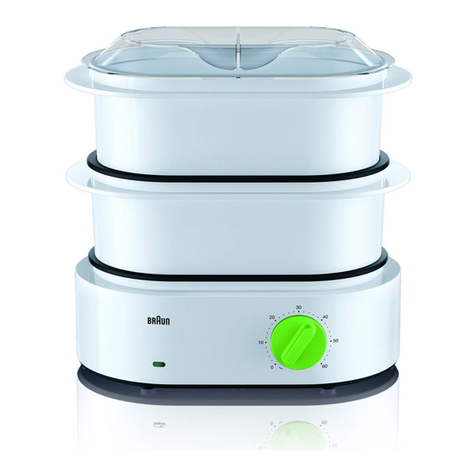
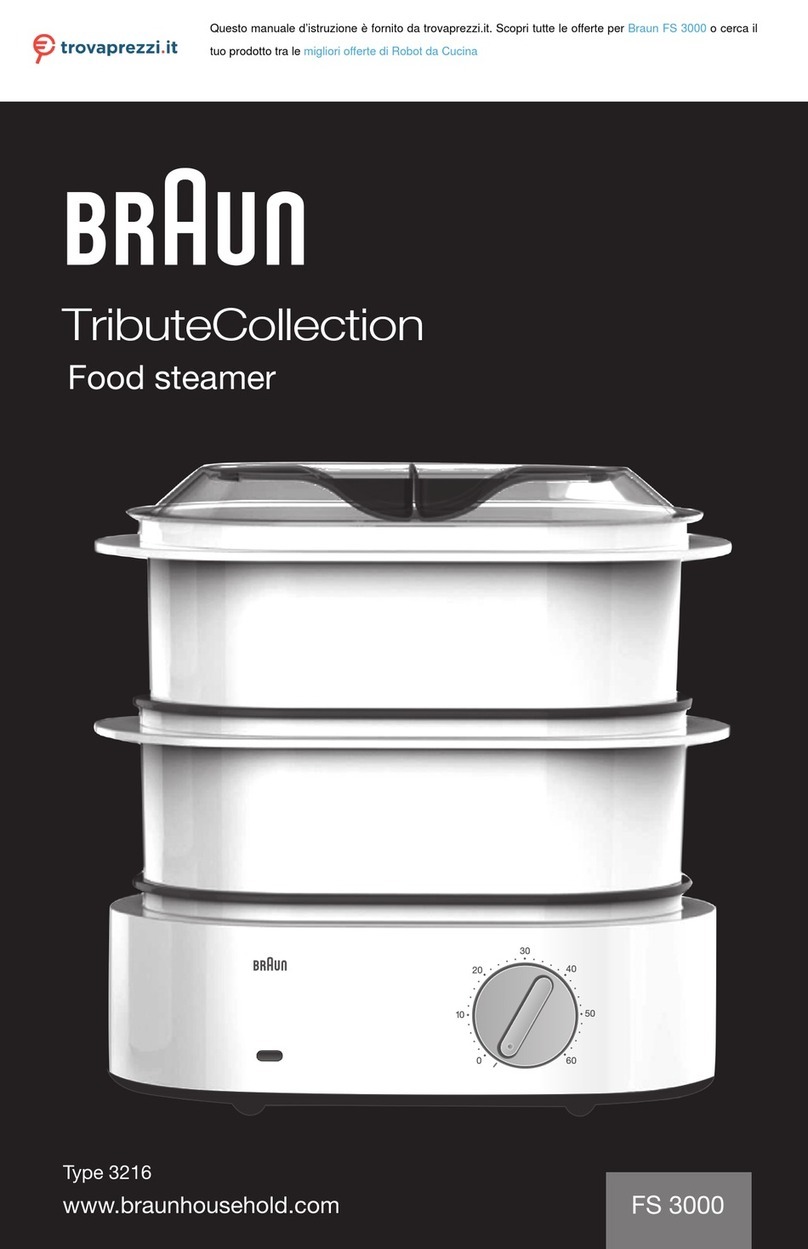
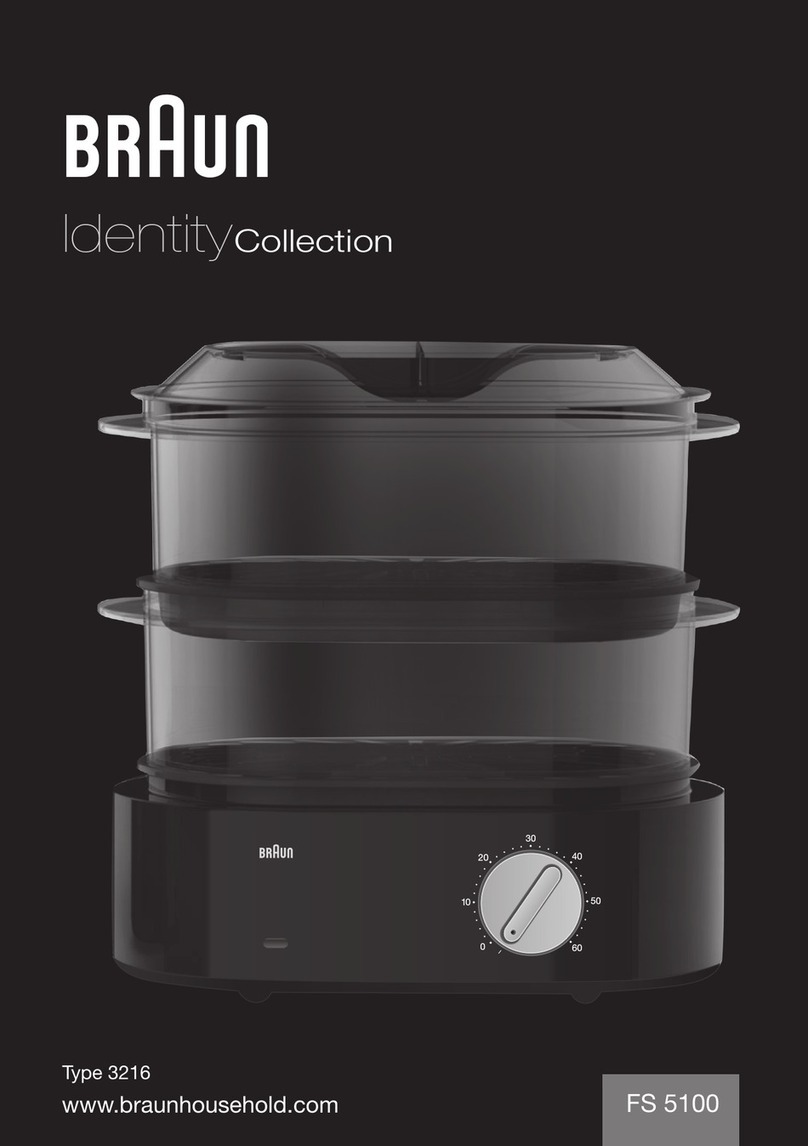
Braun TributeCollection FS 3000 User manual

www.braunhousehold.com
Type 3216
FS 3000
0
10
20
30
40
50
60
Food steamer
TributeCollection
2361001IBR_FS3000_S1.indd 1 25.06.14 15:24

Deutsch 4
English 9
Français 14
Español 19
Português 24
Italiano 29
Nederlands 34
Dansk 39
Norsk 44
Svenska 49
Suomi 54
Polski 59
Česk 64
Slovensk 69
Magyar 74
Hrvatski 79
Slovenski 84
Română (MD) 89
Türkçe 94
Ελληνικά 99
аза 105
Русский 112
Українська 119
131
De’Longhi-Braun-Household GmbH
Carl-Ulrich-Straße 4
63263 Neu-Isenburg/Germany
2361001IBR/06.14
DE/UK/FR/ES/PT/IT/NL/DK/NO/SE/FI/PL/CZ/SK/HU/
HR/SL/RO/MD/TR/GR/KZ/RU/UA/Arab
2361001IBR_FS3000_S2.indd 1 25.06.14 15:24

3
0
10
20
30
40
50
60
4
5
4
5
11
1
2
3
7
8
9
10
5b
6
5a
MAX
MIN
0
1
0
20
30
40
50
60
I
II
12
MAX
2361001IBR_FS3000_S3.indd 1 25.06.14 15:25

Unsere Produkte werden hergestellt, um
höchste Ansprüche an Qualität, Funktionalität
und Design zu erfüllen. Wir wünschen Ihnen
mit Ihrem neuen Braun Gerät viel Freude.
Der Braun FS 3000 eignet sich besonders zum
Garen von Gemüse und Reis sowie für die
Zubereitung von Fisch, Fleisch und Geflügel.
Garen mit Dampf ist die schonendste und
besonders gesunde Art der Zubereitung.
Vitamine, Mineralstoffe, natürlicher Geschmack
und Farbe bleiben weitgehend erhalten.
Lesen Sie bitte die Gebrauchsanweisung
sorgfältig und vollständig, bevor Sie das
Gerät in Betrieb nehmen.
Vorsicht
•
Dieses Gerät kann von Kindern ab
8 Jahren und von Personen mit redu-
zierten physischen, sensorischen
oder mentalen Fähigkeiten oder Mangel
an Erfahrung und/oder Wissen benutzt
werden, wenn sie beaufsichtigt oder
bezüglich des sicheren Gebrauchs
des Gerätes unterwiesen wurden
und die daraus resultierenden
Gefahren verstanden haben. Kinder
dürfen nicht mit dem Gerät spielen.
Reinigung und Benutzer-Wartung
dürfen nicht durch Kinder durchge-
führt werden, es sei denn, sie sind
älter als 8 Jahre und beaufsichtigt.
•
Kinder unter 8 Jahren sollen vom
Gerät und der Anschlussleitung fern-
gehalten werden.
•
Das Gerät ist bei nicht vorhandener
Aufsicht und vor dem Zusammen-
bauen, dem Auseinandernehmen oder
Reinigen stets vom Netz zu trennen.
•
Tauchen Sie das Gehäuse/Bodenge-
fäß
1
niemals ins Wasser.
•
Dieses Gerät ist nur für die Verwen-
dung im Haushalt und zur Verarbei-
tung von haushaltsüblichen Mengen
bestimmt.
•
Den Dampfkorb
5
nur zusammen mit
der Tropfschale
4
verwenden.
•
Verwenden Sie zum Garen von farb-
stoffreichen Gütern (z.B. Karotten,
Paprika, Tomaten usw.) stets den
schwarzen Einsatz
E
im Dampfkorb
5
, um eine bleibende Verfärbung des
weißen Dampfkorbes weitgehend zu
vermeiden.
•
Die schwarze Reisschale
e
bzw. den
schwarzen Einsatz
E
nur zusammen
mit dem Dampfkorb
5
von der Tropf-
schale
4
abheben.
•
Berühren Sie das heiße Gerät niemals
ohne Topfhandschuhe und verwenden
Sie das Gerät nicht ohne Deckel
6
.
Halten Sie den Deckel beim Abneh-
men stets so, dass Sie nicht mit dem
ausströmenden Dampf oder abtrop-
fendem heißen Wasser in Berührung
kommen. Achten Sie auf heiße Flüs-
sigkeit in der(n) Tropfschale(n).
•
Beim Gebrauch auf ausreichende Ab-
stände nach oben (Hängeschränke,
Regale) und zu seitlichen Gegen-
ständen achten.
•
Stellen Sie das Gerät zum Gebrauch
nur auf eine trockene, ebene und
hitzebeständige Fläche.
•
Gerät niemals auf eine heiße Herd-
platte oder eine offene Flamme
stellen.
•
Braun Geräte entsprechen den ein-
schlägigen Sicherheitsbestimmun-
gen. Reparaturen und das Auswech-
seln der Anschlussleitung dürfen nur
autorisierte Fachkräfte vornehmen.
Durch unsachgemäße Reparaturen
können erhebliche Gefahren für den
Benutzer entstehen.
Maximale Füllmenge: 1,2 l Wasser
Gerätebeschreibung
1Gehäuse/Bodengefäß
2Maximale Füllstandmarkierung
3Minimale Füllstandmarkierung
4Tropfschale
5Dampfkorb mit Schlitzen
ESchwarzer Einsatz (mit Schlitzen) für den
Dampfkorb 5
4
Deutsch
2361001IBR_FS3000_S4-134.indd 4 25.06.14 15:26

eSchwarze Reisschale (ohne Schlitze) für den
Dampfkorb 5
6Deckel transparent
7Dampfbeschleuniger (abnehmbar)
8Heizkörper
9Ein-/Ausschalter mit Zeitschaltuhr (60 Min.)
0Kontrollleuchte für Schalter 9
qKabelstauraum zur Aufnahme nicht benötig-
ten Netzkabels
Hinweis: Spülen Sie vor dem Erstgebrauch alle
Teile wie unter «Reinigung» beschrieben.
Garen
1. Füllen Sie das Gehäuse/Bodengefäß 1mit
kaltem Leitungswasser und setzen Sie den
Dampfbeschleuniger 7ein. Geben Sie keine
aromatisierenden Zutaten wie Gewürze, Sau-
cen, Wein etc. dem Wasser zu. Die notwendige
Wassermenge (maximale Füllstandmarkierung
oder minimale Füllstandmarkierung) hängt von
der eingestellten Garzeit ab.
Garen im Dampfkorb 5(z.B. Gemüse, Fisch)
Das Gargut in den Dampfkorb mit Schlitzen
geben. Gewürze erst nach dem Garen hinzu-
fügen.
Beim Garen von farbstoffreichen Gütern (z. B.
Karotten, Paprika, Tomaten usw.) setzen Sie
bitte den schwarzen Einsatz Ein den Dampf-
korb 5, um eine bleibende Verfärbung des
weißen Dampfkorbes weitgehend zu vermeiden.
Bei Verwendung beider Dampfkörbe 5kann
der schwarze Einsatz Eoder die schwarze
Reisschale enur in dem oberen Dampfkorb
eingesetzt werden.
Garen in der schwarzen Reisschale e
(z. B. Reis, Aufläufe)
Das Gargut ggf. mit einer Flüssigkeit in die
Reisschale geben. Die Reisschale in den
Dampfkorb setzen.
2. Den gefüllten Dampfkorb auf die Tropfschale
4im Gehäuse/Bodengefäß 1stellen und den
Deckel 6aufsetzen. Ohne Deckel erhöhen sich
Energieverbrauch und Garzeiten.
Bei Verwendung beider Dampfkörbe stellen Sie
den zweiten Dampfkorb mit Tropfschale auf
den unteren Dampfkorb.
3. Beim Gebrauch auf ausreichende Abstände
nach oben (Hängeschränke, Regale) und zu
seitlichen Gegenständen achten.
4. Das Gerät mit dem Netzstecker ans Strom-
netz anschließen.
5. Die Zeitschaltuhr 9einstellen. Dazu den Dreh-
knopf zuerst auf 60 Minuten stellen und dann
die gewünschte Garzeit zurückstellen. Die Kon-
trollleuchte 0leuchtet und das Garen beginnt.
6. Wenn die ausgewählte Garzeit abgelaufen
ist, schaltet sich das Gerät automatisch aus;
die Kontrollleuchte geht aus und die Klingel des
Timers ertönt.
7. Überprüfen Sie, ob das Lebensmittel gar
ist. Ziehen Sie lange Küchenhandschuhe an.
Schalten Sie das Gerät aus, indem Sie den
Schalter auf «0» zurückdrehen. Heben Sie die
Abdeckung 6ab und achten Sie auf austre-
tenden Dampf. Berühren Sie keine heißen Teile.
Überprüfen Sie das Lebensmittel mithilfe einer
langen Gabel.
Wenn Sie das Dampfgaren fortsetzen möchten,
setzen Sie die Abdeckung auf und schalten
das Gerät durch Drehen des Schalters und Ein-
stellen der verbleibenden Zeit wieder ein.
Bei Verwendung beider Dampfkörbe: Zur Prü-
fung des Garungsgrades im unteren Dampf-
korb gehen Sie bitte wie folgt vor: Schalten Sie
das Gerät aus und nehmen Sie den Deckel 6
ab. Heben Sie vorsichtig den oberen Dampf-
korb (ggf. mit schwarzem Einsatz) ab und
stellen Sie ihn auf den umgestülpten Deckel.
Danach nehmen Sie die Tropfschale mit über-
gezogenen Topfhandschuhen vorsichtig vom
unteren Dampfkorb ab und prüfen Sie den
Garungsgrad.
Soll in beiden Dampfkörben weiter gegart wer-
den, setzen Sie zunächst die abgenommene
Tropfschale und dann den oberen Dampfkorb
mit Deckel wieder auf und schalten Sie das
Gerät ein.
8. Wenn Ihre Speisen nach Abschalten des
Gerätes den gewünschten Garzustand erreicht
haben, ziehen Sie den Netzstecker und lassen
Sie das Gerät etwas abkühlen. Entnehmen Sie
dann den Dampfkorb bzw. die schwarze Reis-
schale oder den schwarzen Einsatz zusammen
mit dem Dampfkorb mit übergezogenen Topf-
handschuhen. Der umgestülpte Deckel 6kann
als Untersetzer für den Dampfkorb verwendet
werden. Nehmen Sie die Speisen aus dem
Dampfkorb oder der Reisschale und würzen
Sie nach Geschmack. Auseinandernehmen
siehe Punkt 7.
9. Die in der Tropfschale 4gesammelte Flüssig-
keit kann für die Zubereitung von Saucen oder
Suppen verwendet werden.
10. Das Restwasser im Gehäuse/Bodengefäß 1
sowie das Gerät vor dem Entleeren oder Reini-
gen stets abkühlen lassen. Netzstecker ziehen.
Wasserfüllung
Die erforderliche Wassermenge hängt von der
Garzeit ab. Bei Garzeiten bis zu 20 Minuten fül-
len Sie bis zur minimalen Füllstandmarkierung
5
2361001IBR_FS3000_S4-134.indd 5 25.06.14 15:26

6
3auf. Bei Garzeiten über 20 Minuten füllen Sie
bis zur maximalen Füllstandmarkierung 2auf.
Achten Sie auf einen ausreichenden Füllstand,
besonders bei Verlängerung der Garzeit.
Sollte die Dampfentwicklung aufhören, prüfen
Sie bitte den Wasserstand. Ziehen Sie dazu
den Netzstecker und lassen Sie das Gerät
etwas abkühlen. Heben Sie den Dampfkorb und
anschließend die Tropfschale vorsichtig ab und
füllen Sie Wasser nach.
Hinweis: Alle Einsätze sind ausschließlich für
den Gebrauch im Braun FS 3000 bestimmt-
Nicht im Backofen oder Mikrowellenherd ver-
wenden.
Garzeiten im Dampfkorb 5und in der schwarzen Reisschale e
Hinweis: Die angegebenen Mengen und Zeiten sind Richtwerte für das Garen mit einem Dampf-
korb. Werden kleinere Mengen gegart, gelten die in den Tabellen aufgeführten Zeiten ebenso.
Beim Garen größerer Mengen können sich die Garzeiten etwas verlängern, wenn das Gargut mit
engen Zwischenräumen im Dampfkorb liegt und die Dampfzirkulation behindert wird.
Die Garzeiten im oberen Dampfkorb sind länger, daher
• größere Stücke bzw. Lebensmittel mit längeren Garzeiten im unteren Dampfkorb garen.
• Beim Garen von verschiedenen Lebensmitteln mit unterschiedlichen Garzeiten:
Lebensmittel mit längerer Garzeit im unteren Dampfkorb garen; nach einiger Zeit den Dampfkorb
mit Lebensmitteln mit kürzerer Garzeit auf den unteren Dampfkorb setzen und oben garen.
Gemüse/Obst
• Entfernen Sie dicke Strünke von Blumenkohl, Brokkoli und Kohl.
• Garen Sie grünes und Blattgemüse so kurz wie möglich, da diese Gemüsearten schnell ihre
Farbe verlieren.
• Tiefgefrorenes Gemüse vor dem Garen nicht auftauen.
Gargut Art ca. Menge Garzeit
Artischocken frisch 4 St. mittelgroß 40 – 45 Min.
Blumenkohl frisch, kleine Röschen 500 g 20 – 25 Min.
Brokkoli frisch, kleine Röschen 500 g 15 – 20 Min.
Champignons frisch, ganz oder
geschnitten 500 g 20 – 25 Min.
(geschnitten
5 Min. kürzer)
Fenchel frisch, in Scheiben 500 g 15 – 20 Min.
Grüne Bohnen frisch, ganz oder
geschnitten 500 g 25 – 35 Min.
Karotten frisch, in Scheiben 500 g 20 – 25 Min.
Kartoffeln geschnitten 500 g 20 – 25 Min.
Kartoffeln in der Schale 500 g 30 – 40 Min.
Kohl frisch, geschnitten 500 g 25 – 30 Min.
Kohlrabi frisch, gewürfelt 500 g 20 – 25 Min.
Maiskolben frisch 2 Stück 55 – 60 Min.
(öfter wenden)
Porree (Lauch) frisch, geschnitten 500 g 15 – 20 Min.
Rosenkohl frisch 500 g 20 – 25 Min.
Spargel frisch 500 g 30 – 40 Min.
Zucchini frisch, in Scheiben 500 g 15 – 20 Min.
Äpfel frisch, 1/8 Stücke 500 g 10 – 15 Min.
Birnen frisch, 1/6 Stücke 500 g 10 – 15 Min.
2361001IBR_FS3000_S4-134.indd 6 25.06.14 15:26

Fische und Meeresfrüchte
• Tiefgefrorener Fisch kann ohne vorheriges Auftauen gegart werden, wenn zusammenhängende
Fische zuerst getrennt werden und die Garzeit um ca. 10 % verlängert wird.
Gargut Art ca. Menge Garzeit
Forelle frisch 2 St. je 150 g 18 – 25 Min.
Thunfischsteak frisch 2 St. je 200 g 25 – 30 Min.
Zahnbrasse frisch, ganz 1 St. 400 g 18 – 25 Min.
Goldbarschfilet frisch 2 St. je 200 g 15 – 18 Min.
Seelachsfilet frisch 2 St. je 140 g 15 – 18 Min.
Garnelen gefroren 450 g 15 – 20 Min.
Miesmuscheln in der Schale 1000 g 18 – 25 Min.
Kalamares gefroren 600 g 20 – 25 Min.
Langusten in der Schale 2 Stück 30 – 35 Min.
Fleisch, Geflügel und Eier
• Feinfaseriges und zartes Fleisch, das mit etwas Fett durchzogen ist, eignet sich besonders gut.
• Die Fleischstücke sollten gut abgewaschen und trocken getupft werden, damit so wenig wie
möglich Saft ausläuft.
• Eier zuvor anstechen.
Gargut Art ca. Menge Garzeit
Putenschnitzel frisch 2 St. je 150 g 25 – 30 Min.
Hähnchenschenkel frisch 2 St. je 150 g 25 – 30 Min.
Kalbsschnitzel frisch 2 St. je 150 g 30 – 35 Min.
Lammkotelett frisch 2 St. je 120 g 25 – 30 Min.
Frankfurter Würstchen frisch 2 – 8 St. (Haut anstechen) 8 – 10 Min.
Rindswürste frisch 2 – 8 St. (Haut anstechen) 8 – 12 Min.
Eier, weich gekocht in der Schale 2 – 10 St. mittlere Größe 10 – 12 Min.
Eier, hart gekocht in der Schale 2 – 10 St. mittlere Größe 15 – 20 Min.
Reis, Getreide, Aufläufe
• Verwenden Sie die schwarze Reisschale ezusammen mit der erforderlichen Flüssigkeitsmenge
und dem Reis usw.
• Bei Verwendung beider Dampfkörbe gehen Sie bitte wie folgt vor: Den lang garenden Reis usw.
in der Reisschale e– eingesetzt im unteren Dampfkorb 5– bei aufgesetztem Deckel vorgaren.
Dann erst den zweiten Dampfkorb mit anderen Gütern nach unten setzen, während der Dampf-
korb mit dem Reis usw. zum Weitergaren nach oben gesetzt wird.
Wasser- Flüssigkeitsmenge
Gargut ca. Füllstand im in der Garzeit
Menge Bodengefäß 1 Reisschale e
Basmatireis 250 g max. 300 – 400 ml Wasser 35 – 40 Min.
Langkornreis 250 g max. 300 – 400 ml Wasser 35 – 40 Min.
Naturreis 250 g max. 300 – 400 ml Wasser 45 – 50 Min.
Milchreis 250 g max. 750 ml Milch 60 Min.
Polenta (Maismehl) 250 g max. 750 – 1000 ml Wasser 20 – 25 Min.
7
2361001IBR_FS3000_S4-134.indd 7 25.06.14 15:26

Reinigung
Vor jeder Reinigung den Netzstecker ziehen.
Außer dem Gehäuse/Bodengefäß 1können
alle Teile in der Spülmaschine oder mit einem
handelsüblichen Geschirrspülmittel gereinigt
werden. Der Dampfbeschleuniger 7lässt sich
zum Reinigen abnehmen.
Das Gehäuse/Bodengefäß 1mit einem feuch-
ten Tuch abwischen.
Lagerung
Zur einfachen Lagerung nach der Verwendung,
können die Körbe ineinander gesteckt werden
w.
Siehe dazu die entsprechenden Markierungen
(I und II): Korb I passt in Korb II.
Das Netzkabel kann wie in Abbildung qgelagert
werden.
Entkalken
Nach mehrmaligem Gebrauch (je nach Was-
serhärte) bildet sich auf dem Heizkörper 8im
Gehäuse/Bodengefäß 1eine Kalkschicht.
Um das Gerät zu entkalken, füllen Sie weißen
Haushaltsessig (5 %) in das Gehäuse/Boden-
gefäß, so dass der Heizkörper gerade bedeckt
ist. Setzen Sie den Dampfbeschleuniger 7auf.
Schließen Sie das Gerät ans Netz an und stel-
len Sie die Zeitschaltuhr auf 15 Minuten. Wenn
nach Ablauf dieser Zeit noch immer Belag
sichtbar ist, wiederholen Sie den Entkalkungs-
vorgang. Entleeren Sie den Essig nach Abküh-
len des Gerätes und spülen Sie das Gehäuse/
Bodengefäß 1drei- bis viermal mit warmem
Wasser aus. Eventuell noch am Dampfbe-
schleuniger verbleibende Kalkreste können mit
einer Bürste entfernt werden.
Änderungen vorbehalten.
Dieses Gerät darf am Ende seiner
Lebensdauer nicht mit dem Hausmüll
entsorgt werden. Die Entsorgung kann
über den Braun Kundendienst oder lokal
verfügbare Rückgabe- und Sammelsysteme
erfolgen.
8
2361001IBR_FS3000_S4-134.indd 8 25.06.14 15:26

Our products are engineered to meet the
highest standards of quality, functionality, and
design. We hope you thoroughly enjoy your
new Braun product.
Your Braun FS 3000 is particularly well suited
for steaming vegetables, rice, fish, meat and
poultry. Steaming is a most gentle and healthy
way of preparing food. Vitamins, minerals, na-
tural taste and colour will be retained to a large
extent.
Read all instructions carefully before using
the appliance.
Important safeguards
•
This appliance can be used by chil-
dren aged from 8 years and above
and persons with reduced physical,
sensory or mental capabilities or
lack of experience and knowledge if
they have been given supervision or
instruction concerning the safe use
of the appliance and understand the
hazards involved. Children shall not
play with the appliance. Cleaning
and user maintenance shall not be
made by children unless they are
older than 8 years and supervised.
•
Children younger than 8 years shall
be kept away from the appliance and
its mains cord.
•
Always disconnect the appliance from
the supply if it is left unattended and
before assembling, disassembling or
cleaning.
•
Never immerse the base
1
into
water.
•
This appliance is designed for house-
hold use only and for processing nor-
mal household quantities.
•
Use the steam basket
5
only together
with the drip pan
4
.
•
Always use the black insert
E
when
steaming food with colour (e. g. carrots,
paprika, tomatoes, etc.), in order to
minimize permanent colouring of the
white steam basket
5
.
•
Remove the black rice bowl
e
or the
black insert
E
only together with the
steam basket
5
from the drip pan
4
.
•
Never touch the appliance without
potholders or kitchen gloves, and do
not use the appliance without the
cover
6
. When lifting the cover, always
hold it so that you do not come in
touch with escaping steam or drip-
ping hot water. Be careful with hot
liquids in the drip pan(s).
•
When using the appliance ensure
sufficient room over and beside the
appliance, in order to prevent damage
to e. g. cabinets or other objects.
•
When using the appliance place it on
a dry, level, heat-resistant surface.
•
Never place the appliance on a hot
surface or over an open flame.
•
Braun electric appliances meet
applicable safety standards. Repairs
or the replacement of the mains cord
must only be done by authorised
service personnel. Faulty, unqualified
repair work may cause considerable
hazards to the user.
Maximum capacity: 1.2 l water
Description
1Base
2Maximum water fill line
3Minimum water fill line
4Drip pan
5Steam basket with slots
EBlack insert (with slots) for the steam basket 5
eBlack rice bowl (without slots)
for the steam basket
6Cover (transparent)
7Steam accelerator (removable)
8Heating element
9On/off switch with timer (60 minutes)
0Pilot light for switch 9
qCord store for unused length of cord
Notice: Clean all parts before the first use as
described under «Cleaning».
9
English
2361001IBR_FS3000_S4-134.indd 9 25.06.14 15:26

Steaming
1. Fill the base 1with cold tap water and put
the steam accelerator 7in place. Do not add
any spices, sauces, wine etc. to the water. The
water quantity needed (maximum or minimum
water fill line) depends on the selected steaming
time.
Steaming in the steam basket 5
(e.g. vegetables, fish)
Put the food into the steam basket with
slots 5. Add spices when steaming is
finished.
Always use the black insert Ewhen steaming
food with colour (e. g. carrots, paprika,
tomatoes, etc.), in order to minimize perma-
nent colouring of the white steam basket 5.
When using both steam baskets 5the black
insert Eor the black rice bowl ecan only be
used in the upper steam basket.
Steaming in the black rice bowl e
(e. g. rice, bakes)
Put the rice/grains with a liquid if necessary
into the rice bowl. Place the rice bowl into
the steam basket.
2. Place the filled steam basket onto the drip
pan 4in the base 1and set the cover 6onto
the steam basket. Without the cover in place,
both consumption of electrical power and
steaming time increase.
When using both steam baskets, place the
second steam basket with its drip pan on the
lower steam basket.
3. When using the steamer ensure sufficient
vertical and horizontal space to other objects
(shelves etc.).
4. Plug the cord into a mains socket.
5. Set the timer 9. To do this first turn the knob
to 60 minutes and then back to the desired
steaming time. The pilot light 0illuminates and
steaming begins.
6. After the selected steaming time is over, the
appliance switches off automatically, the pilot
light turns off and the bell of the timer is ringing.
7. Check whether the food is cooked. Put on
long kitchen gloves. Switch the appliance off
by turning the knob back to «0». Lift the cover
6being careful of escaping steam. Do not
touch any hot parts. Check the food using a
long fork.
If you want to continue steaming put on the
cover and switch the appliance on again by
turning the knob and setting the remaining time.
When using both steam baskets:
To check whether the food is cooked in the
lower steam basket proceed as follows. Switch
the appliance off and remove the cover 6.
Carefully lift off the upper steam basket (with
the black insert) and place it on the reverse
side of the cover. Then, using kitchen gloves,
carefully remove the drip pan from the lower
steam basket and check whether the food is
cooked.
If you want to continue steaming in both steam
baskets, first place the drip pan onto the lower
steam basket and then put on the upper steam
basket with the cover. Switch on the appliance
again.
8. When the appliance switches itself off and
the food is sufficiently cooked pull the plug and
let the appliance cool off slightly. Then remove
the steam basket, the black rice bowl or the
black insert together with the steam basket,
using kitchen gloves. The reserve side of the
cover 6serves as stand for the steam basket.
Remove the food from the steam basket or the
rice bowl and spice it as desired.
For disassembling see Point 7.
9. The liquids which have dripped into the drip
pan 4can be used for sauces or soup.
10. Before you pour out remaining water
from the base 1, disassemble or clean the
appliance, always let it cool off. Pull the plug.
Water quantities
The water quantity needed depends on the
steaming time. When steaming up to 20 min-
utes fill the base up to the minimum water fill
line 3. When you are steaming longer than
20 minutes, fill to the maximum water fill line 2.
Ensure a sufficient water level, especially if the
steaming time was extended. Should no more
steam develop, please check the water level.
To do so, pull the plug and let the appliance
cool off somewhat. Lift the steam basket and
the drip pan carefully, and add water.
Notice: All parts are designed for use in the
Braun FS 3000 only. Do not put them into
a conventional oven or a microwave oven.
10
2361001IBR_FS3000_S4-134.indd 10 25.06.14 15:26

11
Steaming in the steam basket 5and in the black rice bowl e
Notice: The quantities and processing times are approximate for steaming in one steam basket.
The steaming times listed in the charts also apply when steaming smaller quantities.
When steaming larger quantities the steaming times may be somewhat longer if there is not
enough space to permit sufficient steam circulation.
The steaming times in the upper steam basket are longer. Therefore,
• steam larger pieces or food with longer steaming times in the lower steam basket.
• When steaming different kinds of food with different steaming times: Steam food with a longer
steam time in the lower steam basket. After some time place the steam basket containing food
with a shorter steaming time on top of the lower steam basket for steaming.
Vegetables and fruits
• Cut off thick stems from cauliflower, broccoli and cabbage.
• Steam leafy, green vegeteables for the shortest possible time as they lose colour easily.
• Frozen vegetables should not be thawed before steaming.
Food Type Ca. quantity Steam times
Artichokes fresh 4 (medium) 40–45 min.
Asparagus fresh 500 g 30–40 min.
Beans, runner fresh, whole or sliced 500 g 25–35 min.
Broccoli fresh, florets 500 g 15–20 min.
Brussels sprouts fresh 500 g 20–25 min.
Cabbage fresh, sliced 500 g 25–30 min.
Carrots fresh, sliced 500 g 20–25 min.
Cauliflower fresh, florets 500 g 20–25 min.
Courgettes fresh, sliced 500 g 15–20 min.
Fennel fresh, sliced 500 g 15–20 min.
Kohlrabi fresh, in cubes 500 g 20–25 min.
Leeks fresh, cut 500 g 15–20 min.
Mushrooms, button fresh, whole or sliced 500 g 20–25 min.
(sliced 5 min. less)
Potatoes sliced 500 g 20–25 min.
Potatoes unpeeled 500 g 30–40 min.
Sweetcorn fresh 2 pieces 55–60 min.
(turn frequently)
Apples fresh, 1/8 pieces 500 g 10–15 min.
Pears fresh, 1/6 pieces 500 g 10–15 min.
2361001IBR_FS3000_S4-134.indd 11 25.06.14 15:26

12
Fish and Seafood
• Frozen fish may be steamed without defrosting if separated before steaming, and the steaming
time is extended by approximately 10 %.
Food Type Ca. quantity Steam times
Trout fresh 2 pieces, each 150 g 18–25 min.
Tuna steaks fresh 2 pieces, each 200 g 25–30 min.
Bream fresh, whole 1 piece, 400 g 18–25 min.
Rosefish fillets fresh 2 pieces, each 200 g 15–18 min.
Pollack fillets fresh 2 pieces, each 140 g 15–18 min.
Shrimps frozen 450 g 15–20 min.
Mussels in the shells 1000 g 18–25 min.
Squid frozen 600 g 20–25 min.
Lobsters in the shells 2 pieces 30–35 min.
Meat, Poultry und Eggs
• Tender meat with a little fat ist suited best.
• The meat should be well washed and dabbed dry, so that as little juice as possible drips out.
• Puncture eggs first.
Food Type Ca. quantity Steam times
Turkey cutlets fresh 2 pieces, each 150 g 25–30 min.
Chicken legs fresh 2 pieces, each 150 g 25–30 min.
Veal cutlets fresh 2 pieces, each 150 g 30–35 min.
Lamb chops fresh 2 pieces, each 120 g 25–30 min.
Frankfurter sausages fresh 2–8 (pierce skins) 8–10 min.
Beef sausages fresh 2–8 (pierce skins) 8–12 min.
Eggs soft-boiled in the eggshell 2–10 medium size 10–12 min.
Eggs hard-boiled in the eggshell 2–10 medium size 15–20 min.
Rice, grains, bakes
• Use the black rice bowl eand add the required quantity of liquid together with the rice, grains, etc.
• If you are using both steam baskets please proceed as follows. Pre-steam the rice etc. with its
long steaming time in the rice bowl e– placed into the lower steam basket with the cover 6in
place. After some time place the other steam basket filled with different food on the base 1
(i. e. on the bottom) and continue steaming the rice etc. by moving the steam basket to the top.
Food Ca.
quantity Water level in
the base 1
Liquid level in the
rice bowl e
Steam times
Basmati rice 250 g max. 300–400 ml water 35–40 min.
Long-grain rice 250 g max. 300–400 ml water 35–40 min.
Brown rice 250 g max. 300–400 ml water 45–50 min.
Pudding rice 250 g max. 750 ml milk 60 min.
Indian meal (maize) 250 g max. 750–1000 ml water 20–25 min.
2361001IBR_FS3000_S4-134.indd 12 25.06.14 15:26

Cleaning
Always pull the plug before you clean the
appliance. Except the base 1, all parts can be
cleaned in the dishwasher or by hand with a
commercially available detergent. The steam
accelerator 7can be removed for cleaning.
Wipe the base 1with a damp cloth.
Storage
For easy storage after use, the baskets can be
stacked inside each other w.
Please see the corresponding marks (I & II);
basket I fits into basket II.
The power cord can be stored as shown in
pic. q.
Decalcifying
After you have used your steamer several
times (depending on the water hardness in
your housing area), the heater 8in the base 1
is covered by a layer. The appliance should
now be decalcified. Fill the base with white
household vinegar (5 %) so that the heating
element is just covered. Put the steam accele-
rator 7in place. Close the appliance, connect
it to the mains and set the time to 15 minutes.
Should there still be a layer visible after the
15 minutes are over, repeat the procedure.
After the vinegar and the appliance have
sufficiently cooled off empty the base. Rinse
the base 13 to 4 times with warm water.
Any remaining calcium can be removed from
the steam accelerator with a brush.
Subject to change without notice.
Please do not dispose of the product
in the household waste at the end of its
useful life. Disposal can take place at a
Braun Service Centre or at appropriate
collection points provided in your country.
For UK Only
Guarantee Information
All Braun Household products carry a minimum
guarantee period of two year. The rights and
benefits under this guarantee are additional to
your statutory rights which are not affected.
Please keep your receipt as this will form
the basis of your guarantee.
In the unlikely event of a breakdown you have
access to professional help from our team
simply by calling:
02392 392333
For service in the Republic of Ireland please
call:
012475471
Braun Household undertakes within the
specified period to repair or replace any part
of the appliance, free of charge (with the
exception of any glass or porcelain-ware
incorporated in the product) found to be
defective provided that;
• We are promptly informed of the defect.
• The product is used and maintained in
accordance with the User Instructions.
• The appliance has not been altered in any
way or subjected to misuse or repair by a
person other than an authorised service
agent for Braun Household.
• No rights are given under this guarantee to a
person acquiring the appliance second hand
or for commercial or communal use.
• Any repaired or replaced appliance will be
guaranteed on these terms for the unexpired
portion of the guarantee.
• The need for repair has not been caused by
insufficient aftercare or cleaning: or damage
caused by the chemical or electrochemical
effects of water.
Under no circumstances shall the application
of this guarantee give rise to the complete
replacement of the appliance or entitle the
consumer to damages.
Braun Household, New Lane, Havant,
Hampshire PO9 2NH
www.braunhousehold.co.uk
13
2361001IBR_FS3000_S4-134.indd 13 25.06.14 15:26

Nos produits ont été conçus afin de répondre
aux plus grandes exigences de qualité, de
fonctionnalité et de design. Nous espérons que
vous apprécierez pleinement votre nouveau
produit Braun.
Votre cuiseur-vapeur FS 3000 a été conçu spé-
cifiquement pour cuire légumes, riz, poissons,
viandes et volailles à la vapeur. La cuisson à la
vapeur est la façon la plus saine de préparer vos
aliments. Ainsi, le goût naturel et les couleurs, les
vitamines et les minéraux sont au mieux préservés.
Livre avec attention ce mode d’emploi avant
d’utiliser votre appareil.
Importantes mises en garde
•
Cet appareil peut être utilisé par des
enfants de 8 ans et plus et par des per-
sonnes dont les capacités physiques,
sensorielles ou mentales sont réduites,
ou des personnes dénuées d’expé-
rience ou de connaissance, si elles ont
pu bénéficier, par l’intermédiaire d’une
personne responsable de leur sécurité,
d’une surveillance ou d’instructions
préalables concernant l’utilisation de
l’appareil en toute sécurité et les dan-
gers encourus. Les enfants ne doivent
pas jouer avec l’appareil. Le nettoyage
et l’entretien ne doivent pas être faits
par des enfants, à moins qu’ils ne soient
âgés de plus de 8 ans et qu’ils ne soient
sous surveillance.
•
Les enfants âgés de moins de 8 ans
doivent être tenus à distance de cet
appareil et de son cordon d’alimentation
principal.
•
Toujours débrancher l’appareil quand il
est laissé sans surveillance et avant de le
monter, de le démonter ou de le nettoyer.
•
Ne jamais immerger la base
1
dans
l’eau.
•
Cet appareil est uniquement conçu pour
un usage domestique ainsi que pour
traiter des quantités domestiques nor-
males.
•
Utiliser toujours le panier vapeur
5
avec
le plateau égouttoir
4
.
•
Utiliser toujours le panier de protection
noir
E
pour la cuisson des aliments
colorants tels que carottes, paprika,
tomates, etc… pour réduire au minimum
une éventuelle coloration du panier
vapeur blanc
5
.
•
Retirer toujours du plateau égouttoir 4le
panier à riz noir
e
ou le panier de pro-
tection noir
E
en même temps que la
panier vapeur
5
.
•
Ne jamais saisir ou toucher l’appareil
sans gants de cuisine et ne pas utiliser
l’appareil sans couvercle
6
. Lorsque
vous soulevez le couvercle, tenez le
toujours de façon à ne pas entrer en
contact avec la vapeur ou avec des
gouttelettes d’eau bouillante qui s’en
échapperait. Faire attention aux liquides
chauds dans les plateaux égouttoirs.
•
S’assurer de préserver un espace suffi-
sant autour de l’appareil afin d’éviter
d’endommager objets ou placards
éventuels.
•
Utiliser l’appareil sur une surface plane,
sèche et résistante à la chaleur.
•
Ne jamais placer l’appareil sur une
surface chauffante ou au-dessus d’une
flamme.
•
Les appareils électriques Braun
répondent aux normes de sécurité en
vigueur. Leur réparation ou le change-
ment du cordon d’alimentation doivent
être effectués uniquement par les
Centres Service Agréés Braun (C.S.A. –
voir liste sur le 3615 Braun). Des répara-
tions effectuées par du personnel non
qualifié peuvent causer accidents ou
blessures à l’utilisateur.
Capacité maximum : 1,2 litre d’eau
Description
1Bloc de base
2Niveau maximum de remplissage d’eau
3Niveau minimum de remplissage d’eau
4Plateau égouttoir
14
Français
2361001IBR_FS3000_S4-134.indd 14 25.06.14 15:26

5Panier vapeur avec fentes
EInsert noir (avec fentes) pour le panier de
cuisson à vapeur 5
ePanier à riz noir (sans fentes) pour le panier
vapeur
6Couvercle (transparent)
7Accélérateur de vapeur (amovible)
8Elément chauffant
9Interrupteur marche/arrêt avec minuteur
(60 minutes)
0Voyant de contrôle lumineux pour l’interrup-
teur 9
qCompartiment de rangement du cordon
Notice : bien nettoyer chaque élément avant
la première utilisation. Voir paragraphe
« Nettoyage ».
Cuire à la vapeur
1. Remplir la base 1avec de l’eau froide du
robinet et mettre en place l’accélérateur de
vapeur 7. N’ajouter à l’eau, aucun épice,
sauce, vin etc … La quantité d’eau nécessaire
(maximum ou minimum) dépend du temps de
cuisson sélectionné.
Cuire à l’aide du panier vapeur 5
(ex. légumes, poissons)
Mettre les aliments dans le panier vapeur
avec fentes 5. Ajouter épices une fois la
cuisson terminée.
Toujours utiliser le panier de protection noir
Epour la cuisson des aliments colorants
(par ex. carottes, paprika, tomates etc …)
pour réduire au minimum une éventuelle
coloration du panier vapeur blanc 5.
Lorsqu’on utilise en même temps les 2
paniers vapeur 5, le panier de protection
noir Eou le panier à riz noir ene peut être
utilisé que dans le panier vapeur supérieur.
Cuisson vapeur dans le panier à riz noir e
(riz, aliments allant au four …)
Mettre riz ou céréales dans le panier à riz
avec du liquide si nécessaire. Placer le
panier à riz dans le panier vapeur.
2. Placer le panier vapeur plein sur le plateau
égouttoir 4dans la base 1, et poser le
couvercle 6sur le panier vapeur. Sans le
couvercle, la consommation électrique est plus
grande et la durée de cuisson plus longue.
Lorsqu’on utilise les 2 paniers vapeur en même
temps, placer le deuxième panier, avec son
plateau égouttoir, sur le panier inférieur.
3. Lorsque vous utilisez votre cuiseur vapeur,
assurez-vous qu’il soit suffisamment espacé
d’autres objets (étagères etc …) à l’horizontale
comme à la verticale.
4. Brancher le cordon dans la prise.
5. Régler le minuteur 9. Pour cela tourner le
bouton jusqu’à 60 minutes, puis revenir sur le
temps de cuisson désiré. Le voyant lumineux 0
s’allume et la cuisson vapeur commence.
6. Une fois le temps de cuisson à la vapeur
sélectionné terminé, l’appareil s’éteint auto-
matiquement, le témoin lumineux s’éteint et
l’alarme du minuteur sonne.
7. Vérifiez que les aliments sont cuits. Portez
des gants de cuisine longs. Éteignez l’appareil
en tournant le bouton sur «0». Soulevez le
couvercle 6avec précaution à cause de la
vapeur qui peut s’en échapper. Ne touchez
aucun élément chaud. Vérifiez la cuisson des
aliments en utilisant une longue fourchette.
Si vous souhaitez continuer la cuisson à la
vapeur, remettez le couvercle en place et remet-
tez l’appareil en marche en tournant le bouton
puis sélectionnez un temps de cuisson.
Lorsque les 2 paniers vapeur sont utilisés :
Pour vérifier la cuisson dans le panier vapeur
inférieur, éteindre l’appareil et enlever le cou-
vercle 6. Soulever le panier supérieur avec
précaution (en même temps que le panier de
protection noir) et le poser sur la face creuse
du couvercle. Puis, avec des gants de cuisine,
retirer doucement le plateau égouttoir posé sur
le panier inférieur et vérifier l’avancement de
la cuisson. Pour continuer la cuisson dans les
2 paniers vapeur placer d’abord le plateau
égouttoir sur le panier inférieur puis poser le
panier supérieur avec le couvercle. Remettre
l’appareil en marche.
8. Lorsque l’appareil s’éteint de lui-même et
que la cuisson est bien terminée, le débrancher
et le laisser refroidir légèrement. Puis, toujours
avec des gants de cuisine, retirer le panier
vapeur en même temps que le panier à riz noir
ou que le panier de protection noir. Le côte
creux du couvercle 6sert de repose-plat pour
le panier vapeur. Retirer les aliments du panier
vapeur ou du panier à riz et assaisonner.
Pour le démontage, voir Point 7.
9. Les liquides s’étant écoulés sur le plateau
égouttoir 4peuvent être utilisés comme
sauces/soupes.
10. Avant de retirer l’eau du bloc de base 1
ou pour le nettoyer ou le démonter, toujours le
laisser refroidir. Vérifier de bien le débrancher.
Quantités d’eau
La quantité d’eau nécessaire dépend du temps
de cuisson. Pour une cuisson allant jusqu’à
20 minutes, remplir la base jusqu’à la ligne mini-
mum de remplissage d’eau 3. Pour une cuisson
15
2361001IBR_FS3000_S4-134.indd 15 25.06.14 15:26
16
au-delà de 20 minutes, remplir la base jusqu’à
la ligne maximum de remplissage d’eau 2. Vous
assurer d’avoir un niveau d’eau suffisant, sur-
tout si le temps de cuisson devait être prologné.
Si la vapeur arrêtait de se développer, vérifier le
niveau d’eau. Pour cela, débrancher l’appareil et
laisser le refroidir légèrement. Soulever le panier
vapeur puis le plateau égouttoir avec précauti-
on, puis rajouter de l’eau.
Notice : les éléments de votre cuiseur vapeur
FS 3000 sont conçus pour une utilisation de
cuisson à la vapeur spécifique. Ne pas les utili-
ser dans le four conventionnel ou dans un
micro-ondes.
Cuisson dans le panier vapeur 5et le panier à riz noir e
Note: pour la cuisson dans un seul panier vapeur, les quantités et les temps sont approximatifs.
Les temps mentionnés dans les tableaux s’appliquent également pour la cuisson des petites
quantités. Pour des quantités plus importantes, et s’il n’y a pas suffisamment de place pour la
circulation de la vapeur, rallonger légèrement les temps de cuisson.
Les temps de cuisson dans le panier vapeur supérieur sont plus longs. Il est donc préférable
• de cuire les aliments ou grosses pièces plus longuement que dans le panier inférieur
• si on mélange des aliments nécessitant des temps de cuisson différents, de mettre ceux qui
demandent le temps le plus long dans le panier inférieur. Laisser avancer la cuisson puis placer
les aliments à cuisson rapide sur le dessus du panier inférieur.
Légumes et fruits
• Retirer les tiges épaisses de choux, choux-fleurs et brocolis.
• Cuire les légumes verts à feuilles dans des temps les plus courts, car ils perdent facilement leur
couleur.
• Les légumes surgelés ne doivent pas être préalablement décongelés avant la cuisson.
Aliment Type Quantité Temps de cuisson va-
peur
Artichauts frais 4 (moyen 40/45 mn
Asperges fraîches 500 g 30/40 mn
Pois/haricots frais, entiers ou émincés 500 g 25/35 mn
Brocolis frais 500 g 15/20 mn
Choux de Bruxelles frais 500 g 20/25 mn
Choux frais, émincés 500 g 25/30 mn
Carottes fraîches, émincées 500 g 20/25 mn
Choux-fleurs frais 500 g 20/25 mn
Courgettes fraîches, émincées 500 g 15/20 mn
Fenouil frais, émincé 500 g 15/20 mn
Choux-raves frais, en cubes 500 g 20/25 mn
Poireaux frais, coupés 500 g 15/20 mn
Champignons frais, entiers ou émincés 500 g 20/25 mn (5 mn en
moins si tranchés)
Pommes de terre émincées 500 g 20/25 mn
Pommes de terre avec leur peau 500 g 30/40 mn
Maïs frais 2 épis 55/60 nm (les retourner
fréquemment)
Pommes fraîches, en 8 morceaux 500 g 10/15 mn
Poire fraîche, en 6 morceaux 500 g 10/15 mn
2361001IBR_FS3000_S4-134.indd 16 25.06.14 15:26

17
Poissons et fruits de mer
• Du poissons surgelé peut-être cuit à la vapeur sans décongélation en augmentant le temps de
cuisson (environ 10 %).
Aliment Type Quantité Temps de
cuisson vapeur
Truites fraîches 2 pièces de 150 g 18/25 mn
Steak de thon frais 2 pièces de 200 g 25/30 mn
Dorade fraîche, entière 400 g 18/25 mn
Filets de Rosefish frais 2 pièces de 200 g 15/18 mn
Filets de merlan frais 2 pièces de 140 g 15/18 mn
Crevettes surgelées 450 g 15/20 mn
Moules dans leur coquille 1000 g 18/25 mn
Calamar surgelés 600 g 20/25 mn
Homard entier 2 pièces 30/35 mn
Viandes, volailles et oeufs
• De la viande tendre, peu grasse, en tranche très fine convient le mieux à ce type de cuisson.
• La viande doit être lavée et bien séchée afin d’éviter tout risque d’écoulement de jus du panier
vapeur.
Aliment Type Quantité Temps de
cuisson vapeur
Escalopes de dinde fraîches 2 pièces de 150 g 25/30 mn
Cuisses de poulet fraîches 2 pièces de 150 g 25/30 mn
Côtes de veau fraîches 2 pièces de 150 g 30/35 mn
Côtelettes d’agneau fraîches 2 pièces de 120 g 25/30 mn
Saucisses de Francfort fraîches 2/8 (percer la peau) 8/10 mn
Saucisses de boeuf fraîches 2/8 (percer la peau) 8/12 mn
Oeufs mollets dans leur coquille 2/10 taille moyenne 10/12 mn
Oeufs durs dans leur coquille 2/10 taille moyenne 15/20 mn
Riz, céréales, aliments allant au four
• Utiliser le panier à riz noir een ajoutant la quantité nécessaire de liquide aux riz, céréales, etc …
• Lorsqu’on utilise les 2 paniers vapeur en même temps, commencer la cuisson du riz (ou céréales,
etc …), plus longue, dans le panier à riz eplacé dans le panier vapeur inférieur avec le couvercle
6. Laisser avancer la cuisson. Puis retirer le panier vapeur, placer le deuxième panier avec les
aliments sur la partie inférieure 1(c’est-à-dire le socle de l’appareil) et poursuivre la cuisson du
riz, etc … en reposant le panier vapeur sur le dessus.
Aliment Quantité Niveau d’eau Niveau d’eau Temps de
dans la base 1dans le panier à riz ecuisson vapeur
Riz Basmati 250 g max 300/400 ml d’eau 35/40 mn
Riz long 250 g max 300/400 ml d’eau 35/40 mn
Riz complet 250 g max 300/400 ml d’eau 45/50 mn
Riz au lait 250 g max 750 ml de lait 60 mn
Maïs (repas indien) 250 g max 750/1000 ml d’eau 20/25 mn
2361001IBR_FS3000_S4-134.indd 17 25.06.14 15:26
Nettoyage
Toujours débrancher l’appareil avant de le
nettoyer. A part le bloc de base 1, tous les
éléments peuvent être nettoyés au lave-vais-
selle ou à la main avec des détergents usuels.
L’accélérateur de vapeur 7peut être retiré
pour être nettoyé. Nettoyer la base 1en
l’essuyant à l’aide d’un chiffon humide.
Rangement
Pour un rangement simple après utilisation, les
paniers peuvent être empilés les uns dans les
autres w.
Suivez les marquages correspondants (I & II) ;
le panier I s’empile dans le panier II.
Le cordon d’alimentation peut être rangé
comme illustré q.
Détartrage
Aprés avoir utilisé le cuiseur vapeur pendant
un certain temps (et selon que l’eau de votre
région soit plus ou moins calcaire), une couche
de calcaire recouvre l’élément chauffant 8du
bloc de base 1. L’appareil doit alors être
détartré.
Remplir la base de vinaigre blanc de façon à
recouvrir l’élément chauffant. Mettre l’accé-
lérateur de vapeur 7en place. Recouvrir l’appa-
reil, brancher le cordon et sélectionner le temps
de cuisson à 15 minutes. Si la couche de
calcaire est toujours visible après 15 minutes,
recommencer l’opération. Une fois l’appareil
et le vinaigre refroidis, vider la base. Rincer
cette dernière 13 à 4 fois avec de l’eau tiède.
Le calcaire restant peut être retiré de l’accélé-
rateur de vapeur à l’aide d’une brosse.
Sauf modifications.
A la fin de vie de votre appareil, veuillez
ne pas le jeter avec vos déchets
ménagers. Remettez-le à votre Centre
Service agréé Braun ou déposez-le
dans des sites de récupération appropriés
conformément aux réglementations
locales ou nationales en vigueur.
18
2361001IBR_FS3000_S4-134.indd 18 25.06.14 15:26

Nuestros productos están desarrollados para
alcanzar los más altos standards de calidad,
funcionalidad y diseño. Esperamos que de ver-
dad disfrute de su nuevo pequeño electrodo-
méstico Braun.
Su Braun FS 3000 está especialmente pensado
para cocinar al vapor todo tipo de verduras,
arroces, pescados, carnes y aves.
La cocina al vapor es la forma más ligera y más
sana de cocinar. Mantiene las vitaminas, el sabor
y el color natural de los alimentos, y a su vez se
eliminan todas las grasas pesadas e indigestas.
Lea atentamente el folleto de instrucciones
antes de utilizar este aparato.
Atención
•
Este aparato puede ser utilizado por
niños a partir de los 8 años y personas
con capacidades físicas, sensoriales
o mentales reducidas o con falta de
experiencia y conocimiento si se les
ha dado la supervisión o instrucciones
adecuadas para el uso seguro del
aparato y entienden los riesgos que
implica. Los niños no deberían jugar
con el aparato. Los niños no deberían
realizar la limpieza y el mantenimiento
del aparato a no ser que sean mayores
de 8 años y lo hagan bajo supervisión.
•
Los niños menores de 8 años deben
mantenerse alejados del aparato y
su cable principal.
•
Desconecte siempre el dispositivo
de la toma de corriente si lo deja
desatendido y antes de los procesos
de montaje, desmontaje o limpieza.
•
Nunca debe sumergir la base del
aparato
1
en agua u otros líquidos.
•
Este dispositivo está diseñado exclu-
sivamente para uso doméstico y
para procesar cantidades normales
en el ámbito doméstico.
•
Cuando utilice el contenedor de ali-
mentos
5
siempre debe estar colo-
cada la bandeja recogedora
4
.
•
Utilice siempre el contenedor oscuro
adicional
E
cuando cocine al vapor
alimentos de colores fuertes (como
por ejemplo zanahorias, pimienta,
tomate, etc …), con el fin de minimi-
zar la decoloración permanente del
contenedor de alimentos
5
.
•
Retire el recipiente oscuro del arroz
e
o el contenedor oscuro adicional
E
siempre junto con el contenedor
de alimentos
5
.
•
Evite tocar el aparato sin usar mano-
plas, y nunca lo utilice la tapa
6
.
Siempre que retire la tapa, hágalo por
las asas para evitar quemarse con el
vapor o el goteo de agua caliente.
Tenga cuidado con los líquidos
calientes que quedan en la(s) ban-
deja(s) recogedora(s).
•
Cuando utilice el aparato, asegúrese
de tener suficiente espacio por encima
y alrededor del mismo, con el fin de
evitar que el vapor dañe por ejemplo
armarios u otros objetos.
•
Al usar el aparato, éste debe estar
sobre una superficie seca, nivelada
y resistente al calor.
•
Nunca coloque el aparato sobre una
superficie caliente ni encima del fuego.
•
Los aparatos eléctricos Braun cumplen
con las normas internacionales de
seguridad. Las reparaciones o la
sustitución del cable eléctrico deben
ser realizadas por un Servicio de
Asistencia Técnica autorizado. Las
reparaciones realizadas por personal
no autorizado pueden causar acci-
dentes o daños al usuario.
Capacidad máxima: 1,2 litros de agua
Descripción
1Base
2Nivel máximo de llenado de agua
3Nivel mínimo de llendao de agua
4Bandeja recogedora
5Contenedor de alimentos con aberturas
EPieza de inserción negra (con ranuras) para
el cestillo de vapor 5
19
Español
2361001IBR_FS3000_S4-134.indd 19 25.06.14 15:26

eRecipiente oscuro especial para preparar
arroz (sin aberturas) para insertar en el
contenedor de alimentos
6Tapa (transparente)
7Acelerador de vapor (se puede retirar)
8Resistencia
9Interruptor de puesta en marcha con tempo-
rizador (60 minutos)
0Luz piloto del interruptor 9
qRecogecables para guardar la cantidad de
cable que no necesite
Nota: Limpie todas las partes del aparato antes
del primer uso tal y como se describe en el
apartado «Limpieza».
Cocción al vapor
1. Llene la base 1con agua corriente fría y
coloque el acelerador de vapor 7en su lugar.
No añada sal ni ningún tipo de especias, ni sal-
sas, ni vino, etc … La cantidad de agua nece-
saria (nivel máximo o mínimo) depende del
tiempo de cocción seleccionado.
Cocinar al vapor en el contenedor de alimen-
tos 5(por ejemplo, verduras, pescados)
Coloque los alimentos en el contenedor con
aberturas 5.
Añada sal, especias una vez haya finalizado
la cocción al vapor, nunca antes.
Utilice siempre el contenedor oscuro adicio-
nal Ecuando cocine al vapor alimentos
de colores fuertes (como por ejemplo zana-
horias, pimienta, tomate, etc …), con el fin
de minimizar la decoloración permanente del
contenedor de alimentos 5.
Cuando utilice ambos contenedores de ali-
mentos 5, el contenedor oscuro adicional E
o el recipiente oscuro para el arroz eúnica-
mente debe usarse dentro del contenedor
de alimentos superior.
Cocinar al vapor en el recipiente oscuro
para el arroz e
Coloque el arroz y, si lo desea, un líquido en
el recipiente especial para preparar arroz.
Ponga este recipiente dentro del contenedor
de alimentos 5.
2. Coloque el contenedor con los alimentos
sobre la bandeja recogedora 4en la base 1y
tape dicho contenedor con la tapa transpa-
rente 6. Sin la tapa colocada, la consumición
de potencia eléctrica sería muy alta y el tiempo
de cocción se alargaría mucho.
Cuando utilice ambos contenedores del
alimentos 5, coloque el segundo de ellos con
su bandeja recogedora encima del otro
contenedor de alimentos.
3. Cuando use el aparato, asegúrese de que
tenga suficiente espacio por encima y
alrededor del mismo (lejos de estanterías,
armarios, etc …).
4. Conecte el aparato a la red.
5. Seleccione el tiempo mediante el tempori-
zador 9(ver tiempos de cocción recomen-
dados). Gírelo hasta el máximo (60 minutos) y
retroceda hasta el tiempo de cocción deseado.
La luz piloto 0se iluminará y la cocción al
vapor se habrá iniciado.
6. Cuando pase el tiempo seleccionado de
cocción al vapor, el dispositivo se apaga auto-
máticamente, la luz piloto se apaga y suena el
timbre del temporizador.
7. Compruebe que se han cocido los alimen-
tos. Use guantes largos de cocina. Apague el
dispositivo poniendo el botón de control de
nuevo en «0». Levante la tapa 6teniendo cui-
dado con el vapor que sale. No toque ningún
componente caliente. Compruebe los alimen-
tos utilizando un tenedor largo.
Si desea continuar cociendo los alimentos al
vapor, coloque la tapa y vuelva a encender el
dispositivo girando el botón de control y confi-
gurando el tiempo restante.
Cuando utilice los dos contenedores de
alimentos: para vomprobar si los alimentos del
contenedor inferior están bien hechos proceda
de la siguiente manera.
Desconecte el aparato y retire la tapa 6.
Con cuidado retire contenedor de alimentos
superior (con el contenedor oscuro adicional
si lo ha utilizado) y déjelo apoyado sobre la
parte interior de la tapa especialmente dise-
ñada para ello. Después, utilizando manoplas,
retire la bandeja recogedora que está encima
del contenedor inferior y compruebe si los
alimentos ya están cocidos. Si desea continuar
la cocción con los dos contenedores de ali-
mentos, coloque primero la bandeja recoge-
dora sobre el contenedor inferior y encima el
contenedor superior con la tapa. Vuelva a
conectar el aparato.
8. Cuando el aparato se haya desconectado
automáticamente y los alimentos estén bien
hechos, desenchúfelo de la red, y deje que
se vaya enfriando lentamente. Después,
retire el contenedor de alimentos junto con
el recipiente oscuro para el arroz si ha sido
utilizado, utilizando siempre las manoplas. La
parte interior de la tapa 6sirve como soporte
para el contenedor de alimentos. Retire los
alimentos del contenedor o del recipiente para
el arroz añada sal y/o especias si lo desea.
Para retirar los contenedores ver punto 7.
20
2361001IBR_FS3000_S4-134.indd 20 25.06.14 15:26
This manual suits for next models
2
Table of contents
Other Braun Electric Steamer manuals
Popular Electric Steamer manuals by other brands

Eureka
Eureka 350 Series owner's guide

Optimum
Optimum PR-0750 operating instructions

Bosch
Bosch CDG634B.1B instruction manual

Chicco
Chicco CuociPappa Natural Instructions for use

Maxwell
Maxwell MW-1201 Manual instruction

Market Forge Industries
Market Forge Industries ST-6-TGG Installation, operation and maintenance manual