Operating instructions
diesel locomotive BR 232 – N
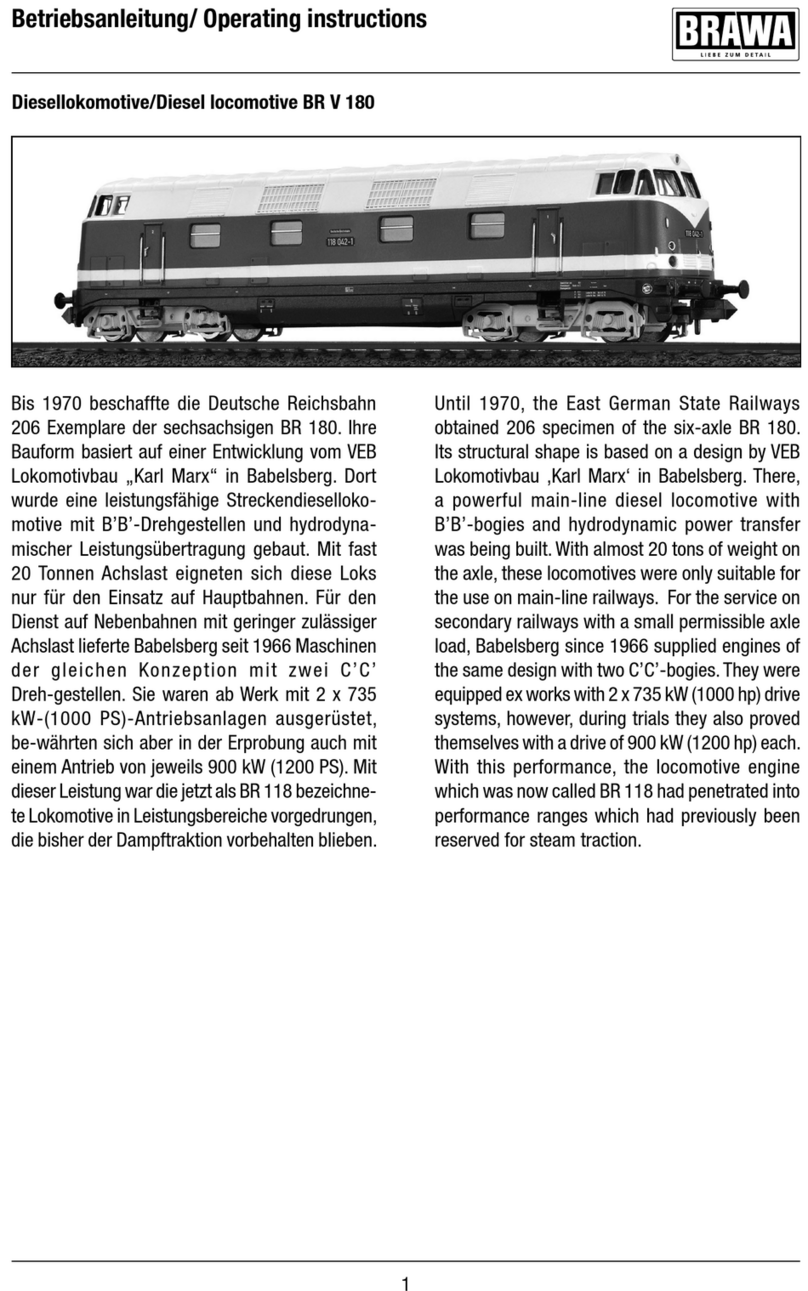
The diesel-electric passenger train locomotive 232
impressively unites the creativity of railway design-
ers from the Soviet Union and the former German
Democratic Republic. This experience you can now
relive on your model railroad with the imposing
BRAWA 232 series model. The developmental history
of these 2200 kW strong diesel locomotives starts
with the thorough optimization of the Russian pre-
stages 130 and 131 by order of the East German
State Railways. The task was to satisfy the require-
ments of the heavy passenger train service on the
main lines of the East German State Railways. For
this reason it was e.g. necessary to extend the vehicle
length to LOB= 20.820 mm for the purpose of
installing the electric train heating facility. Further
modifications concerned the diesel engine’s speed
governor, the driver’s cab heating, the preheating
device as well as the wiring of the electropneumatic
brake. In 1973, the first delivery of the 132 series,
later renamed 232, by the Soviet diesel locomotive
factory „October Revolution“ in Woroschilowgrad to
the East German State Railways commenced with
initially 42 vehicles. On the 22nd of July 1983, the
procurement of this up to 140 km/h fast series which
had proven immensely competent in the field, was
concluded with the ceremonial handing over of a
locomotive to the engine shed Reichenbach. With
its exceptional resemblence to the model, the
BRAWA heavy diesel locomotive model of the 232
now offers you the opportunity to perfectly recon-
struct the renewal programme of the East German
State Railways on your H0-model railroad.
Mode d’emploi de la
locomotive diesel BR 232 – N
Les constructeurs des chemins de fer de l’Union
soviétique et de l’ancienne RDA ont conjugué leur
énergie de création d’une façon impressionnante
dans les locomotives 232 électro-diesel des trains
de voyageurs : vous pouvez en constater le résultat
sur le modèle imposant BRAWA de la série 232 qui
se trouve dans votre installation miniature. L’histoire
du développement de ces puissantes loco à moteur
diesel de 2200 kW a commencé avec ‘optimisation
systématique des modèles prédécesseurs russes
130 et 131, réalisés pour les Chemins de fer
allemands. La mission était de couvrir les besoins
de l’important service de trains de voyageurs sur
les lignes principales de la RDA. C’est ainsi que par
ex. En vue du montage du dispositif de chauffage
électrique des trains, il fallait que la longueur des
véhicules soit augmentée à LÜP = 20.820 mm.
2 3 4 5 6 7 8
Istruzioni per l’uso
Locomotiva diesel BR 232 – N
Nella locomotiva 232 per treni viaggiatori
dieselelettrici, i costruttori ferroviari dell’Unione
Sovietica e della Germania dell’Est hanno combinato
la loro forza creativa realizzando una locomotiva di
grande effetto. Adesso potrete rivivere questa
esperienza sul vostro plastico con l’imponente
modello della ditta BRAWA della serie 232. La storia
dello sviluppo di questa potente locomotiva Diesel
da 2200 kW, iniziò con l’ordine della Deutsche
Reichsbahn di ottimizzare radicalmente i modelli
russi 130 e 131. Il compito era di coprire il
fabbisogno della DR nel servizio di treni pesanti per
viaggiatori sui tratti principali. Per esempio per
integrare l’impianto di riscaldamento elettrico si è
dovuta aumentare la lunghezza del veicolo – a lun-
ghezza tra i respingenti = 20.820 mm. Le altre
modifiche hanno interessato il regolatore di velocità
del motore Diesel, il riscaldamento della cabina del
macchinista, l’apparecchio di preriscaldamento
nonché l’integrazione del freno elettropneumatico.
Nel 1973 iniziò la prima fornitura alla DR con 42
veicoli della serie 132, più tardi ribattezzata 232, da
parte della fabbrica di locomotive Diesel sovietica
“Rivoluzione d’ottobre” a Woroschilowgrad. Il 22
luglio 1983 è stato concluso l’acquisto di questa serie
estremamente veloce 140 km/h, già
comprovatissima, con la cerimoniosa consegna della
locomotiva alla Bw Reichenbach. Con il modello di
locomotiva Diesel pesante 232 della BRAWA avete
finalmente la possibilità di ricostruire perfettamente
sul vostro plastico H0 il programma di rinnovo della
Deutsche Reichsbahn.
Inhaltsverzeichnis
Contents
Benennung Seite
Allgemeine Hinweise ................................... 5
Wartungsarbeiten
• 1. Gehäuse demontieren ......................... 6
• 2. Motor tauschen ................................... 6
• 3. Platine tauschen,
Glühbirnenwechsel .............................. 6
• 4. Drehgestell ausbauen,
Haftreifen erneuern
Kupplungsschacht tauschen ................ 6
• 5. Ölen..................................................... 9
Ersatzteilliste ..................................... 10 – 13
Bestellbeispiel ............................................ 12
Description Page
General information ..................................... 5
Maintenance works
• 1. Dismantling the body .......................... 8
• 2. Exchanging the motor ......................... 8
• 3. Exchanging the pc-board,
exchanging the bulb ............................ 8
• 4. Dismantling the bogie,
renewing the adhesion tyres,
exchanging the coupling shaft ............. 8
• 5. Lubrication .......................................... 9
Spare parts list .................................. 10 – 13
Order example ........................................... 13
Allgemeine Montage- und
Sicherheitshinweise
• Diese Bedienungsanleitung beschreibt
sämtliche Arbeitsvorgänge die zur Wartung
und Instandhaltung notwendig sind. Bitte
lesen Sie diese Bedienungsanleitung bevor
Sie mit den Arbeiten beginnen.
• Bei unsachgemäßem Umgang mit
elektrischen Bauteilen können diese zerstört
werden.
Für entsprechende Arbeiten (z.B. Platinen-
wechsel) können Sie sich an Ihren
Fachhändler oder den Hersteller wenden.
• Bei den folgenden Wartungsarbeiten ist die
jeweilige Demontage beschrieben, der
Zusammenbau ist in umgekehrter
Reihenfolge auszuführen.
• Achten Sie beim Zerlegen der Lokomotive
auf die Einbaulage der entsprechenden
Bauteile. Wird ein Bauteil falsch eingebaut
kann dieses zerstört werden oder es kommt
zu Funktionsstörungen im Betrieb.
General assembly and safety
information
• These operating instructions describe all
work steps necessary for maintenance and
repair. Please read these operating
instructions carefully before you start with
your work.
• In the case of incorrect handling of
electrical components, they may be
destroyed. Please ask your specialist dealer
to help with the necessary work
(e.g. changing circuit boards).
• In the case of maintenance work, the
disassembly is described below, to re-
assemble the tractor reverse the work
steps.
• When dismantling the engine make a note
of the mounted position of the individual
parts. An incorrectly mounted part can be
destroyed or operation can be disrupted.
Wartungsarbeiten
1. Gehäuse demontieren (Fig. 1)
Puffer (1) nach vorn abziehen, Gehäuse (2)
leicht spreizen und nach oben abnehmen.
2. Motor tauschen (Fig. 1)
Gehäuse demontieren, siehe Punkt 1.
Snap-in (3) beider Motorhalterungen nach
innen drücken, Motor (4) mit anhängender
Kardanwelle nach oben herausziehen.
3. Platine tauschen, Glühbirnen wechseln
(Fig. 1)
Motor ausbauen, siehe Punkt 2.
Snap-in (5) des Gewichtes mit kleinem
Schraubenzieher lösen, Gewicht (6)
abnehmen. Snap-in (7) beider Drehgestell-
halterungen nach innen drücken und
Drehgestellhalterung (8) nach oben
abnehmen.
Achtung:
Nach Abnehmen der Drehgestellhalterung
fällt das Drehgestell nach unten heraus.
Befestigungsschraube (9) der Platine
herausdrehen und Platine (10) abnehmen.
Jetzt kann die Glühbirne (11) an der
Unterseite der Platine abgelötet werden.
4. Drehgestell ausbauen, Haftreifen
erneuern, Kupplungsschacht tauschen,
(Fig. 1)
- Drehgestell ausbauen
Gehäuse demontieren, siehe Punkt 1.
Snap-in (7) der entsprechenden Drehgestell-
halterungen nach innen drücken und
Drehgestellhalterung (8) nach oben
abnehmen. Das Drehgestell (12) lässt sich
jetzt nach unten herausziehen.
- Haftreifen erneuern
Snap-in (13) lösen und Drehgestell umdre-
hen, Räder müssen nach oben zeigen.
Rahmen (14) abnehmen, jetzt sind die Räder
frei zugänglich und die Haftreifen (15) können
erneuert werden.
- Kupplungsschacht tauschen
Kupplungsschacht (16) mit Kupplung (17)
ausclipsen. Kupplung aus Kupplungsschacht
ausclipsen.
2
9
10
11
136
5
Clip
Ansicht X
1
13 15
Clip
14
16
17 Clip
Ansicht X
7
8
12
13
Clip
1
4
Fig. 1 Maintenance works
1. Dismantling the body (fig. 1)
Remove the buffers (1) by pulling them
forwards. Spread the body (2) slightly apart
and lift off.
2. Exchanging the motor (fig. 1)
Dismantle the body (see point 1). Press in the
snap-in catches (3) of the two motor holders.
Lift out the motor (4) with attached cardan
shaft.
3. Exchanging the pc-board -
Exchanging the bulb (fig. 1)
Dismantle the motor (see point 2).
Release the snap-in catch (5) with a small
screwdriver. Remove the weight (6). Press in
the snap-in catches (7) of both bogie holders
and lift out the bogie holder (8).
WARNING:
The bogie will fall out at the bottom when
the bogie holder is lifted out.
Unscrew the fastening screw (9) of the
pc-board (10). The bulb (11) underneath
the pc-board can now be unsoldered.
4. Dismantling the bogie - Renewing the
adhesion tyres - Exchanging the coupling
shaft (fig. 1)
- Dismantling the bogie
Dismantle the body (see point 1). Press in the
snap-in catches (7) of the corresponding
bogie holders and lift-out the bogie holder
(8). The bogie (12) can be easily pulled out
downwards.
- Renewing the adhesion tyres
Release the snap-in catch (13) and turn over
the bogie; the wheels must be facing
upwards. Remove the frame (14). The wheels
are now freely accessible so that the adhesion
tyres (15) can be renewed.
- Exchanging the coupling shaft
Unclip the coupling shaft (16) with coupling
(17). Unclip the coupling from the coupling
shaft.
D’autres modifications concernèrent la régulation du
régime du moteur diesel, le chauffage de la cabine
du conducteur, l’appareil de préchauffage ainsi que
la commande du frein électro-pneumatique.
« Révolution d’Octobre », usine soviétique de fabri-
cation de locomotives à moteur diesel se trouvant à
Woroschilowgrad, commença en 1973 par livrer à
la RDA 42 premiers véhicules de la série 132 qui,
plus tard, fut désignée par 232. Le 22 juillet 1983,
l’approvisionnement de cette série d’une vitesse
allant jusqu’à 140 km/h, ayant fait ses preuves
prodigieusement, se termina par la cérémonie de
remise de loco à la Bw Reichenbach. Ce lourd
modèle de loco à moteur diesel de la série 232 de
BRAWA vous donne enfin maintenant l’occasion
extrêmement exemplaire de pouvoir reconstruire
parfaitement le programme de renouveau de la RDA
sur votre trafic ferroviaire H0.
1


