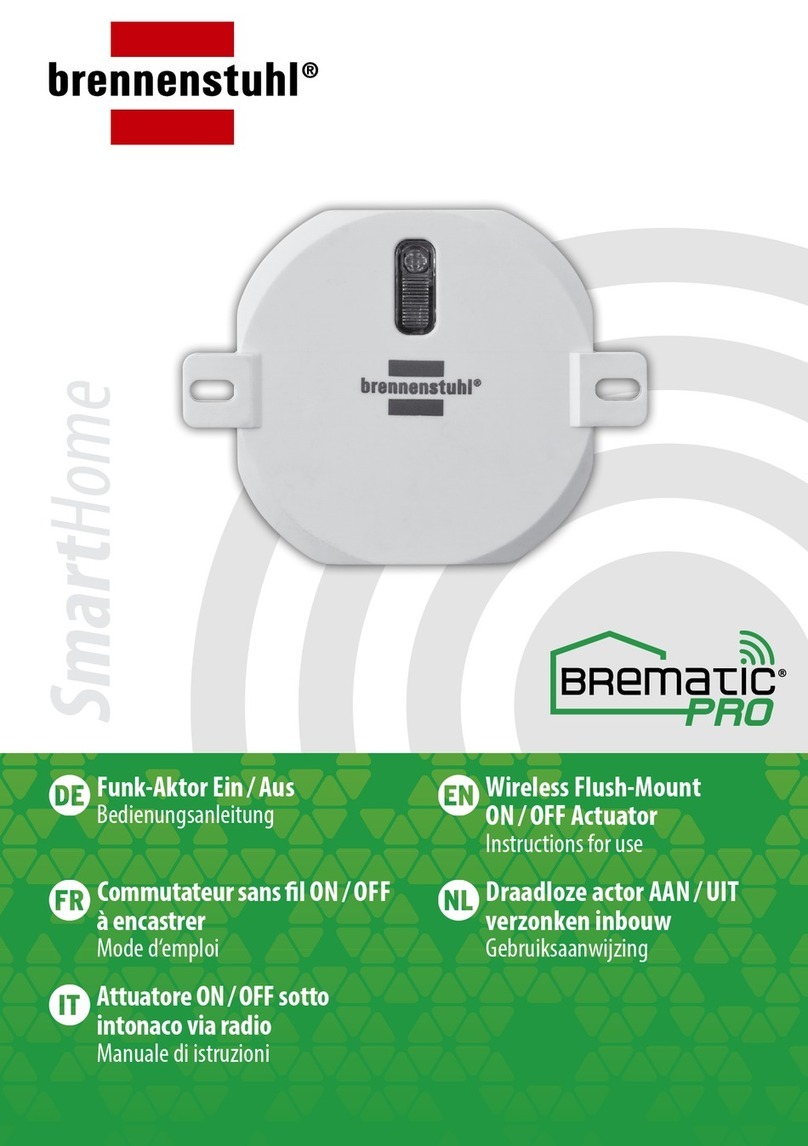
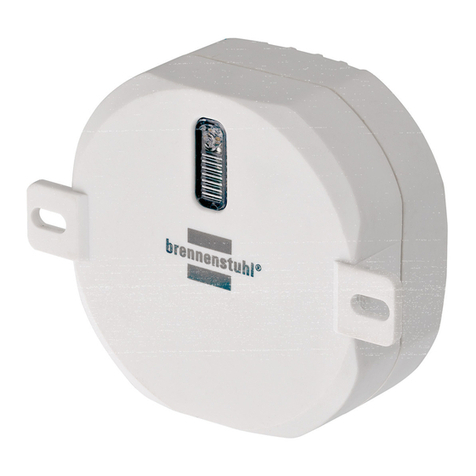
brennenstuhl BREMATIC PRO 1294710 User manual

SmartHome
Funk-Aktor mit
Schalteranbindung
Bedienungsanleitung
Commutateur sans l ON/OFF
avec raccordement interrupteur
Mode d‘emploi
Attuatore sotto intonaco
con interruttore
Manuale di istruzioni
Wireless Flush-Mount Actuator
with Switch Wiring
Instructions for use
Draadloze actor met schakelaar
koppeling verzonken inbouw
Gebruiksaanwijzing

DE Bedienungsanleitung ..............................................................................Seite 3
EN Instruction................................................................................................Page 9
FR Mode d‘emploi.........................................................................................Page 15
NL Gebruiksaanwijzing................................................................................. Pagina 21
IT Manuale di istruzioni............................................................................... Pagina 27

DE 3
Funk-Aktor mit Schalteranbindung 868.3 MHz
Legende der verwendeten Piktogramme........................................................................................................................Seite 4
Sicherheitshinweise..........................................................................................................................................................................Seite 4
Bestimmungsgemäße Verwendung....................................................................................................................................Seite 4
Informationen zum Funkbetrieb............................................................................................................................................Seite 4
Duty Cycle......................................................................................................................................................................................................Seite 5
Lieferumfang..........................................................................................................................................................................................Seite 5
Technische Daten.................................................................................................................................................................................Seite 5
Geräteübersicht.....................................................................................................................................................................................Seite 5
Vorderseite....................................................................................................................................................................................................Seite 5
Anschlüsse.....................................................................................................................................................................................................Seite 5
Funktion......................................................................................................................................................................................................Seite 5
Montage......................................................................................................................................................................................................Seite 6
App/ PC-Software BrematicPRO herunterladen.........................................................................................................Seite 6
Funk-Aktor mit Schalteranbindung an BrematicPRO Funk-Fernbedienung anlernen...............Seite 6
Kopplung löschen................................................................................................................................................................................Seite 7
Funk-Aktor mit Schalteranbindung an den BrematicPRO Gateway anlernen...................................Seite 7
Werkseinstellungen wiederherstellen...............................................................................................................................Seite 7
Gerät reinigen.........................................................................................................................................................................................Seite 7
Fehlerbehebung...................................................................................................................................................................................Seite 8
Entsorgung................................................................................................................................................................................................Seite 8
Service...........................................................................................................................................................................................................Seite 8
Hersteller....................................................................................................................................................................................................Seite 8
Konformitätserklärung...................................................................................................................................................................Seite 8
Inhaltsverzeichnis

4DE
Funk-Aktor mit Schalteranbindung 868.3 MHzFunk-Aktor mit Schalteranbindung 868.3 MHz
Legende der verwendeten Piktogramme
Bedienungsanleitung lesen! Vorsicht! Brandgefahr!
Warn- und Sicherheitshinweise beachten! Entsorgen SieVerpackung und Gerät
umweltgerecht!
Vorsicht! Stromschlaggefahr!
Sicherheitshinweise
Die Bedienungsanleitung istTeil dieses Produkts.
Sie enthält wichtige Hinweise für Sicherheit, Ge-
brauch und Entsorgung. Machen Sie sich vor der
Benutzung des Gerätes mit allen Bedien- und Sicherheitshin-
weisen vertraut. Benutzen Sie das Gerät nur wie beschrieben
und für die angegebenen Einsatzbereiche. Händigen Sie alle
Unterlagen beiWeitergabe des Gerätes an Dritte mit aus.
WARNUNG! LEBENS- UND UNFALLGEFAHR FÜR
KLEINKINDER UND KINDER! Lassen Sie Kinder niemals unbe-
aufsichtigt mit demVerpackungsmaterial. Es besteht Erstickungs-
gefahr durchVerschlucken oder Einatmen von Kleinteilen oder
Folien. Kinder unterschätzen häug die Gefahren. Halten Sie
Kinder stets vom Gerät fern. Es ist kein Spielzeug.
Dieses Gerät kann von Kindern ab 8 Jahren und darüber sowie von
Personen mit verringerten physischen, sensorischen oder men-
talen Fähigkeiten oder Mangel an Erfahrung undWissen benutzt
werden, wenn sie beaufsichtigt oder bezüglich des sicheren
Gebrauchs des Gerätes unterwiesen wurden und die daraus re-
sultierenden Gefahren verstehen. Kinder dürfen nicht mit dem
Gerät spielen. Reinigung und Benutzerwartung dürfen nicht
von Kindern ohne Beaufsichtigung durchgeführt werden.
Betreiben Sie das Gerät nur in trockener und staubfreier
Umgebung.
Betreiben Sie das Gerät nur in Innenräumen.
Setzen Sie das Gerät keinen ungünstigen Einüssen aus, wie
• Feuchtigkeit,
• ständiges Sonnenlicht,
• Wärmeeinstrahlung,
• Kälte,
• Vibrationen.
VORSICHT! VERLETZUNGSGEFAHR!
Bei Sach- oder Personenschäden, die durch unsachgemäße
Hand-
habung oder Nichtbeachten der Sicherheitshinweise verursacht
werden, übernehmen wir keine Haftung! In solchen Fällen erlischt
die Gewährleistung/Garantie!
Eine andereVerwendung als in dieser Anleitung beschrieben,
führt zur Beschädigung des Gerätes. Nehmen Sie keine bauliche
Veränderung am Gerät vor. Andernfalls kann ein sicherer Betrieb
nicht gewährleistet werden.
STROMSCHLAGGEFAHR!
Önen Sie nicht das Gehäuse. Das Gerät enthält keine zu
wartendenTeile. Im Fehlerfall kontaktieren Sie den Service.
Arbeiten am Stromnetz ausschließlich im spannungsfreien
Zustand durch eine Elektrofachkraft durchführen lassen.
Haben Sie keine Fachkenntnisse, nehmen Sie die Montage
keinesfalls selbst vor, sondern beauftragen Sie einen Fachmann.
Nehmen Sie das Gerät bei sichtbaren Schäden nicht in Betrieb.
BRANDGEFAHR!
Die Installation des Produkts darf nur durch eine qualizierte
Elektrofachkraft (z. B. Elektriker) erfolgen, die mit den einschlägigen
Vorschriften (z. B.VDE) vertraut ist.
Schließen Sie keine Endgeräte an das Gerät an, deren unbeauf-
sichtigtes Einschalten Brände oder andere Schäden verursachen
könnte (z. B. Bügeleisen).
Schalten Sie das Gerät nicht unkontrolliert und nicht ohne Aufsicht.
Vermeiden Sie eine Überlastung des Gerätes.
Bei Überlastung kann Brandgefahr oder Schaden am Gerät
auftreten. Die maximale Belastbarkeit beträgt 400W.
Bestimmungsgemäße Verwendung
Der Funk-Aktor mit Schalteranbindung dient ausschließlich dazu,
am Funk-Aktor angeschlosseneVerbraucher in trockenen Innen-
räumen ein- und auszuschalten.
Informationen zum Funkbetrieb
Dieses Gerät arbeitet mit dem 868.3 MHz proprietären Funkprotokoll.
DieFunkübertragung wird auf einem nicht exklusiven Übertragungs-
weg realisiert, daher können Störungen nicht ausgeschlossen werden.

DE 5
Funk-Aktor mit Schalteranbindung 868.3 MHzFunk-Aktor mit Schalteranbindung 868.3 MHz
Die Reichweite in Gebäuden kann stark von der im Freifeld abweichen.
Außer der Sendeleistung und Empfangseigenschaften der Empfänger
spielen Umwelteinüsse wie z. B. Luftfeuchtigkeit neben baulichen
Gegebenheiten vor Ort eine wichtige Rolle.
Die Reichweite kann teils beträchtlich verringert werden durch:
• Wände aus Holz, Gips, Beton, Stahlbeton
• Nähe zu metallischen und leitenden Gegenständen
• Breitbandstörungen z. B. inWohngebieten (DECT-Telefone, Mobil-
telefone, Funkkopfhörer, Funklautsprecher, Funk-Wetterstationen,
Baby-Überwachungssysteme)
• Nähe zu elektrischen Motoren,Trafos, Netzteilen, Computern
Duty Cycle
Der Duty Cycle bezeichnet eine gesetzlich geregelte Sendezeitbegren-
zung von Geräten, die im 868 MHz Bereich senden. Dadurch soll ein
reibungsloser Betrieb der im 868 MHz Bereich arbeitenden Geräte
gewährleistet werden. Die maximale Sendezeit eines jeden Gerätes
beträgt 1% einer Stunde (entspricht 36 Sekunden/ Stunde). Nach
Erreichen des 1 %-Limits kann nicht gesendet werden, bis zeitliche
Begrenzung des Duty Cycles beendet ist, sprich nach einer Stunde.
Lieferumfang
1x Funk-Aktor mit Schalteranbindung
1x Kurzanleitung
1x Bedienungsanleitung (digital, als Download)
Technische Daten
Bezeichnung Produkt: UPMS 868 01W400 3726
Art. Nr.: 1294710
Funk-Frequenz: 868.3 MHz
Frequenzband: 868.1 - 868.5 MHz
Max. Sendeleistung: < 20mW
Duty Cycle: < 1% pro h
Versorgungsspannung: 230V/ AC, 50Hz
Schaltleistung max.: 400W
Stromaufnahme: 1,3W
Umgebungstemperatur: 0°C bis 35°C
Schutzart: IP00
Reichweite Freifeld: ca. 100m
Abmessungen (B x H xT): 52 x 49,5 x 16,9mm
Gewicht: 30g
Technische Änderungen vorbehalten.
Geräteübersicht
Vorderseite
Geräte-LED
Litzendrähte, zum
Verbinden mit dem
Schalter (keinTaster)
Anlern-Taste
Anschlüsse
LAnschluss Außenleiter
L 230V Phase (Eingang)
Geschalteter Außenleiter
L 230V Phase (Verbraucher)
NAnschluss Neutralleiter
N 230V (Verbraucher)
N Anschluss Neutralleiter N 230V
(Eingang)
Funktion
Der Funk-Aktor mit Schalteranbindung istTeil des Brennenstuhl Home
Automation Systems BrematicPRO, das über die App oder PC-Software
BrematicPRO gesteuert wird. Der Funk-Aktor mit Schalteranbindung
kann direkt mit der BrematicPRO Funk-Fernbedienung gekoppelt und
geschaltet werden. Um weitere softwarebasierte Funktionen (z. B.
Timer- Steuerung, Szenen-Steuerung, Astro-Funktion) nutzen zu
können, kann er über den BrematicPRO Gateway in das Brennenstuhl
Home Automation Systems BrematicPRO eingebunden werden.
Welche Komponenten zum Funk-Aktor mit Schalteranbindung
kompatibel sind, nden Sie unter www.brematic.com/de/service.
Weitere Informationen zum Anlernen der Komponenten nden Sie in der
Bedienungsanleitung der jeweiligen BrematicPRO Funk-Komponente.

6DE
Funk-Aktor mit Schalteranbindung 868.3 MHzFunk-Aktor mit Schalteranbindung 868.3 MHz
Montage
Hinweis: Prüfen Sie vor der Montage, ob sich das Produkt im
Reichweitenbereich des Gateways bendet.
VORSICHT! STROMSCHLAGGEFAHR!
Die Installation des Geräts nur im spannungsfreien Zustand vor-
nehmen! Elektrische Netzzuleitung stromlos schalten, indem
Sie den zugehörigen Sicherungsautomaten abschalten bzw. die
Sicherung herausdrehen. Sichern Sie diese vor unberechtigtem
Wiedereinschalten, z. B. mit einemWarnschild.
Vor der Montage Netzzuleitung mit einem geeigneten Messgerät
auf Spannungsfreiheit überprüfen.
Die örtliche Netzspannung muss den technischen Daten des
Geräts entsprechen (siehe Technische Daten).
Prüfen Sie vor der Montage die Leistungsaufnahme des
Verbrauchers, den Sie an das Gerät anschließen wollen.
Die maximale Belastbarkeit beträgt 400W.
Das Gerät zwingend in einer geeigneten Unterputz- bzw. Auf-
putzdose betreiben oder in einem anderen dazu geeigneten
Gehäuse montieren.
Das Gerät nur ortsfest betreiben.
ACHTUNG! Kurzschlussgefahr für die Schalteran-
bindung! Isolieren Sie die Kabelenden des Litzenpaares,
um Kurzschlüsse zu vermeiden.
L
N
PE
Schließen Sie die Netzspannungskabel an die Schraubklemmen
L und N an (N = Neutralleiter, L = Phase) (siehe Abb.).
Schließen Sie an den mittleren beiden Schraubklemmen den
Verbraucher an (siehe Abb.).
BeiVerbrauchern mit einem PE /Erdleiter-Anschluss muss der
Erdleiter angeschlossen werden.
An das Litzenkabel kann ein externer potentialfreier Schalter
(keinTaster) angeschlossen werden. Über den externen Schalter
kann der Funk-Aktor zusätzlich an- oder ausgeschaltet werden.
Die Litzenkabel sind im Auslieferungszustand mit Isolierschläuc
hen
isoliert. Entfernen Sie die Isolierschläuche z. B. mit einem Messer,
bevor Sie einen externen Schalter an die Litzenkabel anschließen.
Achten Sie bei der Montage darauf, dass die Anlern-Taste an der
Gehäusevorderseite frei liegt und nicht versehentlich betätigt wird.
App/ PC-Software BrematicPRO herunterladen
Das Brennenstuhl Home Automation Systems BrematicPRO wird über
die App /PC-Software BrematicPRO gesteuert. Die App ist im App Store
und im Google Play Store kostenfrei erhältlich. Die PC-Software können
Sie unter www.brematic.com/de/service herunterladen.
Folgen Sie für das Herunterladen und die Installation den
Anweisungen am Bildschirm.
Weiterführende Informationen zur App und Bedienung nden Sie
unter www.brematic.com/de/service.
Funk-Aktor mit Schalteranbindung an
BrematicPRO Funk-Fernbedienung anlernen
Der Funk-Aktor mit Schalteranbindung kann direkt an die BrematicPRO
Funk-Fernbedienung angelernt werden.Weitere Möglichkeiten siehe
Kompatibilitätsliste unter www.brematic.com/de/service.
Drücken und halten Sie die Anlern-Taste für 3 Sekunden.
Die LED blinkt rot.

DE 7
Funk-Aktor mit Schalteranbindung 868.3 MHzFunk-Aktor mit Schalteranbindung 868.3 MHz
Drücken Sie, während
die LED blinkt, auf der
BrematicPRO Funk-Fern-
bedienung eine linke
Taste, die Sie belegen
möchten.
Nach erfolgreicher Kopp-
lung beider Geräte leuchtet
die LED vom Aktor grün.
Der Anlern-Vorgang ist
abgeschlossen und der
Aktor ist eingeschaltet.
Kopplung löschen
Drücken und halten Sie
die Anlern-Taste für
3 Sekunden.
Die LED blinkt rot.
Drücken Sie, während
die LED blinkt, auf der
BrematicPRO Funk-Fern-
bedienung die rechte
Taste, die Sie entkoppeln
möchten.
Der Entkopplungsvorgang
ist abgeschlossen.
Funk-Aktor mit Schalteranbindung an den
BrematicPRO Gateway anlernen
Beim Einbinden in das Home Automation Systems BrematicPRO über
den BrematicPRO Gateway ist es möglich, mit Hilfe der App/ PC
Software BrematicPRO softwarebasierte Funktionen zu nutzen, wie
z. B.:Timer-Steuerung, Szenen-Steuerung, Astro-Funktion (Sonnen-
auf-/Sonnenuntergang-Steuerung).
Die App oder die PC-Software BrematicPRO ist installiert und geönet.
Der BrematicPRO Gateway ist betriebsbereit.
Halten Sie einen Mindestabstand vom Gerät zum Gateway von
50 cm ein.
Önen Sie das Menü„Einstellungen“.
Wählen Sie den Raum, in dem Sie das Gerät nutzen wollen.
Frequenzband auswählen„868 MHz“.
Wählen Sie„Gerät hinzufügen“ aus.
Wählen Sie unter„Neues Gerät“ den Punkt„Schalter/ Steckdose“
aus und bestätigen Sie die Auswahl mit„weiter“.
Folgen Sie den Anweisungen am Bildschirm.
Drücken und halten Sie die Anlern-Taste am Gerät für 3 Sekunden.
Geben Sie eine Geräte-Bezeichnung für das Gerät ein,
z. B.„LampeWohnzimmer“.
Wählen Sie„hinzufügen“, um das Gerät dem Raum zu zuordnen.
Zunächst mit„Zurück“ den Raum verlassen, anschließend
„Fertig“ antippen, um den Anlernvorgang abzuschließen.
Der Funk-Aktor mit Schalteranbindung ist nun im Home
Automation Systems BrematicPRO eingebunden.
Prüfen Sie die einwandfreie Funktion des Funk-Aktors mit
Schalteranbindung unter Gerät testen, indem Sie über ihn
denVerbraucher ein- und ausschalten.
In diesem Untermenü haben Sie auch die Möglichkeit, das
Gerät zu den Favoriten hinzuzufügen.
Weiter Informationen zur App und Bedienung nden Sie auf unserer
Homepage www.brematic.com/de/service.
Werkseinstellungen wiederherstellen
Das Gerät kann jederzeit in den Auslieferungszustand zurückgesetzt
werden. Das Zurücksetzen ist im Falle einer Fehlfunktion erforderlich.
Drücken Sie die Anlern-Taste für mindestens 6 Sekunden.
Die LED blinkt schnell und erlischt nach ca. 3 Sekunden.
Das Gerät wurde zurückgesetzt.
Gerät reinigen
GEFAHR! GEFAHR DURCH ELEKTRISCHEN SCHLAG!
Vor dem Reinigen das Gerät vom Stromnetz nehmen.
Achten Sie darauf, dass keine Flüssigkeit in das Gerät eindringt.
Eindringende Flüssigkeit kann zu einem Kurzschluss führen.
Reinigen Sie das Gerät mit einem trockenen, fusselfreienTuch.
Bei stärkererVerschmutzung können Sie dasTuch leicht anfeuchten.

8DE
Funk-Aktor mit Schalteranbindung 868.3 MHz
Verwenden Sie zur Reinigung keine lösungsmittelhaltigen
Reiniger. Andernfalls kann die Oberäche und Beschriftung
des Geräts beschädigt werden.
Tauchen Sie das Gerät niemals inWasser oder in andere Flüssig-
keiten. Andernfalls kann das Produkt beschädigt werden.
Stellen Sie vor der nächstenVerwendung sicher, dass das Gerät
vollständig getrocknet ist.
Fehlerbehebung
Problem Möglicher
Grund
Fehler-
behebung
LED blinkt nicht. Gerät nicht korrekt
installiert.
Sicherungsautomat
ist nicht einge-
schaltet.
Installation fachge-
recht ausführen
lassen. Prüfen ob,
Strom anliegt.
Sicherungsautomat
einschalten.
Gerät wird nicht
erkannt.
Gerät außerhalb
der Reichweite des
Gateways.
Abstand zum
Gateway verringern.
Entsorgung
DieVerpackung besteht aus umweltfreundlichen
Materialien, die Sie über die örtlichen Recyclingstellen
entsorgen können.
Möglichkeiten zur Entsorgung des ausgedienten Produkts erfahren
Sie bei Ihrer Gemeinde oder Stadtverwaltung.
Werfen Sie Ihr Produkt, wenn es ausgedient hat, im
Interesse des Umweltschutzes nicht in den Hausmüll,
sondern führen Sie es einer fachgerechten Entsorgung
zu. Über Sammelstellen und deren Önungszeiten
können Sie sich bei Ihrer zuständigenVerwaltung,
informieren.
Service
Bei Fragen zum Produkt kontaktieren Sie uns unter
www.brematic.com/de/service.
Tel.: 0080048720743 (kostenlos)
Hersteller
Hugo Brennenstuhl GmbH & Co. KG
Seestraße 1-3 ∙ D-72074Tübingen
H. Brennenstuhl S.A.S.
4 rue de Bruxelles ∙ F-67170 Bernolsheim
lectra-t ag
Blegistrasse 13 ∙ CH-6340 Baar
www.brematic.com
www.brennenstuhl.com
Konformitätserklärung
Hiermit erklären wir, die Firma Hugo Brennenstuhl GmbH & Co.KG, dass
der Funkanlagentyp UPMS 868 01W400 3726 der Richtlinie 2014/53/EU
und 2011/65/EU (RoHS II) entspricht. Der vollständigeText der EU-Kon-
formitätserklärung ist unter der folgenden Internetadresse verfügbar:
www.brematic.com/de/service/konformitaetserklaerung/ke_
1294710.pdf
Dieses Produkt erfüllt die gesetzlichen, nationalen und europäischen
Anforderungen. Alle enthaltenen Firmennamen und Produktbezeich-
nungen sindWarenzeichen der jeweiligen Inhaber.
Alle Rechte vorbehalten.
Table of contents

EN 9
Funk-Aktor mit Schalteranbindung 868.3 MHz Table of contents
Wireless ush-mount actuator with switch wiring
868.3 MHz
List of pictograms used...................................................................................................................................................................Page 10
Safety instructions.............................................................................................................................................................................Page 10
Intended use............................................................................................................................................................................................Page 10
Information aboutWireless Operation..............................................................................................................................Page 11
Duty Cycle......................................................................................................................................................................................................Page 11
Included in delivery...........................................................................................................................................................................Page 11
Technical data.........................................................................................................................................................................................Page 11
Device overview....................................................................................................................................................................................Page 11
Front..............................................................................................................................................................................................................Page 11
Connections...................................................................................................................................................................................................Page 11
Function.......................................................................................................................................................................................................Page 12
Installation...............................................................................................................................................................................................Page 12
Download app/ PC software BrematicPRO......................................................................................................................Page 12
Pairing the wireless ush-mount actuator with switch wiring with the
BrematicPRO Wireless Remote Control..............................................................................................................................Page 13
Unpair............................................................................................................................................................................................................Page 13
Pairing the wireless ush-mount actuator with switch wiring with the
BrematicPRO Gateway.....................................................................................................................................................................Page 13
Factory Reset...........................................................................................................................................................................................Page 14
Cleaning the Device............................................................................................................................................................................Page 14
Action.............................................................................................................................................................................................................Page 14
Disposal........................................................................................................................................................................................................Page 14
Service...........................................................................................................................................................................................................Page 14
Manufacturer..........................................................................................................................................................................................Page 14
Declaration of conformity.............................................................................................................................................................Page 14

10 EN
Wireless flush-mount actuator with switch wiring 868.3 MHzWireless flush-mount actuator with switch wiring 868.3 MHz
List of pictograms used
Please read the instructions for use! Caution! Fire hazard!
Observe the warnings and safety instructions! Dispose of the packaging and device in an
environmentally friendly manner!
Caution! Danger of electric shock!
Safety instructions
The instructions for use are a part of this product.
They contain important information about safety,
use and disposal. Before using this device, please
familiarise yourself with all instructions for use and safety
instructions. Only use the device as described and for the
indicated purpose. Be sure to include all documentation when
passing this device on to others.
WARNING! DANGER TO LIFE AND RISK OF
ACCIDENTS FOR INFANTS AND CHILDREN! Never leave
children alone and unsupervised with the packaging material.
It poses a risk of suocation as children may swallow or inhale
small parts or plastic lm. Children frequently underestimate
the dangers. Always keep children away from the device. It is
not a toy.
This device may be used by children aged 8 years and up, as
well as by persons with reduced physical, sensory or mental
capacities, or lacking experience and/or knowledge, so long as
they are supervised or instructed in the safe use of the device
and understand the associated risks. Do not allow children to
play with the device. Cleaning and user maintenance must not
be performed by children without supervision.
Only operate this device in a dry, dust-free environment.
Only operate this device indoors.
Do not expose the device to adverse conditions, such as
• moisture,
• continuous sunlight,
• heat radiation,
• cold,
• vibrations.
CAUTION! RISK OF INJURY!
We assume no liability for property damage or personal injury
due to improper use or failure to observe the safety instructions!
This will void the warranty/ guarantee!
Any use not specied in these instructions for use will damage
the device. Do not modify the device. Otherwise safe operation
is not guaranteed.
DANGER OF ELECTRIC SHOCK!
Do not open the housing.This device has no parts which require
maintenance. In the event of a malfunction, please contact Service.
Work on the mains must be performed by an electrician whilst
de-energised.
If you do not have any expertise in this area, do not perform
the installation of the product yourself. Commission a trained
electrician.
Do not use the device if it is visibly damaged.
FIRE HAZARD!
Installation of the product may only be carried out by a qualied
professional (e.g. an electrician), who is familiar with the relevant
specications (e.g.VDE).
Do not connect any terminal devices to the device which could
cause a re or other damage when switched on unattended
(e.g. iron).
Do not switch the device uncontrolled or whilst unattended.
Do not overload the device.
Overloads may result in re hazards or product damage.The
maximum load is approx. 400W.
Intended use
The wireless ush-mount actuator with switch wiring is solely intended
to switch consumers connected to the wireless actuator on and o in
dry indoor locations.

EN 11
Wireless flush-mount actuator with switch wiring 868.3 MHzWireless flush-mount actuator with switch wiring 868.3 MHz
Information aboutWireless Operation
This device uses the 868.3 MHz proprietary wireless protocol.Wireless
transmission is implemented using a non-exclusive channel, interference
can therefore not be excluded.
The range in buildings may vary greatly from open areas. In addition to
the transmission power and the reception characteristics of the receivers,
ambient conditions, e.g. humidity in addition to the structural conditions
on site, are important factors.
The range can be signicantly reduced in part due to:
• wood, gypsum, concrete, reinforced concrete walls
• proximity to metal and conductive objects
• broadband interference, e.g. in residential areas (DECT phones,
mobiles, wireless headphones, wireless speakers, wireless
weather stations, baby monitors)
•
proximity to electric motors, transformers, mains adapters, computers
Duty Cycle
Duty cycle refers to a transmission time limit regulated by law for
devices transmitting in the 868 MHz range. It is intended to ensure
smooth operation of devices operating in the 868 MHz range.The
maximum transmission time of each device is 1% of an hour
(corresponding to 36 seconds/hour). Once the 1% limit has been
reached it cannot transmit until the time limit of the duty cycle has
ended, so after one hour.
Included in delivery
1x Wireless ush-mount actuator with switch wiring
1x Quick start guide
1x Instructions for use (digital, available for download)
Technical data
Product designation: UPMS 868 01W400 3726
Item no.: 1294710
Radio frequency: 868.3 MHz
Frequency: 868.1 - 868.5 MHz
Max. transmitting power: < 20 mW
Duty cycle: < 1% per h
Supply voltage: 230V/AC, 50Hz
Max. switching capacity: 400W
Power input: 1.3W
Ambient temperature: 0°C to 35°C
Protection type: IP00
Open area range: approx. 100m
Dimensions (W x H x D): 52 x 49.5 x 16.9mm
Weight: 30 g
Subject to technical changes without notice.
Device overview
Front
Device LED
Stranded wires to
connect to switch
(no button)
Pair button
Connections
LExternal conductor
connection L 230V phase
(input)
Switched external conductor
L 230V phase (consumer)
NNeutral conductor
connection N 230V
(consumer)
N Neutral conductor connection
N 230V (input)

12 EN
Wireless flush-mount actuator with switch wiring 868.3 MHzWireless flush-mount actuator with switch wiring 868.3 MHz
Function
The wireless ush-mount actuator with switch wiring is part of the
Brennenstuhl Home Automation Systems BrematicPRO, controlled via
app or the BrematicPRO PC software.The wireless ush-mount actuator
with switch wiring can be connected and controlled directly with the
BrematicPRO wireless remote control. It can be directly linked with
the Brennenstuhl Home Automation Systems BrematicPRO via the
BrematicPRO Gateway to use other software-based functions (e.g.
timer control, theme control, astro function).
For information on which components are compatible with the
wireless ush-mount actuator with switch wiring, please visit:
www.brematic.com/en/service.
For additional information on components, please refer to the
instructions for use of the respective BrematicPRO wireless component.
Installation
Note: Check before installation whether the product is located within
the range of the Gateway.
CAUTION! DANGER OF ELECTRIC SHOCK!
Only install the device in a de-energised state! Disconnect the
electrical mains supply line by switching o the circuit breakers
connected to it or unscrewing the fuse. Prevent this from being
unintentionally re-started e.g. with a warning sign.
Before installation, check the mains supply line with a suitable
measuring device to see that it is de-energised.
The mains voltage on site must correspond with the technical
data of the device (see“Technical data“).
Check the power input of the consumer you intend to connect
to the device prior to installation.
The maximum load is approx. 400W.
The device must be operated in a suitable ush-mounted box or
surface mount box or assembled in another suitable casing to
guarantee the necessary electric shock protection.
Only operate the device when it is stationary.
ATTENTION! Risk of short circuit for switch
connection! Insulate the cable ends of the braid pair to
prevent short circuits.
L
N
PE
Connect the supply voltage cable to the screw terminals L and N
(N = neutral conductor, L = phase) (see Fig.).
Connect the consumer to the both of the centre screw terminals
(see Fig.).
For consumers with a PE/ ground conductor connection, the
ground conductor must be connected.
An external potential-free switch (no button) can be connected
to the multi-wire cable. In addition, the wireless actuator can be
switched on or o via the external switch.
The multi-wire cables are insulated with insulating sleeves in their
delivery state. Remove the insulating sleeves, i.e. using a knife,
before connecting an external switch to the multi-wire cables.
Ensure during installation that the pair button on the housing
front is not covered and that it is not pressed by accident.
Download app/ PC software BrematicPRO
The Brennenstuhl Home Automation Systems BrematicPRO is controlled
via the BrematicPRO app/ PC software.The app can be downloaded
for free from the App Store and Google Play.The PC software is available
for download at www.brematic.com/en/service.
Please follow the on-screen instructions for download and installation.
For more information about the app and how to use it, please visit
www.brematic.com/en/service.

EN 13
Wireless flush-mount actuator with switch wiring 868.3 MHzWireless flush-mount actuator with switch wiring 868.3 MHz
Pairing the wireless ush-mount actuator
with switch wiring with the BrematicPRO
Wireless Remote Control
The wireless ush-mount actuator with switch wiring can be paired
directly with the BrematicPRO wireless remote control. For further
options, see the compatibility list at: www.brematic.com/en/service.
Press and hold the pair button for 3 seconds.
The LED will ash red.
Whilst the LED is ashing,
press a button on the left
of the BrematicPRO
wireless remote control
you wish to program for
the device.
Once the devices have
been paired the LED of
the actuator will light up
green.The pairing process
is now completed and the
actuator is switched on.
Unpair
Press and hold the pair
button for 3 seconds.
The LED will ash red.
Whilst the LED is ashing,
press the respective
button on the right of the
BrematicPRO wireless
remote control you wish
to unpair. This completes
the unpairing process.
Pairing the wireless ush-mount actuator
with switch wiring with the BrematicPRO
Gateway
When linked with the Home Automation Systems BrematicPRO via
the BrematicPRO Gateway, you can use the app/ BrematicPRO PC
software to use additional functions, e.g. timer control, theme control,
astro function (dawn /dusk control).
The app or BrematicPRO PC software is installed and open.
The BrematicPRO Gateway is ready for use.
Keep the device at least 50 cm from the Gateway.
Open the“Settings“ menu.
Select the room where you wish to use the device.
Select the frequency“868 MHz“.
Select“Add Device“.
Under“New Device“, select“Switch/Socket“ and click“Continue“
to conrm your selection.
Follow the on-screen instructions.
Press and hold the pair button on the device for 3 seconds.
Enter a device name, e.g.“Living Room Lamp“.
Select“Add“ to assign the device to the room.
First tap“Back“ to leave the room, then“Done“ to complete the
pairing process.
The wireless ush-mount actuator with switch wiring is now
connected to the Home Automation Systems BrematicPRO.
Use“Test Device“ to switch the consumer on and o to ensure the
wireless ush-mount actuator with switch wiring is working
properly.
In this submenu you can also add the device to your favourites.
For more information about the app and how to use it, please visit
our homepage at: www.brematic.com/en/service.

14 EN
Wireless flush-mount actuator with switch wiring 868.3 MHz
Factory Reset
The device can be restored to the factory settings at any time. A reset
will be required if malfunctions occur.
Press the pair button for at least 6 seconds.
The LED will ash rapidly and go out after approx. 3 seconds.
The device has been reset.
Cleaning the Device
DANGER! RISK OF ELECTRIC SHOCK!
Disconnect the device from the mains before cleaning.
Do not allow liquids to enter the device. Liquids entering can result
in a short circuit.
Clean the device with a dry, lint-free cloth. For tough dirt, you
may also slightly dampen the cloth.
Do not clean with solvent-based cleaners.These could damage
the device surface and markings.
Never immerse the device in water or other liquids.The product
may otherwise be damaged.
Ensure the device is completely dry before using it again.
Action
Problem Possible cause Action
LED doesn't ash. Device has not
been installed
correctly.
The circuit breaker
is not switched on.
Have installation
carried out
correctly. Check if
there is power.
Switch on the
circuit breaker.
Device not
detected.
The device is
outside the
Gateway range.
Reduce the distance
to the Gateway.
Disposal
The packaging is made from environmentally-friendly
materials which can be disposed of through your local
recycling facilities.
Contact your local refuse disposal authority for more details of how to
dispose of your worn-out product.
To help protect the environment, please dispose of the
product properly when it has reached the end of its
useful life, not in the household waste. Please contact
your municipality for information on collection facilities
and their opening hours.
Service
For questions related to the product, please contact us at
www.brematic.com/en/service.
Tel.: 0080048720743 (toll-free)
Manufacturer
Hugo Brennenstuhl GmbH & Co. KG
Seestraße 1-3 ∙ D-72074Tübingen
H. Brennenstuhl S.A.S.
4 rue de Bruxelles ∙ F-67170 Bernolsheim
lectra-t ag
Blegistrasse 13 ∙ CH-6340 Baar
www.brematic.com
www.brennenstuhl.com
Declaration of conformity
Hugo Brennenstuhl GmbH & Co.KG, hereby declares the wireless system
model UPMS 868 01W400 3726 to comply with directives 2014/53/EU
a
nd 2011/65/EU (RoHS II).The full text of the EU declaration of con
formity
is available at the following internet address:
www.brematic.com/en/service/konformitaetserklaerung /ke_
1294710.pdf
This
product complies with the legal, national and European require
ments.
All company names and product names are trademarks of the respective
owners.
All rights reserved.
Table des matières

FR 15
Wireless flush-mount actuator with switch wiring 868.3 MHz Table des matières
Commutateur sans l ON/OFF avec raccordement
interrupteur 868.3 MHz
Légende des pictogrammes utilisés....................................................................................................................................Page 16
Consignes de sécurité......................................................................................................................................................................Page 16
Utilisation conforme........................................................................................................................................................................Page 16
Informations sur le fonctionnement radio....................................................................................................................Page 17
Duty Cycle.....................................................................................................................................................................................................Page 17
Contenu de la livraison...................................................................................................................................................................Page 17
Caractéristiques techniques......................................................................................................................................................Page 17
Aperçu de l'appareil..........................................................................................................................................................................Page 17
Avant............................................................................................................................................................................................................Page 17
Raccordements.............................................................................................................................................................................................Page 17
Fonctionnalité.......................................................................................................................................................................................Page 18
Montage.....................................................................................................................................................................................................Page 18
Télécharger l'application /le logiciel pour PC BrematicPRO............................................................................Page 18
Programmer l'commutateur sans l ON/OFF avec raccordement interrupteur
sur la télécommande radio BrematicPRO.......................................................................................................................Page 19
Supprimer le couplage....................................................................................................................................................................Page 19
Programmer l'commutateur sans l ON/OFF avec raccordement interrupteur
sur le BrematicPRO Gateway.....................................................................................................................................................Page 19
Restaurer les paramètres d'usine..........................................................................................................................................Page 20
Nettoyer l'appareil.............................................................................................................................................................................Page 20
Dépannage...............................................................................................................................................................................................Page 20
Mise au rebut..........................................................................................................................................................................................Page 20
Service..........................................................................................................................................................................................................Page 20
Fabricant....................................................................................................................................................................................................Page 20
Déclaration de conformité...........................................................................................................................................................Page 20

16 FR
Commutateur sans fil ON/ OFF avec raccordement interrupteur 868.3 MHzCommutateur sans fil ON /OFF avec raccordement interrupteur 868.3 MHz
Légende des pictogrammes utilisés
Lire le mode d'emploi! Attention! Risque d'incendie !
Respecter les avertissements et consignes de sécurité ! Mettez l'emballage et l'appareil au rebut dans le
respect de l'environnement !
Attention! Risque d'électrocution !
Consignes de sécurité
Le mode d'emploi fait partie intégrante de ce
produit. Elle contient des indications importantes
pour la sécurité, l'utilisation et la mise au rebut.
Avant d'utiliser l’appareil, familiarisez-vous avec toutes les ins-
tructions d’utilisation et consignes de sécurité. N'utilisez cet ap-
pareil que conformément aux instructions et dans les domaines
d'application spéciés. Si vous donnez l'appareil à des tiers,
remettez-leur également la totalité des documents.
AVERTISSEMENT ! DANGER DE MORT ET
RISQUE D'ACCIDENT POUR LES ENFANTS EN BAS ÂGE
ET LES ENFANTS ! Ne laissez jamais les enfants manipuler les
emballages sans surveillance. Risque de suocation en cas d'in-
gestion ou d'inhalation de petites pièces ou de lms plastiques.
Les enfants sous-estiment souvent les dangers.Toujours tenir
l'appareil hors de portée des enfants. Ce n'est pas un jouet.
Cet appareil peut être utilisé par des enfants âgés de 8 ans et plus
ainsi que par des personnes ayant des capacités physiques, sen-
sorielles ou mentales réduites ou manquant d'expérience ou de
connaissances, s'ils sont surveillés ou s'ils ont été informés de
l'utilisation sûre de l'appareil et comprennent les risques liés à
son utilisation. Les enfants ne doivent pas jouer avec cet appareil.
Le nettoyage et l'entretien du produit ne doivent pas être eec-
tués par des enfants laissés sans surveillance.
Faites fonctionner l'appareil uniquement dans un environnement
sec et sans poussières.
Faites fonctionner l'appareil uniquement dans des espaces
intérieurs.
N'exposez pas l'appareil à des conditions défavorables, comme
• l'humidité,
• le rayonnement solaire permanent,
• le rayonnement thermique,
• le froid,
• les vibrations.
ATTENTION ! RISQUE DE BLESSURES !
Nous déclinons toute responsabilité en cas de dommages maté-
riels ou corporels causés par une manipulation incorrecte ou par
le non-respect des consignes de sécurité ! Dans de tels cas, la
garantie est annulée !
Toute utilisation autre que celle décrite dans ce mode d'emploi
conduit à un endommagement de l'appareil. N'eectuez aucune
modication de la structure de l'appareil. Dans le cas contraire,
un fonctionnement sûr ne peut être garanti.
RISQUE DE CHOC ÉLECTRIQUE !
N'ouvrez pas le boîtier. L'appareil ne contient pas de pièce nécessi-
tant un entretien. En cas de problème, contactez le service.
Les travaux sur le réseau électrique doivent être uniquement
eectués hors tension et exclusivement conés à un électricien
spécialisé.
Si vous ne disposez pas des connaissances nécessaires, n'eectuez
pas le montage vous-même, mais faites appel à un spécialiste.
Ne faites pas fonctionner l'appareil en cas de dommages visibles.
RISQUE D‘INCENDIE!
L'installation du produit ne doit être eectuée que par un spécialiste
qualié (par ex. électricien) familiarisé avec les prescriptions en vigueur
(par ex.VDE).
Ne branchez à l'appareil aucun dispositif terminal dont la mise
en route sans surveillance peut entraîner un incendie ou
d'autres dégâts (comme des fers à repasser par exemple).
Ne branchez pas l'appareil sans contrôle ni surveillance.
Évitez une surcharge de l'appareil.
Une surcharge peut entraîner un incendie ou une dégradation
de l'appareil. La charge maximale est d'env. 400W.
Utilisation conforme
L'commutateur sans l ON/ OFF avec raccordement interrupteur est
uniquement destiné à allumer et éteindre les consommateurs raccor-
dés à l'actionneur radio dans des pièces intérieures sèches.

FR 17
Commutateur sans fil ON/ OFF avec raccordement interrupteur 868.3 MHzCommutateur sans fil ON /OFF avec raccordement interrupteur 868.3 MHz
Informations sur le fonctionnement radio
Cet appareil fonctionne sur base du protocole radio propriétaire 868.3 MHz.
La transmission radio est réalisée sur un trajet de propagation non
exclusif. Ainsi, des perturbations ne peuvent pas être exclues.
La portée dans des bâtiments peut donc est diérente de celle en zone
dégagée. Hormis la puissance d'émission et les propriétés de réception
du récepteur, des conditions environnementales, comme par exemple
l'humidité de l'air et les spécicités de construction sur place, jouent
un rôle important.
La portée peut être en partie fortement réduite à cause de :
• parois en bois, plâtre, béton, béton armé
• la proximité d'objets métalliques et conducteurs
• perturbations à bande large, par exemple dans des zones résiden-
tielles (téléphones DECT, téléphones portables, écouteurs radio,
haut-parleurs radio, station météo radioguidées, systèmes de
surveillances pour bébés)
• la proximité de moteurs électriques, transformateurs, blocs
d'alimentation, ordinateurs
Duty Cycle
Le Duty Cycle désigne une limitation de la durée d'émission dénie par
la loi concernant les appareils qui émettent dans la plage de fréquences
de 868 MHz. Ainsi, un fonctionnement sans faille des appareils fonction-
nant dans la plage des 868 MHz doit être assuré. La durée maximale
d'émission d'un appareil est de 1 % d'une heure (ce qui correspond
à 36 secondes/ heure). Après avoir atteint cette limite de 1%, une
émission n'est plus possible jusqu'à ce que la limitation de temps du
Duty Cycle soit achevée, c'est-à-dire après une heure.
Contenu de la livraison
1x commutateur sans l ON/OFF avec raccordement interrupteur
1x mode d'emploi bref
1x mode d'emploi (numérique, à télécharger)
Caractéristiques techniques
Désignation du produit : UPMS 868 01W400 3726
N° d'art. : 1294710
Fréquence radio : 868.3 MHz
Bande de fréquences : 868.1 - 868.5 MHz
Puissance d'émission max. : < 20mW
Duty Cycle : < 1% par h
Tension d'alimentation : 230V /AC, 50Hz
Puissance de commutation max. : 400W
Consommation électrique : 1,3W
Température ambiante : 0°C à 35°C
Indice de protection : IP00
Portée en zone dégagée : env. 100 m
Dimensions (l x h x p) : 52 x 49,5 x 16,9mm
Poids: 30g
Sous réserve de modications techniques.
Aperçu de l'appareil
Avant
LED de l'appareil
Fils toronnés, pour le
branchement au commu-
tateur (pas de bouton)
Touche de programmation
Raccordements
LRaccordement de conduc-
teur externe L phase 230V
(entrée)
Conducteur extérieur activé
phase L 230V (consommateur)
NRaccordement de conduc-
teur neutre N 230V
(consommateur)
NRaccordement de conducteur
neutre N 230V (entrée)

18 FR
Commutateur sans fil ON/ OFF avec raccordement interrupteur 868.3 MHzCommutateur sans fil ON /OFF avec raccordement interrupteur 868.3 MHz
Fonctionnalité
L'commutateur sans l ON/OFF avec raccordement interrupteur fait part
ie
dusystème Brennenstuhl Home Automation BrematicPRO, piloté par
l'application ou le logiciel pour PC BrematicPRO. L'commutateur sans
l ON / OFF avec raccordement interrupteur peut être directement coup
lé
à la télécommande radio BrematicPRO et être commuté. Pour pouvoir
utiliser d'autres fonctions basées sur un logiciel (par ex. contrôle du
timer, contrôle de scènes, fonction astro), il peut être couplé au Brennens-
tuhl Home Automation Systems BrematicPRO par le biais du BrematicPRO
Gateway.
Pour savoir quels composants sont compatibles avec l'commutateur
sans l ON/ OFF avec raccordement interrupteur, consultez l'adresse :
www.brematic.com/fr/service.
Dans le mode d'emploi de chaque composant radio BrematicPRO, vous
trouverez des informations supplémentaires sur la programmation de
ces composants.
Montage
Remarque :Vériez avant le montage si le produit se trouve dans
la zone de couverture du Gateway.
ATTENTION ! RISQUE D'ÉLECTROCUTION !
Eectuer l'installation du produit uniquement hors tension !
Mettez hors tension la ligne électrique du réseau en coupant les
disjoncteurs correspondants ou en retirant le fusible. Sécurisez-les
contre toute remise en marche non autorisée, par ex. avec un
panneau d'avertissement.
Avant le montage, vérier l'absence de tension sur la ligne réseau
à l'aide d'un appareil de mesure approprié.
La tension réseau locale doit correspondre aux caractéristiques
techniques de l'appareil (voir Caractéristiques techniques).
Avant le montage, vériez la puissance absorbée par le consom-
mateur que vous souhaitez brancher à l'appareil.
La charge maximale est d'env. 400W.
Faire impérativement fonctionner l'appareil dans un boîtier en-
castré ou apparent approprié, ou bien le monter dans un autre
boîtier approprié.
Faire uniquement fonctionner l'appareil de manière stationnaire.
ATTENTION ! Risque de court-circuit de connexion
de commutateur! Isolez les extrémités de la paire de torons
an d'éviter les courts-circuits.
L
N
PE
Branchez les câbles de tension secteur aux pinces à vis L et N
(N = l neutre, L = phase) (voir Fig.).
Branchez le consommateur aux deux pinces à vis centrales
(voir Fig.).
Dans le cas de consommateurs équipés d'un branchement PE/
conducteur de terre, le conducteur de terre doit être raccordé.
Un commutateur externe sans potentiel (pas de bouton) peut
être branché au câble toronné. Le commutateur externe permet
de plus d'allumer ou d'éteindre l'actionneur radio.
Les câbles toronnés sont isolés à l'aide de gaines à leur sortie
d'usine. Retirez les gaines isolantes, p. ex. avec un couteau, avant
de raccorder le commutateur externe aux câbles toronnés.
Lors du montage, veillez à ce que la touche de programmation
sur le côté avant de l'appareil soit accessible et non actionnée
par inadvertance.
Télécharger l'application /le logiciel pour PC
BrematicPRO
Le système Brennenstuhl Home Automation BrematicPRO est piloté par
l'application ou le logiciel pour PC BrematicPRO. L'application est dispo-
nible gratuitement dans l'App Store et dans le Google Play Store. Le lo-
giciel PC peut être téléchargé sur le site www.brematic.com/fr/service.
Pour le téléchargement et l'installation de l'application, suivez les
instructions à l'écran.
Informations complémentaires relatives à l'application et à l'utilisation
du produit disponibles à l'adresse www.brematic.com/fr/service.

FR 19
Commutateur sans fil ON/ OFF avec raccordement interrupteur 868.3 MHzCommutateur sans fil ON /OFF avec raccordement interrupteur 868.3 MHz
Programmer l'commutateur sans l ON/OFF
avec raccordement interrupteur sur la
télécommande radio BrematicPRO
L
'commutateur sans l ON/ OFF avec raccordement interrupteur peut être
directem
ent programmé à la télécommande radio BrematicPRO. Pour
d'autres possibilités, vous trouverez une liste de compatibilité sur
www.brematic.com/fr/service.
Appuyez sur la touche de programmation et maintenez-la
enfoncée pendant 3 secondes.
La LED clignote en rouge.
Pendant que la LED cli-
gnote, appuyez sur une
touche que vous souhai-
tez coupler sur la gauche
de la télécommande Bre-
maticPRO.
Après le couplage réussi
des deux appareils, la LED
de l'actionneur s'allume en
vert. Le processus de pro-
grammation est nalisé
et l'actionneur est activé.
Supprimer le couplage
Appuyez sur la touche
de programmation et
maintenez-la enfoncée
pendant 3 secondes.
La LED clignote en rouge.
Pendant que la LED cli-
gnote, appuyez sur la
touche sur la droite de la
télécommande Brema-
ticPRO que vous souhaitez
découpler. Le processus de
découplage est terminé.
Programmer l'commutateur sans l ON/
OFF avec raccordement interrupteur sur le
BrematicPRO Gateway
Lors de l'intégration dans le Home Automation Systems BrematicPRO
via le BrematicPRO Gateway, grâce à l'application/au logiciel pour PC
BrematicPRO, il est possible d'utiliser des fonctionnalités basées sur
logiciel, comme par exemple la commande du timer ou des scènes,
les fonctions astro (commande du lever et du coucher de soleil).
L'application ou le logiciel PC pour BrematicPRO est installé(e) et ouvert(e).
Le BrematicPRO Gateway est prêt à fonctionner.
Respectez une distance minimale de 50 cm entre l'appareil et
le Gateway.
Ouvrez le menu «Réglages».
Choisissez la pièce dans laquelle vous souhaitez utiliser l'appareil.
Sélectionner la bande de fréquence «868 MHz».
Choisissez «Ajouter un appareil».
Au point «Nouvel appareil», choisissez le point «Interrupteur/
Prise» et conrmez votre choix avec «Suivant».
Suivez les instructions sur l'écran.
Appuyez sur la touche de programmation située sur l'appareil et
maintenez-la enfoncée pendant 3 secondes.
Entrez une désignation d'appareil pour l'appareil, par exemple
«Lampe de la salle de séjour».
Sélectionnez «Ajouter» pour attribuer l'appareil à la pièce.
Quittez ensuite la pièce avec «Retour», puis appuyez sur «Terminé»
pour achever le processus de programmation.
L'commutateur sans l ON/ OFF avec raccordement interrupteur est
maintenant intégré au Home Automation Systems BrematicPRO.
Vériez le bon fonctionnement de l'commutateur sans l ON/
OFF avec raccordement interrupteur sous «Tester l'appareil» en
allumant et éteignant l'appareil consommateur par le biais de
cet interrupteur.

20 FR
Commutateur sans fil ON/ OFF avec raccordement interrupteur 868.3 MHz
Dans ce sous-menu, il vous est également possible d'ajouter
l'appareil aux favoris.
Retrouvez plus d'informations complémentaires relatives à l'application
et à l'utilisation du produit sur la page d'accueil du site :
www.brematic.com/fr/service.
Restaurer les paramètres d'usine
L'appareil peut à tout moment être restauré à son état de livraison.
Cette réinitialisation est nécessaire en cas de dysfonctionnement.
Appuyez sur la touche de programmation pendant au moins
6 secondes.
La LED clignote rapidement et s'éteint après environ 3 secondes.
L'appareil a été restauré.
Nettoyer l'appareil
DANGER! RISQUE DE DÉCHARGE ÉLECTRIQUE !
Séparez l'appareil du réseau électrique avant de le nettoyer.
Veillez à ce qu'aucun liquide ne pénètre dans l'appareil. La présence
de liquide dans l'appareil peut entraîner un court-circuit.
Nettoyez l'appareil à l'aide d'un chion sec et ne peluchant pas.
Vous pouvez humidier légèrement le chion en cas de salissures
importantes.
N'utilisez pas de nettoyant à base de solvant pour le nettoyage.
La surface et l'inscription de l'appareil pourraient sinon être en-
dommagées.
N'immergez jamais l'appareil dans de l'eau ou d'autres liquides.
Dans le cas contraire, le produit pourrait être endommagé.
Assurez-vous que l'appareil soit entièrement sec avant de
l''utiliser de nouveau.
Dépannage
Problème Cause possible Dépannage
La LED ne clignote
pas.
Appareil installé de
manière incorrecte.
Disjoncteur désac-
tivé.
Faire eectuer l'ins-
tallation en bonne
et due forme.
Contrôler la pré-
sence de courant.
Activer le disjoncteur.
L'appareil n'est pas
reconnu.
L'appareil est hors
de portée du
Gateway.
Réduire la distance
au Gateway.
Mise au rebut
L'emballage se compose de matières recyclables pou-
vant être mises au rebut dans les déchetteries locales.
Renseignez-vous auprès de votre commune ou de votre ville sur les
possibilités de mise au rebut du produit usagé.
An de contribuer à la protection de l'environnement,
veuillez ne pas jeter votre produit usagé dans les ordures
ménagères, éliminez-le de manière appropriée. Pour
obtenir des renseignements concernant les points de
collecte et leurs horaires d'ouverture, vous pouvez
contacter votre municipalité.
Service
Vous trouverez les informations détaillées concernant le produit sur
le site : www.brematic.com/fr/service.
Tél. : 0080048720743 (appel gratuit)
Fabricant
Hugo Brennenstuhl GmbH & Co. KG
Seestraße 1-3 ∙ D-72074Tübingen
H. Brennenstuhl S.A.S.
4 rue de Bruxelles ∙ F-67170 Bernolsheim
lectra-t ag
Blegistrasse 13 ∙ CH-6340 Baar
www.brematic.com
www.brennenstuhl.com
Déclaration de conformité
Par la présente, nous, société Hugo Brennenstuhl GmbH & Co.KG,
déclarons que le type de matériel radio UPMS 868 01W400 3726 est
conforme aux directives 2014/53/EU et 2011/65/EU (RoHS II). La dé-
claration de conformité européenne est disponible en version complète
à l'adresse Internet suivante : www.brematic.com/fr/service/konfor-
mitaetserklaerung/ke_1294710.pdf
Ce produit est conforme aux exigences légales, nationales et européennes
en application.Tous les noms de société et de produit cités dans ce docu-
ment sont des marques déposées par leurs propriétaires respectifs.
Tous droits réservés.
Inhoudsopgave
Table of contents
Languages:
Other brennenstuhl Controllers manuals
Popular Controllers manuals by other brands

YASKAWA
YASKAWA MP2000iec Example Code Manual
IS Technologies
IS Technologies ISL V2 Series installation manual
Uponor
Uponor SETPOINT 511S Installation and operation manual
Phenom
Phenom 55852B quick start guide
Team Orion
Team Orion Vortex R10 One instruction manual
Omron
Omron NE1A-SCPU01 - 2006 Operation manual
