TPMUNI2
Basic Flush Ceiling Mount
with Quick Release
AssemblyInstructions
PARTS LIST
Qty Description
1 Arm Assembly with Ceiling Plate
1 MountingBracketHead
1 PressurePlatew/ 4 Countersunk Boreholes
1 PressurePlate
4 SwivelArms
Qty Description
4 CountersunkPhillipsScrews
4 ClampingScrews
1 Pkg. M3 Distance Bolts with Screws & Washers
1 Pkg. M4 Distance Bolts with Screws & Washers
1 Pkg. M5 Distance Bolts with Screws & Washers
1 Pkg. M6 Distance Bolts with Screws & Washers
4 Countersunk Phillips Bolts
(These bolts can be used to replace the
clampingscrews for security)
2 AllenWrenches
HARDWARE LIST
STEP 1
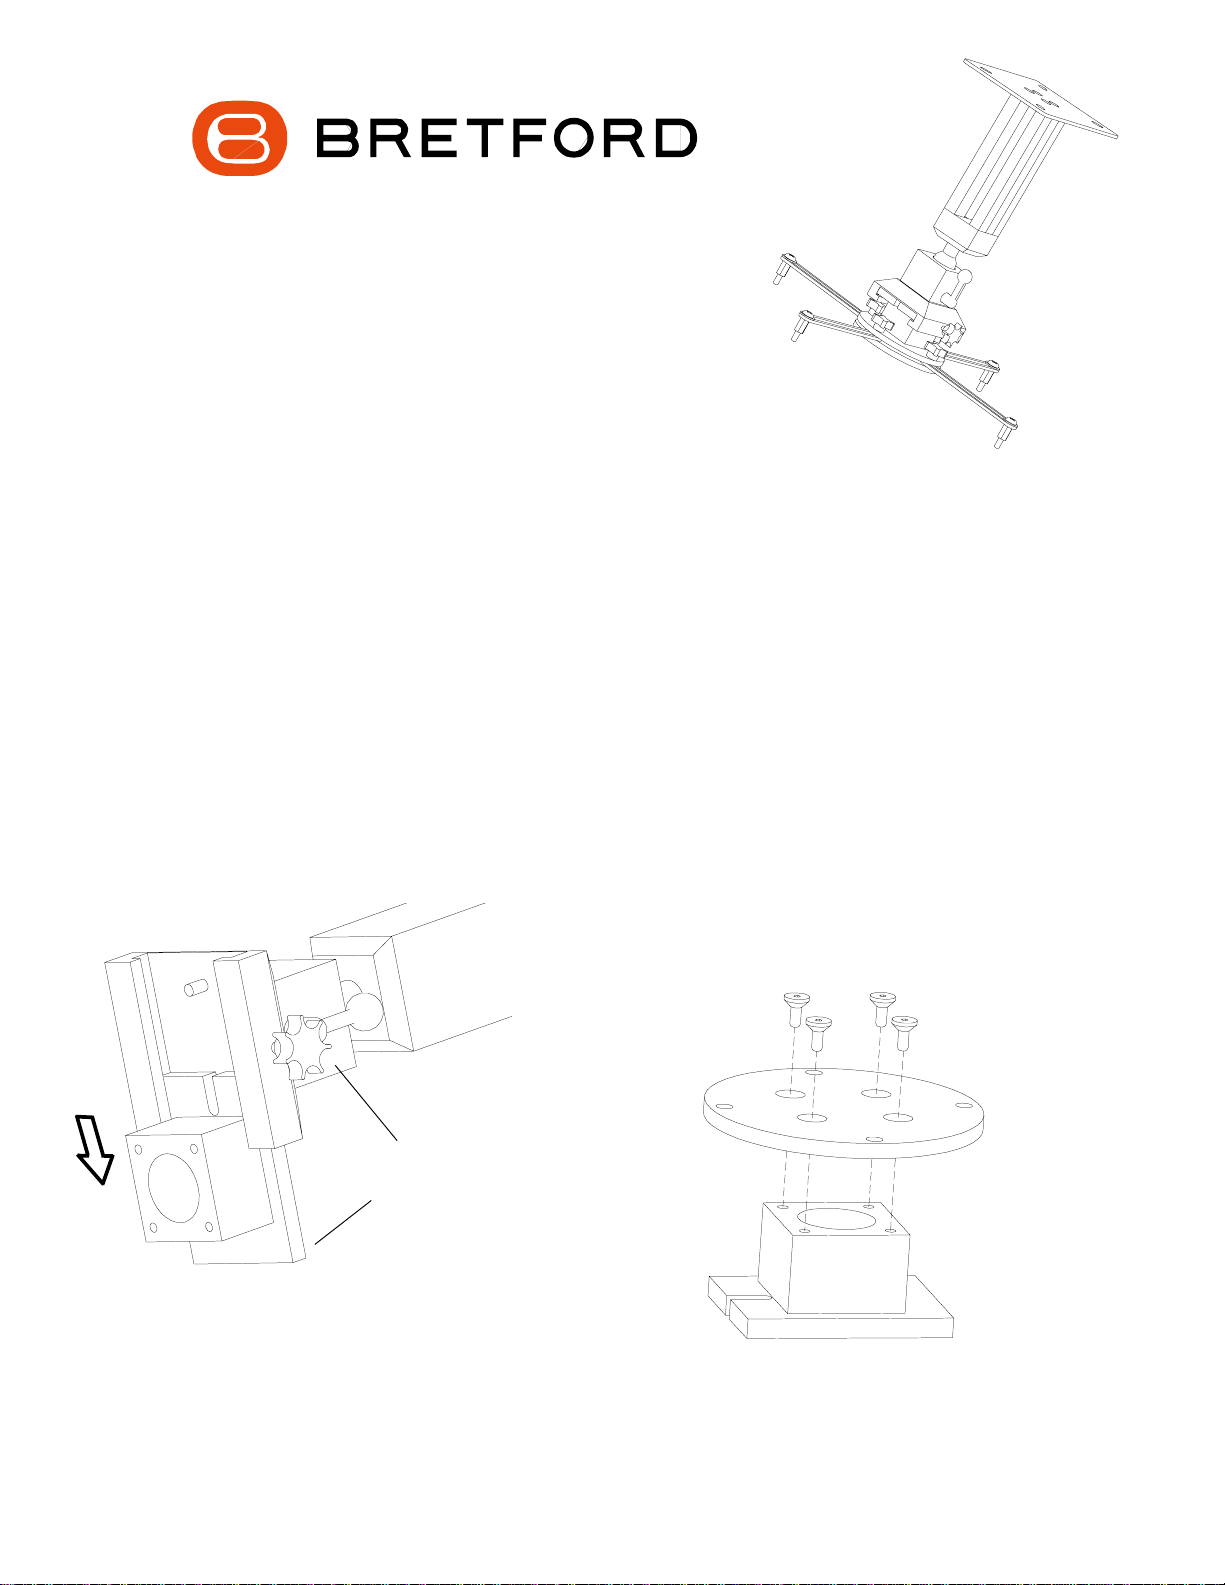
Removethe mounting bracket head fromthe arm assembly by unscrewingthe knob as shown
in FIGURE 1. Position the pressure plate (the one with the countersunk boreholes) onto the
mountingbracket head. Using supplied Allen wrenchsecure together with the countersunk
screws as shown in FIGURE 2.
FIGURE 1 FIGURE 2
TurnKnobtoRelease
MountingHead
WARNING: Thisarm mountis intendedto supportprojectors witha maximumweight of26lbs. If your
projectordoes nothave mountingnutsembedded inthe bottom,it cannotbeattached tothis armmount.
THIS ARM MOUNT IS INTENDED AS A CEILING MOUNT ONLY. A QUALIFIED PROFESSIONAL
SHOULD BE USED TO PROPERLY INSTALL THIS UNIT TO THE CEILING. BRETFORD DOES NOT
RECOMMEND THE USE OF POWER TOOLS AND WILL NOT BE LIABLE FOR THE IMPROPER
USE OR INSTALLATION OF ITS PRODUCTS.


