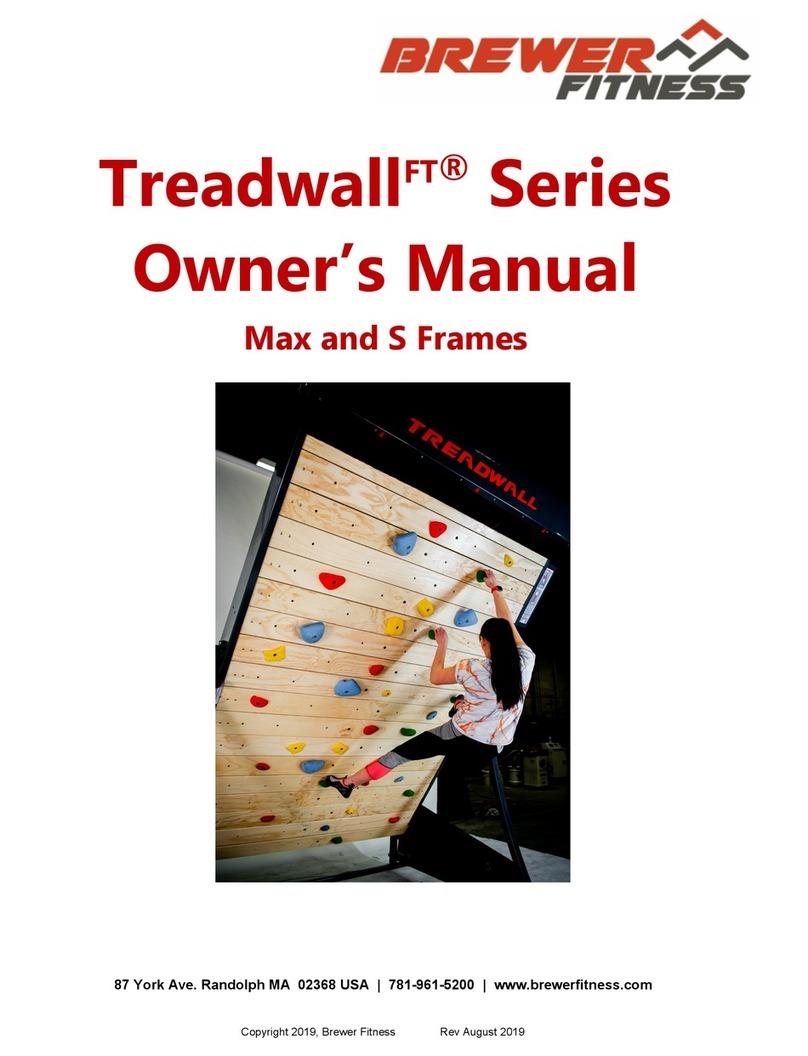
Brewer Fitness M6 Pro-V User manual

Treadwall M6 Pro-V
Owner’s Manual
87 York Ave. Randolph MA 02368 | 781-961-5200 | www.brewerfitness.com
Copyright 2017, Brewer Fitness

i
Treadwall M6 Pro-V Owner’s Manual—2018
Table of Contents
Introduction / Registration 1
Safety tips / Specifications 3
Operating Instructions/hold setup 5
Making Your Treadwall a Success 11
Information for Your Staff 13
Training Tips/Guidelines 14
Activities & Promotional Ideas 16
Frequently Asked Questions 18
General Maintenance 20
Troubleshooting 22
Service Instructions 23
Assembly instructions 28
A-Frame Assembly 29
Main Channel Assembly 33
Glossary 49
Warranty 50
Contact Info 52
TREADWALL
M6 Pro
Complete Owners Manual

1
Treadwall M6 Pro-V Owner’s Manual—2018
INTRODUCTION
Vertical movement is a new category of training that works the whole body and
mind together.
The Treadwall delivers a full range of workout opportunities - from a remarkable
aerobic burn to an upper-body core and grip-strength workout that challenges the
fittest athletes.
When introducing the wall, it is important that the staff understands how to
unlock the potential benefits of this powerful fitness tool.
The owner's manual is designed to help managers, staff and trainers take full
advantage of this equipment. This reference tool emphasizes the benefits of
vertical movement with links and resources to help integrate the wall into fitness
routines. In addition, there are incentive programs to help ramp up popularity and
much more.
PRODUCT REGISTRATION
Record your serial number here:________________________________
Please visit brewerfitness.com/OwnersManual to register your new Treadwall with us.
You can also email us at sales@brewerfitness.com with your contact information and
serial number to complete your product registration.
You must make sure to register your new Treadwall to receive service updates.

3
Treadwall M6 Pro-V Owner’s Manual—2018
Safety Tips
Safety Tips
WARNING - Read all instrucons before assembling and using the Treadwall.
For Assembly:
Be careful when moving and installing larger Treadwall components, as they might require
effort to li and aach. Some steps require two individuals. Have a second person assist you
during assembly and make sure to have two ladders on hand. Several of the heaviest
components need to be lied to the top of the machine.
For General Use:
Carefully read and understand the Treadwall Owner’s Manual. Provide a general overview of
the basic operaons and usage to new Treadwall users. Do not place other equipment or any
items in the fall zone or onto the floor mat of the Treadwall.
M6 Pro-V Specifications
Weight 1150 Pounds
Dimensions 83” wide x 72” deep x 128” tall
Width of climbing surface 6 feet
Length of climbing surface 20 feet
Number of hold Placements 280
Angle Range 3 Options: +5 degrees, vertical, -5 degrees
Electrical Requirements 9 V DC Plug-in Transformer
Electronic Display Measures Distance in feet, time, and calories
Included Holds 40 custom training holds and 14 Ladder Line
holds
Maximum Hold Size 2.5 inches high x 6 inches wide
Floor Mat 8' x 6' custom mat, 1.25" dual foam
Warranty 10 years on structural parts

5
Treadwall M6 Pro-V Owner’s Manual—2018
Operating Instructions
INTRODUCTION
There are 2 primary controls to know about on the Treadwall M6.Pro-V
You can adjust the speed of the climb with the lever located on the right side of the machine, and
you can view and track the stats on your exercise with the digital counter also on the right side
of the machine.
HOW THE TREADWALL WORKS
It’s very simple, you can just hop on and climb! The weight of your body will move the wall
downwards. With our auto-stop technology, if you stop climbing, the Treadwall will stop and
wait for you. The Treadwall will not move unless you are on the wall and climbing upwards.
You can choose the angle of the wall during assembly, and change later by re-bolting the wall
angle (10 minutes). There is a limited range of three options: slightly inclined (easier), vertical,
and slightly overhanging (harder). Easier angles are great for aerobic workouts and focus on
the lower body. Overhanging angles target upper body strength and really engage the core.
Use the digital counter to set goals, manage your progress, and track your exercises. The
counter will begin automatically counting upwards when you start climbing, or you can set time
Speed Lever
Digital Counter
Control Mechanisms

6
Treadwall M6 Pro-V Owner’s Manual—2018
Operating Instructions
Speed Control
To control the speed of your climb you simply move
the lever up and down. At the “0” setting the
Treadwall will be completely stopped for most people
or it may just barely creep downwards for heavier
individuals. At speed “10” the wall is at its fastest and
only requires about 50 pounds of weight to move.
The ideal setting will be different for people of
different weights.
Accurate current and average speeds are displayed
on the counter in feet/min. or meters/min as required.
Angle Changing
The M6 Pro-V is a fixed angle unit:
however you can reset the angle with 10
minutes work. There are three options:
+5 degrees, vertical and –5 degrees.
To change the angle unbolt the four bolts
that attach the channels to the side
frames. A set of 9/16” wrenches are
used. Swing the wall into the new position
and re-bolt.
On each side there are two bolts at-
taching the frame to the channel
blocks: Remove the plastic covers and
using (2) 9/16” wrenched, un-bolt to
change angles. Re-bolt securely.

7
Treadwall M6 Pro-V Owner’s Manual—2018
Operating Instructions
Digital Counter
The counter will start as soon as you begin climbing. It will pause if
you rest for 5 seconds, and it will power down after 5 minutes of non-
use. To turn the counter back on just start climbing, or tap the
screen.
You can adjust the view angle by adjusting the small arm at the rear
of the counter.
Adjustment knobs
0
Calories
Time
0
Distance
0
Speed
0
Average Speed
Reset
Setup ?
Done
Distance Goal
?
Time Goal
Hold buttons above for
distance and time goals
Enter weight
below for
0
00:00
0
1 2 3 4 5
6 7 8 9 0
Clear
Home Screen
The home screen shows real-time data for a single climb. When
you pause for 5 seconds the counter will hold your data on the
screen until you begin climbing again and then it will start from
where you left off. To reset the counter for a new climber hit
Setup Screen
To set a distance or time goal tap or hold the buttons labeled
“Distance Goal” or “Time Goal”. The values will increase more
rapidly as you hold the buttons down longer.
The number pad allows you to enter your weight for a more
accurate calorie count. The default weight is 150 pounds.
When you are satisfied with your goal, hit done and the value
you selected will appear on the home screen.
You can only select a distance or a time goal, not both at once.

9
Treadwall M6 Pro-V Owner’s Manual—2018
Operating Instructions
Installing the climbing holds—Route Setting!
Placing the climbing holds onto your Treadwall is called route setting, and the individual
climbs you set up are called routes. On our website at brewerfitness.com/routesetting, you
can download, adapt, and even create routes to use and share with others.
The standard set of Treadwall climbing holds comes with 40 holds. There are 13 easy green
holds, 14 orange medium difficulty holds, and 13 red holds for the advanced user. You can set
individual routes by only using hold of a given color, or you can set up the entire wall and label
individual routes with colored pieces of tape.
If you want to try your own hand at route setting one of the most fun ways to start is to place
holds almost randomly with one hold per panel. Alternate the color of the holds as you move
from panel to panel. Then, try climbing a single color. If you find any move too difficult just
move a nearby hold of that color to make the climb feel as hard or as easy as you like.
Climbing Hold Rules
There are 2 important rules to remember
when purchasing and attaching holds for
your Treadwall.
1. Holds can not be more than 2.5” tall,
this is the projection from the
climbing surface.
2. Holds can not overlap two panels,
the panels must be free to come
apart and together as they rotate
around the Treadwall.
Assemble holds with a 3/8 bolt and
a 5/16” Allen wrench

11
Treadwall M6 Pro-V Owner’s Manual—2018
Making Your Treadwall a Success
Groundwork:
Staff should understand that vertical movement is a basic human activity, non-
contrived and part of everyday life. It should be presented as a positive and ac-
cessible addition to the facility.
Climbing will often be perceived as challenging and intimidating activity. A staff
locked into the value of vertical movement as a fitness tool is the key for chang-
ing this perception. Members should be actively encouraged to try the Treadwall
and consider it for part of their workout routine. We have found that people who
are initially hesitant often end up being the biggest Treadwall fans.
Choosing an Advocate/Integration
When the Treadwall is first installed, it will be an unfamiliar item. Climbing will be
a relatively new training activity for most. We recommend that a staff person be
chosen as the main advocate for the product’s introduction period. This person
might take on the following responsibilities:
1. Read through the manual thoroughly to become familiarized with the Treadwall
operation procedures, use and set-up.
2. Formulate a plan to integrate this equipment into their classes, personal train-
ing or general usage.
3. Create fun ways to get you members hooked on Vertical Movement - challeng-
es, competitions and incentives (such as our popular Everest Club program).
Set up a meeting with trainers to Establish Goals and Discuss Ideas:
1. Cross-training for sports that emphasize forearm strength such as martial arts,
baseball, swimming and tennis.
2. Weight-loss programs. Focus on manageable goals, using easier positive an-
gles. Emphasize smoothness over speed.
3. For Cardiovascular try 15 minutes once a week or every two weeks in place of
a treadmill.
4. As a warm-up, especially for lifting. Suggest using ground-based training
(hands only) for larger lifters.

13
Treadwall M6 Pro-V Owner’s Manual—2018
Information for Your Staff
The Benefits of Vertical Movement: Valuable Information
Most fitness activities target isolated muscle groups, but vertical movement is differ-
ent. Using a Treadwall provides a full-body, non-repetitive exercise that can be
adapted by the user for different goals. You can customize the experience by ad-
justing the exercise patterns, angle of the wall and climbing speed.
In terms of focus and mental involvement, climbing has no peer. The activity re-
quires constant decision-making and concentration. This promotes a quick motor
response and muscle recruitment. Technique, balance and core strength interplay
and climbers often develop a heightened sense of body awareness and confi-
dence in their daily lives.
The Treadwall is very versatile. It can stand alone as a high- energy interval trainer,
with longer workouts to develop endurance, or as part of a circuit routine with oth-
er equipment.
Customize it to suit YOUR needs and GOALS:
1) You should use the equipment yourself. Get a first-hand look at how the workout
makes you feel, learning to access angle and speed to accommodate a range of
abilities. Experience the benefits of vertical movement personally.
2) At first, clients might consider this equipment to be intimidating, but knowledge
you can pass on to your members about training and benefits will help bridge the
gap.
3) Check out all the different ways it can be used, experimenting with different hand
grips, angles, speeds and body movement. Your personal experience and enthu-
siasm will engage the user. Be creative.
Encourage Members to Try It Out:
Introduce it at the easier positive angle first so that members can get familiar with
the balance and motions involved. The workout on the Quick Start guide at
www.brewerfitness.com is a good place to begin.
Emphasize controlled, smooth climbing and attention to balance and footwork.
Suggest short workouts to start, which will complement their current workout routine.

15
Treadwall M6 Pro-V Owner’s Manual—2018
QUICK HINTS:
1. Start them slow. Remind about auto-stop sensor panel.
2. Focus on Safety. Don’t jump off—ride it down. It will stop at the right height to
step off .
3. Tell them they are not very high off the ground if they seem reluctant (focus on
the padding below).
4. Mention the benefits of Vertical Movement so they are aware of WHY they
should use the equipment.
Full-Body/Burn Calories/Lean Muscle/Core Strength/Balance
1. Refer www.brewerfitness.com/ownersmanual for downloadable versions of the
Quick Start guide, printable Training Logs, resources for articles on the benefits
of climbing etc.
2. Refer to our website for full training program ideas and short workouts.
Climbing is a progressive activity—there is a great deal to learn about balance and
technique. The initial workouts should emphasize the fun and excitement of re-
learning an activity that has roots in the earliest childhood years. As climbers pro-
gress and become more comfortable, they naturally and inevitably gravitate to the
more challenging aspects of the sport.
Climbers love “problems” - climbing problems that is. They seek them out. They talk
about them. They work on them—sometimes for months or even years. Few things
in life are more satisfying than solving a tricky, elusive “problem” that initially
seemed completely improbable if not downright impossible.
Training Tips/Guidelines

17
Treadwall M6 Pro-V Owner’s Manual—2018
Elevation/Location
30' Typical street lamp
40’ Height of the Parthenon
190' Niagara Falls (American Side)
302' Statue of Liberty
555' Washington Monument
607' Space Needle, Seattle
642' Top Span, Astrodome roof.
984' Eiffel Tower, Paris
1250' Empire State Building, New York
1454' Sears Tower, Chicago
2,717’ Burj Khalifa (tower in Dubai)
3200' Angel Falls, Venezuela
4610' Mt. Vesuvius, Italy
5117' Devil's Tower, Wyoming
5267' Mt. Katahdin, Maine
6288' Mt. Washington, New Hampshire
7310' Mt. Koscivsko. high point in Australia
7569' El Capitan, Yosemite National Park
8842' Half Dome, Yosemite National Park
9570' Mt. Olympus, Greece
11245' Mt. Hood, Oregon
13766' Grand Teton, Wyoming
14161' Mt. Shasta, California
14495' Mt. Whitney, high point continental US
14692' The Matterhorn, Germany
Activities & Promotional Ideas
Other Ideas:
1. Other distances : trail length (Appalachian), Body of Water Length
(English Channel)
2. Weekly “Tread crew,” meet up group
3. Bi-monthly Competitions using wall (Triathlon: Rower, Pool, Tread-
wall) or other cardio pieces

18
Treadwall M6 Pro-V Owner’s Manual—2018
How hard is climbing on the Treadwall?
Climbing on the Treadwall is as hard or as easy as you
choose. The wall is customizable in difficulty by altering the
speed, angle and route you follow.
How fast can I climb on the Treadwall?
The Treadwall is easily adjusted via the speed lever. In addition, the auto-stop sys-
tem will keep pace with your stops and starts. We recommend starting off climbing at
a slower controlled pace, focusing on smooth movement.
How does the Treadwall work?
The Treadwall operates by the weight of the climber. There are no electric motors. A hydrau-
lic brake controls the speed of descent. The Treadwall cannot move aer the climber steps
off.
How long should I climb for?
This depends on your objectives. Test out various methods and take a look at our
training section: www.brewerfitness.com/index.php/info/training
Will the hold pattern get repetitious?
Eventually, but it takes much longer that you might expect. The Treadwall has no beginning
or end, and it connually presents you with new challenges and possibilies. It is simple to
set holds in other places and change the climb completely.
Do I need special shoes to climb the Treadwall?
No. Any well fied athlec shoe will do quite well. However, special climbing shoes are more
enjoyable to climb in. Climbing shoes are very close fing with a special flat sole of special
'scky' rubber. They are quite expensive. Karate shoes are a good inexpensive alternave.
Can anybody use the Treadwall?
Almost anyone can perform vertical movement. Anyone with a serious physical prob-
lem should consult with their doctor, and people with very long fingernails should
think twice. We also suggest taking off your rings before climbing.
Can you be too old to climb?
Maybe, but we have reports of people well into their 70s who enjoy climbing on the
Treadwall. One climber 72 years old recently completed the Everest challenge
(29,028 ft.) - for the second time!
Q&A
Frequently Asked Questions

19
Treadwall M6 Pro-V Owner’s Manual—2018
Does everyone like it?
Most people who try the Treadwall love it. Some of the biggest fans are people who
start off saying "I don't think I'd like that." Everyone should be encouraged to give it a
try.
I have never done that. Will it take me long to learn?
Never climbed? - not likely. Most children spend many happy hours climbing play
equipment and trees. For adults, climbing on the Treadwall recaptures much of that
simple joy and natural vertical movement.
What kind of bodies does Vertical Movement build?
Climbing and gymnastics are similar, promoting muscle tone, flexibility and endurance
with increased agility and body awareness. Your body will respond by burning fat, cre-
ating a lean muscle structure and increasing bone density
Do serious climbers like the Treadwall?
Yes, it is a perfect endurance training tool, all the way from elite climbers to a novice.
Frequently Asked Questions

21
Treadwall M6 Pro-V Owner’s Manual—2018
General Maintenance
After The First Month:
Check the drive chain to make sure that it is not loose. Tighten if necessary. (Pg. 17).
Check and tighten holds if necessary. They may loosen more readily as the panels adjust to
your gym.
Every 6 Months:
Lubricate the side channels (Pg. 19) —This can be done more or less frequently depending
on usage.
Clean the Climbing holds and set new routes. (Pg. 19)
Wipe down and clean machine.
Maintenance Schedule
How to access the inside of your Treadwall
The Treadwall wall panels are bolted to a set of chains. These two chains form a continuous
loop around the top and bottom axles. Each panel is attached to flanges mounted on the chains
with 4 Philips head bolts and 3/8” lock nuts.
Rotate the wall so that the desired panel is lined up with the access hole. Remove the cover,
then remove panel bolts and nuts. Rotate the wall downward and allow the panel to drop out at
bottom. Multiple panels can be removed in a similar manner if necessary. Rotate the wall until
the opening is at the height where service is required. Reverse this process to reattach the
panel and cover up the access hole.
Plasc access covers
Panel Bolts

23
Treadwall M6 Pro-V Owner’s Manual—2018
Service Instructions
Frame Alignment
Adjust to these dimensions if the wall appears
too far to one side. The Pro-V is locked into the
side frames, however if the whole wall appears
tilted to one side you can re adjust the wall with
the back x-bracing. You can use a level on the
side frame to get the alignment vertical.
You will have to loosen one turnbuckle and
tighten the other: the side that is tightened will
be the side to which the wall is pulled.
Image shown is the Pro, however the system is
the same on the Pro-V.

25
Treadwall M6 Pro-V Owner’s Manual—2018
Service Instructions
MICRO-
SWITCH
ADJUST-
MENT
BOTTOM OF RIGHT CHAN-
NEL
Auto-Stop Adjustment
1. Loosen the two small nuts on the outside of
the channel that hold the microswitch in
place.
2. Adjust the microswitch by pivoting it around
its upper mounting screw (see diagram).
3. Retighten the small nuts (not too much force
– they are very small!)
4. Test the wall and re-adjust if necessary.
If the microswitch needs to be inspected further
or replaced remove the plastic access hole
cover and all nuts and washers from the
microswitch. Reach inside of the access cover
and unclip the electrical wire from inside the
channel and pull the microswitch out.
Counter Sensor Adjustment
1. Remove 1 or 2 panels
2. Rotate panel gap to reveal sprocket and sensor assembly on right side of machine.
3. Inspect sprocket and make sure that three magnets are present, they should be equally
spaced around the shaft with the flat face of the magnet facing outwards
4. Inspect reed switch position, the tip should be 1/8 to 1/4 inch from the magnets.

27
Treadwall M6 Pro-V Owner’s Manual—2018
Safety Tips
Safety Tips
WARNING - Read all instructions before assembling and using the
Treadwall.
For Assembly:
Be careful when moving and installing larger Treadwall components, as they might
require effort to lift and attach. Some steps require two individuals. Have a second
person assist you during assembly and make sure to have two ladders on hand.
Several of the heaviest components need to be lifted to the top of the machine.
For General Use:
Carefully read and understand the Treadwall Owner’s Manual. Provide a general
overview of the basic operations and usage to new Treadwall users. Do not place
other equipment or any items in the fall zone or onto the floor mat of the Treadwall.
M6 Pro-V Specifications
Weight 1250 Pounds
Dimensions 83” wide x 110” deep x 130” tall
Width of climbing surface 6 feet
Length of climbing surface 20 feet
Number of hold Placements 280
Angle Range 3 Options: +5 degrees, vertical, -5 degrees
Electrical Requirements 9 V DC Plug-in Transformer
Electronic Display Measures Distance in feet, me, and calories
Included Holds 40 custom training holds and 14 Ladder Line holds
Maximum Hold Size 2.5 inches high x 6 inches wide
Floor Mat 8' x 6' custom mat, 1.25" dual foam
Warranty 10 years on structural parts

TREADWALL M6-V INSTALL AND SERVICE MANUAL
Copyright 2016
Brewer's Ledge Inc.
www.treadwall.com

LOWER FRAMES
UPPER FRAMES
LOWER HORIZONTAL
UPPER HORIZONTAL
X-BRACING
ANGLE SPACERS
ANGLE SPACER HARDWARE (BAG WM-3)
A-FRAME HARDWARE (BAG WM-2)
SUPPORT FRAME PARTS
Page 1
M -V install manual
1-15-1
TOOLS NEEDED (PER PERSON):
9/1 " COMBINATION WRENCH
3/4" COMBINATION WRENCH
MEDIUM SIZE ADJUSTABLE WRENCH
CORDLESS DRILL WITH #2 PHILLIPS SCREWDRIVER BIT
3/8" SOCKET WRENCH
(2) 8 FOOT STEPLADDERS
Table of contents
Other Brewer Fitness Fitness Equipment manuals