Bricon CLUB-MASTER User manual

CLUB-MASTER
User Guide
International
BRICON nv
Europark Oost 15C, 9100 Sint-Niklaas, Belgium.
Tel: +32 3 777 39 74 Fax: +32 3 778 07 35
Website: www.bricon.be email: bricon@bricon.be
Herold Tamás e.v.
2921 Komárom, Akácfa utca 25.
Tel: +36 70 508 56 98
Web: www.bricon.hu email: bric[email protected]
BRICON CLUB-MASTER 2
The BRICON CLUB-MASTER is intended for the electronic recording of racing pigeons.
The BRICON CLUB-MASTER should only be used for the purpose that it is intended.
Protect the BRICON CLUB-MASTER against water and extreme sunlight and temperatures.
Modifications reserved.
Important
• Position the club-master at least 1 metre away
from another master.
• Maintain at least 0.5 metre distance between
the clock and the club-master
• Install the club-master at least 1 metre from
a monitor.

Contents:
Page
1. Installation. 4
1.1. Foreword. 4
1.2. Components of the BRICON CLUB-MASTER system. 4
1.3. Schematic the BRICON CLUB-MASTER. 4
2. Assembly of the BRICON CLUB-MASTER. 5
2.1. The BRICON CLUB-MASTER. 5
2.2. The BRICON UNIVES-BOX. 5
2.3. UNIVES-BOX connection. 5
2.4. Connecting the ETS clock. 6
2.5. The Printer. 6
2.6. The PC. 6
2.7. The Radio-frequency mother clock. 6
2.8. GPS receiver 7
2.9. Gender. 10
3. PC software. 10
3.1. Starting the BRICON CLUB EDITOR (BCE). 11
3.2. Fancier - List. 12
3.3. Fancier- Details. 14
3.4. Clubs. 16
3.5. Races. 17
3.6. Options. 18
4. Exploring the menu of the Club-Master for the first time. 21
4.1. The language of the display. 21
4.2. Setting the contrast of the display. 21
4.3. Connect the Club-Master to the PC. 21
5. Linking chip rings. 22
5.1. Connect master to the PC. 22
5.2. Create Fancier. 23
5.3. Linking official association life rings with chip rings. 24
5.4. Send fancier to the ETS. 27
6. Unives 1.7 28
7. Basketing races. 28
7.1. Making an emergency link. 30
7.2. Cancel a basketed pigeon. 30
8. Read Out races. 31
8.1. Delete the closed race from the ETS clock. 32
9. Progress Reading. 32
10. Antenna options. 32
11. Races. 33
12. Set up. 33
13. Printing. 33
14. Set time/strike master timer 34
15. Updating. 34
16. Updating the ETS devices. 34
17. Questions and solutions. 35
18. Declaration of conformity. 36
BRICON CLUBMASTER 3

1. Installation.
1.1. Foreword.
Thank you for your confidence in BRICON.
This manual will give a detailed explanation of the functions of the BRICON CLUB-MASTER.
The CLUB-MASTER is to be permanently situated at the organisation. The ETS (clock) is the
equipment of the fancier, which must be present at the basketing and read out of races.
1.2. Components of the BRICON CLUB-MASTER System.
The system contains the following components :
1 BRICON CLUB-MASTER .
2 BRICON radio-frequency mother clock (optional) .
3 The power supply (12 volt transformer).
4 USB cable.
5 Connection cable RS 232 (female/female).
6 Connection cable (x2) (male/male) (optional).
7 Unives-box (optional).
8 Black Unives cable.
9 GPS receiver.
NB: The Unives-box and the two connection cables (male/male) are optionally supplied.
1.3. Schematic of the BRICON CLUB-MASTER.
BRICON CLUB-MASTER 4
12
7
45 and 6
3
8
or
for connecting
other brands of ETS.
9

2. Assembly of the CLUB-MASTER.
2.1. The BRICON CLUB-MASTER.
2.2 The BRICON UNIVES-BOX (Optional).
The Bricon Unives-box allows other ETS brands to connect to the Bricon Club-Master, having
connections for Benzing-Atis, Tipes and Unikon.
It is possible to connect Bricon clocks directly to the Club-Master without using the Unives-box.
A Black Unives cable may be supplied as an alternative to the Unives-box.
2.3. The BRICON UNIVES-BOX connection (optional).
A Bricon Unives-box is connected to the Bricon Club-Master using the cable (male/male) provided.
This cable will provide the Unives-box with power, therefore it is not normally necessary to connect
the Unives-box with a power supply. Under some circumstances however it may be necessary to
connect a power supply to the Unives-box due to the high power consumption of some brands of ETS.
BRICON CLUB-MASTER 5
Unives/Bricon
connection
SD Memory slot
PS/2 keyboard /GPS
USB-connection/
PC connection Radio-frequency mother clock/ gps
Serial connection
PC connection
Printer connection
Power supply
Speedy
docking
station
Speedy
Keyboard
Display
Unikon connection
BRICON connection
Club-Master connection
BRICON connection
Unives connection
- Benzing-Atis (with cable)
- Tipes (with cable)
- Tauris (with box)
- Mega (with standard)

2.4. Connecting the ETS clock.
You can connect other brands of ETS clock to the Bricon Unives-box, using the necessary cables as
supplied by each particular brand of ETS. For Bricon clocks all cables are provided and the Speedy
clock also has its own docking station on the Bricon Club-Master.
2.5. The Printer.
A printer is necessary to print the basketing and clocking lists. You can use any DOS-compatible
printer (with a language of PCL5 or 6) but please note that Windows/USB printers are not compatible.
Use a standard parallel printer cable to connect the printer to the Bricon Club-Master.
2.6. The PC.
You can use any PC equipped with Windows XP or higher to communicate with the Club-Master.
The PC is connected with the Bricon Club-Master by a serial RS-232 null-modem cable.
The null-modem cable can be recognised by the 9-pins female connection on both sides.
It is also possible to connect the Bricon Club-Master to the PC using the USB cable provided.
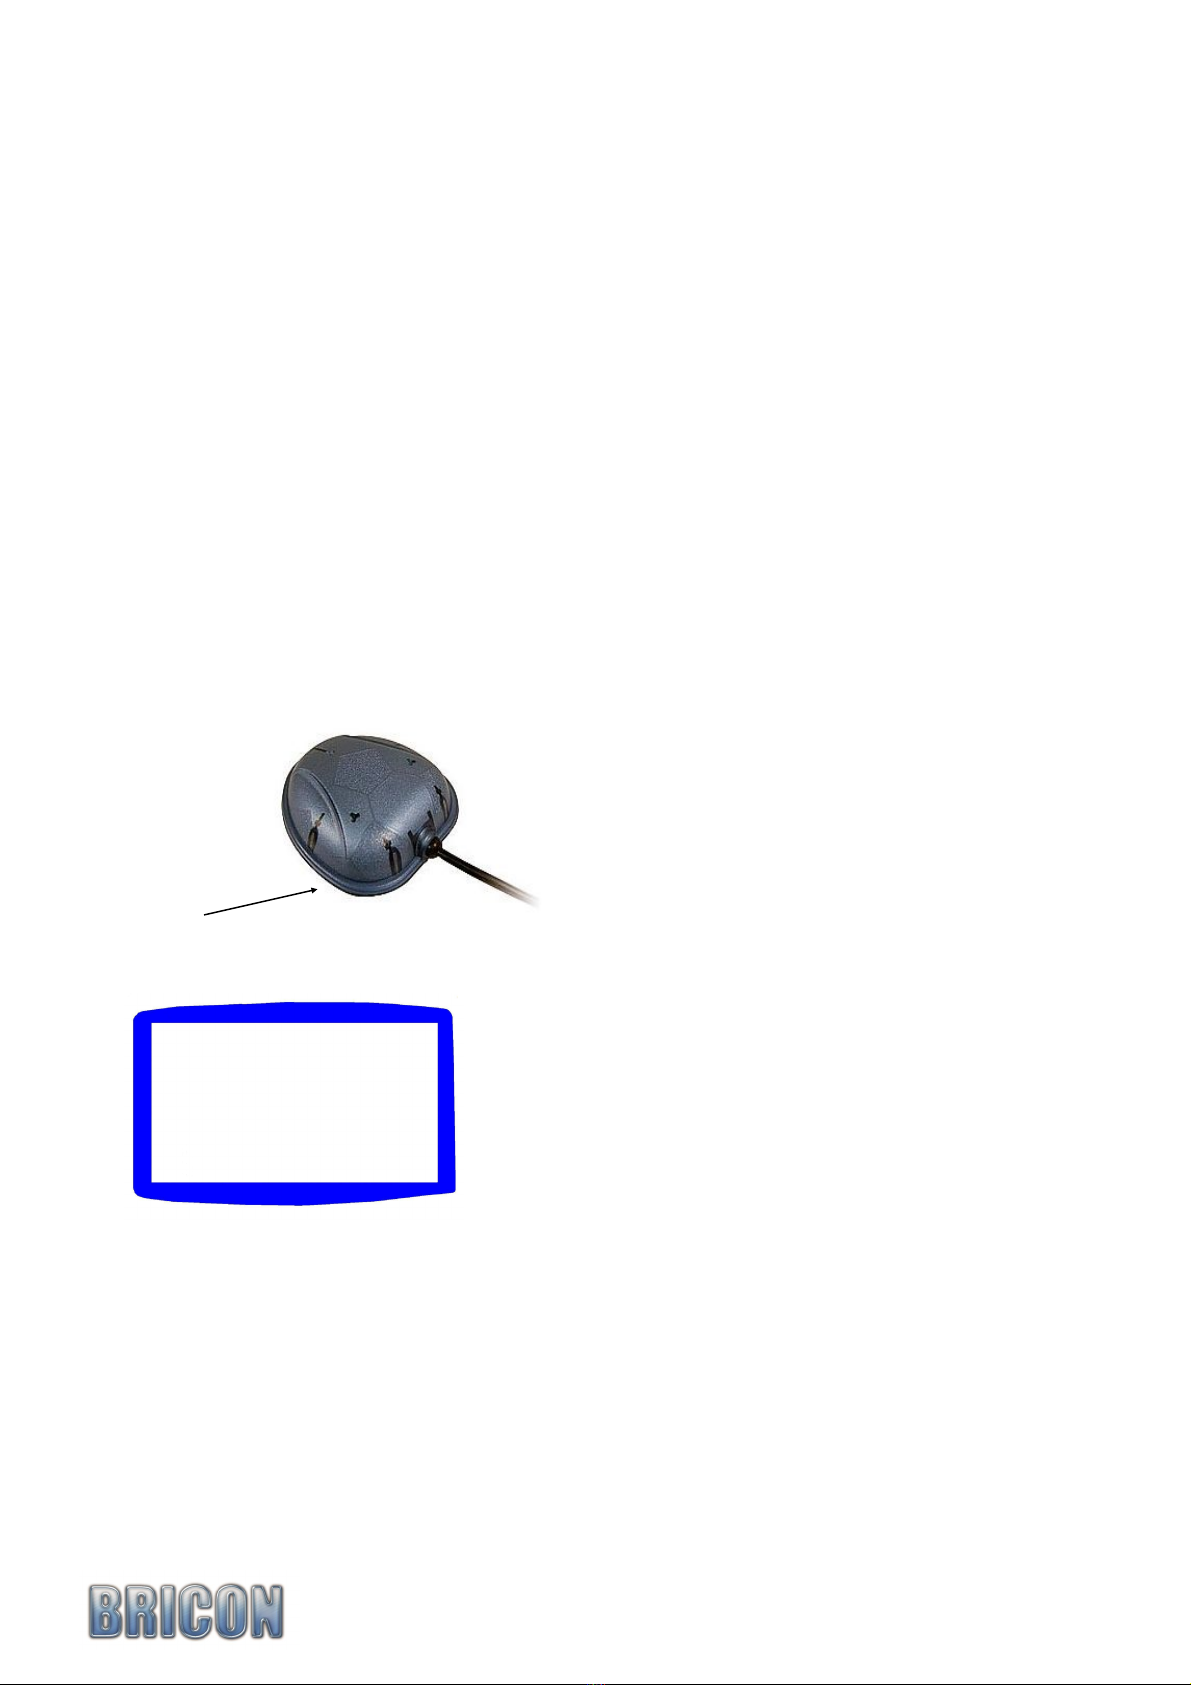
2.7. The BRICON radio-frequency mother clock.
The Bricon mother clock is a radio-frequency controlled clock that automatically synchronises with the
radio-frequency time signal transmitted by the National Physical Laboratories in Cumbria.
The master checks that the mother clock is synchronised with the time signal and if the clock has no
reception from the time signal (no antenna mast showing on the display) it will not synchronise.
Enclosed spaces such as armoured concrete and metal will disturb the signal. For this reason the mother
clock should always be kept in a place where you can receive the signal, the most suitable being near to
a window. By inserting an object into the reset button on the back of the mother clock, the clock will
search for the time signal once again. You will see 3 or 4 lines and after a period 5 minutes the mother
clock should have reset. Do not hold the mother clock in your hand during the synchronisation because
this will cause disturbance to the signal. If possible it is recommended to check that a signal is being
received by the mother clock, a number of hours before both the basketing and race checking..
The mother clock is provided with 2 AAA batteries. Open the clock with a small screwdriver
(2 screws) and place the batteries. Depending on the type of batteries, the life span is approximately 2y.
BRICON CLUB-MASTER 6

2.8. GPS receiver.
Synchronisation with the « GPS – Module »
Start up the Bricon Club-Master.
Select menu-option “ 6. Set Time ”
Press < OK >
The following new menu is shown.
Not all of these options are active, i.e. the “Manual synchr.” is only active for those countries
where manual setting is allowed.
Press < 1 > to activate the GPS setting.
The following message then appears:
The module has two connectors (RS232 and PS2). Connect the RS232 to the back of the Master
(where you would normally connect the HKW or PC-cable) and connect the PS2 into the left hand
side of the master. The PS2 provides the power.
PS/2
RS 232
Fig. 2Fig. 1 Fig. 3
GPS syncr.
Radio syncr.
Manual syncr.
Master-Timer
<C> Cancel
Set RTC from GPS
Connect GPS – Module
PRESS <C> to cancel
BRICON CLUB-MASTER 7
Advice: Have the PS2 and GPS connected when you start up the master (fig 2), as the module is then
powered-on and immediately commences searching for the satellites(fig 2).
Now connect the RS232 from the GPS – Module, but not before the above message is displayed be-
cause otherwise this connection will activate the automatic PC-communication (fig 3).
Press < C > if you want to cancel the operation.
The GPS - Module has a red light indicating it’s activity.
- No red light No power (check the connections)
- Continuous red light Module powered but no connection with the satellites.
- Blinking red light The module is reading the satellites and is ready for time setting.
Press < OK > once the GPS - Module is reading the satellites.
The message changes and shows the time after a short while. If it takes too long, repeat the proce-
dure:
Now disconnect the RS232 connection of the GPS – Module.
Press any button on the keypad of the master to start the printing of the synchronisation sheet.
Red light
Set RTC from GPS
Connect GPS – Module
GMT - UTC correct.: 0
DD/MM/YY
HH:MM:SS
Discon. GPS – Module
Press any key
BRICON CLUB-MASTER 8

BRICON CLUB-MASTER 9
Somme country’s have more than one time zone
Then it is possible to fill in the time difference
The master will calculate automatic the time difference
Set RTC from GPS
Connect GPS – Module
GMT - UTC correct.: 0
DD/MM/YY
HH:MM:SS
Discon. GPS – Module
Press any key
2.8. The Gender.
The gender cable is used to change a 9-pin female connector to a 9-pin male.
There are three gender cables provided.
3.0. PC-SOFTWARE.
You must provide the clocks with a link table (a list of the association ring numbers of the pi-
geons that are to be raced, each linked to a chip ring) before you can basket a pigeon. You can make
a link table with the Club-Master using the PC-software. This software is free provided on a CD, but
can also be
obtained free on the Bricon website at www.bricon.be.
Install the BRICON CLUB EDITOR (BCE) link program, and the CD will start automatically
after which the instructions should be followed. The program will operate under Windows 98/ME,
but is designed for use with XP and Vista. If your computer is connected to the internet, you will
automatically receive the latest version, but when operating under Windows 98/ME you must down-
load the updates manually. After the installation a BCE icon will appear on the desktop of your com-
puter. You can start the Bricon Club Editor software by double clicking on the icon.
BRICON CLUB-MASTER 10

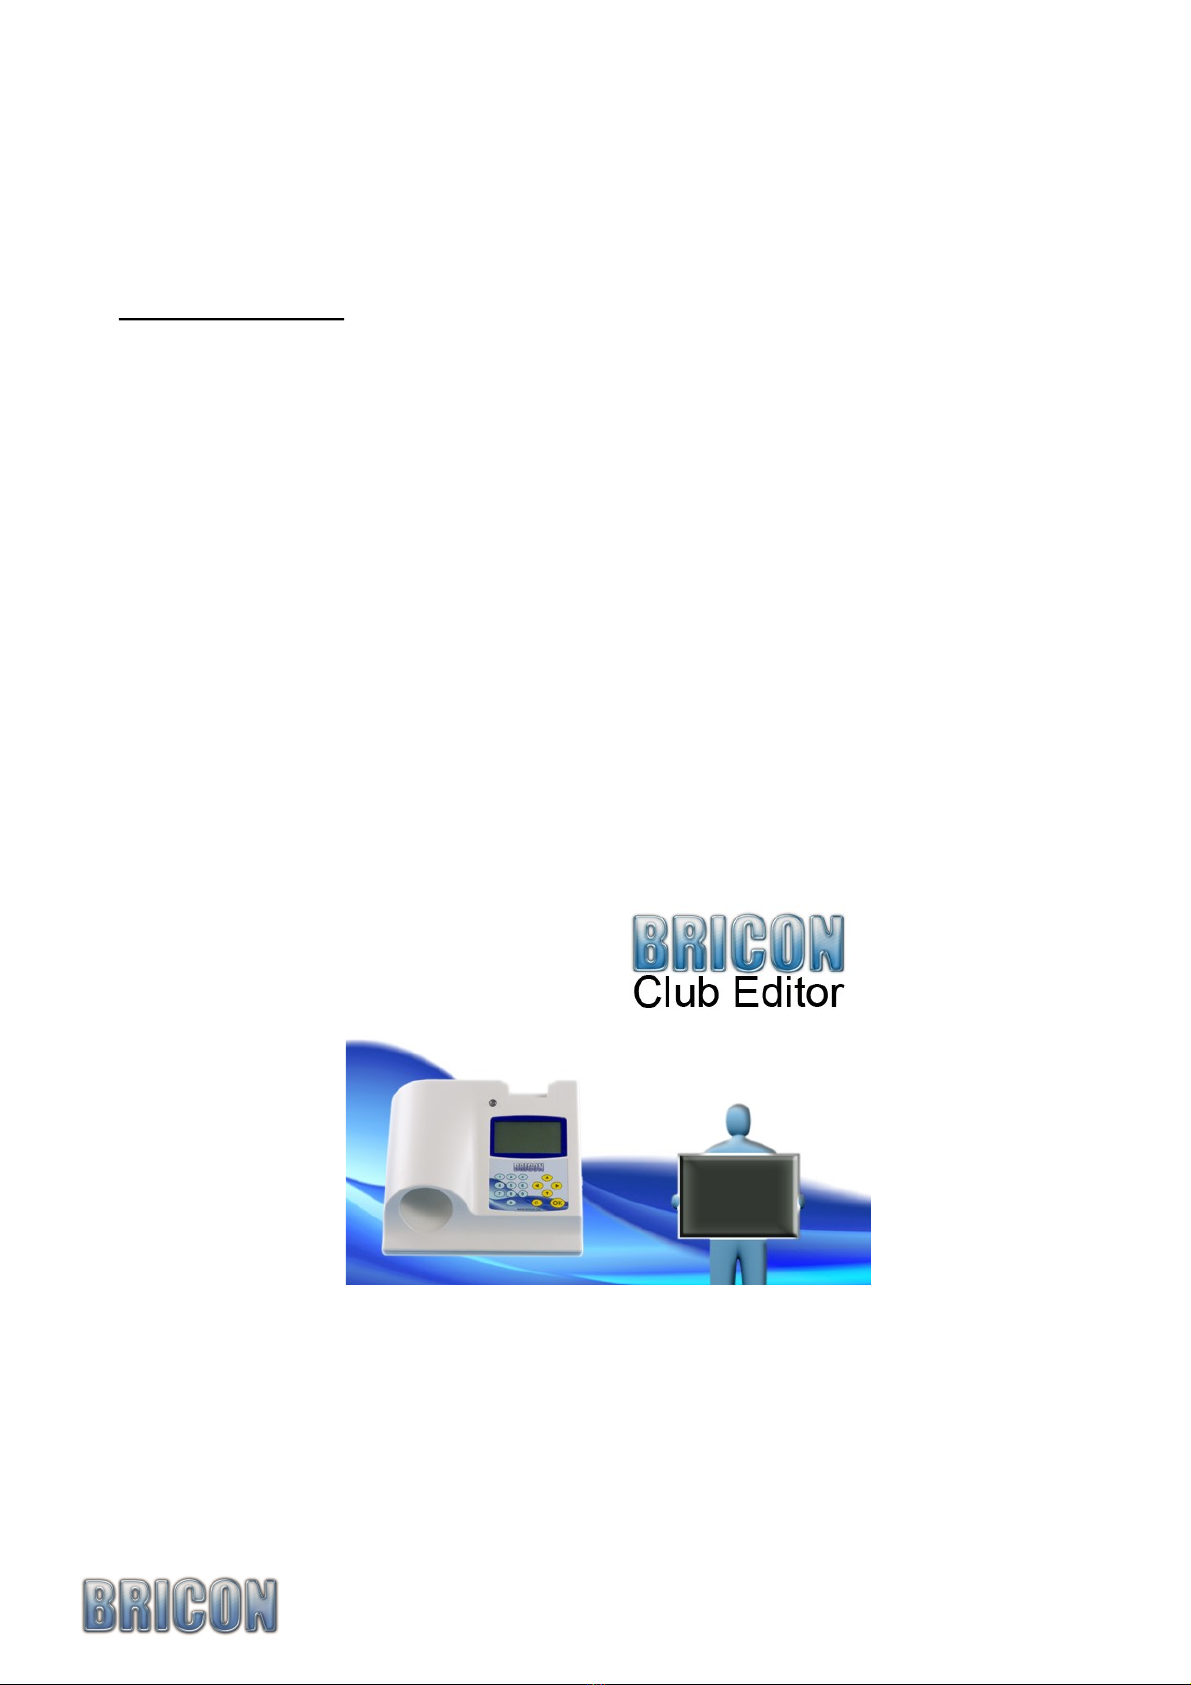
3.1. Starting the BRICON CLUB EDITOR (BCE).
When you start the BCE programme, you will see the following screen (but without the info added).
Connect the Club-Master with the USB or serial cable (see page 14). The software reads the language
and country code from the master. This is important to avoid wrong input.
- At the top of the screen you will see six main work sheet sections.
- With the icons featured below, you can perform the following functions:
BRICON CLUB-MASTER 11
Add new
Move first
Move previous
Move last
Move next
Delete
Send to ETS
Read from ETS
Print
Send
multiple
fanciers Read flight data
Read flight data

3.2. Fancier - List.
ID : Reference number in BCE.
-Loft number : Loft number of the fancier.
-Name : Name of the fancier.
-Address, Postcode, City, Telephone, Fax/GSM, Email, Bank account : The data of the fancier.
-Coord X, Coord Y: The loft co-ordinates of the fancier (latitude and longitude).
The members of the club that have been entered into the system will appear on the list.
By clicking on the heading of a particular column you can sort the list into alphabetical or numerical
order according to the information in that column, ie the ID, licence, name, address, postcode, etc ...
If you click on the column once again it will re-sort the list from high to low (or reversed)
Read from ETS :
Upon activation and reading the ETS clock,
the BCE checks the serial number of the clock.
If the number is not present BCE will ask for the fancier to be added.
If the serial number exists, BCE will ask to overwrite the data with that received from the ETS clock.
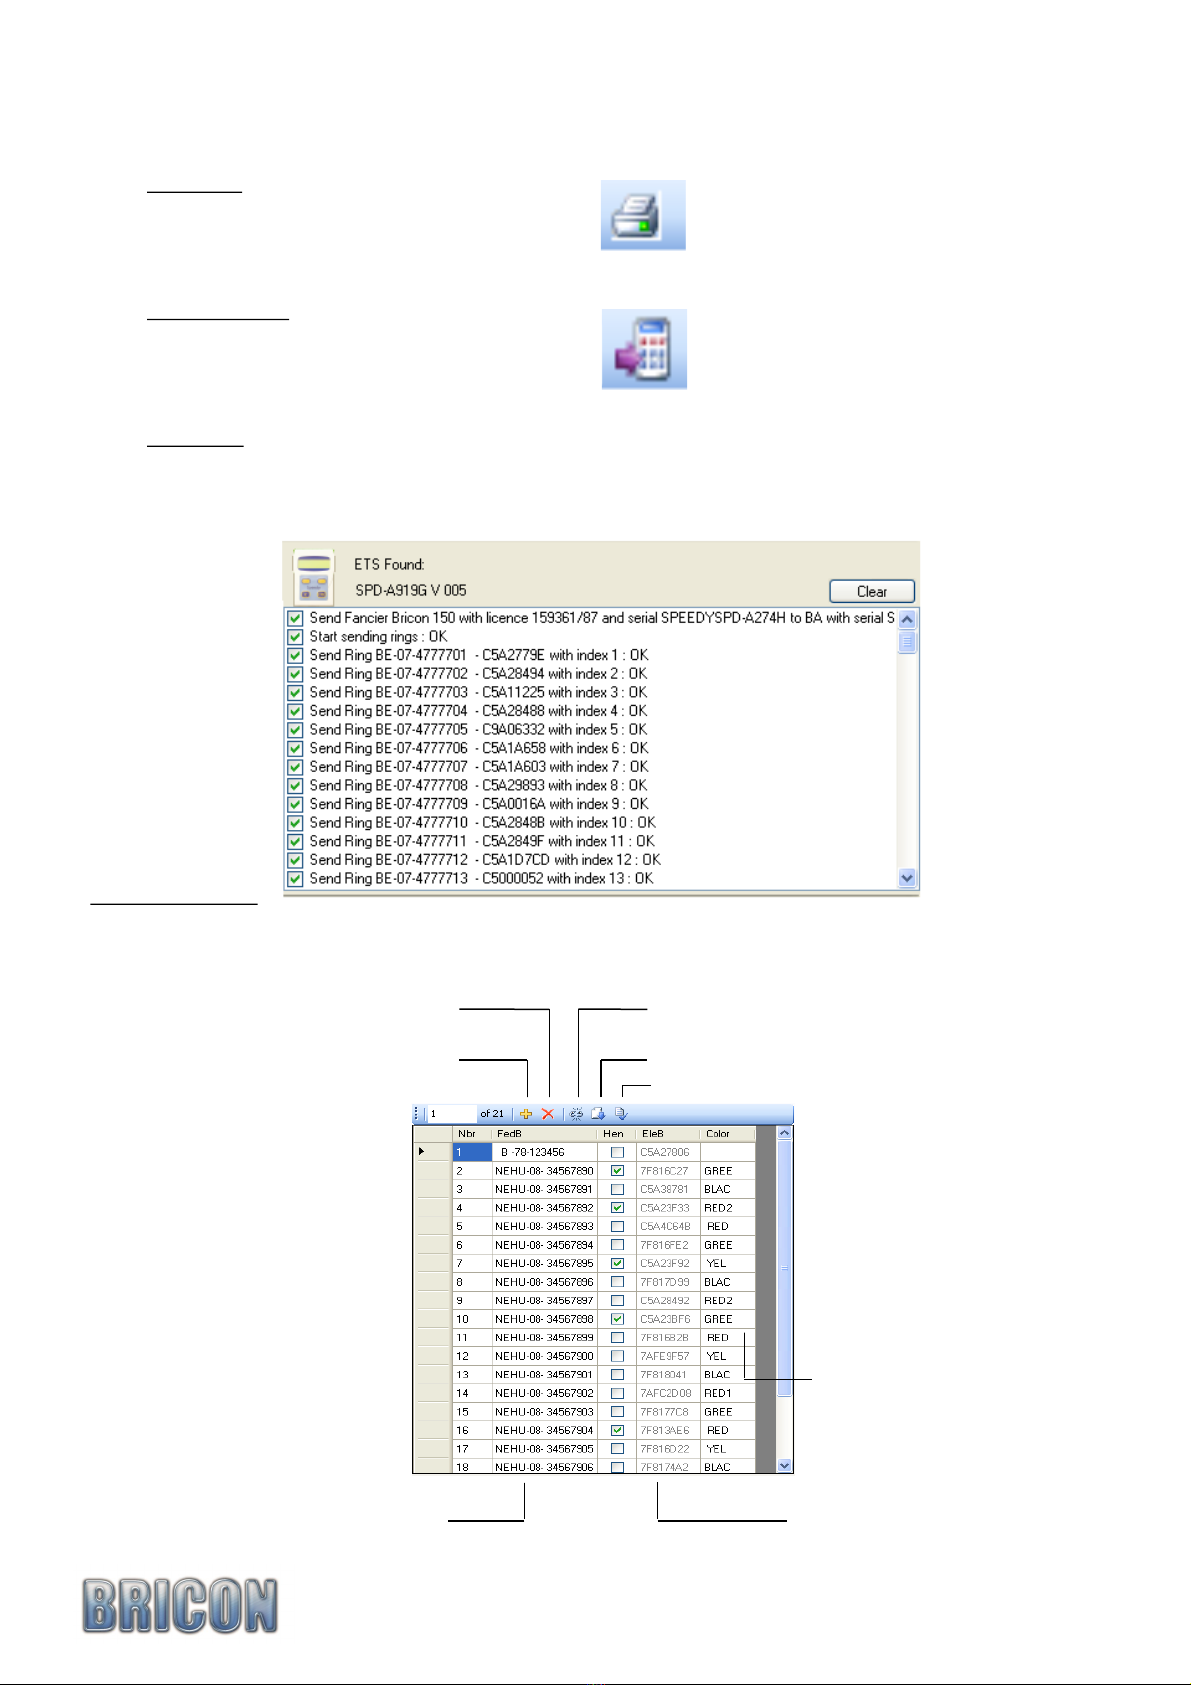
Here you can see the communication with
the ETS. If you see such an announcement
then the communication has been achieved.
BRICON CLUB-MASTER 12
Select or enter a fancier.
BCE automatically processes the
received data.
Select no fancier. BCE automatically
selects the right fancier from the ETS
by the serial number.
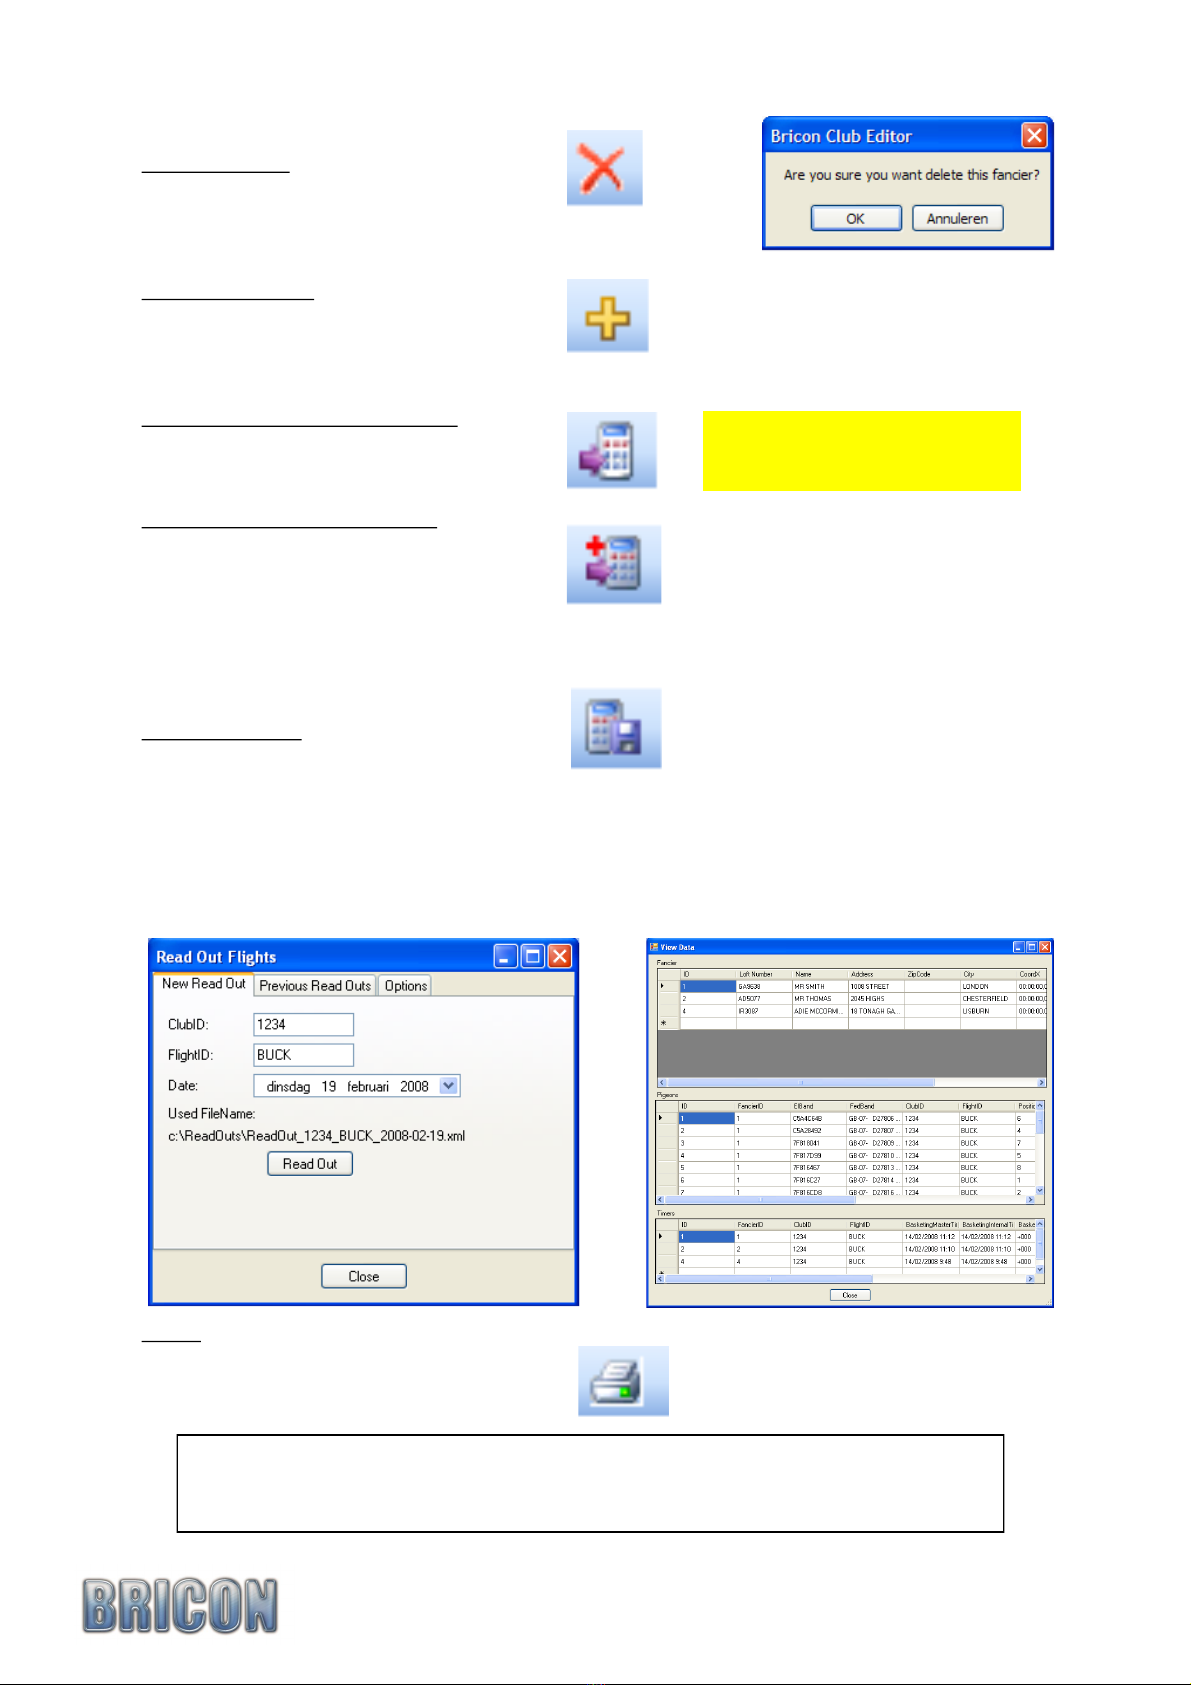
Delete fancier :
The selected fancier is erased if you confirm with <OK>.
Add new fancier :
Here you can add a fancier (see new fancier).
Automatically load fancier data :
Send multiple fanciers to ETS :
Read flightdata :
Print :
Here you can print the lists.
To get the necessary serial number onto the list, you must send the club ID
whilst in the ‘Club’ section (see page 12) to the master.
The serial number from the master is then filled in and saved in the field.
BRICON CLUB-MASTER 13
It is possible for up to 3 fanciers to fly with the same ETS clock, and for their data to be sent to the
clock at the same time. Press send multiple fanciers and select the fanciers.
A club can read the fancier data for a certain flight.
Fill in the clubID and the flight ID (fig 1), and press read flightdata and BCE will make a xml file.
This xml file can then be viewed in previous read outs (see fig2).
In options you can modify the file location. The xml file can be used to export to another
programme.

3.3. Fancier - Detail .
This screen shows the details of the selected fancier. The information that is to be sent to the ETS
is located in the yellow fields. The other fields are for information purposes only for the club.
On the right side of the screen you see the link table (list of ring numbers linked with the chip ring).
Delete fancier :
The selected fancier will be erased if you confirm with <OK>
Add new fancier :
Here you can add a fancier (see new fancier).
Read from ETS :
When reading from the ETS clock, by choosing the ‘Yes’, the data stored on the BCE program
will by overwritten. If you select ‘No’ a new fancier will be created for the data.
BRICON CLUB-MASTER 14
Print list :
Print fancier data with link table.
Send To ETS :
The selected fancier is sent to the ETS.
Attention: When the link table is sent to the ETS, all of the old data on the clock will be
overwritten and will be permanently lost.
Detail link table :
BRICON CLUB-MASTER 15
Add new Ring
Delete Ring
Generate Rings
Read Ring
Association life ring Electronic chip ring
Colour
Check ring

3.4. Clubs.
The BCE programme has the ability to manage the records of fanciers from several different clubs.
To distinguish between clubs, a different club ID (a four number code) must be entered for each club.
It is recommended to use the club’s official number or a unique number (NB do not use 1234 !!)
When basketing on the club-master, a unique identity is created for each race by the club-master,
incorporating the club ID, race point and pin code.
When fanciers clocks are downloaded to the BCE, they are added to the list of the active club, so if
you want to edit a fancier, the club that contains this fanciers list has to be selected.
By sending to the Club-Master, the serial number is filled in.
The first time that you click onto the pin code dots, you will see following screen :
The pin code is pre-set at 999999. You can change the code by entering the same number in the fields
‘new pin code’ and ‘repeat new pin code’ (6 numbers). Each time that you wish to make a change, you
will need to enter the old pin code before being able to enter the new pin code.
Name, address, city and pin code are needed.
BRICON CLUB-MASTER 16
Read from Master Send to Master

3.5. Races.
The first time that BCE is started up the liberation race points are empty.
- Add default flights :
Press the button ‘add default flights’, and all default liberation race points are added to the screen.
Now you can select the race points in the ‘Sel’ column. Only the selected race points are sent to the
master and replace those previously there.
- Delete flights :
To delete a race point, select the race point and press delete.
- Add new flights :
Most UK race points are present in the default flights, but it is also possible to add new points.
Press add new flights and enter the correct data of the race point.
Then send the race points to the master
- Send to master :
- Clear selection :
- Send flights to the ETS :
If you do not use a Bricon club-master, it is also possible to send the selected race points to your ETS.
Connect your ETS clock with the dealer cable to your PC, and press send to the
ETS.
BRICON CLUB-MASTER 17
Add Default Flights
Send To Master Clear selection
Send to ETS

3.6. Options.
Automatic Updates :
The Bricon Club Editor (BCE) programme will automatically check for the latest version of the
software. The PC on which the programme is running must be connected to the internet.
If these ‘Automatic Updates’ settings disturb the normal workings you can turn them off, but where
possible it is recommended to leave the settings on.
If ‘Check for newer version’ is selected then the program will check for the latest version.
If ‘Download automatically’ is selected, the latest version will be automatically downloaded to the PC.
If ‘Install automatically’ is selected, the downloaded version will be installed automatically.
It is very important that the PC is connected to the internet on a regular basis and the BCE started to
be sure of having the latest version of the Bricon software.
The latest version of the software will always be available from the Bricon website (www.bricon.be).
Localisation :
If you select automatically read the language and country from the master and you connect the master
as described, the program will read the language and country from the Club-Master. When you restart
BCE the language and country from the master will be filled in.
Attention. BCE will start this function the first time. This is necessary for the controls of the region.
Port :
The master is connected with a serial cable or a USB cable. When the program starts, the PC checks
which port the master is connected to. You can also set the port manually.
If you have a USB connection you must stop the communication before you unplug the master.
Press ‘ReInit communication’ to start the communication.
BRICON CLUB-MASTER 18
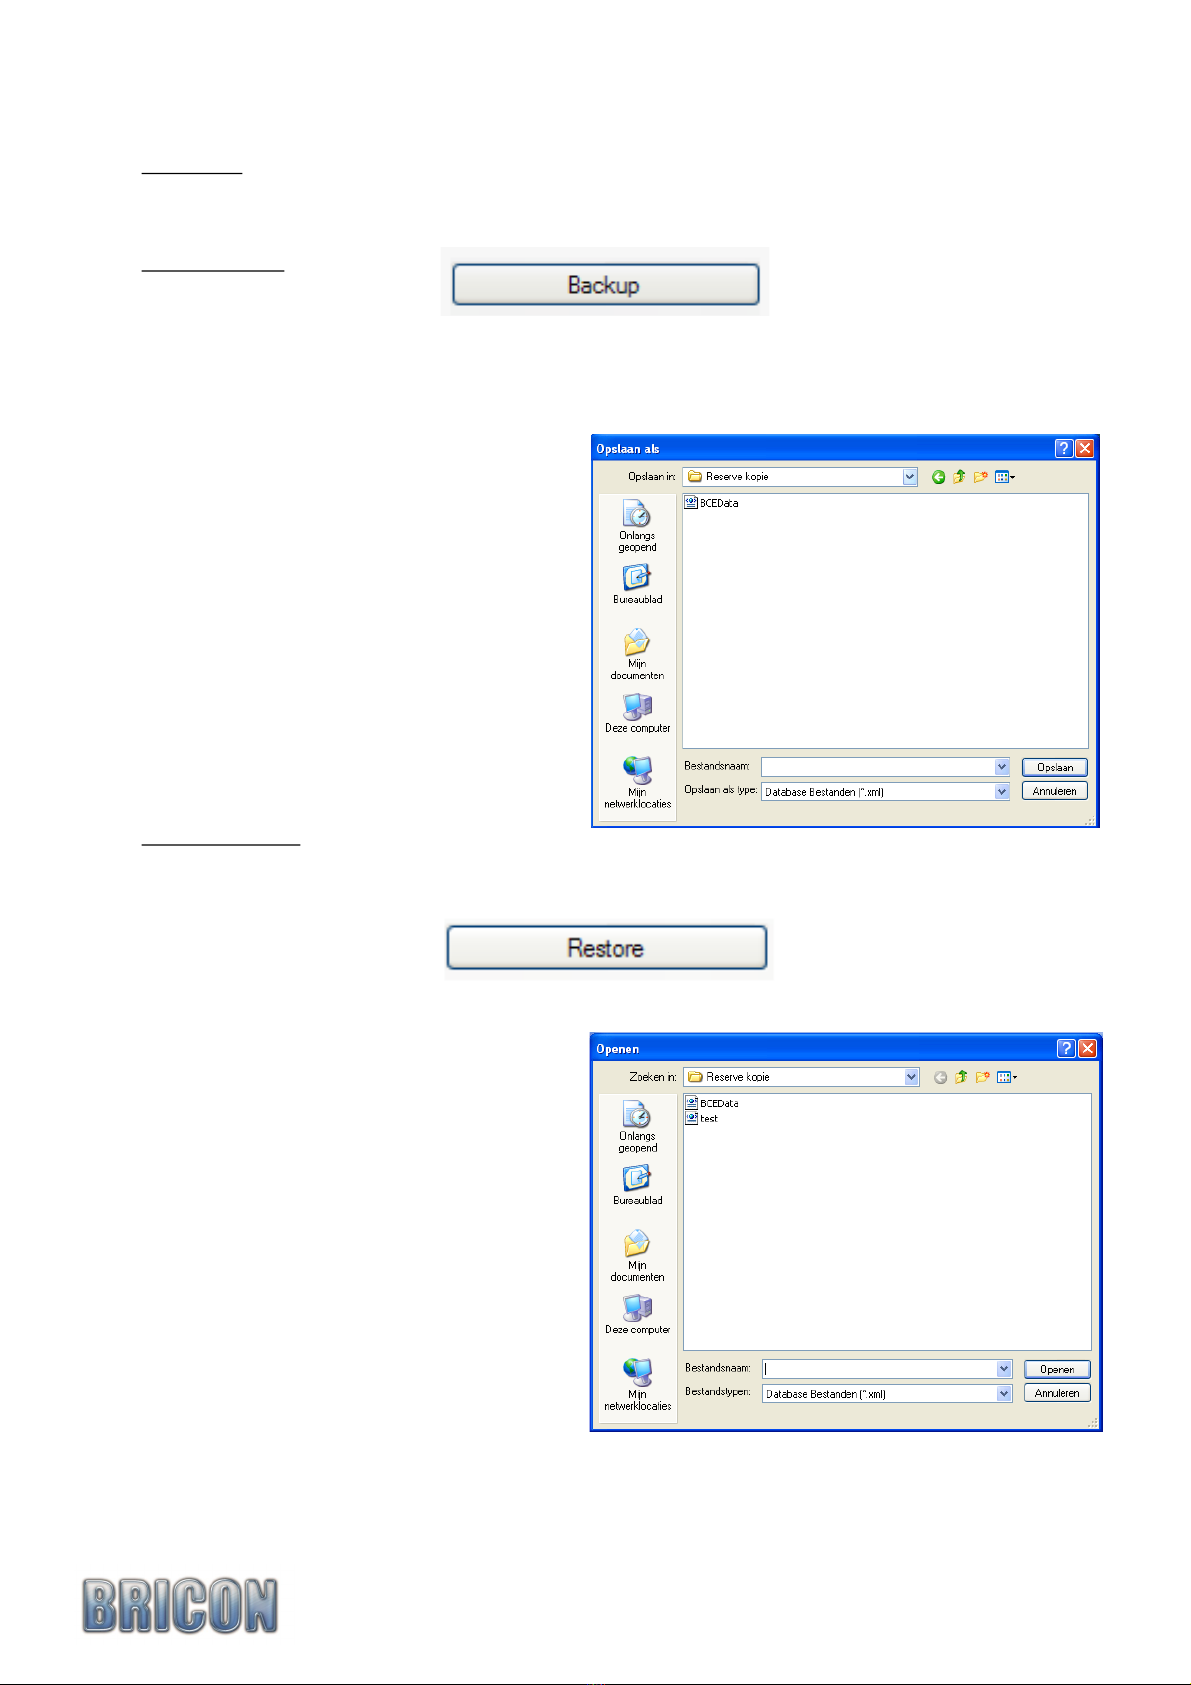
Database :
To prevent data loss you can make a back-up of the system representing a precise moment in time.
Make backup :
Bricon advises that a back-up is taken on a regular basis.
Press ‘Backup’ to make a back-up file:
Give a name to the back-up and press save.
Recommendation: Place the date in the
name of the file.
Restore Back-up :
Press the button to restore.
Select where the back-up is placed.
Select the correct back-up and click open.
The existing file will by replaced by the
back-up.
Attention !
The next time you start BCE, the original
file is opened.
You must rename the files for permanent use.
BRICON CLUB-MASTER 19

Import fanciers and data :
Using ‘Import’ you can import old data from an earlier version of the club software (possible from
version 4.1). To use this feature you must install BRICON PC-Communication programme (Upload95) .
Press import.
Choose <OK> to convert
Press <NO> .
Choose <OK> to import the fancier data.
Attention : the database is replaced by the imported version.
3.7. About.
On a regular basis Bricon sends information to BCE. You will see this info in the yellow box.
Attention: The PC must be connected to the internet to receive this information.
BRICON CLUB-MASTER 20
Table of contents
Other Bricon Measuring Instrument manuals


