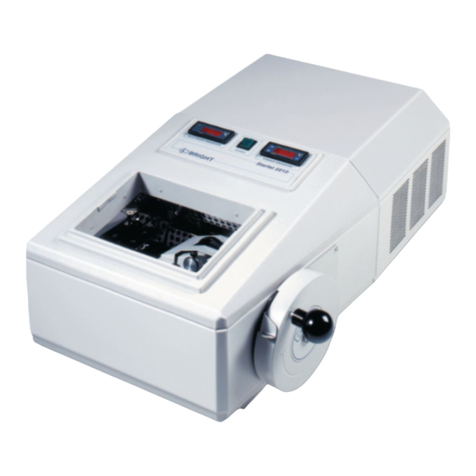
Bright Instruments 8000 User manual

Instruments
8000 Retracting
Sledge Microtome
Manual

Bright Instruments 2
Contents
SAFETY WARNINGS 3
Low Temperature 3
Knives / Blades 4
SAFETY INFORMATION 5
Consumer Protection 5
Mechanical 5
Operation 5
Accessories 5
Product Safety Suggestions 6
Decontamination Certicates 6
WARRANTY 7
1 INTRODUCTION 8
1.1 Receipt of Product 8
1.1.1 Receipt and unpacking 8
1.1.2 Receipt 8
1.1.3 Unpacking 8
1.2 Assembly & Installation 8
1.2.1 Positioning 8
2OPERATING INSTRUCTIONS 9
2.1 Operating handle (3) 9
2.2 Thickness control (5) 9
2.3 Coarse advance/trim control (4) 9
2.4 Specimen holder 9
2.5 Knife clamps 9
2.6 Knife guards 9
2.7 Side pillars [Fig.1 13 & 16] 9
3 OPERATION 10
3.1 Operating handle (3) 10
3.2 Thickness control (5) 10
3.3 Coarse advance/trim control (4) 10
3.4 Specimen holder 11
3.5 Knife clamps 11
4. MAINTENANCE 12
4.1 Cleaning 12
4.2 Lubrication 12
4.3 Decontamination 12
4.4 Removing the Sledge 12
5 SPECIFICATION 13
6 ACCESSORIES & CONSUMABLES 14
MATERIAL SAFETY DATA SHEET 16
Microtome Lubrication oil 17
REFERENCES & DRAWINGS 19
Figure 1. Front & Side View of Microtome 20
Figure 2. Bottom View of Microtome 21
Figure 3. Knife Holder 22
Figure 4. Setting Blade Angle 23

Bright Instruments 3
SAFETY WARNING
Low temperatures are present in this
equipment. Extreme care should be taken.
DO NOT let bare skin come into contact
with metal surfaces.

Bright Instruments 4
SAFETY WARNING
Extremely sharp knives/blades.
Use knife/blade guards at all times.
Use correct tools for removal and insertion of knives/blades.
DO NOT leave knives/blades laying around.
Place knives/blades not in use, into box/wallet provided.

Bright Instruments 5
Safety Information
CONSUMER PROTECTION
The Consumer Protection Act 1987 Part 1.
refers to Product Liability. This legislation was
issued as a direct result of an EC Directive to
all member states and has been in force with
effect from 1 March 1988.
The Bright Instrument Company Limited,
ever mindful of the need to ensure that their
products are not subject to misuse and/or
incorrect handling, have made it their aim to
communicate any possible dangers to their
customers.
Whilst the Bright Instrument Company Limited
markets products manufactured to the highest
safety standards, it is in the interest of the
purchaser that he is aware of the resultant
dangers of misuse and/or incorrect handling
of these products.
Your attention is therefore drawn to the
following precautions:
MECHANICAL
MICROTOME KNIVES/BLADES:
The microtome knife/blade can be a hazard
in the laboratory. Personnel should be made
aware of the dangers and observe the
following warnings:
a. DO NOT leave the microtome unattended
with an exposed knife/blade in position
Remove the knife/blade, or cover with the
guards or visor provided.
b. DO NOT leave unboxed knives/blades lying
around. Place knives/blades that are not
in use in their boxes or packets.
c. DO NOT carry knives/blades unless secure
in the box or packet provided.
d. DO NOT clean the knife/blade along its
length. Wipe the knife from the back edge to
the cutting edge.
e. REMEMBER that even used knives and
blades are dangerous. The are still sharp
and may have been used to cut potentially
infectious specimens.
f. DISPOSE of used knives and blades with
the same care as other sharp objects. On
no account should used knives or blades be
placed in waste bins.
OPERATION
When placing object holders in the vice,
when orientating, manipulating or in any way
placing fingers in a position above the knife/
blade edge – ensure that knife guards are
in position.
ACCESSORIES
Fluids supplied as accessories with Bright
instruments, such as Cryospray 134 and
microtome oil are strictly for laboratory
use only.
They should not be taken by mouth and
precautions afforded to other laboratory
chemicals should be adhered to. Please refer
to the material safety data information,
towards the back of this instruction manual
for further details.

Bright Instruments 6
PRODUCT SAFETY INFORMATION
All Bright Instrument Company Limited
personnel are encouraged to make suggests
regarding product safety. We also welcome
such suggestions from our customers.
They may be submitted by completing the
appropriate (Safety) section of the Quality
Survey Record Form supplied with all Bright
instruments, or alternatively, by letter,
telephone, fax or email. All communications
should be direct to our Quality Assurance
Department and will be acknowledged.
DECONTAMINATION CERTIFICATES
IMPORTANT If the instrument or any part
of it is to be returned to Bright Instrument
Company Limited, a decontamination
certificate must accompany it, and please
note the following:
a. If the instrument or any part of it has been
exposed to or been in contact with potential
pathogenic or radioactive material, it is
essential that it be decontaminated.
b. Set procedures are laid down by the Health
and Safety Executive for decontamination.
For the avoidance of doubt, we ask that
instruments or parts returned to us should be
accompanied by a completed decontamination
certificate. A copy of this can be found at
the back of this instruction manual and we
suggest you use a photocopy of this when
returning parts. Alternatively we would be
pleased to either post or fax you another
copy should you require.
c. Should the instrument or any part of it be
received in a condition that Bright Instrument
Company Limited, consider to be a potential
biological hazard, the instrument or part will
be returned un-repaired at the expense of
the customer.
d. Customers declarations must indicate that
the package contains ‘British Returned Goods’.
Failure to do so will involve customs duty
payable by us, which will be invoiced to
the sender.
Safety Information Cont.

Bright Instruments 7
Warranty
The Warranty relating to the instrument is
outlined in our Terms and Conditions of Sale
paragraph 6.
i. The Seller ‘s products are carefully inspected
and submitted to its standard tests.
ii. The Seller warrants all its products to be
free from defects in workmanship and
materials under normal conditions of use and
service provided always:
a. That if any of the goods so manufactured
is alleged to be defective in workmanship
and material and is returned carriage paid,
and protected against damage in transit to
the Seller’s works at Huntingdon within 12
months from the date of despatch and if
after examination by the Seller that goods
or part of them are found to be so defective
then the Seller will repair or replace them free
of charge and will return them to the Buyer,
carriage paid.
b. Where any part of the goods manufactured
by the Seller is repaired or replaced under
the terms of the foregoing warranty, such
warranty shall thereafter be limited to a
period of six months from the date when
the goods shall have been re-delivered
to the Buyer.
c. This warranty does not apply to any defects
caused by wear and tear, incorrect installation
abnormal conditions of working, accident,
misuse or neglect.
d. That save as in this clause herein before
expressed, the Seller shall not be under any
liability for negligence or otherwise in respect
of defects in goods delivered or for any injury,
damage or loss resulting from such defects
and the Seller’s liability under this clause shall
be in lieu of any warranty or condition implied
by law as to the quality or fitness for any
particular purpose of such goods.
e. This warranty is expressly in lieu of all
other warranties, guarantees or liabilities
expressed or implied by any of the Seller’s
Representatives or Agents.
Please see our separate Product Warranty
sheet for deliveries to the mainland UK.
WARNING: Before proceeding to Operating
Instructions, ensure you are familiar with
the contents of the pages marked ‘Safety
Information’. This instrument must only be
used by competent persons.

Bright Instruments 8
1. Introduction
1.1 RECEIPT OF PRODUCT
1.1.1 RECEIPT AND UNPACKING
This instrument received a final test and
inspection prior to despatch from the factory.
The following instructions are given for the
re-assembly of the instrument, adjustments
and its correct use. If the instrument is
received before preparations for installation
are completed, it should be stored in a clean,
dry place and not exposed to dirty or damp
conditions.
1.1.2 RECEIPT
Immediately upon receipt of the instrument,
make a careful examination for evidence of
damage encountered in transit. If any damage
is found or suspected, notify both the carrier
and Bright Instrument Company Limited.
1.1.3 PACKING
All packing must be carefully removed and
parts checked against the enclosed packing
list. If any damage or discrepancy is noted,
please inform our agent/distributor, or
bright Instrument Company Limited direct,
immediately. At least two people are required
during the unpacking. When removing the
main instrument from the packaging, grip the
instrument on the underside (one person to
each side) and lift out the microtome. Do not
lift by the sledge or attempt to separate the
sledge from the casting within the case as
damage can result.
1.2 ASSEMBLY & INSTALLATION
1.2.1 POSITIONING
The instrument should be positioned on a
level, sturdy surface at a height convenient
for the operator. It may be used with its long
axis parallel to the bench, at right angles or
obliquely. Ensure it has been positioned away
from direct, hot sunlight and is in a location
completely free from draughts.

Bright Instruments 9
2. Operating Instructions
On receipt of your new Bright instrument,
please refer to section 1.1 (Receipt and
Unpacking) and section 1.2 (Assembly and
Installation).
As part of its policy of continual improvement,
Bright Instrument Company Limited, reserves
the right to incorporate changes, or make
additions to, without prior notice. There
may, therefore, be minor details differences
between the information in this manual and
your instrument. These differences will not
affect the safety and use of the instrument.
Refer to Fig. 1.
2.1 OPERATING HANDLE [FIG. 1.3]
Semi automatic advance – when pushed
towards the knife the sledge will move
along the runners and will also advance the
specimen the selected amount (thickness).
When pulled back the specimen retraction
mechanism is activated.
2.2 THICKNESS CONTROL [FIG. 1.5]
A knob, calibrated in microns, is used to
select the thickness of sections to be cut from
1µm – 40µm, in 1µm steps. Always set the
thickness by turning the knob anticlockwise.
If the thickness has to be reduced then turn
clockwise past the required thickness, then
anticlockwise.
2.3 COARSE ADVANCE/TRIM CONTROL
Quickly raises or lowers the specimen 450µm
per turn. As this control is always engaged, it
can be used at any time.
2.4 SPECIMEN HOLDER
Specimens are clamped in the vice [7] or
alternative holder if fitted. The specimen
holder can be raised and lowered after
releasing the clamp lever [21].
2.5 KNIFE CLAMPS
Two screws, turned by a lever [10], are used to
fix the knife in the knife clamp and the knife
clamp in the knife block [9]. The cutting angle
of the knife is adjustable from 0-40º. A scale
is provided on the knife block. Slew angles of
the knife can be obtained by loosening the
knife block clamp levers [12] and the knife
clamp levers [10] and moving knife to slew
angle required.
2.6 KNIFE GUARDS
Each knife guard [1] can be moved to the
central position to cover the working area
of the knife, or to the outer position while
section cutting. The black knobs secure the
guards in the chosen position.
2.7 SIDE PILLARS (FIG. 1.13 & 1.16)
In normal use, these pillars slope inwards
slightly. For large area sections they can be
unbolted from the base, swapped left to right
and refitted, so that they slop outwards, so
providing more space.

Bright Instruments 10
3. Operation
The microtome should be installed on a sturdy
bench at a height convenient for the operator.
It may be used with its long axis parallel to
the bench, at right angles or obliquely.
There are many variations of the preparation
procedure according to the type of specimen
to be sectioned, the size of the specimen and
how the specimen is prepared.
The following general procedures can be
applied to all uses:
Refer to Fig. 1.
3.1 FITTING THE OBJECT HOLDER
Pull the sledge away from the knife holders.
Secure the required object holder by placing
it in the holder in the sledge slide [19]. Set to
correct height and lock by tightening clamp
lever [21].
Note that the clamp lever has a ratchet with
its movement limited to prevent the lever
being left in positions where it could impact
on other parts during sectioning.
3.2 FITTING AND ADJUSTING THE KNIFE
NB: The term ‘knife’ used here also includes
disposable blade holder.
a. Slacken the knife clamp levers (10) just
enough to let the knife slide into the knife
clamps from the side.
b. Insert the knife, taking care to avoid
touching the edge against the metalwork.
c. Check that the knife lies flat on the pad
pieces in the knife clamps and that the heel
of the knife is not caught up on the slot in the
knife clamps.
d. Screw the knife clamp levers down just
sufficiently to steady the knife in position.
e. Slacken the knife block clamp levers [12].
Set the knife holders to the desired slew
angle, ensure the knife clamps still cover
the ends of the knife. Set the knife to the
desired cutting angle and tighten the knife
clamping levers.
f. Check that the knife is still at the desired
slew angles and tighten the knife block clamp
levers.
NB: To ensure that the knife clamps are
correctly aligned in the holders,
the knife block clamp levers must
always be slackened before the knife
clamping levers are tightened.
3.3 TRIMMING THE SPECIMEN
Fit the specimen securely into the appropriate
specimen holder on the microtome.
To trim excess material from the surface of
the specimen block:
a. First move the sledge towards the knife and
adjust the specimen height using the coarse
advance so that the specimen is just below
the knife.
b. Either set the thickness control to cut
thick sections, eg: 20µm, and move the
sledge back and forth repeatedly to trim
the specimen.

Bright Instruments 11
3. Operation Cont.
3.3 TRIMMING THE SPECIMEN (CONT.)
c. Or set the thickness control to zero and
alternately raise the specimen slightly using
the coarse advance and move the sledge
forward then backwards. This method is
quicker but should only be used if the
operator is experienced in the use of base
sledge microtomes.
3.4 SECTION CUTTING AND COLLECTION
Select the desired section thickness. Operate
the sledge back and forth a few times
to remove any surface roughness on the
specimen block caused by trimming.
Cut sections using slow. Steady forward
movements of the sledge. Wax-embedded
specimens should form a ribbon of sections on
the knife.
Sections can be removed either singularly or
as a ribbon using forceps. Wax sections are
usually floated onto warm water to soften
and flatten them. They can be collected on
microscope slides as follows:
a. Dip a microscope slide vertically into the
warm water some distance from the sections.
b. Carefully bring the slide close to the
section so that the sections edge contacts the
slide in the appropriate position.
c. Now raise the slide vertically from
the water.
3.5 HINTS ON SECTIONING
a. Ensure the knife is sharp and clean.
Duringuse, the knife should be cleaned
occasionally to remove built-up wax.
b. Wax embedded specimens usually cut more
easily if they have been chilled. It is common
practice to trim a batch of wax blocks, then
place them face down on a cold plate or
crushed ice to cool them. This way they can
be returned to the microtome and sections cut
while they are still cold.
c. A slow, steady cutting action is needed to
obtain the best results. However, different
specimens may benefit from different cutting
speeds, so experimentation will sometimes
bring improved results.
e. If the section ribbon is excessively folded,
creased or compressed on the knife, first, float
it onto cold water and flatten it with the aid
of a small artists brush. Now collect sections
with a microscope slide and carefully re-float
onto warm water.
e. After collection, dry the wax sections onto
the slides using either an oven or a hotplate.
Using temperatures 10º - 20º above the
melting point of the wax, sections will flatten
and stick to the slide without being damaged.
NB: For more detailed instructions on the
preparation, cutting and subsequent
staining of paraffin wax sections,
see any conventional text book of
histological technique.

Bright Instruments 12
4. Maintenance
The only routine maintenance required is
regular cleaning and lubrication.
Refer to Fig. 1.
4.1 CLEANING
Wipe offsectioning debris etc with a paper
towel. Alcohols (industrial methylated spirits,
ethanol or methanol) may be used. Xylene
may be used sparingly to remove built-up wax,
but ensure surplus Xylene is wiped off.
Avoid harsh solvents such as acetone.
4.2 LUBRICATION
After cleaning, oil both the sliding surfaces of
the sledge base [Fig.1.17] with
Part No. 57425 Microtome Sledge Oil. Now
move the sledge several times over the full
length of travel to distribute oil.
The Slide Blocks Dovetails [Fig.1.6] should also
be lubricated on a regular basis with
Part No.57425 Microtome Sledge Oil.
4.3 DECONTAMINATION
It is the responsibility of the user to ensure
that a decontamination procedure is employed
which is appropriate to the nature of the work
carried out.
The 8000 Sledge Microtome is constructed of
materials which are sensitive to hypochlorite
(bleach) solutions. These are corrosive to
many metals and should be avoided.
4.4 REMOVING THE SLEDGE
If the sledge has to be removed for any
reason, great care must be taken to prevent
damage to the sliding surfaces of either the
sledge or the base.
• Remove the end stops [1.15]
• Slide the sledge offcarefully [1.18]
Refitting is the reversal of removal.
TAKE NOTE: The two components are
heavy and fit closely.

Bright Instruments 13
Weights vary according to specification of instrument
5. Specification
Construction Cast mechanite, precision
machined and fi nished with
durable solvent and detergent
proof coating
Specimen Advance 0 - 40µm in 1µm increments,
retraction operates on return
stroke. Manual gross advance/
rewind facility
Cutting Stroke 270mm
Specimen Orientation ±8º horizontal and vertical
(optional)
Maximum Specimen Size 250mm x 210mm
Specimen Holders Specimen vice or quick
release holder for cassettes,
supercassettes and hardboard
squares.
Knife Holders Support arms reversible with
slew facility. Angle tilt with
indicator scale and full width
knife guards. Single side double
clamp facility is available as an
optional feature
Safety Features Handle designed to ensure
maximum distance away from
knife edge. Knife guards cover
full width of knife
Dimensions H325 x W260 x D610mm
Packing Net weight: 40kg
Gross weight: 50kg
Packing dimensions:
H400 x W920 x D550mm
Shipping volume: 0.202m3

8000 Retracting Sledge Microtome
Order List 2019/20
OPTIONAL FEATURES
Code Description
50533 Quick release wax cassette holder, with out orientation.
318 A simple to use holder for wax cassettes. Accepts standard size wax cassettes
(26x31x5mm). Can be specified instead of standard vice at no extra charge.
54147 Sledge quick release supercassette holder for holding wax supercassettes
(75x52x19mm).
51637 Quick release holder for hardboard squares.
51407 Single side double clamp knife holder.
51473 Orientating tilt adapter +/-8º angle.
PRODUCT
Code Description
8000-01 8000 Retracting base sledge microtome
(with standard blade)
Complete with:
• 1 - 40µm feed screw with
1µm increments.
• Manual gross advance/
rewind facility.
• Angled, tilted knife holder
with indicator scale.
• Full width integral knife
guards.
• Automatic retraction of
approx. 50µm on return
stroke.
• Standard vice.
• Fixed adaptor.
Standard accessories include:
• Knife cleaning brush
• Set of Allen keys
• Knife, cleaning brush
• Microtome oil
• Operating manual
8000-02 8000 Retracting base sledge microtome
(Same as 8000-01 but without standard blade)
Instruments
Instruments
Instruments
Instruments
Instruments
Instruments
Office: Bright Group Holdings Limited
1-3 Sovereign Park, Laporte Way,
Luton, Beds, LU4 8EL, United Kingdom
*Included in standard order | **Not included in
overseas orders. VAT not included - E & OE
Valid from 1 January 2019
OPTIONAL FEATURES
Code Description
CRYOSTAGE - REFRIGERATED FREEZING STAGE
8000-208-01 Cryostage Freezing Stage for 220/240V AC, 50/60Hz
Complete with:
• 130 x 90mm stage.
• Freezing to -30°C.
• Heater for easy removal of
specimen debris.
Standard accessories include:
• Cryo-M-Bed embedding.
compound.
• Spare set of fuses.
• Operating manual.
8000-208-02 Cryostage Freezing Stage for 110/115V AC, 50/60Hz
Same features & accessories as 8000-208-01
SOLID STATE FREEZER WITH PELTIER DEVICE
53024-01 Solid State Freezer for 220/240V AC, 50/60Hz
Complete with:
• 40 x 40mm stage.
• Freezing to -25°C
• Temperature control is
by current limit to Peltier
device.
• Safety cut-out to detect
low water pressure.
Standard accessories include:
• Cryo-M-Bed embedding.
compound.
• Cooling block removal tool.
• Allen Key.
• Spare set of fuses.
• Operating manual.
53024-02 Solid State Freezer for 110/115V AC, 50/60Hz
Same features & accessories as 53024-01
200-012 Solid State Filters
231-001 Cooling Water Re-circulator
(for Solid State Freezer (240v 50/60Hz only).
Removes the reliance on close proximity to a sink and water
supply while preventing water loss and is subsequently
environmentally friendly.
Telephone: +44 (0) 808 168 9697
Web: brightinstruments.com

8000 Retracting Sledge Microtome
Order List 2019/20
ACCESSORIES
Code Description
52498* Standard vice.
51495* Fixed adapter.
52985 CO2(gas) object holder and knife freezer.
51719 Object holder, 73 x 54mm.
51720 Object holder, 100 x 66mm.
51836 Object holder, 130 x 90mm.
51717 Object holder, 250 x 110mm.
50235 Steel knife with box, C-profile, 240 x 33 x 13mm. 22º angle,tapped to accept
holder for Shandon knife sharpener.
53605 Knife sharpening back for 50235.
50233 Steel knife with box, D-profile, 240 x 33 x 13mm. 22º angle, tapped to accept
holder for Shandon knife sharpener.
50234 Tungsten carbide tipped knife with box, 228 x 38 x 6mm. Suitable for bone
sections. NB: Needs to be resharpened at our factory.
57675 Holder for feather blades with box. 240mm, complete with pack of 50 disposable
Feather blades.
50241 Pack of 50 disposable Feather blades.
51675 Handle for 50235 and 50233 knives.
51460-1 Knife raising block, one pair. (Note: Item required if ordering Sledge with Solid
State Freezer).
52306 8000 Knife guard.
51497 End stops left hand.
51498 End stops right hand.
133014 Rubber bumper stops.
ACCESSORIES
Code Description
53051-1 Ratchet wheel.
53052-1 Pawl.
57713-1 Bright Cryospray 134, 300ml aerosol can.
57713 Bright Cryospray 134, 300ml aerosol cans x 12.
53581-1 Bright Cryo-M-Bed, 120ml bottle.
53581 Bright Cryo-M-Bed 120ml bottle carton of 6.
57344* Knife cleaning brush.
57808 Anti-static brush, 12mm.
57425 Microtome oil, 200ml.
57151/2/3/4* Allen keys, set of four.
53575 Spare fuse set for 53023-01 & 53024-01.
53576 Spare fuse set for 53023-02 & 53024-02.
53577 Spare fuse set for 8000-208-01.
53578 Spare fuse set for 8000-208-02.
Instruments
Instruments
Instruments
Instruments
Instruments
Instruments
Office: Bright Group Holdings Limited
1-3 Sovereign Park, Laporte Way,
Luton, Beds, LU4 8EL, United Kingdom
*Included in standard order | **Not included in
overseas orders. VAT not included - E & OE
Valid from 1 January 2019
Telephone: +44 (0) 808 168 9697
Web: brightinstruments.com

Bright Instruments 16
Material Safety
Data Sheets

1. Mic Lubricating Oil 57425 Product Information
Trade/Type: Oil Type ‘C’
Container: Plastic Bottle (200ml).
Uses: For lubrication of 8000 microtomes.
Description: Lubricating Oil.
Microtome Lubricating Oil 57425 MATERIAL SAFETY DATA SHEET
Instruments
Instruments
Instruments
Instruments
Instruments
Instruments
Office: Bright Group Holdings Limited, 1-3 Sovereign Park,
Laporte Way, Luton, Beds, LU4 8EL, United Kingdom
Telephone: +44 (0) 808 168 9697
Email: [email protected]
Web: brightinstruments.com
Member:
2. Mic Lubricating Oil 57425 Product Information
Information on ingredients: Highly refined white oil containing anti-wear, anti-corrosion and anti-oxidation additives.
Physical and chemical
properties:
Form: Liquid.
Odour: Negligible.
Colour: Water White.
Water Solubility: Insoluble
Stability and reactivity: Stable: Yes
Conditions to avoid: Strong oxidising agents
Materials to avoid: No special precautions. Store out of direct heat and avoid
extremes of temperature. DO NOT leave container unsealed.
Will not occur. Hazardous Decomposition/Combustion Products:
Hydrocarbons, oxides of carbon, traces of oxides of nitrogen and sulphur.
Ecological information: Soil: Wash thoroughly, with soap and water.
Water: Fumes may irritate respiratory tract.
Air: Harmless if swallowed in small amounts. DO NOT induce
vomiting
DO NOT allow to enter drainage systems, rivers or waterways.
Hazards Identification: This product is NOT classified as hazardous for supply or conveyance.
Transport Information: Not classified as dangerous to transport.
Disposal Considerations: Dispose of waste in accordance with local authority requirements.
Handling and Storage: No special precautions. Store out of direct heat and avoid extremes of temperature.
DO NOT leave container unsealed.

MATERIAL SAFETY DATA SHEET
Instruments
Instruments
Instruments
Instruments
Instruments
Instruments
Office: Bright Group Holdings Limited, 1-3 Sovereign Park,
Laporte Way, Luton, Beds, LU4 8EL, United Kingdom
Telephone: +44 (0) 808 168 9697
Email: [email protected]
Web: brightinstruments.com
Member:
2. Mic Lubricating Oil 57425 Product Information (Cont.)
Toxicoloigical Information
(Health information):
Skin: Prolonged contact may cause defatting of the ski resulting
in cracking and soreness.
Respiratory: Low volatility make inhalation unlikely at ambient
temperatures.
Ingest: May cause nausea, vomiting and diarrhoea.
Eyes: May cause transient irritation.
First aid procedures: Skin: Wash thoroughly, with soap and water.
Respiratory: Fumes may irritate respiratory tract.
Ingest: Harmless if swallowed in small amounts. DO NOT induce
vomiting.
Eyes: Flush copiously for at least 15 minutes. If irritation persists
SEEK MEDICAL ADVISE
Fire fighting measures: Extinguish fires with foam, dry powder, CO2, sand, earth or water fog.
Accidental release measures: Avoid spillages entry into drains and waterways, contain and absorb with sand, earth or
mineral absorbent.
Exposure controls: OES: 5mg/m3 (8hour TWA) and 10mg/m3 (10 minute reference period) (Ref:EH40/1999).
Regulatory information: This product is a preparation and is NOT classified according to EEC Guideline 88/3709.
Microtome Lubricating Oil 57425

Bright Instruments 19
References &
Drawings

Bright Instruments 20
APP'D
DO NOT SCALE!
DECIMAL:
WHOLE NUMBERS:
ANGULAR:
COPYRIGHT PROTECTED - ALL RIGHTS RESERVED
Full 8000 mic
IF IN DOUBT ASK!
3RD ANGLE
PROJECTION
MM
29/08/2019
1:5
SCALE
1 OF 1
SHEET
A2
0,10
0,50
0,5
LJ
1. REMOVE ALL BURRS, SHARP EDGES AND CORNERS.
2. ALL SURFACES TO BE CLEAN AND SCRATCH FREE.
APP'D
DO NOT SCALE!
DECIMAL:
WHOLE NUMBERS:
ANGULAR:
COPYRIGHT PROTECTED - ALL RIGHTS RESERVED
Full 8000 mic
IF IN DOUBT ASK!
3RD ANGLE
PROJECTION
MM
29/08/2019
1:5
SCALE
1 OF 1
SHEET
A2
0,10
0,50
0,5
LJ
1. REMOVE ALL BURRS, SHARP EDGES AND CORNERS.
2. ALL SURFACES TO BE CLEAN AND SCRATCH FREE.
1. Knife Guard
2. T-Nut
3. Operating Handle
4. Rewind Knob
5. Thickness Knob
6. Slide Block
7. Orientating Head Vice
8. Knife Guard Knob
9. Knife Block
10. Knife Clamp Lever
11. Knife Clamp
12. Knife Block Clamp Lever
13. Side Pillar L/H
14. Anti-lift Plate
15. Bump Stop
16. Slide Pillar R/H
17. Sledge Base
18. Sledge
19. Sledge Slide
20. Orientating Head
21. 0/11 Clamp Lever
22. Rubber Feet
16 7 8 9 10 11 12
2 3 4 5
13 14 15 16 17 18 19 20 21 22
Figure 1. Front & Side
View of Microtome
Table of contents
Other Bright Instruments Laboratory Equipment manuals