2 Safety
2.1 User Guide
This user guide is a component of the product and con-
tributes to its safe use. Non-compliance may lead to seri-
ous or even fatal injuries. If there are uncertainties, do not
use the product and immediately contact your retailer.
uRead the operating instructions.
2.2 Intended use
This product has been designed, tested and approved cor-
responding to the requirements of UN R129/03.
This product is designed for securing a child in a vehicle. It
is approved for the following details:
Designation Value
Body height 61 – 125 cm
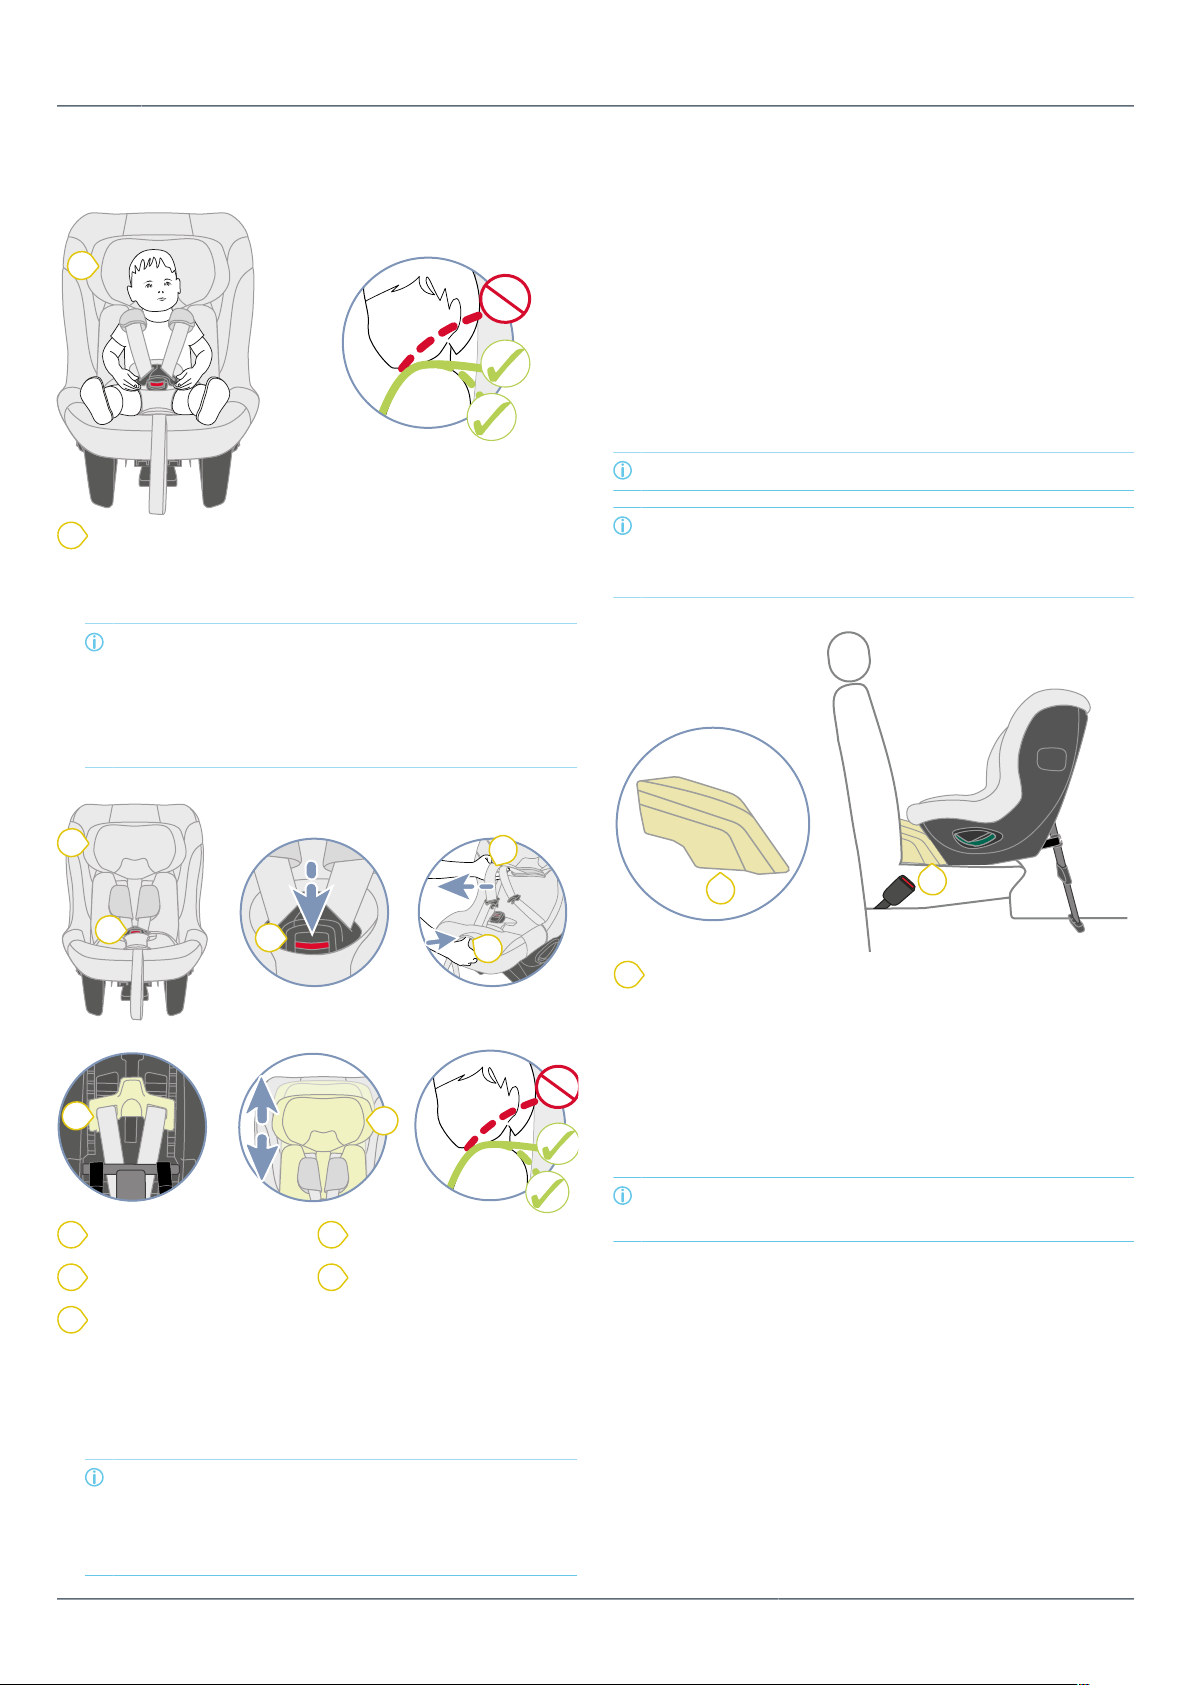
Use the seat insert if the child
is between 61 and 87 cm.
Body weight ≤ 36 kg
Use the product on forward-facing car seats.
This approval is invalidated if you make any modifications
to this product. Changes may only be made by the man-
ufacturer. The stickers on the product are an important
component of the product.
uDo not make any changes to the product.
uDo not remove any stickers from the product.
2.3 Misuse
uDo not use the product as a toy.
uDo not use the product as a chair outside the vehicle,
not even to test.
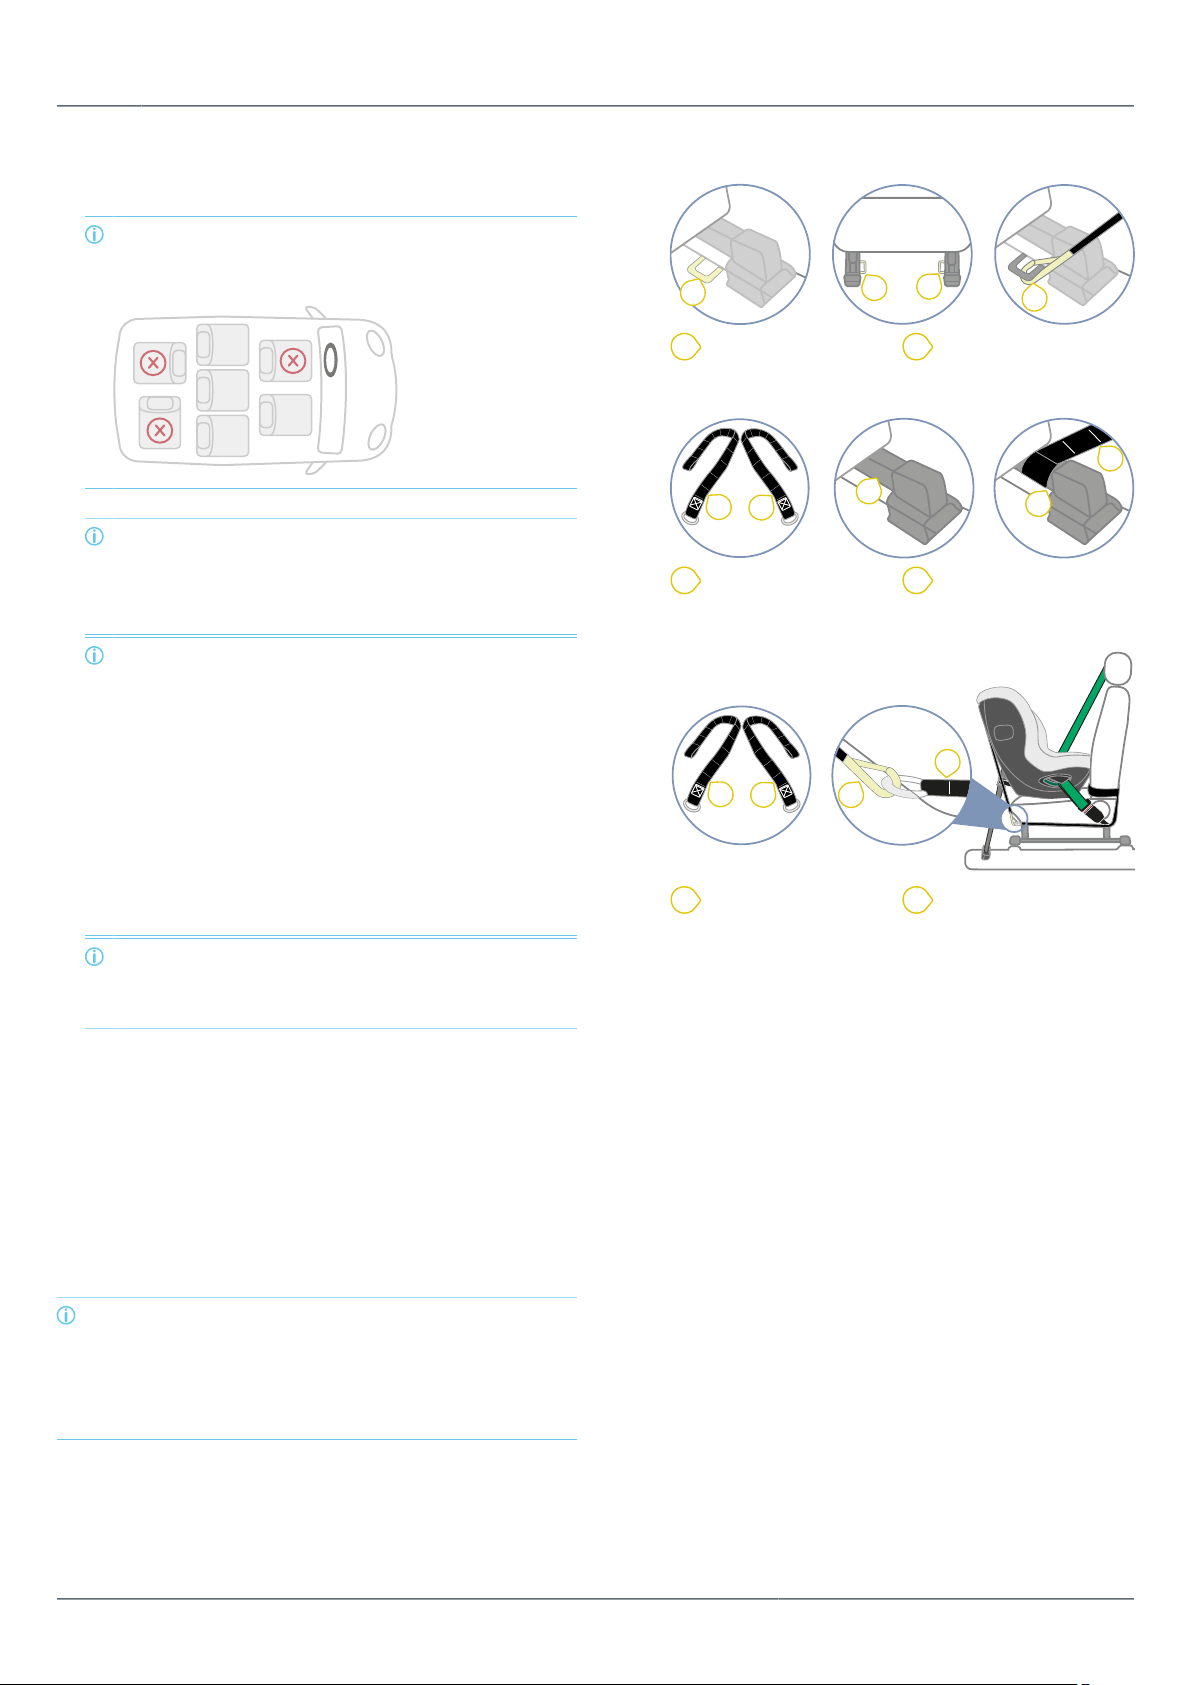
uOnly secure the child seat with fastening points de-
scribed in these operating instructions.
uNever secure the product with a 2-point seat belt.
uEnsure that the product is not trapped between hard
objects (car door, seat rails, etc.).
uKeep product away from moisture, wet conditions, liq-
uids, dust and salt spray.
uDo not lean heavy objects on the product.
uNever lubricate or oil parts of the product.
uSensitive car seat covers may be damaged. Use the
Britax Römer child seat base. These are available sep-
arately.
2.4 Safety informations
WARNING
Risk of injury from damaged child seat
In the event of an accident, the child seat may be dam-
aged without the damage being immediately visible. Se-
rious injuries may result from another accident.
uNever use a damaged product.
uReplace the product after an accident.
uHave a damaged product inspected by Britax Römer
(even if it has fallen onto the ground).
uRegularly check all the important parts for damage.
uEnsure that all mechanical components work proper-
ly.
WARNING
Risk of burns from hot components
Components of the product may become hot in direct
sunlight. Children's skin is sensitive and maybe harmed
as a result.
uProtect the product against intensive direct sunlight
when not in use.
WARNING
Danger to life due to the effects of heat or cold.
If children are exposed to the effects of heat or cold for
a longer period, there is a risk of injury or even death.
uNever leave children unsupervised in the vehicle.
WARNING
Risk of injury when boarding and exit
It can be dangerous to stand on the road-side of the ve-
hicle.
uSecure and remove the child seat from the foot-
path-side.
uSecure and remove the child from the footpath-side.
IP10204 | 1.2 | 2000038517 MAX-SAFE PRO | BRITAX RÖMER 4