Brizon Wingflyer 16 User manual
OWNER’S MANUAL

CONTENTS
•IMPORTANT SAFETY NOTICE
•PARTS AND COMPONENTS
•ASSEMBLY INSTRUCTION
B. FRONT WHEEL ASSEMBLY
C. FOLDING STEM ASSEMBLY
D. HANDLEBAR ASSEMBLY
•CHECK BEFORE RIDING
•HOW TO RIDE
•USE GUIDE AND MAINTENANCE
Copy right © 2017
2
4
5
6
8
9
10
11
14
NOTE: Any photos of the scooter or decals in the owner ‘s manual are
intended to be as reference mainly, and it may be some different from the real
unit you purchase.
FOLDING STEPPER BIKE
………………………………
………………………………………………
…………………
………………………
…………………………
……………………………
……………………………………
A. LEG TUBE ASSEMBLY 5
…………………………………………
……………………………………
………………………………………
E. PUMPING TIRES ……………………………………………...…. 10
1

IMPORTANT SAFETY NOTICE
WARNING!
FOLDING STEPPER BIKE is not a transportation vehicle, and
please DO NOT ride in traffic.
Not suitable for use on public highways. It is dangerous to use it in
traffic. Never ride in traffic or on the street and watch your sur-
roundings for pedestrians, bikes, and skateboards, and scooter
riders.
DO NOT ride the scooter with one hand. Please hold the handle-
bars with two hands.
DO NOT make a short or sharp turn when riding the scooter, and
DO NOT laid your body on the handlebar when making a turn, as
the handlebar of the scooter can be twisted, and the scooter may
go out of control.
DO NOT ride the scooter on the slope of hill, especially DO NOT go
down the hill in a long descending slope, as it can damage the unit
or cause brake failure. Please be careful when passing such areas.
Press the brake lever to ensure the brake is function before riding.
The brake bracket may be hot after continuous use. DO NOT touch
the brake bracket.
All children and preteens should ride with adult supervision at all
times. Supervisor should inspect the scooter prior to use, making
sure all parts are fully assembled and tightened to prevent acci-
dents.
DO NOT use attachments not included with the scooter. DO NOT
attempt to do any modifications by yourself.
PRECAUTIONS:
Like any other moving products, riding on the scooter can be a
hazardous activity and possibly lead to dangerous situations. Be sure
to read the entire manual before riding. In particular, pay attention to
the following notices.
1.
2.
3.
4.
5.
6.
7.
8.
2

Make sure all components are assembled and secured sturdily and
always replace worn or broken parts immediately.
Injury may occur if the precautions above are not observed.
Rear guard keeps fingers away from moving parts
The scooter is for users above 14 years, and the maximum load is
220lbs (100KG).
Always wear safety equipment such as ANSI, SNELL, CPSC or
ASTM approved helmet, knee pads and elbow pads, Always wear
a helmet when riding your scooter and keep the chinstrap securely
buckled. Always wear shoes.
Ride on smooth, paved surface away from motor vehicles. DO NOT
use the scooter on wet or uneven ground with rocks or gravel as the
scooter can slip or be out of control. In addition, DO NOT uses the
scooter at dusk or night or in wet or icy conditions.
Avoid sharp bumps, drainage grates, and sudden surface changes.
Scooter may suddenly stop.
Avoid streets and surfaces with water sand, gravel, dirt, leaves, and
other debris. Wet weather impairs traction, braking, and visibility.
Do not ride at night.
Avoid excessive speed associated with downhill rides.
Adults must assist children in the initial adjustment procedures to
adjust handlebar. Adult’s supervision is required
Obey all local traffic and stepper bike riding laws and regulations.
Warning! Each stepper bike is limited to one rider. It’s forbidden for
more than one rider to use the stepper bike.
9.
10.
11.
12.
13.
14.
15.
16.
17.
18.
19.
20.
21.
3

4
PARTS
LIST
1 Brake Lever
10 Height adjust lever
20 Chain
2 Handle Bar
•11 Positioning button
21 Kickstand
3 Folding Stem
12 Safety Lock
22 Tire
4 Brake cable clip
13 folding joint
5 Folding Stem
Quick Release Lever
14 Gear box
15 Stopper
6 Front Brake
16 Foot Tube
7
Leg Tube Axis
17 Chain Cover
8 Front Fork
18 Pedal
9 Handlebar Grip
19 Chain tensioner
1
2
3
4
5
6
7
8
9
10
11
12
13
14
15
16
1
2
17
18
19
20
21
22
PARTS AND COMPONENTS

ASSEMBLY INSTRUCTION
WARNING!
MUST BE ASSEMBLED BY AN ADULT
Open the box, and take out the Scooter Unit, Handlebar Set, front
tire, pedals and Tool Kits. Please check whether all parts and
components are included.
Screw sets & Tool Kits Owner’s Manual & Hook
and Loop Fastener
A. LEG TUBE ASSEMBLYA. LEG TUBE ASSEMBLY
STEP1
5
M5
15
13
x2
10*10
L type M5 wrench
L type M5 wrench

STEP1
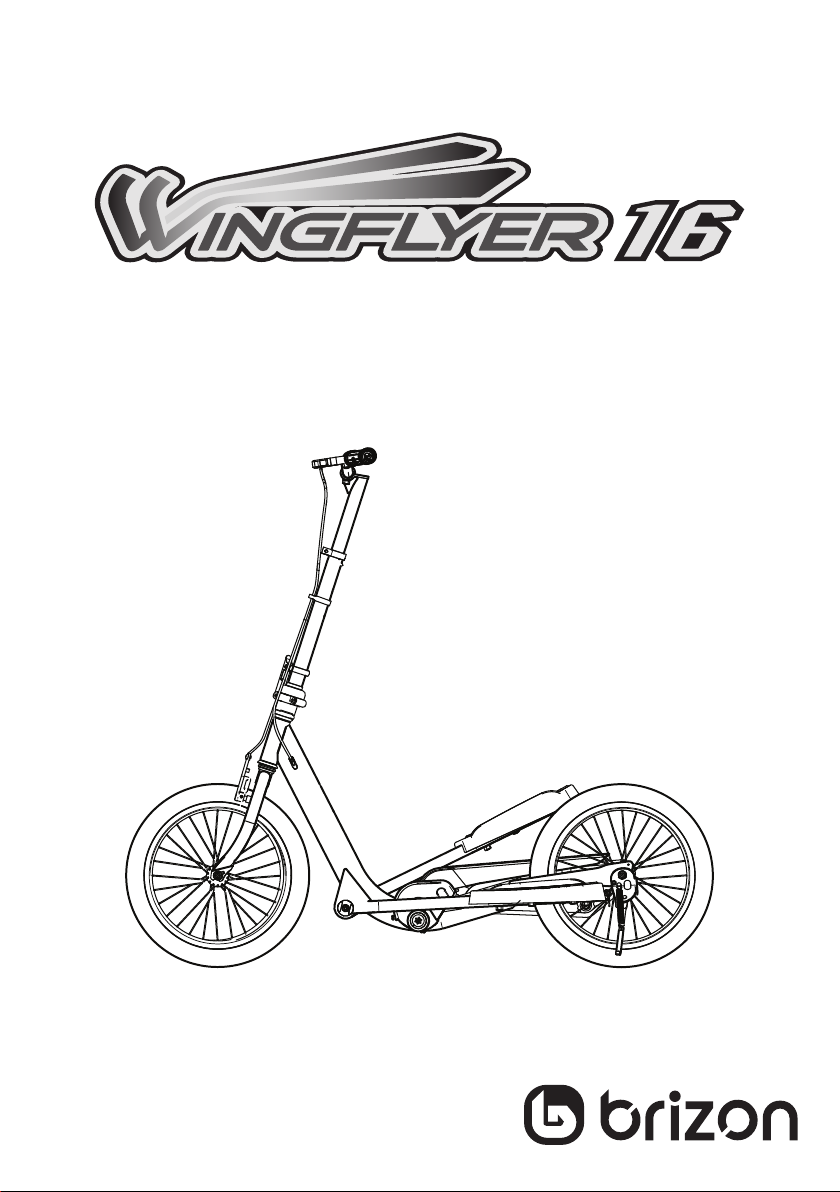
Disassemble the Front brake set
B. FRONT WHEEL ASSEMBLY
STEP 2
Set the wheel into the front fork. **The grain direction of front wheel should be
same as the rear wheel.
STEP 3
Assemble the front brake set
6
15
13
12 3 Adjust the wheel in center.
Tighten the nut on both side..
Step 4
If it's too tight to put the cable in to the slot, please adjust the cable as follow.
How to adjust the brake cable:
If it's too tight to put the cable in to
the slot
Loosen the screw counter-
clockwise gentely
Adjust the cable length Tighten the screw clockwise
Spin the wheel to check if the
wheel able to turn.
Check if the lever about 1.5 to 2
fingers wide when you break.
If the brake is too loose or too tight, then loosen the screw, and adjust the
cable again.
After all set, you can do the micro adjustment on following two parts if
necessary.
7
Adjust by plillip’s
head screw
Adjust by hand

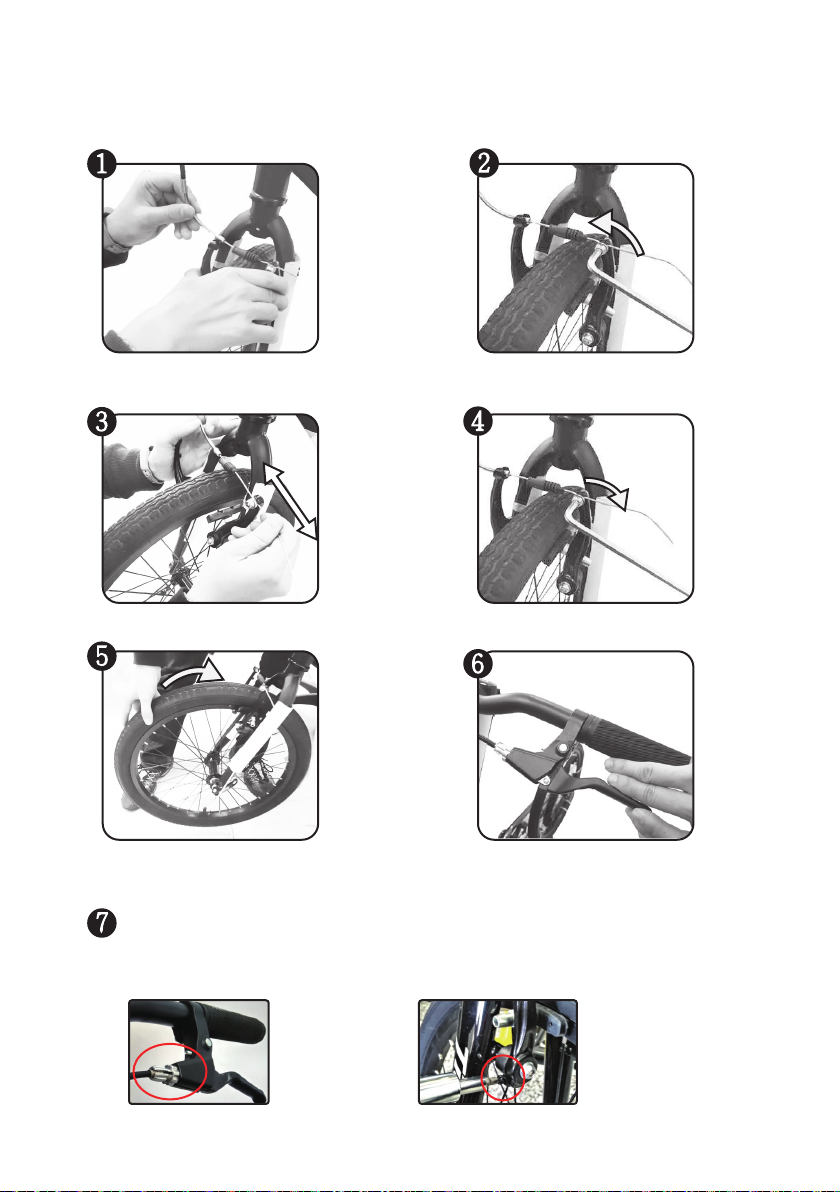
C. FOLDING STEM ASSEMBLY
How to assemble the folding stem and how to fold it
1
22
3
3
1
Press the quick release lever
inwards firmly.
Fold the head tube back to the
original position
4
Use Hook and loop fastener to tighten
the folding stem and front fork.
Pull the lever outwards.
Turn the safety lock counter
clockwise and make sure the
lock is be inserted into the slot of
lever.
Turn the safety lock clockwise.
Lift the head tube up straight..
8
TO ASSEMBLE TO FOLD
2
13
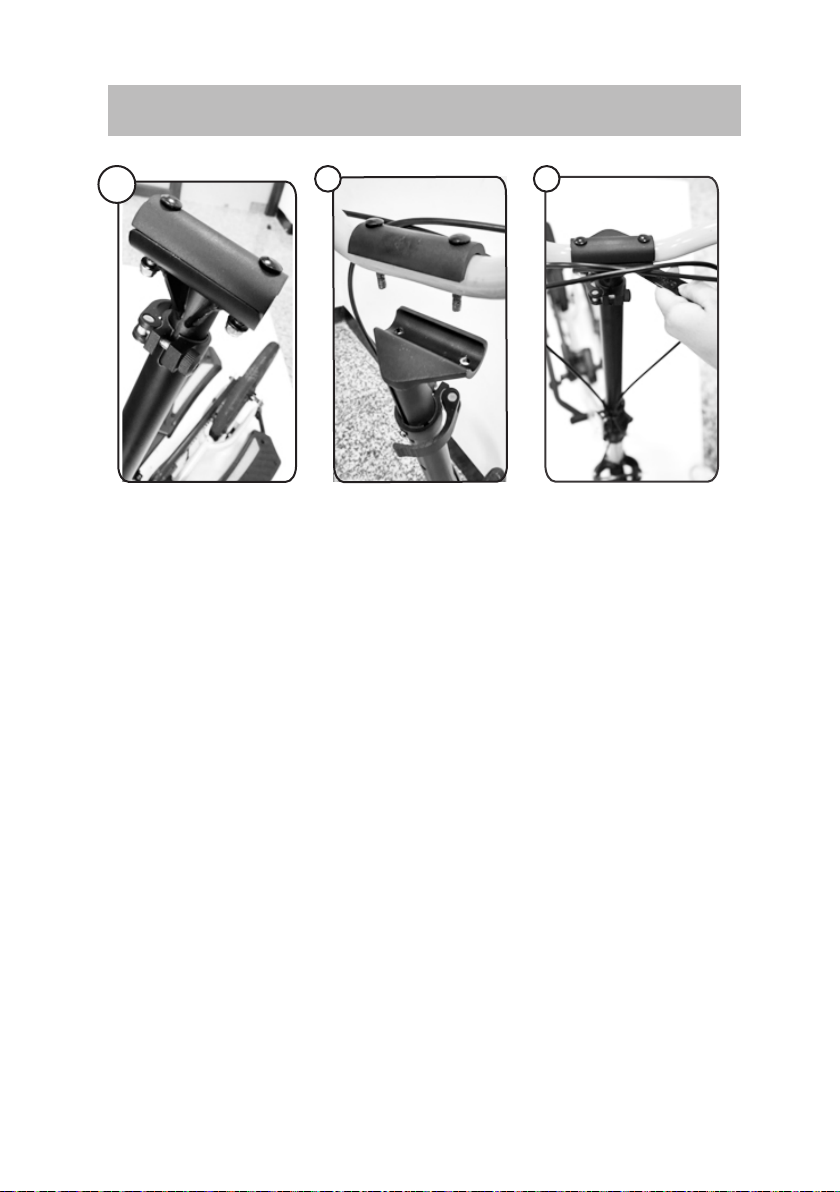
C. HANDLEBAR ASSEMBLY
Unscrew the nut with the
attached hexagon wrench
and open the stem top
cap
Place the handlebar set
and stem top cap on the
folding stem
Tighten the screws with
the attached wrench.
9
Table of contents


