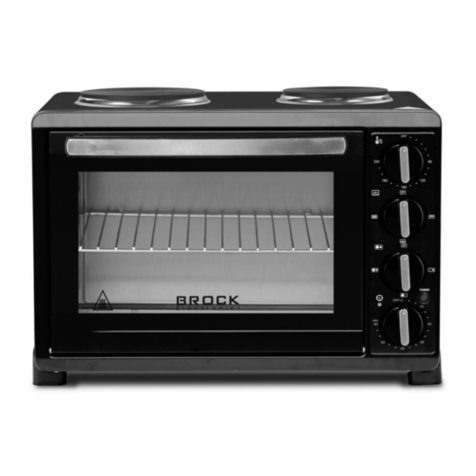
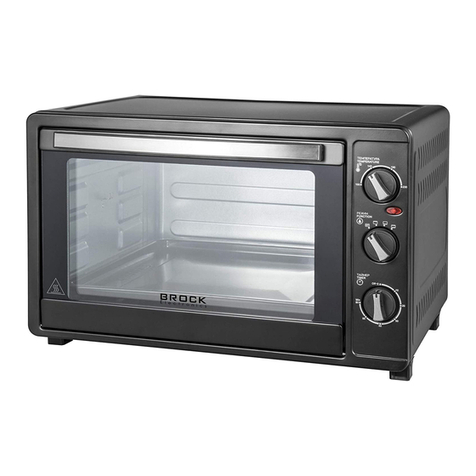
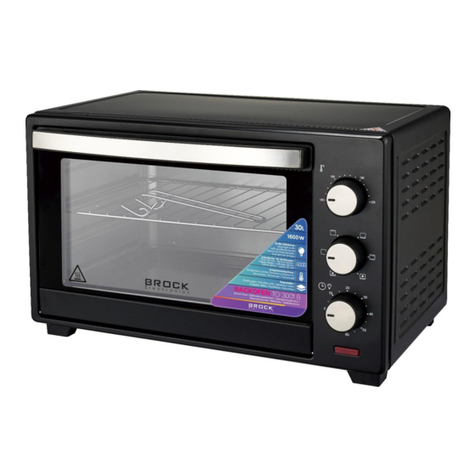
Brock TO 3301 DB User manual

DE DIGITALER OFEN
GB DIGITAL OVEN
LV DIGITĀLĀ CEPEŠKRĀSNS
EE DIGITAALNE AHI
LT SKAITMENINĖ ORKAITĖ
RU ЭЛЕКТРИЧЕСКАЯ ДУХОВКА С ЦИФРОВОЙ
ПАНЕЛЬЮ УПРАВЛЕНИЯ
FI DIGITAALINEN UUNI
TO 3301 DB

BROCK
DIGITALER OFEN
TO 3301 B
WICHTIGE SICHERHEITSHINWEISE
1. Lesen Sie alle Anweisungen.
2. Berühren Sie keine heißen Oberflächen. Verwenden Sie immer Griffe oder Knöpfe.
3. Wenn ein Gerät von Kindern oder in der Nähe von Kindern benutzt wird, ist eine genaue
Aufsicht erforderlich.
4. Zum Schutz vor Stromschlägen dürfen Kabel, Stecker oder andere Teile des Ofens nicht in
Wasser oder andere Flüssigkeiten getaucht werden.
5. Lassen Sie das Kabel nicht über die Tischkante oder den Tresen hängen und berühren Sie
keine heißen Oberflächen.
6. Betreiben Sie das Gerät nicht mit beschädigtem Kabel oder Stecker oder nachdem das Gerät
nicht mehr funktioniert oder in irgendeiner Weise beschädigt wurde. Senden Sie das Gerät
zur Untersuchung, Reparatur oder Anpassung an die nächste autorisierte Serviceeinrichtung
zurück.
7. Die Verwendung von Zusatzgeräten, die nicht vom Gerätehersteller empfohlen werden, kann
zu Gefahren oder Verletzungen führen.
8. Nicht auf oder in die Nähe eines Heißgas- oder Elektrobrenners stellen.
9. Halten Sie beim Betrieb des Ofens auf allen Seiten des Ofens einen Freiraum von mindestens
vier Zoll ein, um eine ausreichende Luftzirkulation zu gewährleisten.
10. Ziehen Sie bei Nichtgebrauch und vor der Reinigung den Stecker aus der Steckdose. Vor dem
An- und Ablegen von Teilen und vor dem Reinigen abkühlen lassen.
11. Um die Verbindung zu trennen, stellen Sie die Zeitsteuerung („Timer Control“) auf OFF und
ziehen Sie dann den Stecker ab. Halten Sie den Stecker immer fest und ziehen Sie niemals am
Kabel.
12. Beim Bewegen einer Auffangwanne mit heißem Öl oder anderen heißen Flüssigkeiten ist
äußerste Vorsicht geboten.
13. Bedecken Sie das Krümelfach oder einen Teil des Ofens nicht mit Metallfolie. Dies kann zu
einer Überhitzung des Ofens führen.
14. Gehen Sie beim Entfernen des Tabletts, der Gestelle oder bei der Entsorgung von heißem Fett
oder anderen heißen Flüssigkeiten äußerst vorsichtig vor.
15. Reinigen Sie das Innere des Ofens nicht mit Scheuerschwämmen aus Metall, da Teile des
Scheuerschwammes abbrechen und elektrische Teile berühren können, wodurch die Gefahr
eines Stromschlags besteht.
16. Übergroße Lebensmittel oder Metallgeschirr dürfen nicht in einen Toaster eingesetzt
werden, da sie einen Brand verursachen oder ein elektrisches Risiko darstellen können.
17. Ein Brand kann entstehen, wenn der Ofen während des Betriebs abgedeckt ist oder
entflammbares Material berührt, einschließlich der Gardinen, Vorhänge, Wände und
dergleichen. Bewahren Sie während des Betriebs keine Gegenstände auf dem Gerät auf.
18. Bei der Verwendung von Koch- oder Backbehältern, die nicht aus Metall oder ofenfestem
Glas hergestellt sind, ist äußerste Vorsicht geboten.
19. Achten Sie darauf, dass nichts die oberen oder unteren Elemente des Ofens berührt.
20. Legen Sie keines der folgenden Materialien in den Ofen: Karton, Plastik, Papier oder
ähnliches.
DE

I - Ofenfüße
J - Rack-Griff
K - Grillgriff
L - Schraube
M - Grillgabel
N - Grillstück
O - Backblech
P - Backrost
21. Bewahren Sie keine anderen Materialien als das vom Hersteller empfohlene Zubehör in
diesem Ofen auf, wenn er nicht in Gebrauch ist.
22. Tragen Sie immer schützende, isolierte Ofenhandschuhe, wenn Sie Gegenstände in den
heißen Ofen einlegen oder herausnehmen.
23. Dieses Gerät hat eine Tür aus gehärtetem Sicherheitsglas. Das Glas ist stärker als normales
Glas und bruchsicherer. Gehärtetes Glas kann an den Kanten immer noch brechen.
Vermeiden Sie das Verkratzen der Türoberfläche oder das Einkerben von Kanten.
24. Dieses Gerät ist AUS, wenn sich die Taste "Timer Control" in der Position "OFF" befindet.
25. Nicht im Freien verwenden.
26. Verwenden Sie das Gerät nicht für einen anderen als den vorgesehenen Zweck.
GERÄTEBESCHREIBUNG
A - Haupteinheit
B - Frontplatte
C - Türgriff
D - Innere Einheit
E - Rohr
F - LCD-Anzeige
G - Touch-Tasten
H - Digitale Steuertafel
BESCHREIBUNG DES BEDIENFELDES
1. LCD-Anzeige: Kochfunktionen. Sie können eine von 8
Funktionen wählen; Anzeigefarbe - blau, Textfarbe - schwarz.
2. LCD-Anzeige: Temperatur des oberen Heizelements. Die
Temperatur wird durch einmaliges Drücken von und Drücken von
oder eingegeben, um die Temperatur um 5 Grad zu erhöhen
oder zu verringern.
3. LCD-Anzeige: niedrigere Temperatur des Heizelements.
Die Temperatur wird durch zweimaliges Drücken von und
DE
DE

Drücken von oder eingegeben, um die Temperatur um 5 Grad zu erhöhen oder zu verringern.
4. LCD-Anzeige: Zeitschaltuhr. Die Zeit wird durch Drücken von und Halten von oder
eingestellt, um die Zeit zu erhöhen oder zu verringern.
5. Einstellung der Temperatur. Drücken Sie auf das Symbol und halten Sie oder
gedrückt, um die Anzeige um 5 Grad zu vergrößern oder zu verkleinern. Die Temperatur kann auch
während des Kochens eingestellt werden.
6. Plus-Zeichen-Symbol. Durch Drücken des Symbols wird die Temperatur oder die Zeit
erhöht.
7. Start-/Stopp-Symbol. Drücken Sie das Symbol , um die eingestellte Funktion zu starten
oder den Vorgang während des Kochens zu stoppen.
8. Einstellung der Uhrzeit. Drücken Sie das Symbol , um die Zeit einzustellen, bevor Sie den
Timer zum Einstellen der Zeit verwenden. Verwenden Sie oder , um die Zeit zu erhöhen oder
zu verringern.
9. Minus-Zeichen-Symbol. Durch Drücken des Symbols wird die Temperatur oder die Zeit
reduziert.
10. Menü-Symbol. Durch Drücken des Symbols werden 8 Garfunktionen aktiviert. Sie werden
mit oder ausgewählt.
VERWENDUNG DES GERÄTS
Kochfunktionen
Einstellung
Zeit
Temperatur
des oberen
Heizteils
Niedrigere
Heizelement
temperatur
Bereich für
die
Zeiteinstellun
g
Einhe
it
Temperatur
-
Einstellbere
ich
Einstellung in
Aktion
1. Huhn
00:40
(Std.)
180℃
/
00:01~02:00
(Std.)
5°
50~180℃
Oberes
Heizelement,
Konvektion, Grill,
Lampe
2. Steak
00:30
(Std.)
180℃
/
00:01~02:00
(Std.)
5°
50~180℃
Oberes
Heizelement,
Konvektion, Lampe
3. Cookies
00:30
(Std.)
/
200℃
00:01~02:00
(Std.)
5°
50~200℃
Oberes
Heizelement,
Konvektion, Lampe
4. Brot
04:00
(min.)
200℃
200℃
02:00 03:00,
04:00,05:00
(min. )
1
Minu
te
200℃
Oberes und unteres
Heizelement,
Lampe
5. Pizza
00:20
(Std.)
230℃
230℃
00:01~02:00
(Std.)
5°
50~230℃
Oberes und unteres
Heizelement,
Konvektion, Lampe

6. Warmhalte
n
01:00
(Std.)
/
70℃
00:01~02:00
(Std.)
5°
30~100℃
Unteres
Heizelement,
Konvektion, Lampe
7. Auftauen
00:20
(Std.)
80℃
80℃
00:01~02:00
(Std.)
5°
80℃
Oberes und unteres
Heizelement,
Konvektion, Lampe
8. DIY
00:30
(Std.)
230℃
230℃
00:01~02:00
(Std.)
5°
50~230℃
Oberes und unteres
Heizelement,
Konvektion, Lampe
OFENFUNKTIONEN
1. HÜHNER-FUNKTION
a) Schließen Sie das Gerät an den NETZAUSGANG an. Das Gerät beginnt zu blinken.
b) Drücken Sie einmal , drücken Sie dann , um die Menüfunktion zu aktivieren. Dann wählen
Sie die erste Funktion, das Symbol "Huhn" beginnt zu blinken.
c) Drücken Sie . Die Standardzeit beträgt 40 Minuten. Stellen Sie die Zeit durch Drücken von
oder ein. Jedes Mal, wenn Sie drücken, ändert sich die Zeit um 1 Minute. Verfügbarer Zeitbereich:
1-120 Min.
d) Drücken Sie einmal. Die Standardtemperatur beträgt 180 ℃, die auch auf dem Display
angezeigt wird. Die Temperatur wird durch Drücken von oder eingestellt. Jedes Drücken
ändert die Temperatur um 5 ℃. Verfügbarer Temperaturbereich: 50 ℃~ 180 ℃.
e) Legen Sie das Fleisch, das Sie kochen möchten, auf den Grillspieß. Achten Sie darauf, dass das
Grillzubehör richtig befestigt ist und das Fleisch auf dem Spieß zentriert ist.
Installation eines Grillspießes
1. Setzen Sie die Grillgabeln auf den Schaft, das Gitter muss korrekt eingesetzt
werden - der kleinste Haken muss sich auf der linken Seite des Ofens befinden.
2. Installieren des Gitters: Setzen Sie das Gitter in den dafür vorgesehenen Raum
auf der rechten Seite ein und stecken Sie dann das andere Ende auf den
Schaftanschluss.
DE
DE

3. Entfernen des Grills: Benutzen Sie den Grillgriff, um das Gitter aus dem
Schaftanschluss und dann aus dem Grillbereich rechts zu entfernen.
f) Stellen Sie ein Backblech auf den Boden und schließen Sie die Tür.
g) Drücken Sie auf , um mit dem Kochen zu beginnen.
h) Wenn das Kochen beendet ist, schaltet sich der Ofen aus, das Gerät piept 3-mal und
geht nach 30 Sekunden in den Standby-Modus.
i) Holen Sie gegrillte Lebensmittel heraus, ziehen Sie den Netzstecker und lassen Sie
das Gerät abkühlen, bevor Sie es reinigen.
2. STEAK-FUNKTION
a) Schließen Sie das Gerät an das Stromnetz an. beginnt zu blinken.
b) Drücken Sie einmal, drücken Sie dann , um die Menüfunktion zu aktivieren.
Wählen Sie dann die zweite Funktion, das Symbol "Steak" beginnt zu blinken.
c) Drücken Sie . Die Standardzeit beträgt 30 Minuten. Stellen Sie die Zeit durch Drücken
von oder ein. Jedes Mal, wenn Sie drücken, ändert sich die Zeit um 1 Minute.
Verfügbarer Zeitbereich: 1-120 Min.
d) Drücken Sie einmal. Die Standardtemperatur beträgt 180 ℃, die auch auf dem Display
angezeigt wird. Die Temperatur wird durch Drücken von oder eingestellt. Jedes Drücken
ändert die Temperatur um 5 ℃. Verfügbarer Temperaturbereich: 50 ℃~ 180 ℃.
e) Legen Sie die Lebensmittel auf das Backblech und platzieren Sie es auf die mittlere
Schiene.
f) Die Lebensmittel müssen sich so nah wie möglich am oberen Heizelement befinden, ohne
dieses zu berühren.
g) Bestreichen Sie das Essen gegebenenfalls mit der Soße und schließen Sie die Tür.
h) Drücken Sie auf , um mit dem Kochen zu beginnen.
i) Wenden Sie die Lebensmittel nach der Hälfte der eingestellten Garzeit.
j) Wenn das Kochen beendet ist, schaltet sich der Ofen aus, das Gerät piept 3-mal und
schaltet nach 30 Sekunden in den Standby-Modus.
k) Ziehen Sie den Netzstecker und lassen Sie das Gerät vor der Reinigung abkühlen.

3. COOKIE-FUNKTION
a) Schließen Sie das Gerät an das Stromnetz an. beginnt zu blinken.
b) Drücken Sie einmal, drücken Sie dann , um die Menüfunktion zu aktivieren.
Wählen Sie dann die dritte Funktion, das Symbol "Cookie" beginnt zu blinken.
c) Drücken Sie . Die Standardzeit beträgt 30 Minuten. Stellen Sie die Zeit durch Drücken
von oder ein. Jedes Mal, wenn Sie drücken, ändert sich die Zeit um 1 Minute.
Verfügbarer Zeitbereich: 1-120 Min.
d) Drücken Sie einmal. Die Standardtemperatur beträgt 180 ℃, die auch auf dem Display
angezeigt wird. Die Temperatur wird durch Drücken von oder eingestellt. Jedes Drücken
ändert die Temperatur um 5 ℃. Verfügbarer Temperaturbereich: 50 ℃~ 180 ℃.
e) Legen Sie die Lebensmittel auf das Backblech und platzieren Sie es auf die mittlere
Schiene.
f) Drücken Sie auf , um mit dem Kochen zu beginnen.
g) Wenn das Kochen beendet ist, schaltet sich der Ofen aus, das Gerät piept 3-mal und geht
nach 30 Sekunden in den Standby-Modus.
h) Ziehen Sie den Netzstecker und lassen Sie das Gerät vor der Reinigung abkühlen.
4. BROT-FUNKTION
a) Schließen Sie das Gerät an das Stromnetz an. beginnt zu blinken.
b) Drücken Sie einmal, drücken Sie dann , um die Menüfunktion zu aktivieren.
Wählen Sie dann die vierte Funktion, das Symbol "Brot" beginnt zu blinken.
c) Drücken Sie . Die Standardzeit beträgt 4 Minuten. Stellen Sie die Zeit durch Drücken
von oder ein. Jedes Mal, wenn Sie drücken, ändert sich die Zeit um 1 Minute.
Verfügbarer Zeitbereich: 2 - 5min.
d) Die Standardtemperatur beträgt 200 ℃(für das obere und untere Heizelement) und kann
nicht eingestellt werden.
e) Legen Sie die Lebensmittel auf das Backblech, legen Sie sie auf das mittlere Regal und
schließen Sie die Tür.
f) Drücken Sie auf , um mit dem Kochen zu beginnen.
g) Wenn das Kochen beendet ist, schaltet sich der Ofen aus, das Gerät piept 3-mal und geht
nach 30 Sekunden in den Standby-Modus.
DE

h) Ziehen Sie den Netzstecker und lassen Sie das Gerät vor der Reinigung abkühlen.
5. PIZZA-FUNKTION
a) Schließen Sie das Gerät an das Stromnetz an. beginnt zu blinken.
b) Drücken Sie einmal, drücken Sie dann , um die Menüfunktion zu aktivieren.
Wählen Sie dann die fünfte Funktion, das Symbol "Pizza" beginnt zu blinken.
c) Drücken Sie . Die Standardzeit beträgt 20 Minuten. Stellen Sie die Zeit durch Drücken
von oder ein. Jedes Mal, wenn Sie drücken, ändert sich die Zeit um 1 Minute.
Verfügbarer Zeitbereich: 1-120 Min.
d) Drücken Sie einmal , um die Temperatur des oberen Heizelements einzustellen.
Drücken Sie zweimal, um die Temperatur des unteren Heizelements einzustellen. Die
Standardtemperatur beträgt 230 ℃(für das obere und untere Heizelement). Die Temperatur
wird durch Drücken von oder eingestellt. Jedes Drücken ändert die Temperatur um 5
℃. Verfügbarer Temperaturbereich: 50 ℃~ 230 ℃.
e) Legen Sie die Lebensmittel auf das Backblech, legen Sie es auf das mittlere Regal und
schließen Sie die Tür.
f) Drücken Sie auf , um mit dem Kochen zu beginnen.
g) Wenn das Kochen beendet ist, schaltet sich der Ofen aus, das Gerät piept 3-mal und geht
nach 30 Sekunden in den Standby-Modus.
h) Ziehen Sie den Netzstecker und lassen Sie das Gerät vor der Reinigung abkühlen.
6. WARMHALTEFUNKTION
a) Schließen Sie das Gerät an das Stromnetz an. beginnt zu blinken.
b) Drücken Sie einmal, drücken Sie dann , um die Menüfunktion zu aktivieren.
Wählen Sie dann die sechste Funktion, das Symbol "Warmhalten" beginnt zu blinken.
c) Drücken Sie . Die Standardzeit beträgt 60 Minuten. Stellen Sie die Zeit durch Drücken
von oder ein. Jedes Mal, wenn Sie drücken, ändert sich die Zeit um 1 Minute.
Verfügbarer Zeitbereich: 1-120 Min.
d) Drücken Sie einmal . Die Standardtemperatur beträgt 70 ℃(unteres Heizelement). Die
Temperatur wird durch Drücken von oder eingestellt. Jedes Drücken ändert die
Temperatur um 5 ℃. Verfügbarer Temperaturbereich: 30 ℃~ 100 ℃.
e) Legen Sie die Lebensmittel auf das Backblech oder den Rost, legen Sie es auf die mittlere
Schiene und schließen Sie die Tür.
f) Drücken Sie auf , um mit dem Kochen zu beginnen.
DE

g) Wenn das Kochen beendet ist, schaltet sich der Ofen aus, das Gerät piept 3-mal und geht
nach 30 Sekunden in den Standby-Modus.
h) Ziehen Sie den Netzstecker und lassen Sie das Gerät vor der Reinigung abkühlen.
7. AUFTAUFUNKTION
a) Schließen Sie das Gerät an das Stromnetz an. beginnt zu blinken.
b) Drücken Sie einmal, drücken Sie dann , um die Menüfunktion zu aktivieren.
Wählen Sie dann die siebte Funktion, das Symbol "Auftauen" beginnt zu blinken.
c) Drücken Sie . Die Standardzeit beträgt 20 Minuten. Stellen Sie die Zeit durch Drücken
von oder ein. Jedes Mal, wenn Sie drücken, ändert sich die Zeit um 1 Minute.
Verfügbarer Zeitbereich: 1-120 Min.
d) Drücken Sie einmal. Die Standardtemperatur beträgt 80 ℃(oberes und unteres
Heizelement) und kann nicht geändert werden.
e) Legen Sie die Lebensmittel auf das Backblech oder den Rost, legen Sie es auf die mittlere
Schiene und schließen Sie die Tür.
f) Drücken Sie auf , um mit dem Kochen zu beginnen.
g) Wenn das Kochen beendet ist, schaltet sich der Ofen aus, das Gerät piept 3-mal und geht
nach 30 Sekunden in den Standby-Modus.
h) Ziehen Sie den Netzstecker und lassen Sie das Gerät vor der Reinigung abkühlen.
8. DIY-FUNKTION
a) Schließen Sie das Gerät an das Stromnetz an. beginnt zu blinken.
b) Drücken Sie einmal, drücken Sie dann , um die Menüfunktion zu aktivieren.
Wählen Sie dann die achte Funktion, das Symbol "DIY" beginnt zu blinken.
c) Drücken Sie . Die Standardzeit beträgt 20 Minuten. Stellen Sie die Zeit durch Drücken
von oder ein. Jedes Mal, wenn Sie drücken, ändert sich die Zeit um 1 Minute.
Verfügbarer Zeitbereich: 1-120 Min.
d) Drücken Sie einmal , um die Temperatur des oberen Heizelements einzustellen.
Drücken Sie zweimal, um die Temperatur des unteren Heizelements einzustellen. Die
Standardtemperatur beträgt 230 ℃(für oberes und unteres Heizelement). Die Temperatur
wird durch Drücken von oder eingestellt. Jedes Drücken ändert die Temperatur um 5
℃. Verfügbarer Temperaturbereich: 50 ℃~ 230 ℃. Die Temperaturtoleranz zwischen dem
oberen und unteren Heizelement beträgt ±30 ℃.
e) Legen Sie die Lebensmittel auf das Backblech oder den Rost, legen Sie es auf die mittlere
Schiene und schließen Sie die Tür.
DE

f) Drücken Sie auf , um mit dem Kochen zu beginnen.
g) Wenn das Kochen beendet ist, schaltet sich der Ofen aus, das Gerät piept 3-mal und geht
nach 30 Sekunden in den Standby-Modus.
h) Ziehen Sie den Netzstecker und lassen Sie das Gerät vor der Reinigung abkühlen.
REINIGUNG
Warnung: Ziehen Sie vor der Reinigung unbedingt den Netzstecker und lassen Sie das Gerät
abkühlen. Wischen Sie bei Bedarf das Innere des Geräts mit einem feuchten Schwamm, Tuch
oder Nylonschwamm ab, der mit einer milden Lösung aus Geschirrspülmittel und Wasser
getränkt ist. Alle Utensilien sollten in heißem Seifenwasser gewaschen werden. Glastüren
können mit einem feuchten Schwamm abgewischt und mit einem Papier- oder Abwischtuch
trockengerieben werden. Reinigen Sie das Gehäuse des Geräts mit einem feuchten
Schwamm.
VERWENDEN SIE KEINE SCHEUERMITTEL!
TECHNISCHE PARAMETER
Modell...............................................................................................................TO 3301 DB
Jahrgang...........................................................................................................33 L
Bemessungsspannung................................................................................220-240 V
Nennfrequenz.................................................................................................50/60 Hz
Leistung............................................................................................................1500 W
INFORMATIONEN FÜR BENUTZER ZUM GEBRAUCH VON ELEKTRISCHEN UND
ELEKTRONISCHEN GERÄTEN
Diese Kennzeichnung weist darauf hin, dass dieses Produkt in der gesamten EU nicht mit
anderen Haushaltsabfällen entsorgt werden sollte. Um eine mögliche Schädigung der Umwelt
oder der menschlichen Gesundheit durch unkontrollierte Abfallentsorgung zu verhindern,
recyceln Sie es verantwortungsbewusst, um die nachhaltige Wiederverwendung von
Materialressourcen zu fördern. Um Ihr gebrauchtes Gerät zurückzugeben, benutzen Sie bitte die
Rückgabe- und Sammelsysteme oder wenden Sie sich an den Händler, bei dem das Produkt
gekauft wurde. Sie können dieses Produkt zum umweltgerechten Recycling abgeben.
Dieses Produkt erfüllt alle grundlegenden Anforderungen der damit verbundenen EU-
Richtlinien.
Der Inhaber der Marke "BROCK Electronics" ist GTCL Baltic LTD
Telefon: +371 67297762
E-Mail: gtcl@gtcl.eu
www.brockgroup.eu
www.gtcl.eu
Technischer Service: Tel. Tel.: +371 28683856, serviss@gtcl.eu
DE

BROCK
DIGITAL OVEN
TO 3301 B
IMPORTANT SAFETY INSTRUCTIONS
1. Read all instructions.
2. Do not touch hot surfaces. Always use handles or knobs.
3. Close supervision is necessary when any appliance is used by or near children.
4. To protect against electric shock, do not immerse cord, plug or any parts of the oven in water
or any other liquids.
5. Do not let cord hang over edge of table or counter, or touch hot surfaces.
6. Do not operate appliance with damaged cord or plug or after the appliance malfunctions or
has been damage in any manner. Return appliance to the nearest authorized service facility
for examination, repair or adjustment.
7. The use of accessory attachments not recommended by the appliance manufacturer may
cause hazard or injury.
8. Do not place on or near a hot gas or electric burner.
9. When operating the oven, keep at least four inches of free space on all sides of the oven to
allow for adequate air circulation.
10. Unplug from outlet when not in use and before cleaning. Allow to cool before putting on or
taking off parts, and before cleaning.
11. To disconnect, turn the time control to OFF, then remove the plug. Always hold the plug, and
never pull the cord.
12. Extreme caution must be used when moving a drip pan containing hot oil or other hot
liquids.
13. Do not cover crumb tray or any part of the oven with metal foil. This may cause the oven to
overheat.
14. Use extreme caution when removing the tray, racks or disposing of hot grease or other hot
liquids.
15. Do not clean the inside of the oven with metal scouring pads, pieces can break off the pad and
touch electrical parts, creating a risk of electric shock.
16. Oversized foods or metal utensils must not be inserted in a toaster oven as they may create a
fire or risk of electric risk.
17. A fire may occur if the oven is covered or touching flammable material, including the
curtains, draperies, walls, and the like, when in operation. Do not store any item on top of the
appliance when in operation.
18. Extreme cautions should be exercised when using cooking or baking containers constructed
of anything other than metal or ovenproof glass.
19. Be sure that nothing touches the top or bottom elements of the oven.
20. Do not place any of the following materials in the oven: cardboard, plastic, paper, or anything
similar.
21. Do not store any materials other than manufacturer’s recommended accessories in this oven
when not in use.
22. Always wear protective, insulated oven gloves when inserting or removing items from the
hot oven.
23. This appliance has a tempered, safety glass door. The glass in stronger than ordinary glass
and more resistant to breakage. Tempered glass can still break around edges. Avoid
scratching door surface or nicking edges.
24. This appliance is OFF when the Timer Control button is in the “OFF” position.
GB

25. Do not use outdoors.
26. Do not use appliance for other than intended use.
DEVICE DESCRIPTION
A –Main unit
B –Front panel
C –Door handle
D –Inner unit
E - Pipe
F –LCD display
G –Touch buttons
H –Digital control panel
DESCRIPTION OF CONTROL PANEL
1. LCD display: cooking functions. You can choose one of
8 functions; display color - blue, text color - black.
2. LCD display: upper heating element temperature. The
temperature is entered by pressing once and pressing or
to increase or decrease by 5 degrees.
3. LCD display: lower heating element temperature. The
temperature is entered by pressing twice and pressing or
to increase or decrease by 5 degrees.
4. LCD display: timer. The time is set by pressing and
holding or to increase or decrease the time.
I –Oven feet
J –Rack handle
K –Grill handle
L –Screw
M –Grill fork
N –Grill piece
O –Baking pan
P –Baking rack
GB

5. Setting the temperature. Press the icon and then hold or to zoom in or out by 5
degrees. The temperature can also be adjusted during cooking.
6. Plus sign icon. Pressing the icon increases the temperature or time.
7. Start / stop icon. Press the icon to start the set function or stop the operation during
cooking.
8. Setting the time. Press the icon to set the time before using the timer to set the time. Use
or to increase or decrease the time.
9. Minus sign icon. Pressing the icon reduces the temperature or time.
10. Menu icon. Pressing the icon activates 8 cooking functions. They are selected using or
.
USING THE DEVICE
Cooking functions
Regime
Time
Upper
heating part
temperature
Lower
heating
element
temperature
Time set up
range
Solis
Temperatur
e set up
range
Setting in action
9. Chicken
00:40
(hr.)
180℃
/
00:01~02:00
(hr.)
5°
50~180℃
Upper heating
element,
Convection, Grill,
Lamp
10. Steak
00:30
(hr.)
180℃
/
00:01~02:00
(hr.)
5°
50~180℃
Upper heating
element,
Convection, Lamp
11. Cookies
00:30
(hr.)
/
200℃
00:01~02:00
(hr.)
5°
50~200℃
Upper heating
element,
Convection, Lamp
12. bread
04:00
(min.)
200℃
200℃
02:00 03:00,
04:00,05:00
(min.)
1 min
200℃
Upper and lower
heating element,
Lamp
13. Pizza
00:20
(hr.)
230℃
230℃
00:01~02:00
(hr.)
5°
50~230℃
Upper and lower
heating element,
Convection, Lamp
14. Heat
maintenanc
e
01:00
(hr.)
/
70℃
00:01~02:00
(hr.)
5°
30~100℃
Lower heating
element,
convection, lamp
15. Defrost
00:20
(hr.)
80℃
80℃
00:01~02:00
(hr.)
5°
80℃
Upper and lower
heating element,
Convection, Lamp
16. DIY
00:30
(hr.)
230℃
230℃
00:01~02:00
(hr.)
5°
50~230℃
Upper and lower
heating element,
GB

Convection, Lamp
OVEN FUNCTIONS
1. CHICKEN FUNCTION
a) Connect the appliance to the POWER OUTLET. Will start flashing.
b) Press once , then press to activate the menu function. Then you select the first function, the
"Chicken" icon will start flashing.
c) Press . The default time is 40 minutes. Adjust the time by pressing or . Each time you
press, the time will change by 1 minute. Available time range: 1-120 min.
d) Press once. The default temperature is 180 ℃, which is also shown on the display. The
temperature is adjusted by pressing or . Each press will change the temperature by 5 ℃.
Available temperature range: 50 ℃~ 180 ℃.
e) Place the meat you want to cook on the grill skewer. Make sure the grill accessories are properly
secured and the meat is centered on the spit.
Grill skewer installation
1. Place the grill forks on the shaft, the grill must be inserted correctly - the smallest
hook must be on the left side of the oven.
2. . Installing the grill: insert the grill in the space provided on the right side, then
insert the other end on the shaft connection.
3. Removing the grill: Use the grill handle to remove the grill from the shaft
connection and then from the grill area on the right.
GB

f) Place a baking tray at the bottom and close the door.
g) Press to start cooking.
h) When cooking is complete, the oven will switch off, the appliance will beep
3 times and go into standby mode after 30 seconds.
i) Unplug grilled food, unplug the appliance and let it cool down before
cleaning.
2. STEAK FUNCTION
a) Connect the appliance to the mains. Will start flashing.
b) Press once, then press to activate the menu function. Then select the second
function, the "Steak" icon will start flashing.
c) Press . The default time is 30 minutes. Adjust the time by pressing or . Each time
you press, the time will change by 1 minute. Available time range: 1-120 min.
d) Press once. The default temperature is 180 ℃, which is also shown on the display. The
temperature is adjusted by pressing or . Each press will change the temperature by 5
℃. Available temperature range: 50 ℃~ 180 ℃.
e) Place the food on the baking tray and place it on the middle shelf.
f) Food must be as close as possible to the upper heating element without touching it.
g) Sprinkle the food with the sauce if necessary and close the door.
h) Press to start cooking.
i) Turn the food over after half the set cooking time.
j) When cooking is complete, the oven will switch off, the appliance will beep 3 times and
switch to standby mode after 30 seconds.
k) Unplug the appliance, unplug it and let it cool down before cleaning.
3. FUNCTION OF COOKIES
a) Connect the appliance to the mains. Will start flashing.
b) Press once, then press to activate the menu function. Then you select the third
function, the "Cookie" icon will start flashing.
c) Press . The default time is 30 minutes. Adjust the time by pressing or . Each time
you press, the time will change by 1 minute. Available time range: 1-120 min.
d) Press once . The default temperature is 180 ℃, which is also shown on the display. The
temperature is adjusted by pressing or . Each press will change the temperature by 5
℃. Available temperature range: 50 ℃~ 180 ℃.
e) Place the food on the baking tray and place it on the middle shelf.
f) Press to start cooking.
GB

g) When cooking is complete, the oven will switch off, the appliance will beep 3 times and go
into standby mode after 30 seconds.
h) Unplug the appliance, unplug it and let it cool down before cleaning.
4. FUNCTION OF BREAD
a) Connect the appliance to the mains. Will start flashing.
b) Press once, then press to activate the menu function. Then select the fourth
function, the "Bread" icon will start flashing.
c) Press . The default time is 4 minutes. Adjust the time by pressing or . Each time
you press, the time will change by 1 minute. Available time range: 2 - 5min.
d) The default temperature is 200 ℃(for upper and lower heating element) and cannot be
adjusted.
e) Place the food on the baking tray, place it on the middle shelf and close the door.
f) Press to start cooking.
g) When cooking is complete, the oven will switch off, the appliance will beep 3 times and go
into standby mode after 30 seconds.
h) Unplug the appliance, unplug it and let it cool down before cleaning.
5. PIZZA FUNCTION
a) Connect the appliance to the mains. Will start flashing.
b) Press once, then press to activate the menu function. Then select the fifth
function, the "Pizza" icon will start flashing.
c) Press . The default time is 20 minutes. Adjust the time by pressing or . Each time
you press, the time will change by 1 minute. Available time range: 1-120 min.
d) Press once to adjust the temperature of the upper heating element. Press twice to
adjust the temperature on the lower heating element. The default temperature is 230 ℃
(for upper and lower heating elements). The temperature is adjusted by pressing or .
Each press will change the temperature by 5 ℃. Available temperature range: 50 ℃~ 230
℃.
e) Place the food on the baking tray, place it on the middle shelf and close the door.
f) Press to start cooking.
g) When cooking is complete, the oven will switch off, the appliance will beep 3 times and go
into standby mode after 30 seconds.
h) Unplug the appliance, unplug it and let it cool down before cleaning.
GB

6. HEAT MAINTENANCE FUNCTION
a) Connect the appliance to the mains. Will start flashing.
b) Press once, then press to activate the menu function. Then select the sixth
function, the "Heat maintenance" icon will start flashing.
c) Press . The default time is 60 minutes. Adjust the time by pressing or . Each time
you press, the time will change by 1 minute. Available time range: 1-120 min.
d) Press once . The default temperature is 70 ℃(lower heating element). The
temperature is adjusted by pressing or . Each press will change the temperature by 5
℃. Available temperature range: 30 ℃~ 100 ℃.
e) Place the food on the baking tray or rack, place it on the middle shelf and close the door.
f) Press to start cooking.
g) When cooking is complete, the oven will switch off, the appliance will beep 3 times and go
into standby mode after 30 seconds.
h) Unplug the appliance, unplug it and let it cool down before cleaning.
7. DEFROST FUNCTION
a) Connect the appliance to the mains. Will start flashing.
b) Press once, then press to activate the menu function. Then select the seventh
function, the "Defrost" icon will start flashing.
c) Press . The default time is 20 minutes. Adjust the time by pressing or . Each time
you press, the time will change by 1 minute. Available time range: 1-120 min.
d) Press once. The default temperature is 80 ℃(upper and lower heating element) and
cannot be changed.
e) Place the food on the baking tray or rack, place it on the middle shelf and close the door.
f) Press to start cooking.
g) When cooking is complete, the oven will switch off, the appliance will beep 3 times and go
into standby mode after 30 seconds.
h) Unplug the appliance, unplug it and let it cool down before cleaning.
8. DIY FUNCTION
a) Connect the appliance to the mains. Will start flashing.
GB

b) Press once, then press to activate the menu function. Then select the eighth
function, the "DIY" icon will start flashing.
c) Press . The default time is 20 minutes. Adjust the time by pressing or . Each time
you press, the time will change by 1 minute. Available time range: 1-120 min.
d) Press once to adjust the temperature of the upper heating element. Press twice to
adjust the temperature on the lower heating element. The default temperature is 230 ℃
(for upper and lower heating elements). The temperature is adjusted by pressing or .
Each press will change the temperature by 5 ℃. Available temperature range: 50 ℃~ 230
℃. The temperature tolerance between the upper and lower heater is ±30 ℃.
e) Place the food on the baking tray or rack, place it on the middle shelf and close the door.
f) Press to start cooking.
g) When cooking is complete, the oven will switch off, the appliance will beep 3 times and go
into standby mode after 30 seconds.
h) Unplug the appliance, unplug it and let it cool down before cleaning.
CLEANING
Warning: Make sure you unplug the appliance and let it cool down before cleaning. If
necessary, wipe the inside of the appliance with a damp sponge, cloth or nylon sponge
soaked in a mild solution of dishwashing detergent and water. All utensils should be washed
in hot soapy water. Glass doors can be wiped with a damp sponge and wiped dry with a
paper or cloth towel. Clean the housing of the appliance with a damp sponge.
DO NOT USE ABRASIVE CLEANERS!
GB

TECHNICAL PARAMETERS
Model............................................................................................................... TO 3301 DB
Volum.................................................................................................... .......... 33 L
Rated voltage………..………………………………………………………….. 220-240 V
Nominal frequency.…………………………………………………………... 50/60 Hz
Power………..………………………………………………………………......... 1500 W
INFORMATION FOR USERS FOR THE USE OF ELECTRICAL AND ELECTRONIC DEVICES
This marking indicates that this product should not be disposed with other household
wastes throughout the EU. To prevent possible harm to the environment or human health from
uncontrolled waste disposal, recycle it responsibly to promote the sustainable reuse of material
resources. To return your used device, please use the return and collection systems or contact
the retailer where the product was purchased. They can take this product for environmental safe
recycling.
This product meets all the basic requirements of EU directives related to it.
The owner of the trademark "BROCK Electronics" is GTCL Baltic LTD
Phone: +371 67297762
E-mail: gtcl@gtcl.eu
www.brockgroup.eu
www.gtcl.eu
GB

BROCK
DIGITĀLĀ CEPEŠKRĀSNS
TO 3301 DB
Pirms šīs ierīces lietošanas pirmoreiz, lūdzu, uzmanīgi izlasiet šo lietošanas instrukciju, pat, ja
jums ir zināms, kā lietot šāda veida ierīci. Izmantojiet ierīci tikai atbilstoši šīs instrukcijas
norādījumiem. Lietošanas instrukciju nepieciešams saglabāt.
Ieteicams vismaz garantijas termiņa laikā saglabāt oriģinālo kartona kasti, iepakošanas
materiālus, kases čeku un garantijas talonu. Ja ierīci nepieciešams transportēt (piemēram,
pārvācoties jaunajā dzīvesvietā vai lai nogādātu servisa centrā), iepakojiet to oriģinālā kastē,
tādējādi pasargājot to pārvadāšanas laikā.
SVARĪGI DROŠĪBAS NORĀDĪJUMI
Izlasiet visus norādījumus.
Neaiztieciet karstas virsmas. Vienmēr izmantojiet rokturus.
Jāievēro īpaša piesardzība, kad ierīce tiek lietota bērnu tuvumā.
Lai izvairītos no elektriskā šoka, nemērciet vadu, kontaktdakšu vai kādu citu ierīces daļu ūdenī,
vai citā šķidrumā.
Neļaujiet ierīces strāvas vadam karāties pāri letes vai galda virsmai, un neļaujiet tam pieskarties
karstām virsmām.
Nelietojiet ierīci ja tai ir bojāts strāvas vads vai kontaktdakša, vai pēc ierīces darbības
traucējumiem, vai ja tā tikusi bojāta jebkurā citā veidā. Nogādājiet ierīci tuvākajā servisa centrā.
Piederumu un aksesuāru izmantošana, ko nav ieteicis ražotājs, var novest pie briesmām vai
ievainojumiem.
Nenovietojiet uz vai tuvu karstām virsmām.
Ierīces darbības laikā, nodrošiniet vismaz 10 cm brīvu vietu uz visām pusēm no ierīces, lai
nodrošinātu pietiekamu gaisa cirkulāciju.
Atvienojiet no strāvas kontaktligzdas, kad ierīce netiek lietota, vai pirms tīrīšanas. Ļaujiet tai
atdzist pirms liekat to glabāt, maināt piederums, vai pirms tīrīšanas.
Lai atvienotu, laika kontroles slēdzi novietojiet pozīcijā Off (Izslēgts), tad atvienojiet no strāvas
kontaktligzdas. Vienmēr turiet aiz pašas kontaktdakšas, nevelciet aiz vada.
Īpašā uzmanība jāpievērš, pārvietojot cepešpannu ar karstu eļļu vai citu karstu šķidrumu.
Neapklājiet drupatu paplāti vai kādu citu krāsns daļu ar metāla foliju. Tas var novest pie krāsns
pārkaršanas.
Pievērsiet īpašu uzmanību, izņemot paplātes, režģi vai izņemot karstas mērces un citus
šķidrumus.
LV
Table of contents
Languages:
Other Brock Oven manuals
Popular Oven manuals by other brands

Bosch
Bosch HMG7361 1 Series User manual and installation instructions

Kuppersbusch
Kuppersbusch BP6570.0 Instructions for use

KitchenAid
KitchenAid Superba KEBS107 Use & care guide

Siemens
Siemens HB78G4.90A instruction manual

Electrolux
Electrolux EOV5700 user manual

Bosch
Bosch HBJ534ES0 Series instruction manual

GE
GE JKP3027 owner's manual

Kenmore
Kenmore 911.47465 owner's manual

Bosch
Bosch FAP-OC 500Series use and care manual

Coven
Coven 10 GMD MECC Instructions for installation, use and maintenance

Belling
Belling E649 Installation and user instructions

Lincoln
Lincoln Impinger Conveyor Oven Series 1200 Service manual