brondell Swash CL825 User manual

OWNER’S MANUAL
CL825-EW Advanced Bidet Toilet Seat
ITM. / ART. 1018505


1
CONTENTS
This manual contains important safety information. Before operating the
unit, please read this manual thoroughly, and retain it for future reference.
PRODUCT INSTALLATION
GENERAL INFO
PRODUCT OPERATION
02 SAFETY INFORMATION
(IMPORTANT SAFEGUARDS)
07
07
08
09
PRODUCT INFORMATION
Product Features
Product Dimensions
Product Parts
10
10
11
11
14
PRODUCT INSTALLATION
Installation Parts
Before Installation
Swash Installation
Remote Control Installation
15
15
16
18
20
OPERATING THE SWASH
Bidet Seat Controls Guide
Remote Control Guide
Using the Swash
Swash Special Mode Operations
TECHNICAL INFO
TRANSLATIONS
22 PRODUCT SPECIFICATIONS
23
23
23
24
24
MAINTENANCE
Seat Cleaning & Removal
Nozzle Cleaning
Cleaning the Mesh Filter
Product Storage & Use
25 TROUBLESHOOTING
28 WARRANTY INFO
30 SPANISH
60 FRENCH

2
SAFETY INFORMATION
IMPORTANT SAFEGUARDS
SAVE THESE INSTRUCTIONS
Be careful to keep this safety information. Please read this information to
prevent property loss and ensure safety.
DANGER
DANGER:
If not observed, serious injury or even death may occur as a result.
WARNING:
If not observed, serious physical injury or property damage may occur as a result.
CAUTION:
If not observed, minor physical injury or property damage may occur as a result.
READ ALL INSTRUCTIONS BEFORE USING
Failure to observe the following warnings may result in electric shock, fire, personal injury,
property damage or product damage:
• Do not use a damaged power plug or loose electric outlet.
• Make sure to use a dedicated electrical outlet. Failure to do so may result in electric shock
or fire.
• Do not move the product by pulling the power cord.
• Do not handle the power plug with wet hands.
• Do not forcefully bend the power cord or place heavy objects on it to prevent it from being
damaged or deformed.
• Do not connect and pull out the power repeatedly.
• Unplug the product before cleaning, repairing, inspecting, or replacing parts.
• Remove any dust or water from the power plug.
• Do not plug the product into an electrical outlet or power strip that is being used by too
many other products. Use an electrical outlet adequate for the wattage of the product.
• If the power cord is damaged, do not attempt to repair, modify, or replace the cord yourself.
Contact the Brondell Service Center at 888-542-3355.
• If the product produces a strange noise, a burning smell, or emits smoke, unplug it
immediately from the electrical outlet and call the Brondell Service Center. Failure to do so
may result in electric shock or fire.
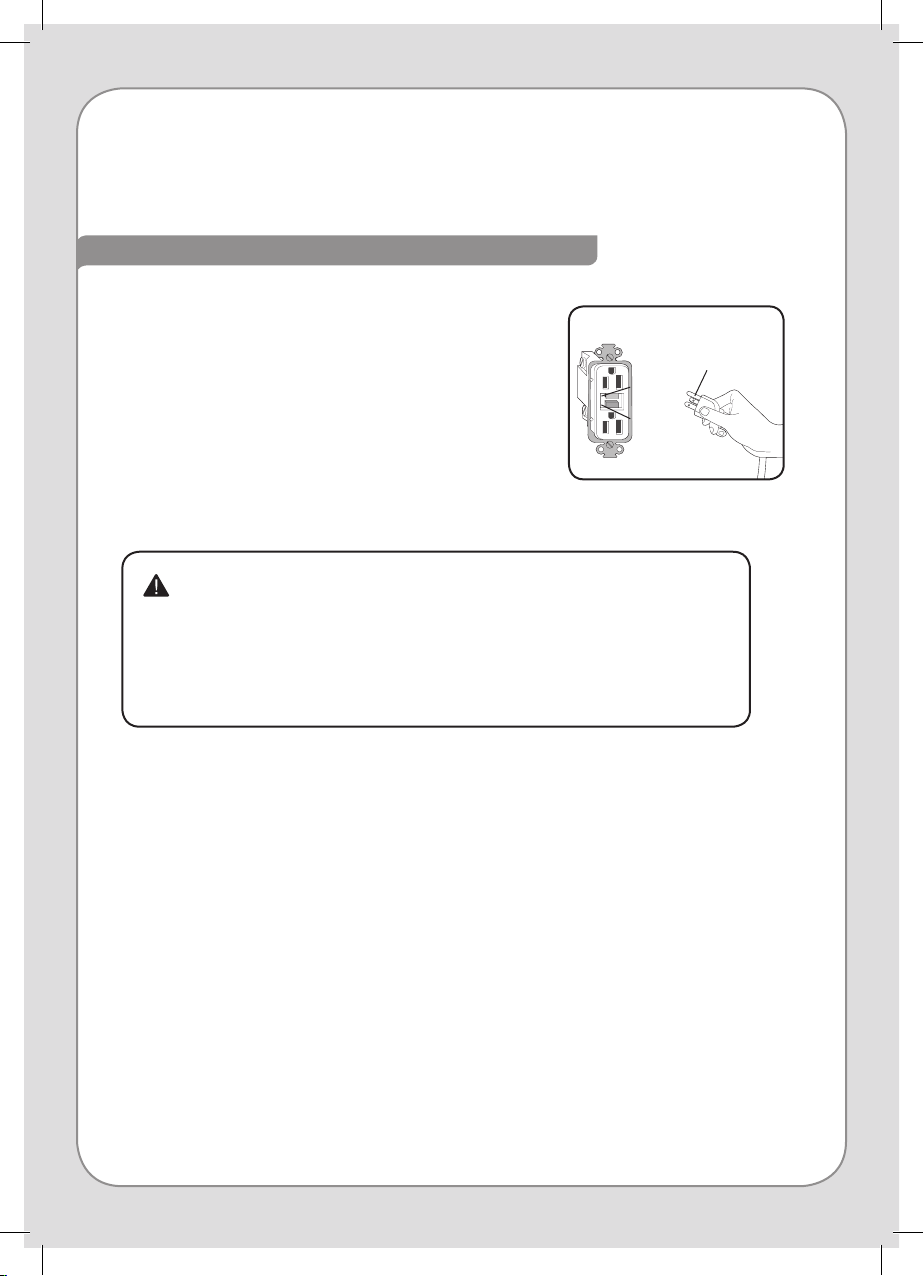
• Do not insert a wire or sharp object in any product gaps. This may result in electric shock,
fire, or product damage.
• Do not place an electronic heater near the product or dispose of any burning materials
such as a lit cigarette in the toilet. This may result in fire or product deformation.

3
SAFETY INFORMATION cont.
IMPORTANT SAFEGUARDS
SAVE THESE INSTRUCTIONS
DANGER
• Do not place any containers filled with water, medicine, food, metallic objects, or any
flammable material on top of the product. If foreign material enters the product, this may
result in electric shock or fire.
• Do not use the product in locations exposed to excessive moisture and do not splash water
onto the product.
• While taking a shower or cleaning the bathroom, pull the power plug out of the electrical
outlet and exercise caution to ensure that water or cleaning supplies do not splash onto
the bidet. Failure to do so may result in electric shock or fire.
• If foreign material enters the product, pull the power plug out of the electrical
outlet, turn o the main water valve, and call the Brondell Service Center.
• Do not disassemble, repair, or modify the product yourself.
• Do not use the product while bathing.
• Do not place or store the product where it can fall or be pulled into a tub or sink.
• Do not place in or drop the product into water or any other liquid.
• Do not reach for the product if it has fallen into water. Unplug the product immediately and
call the Brondell Service Center.
• Do not use the product if it is not working properly. Please unplug the product immediately,
close the main water supply valve, and call the Brondell Service Center at 888-542-3355.
Failure to do so may result in electric shock or fire.

4
WARNING
Failure to observe the following warnings may result in electric shock, fire, personal injury,
property damage or product damage.
• Do not operate or store the unit in locations where flammable or combustible materials are
used.
• Do not use industrial water, or gray water for the supply, as this may cause skin damage or
disease.
• Turn o the main water supply valve when cleaning.
• For children and seniors who may have diculties with adjusting temperatures or those
with sensitive skin or impaired heat sensitivity, set the temperature of the wash spray and
seat to “low” or “o” to prevent burning.
• Close supervision is necessary when this product is used by children or persons requiring
general assistance.
• Do not press the buttons using excessive force.
• Do not stand or place a heavy object on the seat cover.
• Use this product for its intended use only, as described in this manual. Do not use any
attachments that are not recommended by Brondell.
• Never operate this product if it has a damaged cord or plug, if it is not working properly, if it
has been dropped or damaged, or dropped into water. Contact the Brondell Service Center
for examination and repair.
• Keep the cord away from heated surfaces.
• Never block the air openings of the product or place it on a soft surface, such as a bed or
couch, where the air openings may be blocked. Keep the air openings free of lint, hair, etc.
• Never use the product while sleeping or when drowsy.
• Never drop or insert any object into any opening or hose.
• Do not use the product outdoors or operate where aerosol (spray) products are being used
or where it could be exposed to oxygen.
• Connect this product to a properly grounded outlet only. Refer to the Grounding
Instructions on page 06.
• Unplug this product before filling. Fill (reservoir) with water only unless otherwise specified
by Brondell. Do not overfill.
SAFETY INFORMATION cont.
IMPORTANT SAFEGUARDS
SAVE THESE INSTRUCTIONS

5
Failure to observe the following warnings may result in electric shock, fire, personal injury,
property damage, or product damage.
• Do not connect the main water supply to the hot water pipe (only connect to the cold water
supply).
• After the installation, make sure to check all water supply connections for leaks. Rubber
washers should be in place for the water connection hoses & T-Valve.
• Do not open/close the seat cover with excessive force.
• Exercise caution that urine does not come into contact with the nozzles - failure to do so
may result in bad odors or malfunction.
• If the product will not be used for a long period of time, unplug the power cord, close the
main water supply valve, and drain any water in the water tank.
• Do not pull out the bidet hose or connection hose using excessive force.
• Do not use thinner, benzene, acidic chemicals, chloride, or hydrochloric acid detergent. This
may result in corrosion to the metal parts or discoloration or scratches to the bidet body.
• This appliance is not intended for use by persons (including children) with reduced physical,
sensory, or mental capabilities, or lack of experience and knowledge, unless they have
been given supervision or instruction concerning the use of the appliance by a person
responsible for their safety. Children should be supervised to ensure that they do not play
with the appliance.
CAUTION
SAFETY INFORMATION cont.
IMPORTANT SAFEGUARDS
SAVE THESE INSTRUCTIONS

6
This product should only be used with a grounded GFCI
(Ground Fault Circuit Interrupter) outlet and a grounded
three-prong electrical cord as shown to the right. In the
event of an electrical short circuit, using a grounded GFCI
outlet reduces the risk of electric shock.
This product is equipped with a grounded cord and is for
use on a nominal 120V circuit only (minimum 15 amps) and
must be plugged into an outlet that is properly grounded
with a GFCI breaker as shown. Replace or repair a
damaged cord immediately.
Extension Cord
If it is necessary to use an extension cord, use only a three-wire extension cord with a three-
blade grounding plug, and a three-slot receptacle that will accept the plug of the product.
Replace or repair a damaged cord immediately.
GROUNDING AND GFI OUTLET INSTRUCTIONS
Test
Reset
Ground GFCI Outlet
Grounding Pin
Improper use of the grounding plug can result in a risk of electric shock.
• If repair or replacement of the cord or plug is necessary, do not connect
the grounding wire to either flat blade terminal. The wire with green
insulation (either with or without a yellow stripe) is the grounding wire.
• Check with a qualified electrician if the grounding instructions are not
completely understood, or if there is doubt if the product is properly
grounded.
SAFETY INFORMATION cont.
IMPORTANT SAFEGUARDS
SAVE THESE INSTRUCTIONS

7
PRODUCT INFORMATION
Ergonomic heated seat – with three temperature settings (High/Med/Low).
Instant and endless warm water – the cutting-edge instant ceramic heating system ensures an
endless warm water stream for posterior and feminine washes.
Aerated wash spray – micro-bubbles introduced into the wash spray create a gentler, softer
cleansing action designed for sensitive skin. In addition, the aerated spray reduces overall
water consumption and is more eective in cleansing the skin.
Dual stainless steel nozzles – separate stainless steel nozzles resist soiling and bacterial
contamination for enhanced hygiene. The dual nozzle configuration ensures accurate
coverage for all types of users.
Positionable nozzles – each nozzle has five dierent positions to ensure the most comfortable
and complete cleansing.
Nozzle oscillation – the move function provides a massaging, oscillating cleanse during the
wash cycle ensuring a thorough and comfortable cleansing.
Wide spray option – three width settings widens the wash spray from a strong concentrated
stream to a soft spray for a more personal and thorough cleansing.
Wireless remote control – the intuitive remote control comes with a convenient mounting
bracket and includes its own Eco Mode to conserve battery life.
Automatic Eco Mode – when engaged, the power saving Eco Mode function automatically
lowers the seat temperature settings to conserve energy.
Gentle closing seat and lid – “slam free” gentle closing seat and lid are user friendly.
Quick release seat – quick release button for easy removal and cleaning of seat and toilet.
PRODUCT FEATURES

8
PRODUCT INFORMATION
PRODUCT DIMENSIONS
13.9 – 21 cm
5.5 –8.3 in
Distance Between
Mounting Holes
13.4cm / 5.3 in
38.6 cm / 15.2 in
41.1 cm
16.2 in
38.1 cm
15 in
20 cm
7.9 in
Elongated Top View
13.9 – 21 cm
5.5 –8.3 in
Rear Fixing Distance: 16.5 cm / 6.5 in
Bottom View
13.4cm / 5.3 in

9
PRODUCT PARTS
1. Lid
2. IR Sensor
3. Stainless Steel Nozzles
4. Body (seat) Sensor
5. Seat
6. Bidet Hose
7. T-Valve
8. Power Cord
9. Serial Plate
10. Drain Plug
11. Quick Release Button
12. Mounting Plate
13. Bidet Filter
14. Remote Control
1
2
3
4
5
6
7
9
10
11
13
14
12
8

10
PRODUCT INSTALLATION
INSTALLATION PARTS
1. Mounting Bolt (2)
2. Rubber Cone Washer (2)
3. Flat Washer (2)
4. Barrel Nut (2)
5. Mounting Plate
6. Adjustable Bracket (2)
15
2
36
4
78
7. T-Valve Connector with Rubber Washer
8. Bidet Hose
9. Remote Control Wall Mount
10. Remote Screw (2)
11. Remote Anchor (2)
12. AAA Batteries (3)
9
10
11 12

11
CHECK WATER SUPPLY LINE
Check the line that connects the toilet tank to the water shut o valve. If it is a rigid pipe, you
may need to purchase a flexible hose to replace it before installing the Swash. The length of
the hose and the size of the connectors will vary.
RESIDUAL MOISTURE IS NORMAL
Every product is tested with pure water during production to ensure the highest quality and
performance. It is normal to find a small amount of residual moisture on the product and in the
reservoir and filter.
TOOLS
A Phillips head or standard screwdriver may be needed to remove the existing toilet seat and
a standard wrench may be needed for tight water supply connections.
BEFORE INSTALLATION
SWASH INSTALLATION
1. Existing Toilet Seat Removal
a. Lift hinge covers and use a screwdriver to remove the mounting bolts.
b. Remove the toilet seat.
Please read these instructions carefully before installing the Swash. Failure to do so could
result in flooding, leaking or damage to the product.
Note: Steps may vary by type of seat and toilet
Notes: You may wish to place a container under the
tank to catch any excess water.
Do not continue without completing the
above steps. Failure to do so could result in
flooding, leaking or damage to the Swash.
2. Turn O Water Supply Valve and Flush Toilet
a. Turn water valve o to stop the flow of water.
b. Flush toilet and hold down handle to completely
empty tank.
c. Disconnect water supply hose from toilet tank.
Step 2c

12
PRODUCT INSTALLATION cont.
SWASH INSTALLATION (cont.)
3. Connect T-Valve to Water Supply Line and Toilet Tank
a. Install the T-Valve with the rubber washer to the
incoming water connection on the bottom of your
toilet tank. Be sure that you place the flat edge of
the rubber washer into the T-Valve against the metal
with the raised lip facing the toilet tank connection.
b. Connect the water supply line coming from the wall
to the bottom of the T-Valve.
4. Connect Bidet Hose to T-Valve
a. Connect one end of the bidet hose to the T-Valve
and set aside.
5. Install Mounting Plate & Attach Swash
a. Place adjustable mounting plate over mounting
holes on toilet, flat side down, black rubber side of
mounting plate should be closest to the toilet tank
and rubber should be against the ceramic.
b. Place adjustable brackets flat side down in the
center of the square opening in the mounting
plate and insert mounting bolts through adjustable
brackets and mounting holes. Be sure that the
square mounting bolt head is even with sides of
adjustable bracket.
c. Slide rubber cone washer, flat washer, and then
barrel nut onto mounting bolts under the toilet bowl
and tighten to keep mounting plate in place.
Notes: The T-Valve connects to the fill valve directly
under your toilet tank - it does not connect at
the wall.
Only connect to the cold toilet water supply
line.
If your water supply line is rigid you may need
to replace it before continuing.
Steps 5b & 5c
Steps 3a & 3b

13
SWASH INSTALLATION (cont.)
Notes: Make sure to only use a grounded GFCI (ground fault circuit interrupter) electrical
outlet. In the case of a short circuit, a grounded GFCI outlet may help prevent
electric shock or injury. If using an extension cord is unavoidable, use one with
grounding terminals for 120V~/60 Hz or higher only.
5. Install Mounting Plate & Attach Swash (cont.)
d. Set the Swash flat on the toilet bowl in front of the
mounting plate, and slide seat onto plate until it is
secure and “clicks” into place.
e. If the seat appears too short or too long for the
toilet, adjust the mounting plate accordingly. To
adjust the mounting plate, loosen barrel nut and
slide seat forward or backwards as needed. Once
the seat is lined up properly, tighten barrel nuts to
hold in place.
6. Connect the Bidet Hose
a. Connect the bidet hose to the side of the bidet seat
making sure the hose is firmly connected. Take care
not to twist the bidet hose, excessively bend it, or
strip the plastic screw threads when screwing the
hose onto the bidet seat.
8. Connect Power
a. Plug the power cord into the electrical outlet.
7. Turn On Water Supply
a. Open the main water supply valve slowly and check
for leaks.
b. Wait 5 minutes, check again and if there are no
leaks continue.
Step 5d
Step 6

14
PRODUCT INSTALLATION cont.
REMOTE CONTROL INSTALLATION
1. Battery Installation*
a. Separate the remote control from the magnetic wall mount by pulling apart gently.
b. Turn remote over and open the battery compartment by popping o the battery cover
with your finger or small coin. Insert three “AAA” type batteries (included) as indicated
inside battery compartment and replace battery cover.
c. To confirm the batteries are installed correctly, press the “Stop” button and you should
see the “Wide Spray” LED light turn on for a few seconds (note: the 2 other LED lights
may or may not turn on at this time depending on the current settings).
*Important Battery Information:
1. Always purchase the correct size and grade of battery most suitable for the intended use.
2. Clean the battery contacts and also those of the device prior to battery installation.
3. Remove batteries from equipment which is not to be used for an extended period of time.
4. Remove batteries if consumed or if product is to be left unused for a long time.
2. Mount Remote (optional)
a. Identify a location in the bathroom for the remote
control that is visible and reachable from the toilet.
b. Depending on the wall type, you can install using
the supplied screws and anchor mounts or use
the provided double stick tape on the back of the
remote wall mount.
Make sure the remote mount is fully secure with
either method so that it does not fall and damage
the remote control.
c. Place the remote control into the mount as shown.
Step 2c

15
OPERATING THE SWASH
QUICK REFERENCE GUIDE – BIDET SEAT CONTROLS
Basic functions such as Rear Cleansing and Nozzle Cleaning can be used without the
remote by utilizing the auxiliary buttons shown below.
1
2
3
4
11
7
6
5
SEAT DISPLAY
1. Remote IR Receiver (3)
Receives signal from remote control.
2. Power Indicator
This indicator is illuminated when the bidet is powered on.
This indicator is turned o when Eco mode is activated.
3. Eco Mode Indicator
This indicator is illuminated when Eco mode is activated.
4. Seat Temperature Indicator
This indicator is illuminated when the seat temperature is set to Low, Medium, or High.
The indicator is turned o when the seat temperature is o.
AUXILIARY CONTROL PANEL
5. Power Button
Turns the seat On/O. Press and hold the button for 2 seconds to turn o.
If the Power button is pressed while any cleansing function is operating, the cleansing
function will stop and the seat will change to standby mode.
6. Rear Cleansing Button
Selects the rear cleansing function.
7. Nozzle Cleaning Button
When pressed, the nozzles fully extend, allowing for easy cleaning. Press again for the
second nozzle to extend and once more to retract.

16
OPERATING THE SWASH cont.
QUICK REFERENCE GUIDE – REMOTE CONTROL
CL825
1
3
5
7
11
12
13
2
4
6
10
9
8
Remote Control IR
Signal Transmitter
Front (Feminine)
Wash Button
Stop Button
Nozzle Oscillation
(Move) Button
Water Pressure Buttons
Water Temp. Indicator
Spray Width Indicator
Seat Temp. Indicator
Rear Wash Button
Nozzle Position Buttons
Water Temp. Button
Spray Width Button
Seat Temp. Button

17
QUICK REFERENCE GUIDE – REMOTE CONTROL (cont.)
SEE DIAGRAM ON OPPOSITE PAGE
1. Remote IR Signal Transmitter
Transmits the signal from remote control to the seat when a button is pressed.
2. Rear Wash Button
This button activates the aerated Rear Wash cleansing function.
3. Front (Feminine) Wash Button
This button activates the aerated Front, or “Feminine”, Wash cleansing function.
4. Nozzle Oscillation (Move) Button
This button activates the Nozzle Oscillation function. When activated, the front or rear
nozzle moves back and forth during the wash cycle to clean a wider area. Push the button
again to stop the oscillation.
5. Stop Button
Stops all functions currently operating.
6. Water Pressure Buttons
These buttons increase or decrease the water pressure, to one of three settings, during
either of the aerated wash cycles.
7. Nozzle Position Buttons
These buttons move the wash nozzle, to one of five positions, during either of the aerated
wash cycles.
8. Water Temp. Indicator
Indicates the aerated wash Water Temperature setting:
O - incoming water temp., Low - 31.7° C / 89° F (blue), Medium - 34.5° C / 94.1° F (pink),
High - 37.5° C / 99.5° F (red)
9. Spray Width Indicator
Indicates the aerated wash Spray Width setting:
Concentrated (blue), Medium (pink), and Wide (red)
10. Seat Temp. Indicator
Indicates the Seat Temperature setting:
O, Low - 31° C / 87.9° F (blue), Medium - 34° C / 93.2° F (pink), High - 37° C / 98.6° F (red)
11. Water Temp. Button
This button sets the aerated wash Water Temperature to one of four settings:
O - incoming water temp., Low - 31.7° C / 89° F (blue), Medium - 34.5° C / 94.1° F (pink),
High - 37.5° C / 99.5° F (red). Press the button to cycle through each setting.
12. Spray Width Button
This button sets the aerated wash Spray Width to one of three settings:
Concentrated (blue), Medium (pink), and Wide (red). Press the button to cycle through
each setting.
13. Seat Temp. Button
This button sets the Seat Temperature to one of four settings:
O, Low - 31° C / 87.9° F (blue), Medium - 34° C / 93.2° F (pink), High - 37° C / 98.6° F (red)
Press the button to cycle through each setting.

18
OPERATING THE SWASH cont.
USING THE SWASH
Warm Aerated Water Wash
1. Sit on the seat and press the FRONT or REAR button on the remote to begin water flow. The
nozzles will self-clean and purge a small amount of water which will last for several seconds
prior to starting the wash function. The front or rear wand will then extend and wash for 2
minutes, then turn o automatically.
2. To keep the wash continuing longer than 2 minutes, press the FRONT or REAR button again
during the cleansing cycle. Each time your press the button during the cleansing cycle, the
2 minute cycle starts again.
3. If you would like to stop the wash before the 2 minute cycle ends, press STOP button to
discontinue flow.
4. While cleansing, users can adjust the water temperature, water pressure, spray width, and
nozzle position according to their preferences.
5. After the cleansing cycle, the nozzles will perform a self clean cycle purging water for
approximately 5 seconds.
Nozzle Positioning
While the cleansing function is operating, use the Nozzle Position up and down arrows on the
remote control to move the position of the nozzles and spray.
Notes: The wash functions will not work unless the sensor in the seat detects someone
sitting down (skin conductivity sensor). To override the seat sensor, please refer to
the section in the manual called “Configuring a Special Mode”.
The remote control will not operate the Swash if the batteries are weak, dead,
or not installed properly (remote requires 3 x AAA batteries to function).
Note: You cannot increase the water pressure level to higher than level 2 under the
following conditions: Main water supply temperature is under 10° C / 50° F or
if the rated power source is under 110V.
This manual suits for next models
2
Table of contents
Languages:
Other brondell Bathroom Fixture manuals

brondell
brondell SWASH CL1500 Series User manual

brondell
brondell PURESPA PS-65 User manual

brondell
brondell Swash SE600 User manual

brondell
brondell PureSpa PS90 User manual

brondell
brondell SWASH BL67 User manual

brondell
brondell SWASH ECOSEAT 101 User manual

brondell
brondell VivaSpring USFP-PC Operating manual

brondell
brondell SWASH BL97 User manual

brondell
brondell Swash Select EM417-RW User manual

brondell
brondell SWASH DR801 User manual